
This post may contain affiliate links, which means I get a small percentage of the sale at no extra cost to you. I only recommend items I love and have had a positive experience with. Thank you!
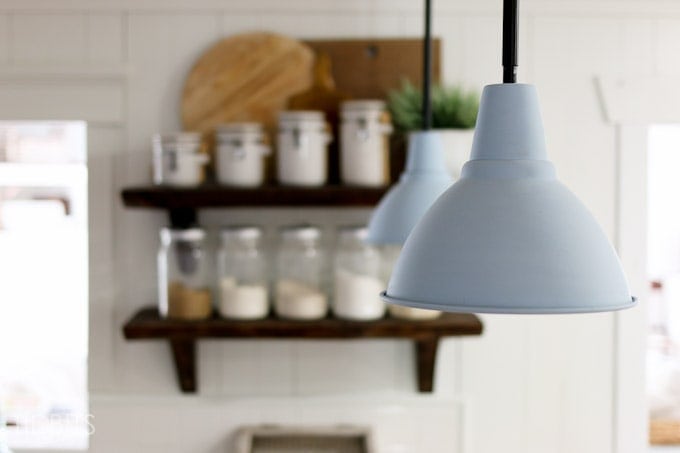
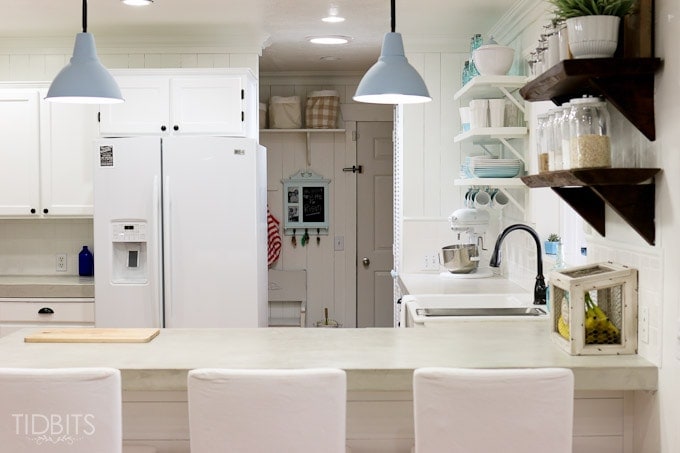
While working on our kitchen remodel, we installed these corded pendant lights above our peninsula to add a little interest in the light department.
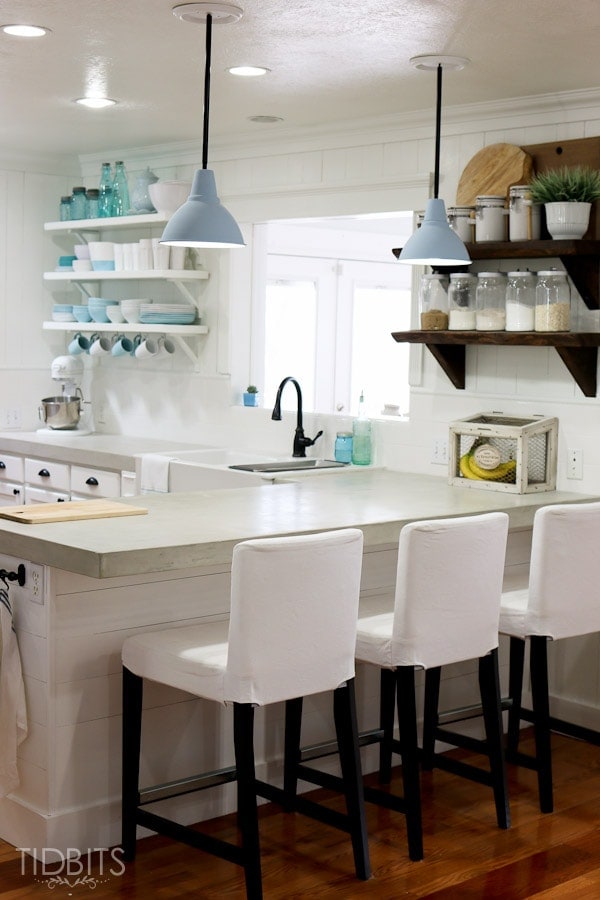
These pendant lights came from IKEA and started out a bit different. First of all, they were beige.
HERE is the actual link to these lights we purchased. I wanted a speck of blue against all the white in the kitchen, so I found some chalk paint at Hobby Lobby and painted it right over the beige.
My husband then hung them up – cord and all.
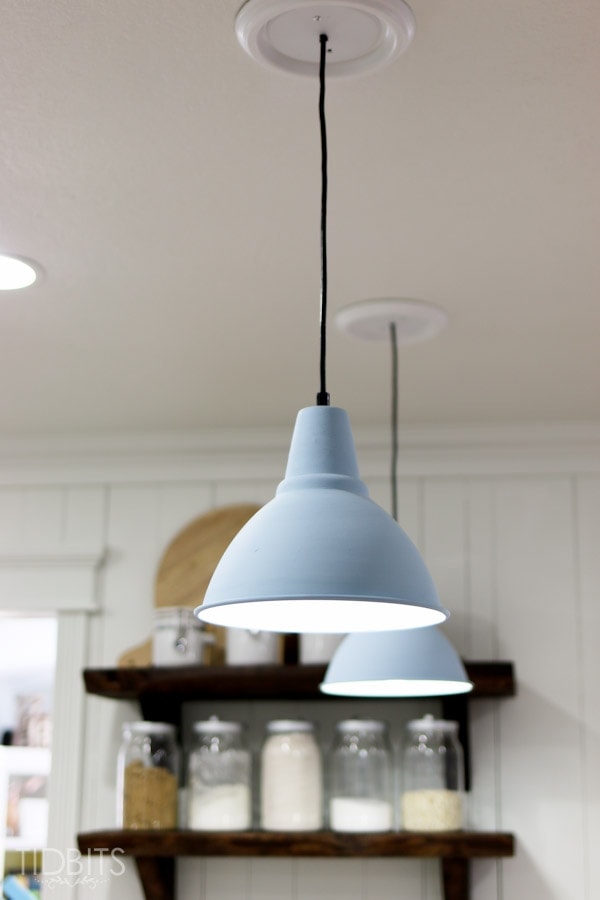
After awhile, I began to feel like the cord hanging down felt a bit cheap.
So my husband and I began to brainstorm how we could upgrade the look of our corded pendant lights.
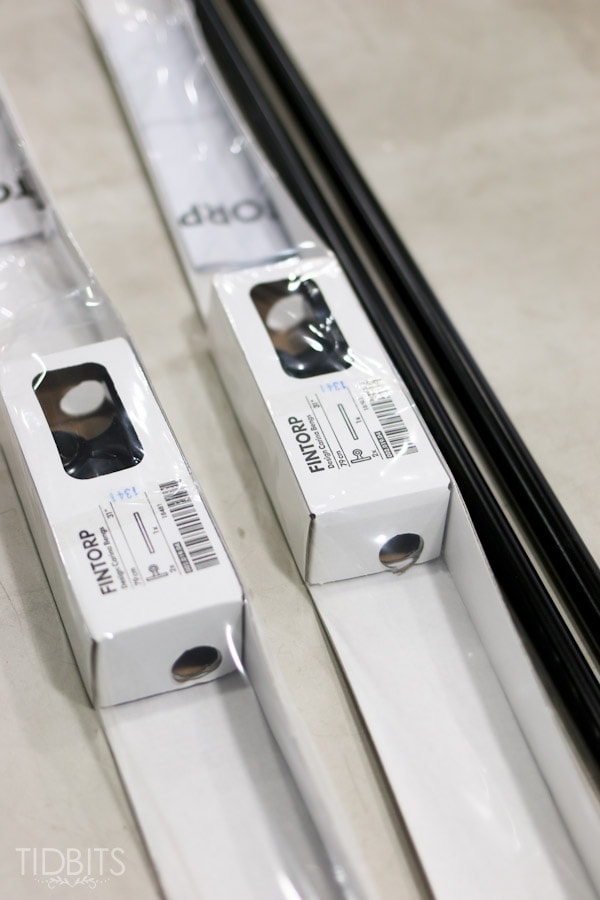
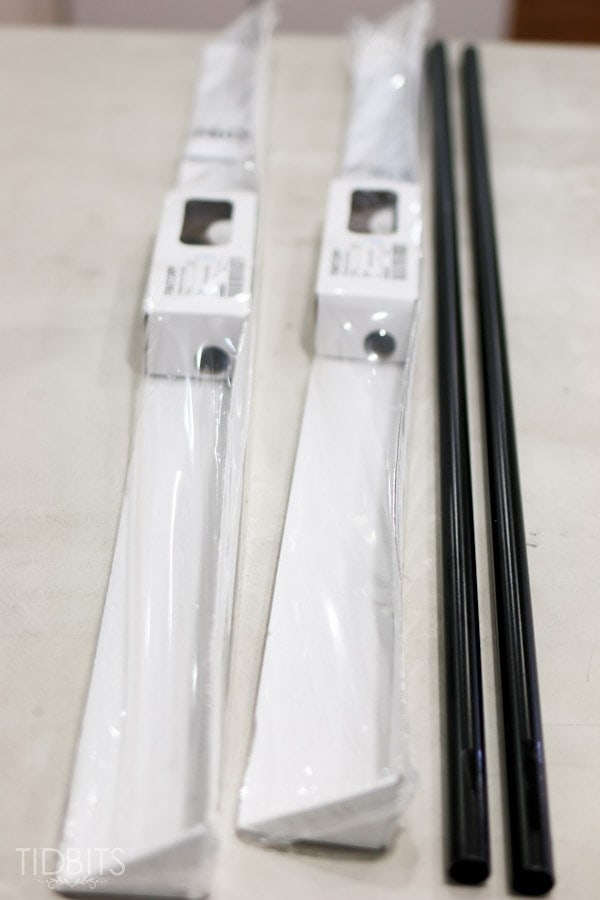
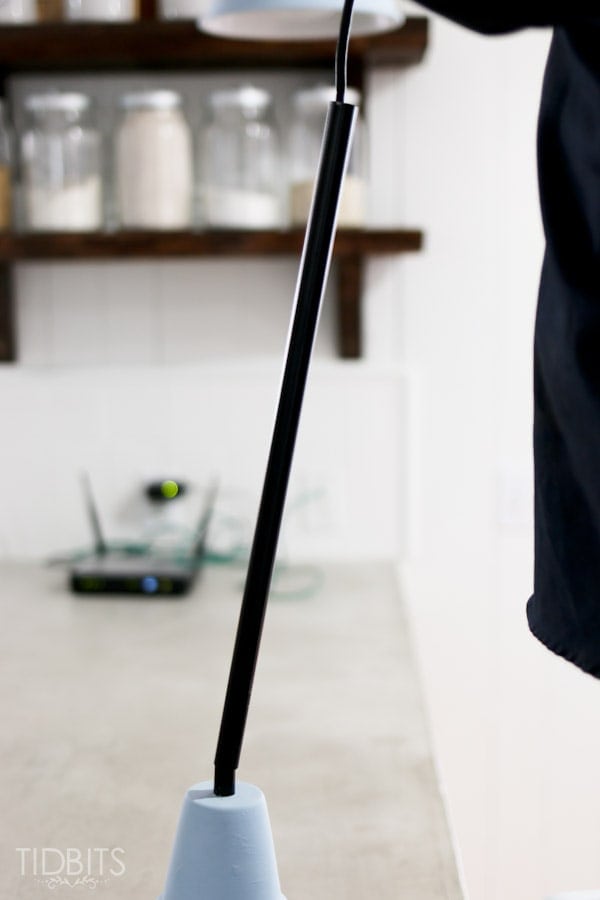
We remembered that we actually bought an extra organizing rail from IKEA (link here) then we ended up needing, and realized it was in fact a hollow steel rod that would work perfectly to upgrade our fixture.
All it took was cutting the rod to size, and inserting the cord through the rod and hanging it up again.
Quickest IKEA hack ever!
Let me walk you through the specifics, in case you too have a corded light fixture you would like to upgrade.
Along with your corded pendant light, you will need a hollow steel rod. If you don’t have access to an IKEA, try exploring the hardware store or look around in curtain rods and see if you can find one the width you would like. The length can be adapted.
First, measure the length of the cord you have hanging down, so you know what size to cut the rod.
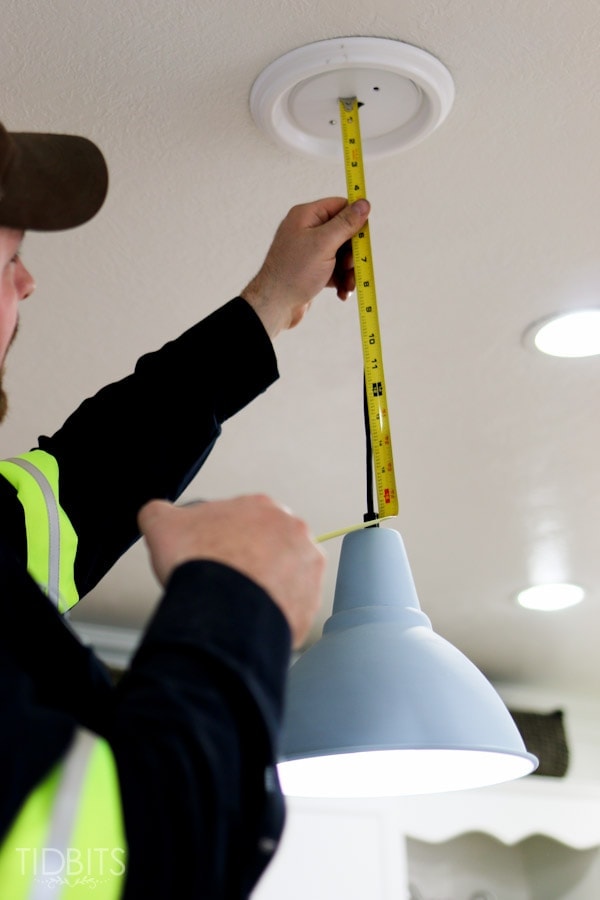
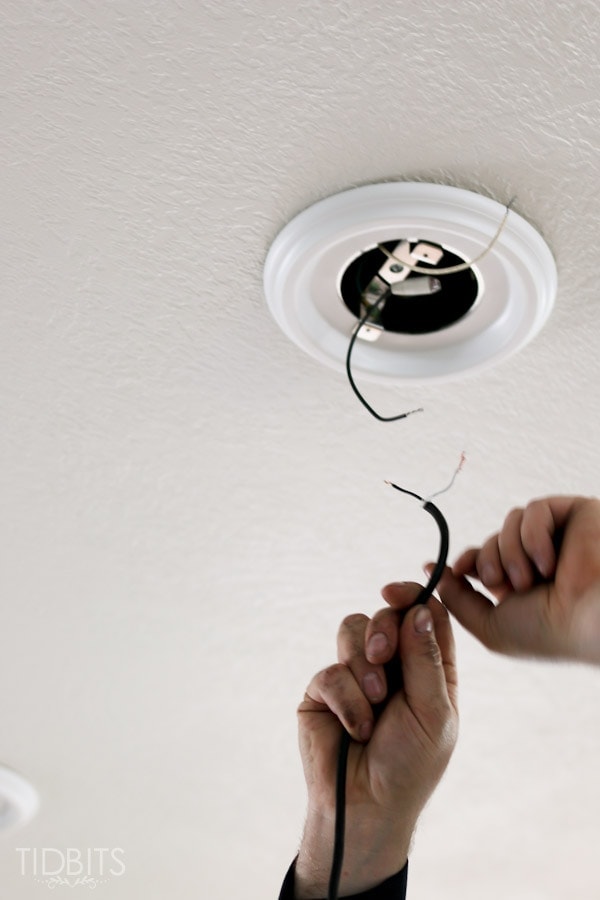
If your light is already hanging up, you’ll need to remove and un-wire the fixture.
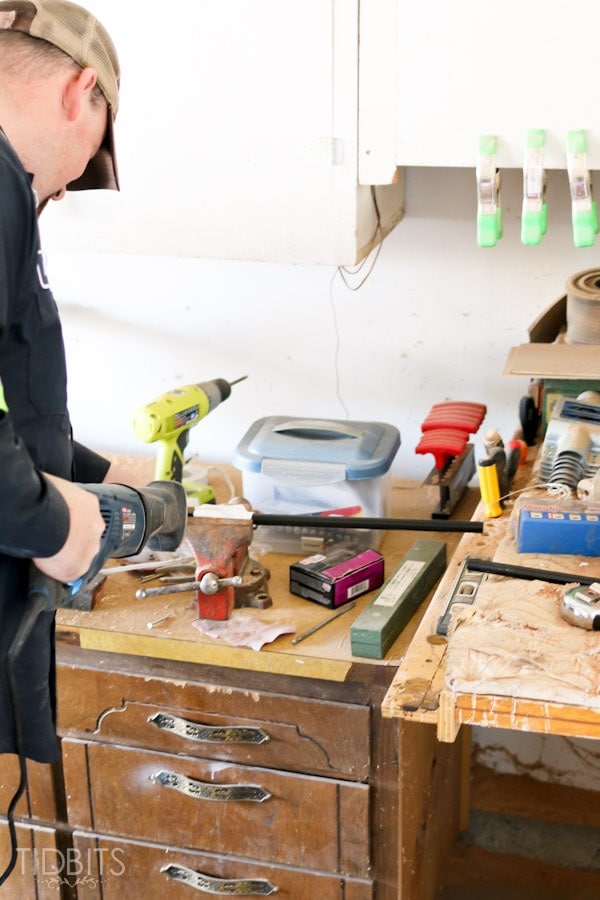
The best way to cut the metal safely, is to clamp it in a vice. You’ll want to protect the surface of the rod with a rag or paper towels inside the clamp so you do not scratch the surface of your rod.

Cut the rod with a sawsall to the measurement you had pre-determined. If the cut leaves the metal a bit jagged, smooth it out with some sandpaper.
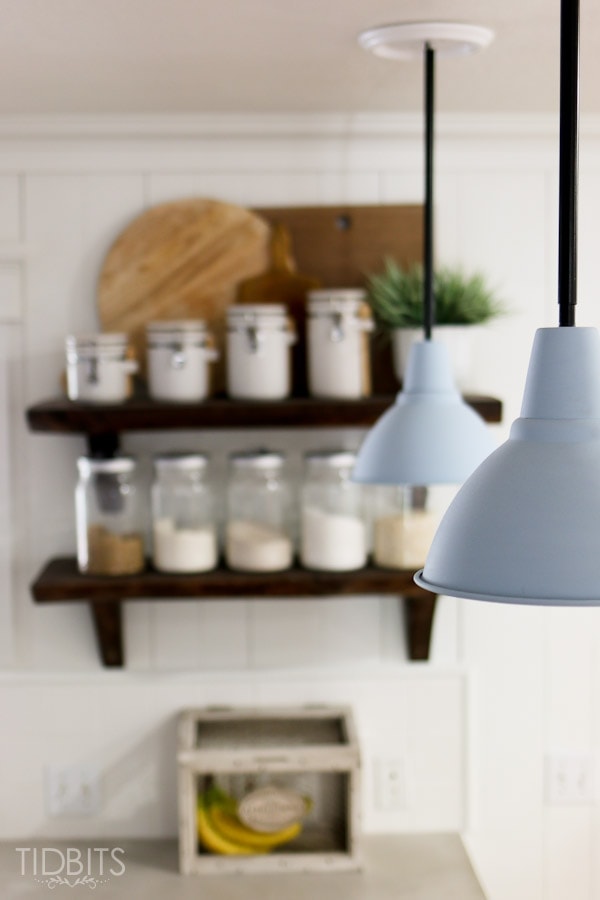
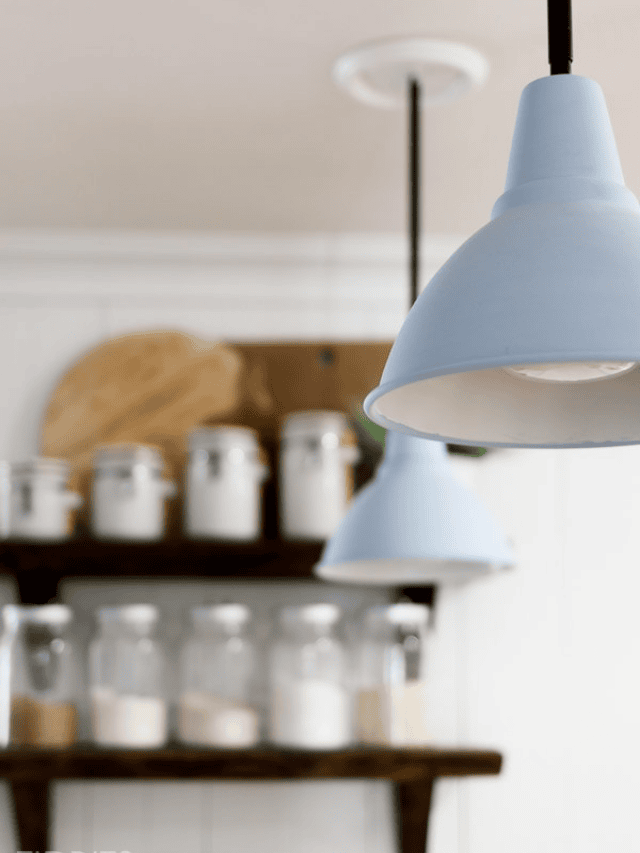
Simply insert the metal rod over the cord from the pendant light.
If using a cover plate as we have (bought at Home Depot), insert that as well. To get the rod tight up against the plate, wrap some electrician’s tape around the cord, or consider tying a knot in the cord.
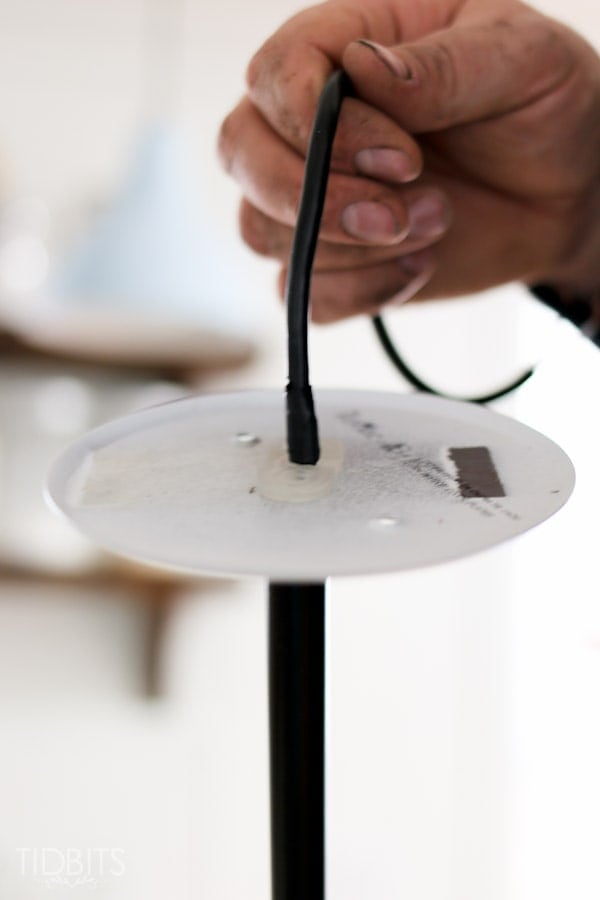
Re-wire and re-hang the pendant light.

Now, stand back and be amazed at how easy that was to instantly upgrade your light fixture.
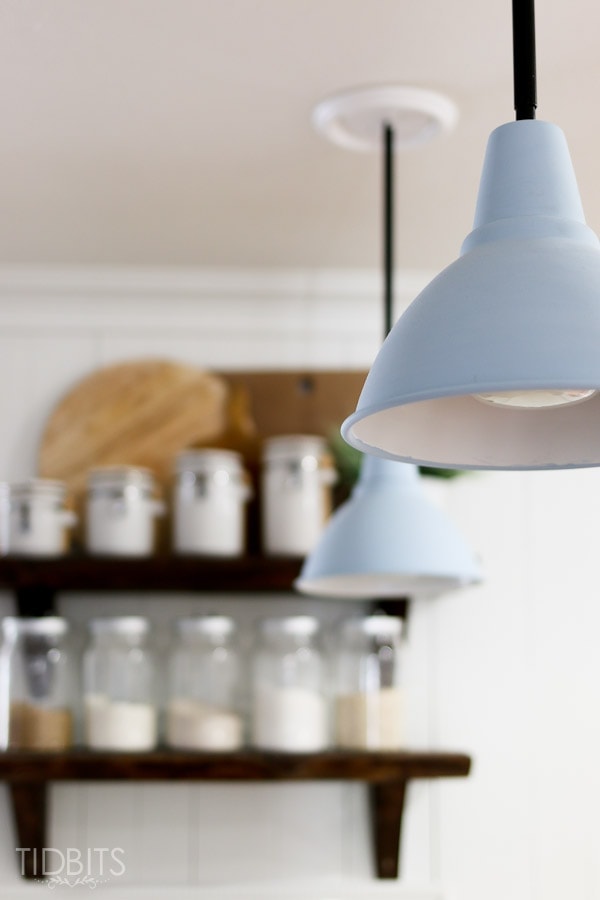
If you missed the rest of my kitchen tour, go HERE to get all the close-up details of our new space.


Hi! I love the way your pendant lights turned out. Thanks for the info!
Question: can you tell me where you got your counter stools? I’ve had a hard time finding ones that I like, and I really like yours.
Thank you!
Can the covering be used to cover wire and chain on chandelier… hate to look at the chain.
Thank you for your helpful guide! Glad I stopped by to read your post.
What is the diameter of the rod you used?
Cam, your light beige pendant lights look amazing over your breakfast nook. It really goes well with the white walls and ceiling. My husband and I are trying to do some minor upgrades to our kitchen at the moment. We currently have an old track light on our ceiling. We’d love to install something a little more modern and energy efficient. We’ll want to hire a licensed electrician to come out and install something like this for us. Neither of us has any experience, tools, or time to do it ourselves.
This is just what I was looking for to replace chained lights that are going over our island. Thanks!
Why do you call a tube a “rod”? Otherwise, the project is sound.
That’s true, blue light is really go with your kitchen. It looks beautiful and you decorate this very well.
Thank you so much!
Thank you for sharing this how-to! These lights look great!