
This post may contain affiliate links, which means I get a small percentage of the sale at no extra cost to you. I only recommend items I love and have had a positive experience with. Thank you!
Anytime someone mentions the word “wallpaper”, I revert back to my teenage years and even into our newly married first home years and remember with terror the hours spent scraping outdated wallpaper off the walls. Wallpaper than never should have seen the light of day in the first place.
I’m talking dancing bears along the chair rail, and fields of sunflowers plastered to the walls.
Oh the horror.
You may have already discovered this fact, but I am just learning that wallpaper has come a long long way from all those years ago. Not only are the pattern options greater, but there are peel and stick varieties for those not wanting permanency or the use of harsh chemicals and hours of elbow grease to remove it when it’s no longer what they desire.
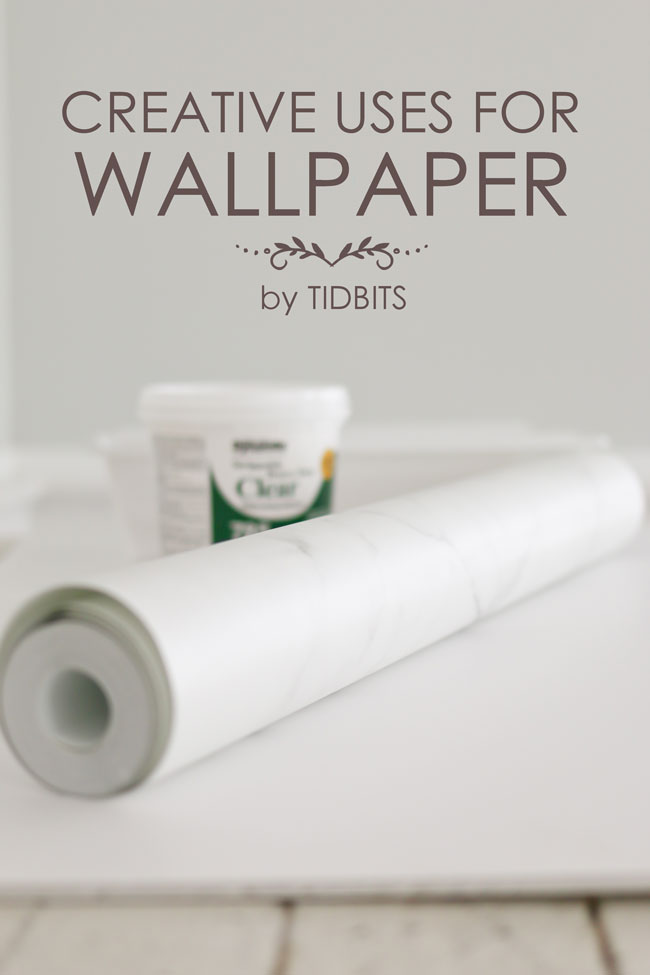
I’ve been wanting to get my hands on some of the super pretty papers available these days, so when Milton & King approached me about trying a roll of their paper, I was all for it.
However, I’m not quite ready to tackle a wall treatment just yet, but my brain wouldn’t stop thinking of all the creative things I could do with wallpaper, sans the wall.
I knew right away which roll I wanted because it coincides perfectly with my most recent obsession . . . white marble.

Here are 3 creative ideas where I used this lovely roll of marble wallpaper in our home that didn’t include the walls. After I share my ideas, I’ll show you how I applied the wallpaper onto the surfaces.

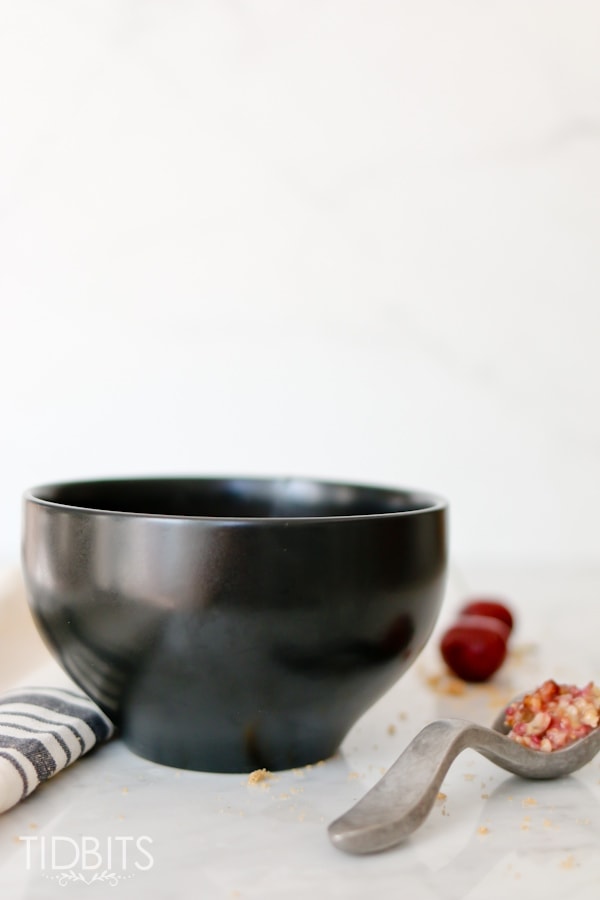
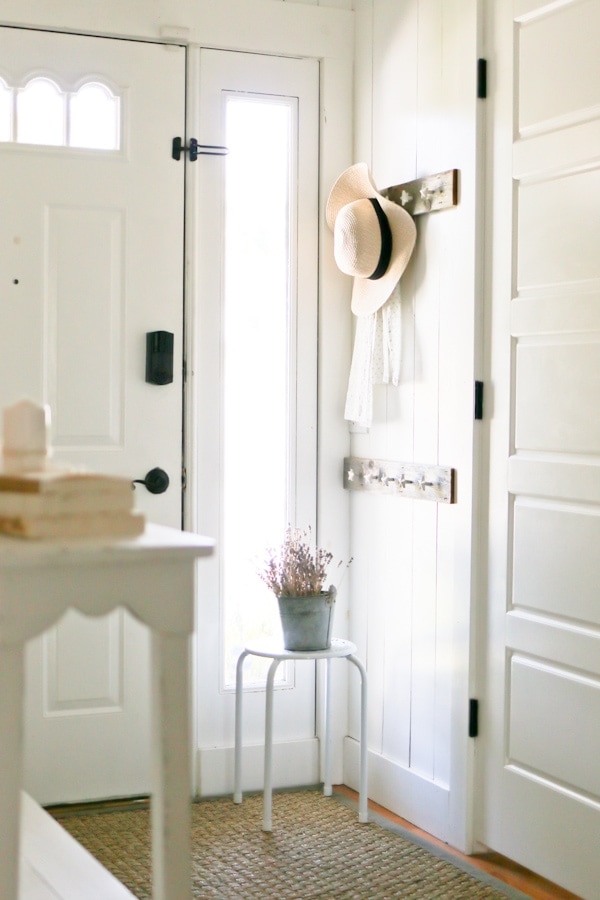
Right away, I knew I wanted to create a photo backdrop of marble. I dream of a marble covered kitchen, but until I land the jackpot, faking a marble kitchen in my pictures will have to do.
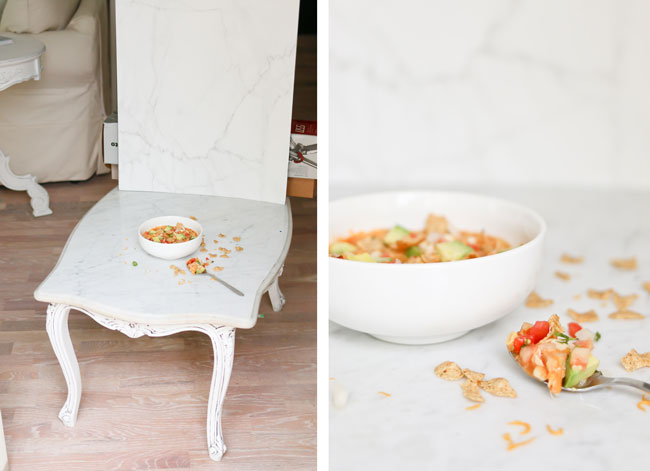
The subtle gray veining found in marble looks so much better in food images than just a plain white backdrop.
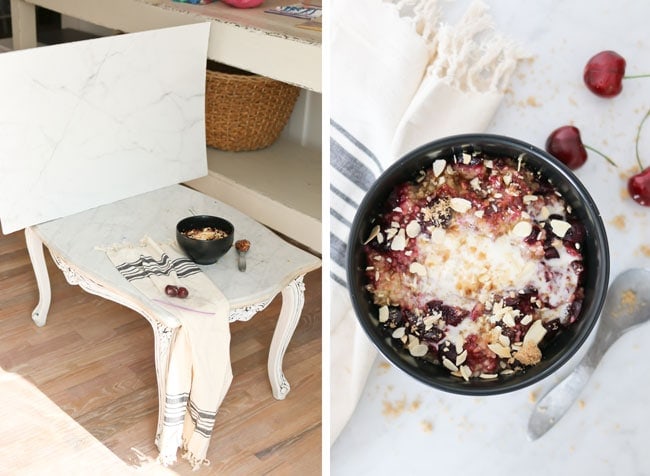
I simply covered 2 foam cores with the marble wallpaper. I can use them as the backing to other surfaces or both the backing and surface. An added bonus is the white reflects the light onto the item you are photographing and evens out the shadows beautifully.
I had a lot of fun playing with my new backdrops and I loved the look it gave each photo.
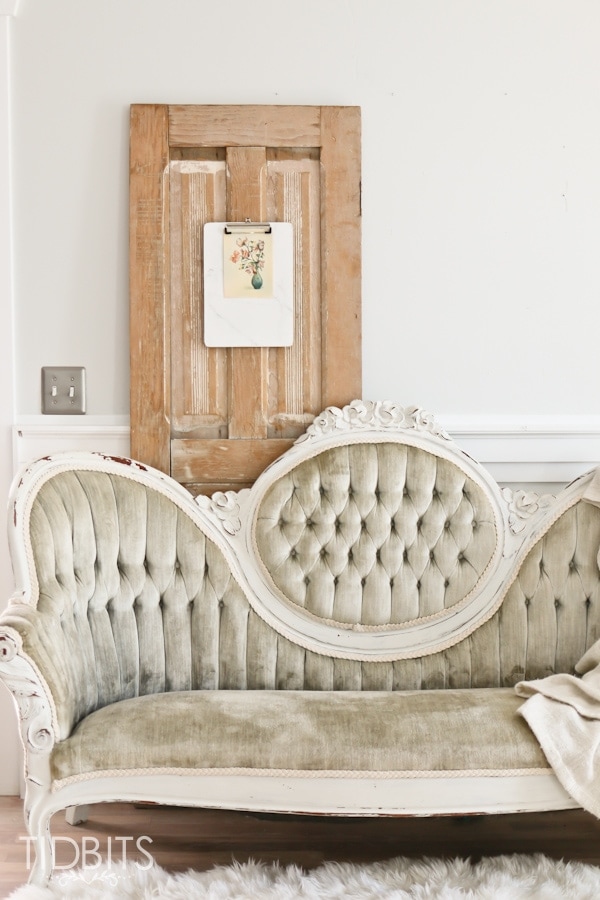
The next idea I had was to add it to a boring old clipboard.
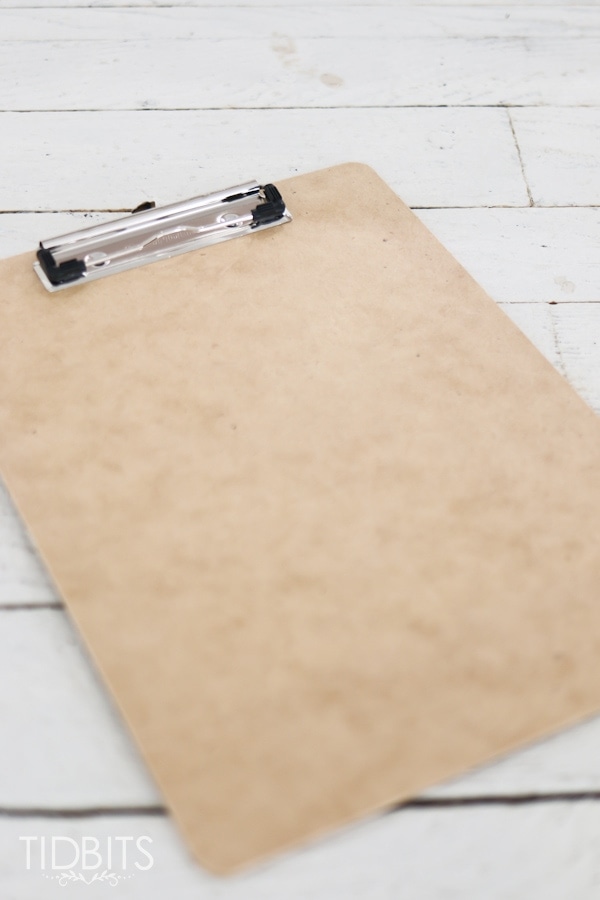
I’ve always loved the idea of displaying easy-to-switch-out art on clipboards in the home, but was never fond of the brown in the clipboard.
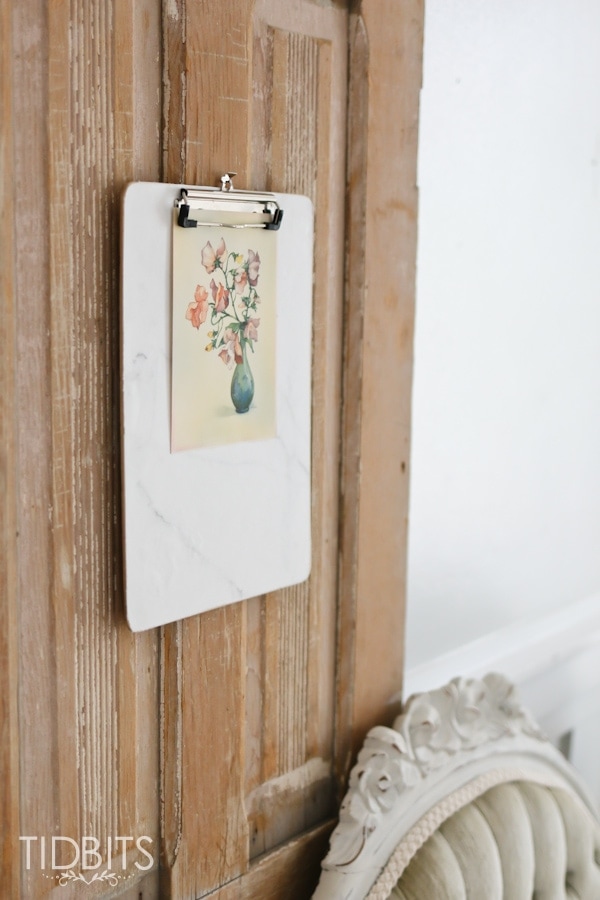
The marble paper really adds to the charm of this idea.
I removed the hardware first, applied the wallpaper, then put the hardware back on.
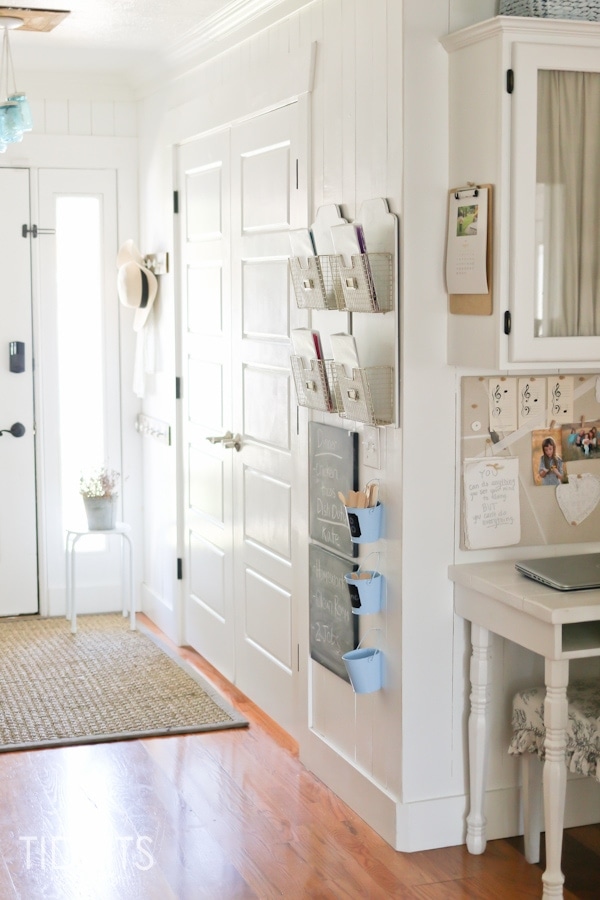
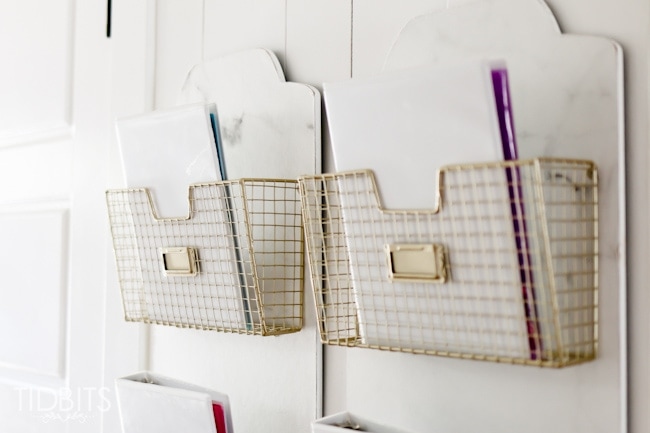
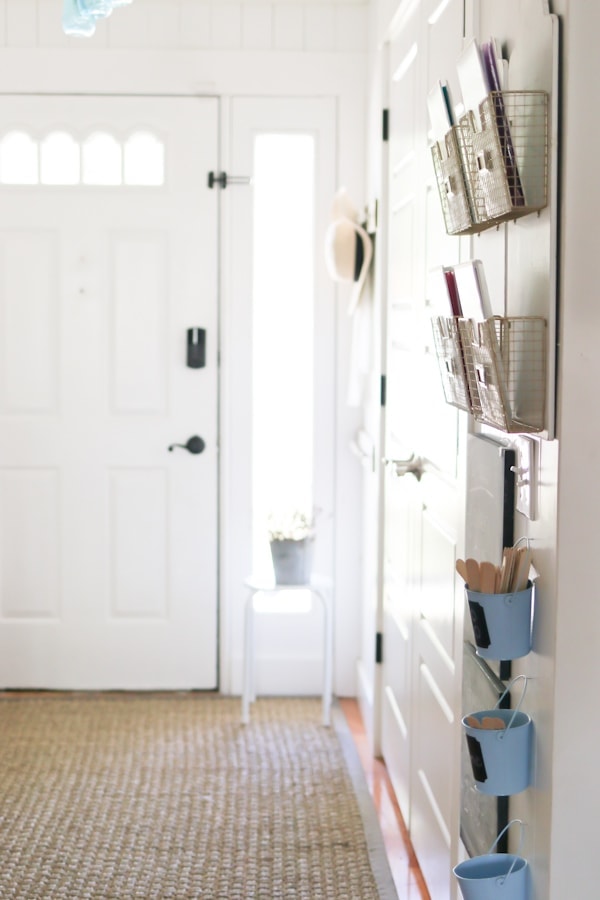
The next thing I wanted to do with the wallpaper was to upgrade our command center a bit – just in time for school.
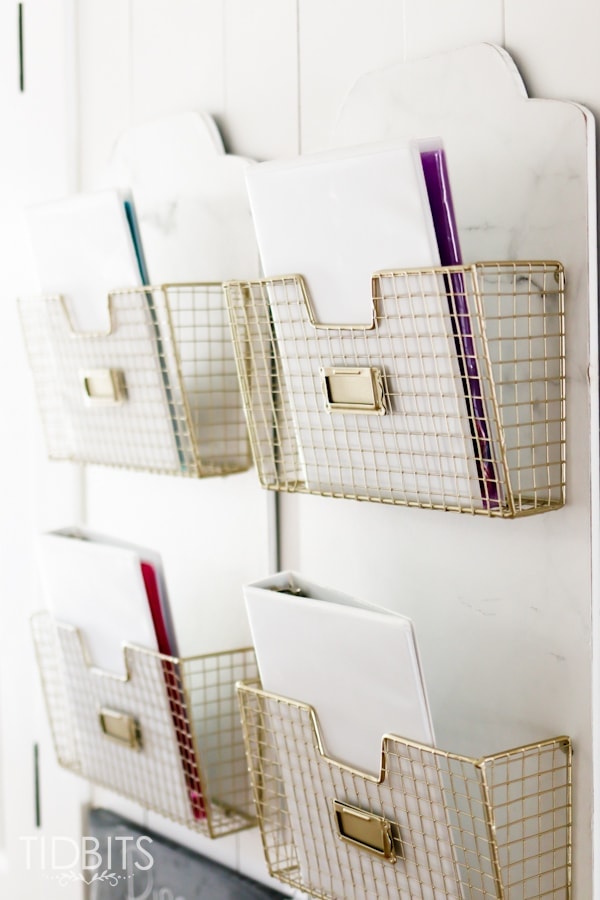
I found these discounted organizers at homegoods, and they looked a bit scruffed up. I thought the marks on the surface was something I could wipe away, but they just always looked banged and scratched up.
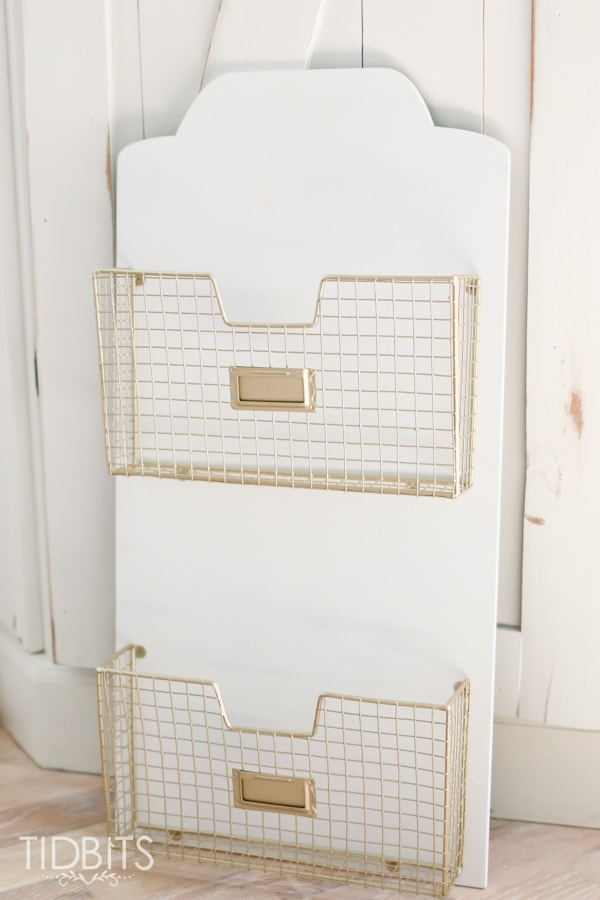
So I removed the folder pockets and applied the wallpaper to the plain white, scratched up surface – and walla!
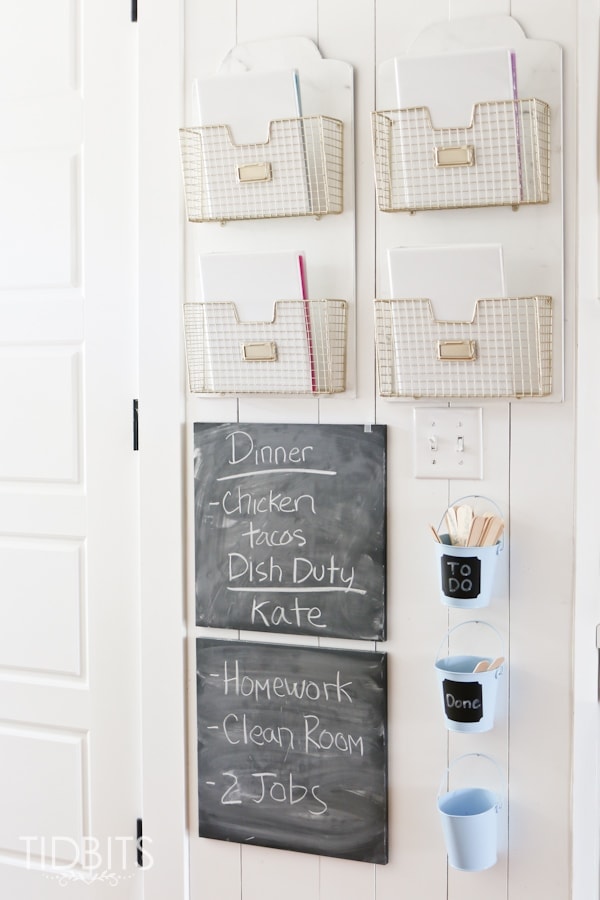
They look a thousand times prettier displayed in our entry way.
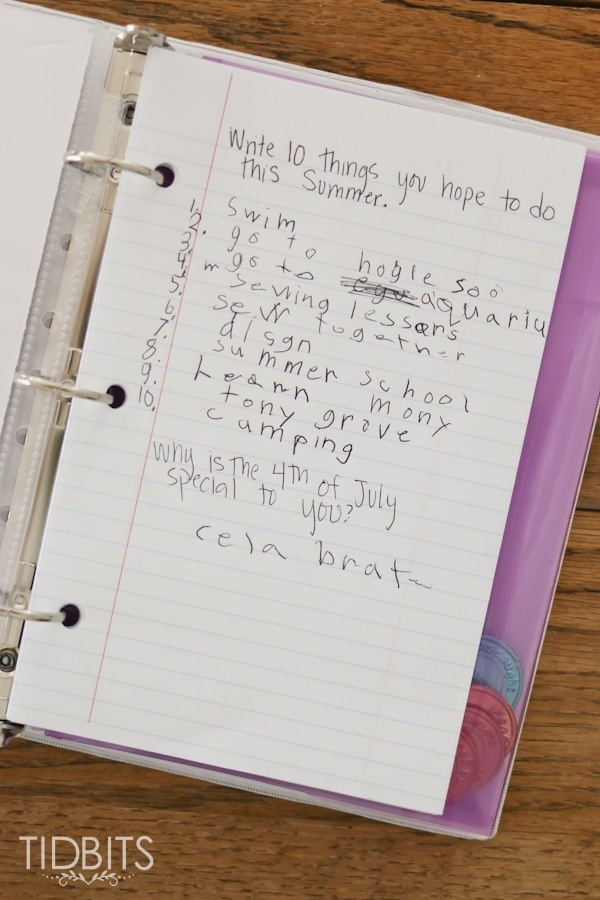
Folks are always curious what I have in these folders, so I’ll share a little peek with you. We call them our “folder tasks”, and they have worked better than any chore chart I’ve attempted to have for my little ones.
*The following links to products are my Amazon affiliate links.
Each day they are “supposed” to complete their folder tasks, kept in these mini folders, which include the following jobs, modified a bit for each age range.
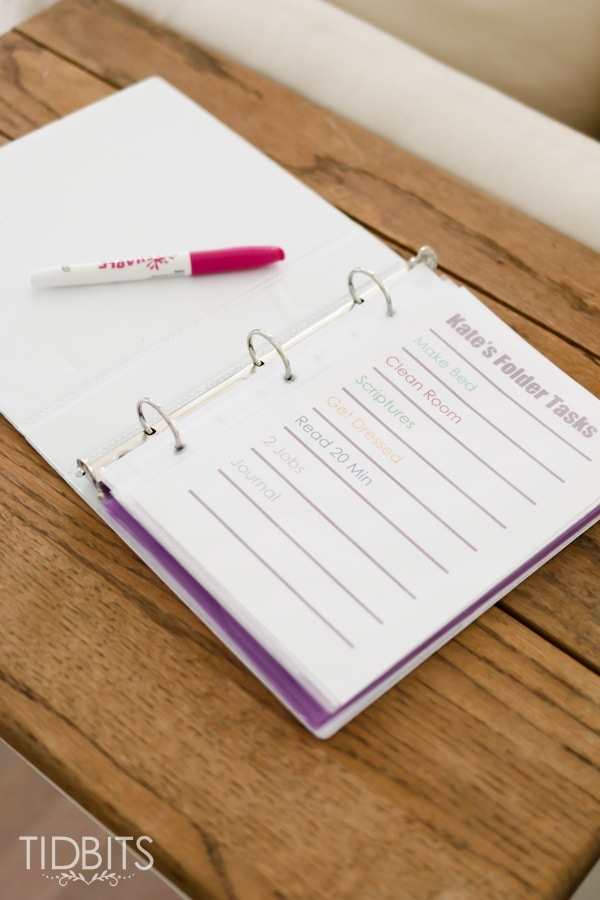
I’ve added some small paper right in it for them to do some writing prompts or journaling.
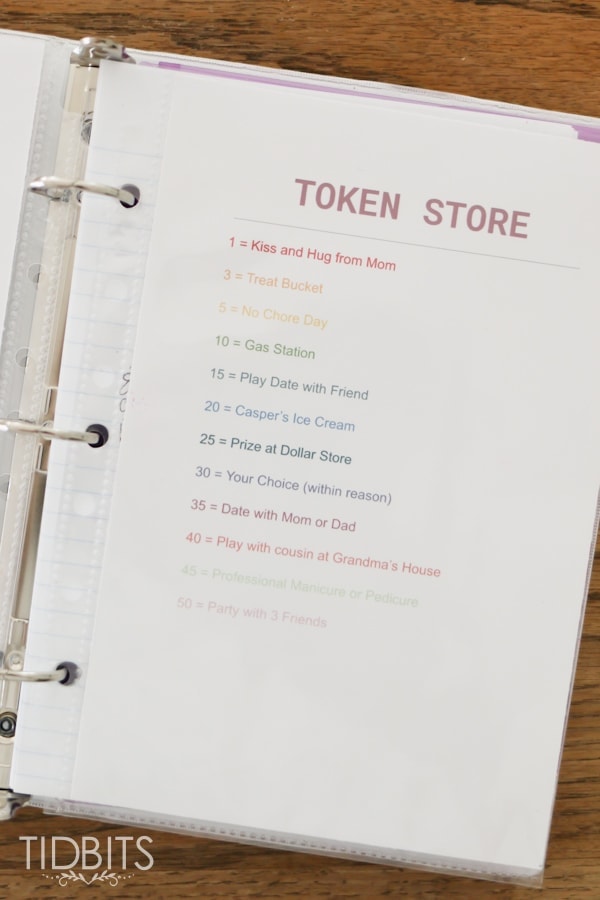
If they accomplish their folder tasks, they get a cute little token which I keep in these little folder pockets.
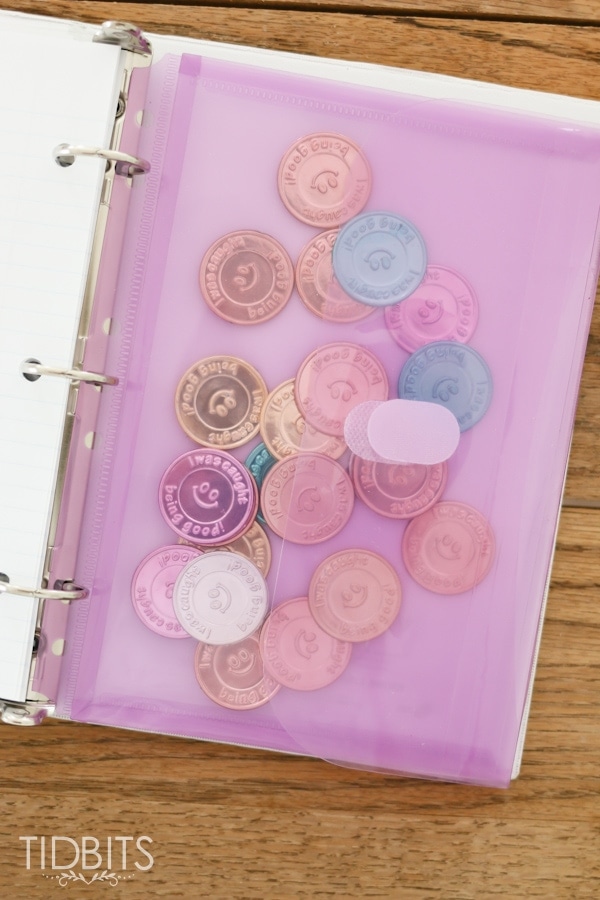
They then get to refer to the token store to see how they would like to spend their tokens. It’s a pretty successful motivational method for my kids. I keep the papers inside these mini sleeve protectors so they can be used over and over with a dry erase marker.
Now I’d love to show you how easy it was to apply wallpaper to these flat surfaces.
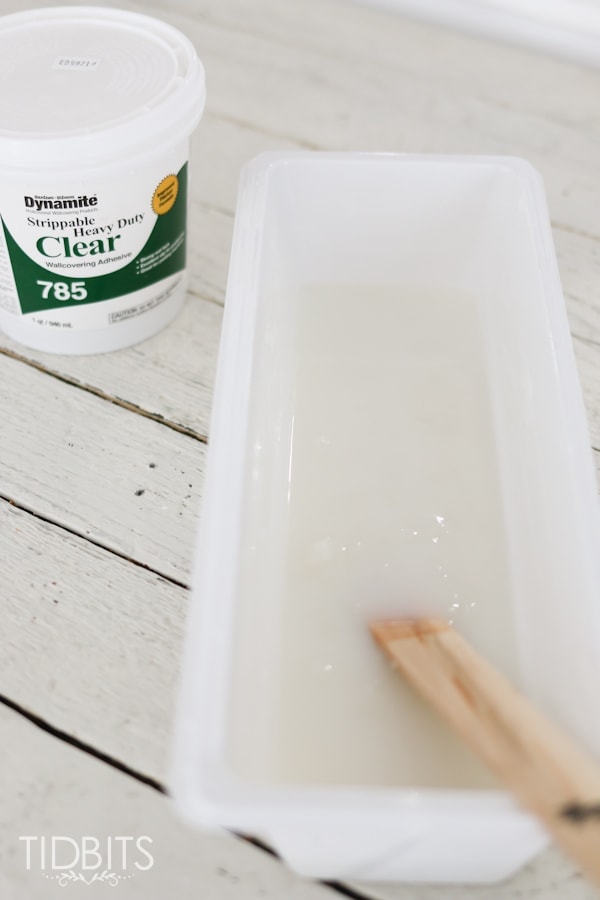
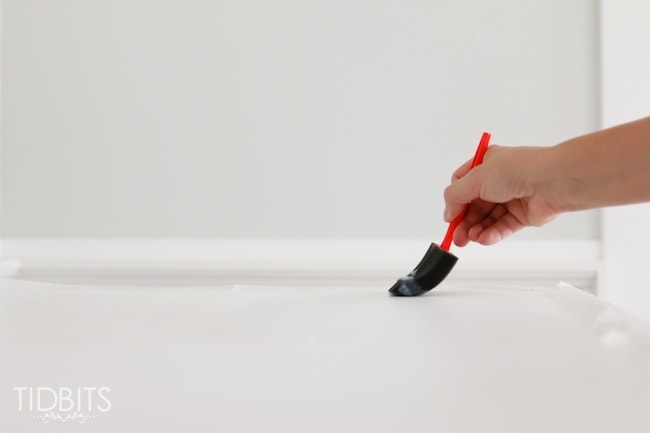
The wallpaper I received is not the peel and stick, but is adhered by a wallpaper paste/glue I just bought from my local paint and hardware store. I diluted and mixed the paste with water as instructed on the bottle.
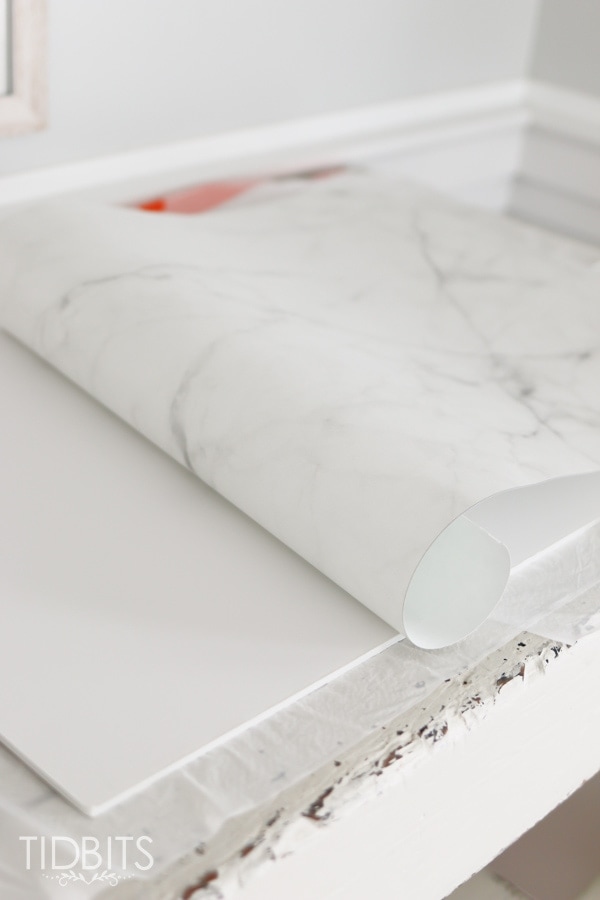
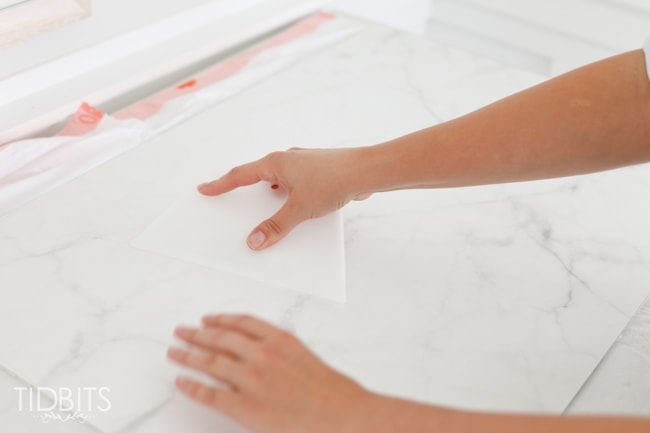
Then I measure and marked the size and shape I needed to cover the surfaces I was working on.
Using a foam brush, I spread the glue over the surface.
Then I carefully lined the paper up to the surface and worked on smoothing it out.
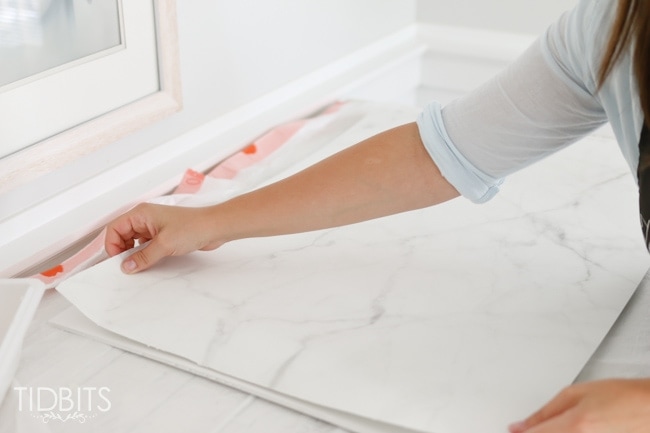
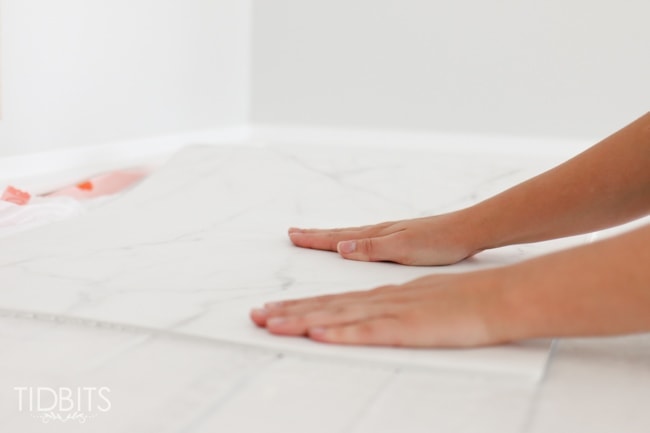
Some kind of hard and flat tool can help with smoothing it out.
Let it dry, and it is as easy as that. If you are doing this over foam core boards, I suggest letting it dry flat with something heavy on the back side. The glue will make it bow a little and this will help with that.
Can you think of any more creative ways for wallpaper? I was thinking it would look lovely as the backing in a bookshelf, or even covering a shelf. Make a faux marble table top for a side table or coffee table. Inside of a tray, as coasters, framed and hung . . . oh the possibilities!
Thanks for reading!
*This post contains affiliate links. Thank you!


WOW! this is amazing… we created a coffee wallpaper and it worked out great.
Hello, I just found this site and I love it! The antique couch you have in one of the photos is amazing! Where did you find it or did you redo it yourself???
Thank you Amy and welcome! I found the sofa at an antique store and fixed it up a bit. My kids love to sit and pretend they are royalty 🙂
Great projects – love them and now I need some marble wallpaper. But at $132/roll – uh, no.
Que idea tan buena, pues me parece que tengo por algún altillo un par de rollos que sobraron al empapelar alguna habitación, (si, jeje, hace añisimos ya, pero entonces me dio por poner papel, aunque juro que no eran osos bailando, jajajaja) . Ese papel imitación mármol es precioso, en el porta-notas me ha encantado, pero en la imagen que lo usas de fondo para fotografiar un plato queda fantástico. Lo único que no me convence mucho es lo de forrar las sillas, no se…creo que con el uso diario se deterioraría rápidamente.
Besote!!!!!
PD: no he marcado eso de commentluv, no se que es y la verdad cuando no entiendo que va a pasar si marco una casilla me entra terror, jeje, la informática y yo….. Intentaré averiguar para que sirve marcarlo 😀
Well I recognize that cute face! So fun to meet you at Haven! I really want to try some of the peel and stick stuff, then I might be brave enough to slap it on a wall. I grew up with it all along borders on every wall of the house too. I like to switch stuff around too often, that would not be a good idea for me. I wonder if you could seal it in as well. That would be a gorgeous and cheap DIY! So many ideas!
Thank you! I love your idea for using tokens in the work place! Motivating for adults too! I should come up with a reward system for my hubby 😉 That could be good!
Yes I agree. They are so pretty these days but I still know I would tire of it and never want to scrape it off of walls again. And thanks for noticing the feature! I find it so funny more than anything. I would not do well on TV 😉 Have a beautiful day sweet friend!
Yes I agree. They are so pretty these days but I still know I would tire of it and never want to scrape it off of walls again. And thanks for noticing the feature! I find it so funny more than anything. I would not do well on TV 😉 Have a beautiful day sweet friend!
Hey girl this is so cool! Love the ideas for the girls to! So cute!
Thank you Shawnna!