
This post may contain affiliate links, which means I get a small percentage of the sale at no extra cost to you. I only recommend items I love and have had a positive experience with. Thank you!
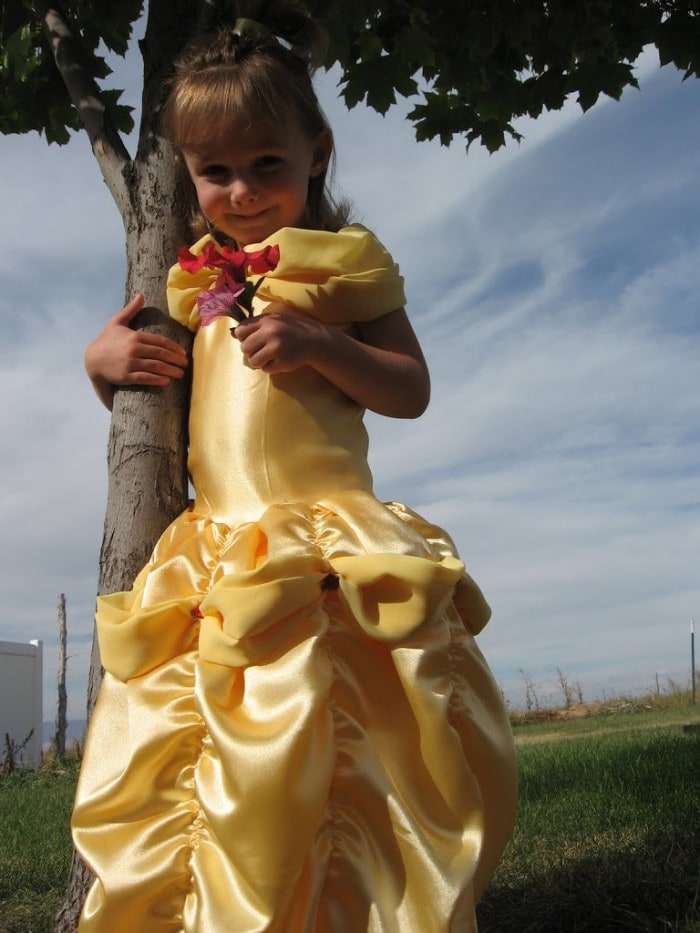
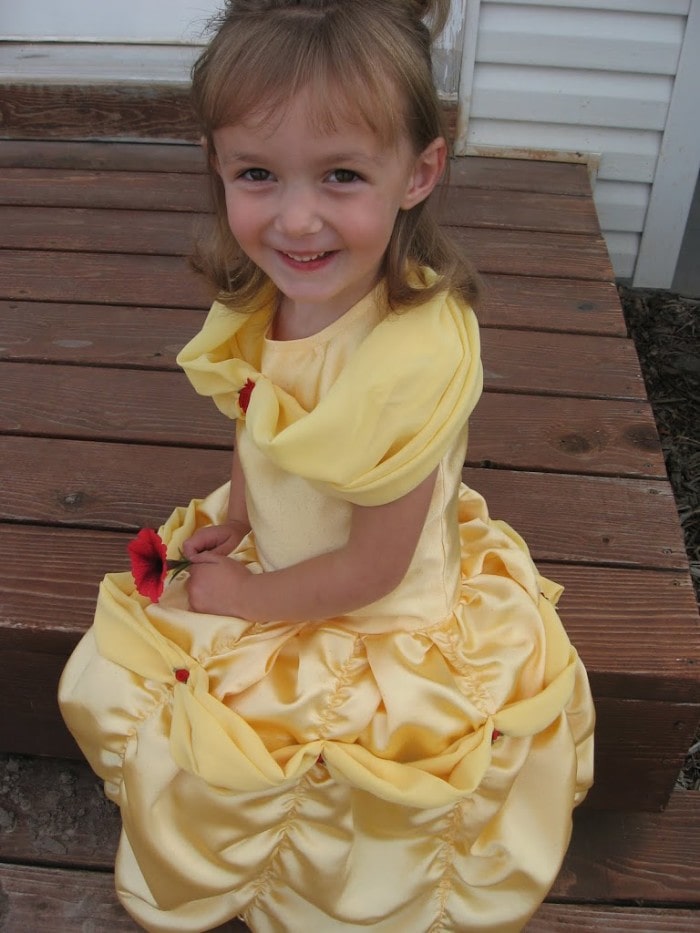
There is something about Belle’s dress, don’t ya think,
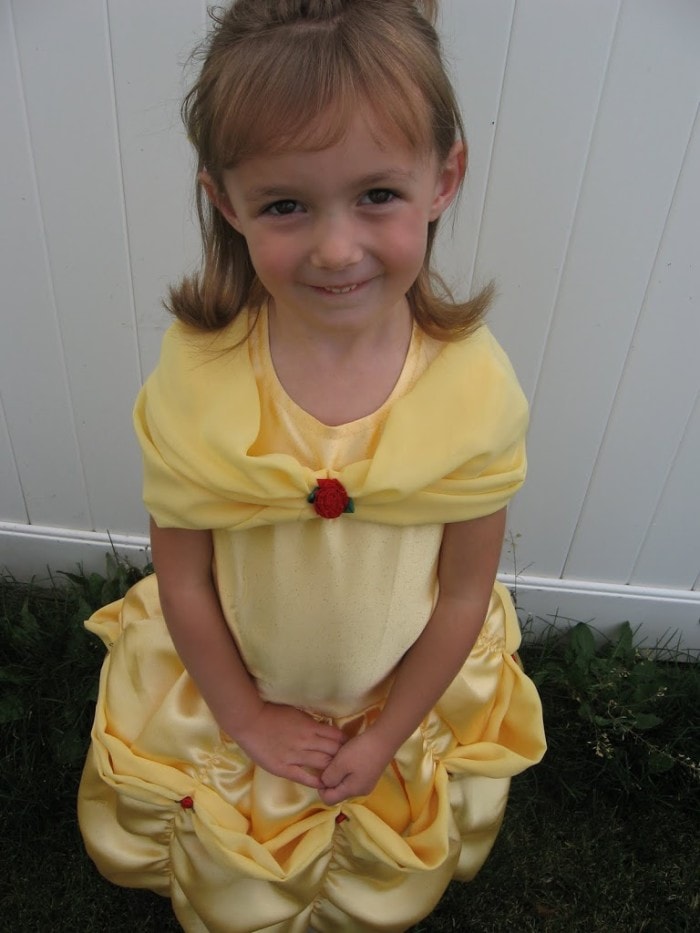
that makes every little girl wish they had one.
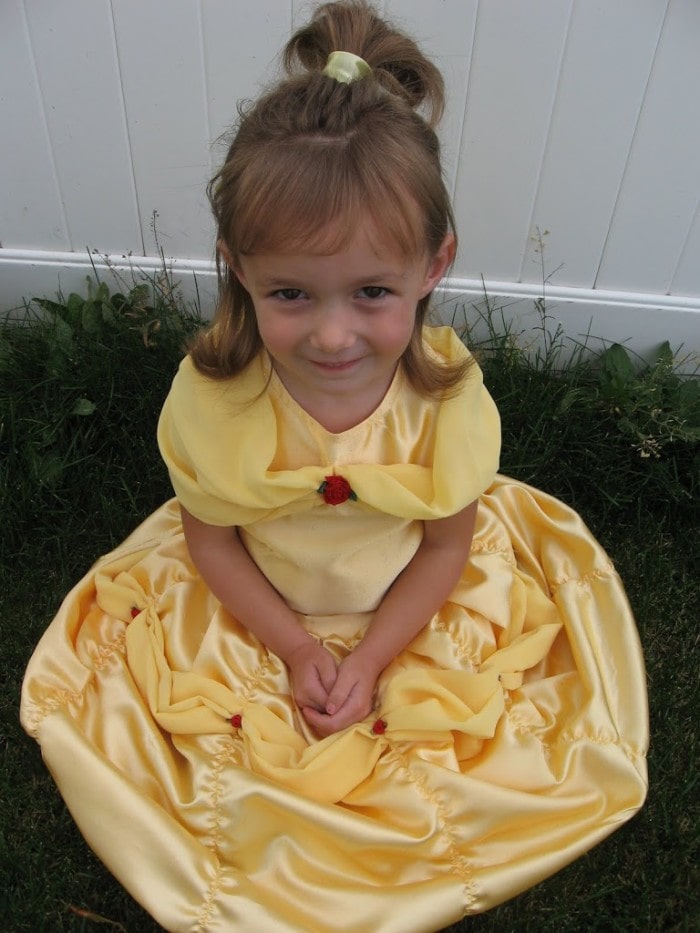 Equipped with soft chiffon swags
 and it’s scalloped skirt
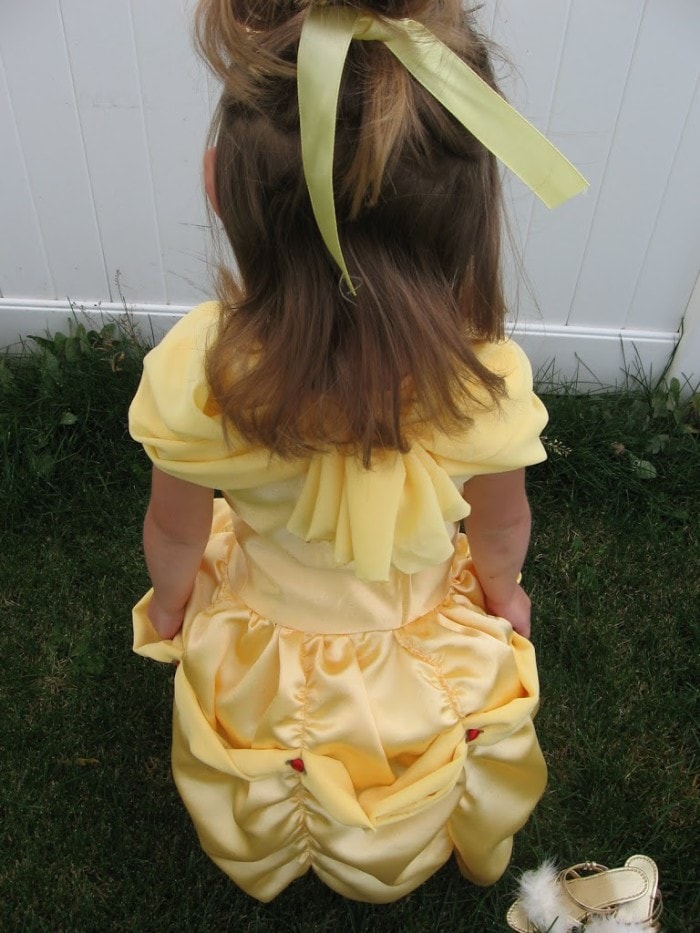 with just the right poofy-ness and spin.
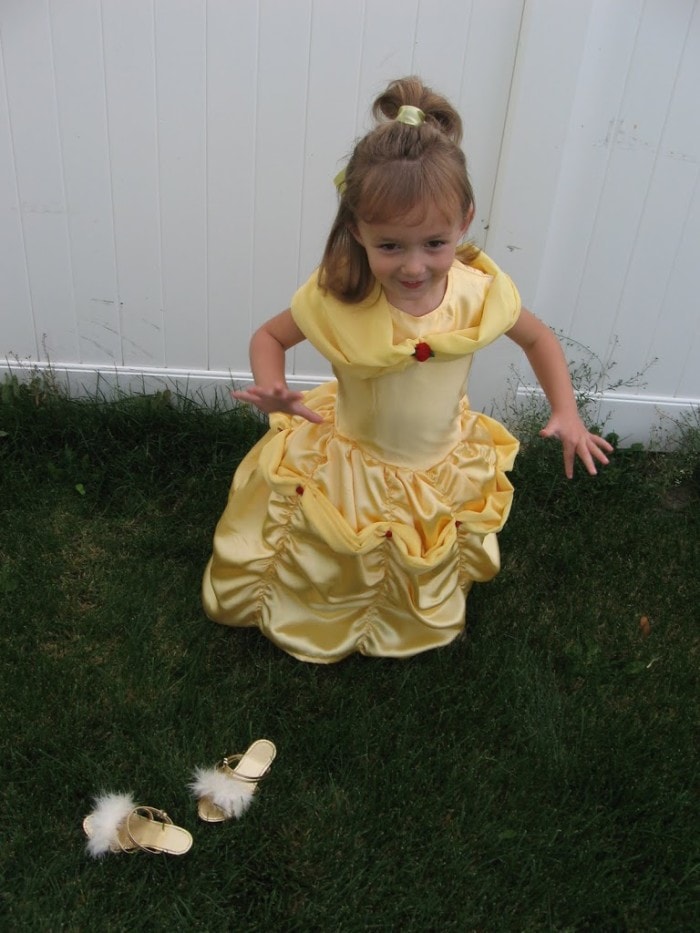 What girl hasn’t imagined dancing around in that sparkly yellow dress?
 Well, this little girl would accept nothing else for her Halloween costume.
 So mommy made her dreams come true.
 And it was very satisfying.
I’ll show you step-by-step, how you can do that too.
WARNING-lots of pictures ahead!
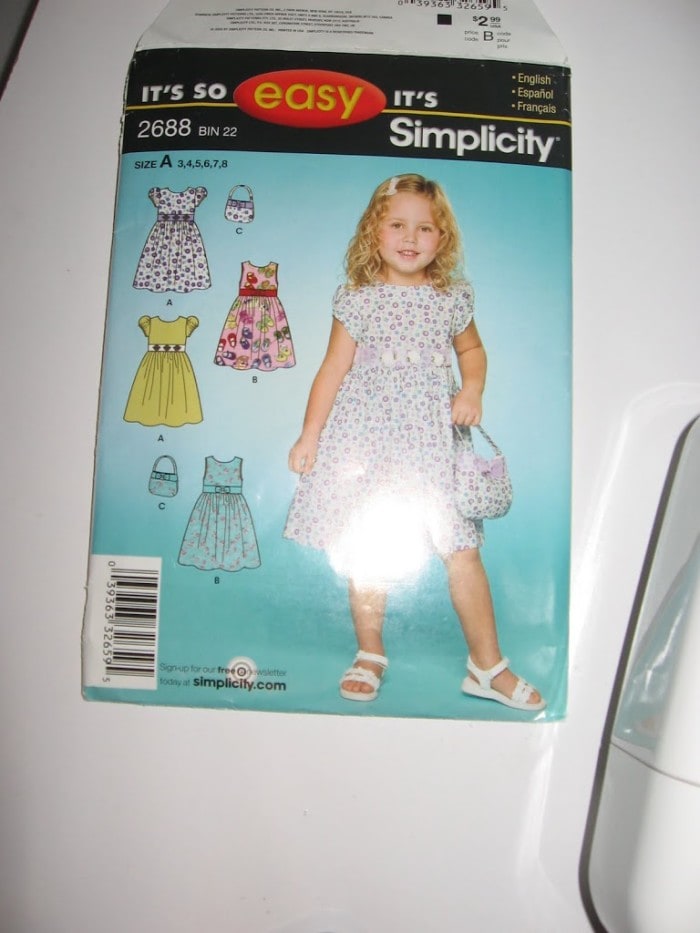
So after begging my husband to allow me to take back my promise that I would only use what I had at home to make the girls costumes this year, I headed to Joann’s. I convinced him that this Belle costume was indeed a need for his daughter and much more than a want. Good news for him though, it only cost him 15 bucks, max. The quality far exceeds that of the 35 dollar Belle costumes that you find in the store with it’s cheap short cuts to appear as Beauty’s dress. This time of year Joann’s sells costume fabrics which are significantly cheaper than the higher quality satins. Though, if you have the money to spare, I would recommend buying the better quality stuff. The costume fabric is not the easiest to work with, but it yields close enough to the same results.
You can use a Belle dress pattern, but didn’t like anything I saw in all the pattern books. They were missing some of the best parts of her dress, and some would make my 4 year old daughter look a little to grown up, if you know what I mean. I’ve tried hard to teach my daughter the value of modesty. So I took a basic pattern and altered it a bit, as I’ll show you below.
Here is what you will need to buy:
3 yards yellow satin
3 yards yelllow chiffon
8 small roses and one bigger rose, or you can make your own.
Sew on velcro
2 packages 1/4 inch elastic
THE PATTERN:
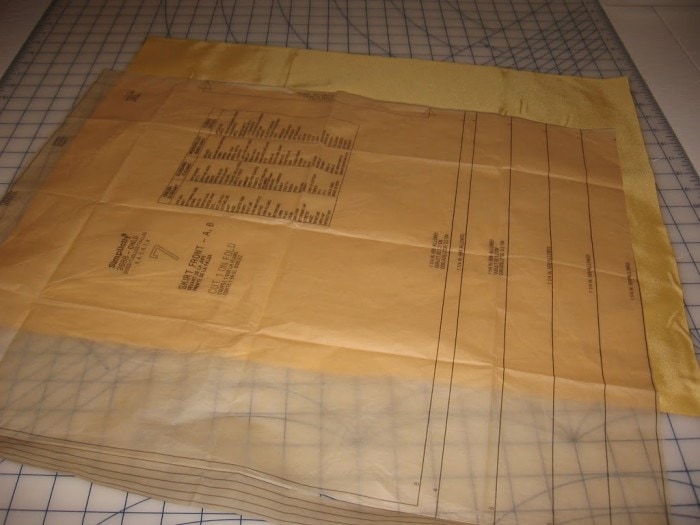
I began with this pattern, one I already had on hand. I used the sleeveless top to begin with.
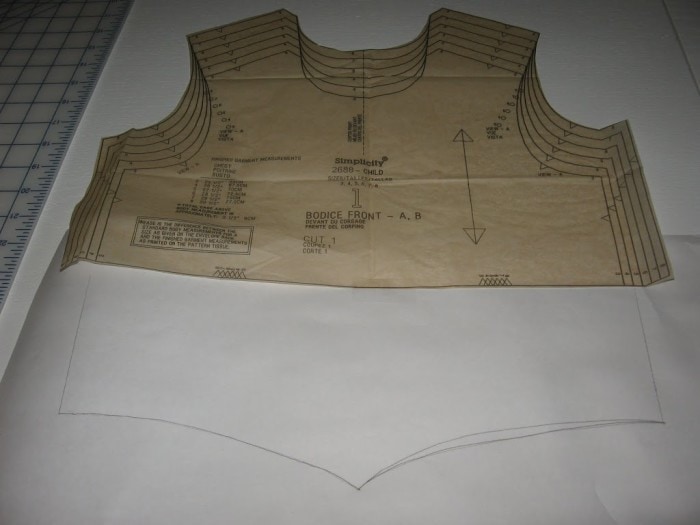 Using size 4 as my guide, I taped it on some paper and brought the waistline down 4 inches and drew a point. After I cut it out, I folded it in half and made sure the point was the same on both sides.
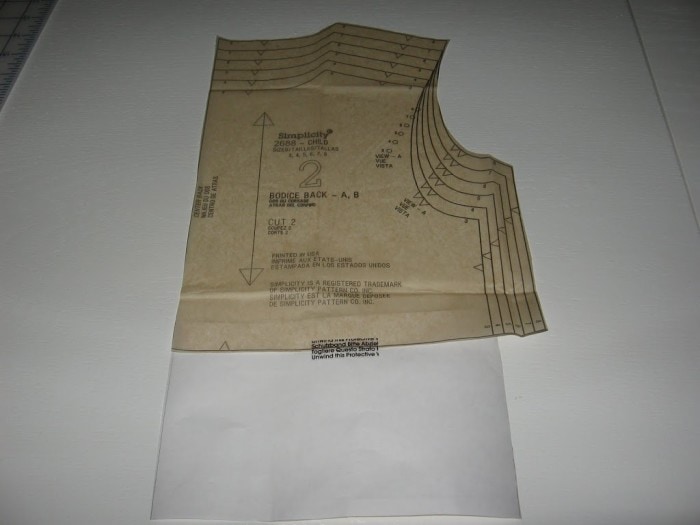 I did the same for the back piece.
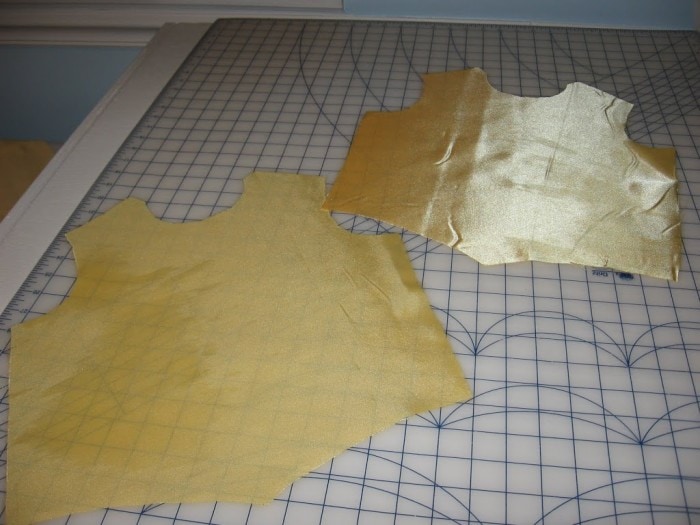 Cut two for the front and back, so you have a lining to use. I actually used the wrong side of the fabric to act as the right side for the lining because the sparkles make it somewhat itchy.
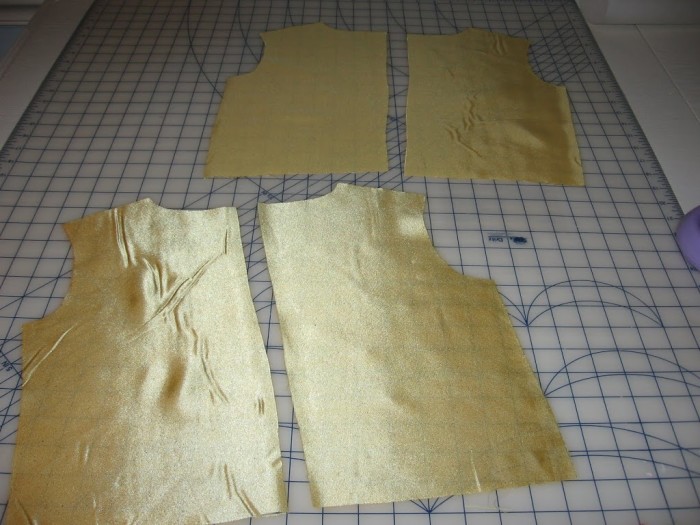
 Using the same pattern I cut the skirt front and back.
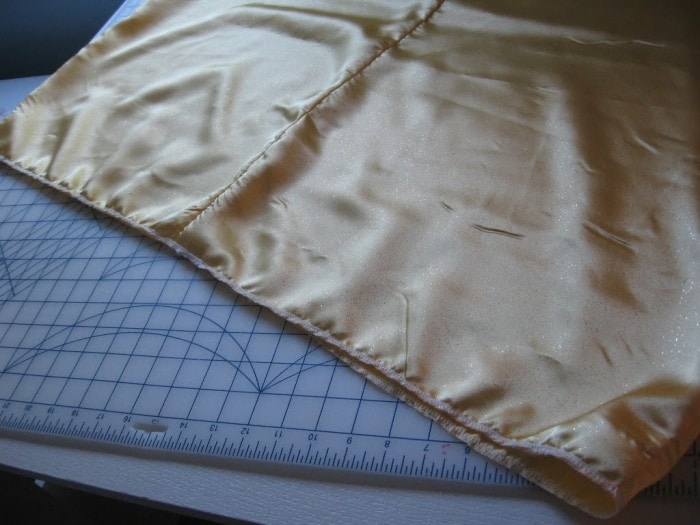
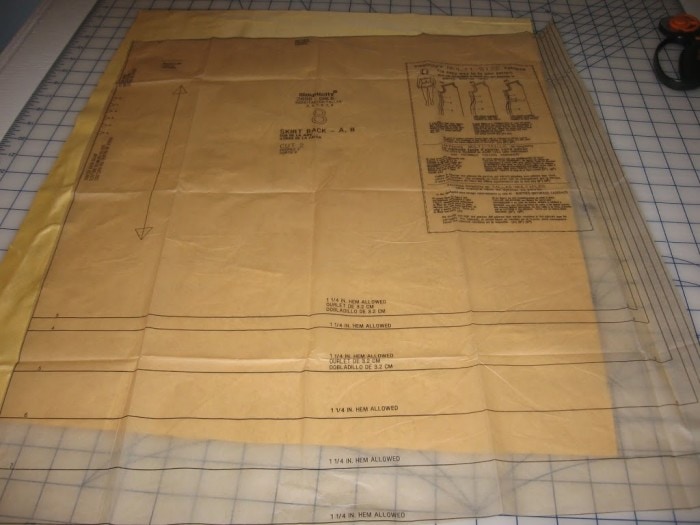 I didn’t line the skirt, so I only cut one of each. Rather than using size 4’s hem measurement, I measured my daughter and made sure it went down to her ankles. I ended up using the biggest size on the pattern for my hem guide.
SEWING THE TOP:
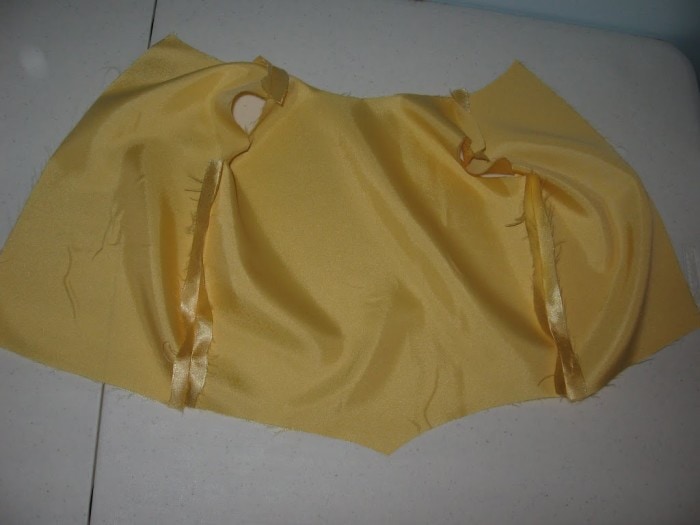 I began by sewing the side and shoulder seams for both the top front and the top lining fabric, right sides together.
 Then I sewed along the neck edge, now joining the lining with the top, right sides together.
 Under-stitching and clipping the curve makes it lay nice and flat.
 Then I top stitched the neckline.
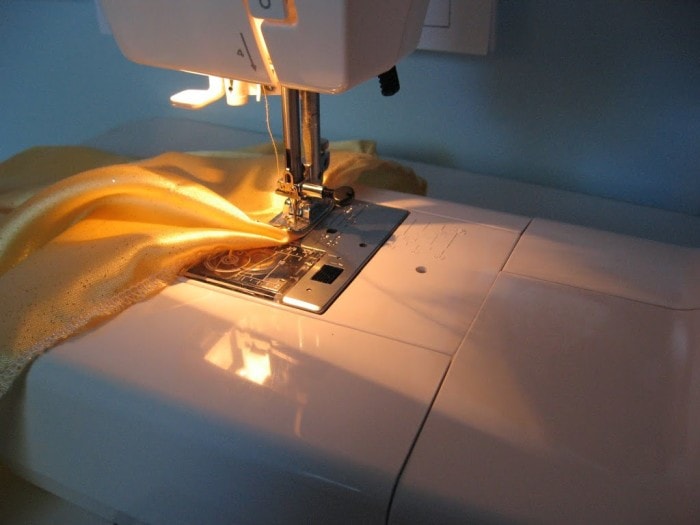
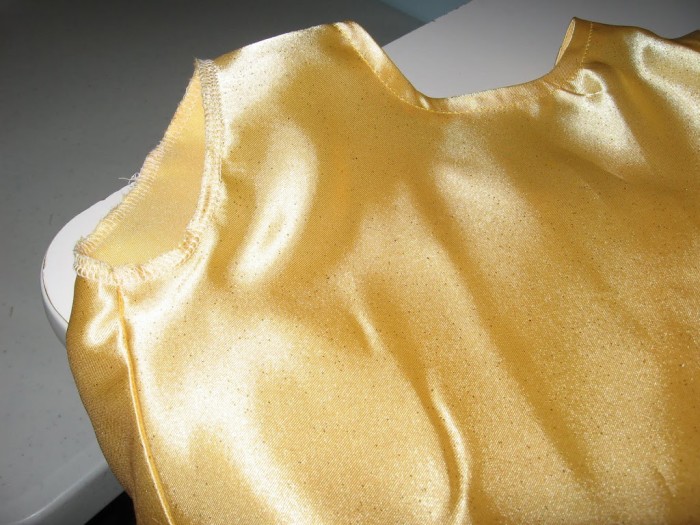 This is where I had big plans to make some pretty binding for the sleeves, but soon realized that this cheap fabric doesn’t press well. It became almost impossible for it to look good, so rather than becoming a cussing women, I decided to simply serge the sleeves. After all, they would be covered up any way. That’s how I justified what I did here. If you don’t have a serger, there are many other methods. Make a binding (if you bought more cooperative fabric), buy a pre-made binding, or zig-zag the edges.
 For the back closure, I serged the edges first,
 folded over and top stitched.
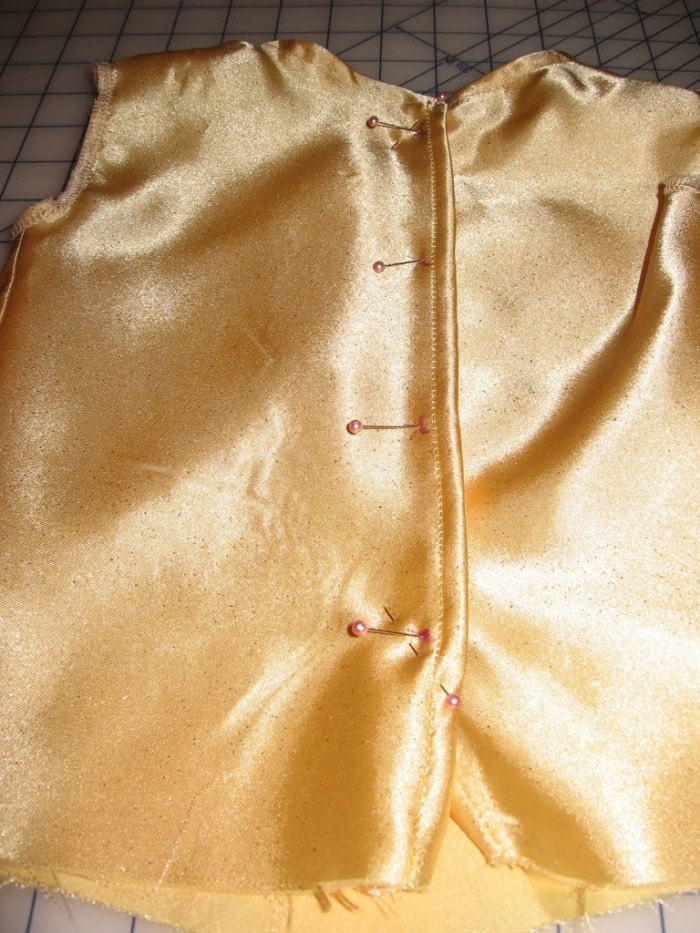 You could choose to do a nicer zipper, but velcro seems to work better for my girls when they are playing dress up. So I marked where I wanted the velcro to go,
 and sewed the squares in place.
THE SKIRT:
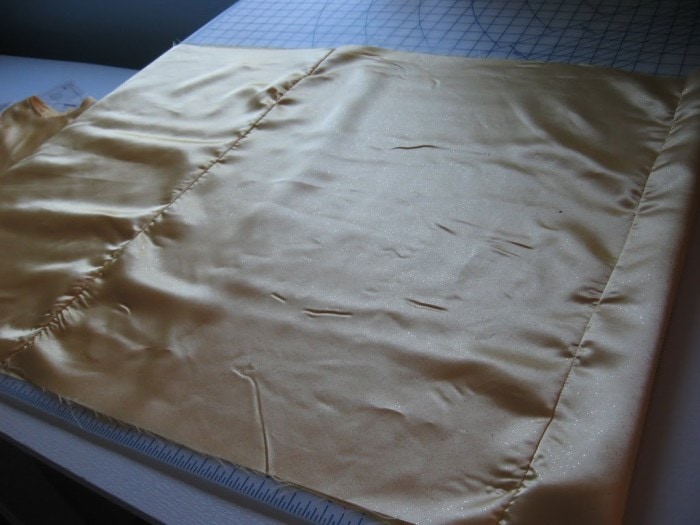 Then I moved onto the skirt. You could sew or serge the side seams and back seam together. If I didn’t have a serger I would do a enclosed french seam or flat-fell seam.
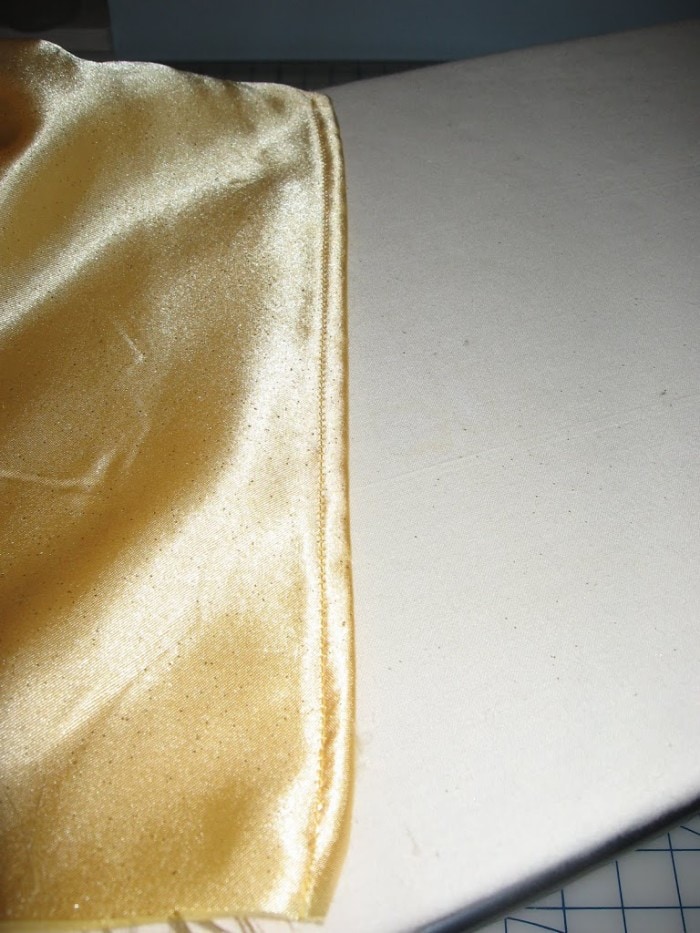
 Then I hemmed the bottom by serging
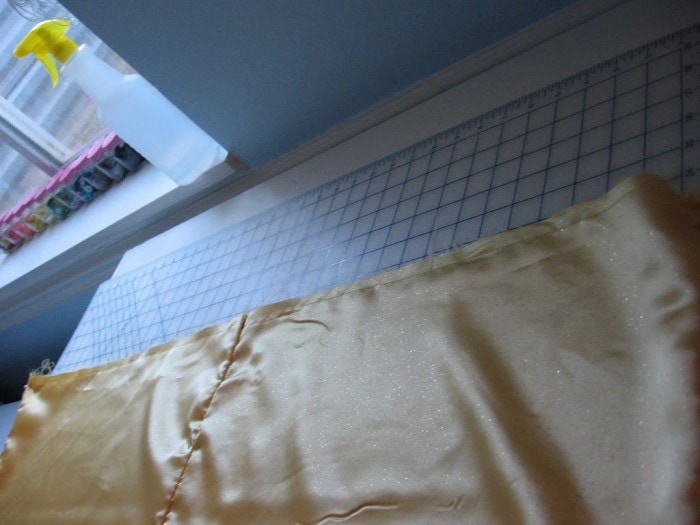
 and rolling up and top-stitching. I had to press it good to get out all the funny rolls. I recommend using a pressing cloth over the fabric when you press formal fabrics. I learned this costume fabric will leave a film all over your iron if you try to do it without.
 Then I made a gathering stitch all along the top. To do this, increase your stitch length at high as it goes and sew along the top about 1/4 to 1/2 inch from the edge. Leave your thread tails.
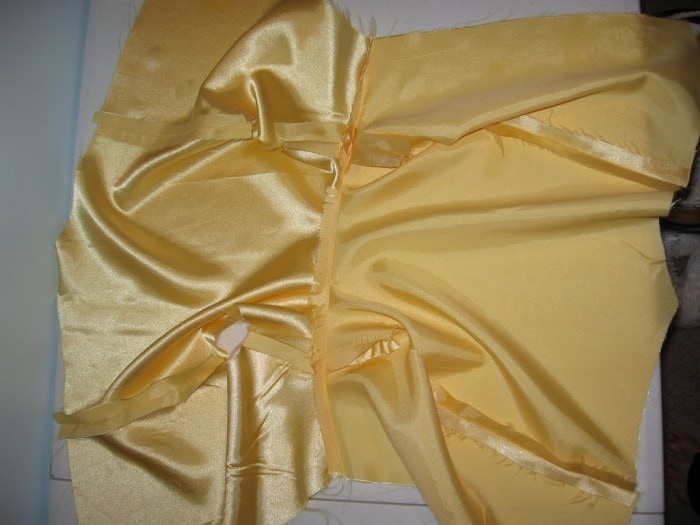
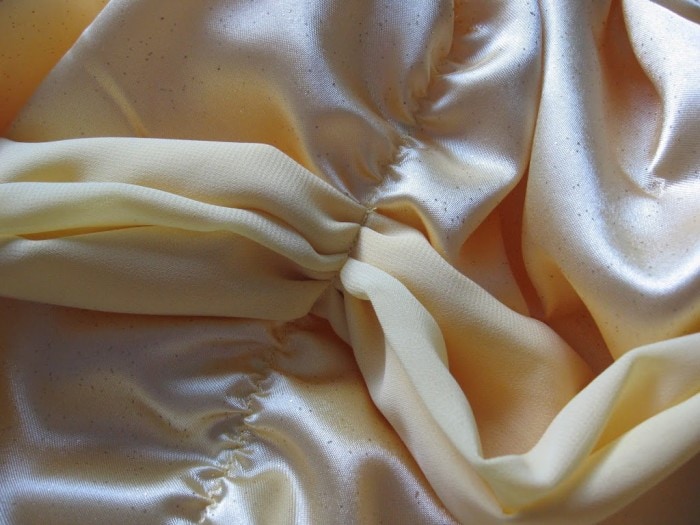
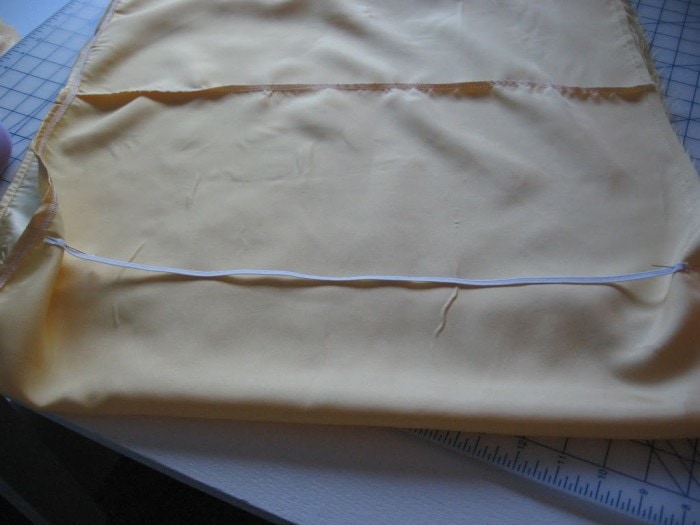 Before I began gathering, I wanted to sew on the elastic to create the scallops. I took the measurements for the width of the skirt and divided it buy how many bunches I wanted. I ended up doing 8 bunches every 8.5 inches apart. I marked top and bottom where the elastic would go and pinned it in place. You will need to play around with how long you want your elastic. I ended up cutting each elastic piece 17 inches, which was about 2 or 3 inches shorter the the length of the skirt.
 To sew the elastic on I simply stretched it as I stitched.
 That is one way to create the scallops, or bunches of Belle’s skirt.
 Then I began pulling the gathering thread to fit into the top piece. I like to stitch the gathers before I sew top and bottom together, though many don’t do this. I find it easier to work with. You can still play with the gathers a little to make it fit perfectly after you do this.
JOINING TOP AND BOTTOM:
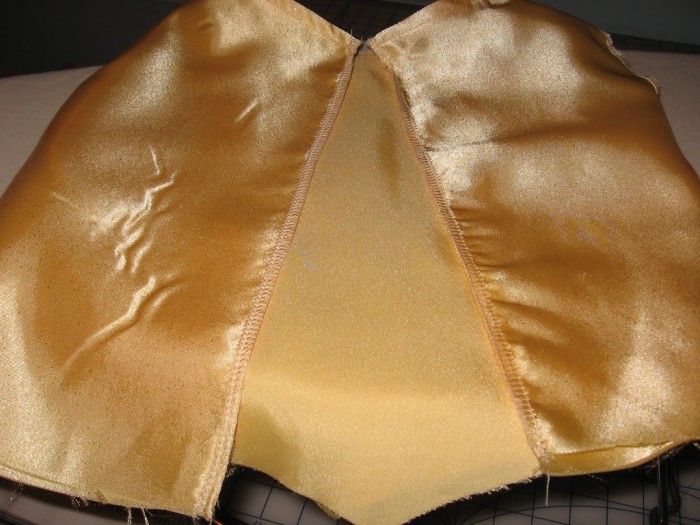
 Then I pinned and pinned and pinned in place, right side of the top and right side of the skirt together.
 I stitched and serged to clean up the edges.
THE SWAGS:
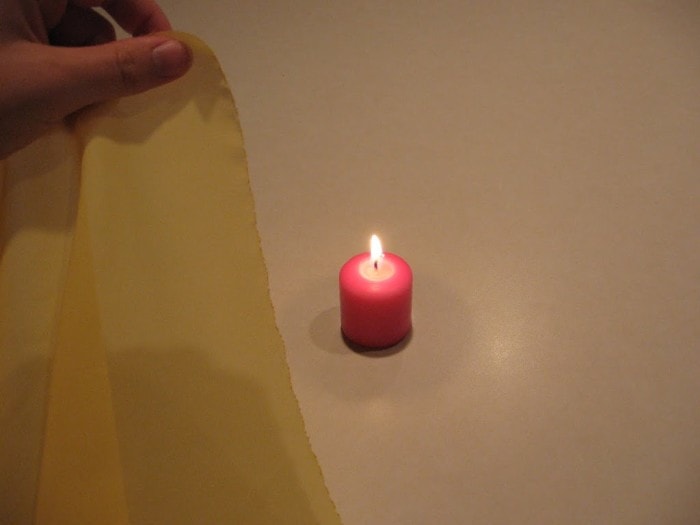 After the dress was put together I began making the swags with the chiffon fabric. Rather then hem all of it, I singed the edges by running it through a candle. It works best if you do this quickly and closer to the bottom of the flame. This will keep it from unraveling.
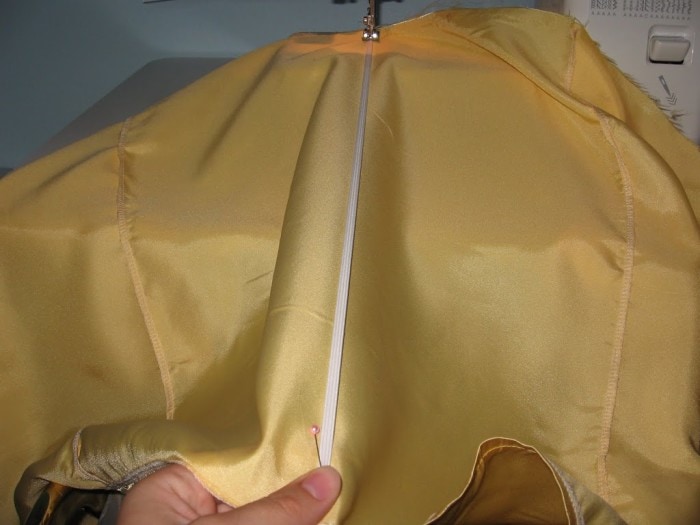
 For the neck swag, I cut a total of 41 inches long, and 21 inches wide. You can do whatever you think you need. I centered it on the dress, just below the neckline, bunched it together and stitched in place.
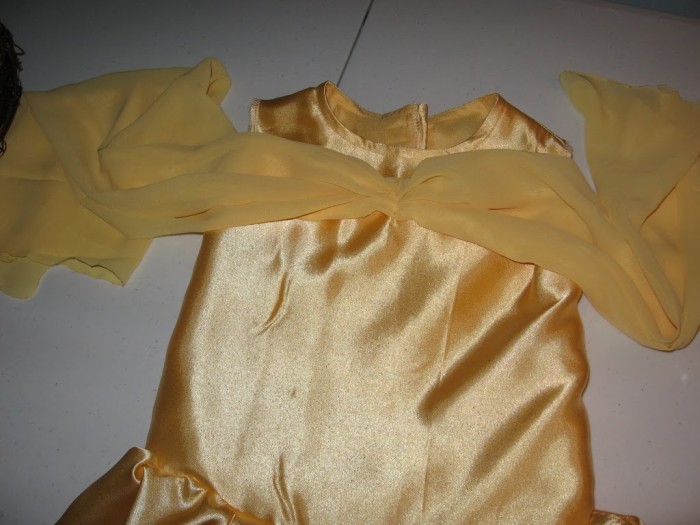
 At this point it was very late and I had to use the only model I had, and that was the 2 year old who refused to go to sleep. A very frustrating process indeed. But I some how figured out how long I would need the swags to go over the shoulders.
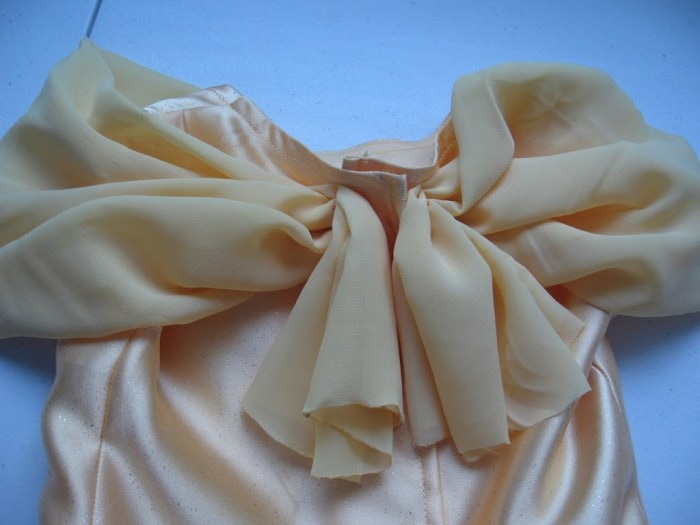 I simply bunched them in the back and stitched in place, making sure to leave room for the Velcro to open and shut.
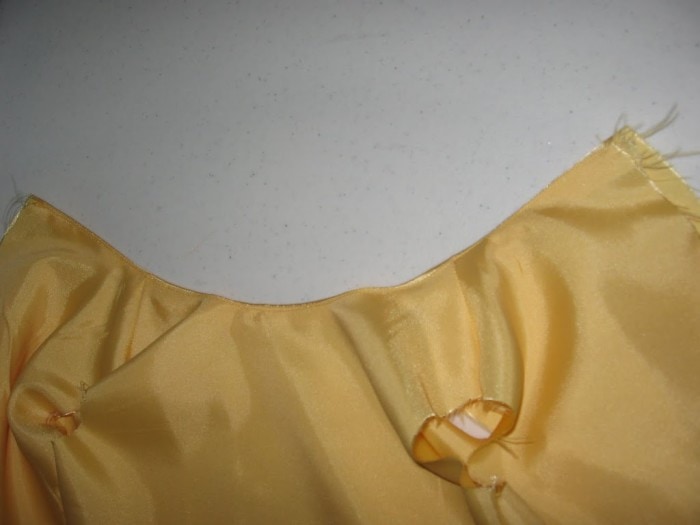
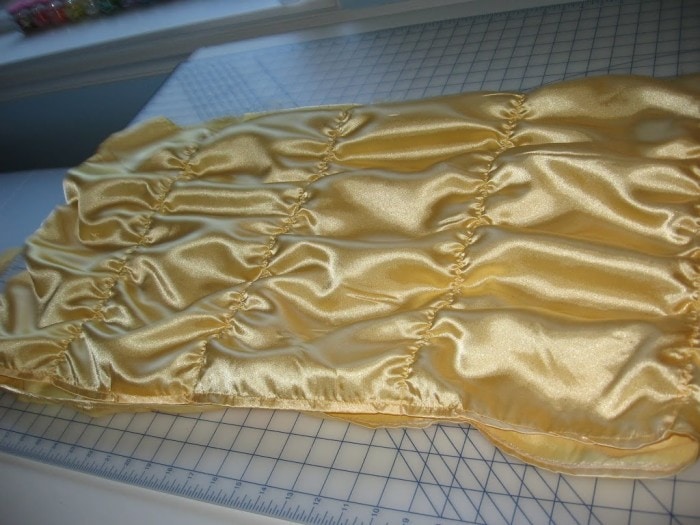
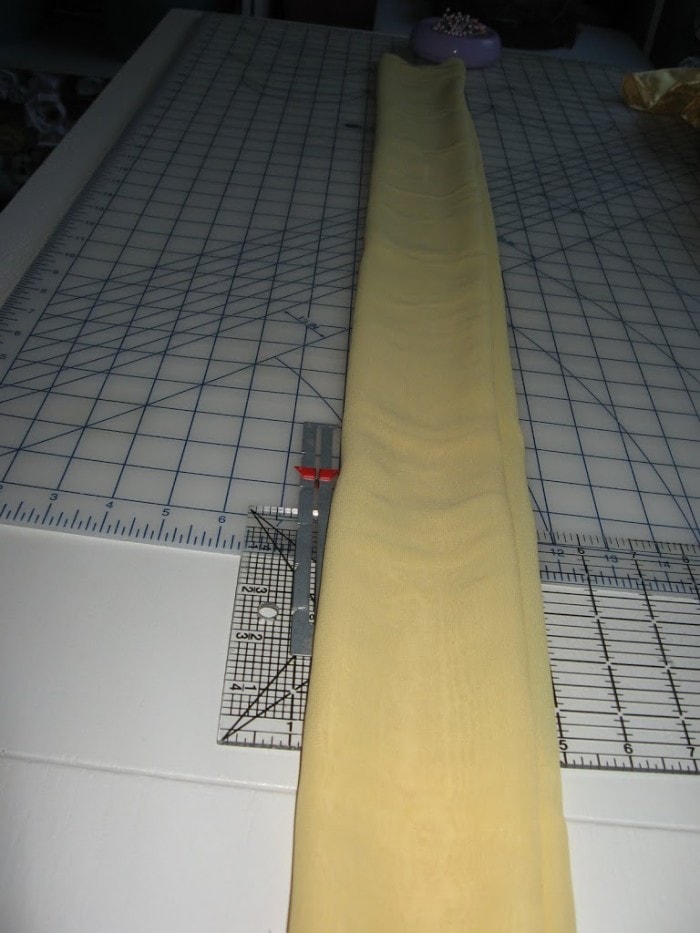 Now for the finishing touch. The skirt swags. This may vary but I cut 21 inches wide again of the chiffon fabric and 2 yards in length. I folded it in fourths and laid it out.
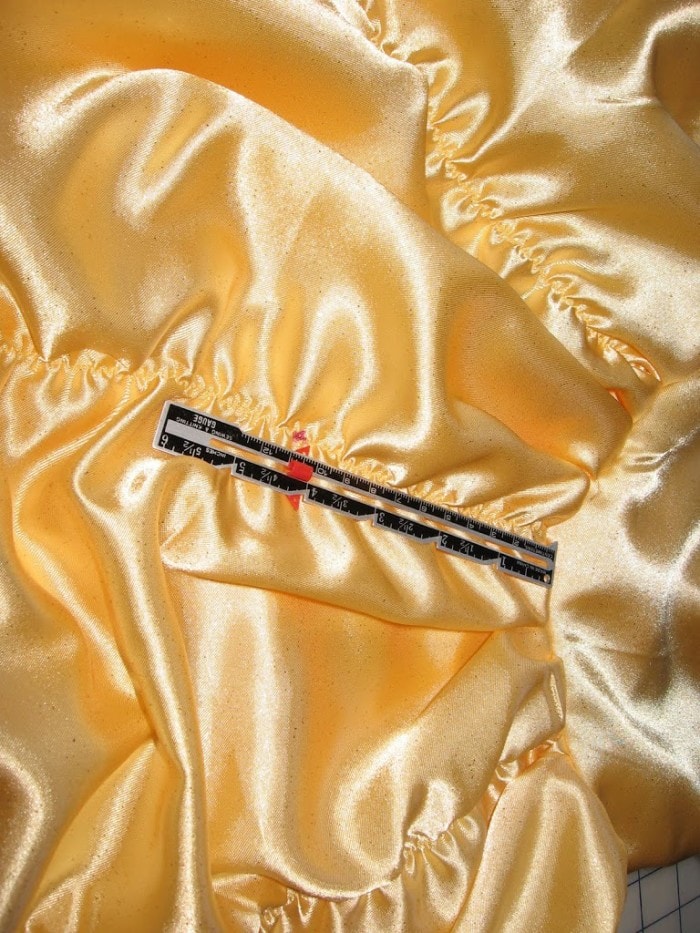 I marked 4 inches down on each bunch I previously sewed
 and pinned in place. Make sure the length of each swag is where you want it before you begin sewing.
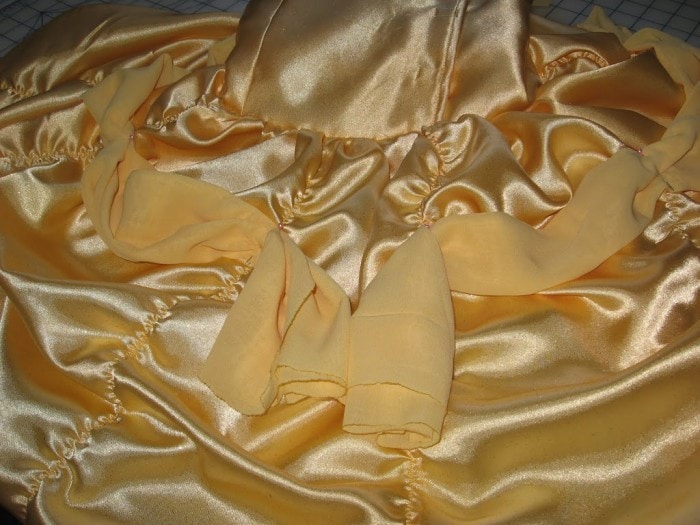 I left an open swag in the back to later be stitched.
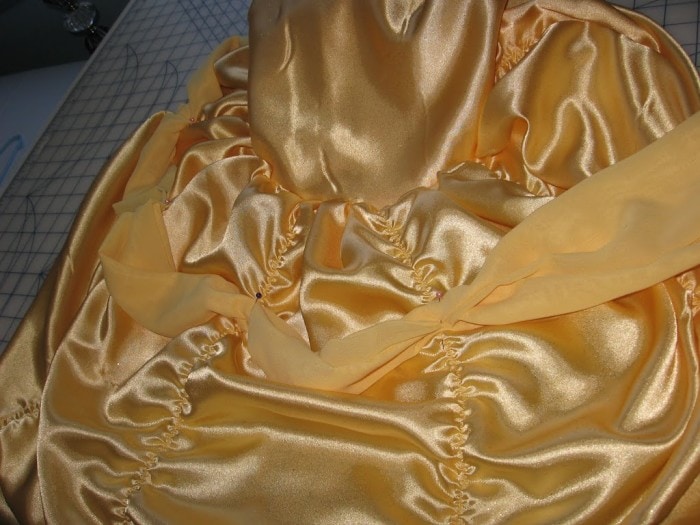
 Then I stitched on each spot I marked.
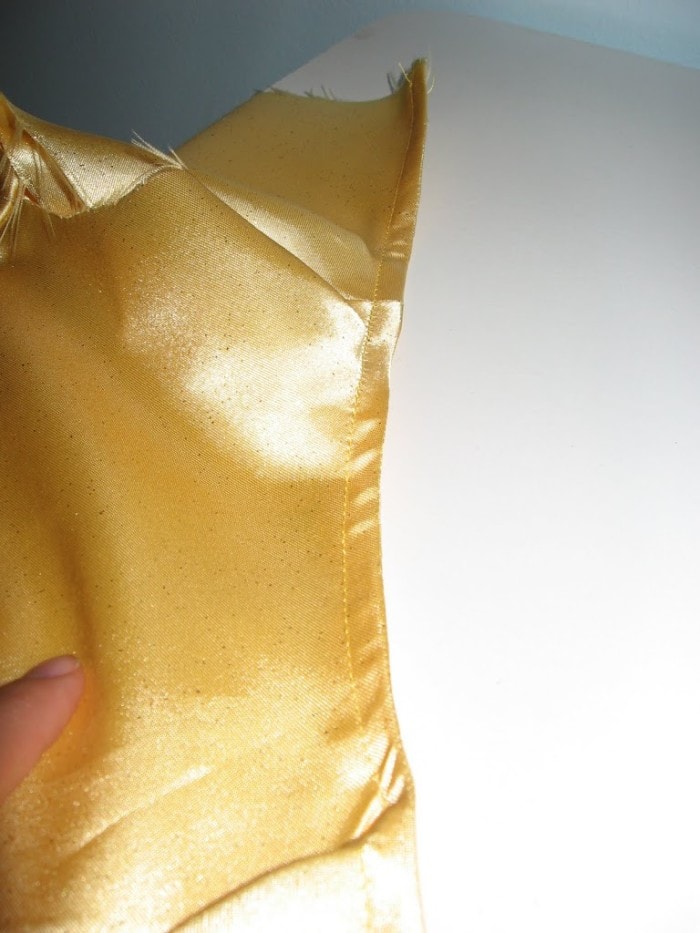
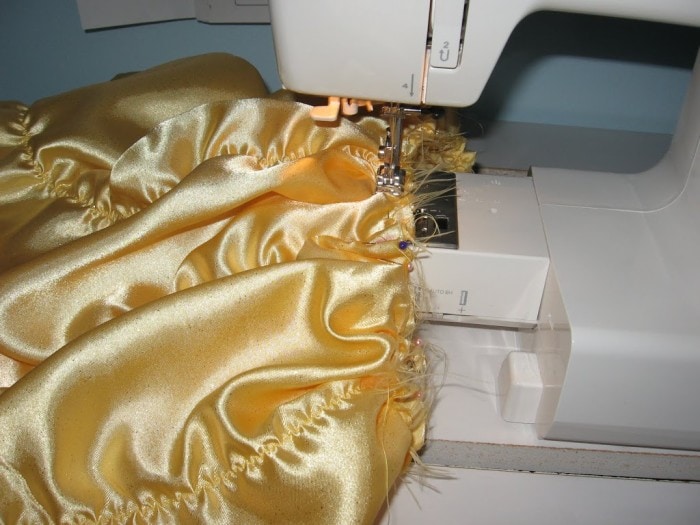
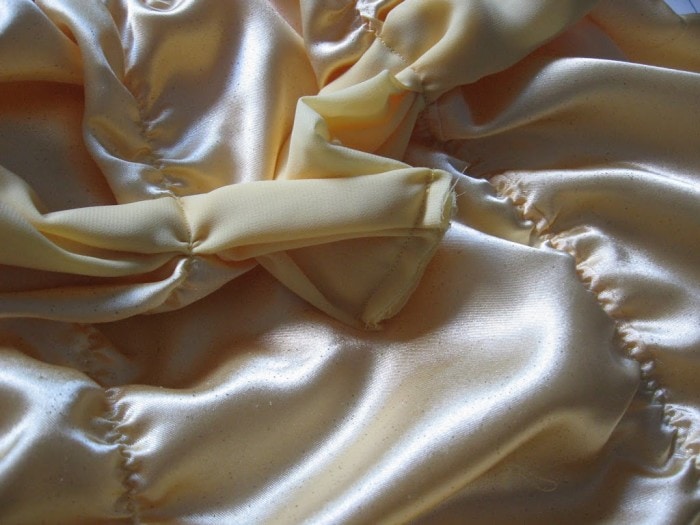 To finish off that open swag, I first cut it to the length I needed it. Then with right sides together, I stitched. Later I singed the raw edges so it wouldn’t be a mess.
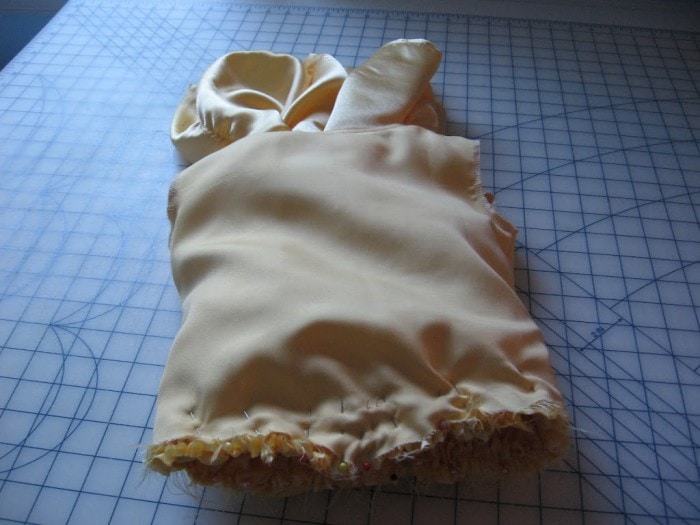
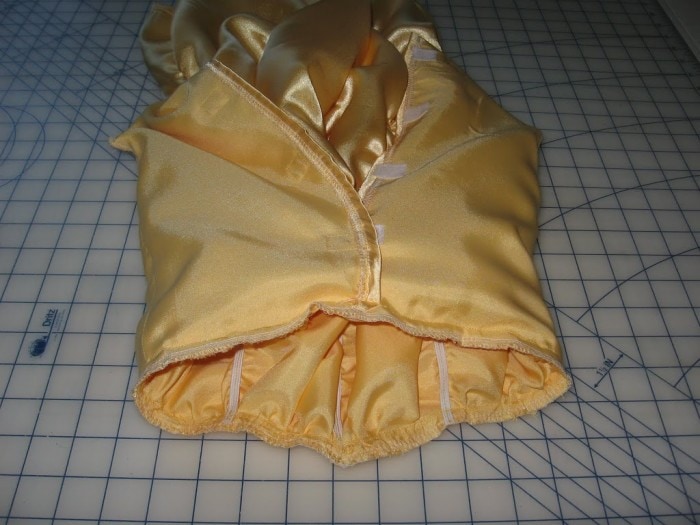
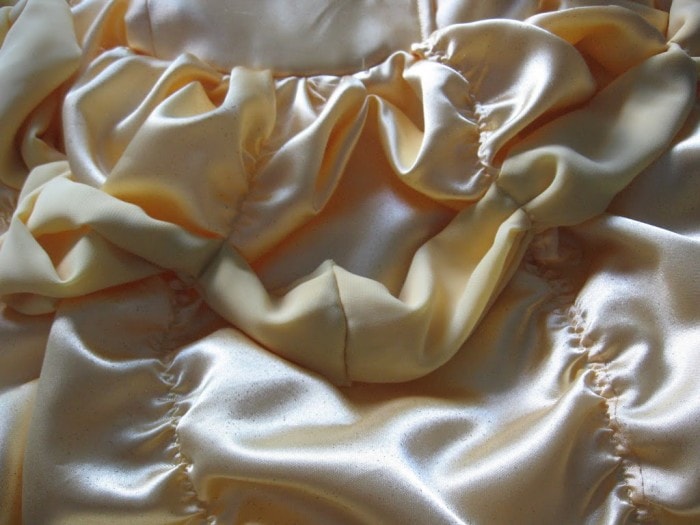 This is what it looked like when I was done.
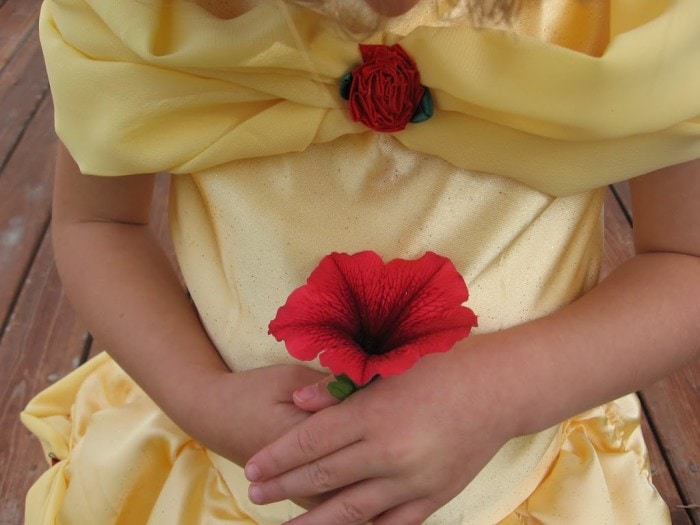
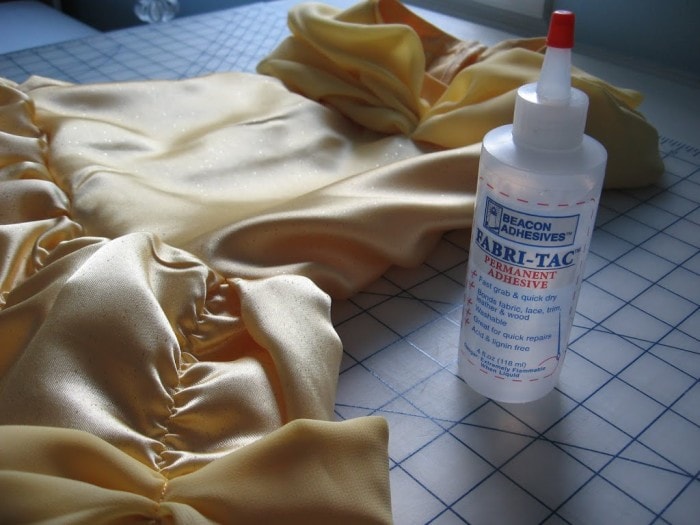 To apply the small roses, I used fabric-tac. This is good stuff.
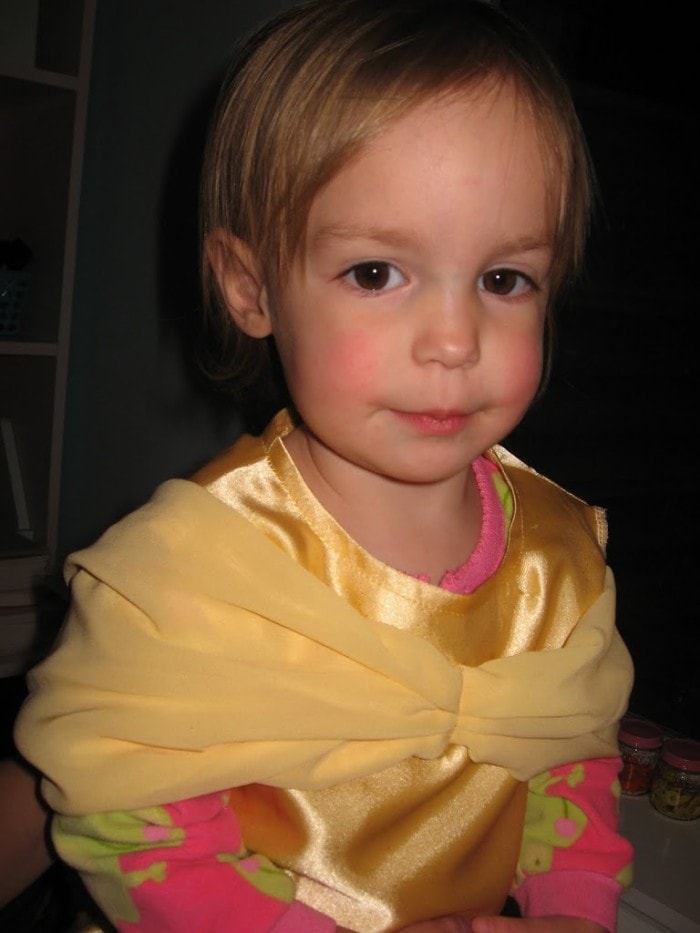
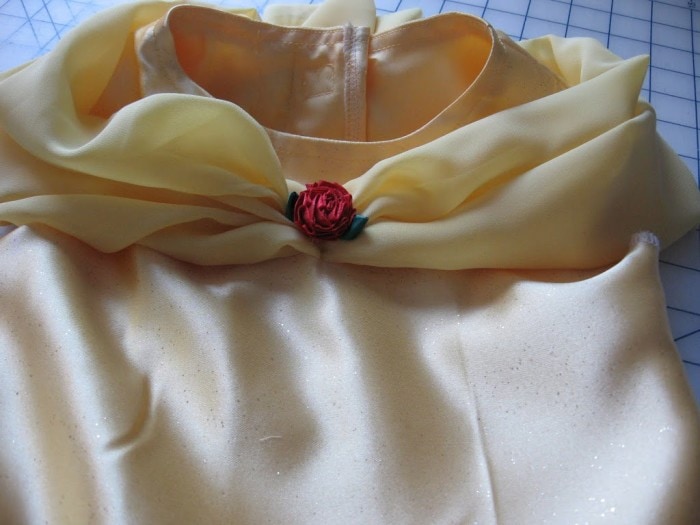 After gluing those in place, the dress was complete!
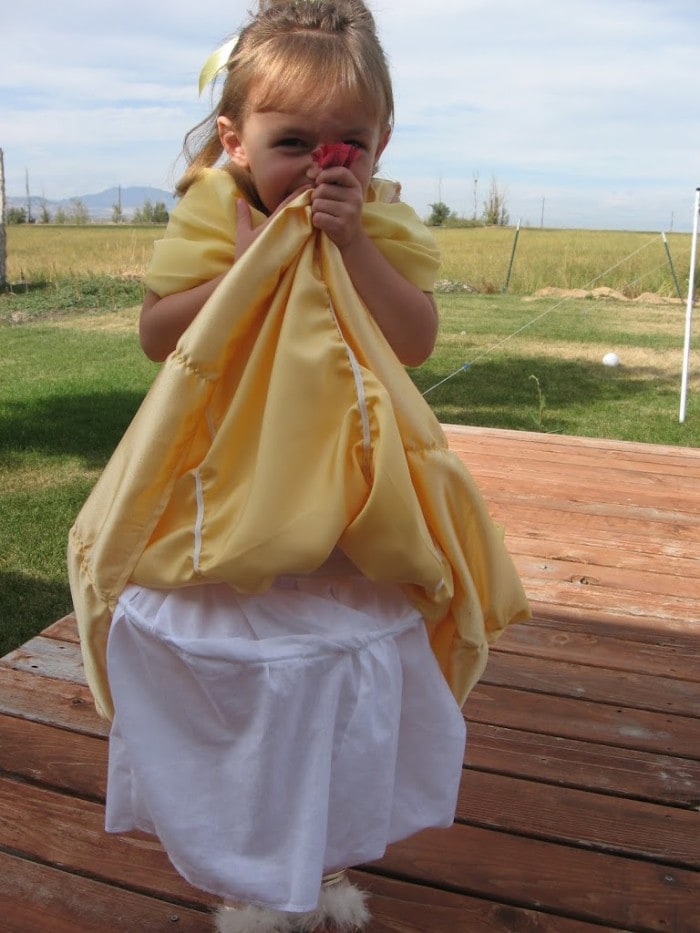
After the dress was finished, I made a simple version of a hoop skirt for her slip. This will be another tutorial for another day. You could sew a lot of tulle fabric and a slip in with the skirt, but I thought a hoop skirt would give it a better poof. She sure thinks it’s funny too!
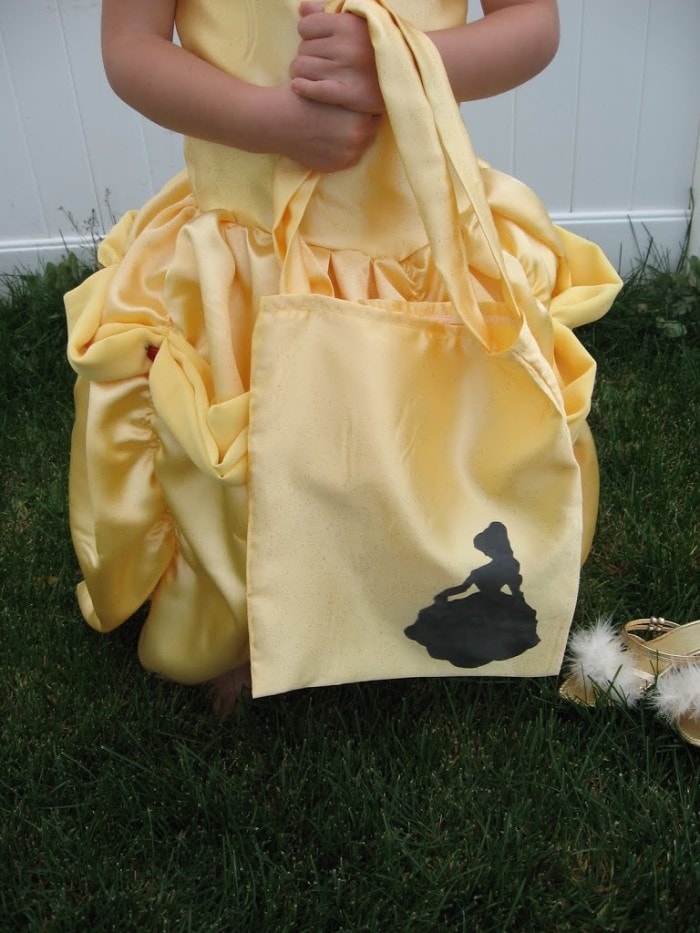
 I freezer paper stenciled a Belle silhouette onto a very simple and basic trick-or-treat bag for her to fill with junk food. If your wondering about the circles on the silhouette, I think this was another weird quark about this cheap costume fabric. When I went to heat set the paint job it puffed up and did this. I’ve never had this happen before. Oh well. What can you do.
And now my little one can dream up her enchanted castle all the day long.

And if you were wondering, I do indeed have another costume to sew before Halloween. The 2 year old wants to be an angel (with a little convincing from mom and sis). Lucky for hubby, I already have white fabric on hand! I will post that when it’s done.
Please feel free to ask any questions you might have. I’m never sure if my tutorials make any sense:)


Did you ever post hoop skirt tutorial? My dress came out beautifully! Thank you.
I just found this tutorial on pinterest. Thank you soooooo much! I did not want to pay $70 for skmething i can make for less than $25. Im going to get the fabric today.
Thanks again!
So… I'm 21… and looking for ways to make ME a Belle dress. I love dresses, and I have always wanted to make, like an old style dress, and Belle has always been my favorite Disney princess. I absolutely love this tutorial, and it looks so good on your little one! <3
This comment has been removed by the author.
I just wanted to say thank you for this tutorial–I used a lot of it to make a dress for my own daughter, and I love how it came out. Thanks so much for putting this up to help the rest of us along. 🙂 Such a cute dress on such a cute little girl. 🙂
You are an awesome Mom. Just thought it needed to be said. 🙂
Thank you so much! This is exactly what I hoped to find. My granddaughter is a Belle fanatic and she is going to love receiving this dress! 🙂
Thank you for the help! I will be attempting a belle dress soon!
THANK YOU so much for this tutorial! There aren't any Belle patterns out there that are just right and your elastic technique on the skirt nailed it! My daughter is so excited and I'm so excited that I was able to actually do it! Thank you, thank you, thank you!
Beautiful dress! I love that it's easy-on and -off, modest, and according to my daughter it "looks just like Belle"! Thank you so much for sharing this tutorial. My daughter is already begging for a Belle dress for Halloween–7 months away!
I love how modest this costume is! I wish I had your sewing skills to make one….but I will definitely pass this on to some women that I know who can….
This is every little girl's dream! Beautiful! I wish I had your sewing skills. <br /><br />You live in Cache Valley? I had no idea!!! Let me come work in your craft room:)
So fun! I always wanted to wear a hoop skirt to something, can you make me one of those dresses w/ the hoop skirt? Thanks, you're the best!
That is beautiful! I'm bookmarking this for later! :)<br />http://embellishinglifeeveryday.blogspot.com/
Thank you so much for sharing this tutorial with us, taking all the photos while doing it (it ain't easy and makes the process slower)so thank you so much for.<br />Your daughter is so bless to have a mom like you!<br />Happy tricker treating
WOW you are amazing! I love how you altered the patern, so cool. I want a belle dress too!<br />~sophia<br />sisters4saymoreismore.blogspot.com
you are genious! can i tell you! i just finished my girls disney fairy costumes and realized, hey, i probably could have figured this out with a pattern i already had and maybe it would have been easier!!! i am totally doing this one… my girls would go nuts! i know what they will be next year!!!<br /><br />~selina
this is really beautiful! thank you for taking the time to share your hard work! i can't wait for the hoop tutorial!
This is so so so adorable!! Belle is my absolute favorite princess. When I got my first car when I was 16 and named it Belle, complete with rhinestones license plate and a steering wheel cover that said "Belle" on it. My mom went to great lengths (: Your daughter must be so happy. She's just so cute. You're so talented!
So so cute! She looks absolutely thrilled with her costume!
Gorgeous! It makes me want one! I'd love for you to come link this to my Halloween costume contest!<br /><br />Krista<br />http://whilehewasnapping.blogspot.com/2010/10/halloween-costume-contest.html
I just love this! I'm sure your daughter will get a lot of use out of this. I made one ages ago for my daughter (she's 21 now!), but it wasn't this pretty.
WOW!! It looks amazing Cami! So cute! I'm sure it will have plenty of dress up time action as well.
Very clever, I like that she's all modest, my little girl is the same way. I hate the store bought costumes because well, their NOT modest at all, and, yeah, I don't want my little girl sporting something that makes me think of someone on the corner.
cute baby with cute dress.Thanks for sharing.
Your daughter's costume is so adorable. The tutorial was easy to read too. When my neice was 3 she wanted a lello dress. lol I wanted to make one for her but didn't know where to start. She's 21 now!!<br /><br />Thanks for sharing.
oh yeah, I totally following you now too 🙂
I am so excited! My friend Tasha (comment above) just sent me this link. I have searched all day long for a good tutorial and couldn't find any half as good as yours. 🙂 I love it!! I love how you used elastic for the scalloped parts. Thanks for this tutorial!
So so beautiful!!! I just sent this link to a friend who is making a belle dress and was having some trouble deciding how she was going to do it. I am sure she is going to be so excited!
That is gorgeous! I want one in my size! I would have settled for the ugly walmart ones as a kid, but yours is like the real thing!
A.Maz.Ing. This is beautiful, I feel this crazy urge to run out and buy yellow fabric right NOW! I am so impressed.
Cami, You are so talented!
You are amazing!! She looks so cute! Maybe one day I'll try something like that but it looks a little bit over my head. So I'm curious..do you have a fun pregnancy costume?