
This post may contain affiliate links, which means I get a small percentage of the sale at no extra cost to you. I only recommend items I love and have had a positive experience with. Thank you!

It’s a life savor too! Perfect for any kind of crafting. One reader requested the plans so she could do her cake baking business on. Really, it can be suited for anything.
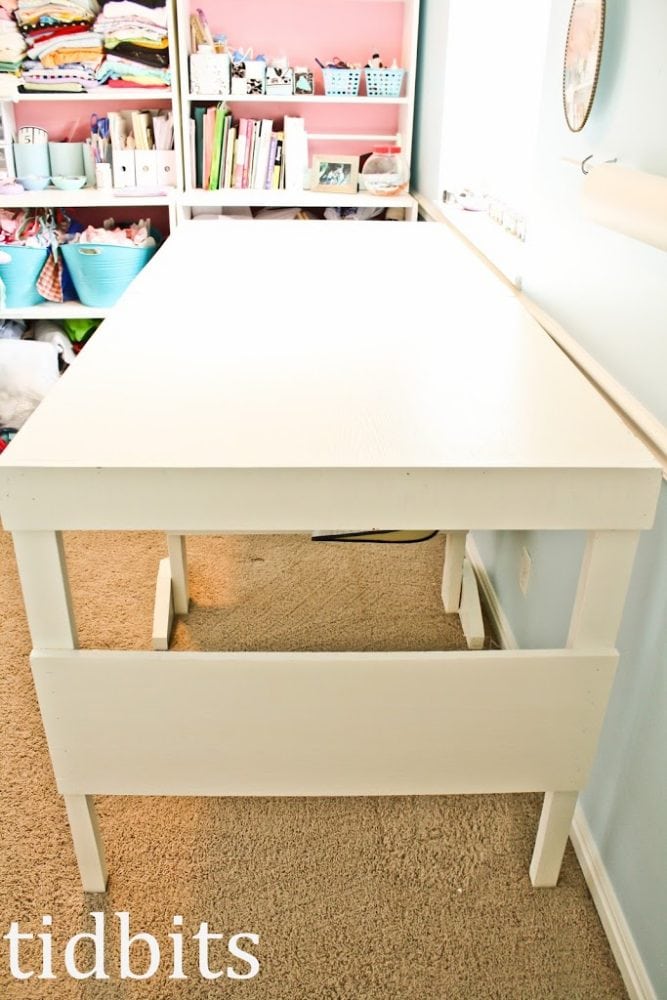
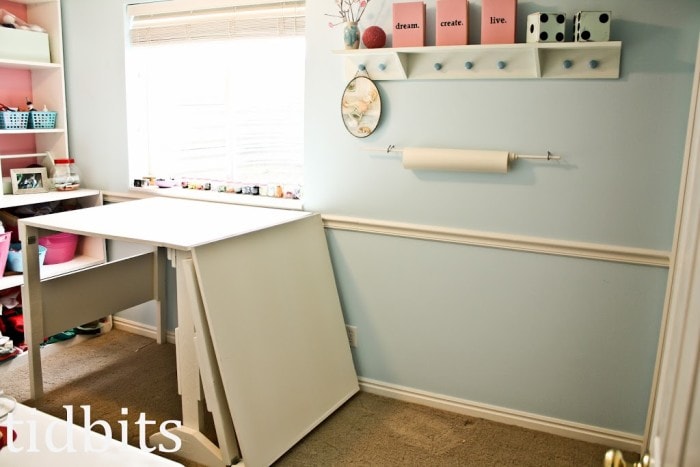
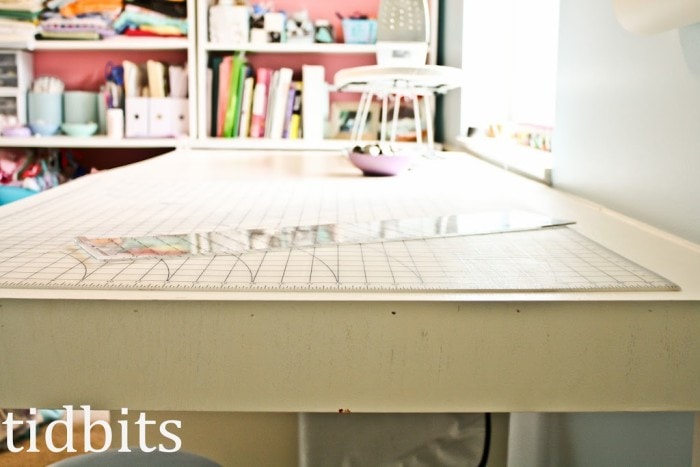
It’s hefty and sturdy,
convenient,
and portable.
If you find yourself with a tiny space, it easily allows for more wiggle room when needed.
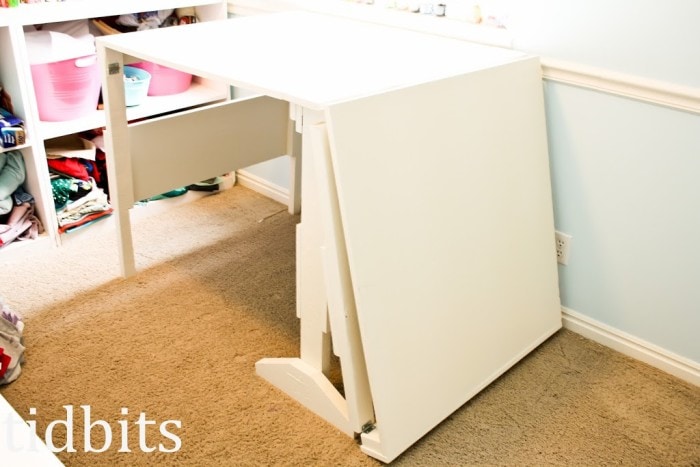
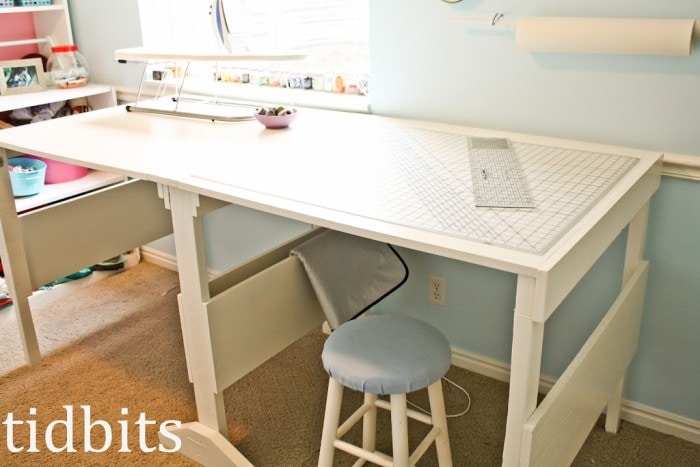
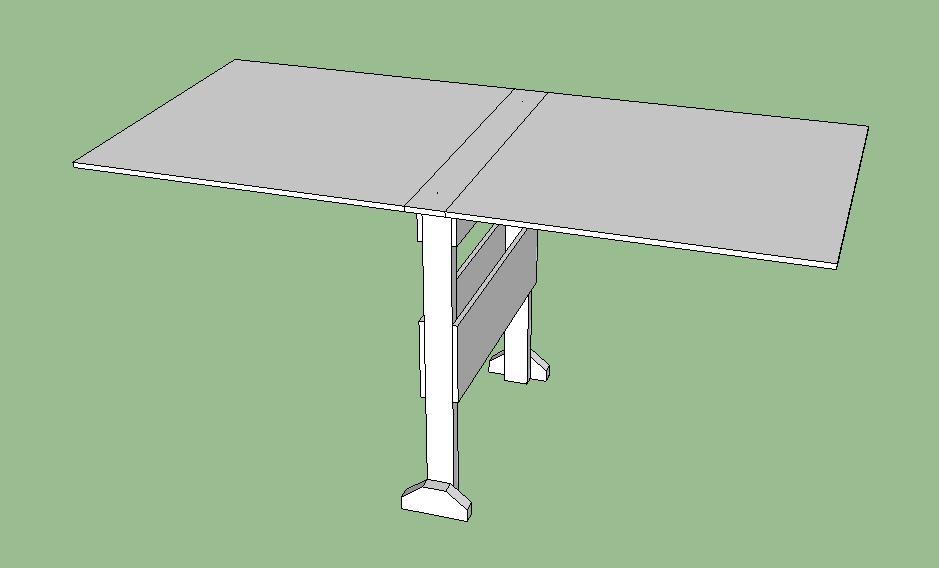
There is plenty of surface space to suit all your needs when crafting, sewing, baking or whatever!
If you know how to work the saw, get to it. If you don’t, find a handy man (or woman) that can. Just hand them the free plans below.
Update: These table plans are to be used as a guide. We have been notified by users explaining some of the measurements seem to be off, which may be the case. We apologize for the inconvenience and any confusions. We recommend drafting paper pattern pieces before cutting any wood.
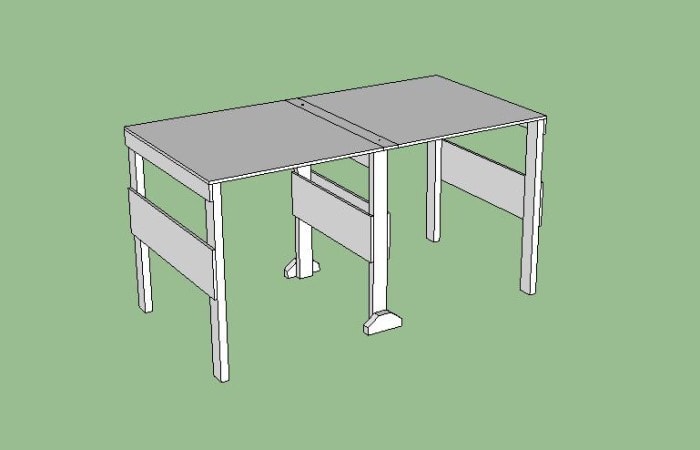
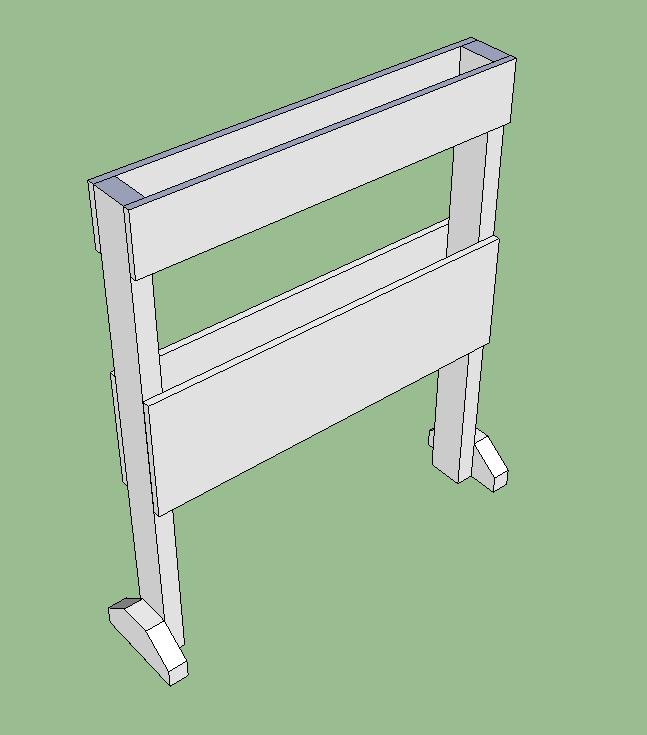
The above table can be made out of ¾ inch plywood and pine boards. The material list includes:
The 2×4’s are cut at 3’ 1” and you will need 6 of them. One of the 1×4 boards is cut in half at 4’ and the other two are cut into three pieces at 3’ 2” inches. Using a table saw cut the other half of the 4’ 1X4 in half lengthwise. The 2×6 is for the feet of the center board and is cut at 18 inches long with tapered tops to match the leg width. The taper is optional since it is only aesthetic. The dowel is for the lid of the center box, you will only need two 2 inch pieces.
|
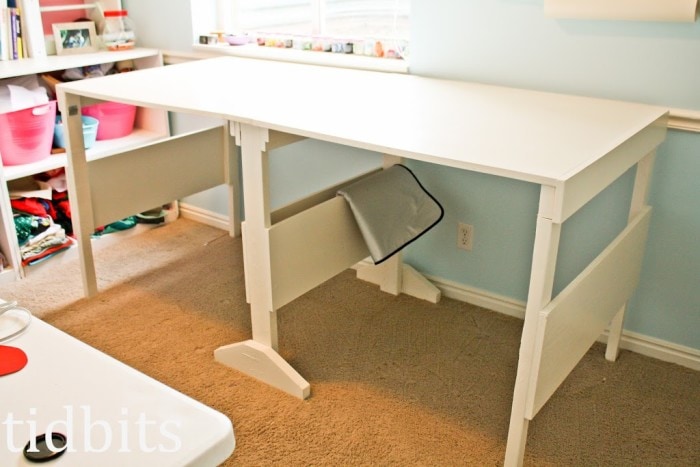
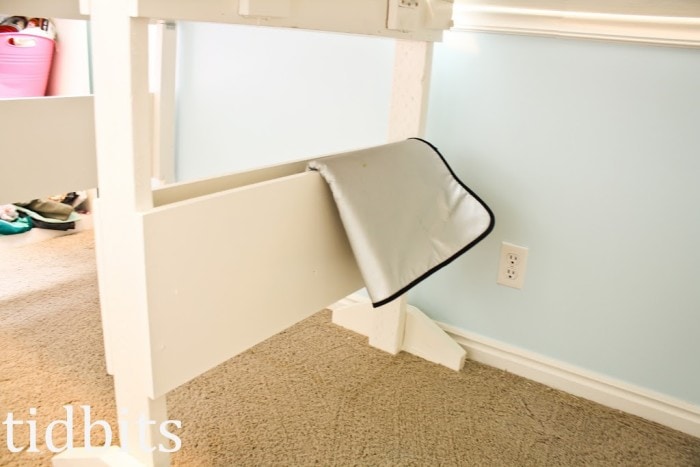
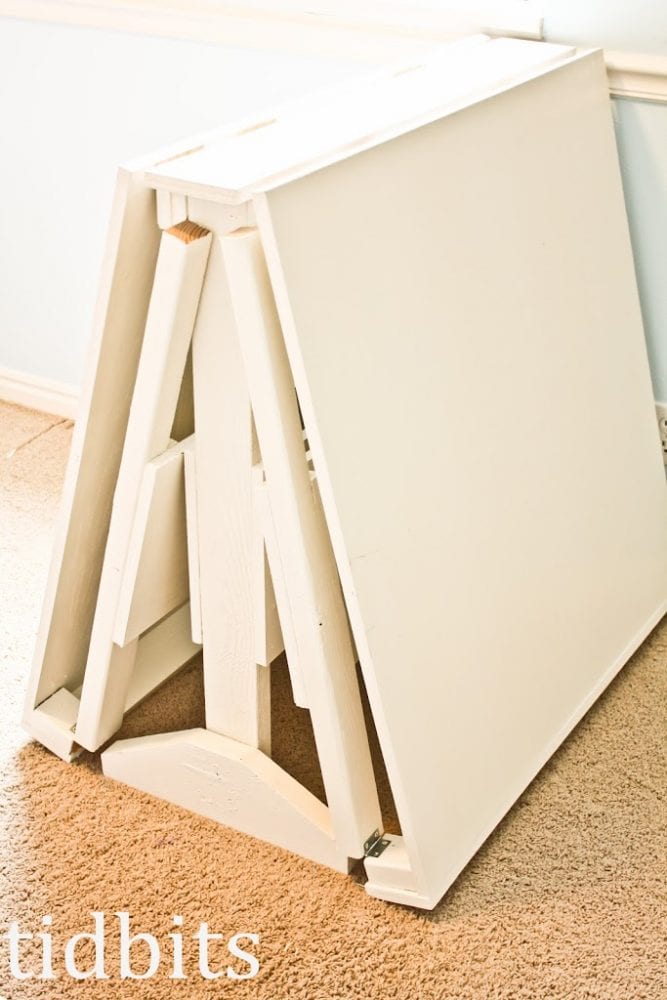
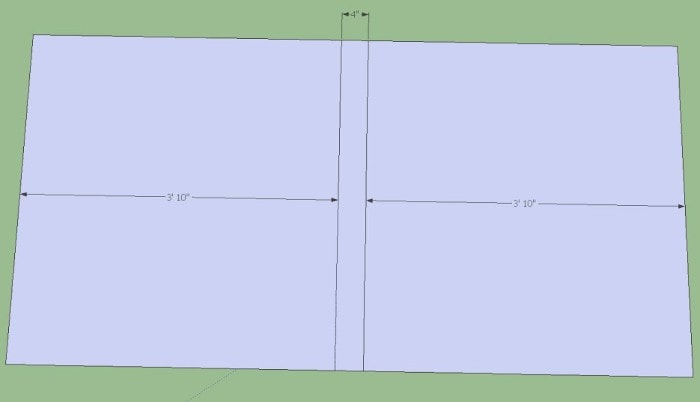
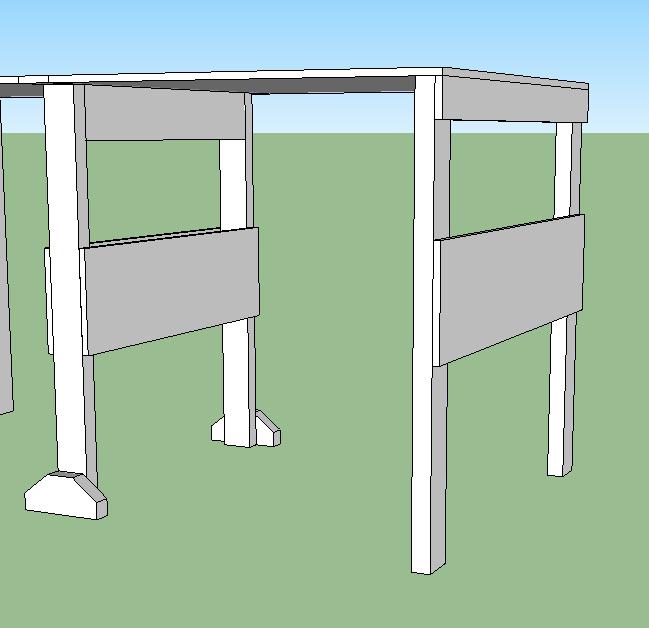
Folded up the table should look something like this:
|

| I hope these made sense to you. It’s kind of a foreign language to me. I’m sure you can direct any questions to me and I will continue to nag 🙂 |


Cami- Can you tell me the finished size of your table ?? Height /Length/width ?? It looks awesome !
Is there anyone who can recommend the best product among the ones listed here?
This is a brilliant table but I would use it as a starting design as everyone’s space and needs are different. I always make a scale model out of foam board of anything I make so I can tweak it and get it right before cutting large pieces of wood so it doesn’t matter that it’s not accurate but that you took the time to put it on here for others to see. Thank you
Are you quite sure about the 2×4 measurement of 3′ 2″?
Actually, I am not. That is why I added the disclaimer update on this post, if you need to look back at that it should help. Sorry for any inconvenience.
MARAVILLOSA MESA, ME ENCANTA
LOVE THIS! Saved the tutorial for when the weather is nicer. Have to work outside on something like this. I think I will make the center top piece the same width as the feet on the middle part so that it doesn’t end up with angled sides when folded. Plus it would give me a larger hidey spot! Thank you so much for sharing.
I think there are several things you could do with this design to suit your needs. I appreciate the sweet comment! Thanks for stopping by.
The plan should be used as a starting point not just copy it 100%.I made my version of that table but 3foot by 6foot and put casters on the bottom of the feet. So not many of the demension are the same. In woodworking or carpentry plans hardly ever get built exactly.
I was excited to find these plans, and was going to make them. Unfortunately when I actually study them, the measurements do not match the instructions, and the instructions do not create the table in the pictures. The table in the pictures has additional pieces of wood where the legs hinge from the table top, and where the table top wings hinge from the box. Also the table leg braces do not
Thank you for sharing these detailed plans. Do you move your table around? I am wondering if I might add caster wheels.
I have been searching and searing for a folding sewing/ cutting table and everything had disappointed me in one way or another. I just now stumbled upon your DIY table and I love it. It meets all my requirements. But could you please tell me the dimension of the table when fully extended- width, height, depth, and the dimensions when folded. I have a small space and want to make sure this would
What are the dimensions of the table? Could you please share. Want to make sure it will fit my craft room.
This is awesome! I have been looking for plans like this! My husband doesn't know how to do anything like this but I sure can! Thank you SO much for sharing!
Awesome.. just found this tonight.. and I've already shown M'honey.. This is PERFECT for my future craft room and he can have the table I have in there now. Thanks to you & your hubby for sharing these plans. This is awesome!
help i am looking at making your table but cannot get up one of the pictures that show us how to do the first part of assembly which is so frustrating as it is probably the most important one please help thankyou very much.
What a perfect table! I love it!
You literally are my hero!! I was SOOO Stoked when I came across this EXACTLY what I needed!! I cant possibly thank you enough for sharing, Its sad and disappointing when you come across something you Love and or could really need and or use and they dont take the time to share. It most definitely must have not been easy putting this all together but I really Appreciate it!! Thank YOU!!!!!! <br /
For those of us with back problems, I think the height could be adjusted to make it possible to work without bending. What a life saver this could be.<br /><br />Now…..can I make this???
YEAH! I'm so glad that you finally have put up the plans for this table. I have been wanting to do this for my craft room since I first saw it on your blog. Please thank your husband for finally making the plans.
Oh wow- this is incredible! I just got my sewing table this year and a cutting table is next on my list. I would love to make this! And I would love to link to your tutorial if you didn't mind- my readers would go crazy over this.
I was looking for something like this just last night! My craft room is also our guest room so I needed something that can fold up out of the way but I couldn't find anything counter height. I'm so excited!
This is brilliant. I have been looking for a plan for a long time now… cannot wait to show my husband! Thank you for sharing this plan with us!
So I am dreaming of a craft room, and that table is quite lovely! Thanks for sharing the plans!
This looks awesome. We're in the middle of having our house built. Our bedroom will have a corner in it just the right size for my craft stuff…every time I think of having a cutting/sewing table there it makes me smile. No more clearing off the dinner table every time I want to sew. It will just be a regular "kitchen" type table that is currently gathering dust in my in-laws