
This post may contain affiliate links, which means I get a small percentage of the sale at no extra cost to you. I only recommend items I love and have had a positive experience with. Thank you!
Before you follow this tutorial, head on over here. I wish this girl would have been by me when I was trying to figure it all out. She came up with a much more productive way to make this. So check it out!
 When my 4 year old requested a cowgirl birthday party, the idea for a hankerchief skirt popped in my head. I wanted it to have the look of hanging hankerchiefs, and I wanted it to be cheap. So this is what I came up with, and now I’ll show you how I did it.
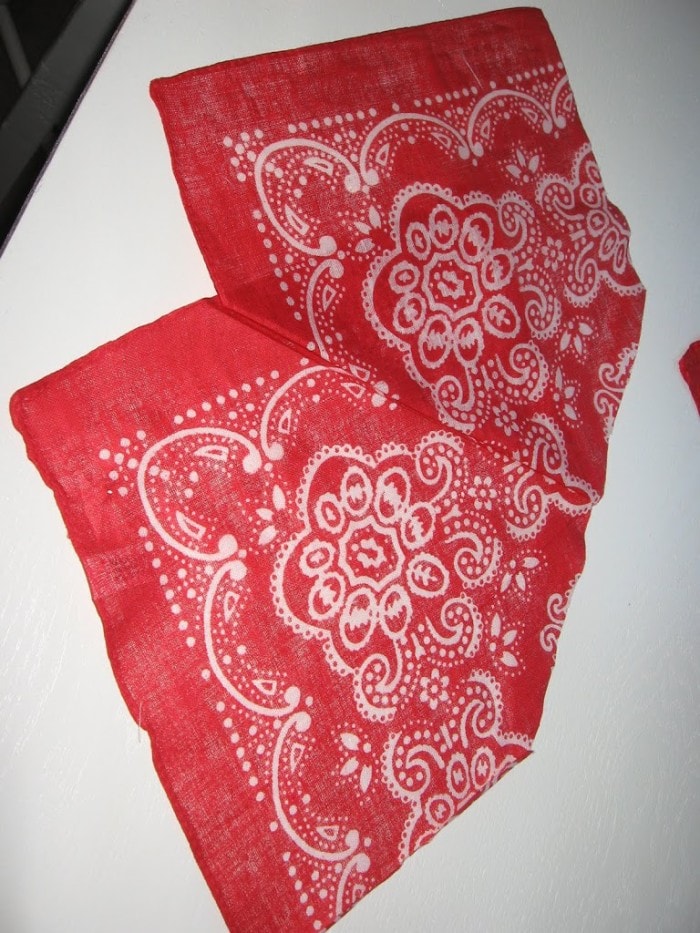
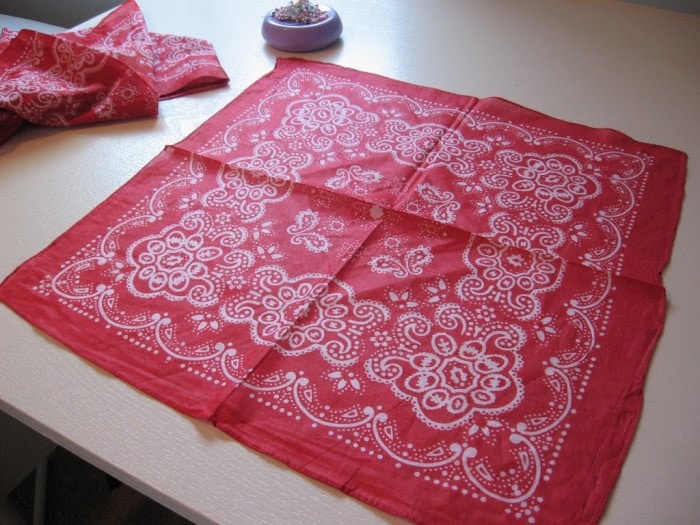 First you will need hankerchiefs. I only ended up using 2 hanky’s, and they cost me 5o cents a piece. I found them at a local party store. They had nicer 1 dollar hankerchiefs which were a little better quality. I’m kind of wishing I would have forked out the extra dollar and went with them. These hanky’s were 19 inches by 19 inches.
Before you start any sewing, make sure you pre-wash your hanky’s. The cheap dye in them will bleed all over everything you put with it in the wash, so don’t skip this step.
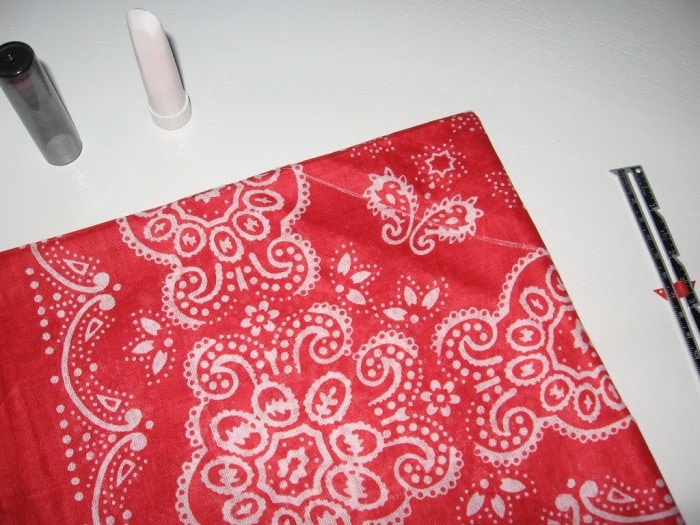 After you have washed them, fold one hanky in fourths. In the top folded corner, measure down 2 1/2 inches and mark a straight line. I love my chalk roller marker (by the way).
 Cut on that line you marked.
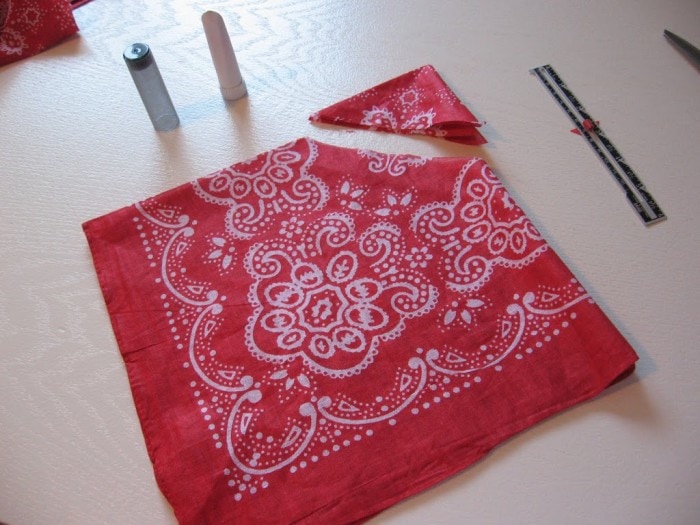
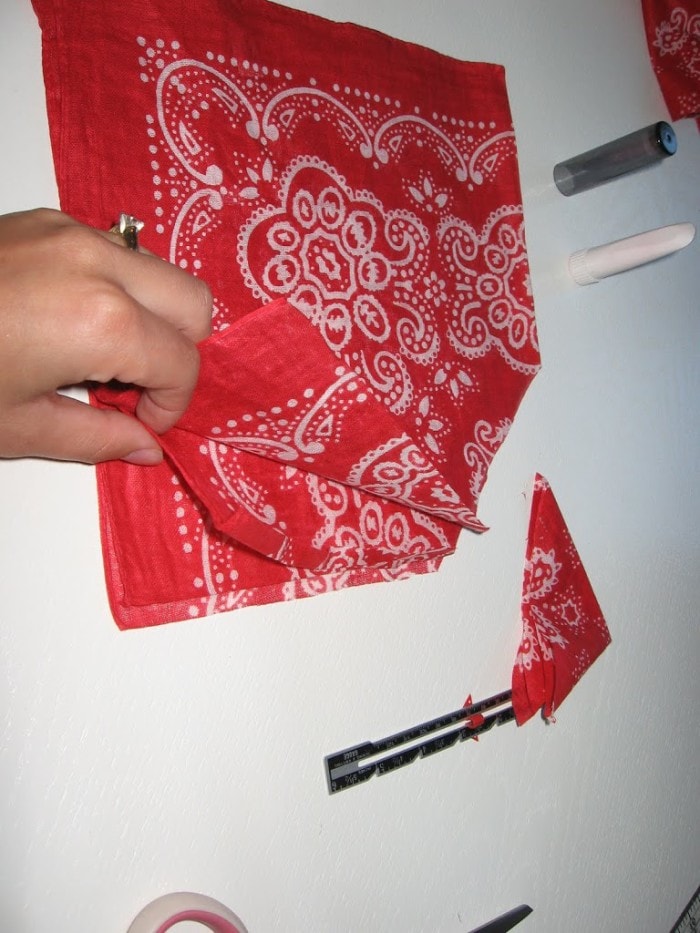 Then you need to cut the sides so you have 4 separate pieces. Do this on both sides.
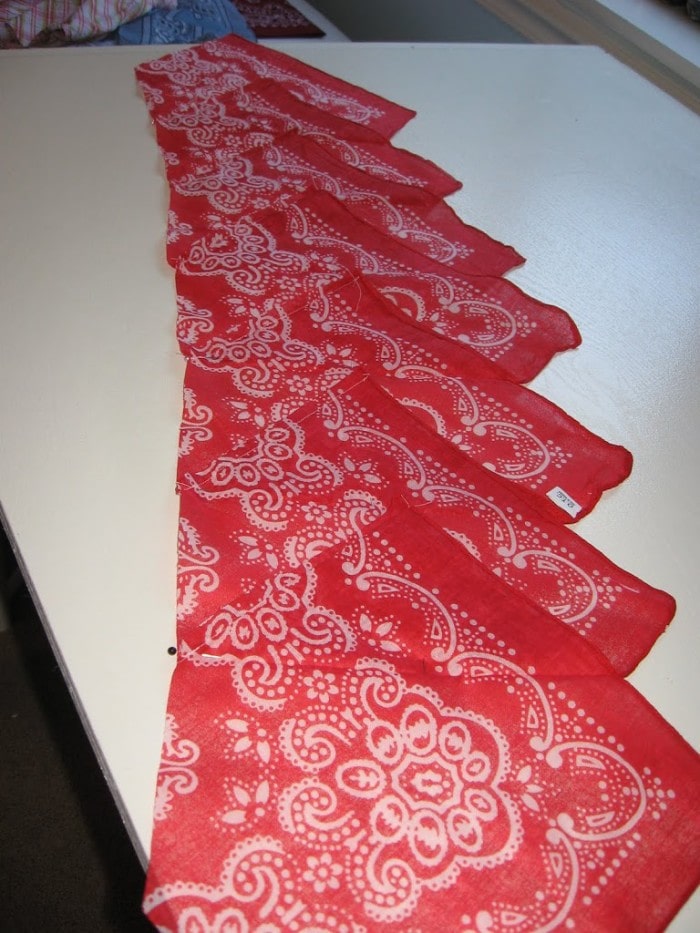
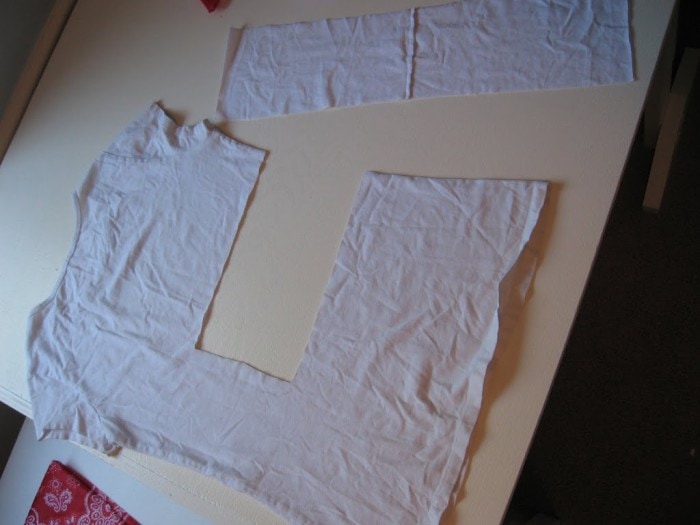
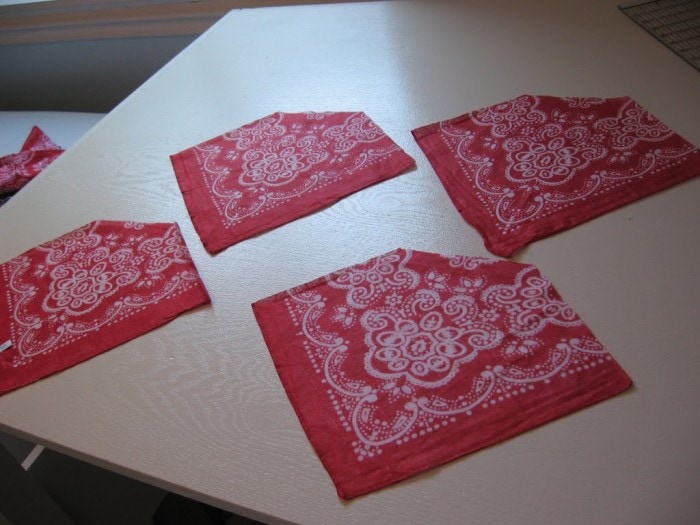 Lay out your 4 pieces. How many hankerchiefs you do this to will depend on the size of the skirt you are making. I used 2 hanky’s for my four year old, but only used 7 of the separate pieces I made in the picture above. If you want one for yourself, well, I don’t even want to know how many hanky’s I would have to use to go around me:)
 Now you are ready to sew. Take 2 pieces and sew them right sides together on one of the sides, like above. Press your seams open. You could try to do fancier seams, but I really wasn’t going to go that far for a 1 dollar skirt.
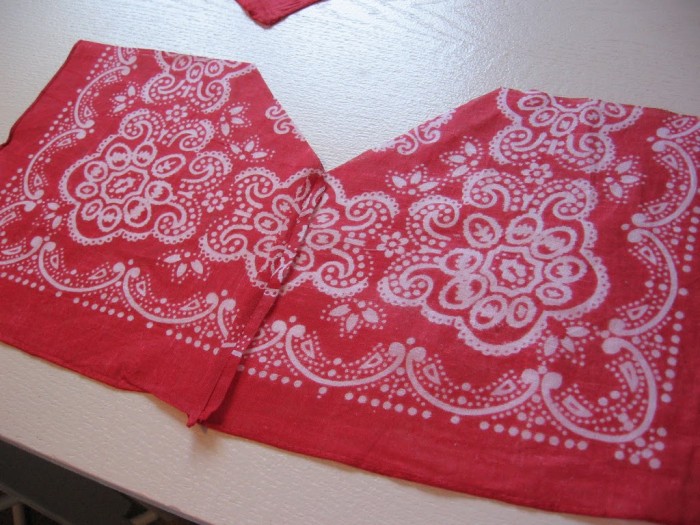
 I’m not quite sure how to explain this next step, but I hope the picture helps. You want the top to be even, so fold those to pieces together until the top is a straight line. In this picture you are looking at the wrong side of the fabric. You will have a triangular piece left on that side, which will remain in tact to give it the hanging hanky look. No need to sew this in place, but you do need to press it both ways so there is a good crease to keep it where it needs to be.
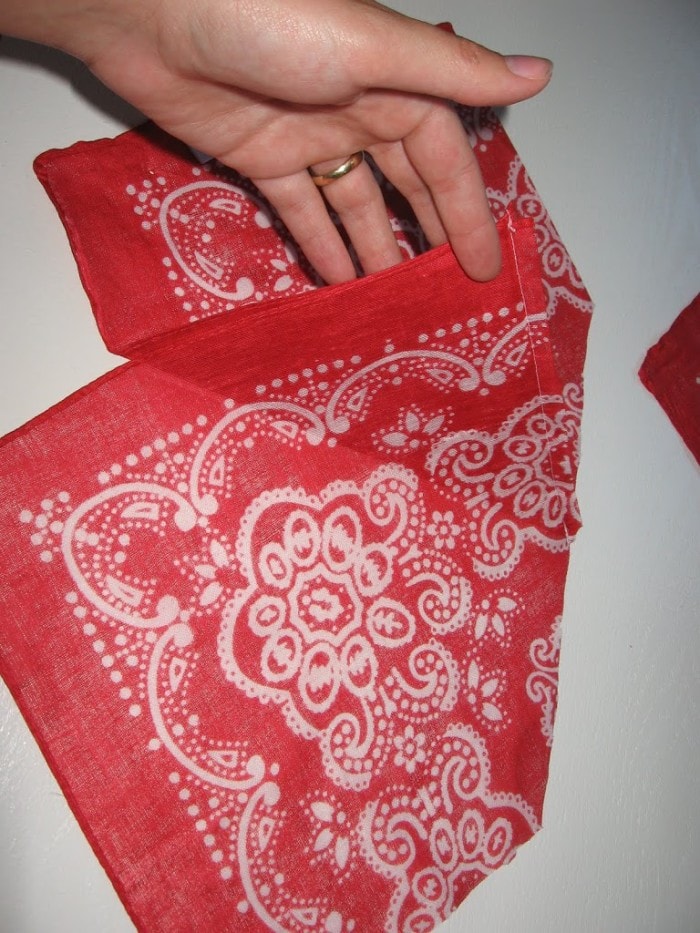
 The front side will look like this.
 Now you repeat these steps until you have sewn how many pieces you need all together. To figure this out I used the not so professional method of wrapping it around my girls waist until I liked what I saw. Keep in mind you will be gathering the top a bit. Use pins wherever you feel you need to to hold the creases in place.
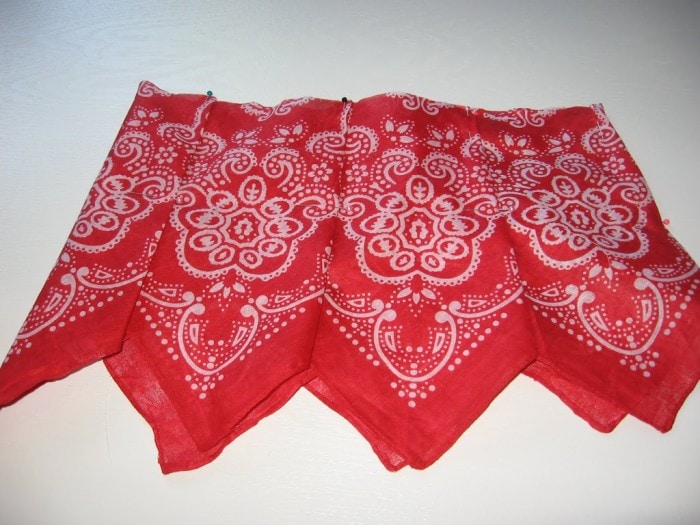
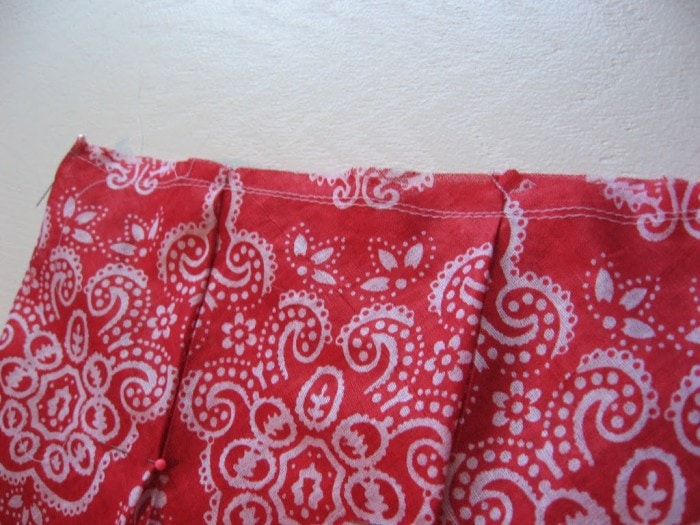
 The back side will look like this. Make sure all the extra triangular pieces are facing the same way before you continue.
 To make it a complete circle you will simply sew the side seam together just as you have done all along.
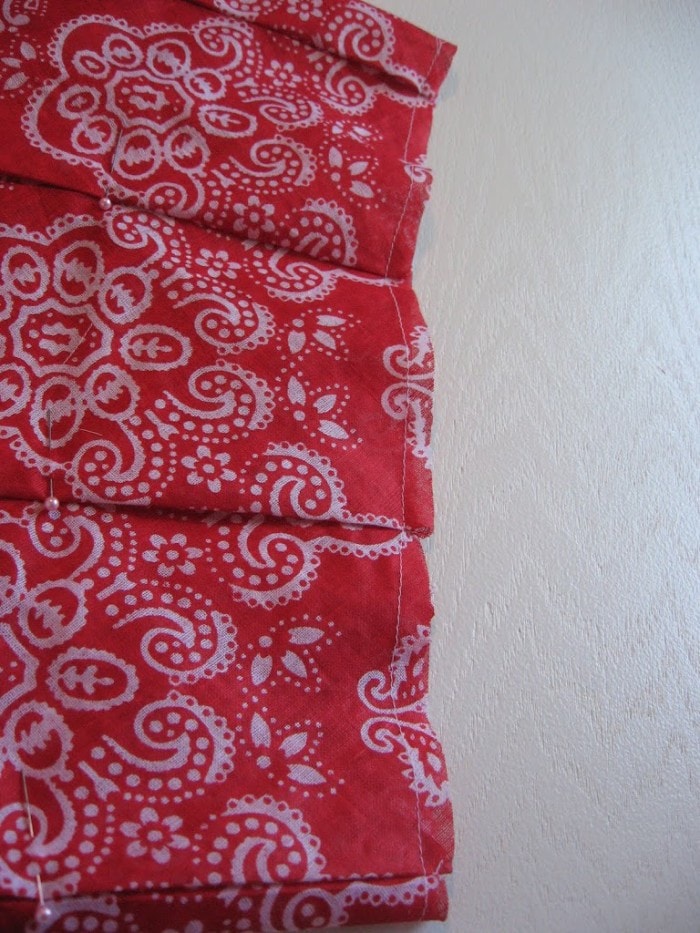 To make it much easier to work with, baste around the top 1/4 of an inch away from the edge. Then you can remove all your pins.
 Then sew another basting stitch just below the one you just did. This stitch will be used for gathering so be sure to leave thread tails. You could gather a little bit at this point also by pulling the bobbin thread and bunching the fabric.
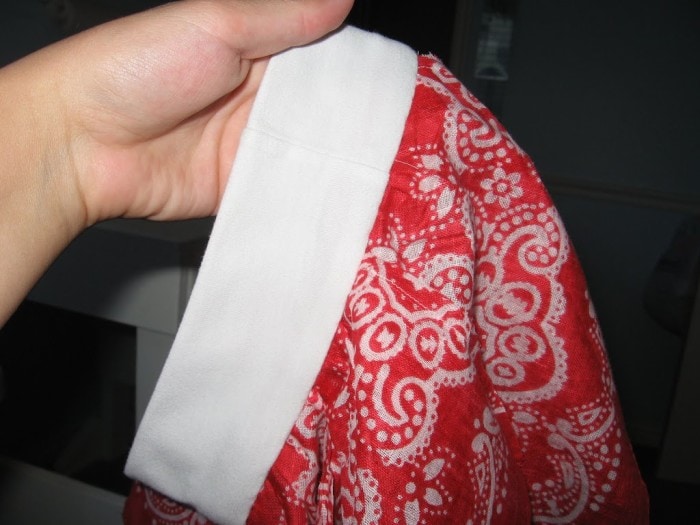
 To make your waistband, you could really choose several methods. I wanted to try this method out so I’ll show you what I did. You need some knit fabric. Rather than buying some, I used an old arm pit stained white t-shirt of mine. You never know when they will come in handy! Once again, I just measure around my girls waist to see how much I needed. Make sure it will be snug enough to stay up on the kid.
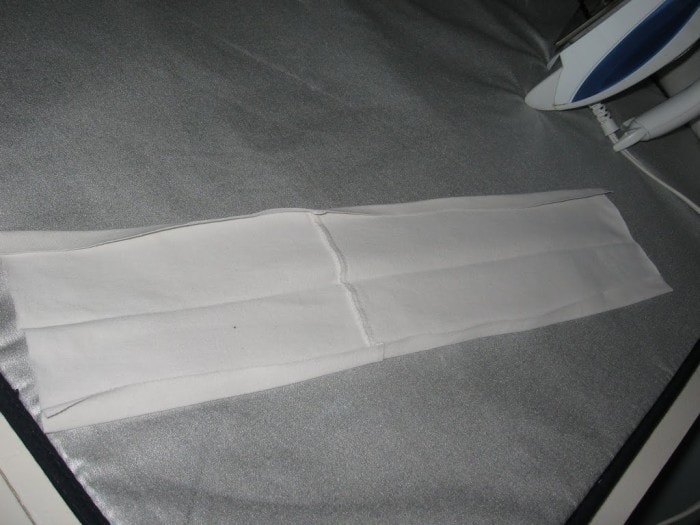 Press 1/4 inch on both the long ends. Press in half hot dog way. (I never thought I would use that term in sewing).
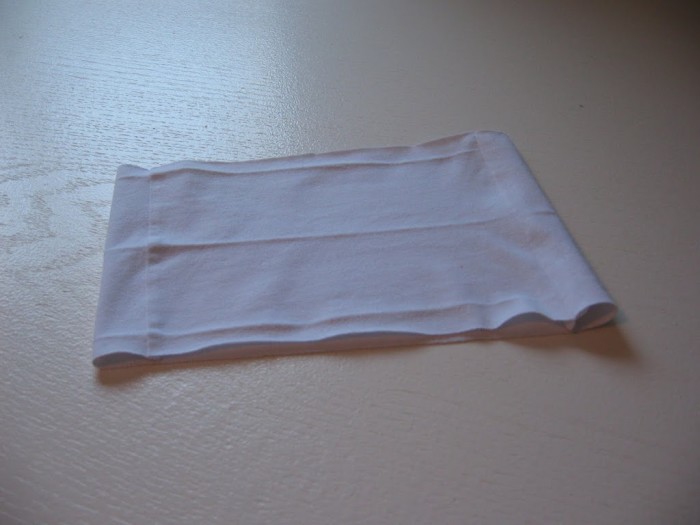 Fold hamburger way, and sew the side seams right sides together and turn right side out. Double check to see if this is the right measurement for your little one.
 Now you are going to put the right side of the waisteband together with the right side of your skirt, as shown. Adjust the gathering of the skirt to fit in with the waistband. Pin in place really good!
 Sew along the top, at least 5/8 inch. I have a serger so I cleaned up the seam that way. You really don’t need to do this because the seam will be encased inside the waistband any way. I just tend to do things like that just because. Be sure you at least trim to decrease any bulk. Then fold over the waistband to the inside. I forgot to take a picture of this next step, but I then slip stitched or hand stitched (google it) the back side of the waistband. Be sure to fold that side of the 1/4 inch you pressed so you have a clean edge.
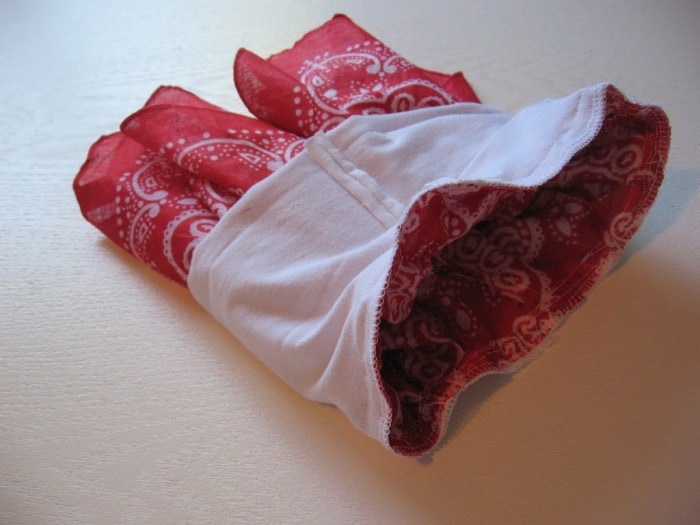
 Then I top stitched the band. The best part about using hanky’s is the no-need to hem part. It’s already finished for you.
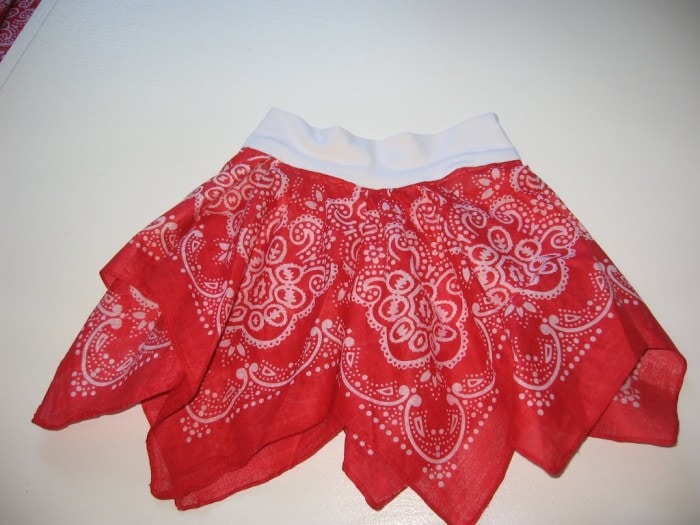 And that completes your hankerchief skirt!
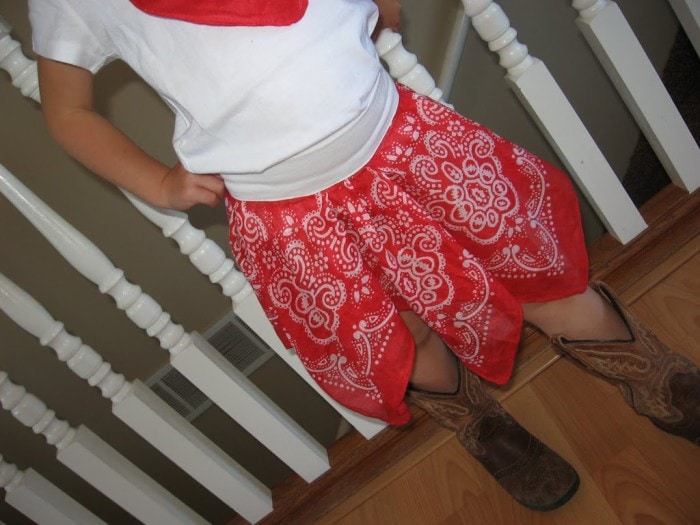
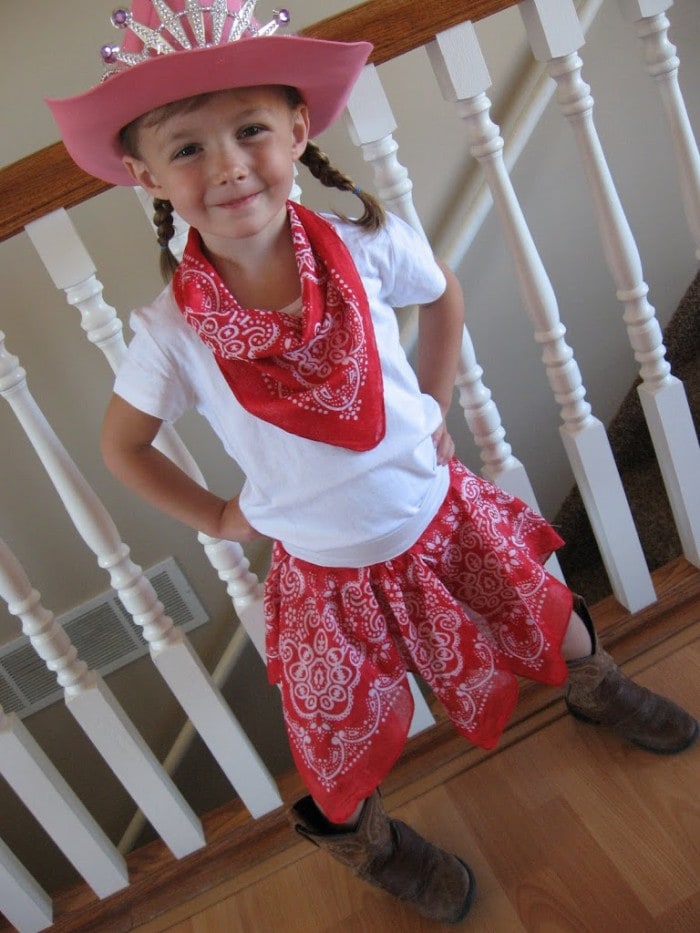 It looks adorable on the cutie!
 If you didn’t read all about her cowgirl party, click here.
Happy sewing!


Hey there!
I absolutely love this skirt. My boyfriend’s daughter wants to be a cowgirl for Halloween so I am making this. It’s genius!
I’m pretty new at sewing so I don’t know all the dos and don’ts of the craft.
I’m a little confused at the step of making the waistband. I have my fabric cut and the 1/4 inch folded in longways… my question here is, do I leave that 1/4 inch folded in (to leave a clean edge) before folding it ‘hamburger’ and sewing the ends together?
Thanks 🙂
So darling. Thanks for sharing! You must be a wonderful mom!
another cute idea, love it!
ha ha… just caught your mention at the beginning of this post! 🙂 Thanks Cami! Love this little skirt!
My d-i-l sent me this link wanting me to make one for my granddaughter. One question…you just left the 'flaps' loose….you didn't sew them down, right?<br /><br />I know my little granddaughter is going to love this skirt…she wanted a teal one 🙂
I just made one! I'll post a link tomorrow, after I can take a picture of it on my lil one (who is currently sleeping, I measured her waist while she was out! LOL). I used one red and one blue for the 4th! 🙂
Hey Cami! I just posted my version of your adorable skirt. Love it!<br /><br />http://sunscholars.blogspot.com/2011/05/bandanna-skirt.html
I love it!!!!!!! Oh my gosh.. thinking I need to get some bandanas tomorrow… This is too cute to pass up!
Great tutorial! Love it, so cute! Hope you can join my giveaway for a cute felt headband! I bet your cowgirl would love one! 😉 alittleknickknack.blogspot.com
Impressive! I love the skirt and your tutorial is excellent!
Love it! I have two hankerchiefs just waiting for me to figure out what I want to do with them…now I know!
Love it:) It's good to see you again:)
great tutorial<br />have to try…<br /><br />and <br />let me invite you to link it up on our site so that our readers can find you also:<br />http://www.finecraftguild.com/diy-tutorial-linky-party-15/<br /><br />btw a new diy/craft tutorial party opens each wednesday, so create an easy way to come back for more.<br /><br />great ideas are featured, just like yours!
you are one crafty mama!! and you can tell that sweet girl LOVED it!!! great idea.
Very sweet and easy. Thanks for the instructions
Oh I love this! I am totally going to feature this!!!! Cool idea! (and congrads on the new baby!)
ADORABLE!
THis is so cute… it would be a great Halloween costume too… but actually I think pretty enough to wear any time.
That is awesome! A must-do for next summer. Thanks!