
This post may contain affiliate links, which means I get a small percentage of the sale at no extra cost to you. I only recommend items I love and have had a positive experience with. Thank you!
Not a designer? No problem! Let these 6 steps guide your way to planning your own kitchen. You’ll see my own design mood board and elements for our new kitchen, and discover how you can help create the kitchen of your dreams.
Sure, I took a few interior design classes in collage. Sure, I spend hours studying design elements. But truth be told, I am no pro. In fact, this is the first kitchen I have ever designed from scratch.
I’ve had moments of second guessing myself, and feeling way in over my head. But as I’ve trudged forward and watched our kitchen begin to fall into place, I’ve felt such pride that we figured this out on our own.
I want to take you through the process I’ve walked to design our own kitchen. I’d like to share with you the tools and resources I’ve found to help us along the way. My hope is that if you ever find yourself with a kitchen to plan, you can also walk these steps and feel a little more confident in the direction you are going.
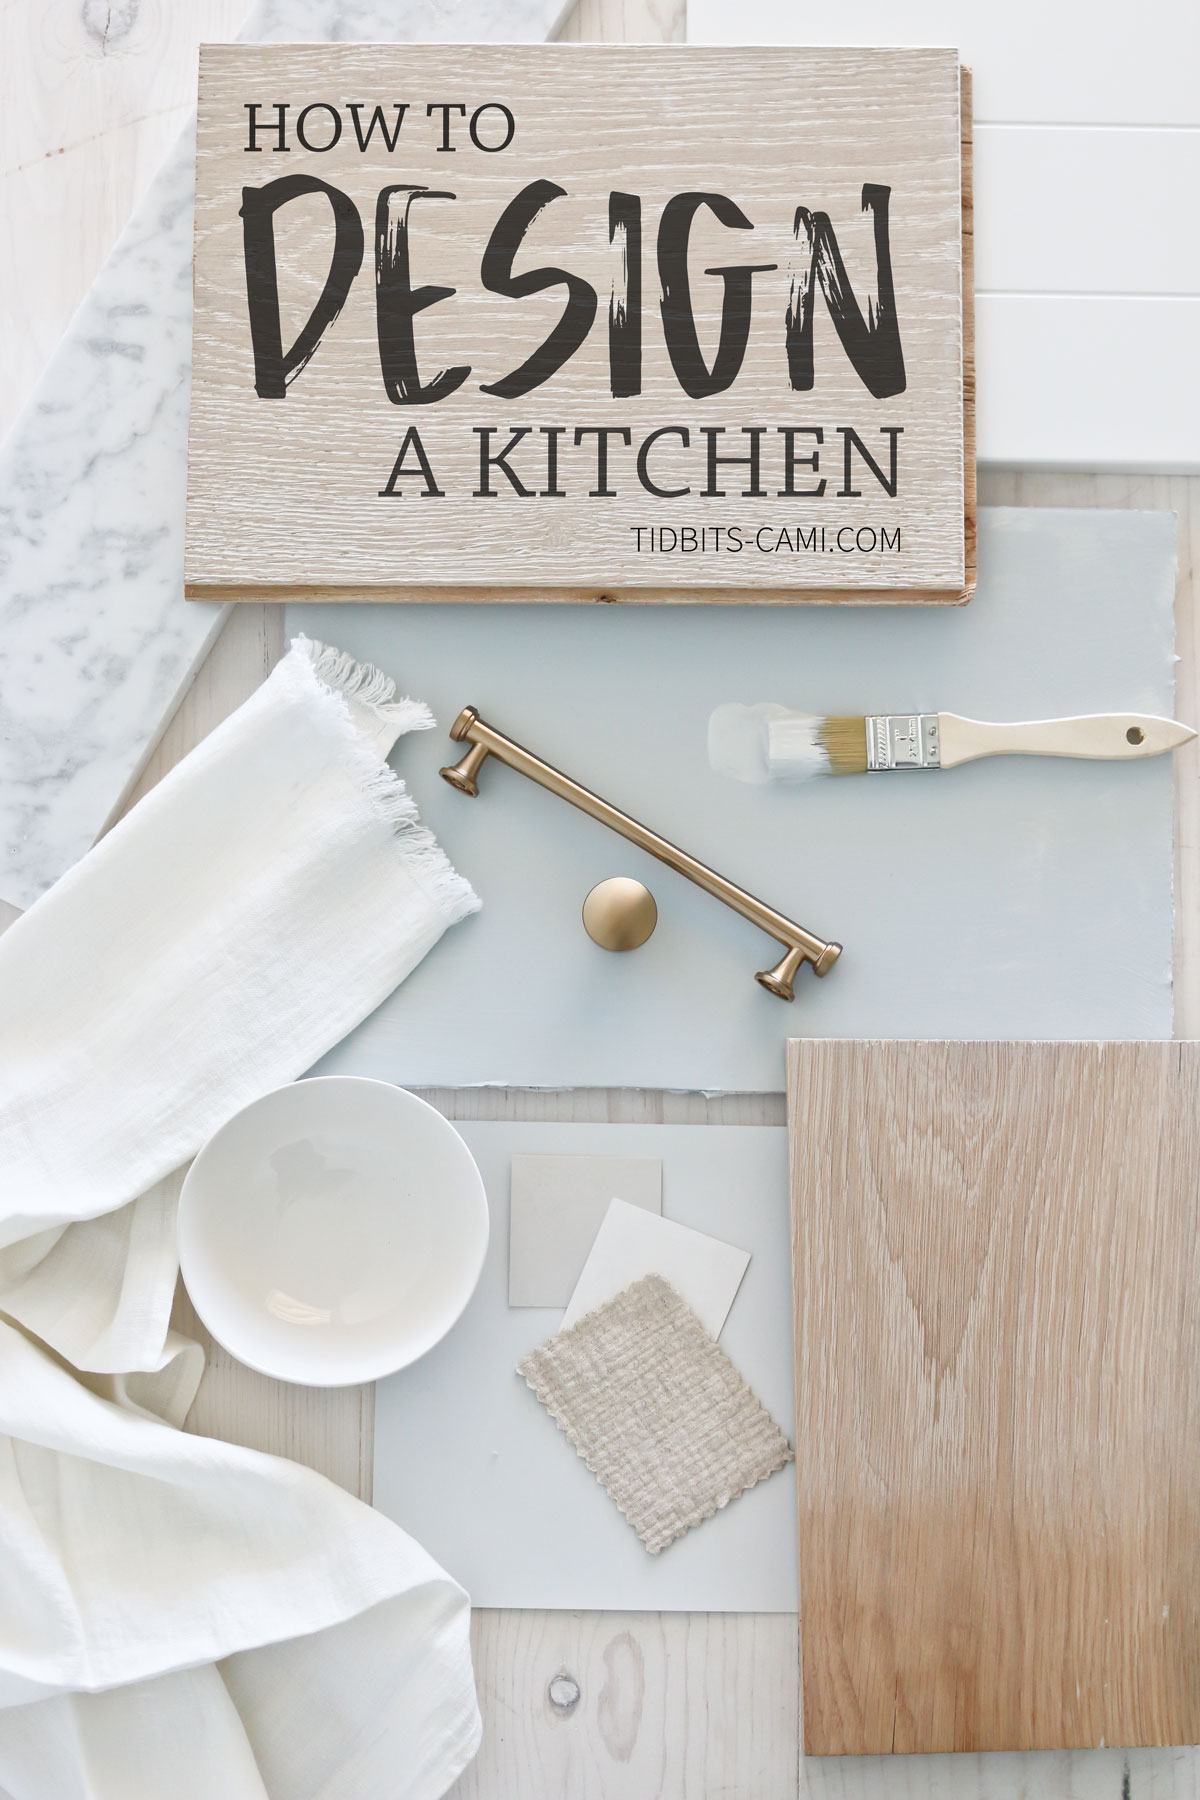
HOW TO DESIGN A KITCHEN
STEP 1: Consider the shape, size, flow, hook ups, advantages and disadvantages of your space.
Whether you are building from scratch or remodeling your space, it helps to consider structural elements before you even begin looking for inspiration. There is nothing worse then finding an image of a kitchen you adore, and realizing that none of the elements will actually work for your space.
Go into your search knowing full well what you have to work with.
It helps to know what type of kitchen you have, whether that be a U-shaped kitchen (like ours), L-Shaped, one wall, galley, peninsula, island, and so forth.
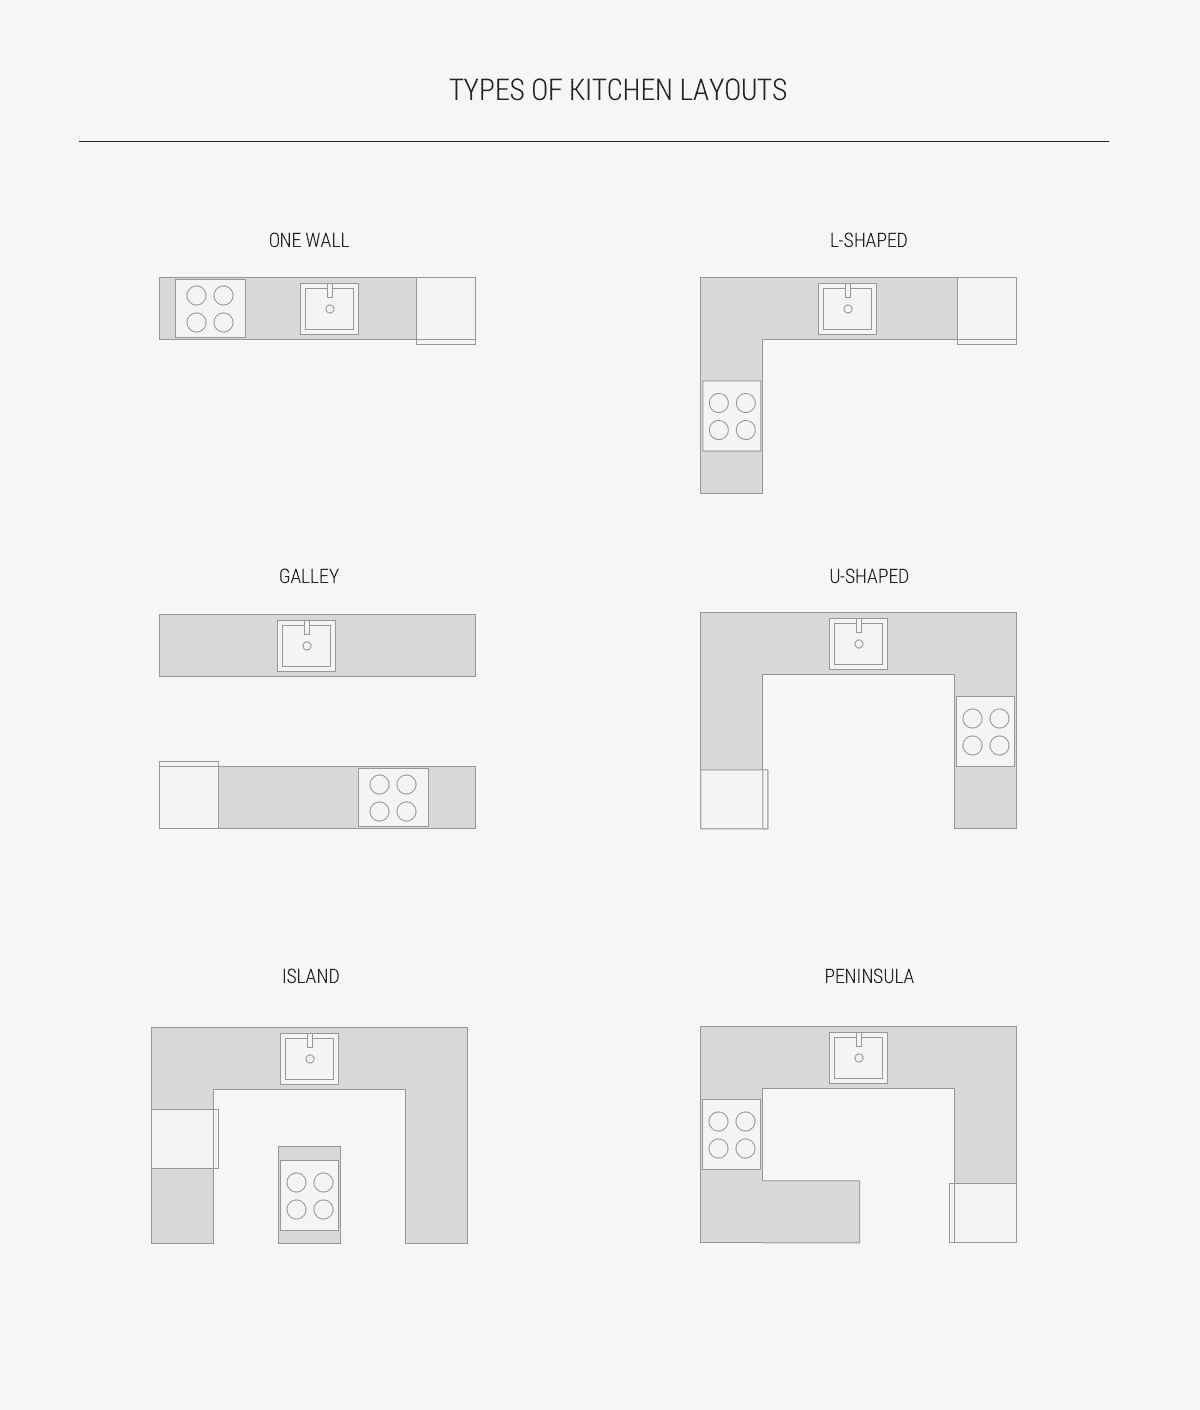
Image Via Home Designing
We created our floor plan, so I had to determine this before hand. You may have restrictions or none at all, but try to decide which shape works best for you based on what you have.
You’ll also need to consider the flow of the kitchen, which is typically based on where your appliances and hookups are. Do you like the fridge closer to the oven? Where will you likely prep your food? Is the garbage going to be in a convenient spot? Do you need a baking center? All things to think about.
Of course, if you have tricky problems to work around, like where outlets and hookups are placed, or a wall that can’t be moved – you’ll need to be very aware of those situations before planning.
This stage of the game is mostly just thinking and becoming aware of what you have to work with – which is very very important.
STEP 2: Search for inspiration
Now that you know what you have available to you, begin the search!
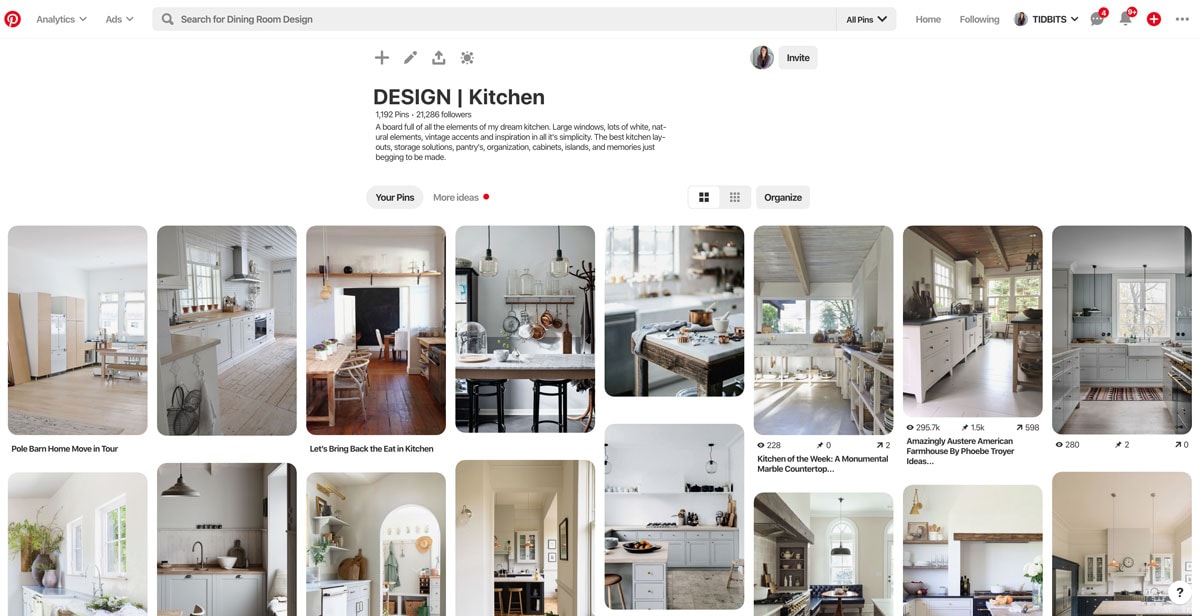
I always make a Pinterest board, or several, dedicated to the space I am creating. Pinning the things that catch my eye help immensely to figure out what elements I definitely want to incorporate into the space.
Instagram is also a great place to fill your inspiration cup these days, albeit a little messier to find exactly what you are searching for. I often round up my favorites and share on my blog, like this round up of 30+ European Inspired Kitchens.
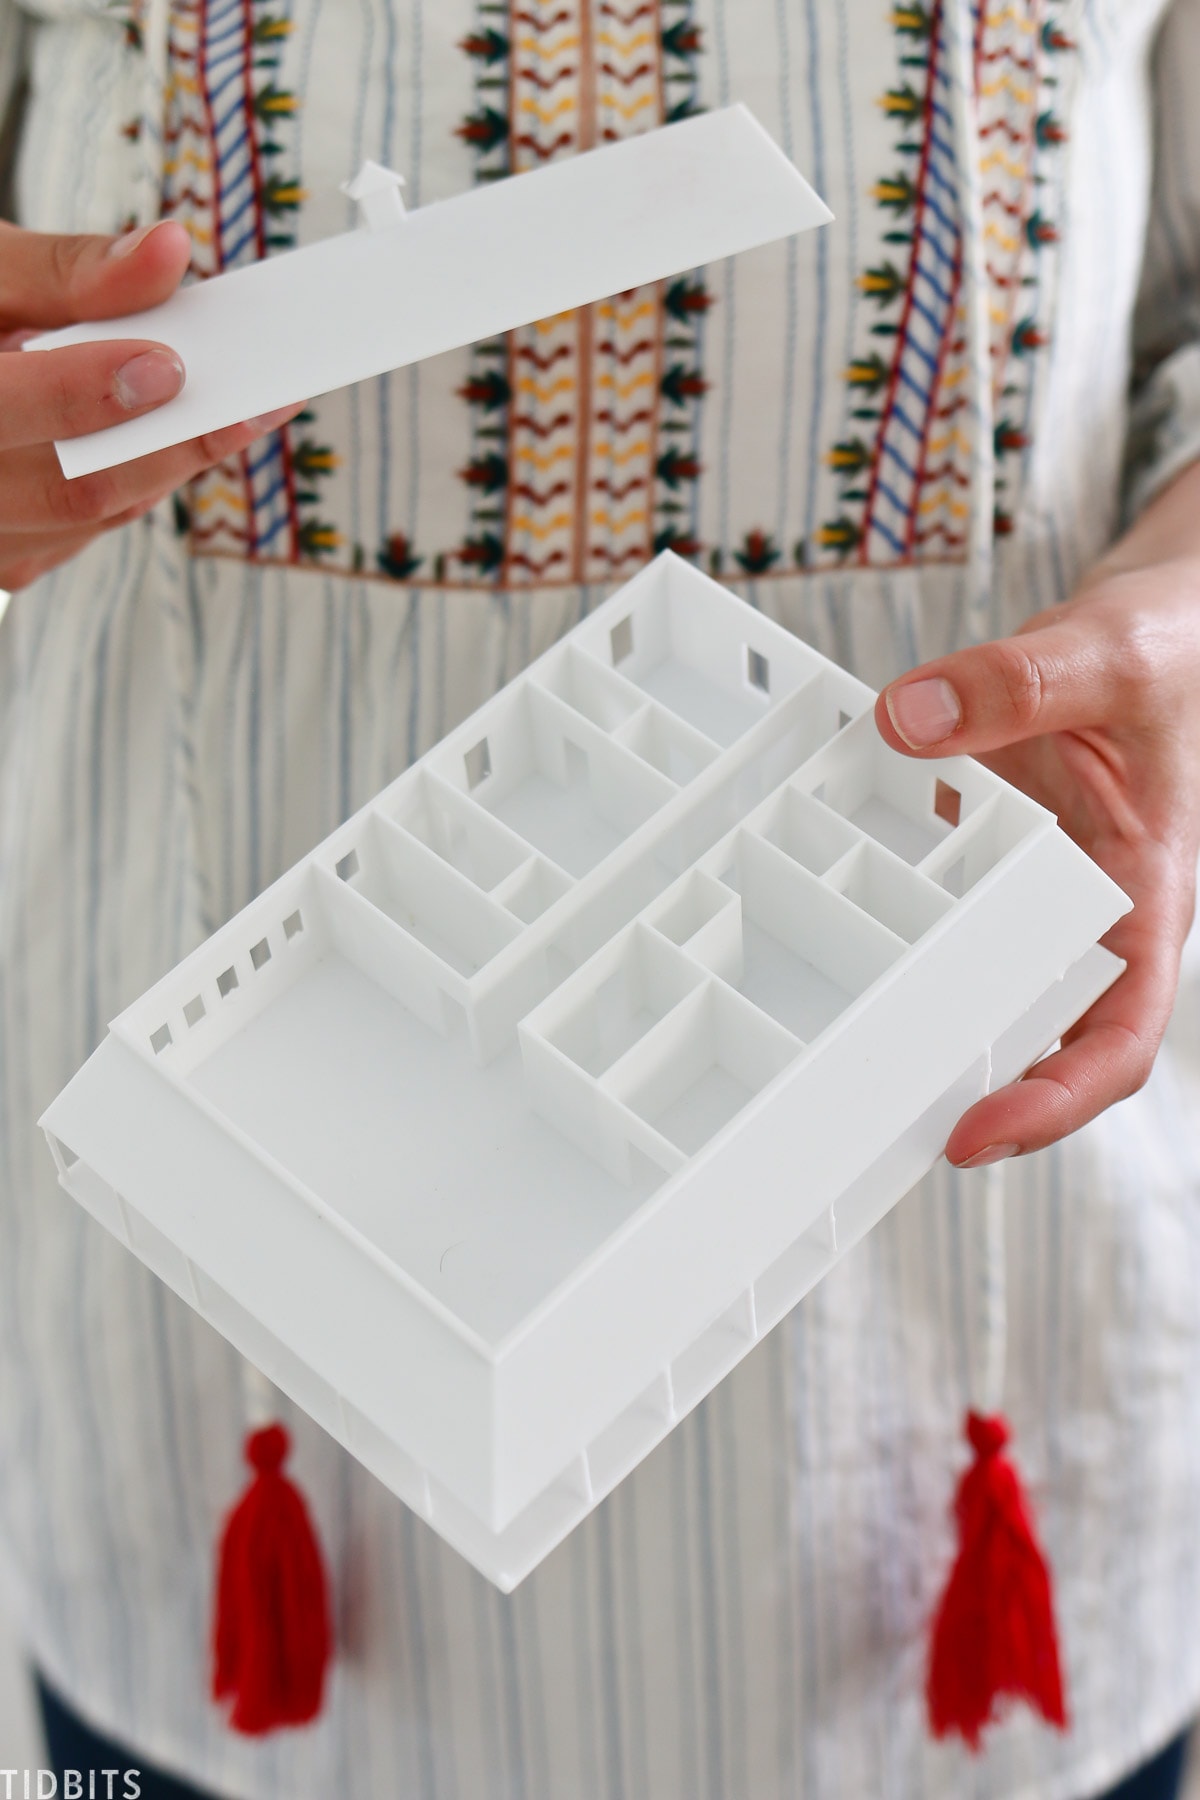
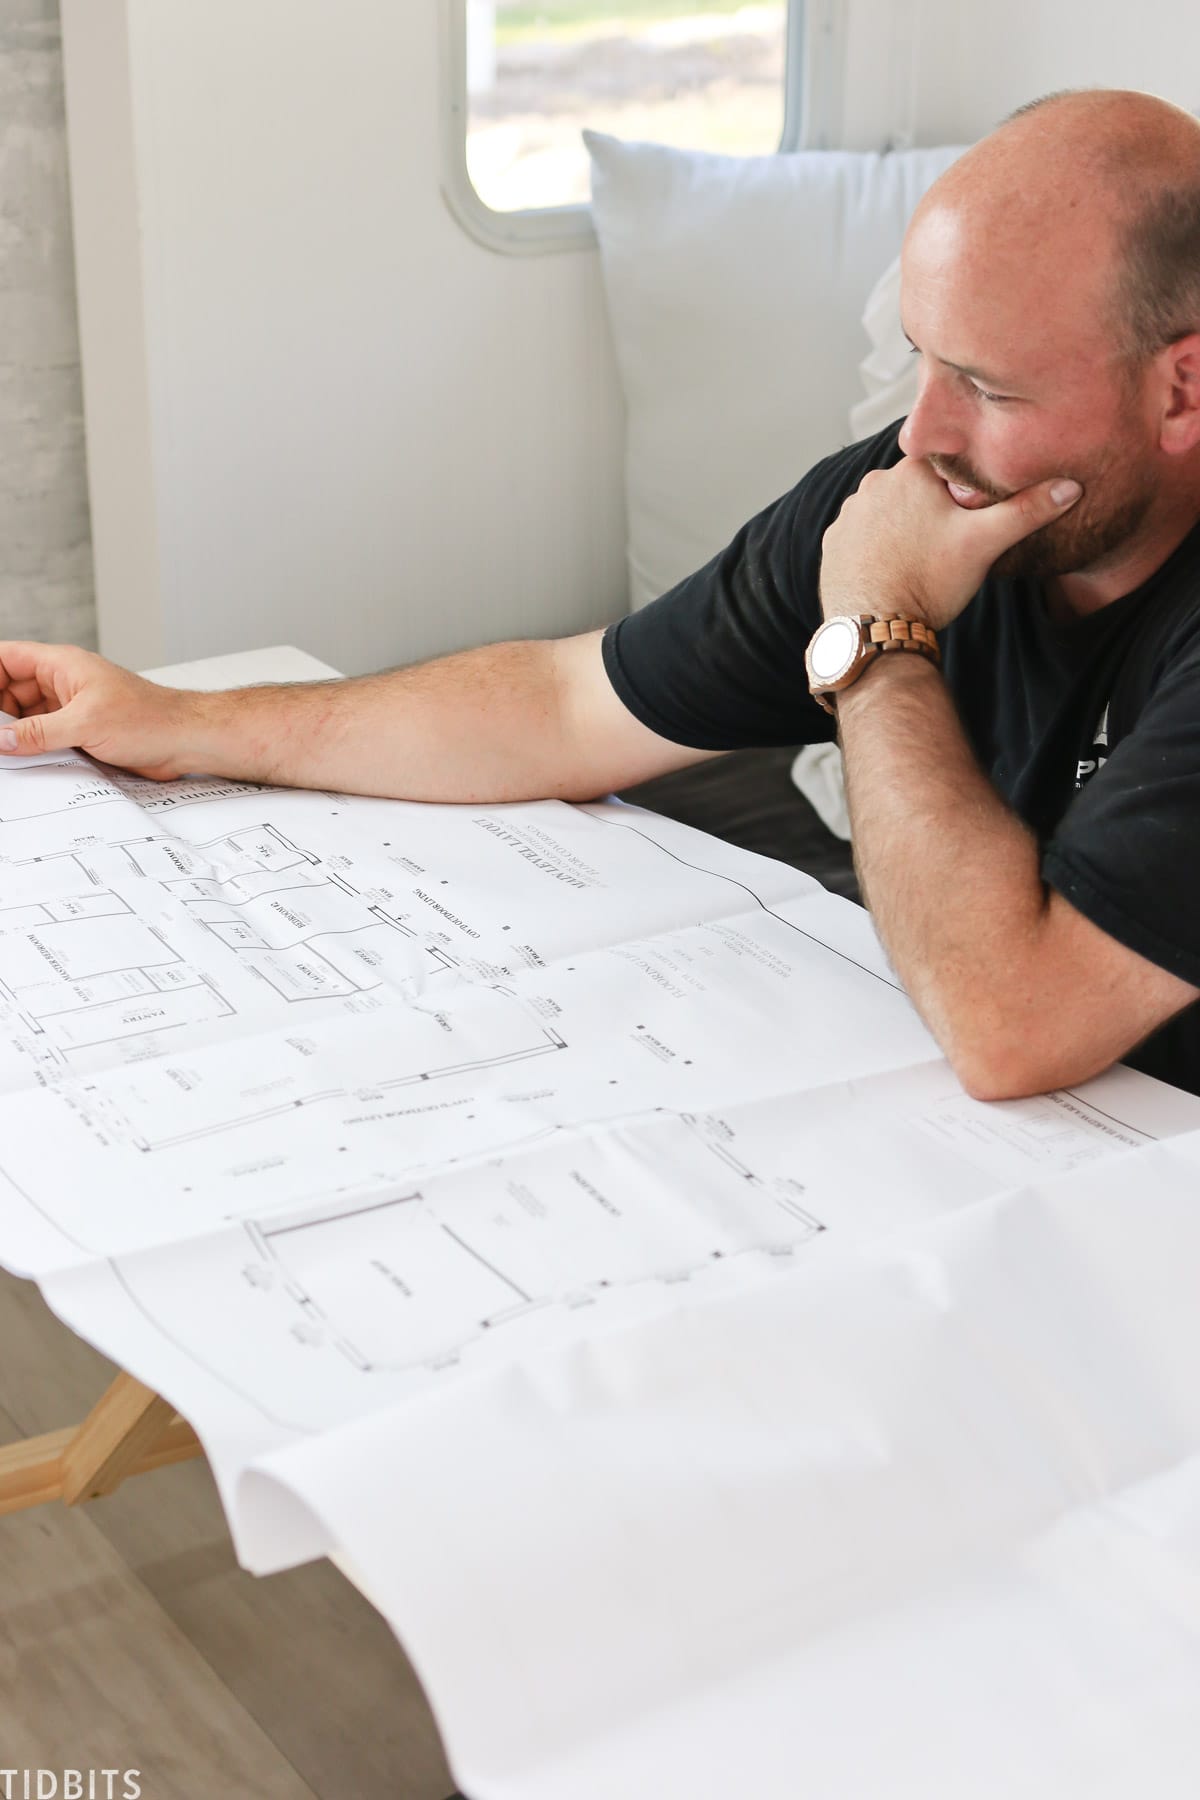
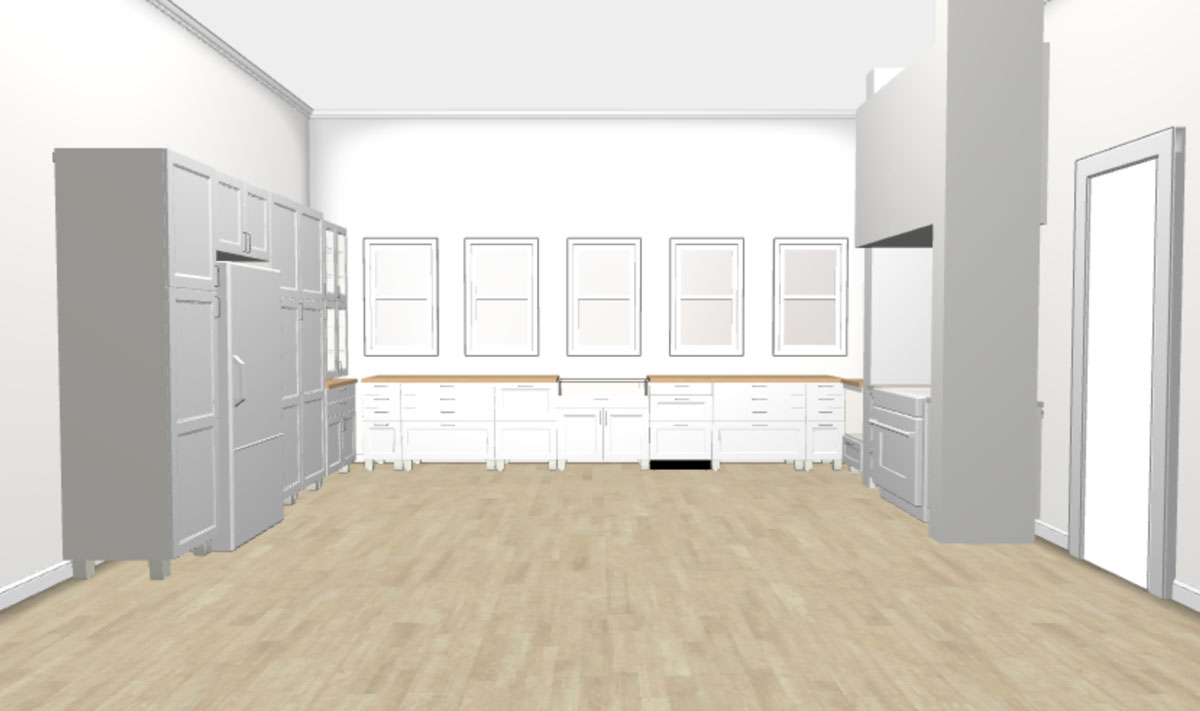
STEP 3: Design the space digitally
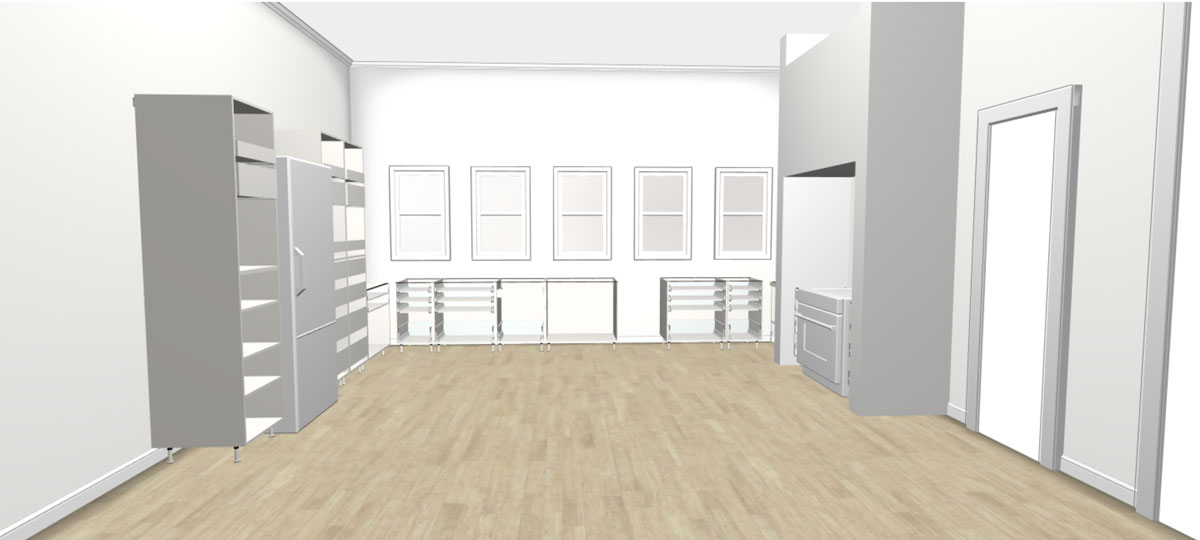
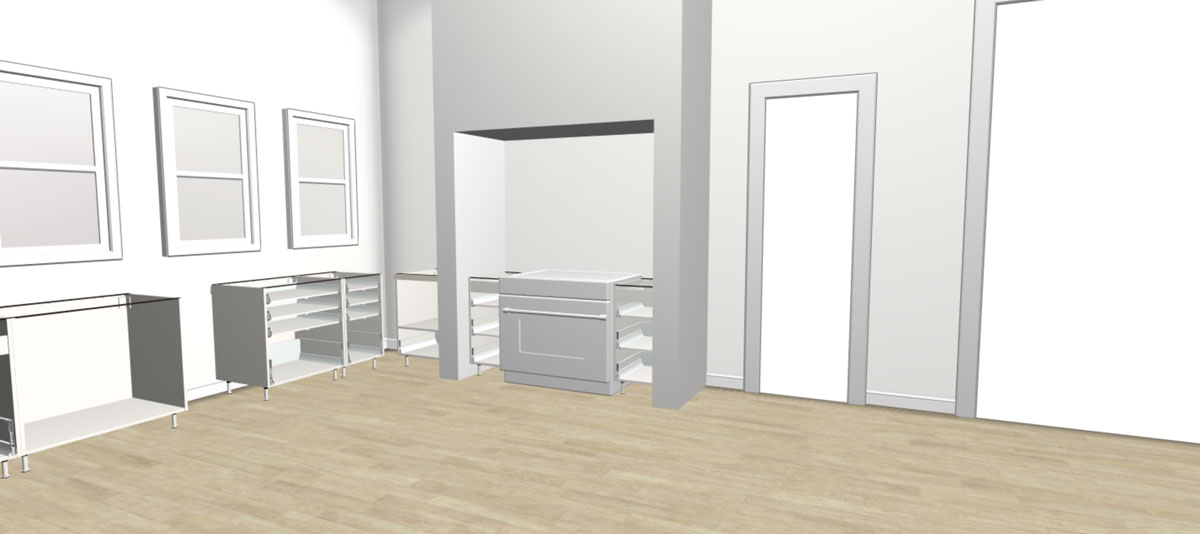
In order to make sure the space will come together as you envision, it’s best to design that space digitally. This is also the time to make sure all your measurements line up, so you know what sizes you need for cabinets, appliances and so forth. These details can be hard to figure out if you just sketch a plan.
In our attempt to do this, we found many really expensive designer programs, that I am sure are fantastic (with a learning curve).
The other options are to go with a company that designs kitchens and they will do this for you in their programs. Places like Home Depot and Lowes do this as well. While they do this for free (I believe), they are going to draw up the designs based on their products. At that point you pretty much are committed to buying their products because it works with the design – and a custom kitchen is always going to cost more.
We are on a budget for our kitchen, so we found a way to use a free kitchen design software and still customize it a bit for our needs.
Enter . . . IKEA.
When we went to our local parade of homes, I could always pinpoint an IKEA kitchen. Sure, they are pretty, and nothing really against them. I just didn’t want a kitchen that looked too IKEA-ish.
But, I think they function fantastic, the price is great, and you have a lot of options to customize layout. We just needed to look for companies that made custom IKEA cabinet fronts, to create a look of our own.
IKEA has a free kitchen planner software anyone can hop on and use (search it for your area). It is clunky – to say the least – and can be super frustrating. But that is what you get with free. However, it is accurate to their products and will really help you figure out what you need to buy and plan for.
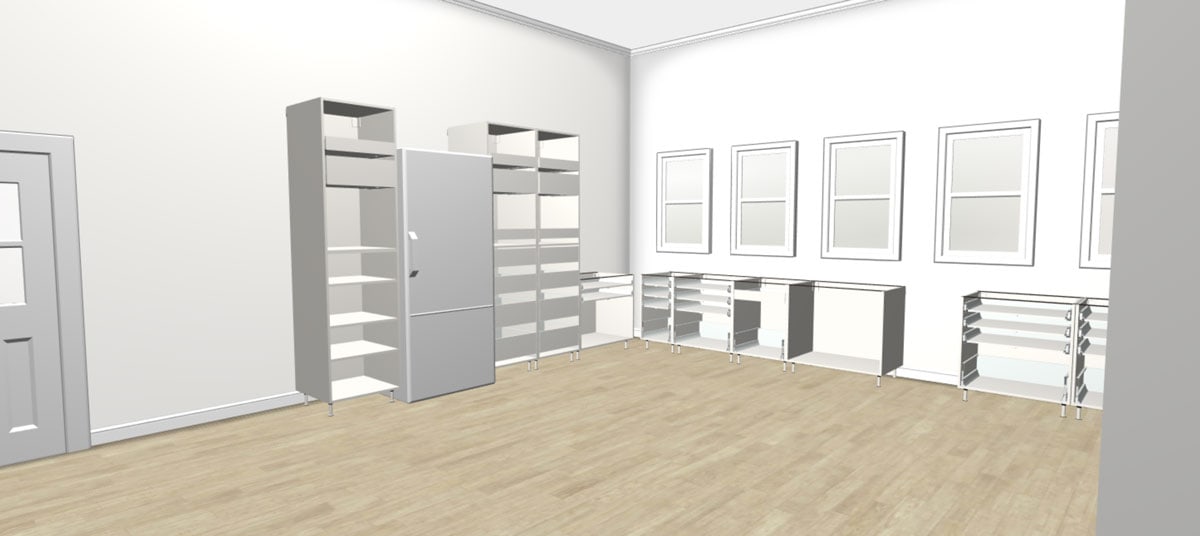
I could type in the measurements of my doorways, sink, range, fridge and build the kitchen around that.
You can use their design tools just to see if your ideas are good, or to actually order from them. To order, you need to actually go into a store and have a worker help you order the right items based off your designs, or I believe you can call in and an expert will do that over phone.
We did order the cabinet boxes and interior drawers/hinges, and then opted to use the company called Semihandmade to order custom fronts. We choose a beaded white front for our lower cabinets and a paintable flat panel front for the tall and side cabinets. There are actually several companies that make custom IKEA fronts, so do your search and find one that you like. I also saw options for companies that will even paint them your color of choice.
Going this route saved us on having to hire a designer, gave me creative freedom, and I get the fantastic functionality and organization of IKEA kitchens – which is really pretty great!
STEP 4: Create your mood board
With the layout planned, I was able to focus on making sure the design elements in my head were going to go well together. I needed to make sure the paint colors, the tones in my floor, material in countertops, metal finishes and all design choices would flow well together. Truth be told, this is my favorite part.
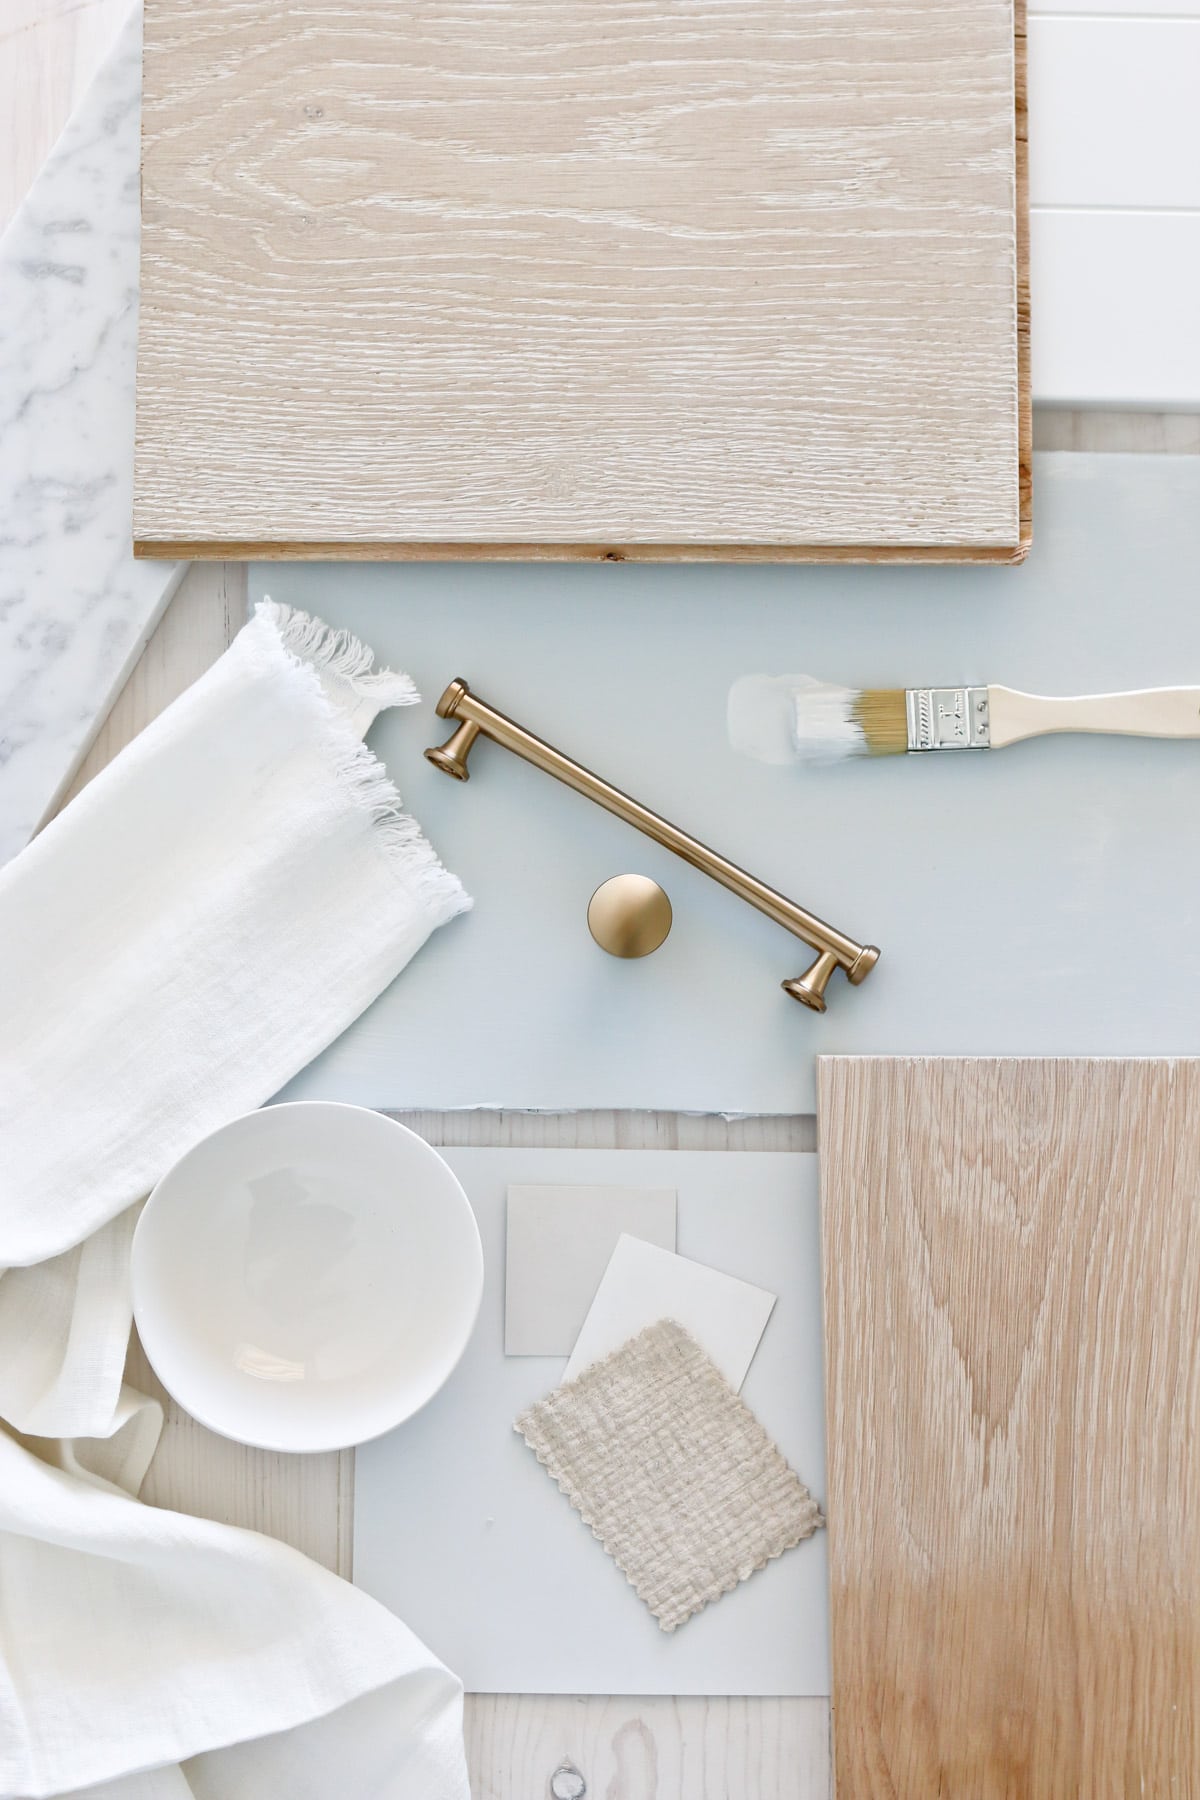
You can create a design board digitally, which I often do, but for this big project, I wanted to actually bring all the elements together in real life and get a feel for how they went together.
It was so crazy fun to create this type of mood board and take pictures!
You might be deciding on ALL THE THINGS at this point, or you might have flooring, wall color, etc. already in and need to work around it. Bringing them all together and building on colors and textures is super exciting. At least for me it was!
STEP 5: Decide on the big things – cabinets, countertops, appliances, flooring, etc.
I waited until I had all those details in place before we made the big purchases. I really needed to be sure of my plan first.
While we are still piecing and building our kitchen together, we were able to really make progress after we had decided on the big things.
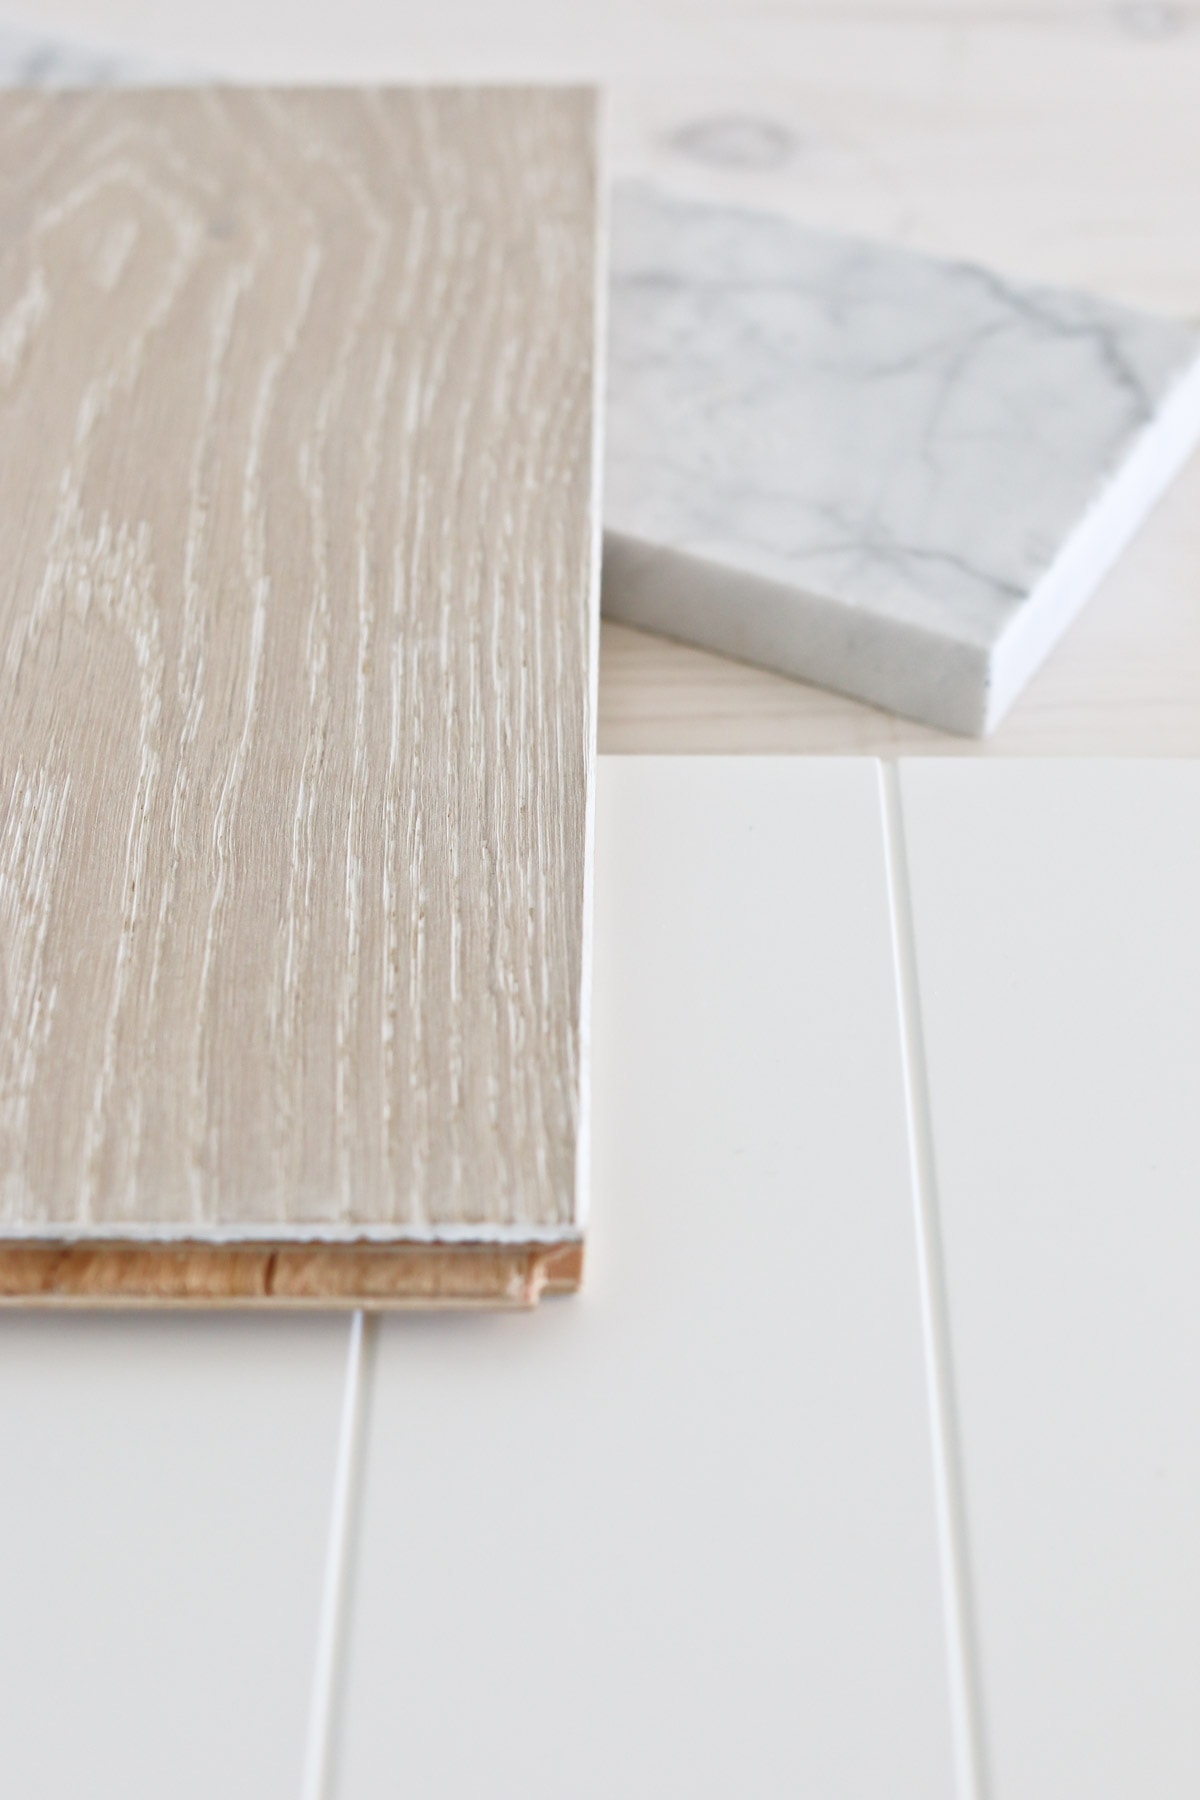
The tones in the flooring helped me decide on the butcher block wood we choose. This flooring is a white oak engineered hardwood from Floor and Decor. So we picked a white oak for the countertop as well. You’ll see in this sample piece the variation of color.
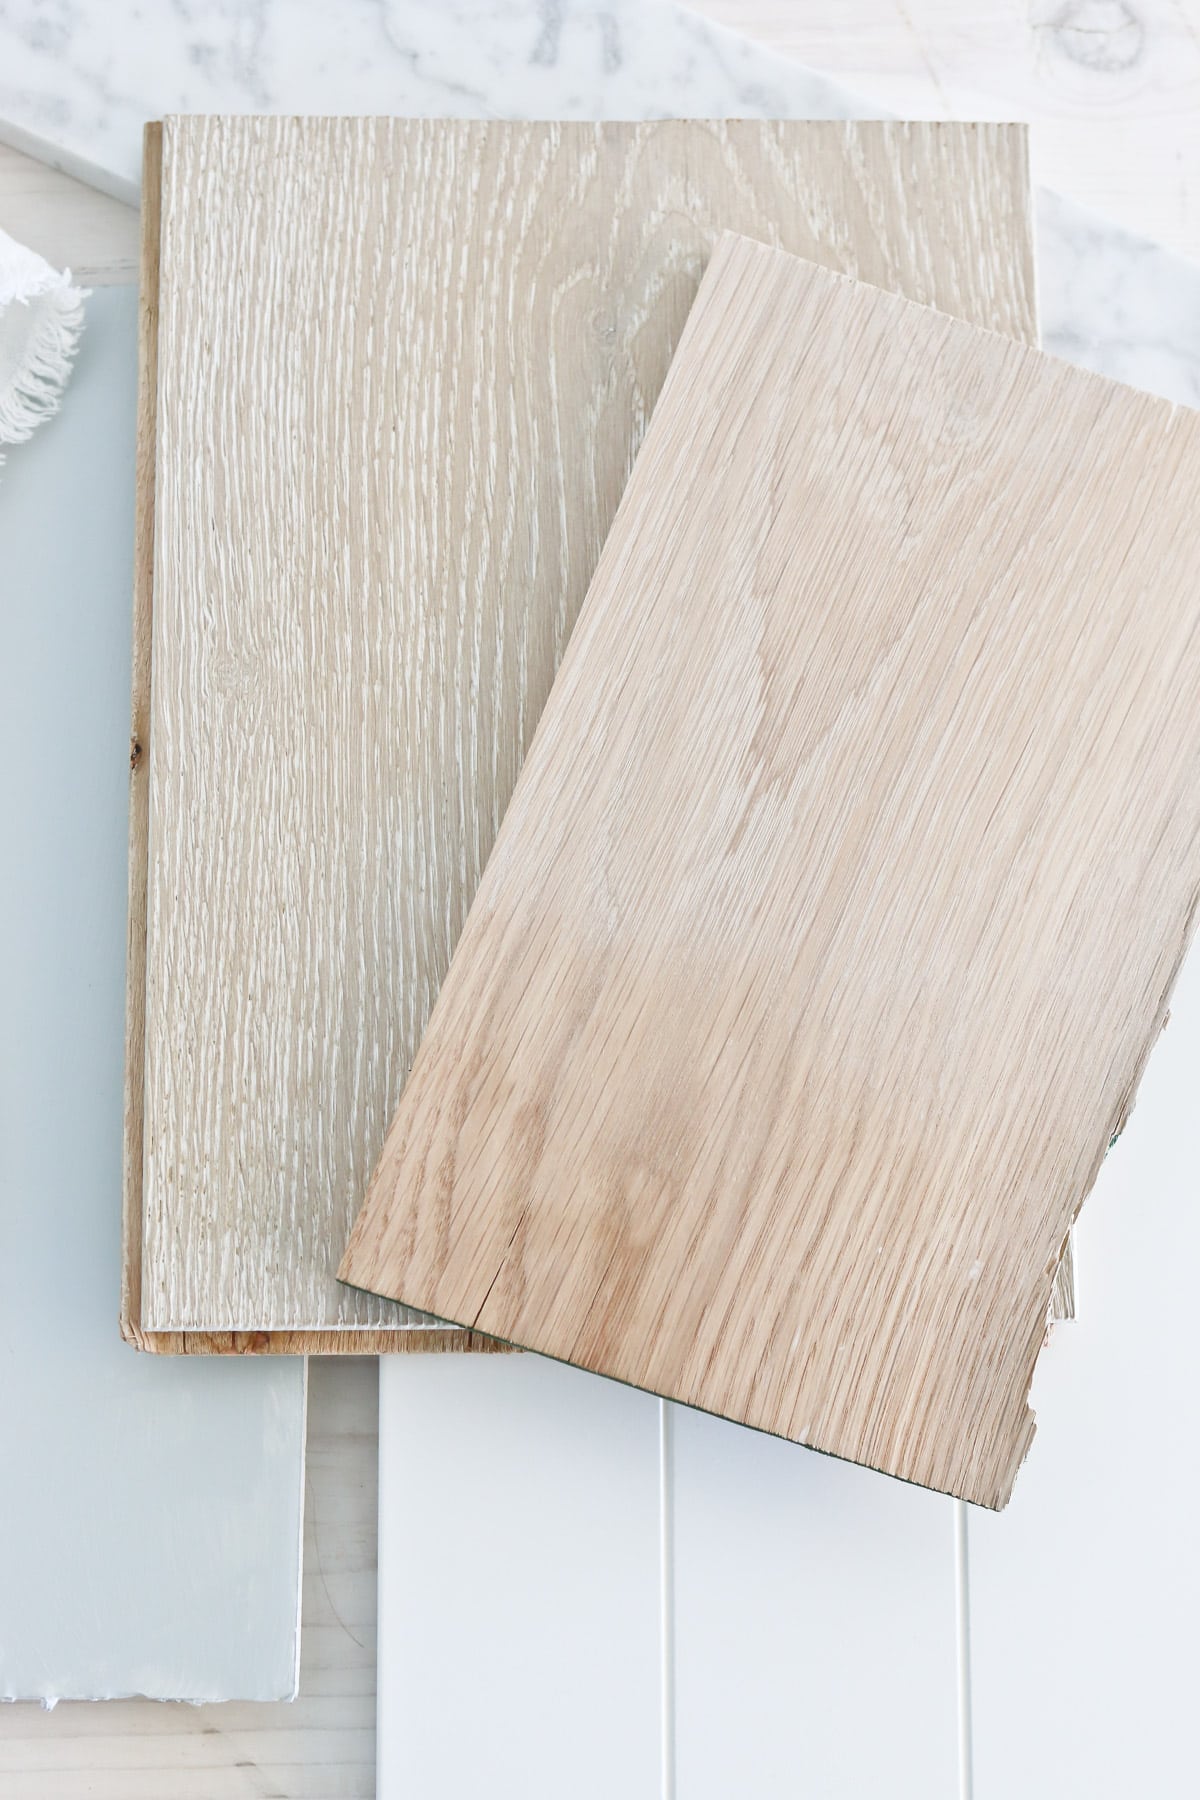
We played around with it and discovered we loved when we applied some picking stain to the wood and then sanded it off. It lightened up the grain a bit without going pink, which coordinates with the wire brushed white oak flooring really well. The hubs is currently building these butcher block countertops.
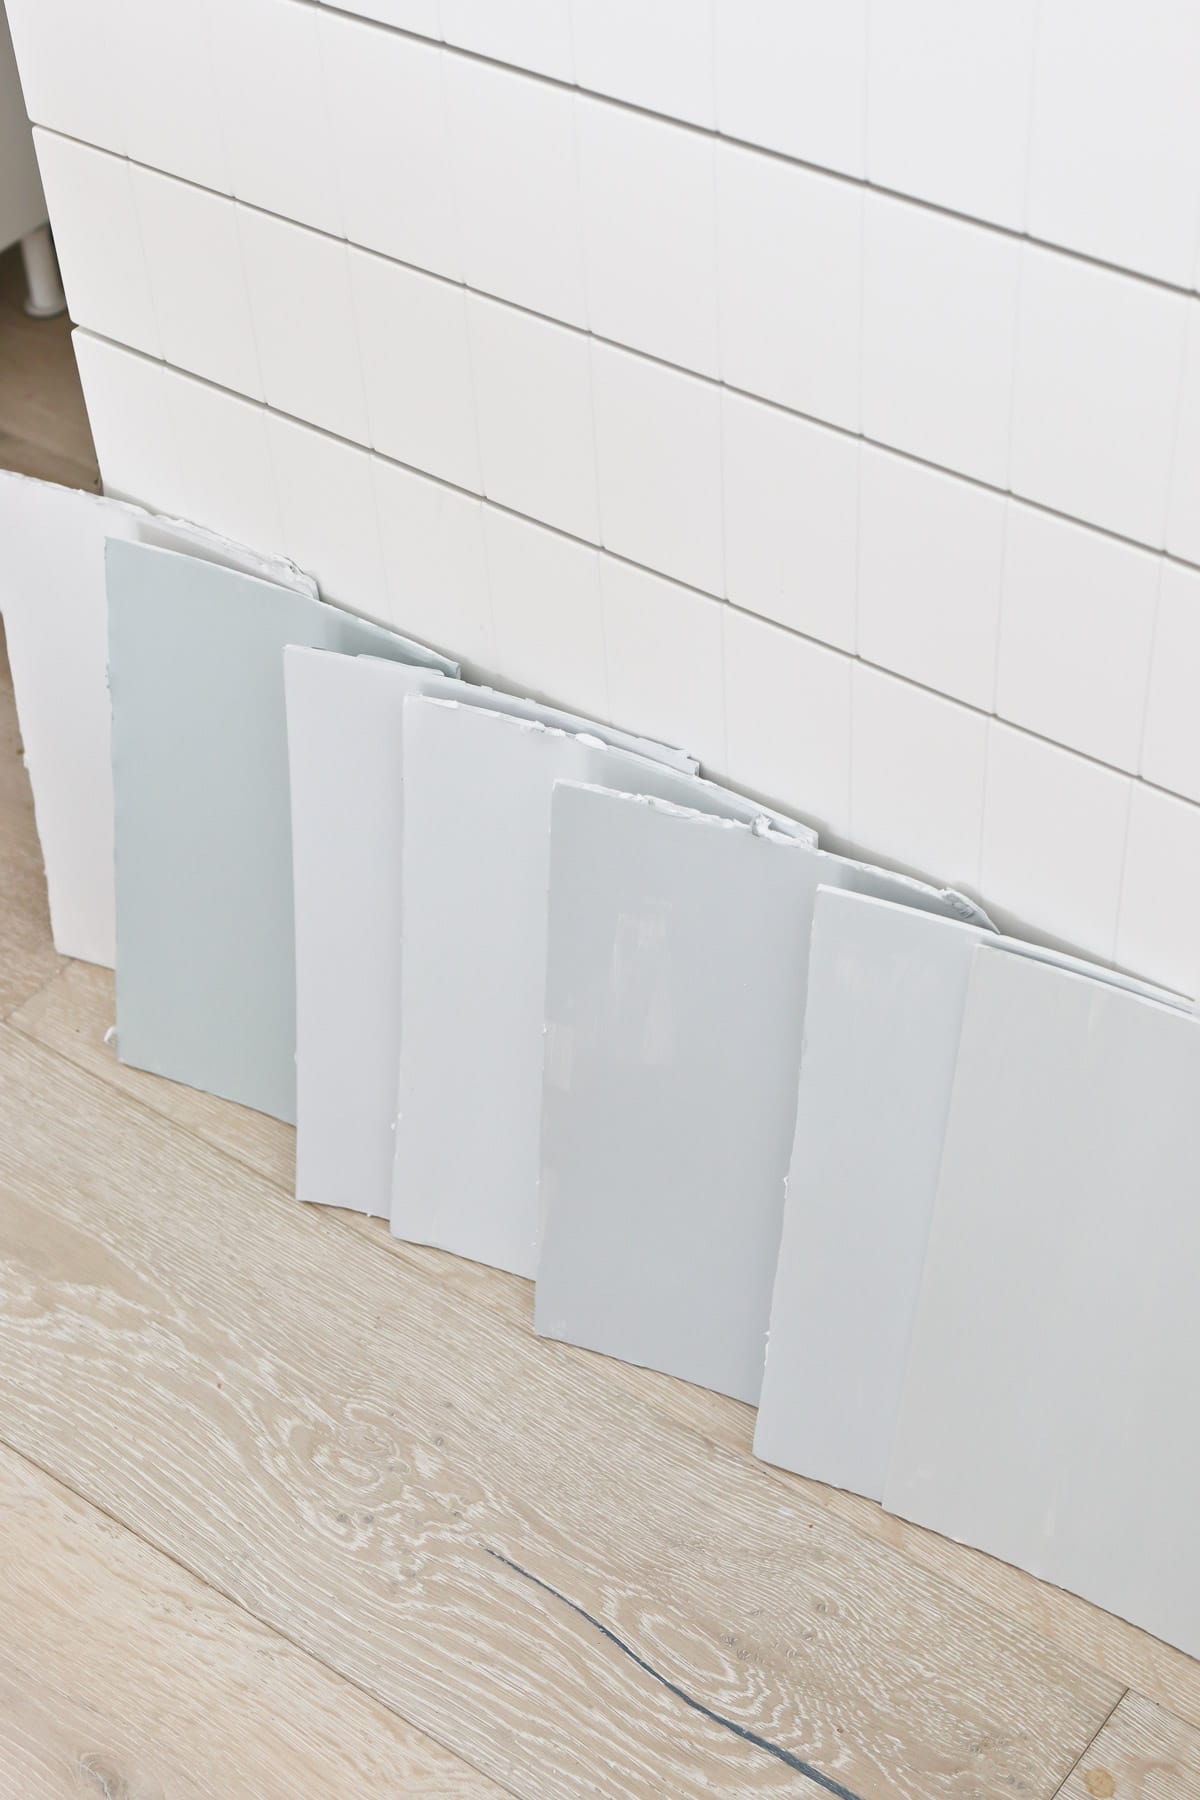
With the major finishes decided, I could make a better decision on paint colors for the walls and cabinets. Surprise, surprise . . . I’m going with a dusty blue/gray for the cabinets (Benjamin Moore, Ghost Whisperer), and I’m still working on nailing down the white and off white colors – but at least I know that is what I want.
Sometimes I go with my gut and just grab paint quick from the store, but for a decision this big, I was sure to test several samples on big pieces of foam core.
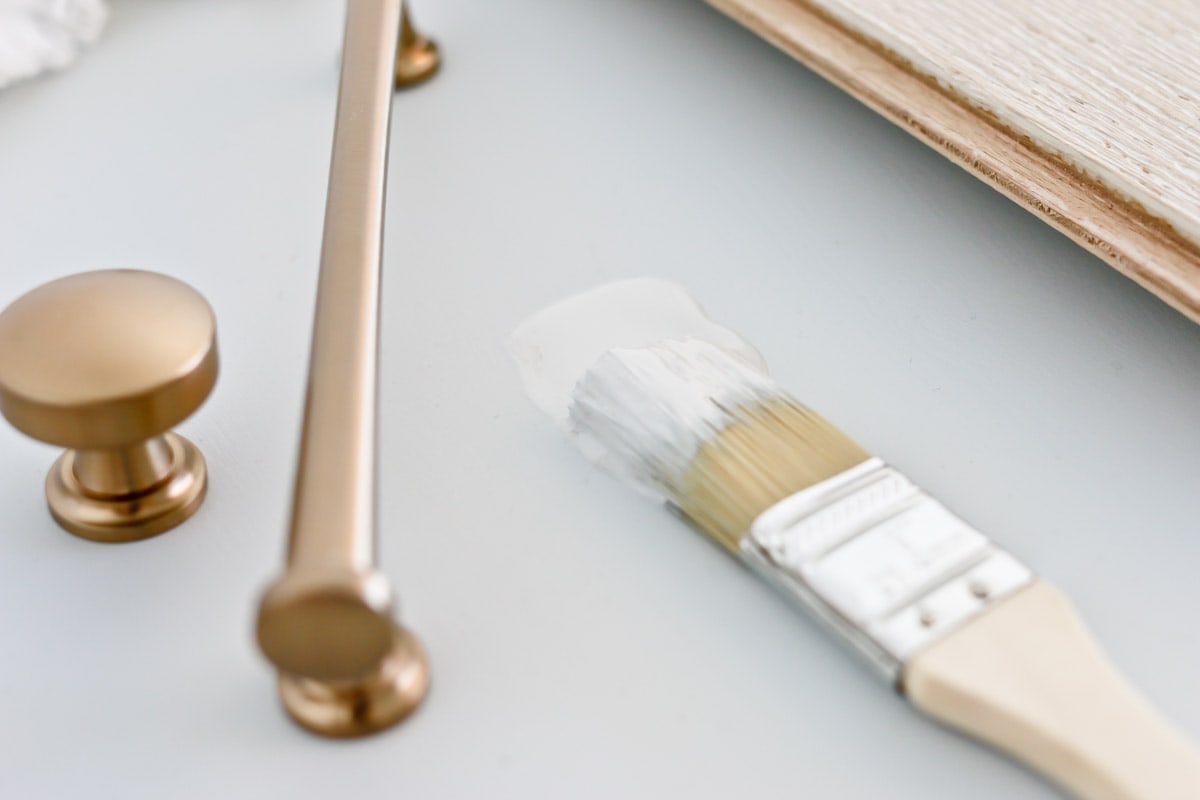
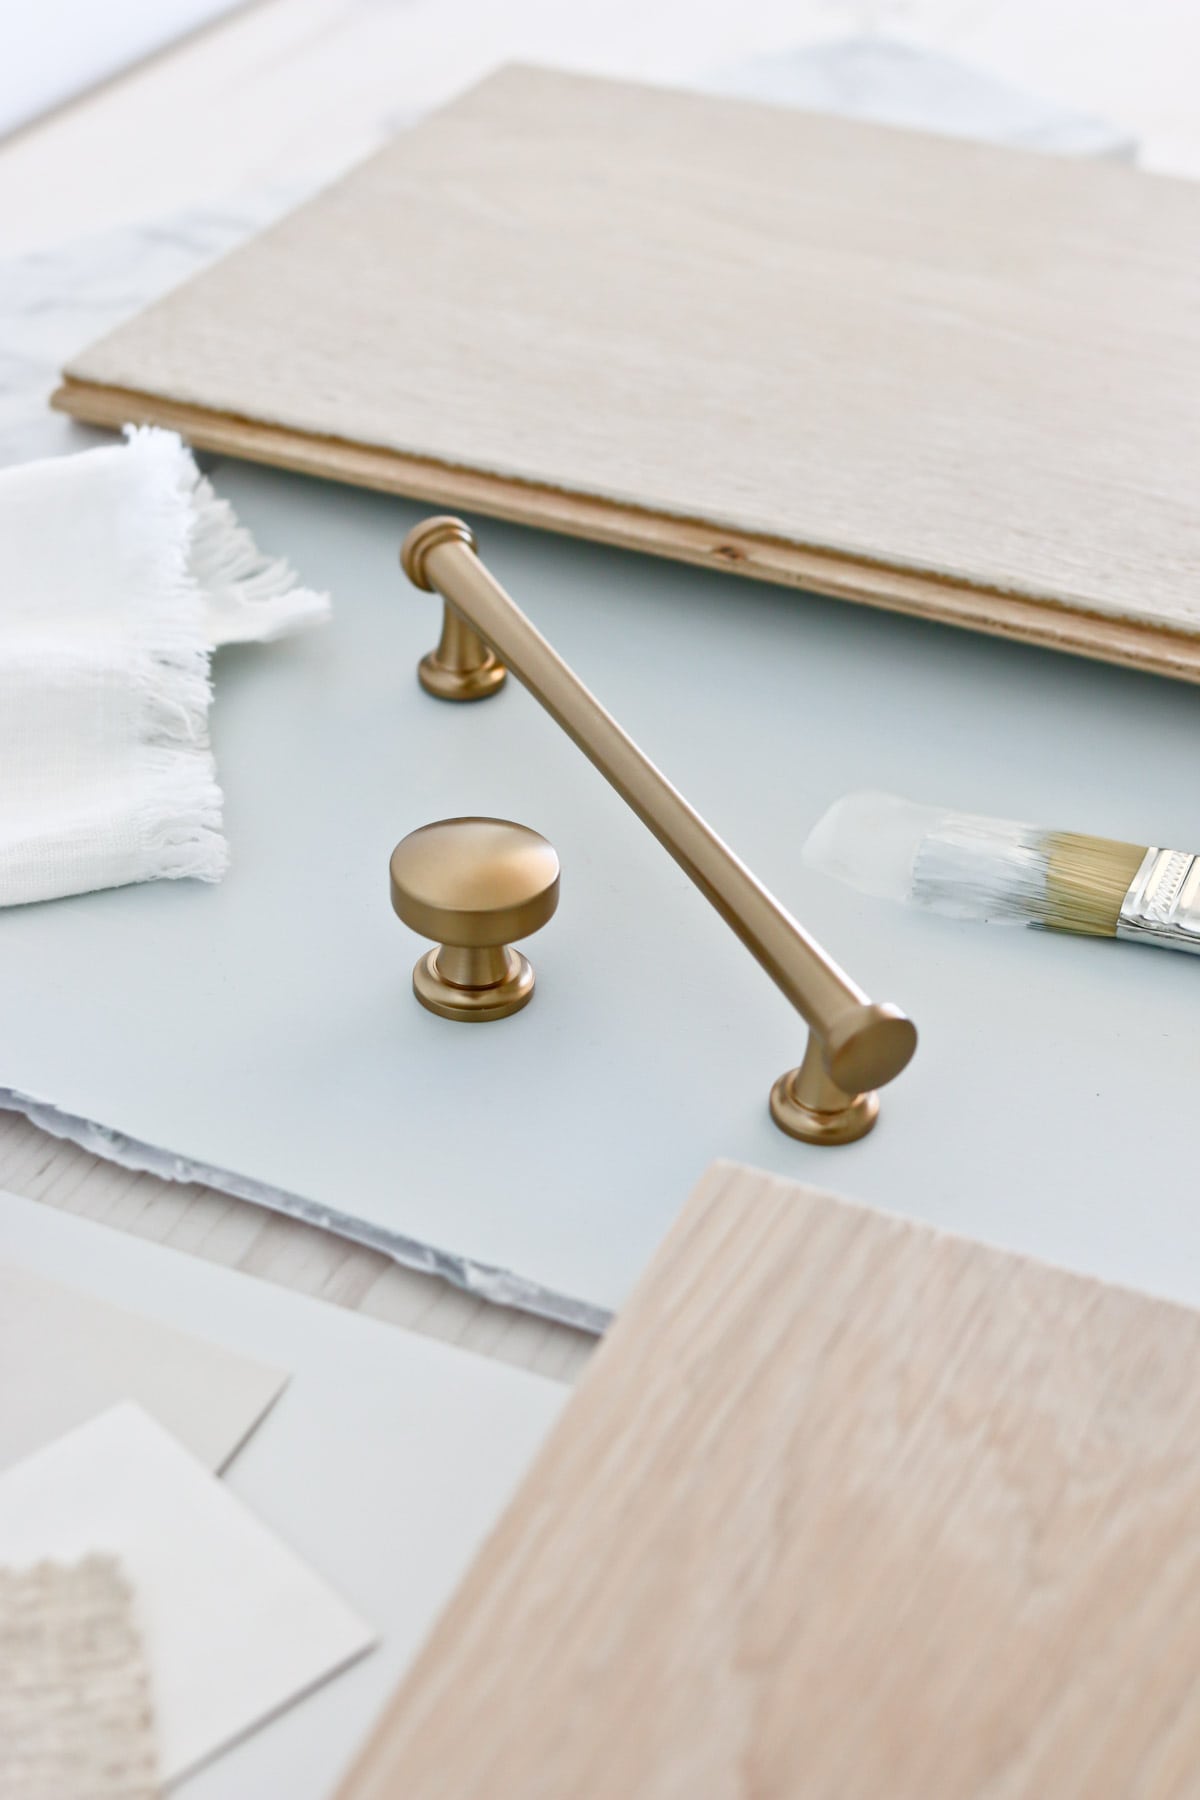
STEP 6: Have fun with the little things – shelving, decor, faucets, hardware, etc.
Those big decisions can make me really nervous, but I love having fun with the not so hefty design decisions. I determined I loved how this Champagne hardware from Atlas (one of my kitchen sponsors) looked with all the tones I had selected. These are the Browning Pull and the Browning Knob.
They are incredibly beautiful!!! I can’t wait to get them on!
I’m also confident my creamy dish ware will look great on display with the big choices I made. I’ll look for quiet yet textured linens to coordinate with the space. Looking at all this helps me know the decor I bring in will need to be earthy and simple.
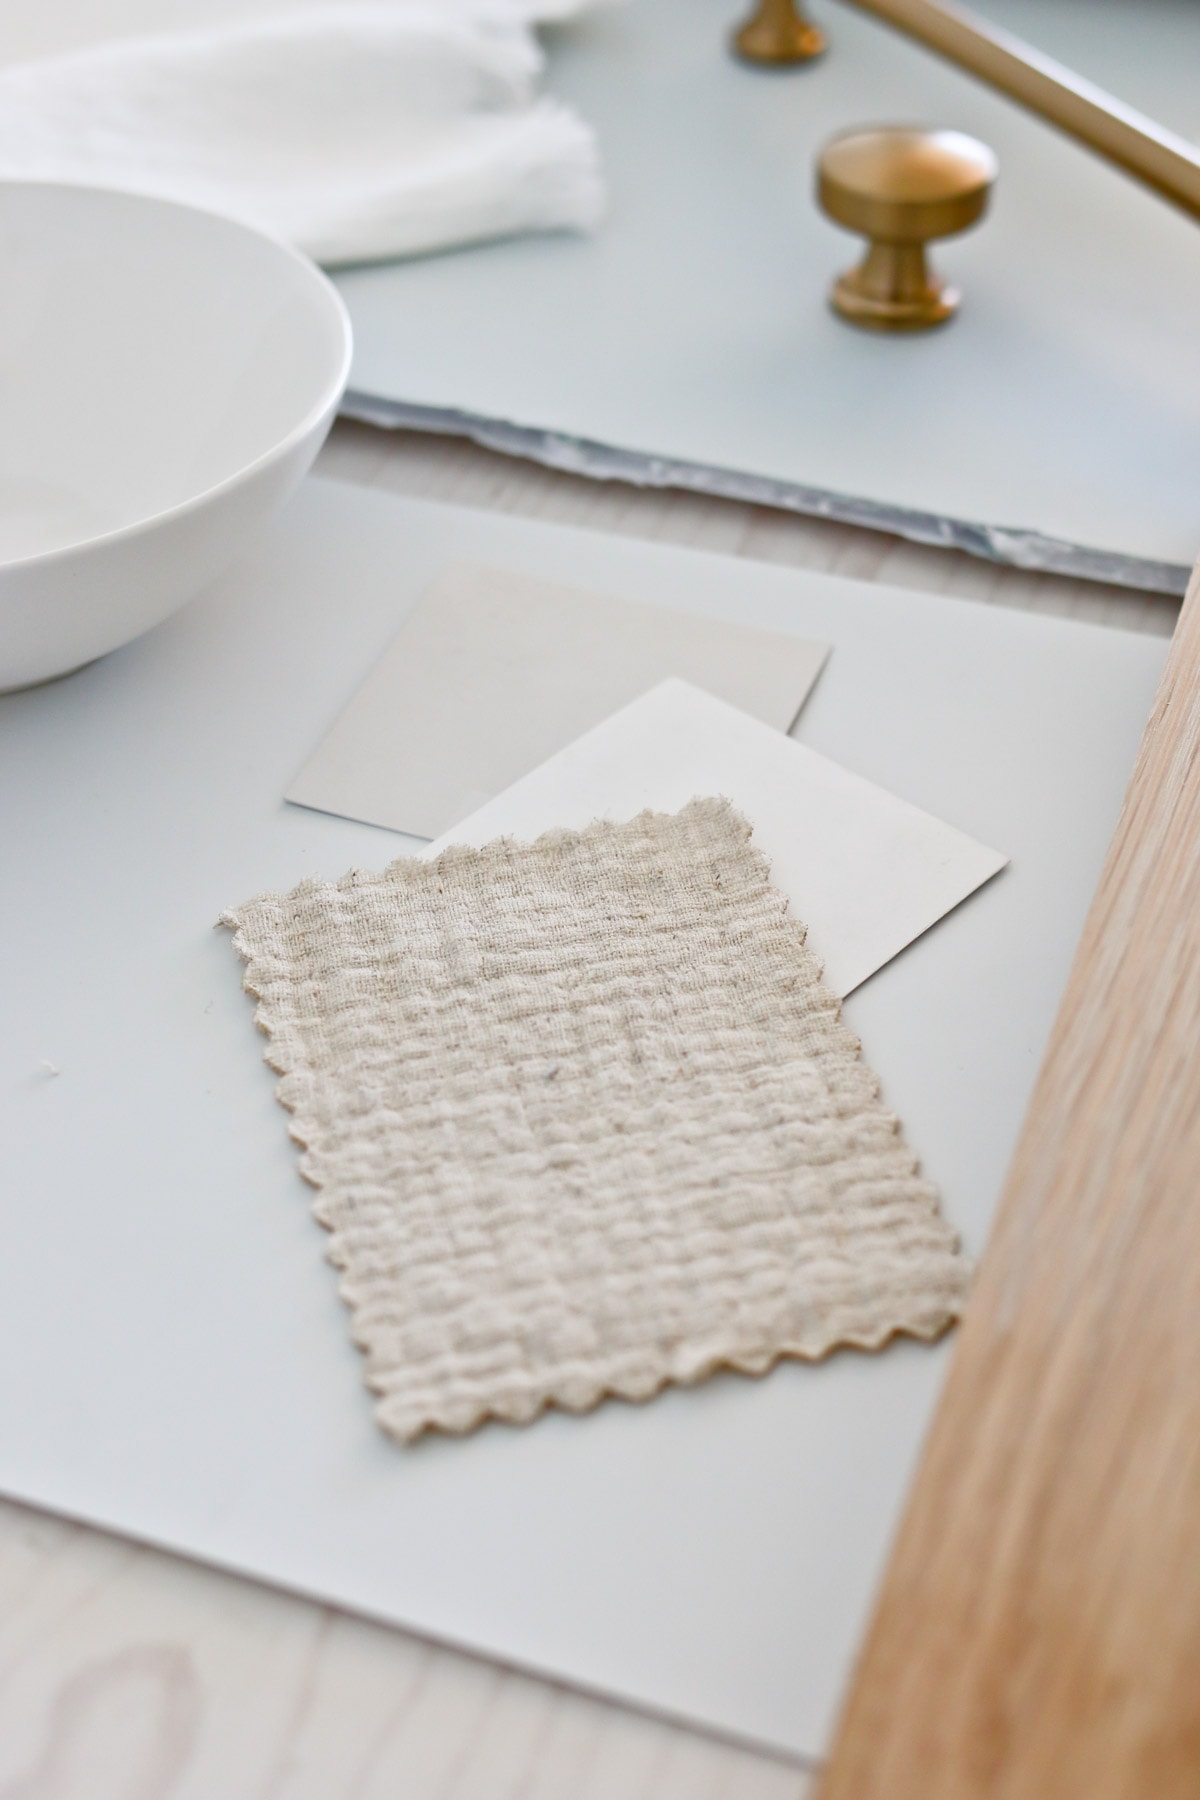
I have some antiquing to do to find pieces I want to use to bring in some one-of-a-kind character to this otherwise very “new” space, but that is going to be the joy of the hunt and I wish to be patient and find the perfect items. I’m looking for a bakers rack (which we might end up building) to put beside the tall cabinets, and perhaps some interesting antique cabinets or shelving to add in the corners.
I really hope it was helpful to see how I planned out our kitchen. If you haven’t already, check out our Move In Tour, to see our new unfinished home so you can watch it transform as we move from space to space.
I can’t wait to keep working on our kitchen and bring you lots of DIY’s and the reveal! Trust me when I say, no one is more anxious to get it done than me!
If you’ve had experience designing a kitchen, we would all love your comments below. Please also let me know if you have any questions or if I missed any sources you would like to know about.
Thank you for reading!


Hi Cami,
This post is a great resource for anyone looking to design their own kitchen. The author provides a clear and easy-to-follow six-step process that will help even those who are not interior design professionals create a kitchen that they love. From considering the shape, size, flow, and hookups of the space to searching for inspiration and designing the space digitally, this post covers everything you need to know. The author even provides recommendations for free kitchen design software to help you get started. Overall, a fantastic DIY guide to kitchen design!
This article is really helpful and I appreciated all the samples over here!
Dining receives many applications. You may not immediately hear back because needs frequently change; it may be positions are currently full, but will open up next quarter. Your application is kept on file and will be contacted if there is an opening!
Awesome! I really like your kitchen design idea.
Love the design! Wonderfully written. looking forward to reading more like these. If you are interested in kitchen faucets you should take a look at ARCORA. Check out wasserhahn küche
This is a very handy article and you have great information regarding kitchen product. I love BBQ Grills for a home that can be used both for indoor and outdoor.
I have a small and one wall kitchen. Finally i can make it beautiful.
I really like the idea of design the kitchen. A great guide to design kitchen in easy way, I will do it for my coffee cabinet. Thank you for sharing it.
Thanks for sharing these tips, we are going for an Island design and I am getting my countertops done from gmmarbleandgranite.com. Realy excited to see how it’ll turn out. Even when you have professionals to assist you, it is important to know how everything works
i appreciate your DIY detailed post, my kitchen i one of my favorite places at home.
but i have not given my kitchen the desired look i had wanted, because my expression can only be translated by me. thanks for a wonderful post
Your design is very impressive. How exciting to be designing a new kitchen. I totally agree with you on having a view outside when standing at the sink. We seem to spend so much time in front of the sink.
I can beat my chest and say you are a PRO!
All your points are valid and easy to follow.
Point one is very important if anyone should miss that, your kitchen will fall out of line.
I have learned the importance of planning and having a vision from your article.
Thanks so much for sharing this with us.