
This post may contain affiliate links, which means I get a small percentage of the sale at no extra cost to you. I only recommend items I love and have had a positive experience with. Thank you!
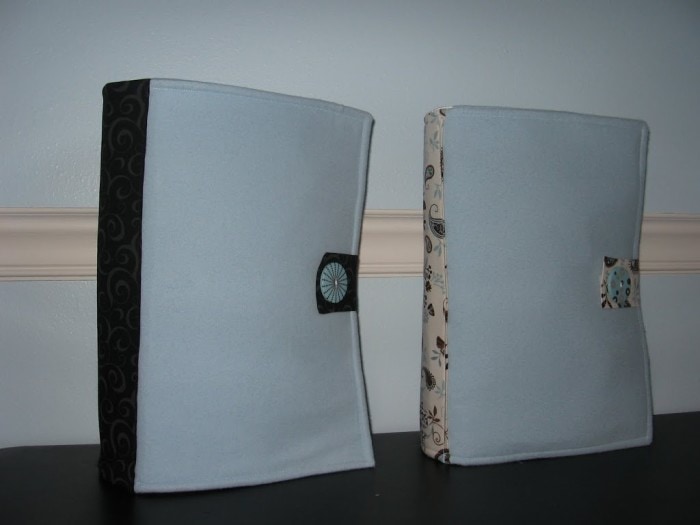
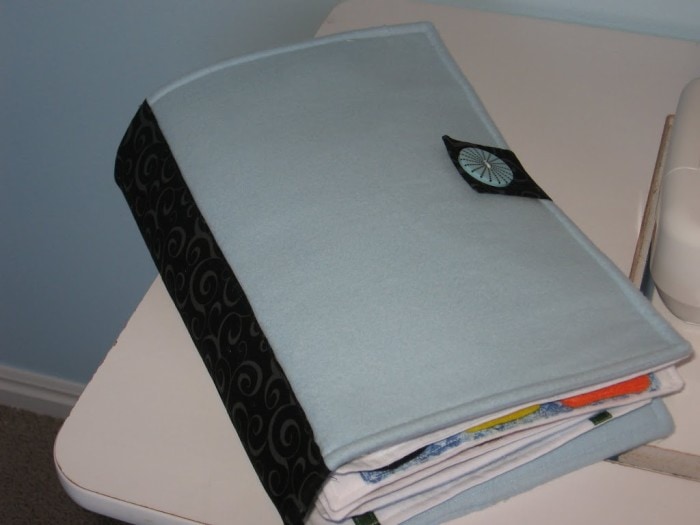 I love how my quiet book cover turned out, though I can’t take the credit for the idea. It was actually my thinker husband who thought of putting the button holes inside so the rings don’t stick out of the book. It’s like a fabric 2 ring binder.
Here is a little tutorial for the construction of a fabric quiet book cover. Sorry about the bluish tint on all the pictures. My blue walls gave a weird glare that time of day.
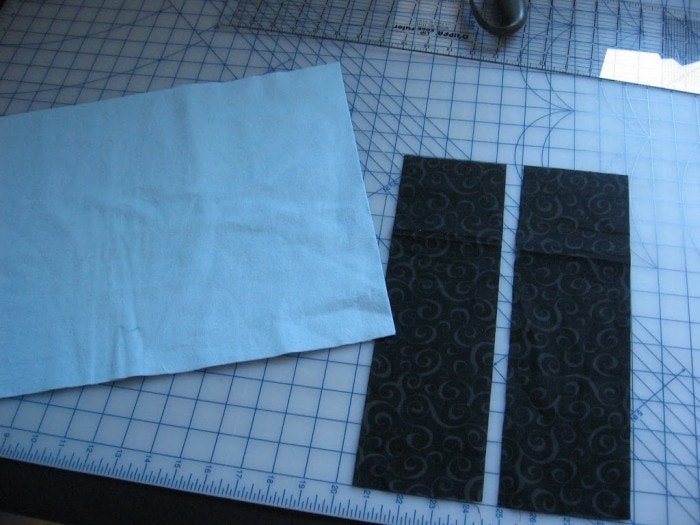
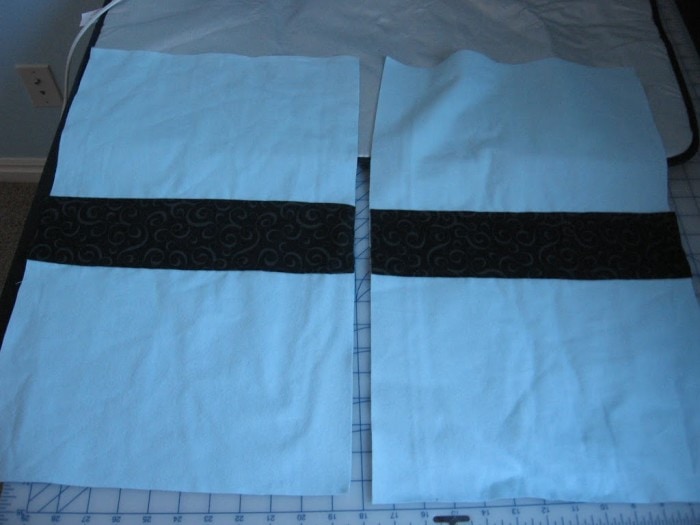
I used blue flannel fabric for the cover, mostly because I way over bought once and have plenty to use up. Then I grabbed scraps for the contrasting fabric. How big you cut your fabric will depend on the size of your quiet book pages. My pages were cut 9×11, but I think if I ever did it again I would do it a little bigger. So for the cover I cut 2 pieces of light blue flannel measuring 20×13 inches. You will also need some kind of stabilizer, and I really like the thickest stiff pellon. I cut that the same size as the flannel, 20×13.

The strips were measured and cut at 4×13 inches.
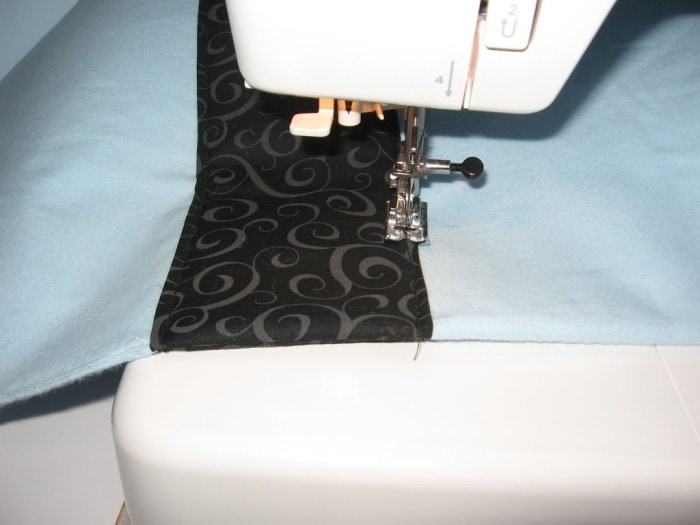
You will then need to press the contrasting strips 1/4 inch on each side.
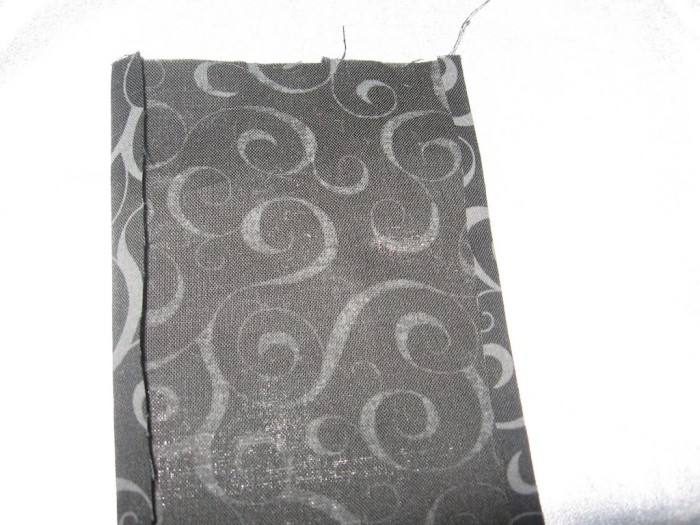
Pin that strip down the center of the flannel piece, and sew into place.
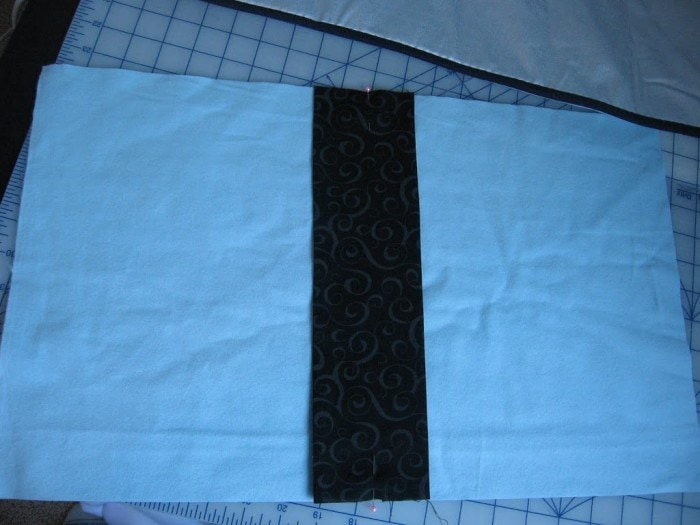 Do this for both pieces of flannel.
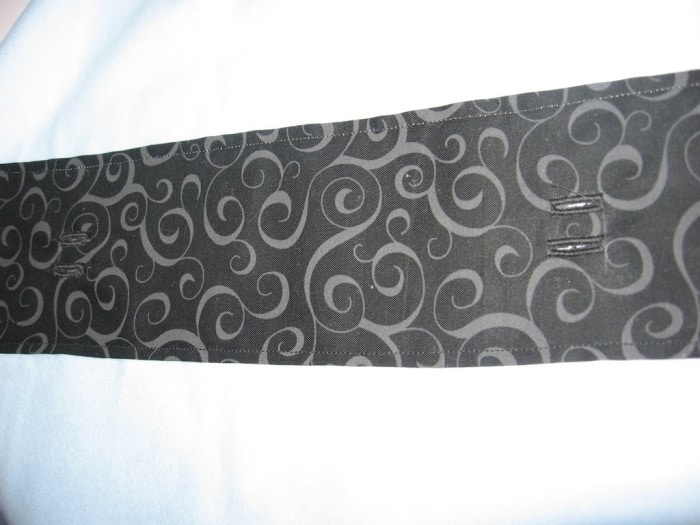
 Take the piece you want for the inside of the book and sew 2 button holes side by side wherever your quiet book pages are going to be attached. Cut through the button holes carefully.
 Now with right sides together, and the stiff pellon on top, sew the cover pieces together leaving a space to turn it right side out.
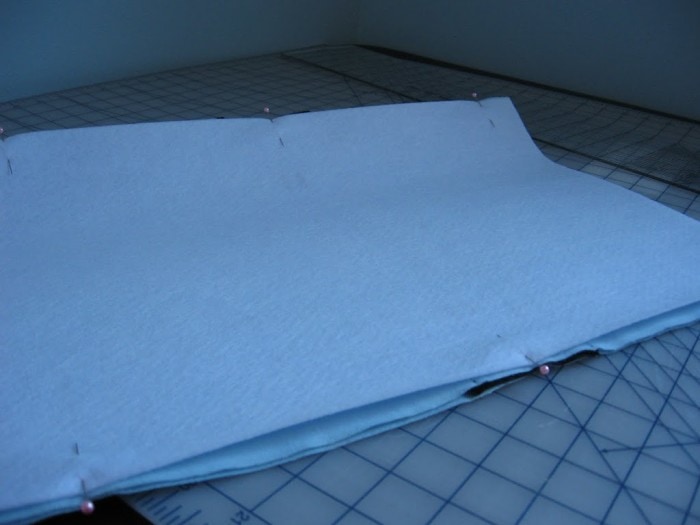 Poke your corners out and press so it looks nice and lays flat. Sew your opening closed.
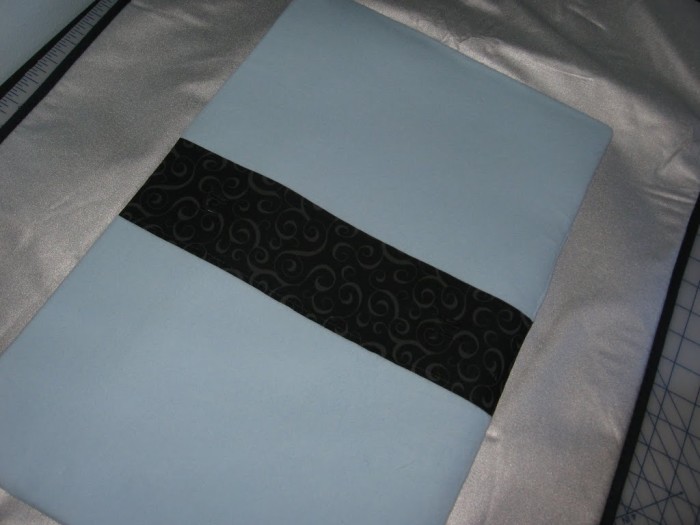 You’ll also want to sew down the side strip on each side.
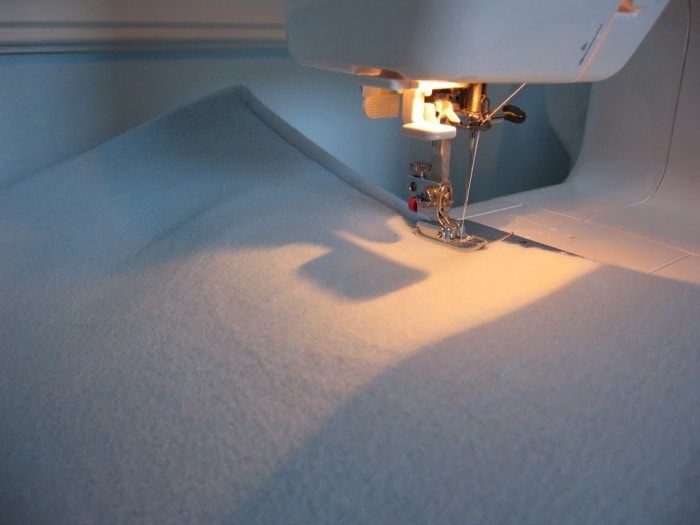
 And top stitch around.
 Now you need to make the closure. I didn’t think about this until it was too late but you might want to make the closure before you sew it together so the closure is attached inside. But since I was too lazy to unpick, this is what I did.
Cut 2 strips 5 1/2 x 2 1/2. 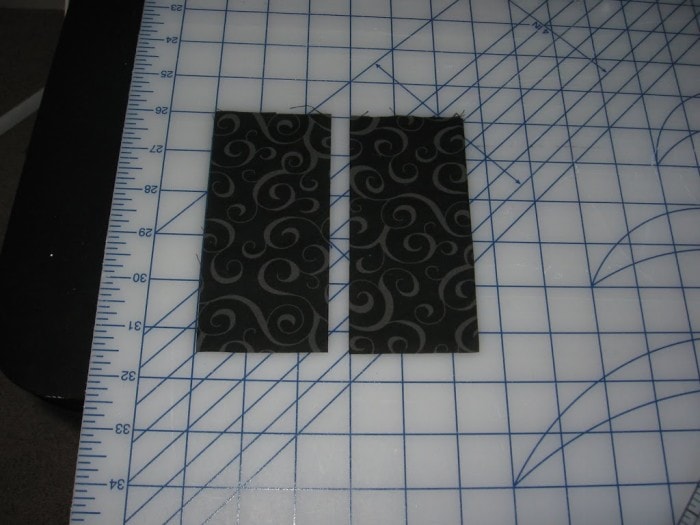 Sew them right sides together leaving one side open and clipping corners.
 After you turn it right side out, press it and make it look nice and sew the pressed opening closed. Then sew a strip of Velcro to the inside of the flap.
 Sew this flap onto the back page of the quiet book. This is where it would have looked nicer to have sewn it inside.
 Sew some Velcro onto the front of the cover, I like to do the soft piece of Velcro here. Attach a button, or whatever floats your boat to the closure flap.
 And your are finished!
 To attach your quiet book pages you will need rings. I was wanting to find some D-rings, but trying to be thrifty I just snipped off some metal rings from an old purse that was going to go into the garbage. Someday I’ll find those D-rings and splurge.
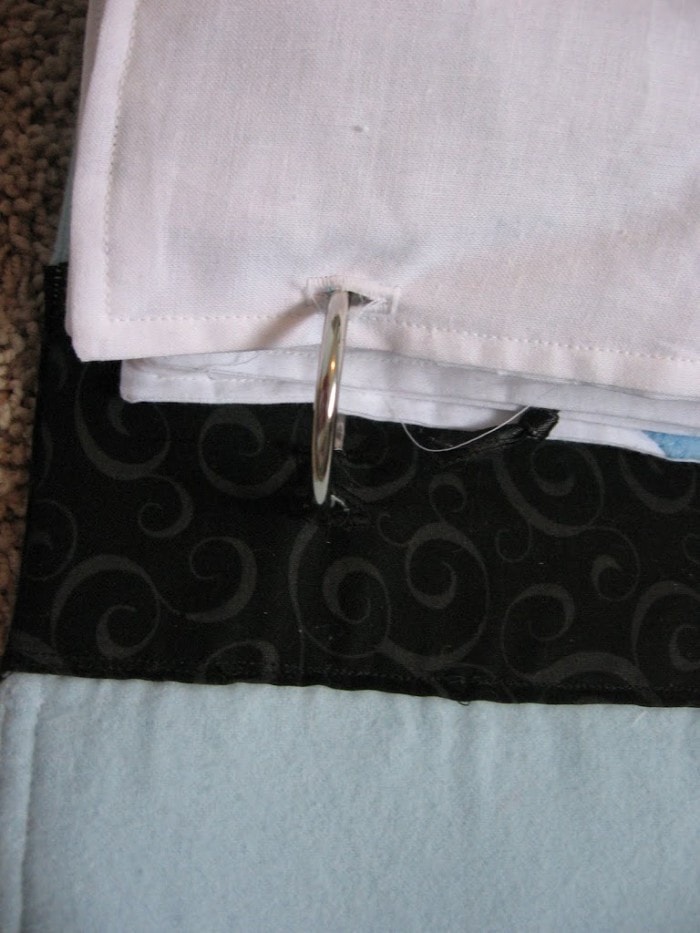 By following this method you don’t have the rings sticking out of the book, and your pages are also removable and you have the ability to insert more pages easily. Fun and easy!
 Don’t forget to check out my quiet book!


I don’t understand what kind of rings to use…..how do you attach them to the pages and the cover. Do they open so new pages can be added? I looked at D rings, but can’t figure out how to attach them…
I love this – I am going to give it a try for my 2 year old grandson..
I love this! I am going to give it a try for my 2 year old grandson.. Thanks a lot ..
I just made a cover for a quiet book following your instructions only adding a carry handle instead of the Velcro closure. Thank you so much, your instructions were easy to follow.
This is brilliant. Thanks for sharing. I have plans ready to do a quiet book but wasn't sure on what to do once my pages were finished, now I know 🙂
Your directions are very complete and easy to follow. Thank you very much for an impressive pattern.
Very cute! I've had my cover-less pages ready to go for months now, and am finally getting around to making a cover. I have my fabric and pellon, but maybe I got the wrong kind of pellon? I got the thickest stuff they had and it is double sided iron-on…this tutorial doesn't say anything about ironing on the pellon. I guess I just need to think it through a little more to figure out
thank you so much for this!!! I made a quiet book and could never figure out how to make a cute cover for it. Thank you so much for your time and creativity.
Brilliant! Love it! Thanks for sharing! I found you from Tip Junkie!
I'm so excited about your blog! I'll be the one stealing your ideas!! I was inspired by you when we made our matching quilts in college I will keep copying you. You are amazing!!
I absolutely loooove your blog! I just read every single post and admired all your crafty-ness (yes, lol, the baby is napping!) Your family looks so happy, I'll be checking back often!!