
This post may contain affiliate links, which means I get a small percentage of the sale at no extra cost to you. I only recommend items I love and have had a positive experience with. Thank you!
Didn’t I promise this kimono tunic tutorial around . . . . . ummm . . . . . Easter.
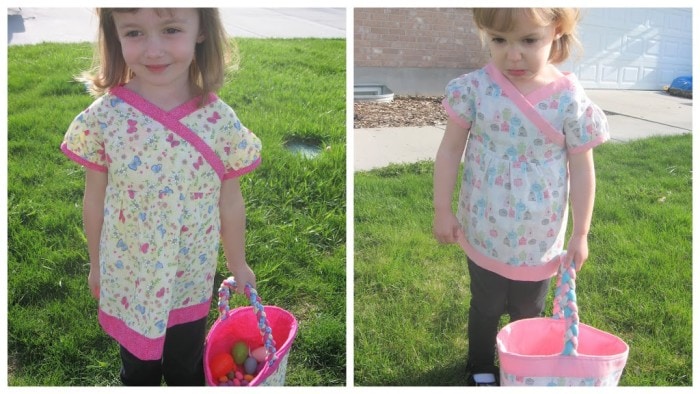 Oops. Well, here it is. Looking at my pictures, I was pretty amazed I took such details shots. This tutorial should guide you through all my steps. However, please note there are several ways of doing these techniques. I sometimes just do whatever fits my fancy at the time, so feel free to adapt.
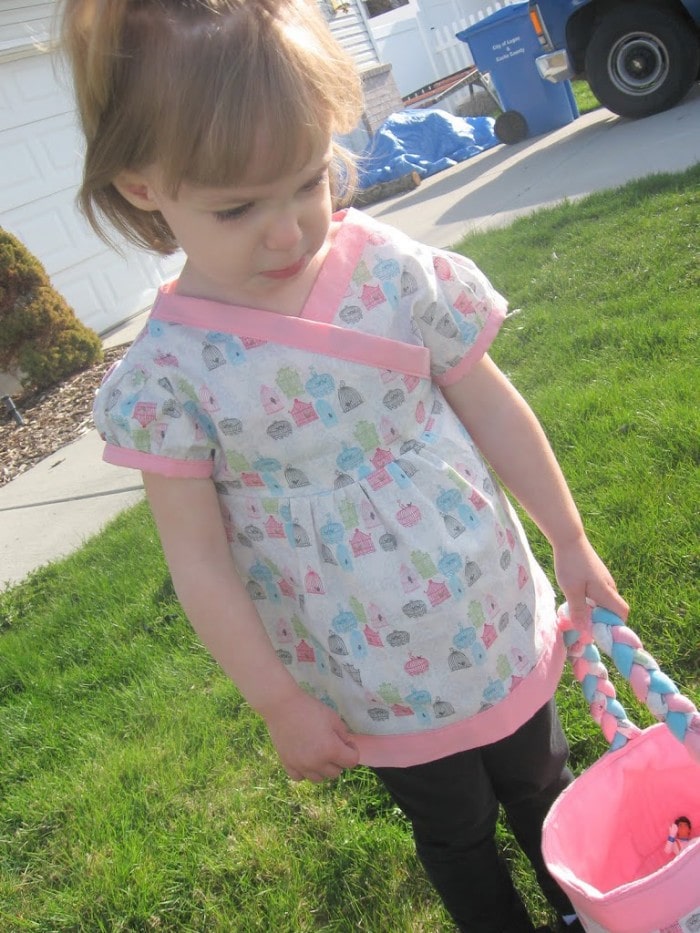

 Any way, on to the way overdue tutorial.
For my pattern, I basically sized it off of other tops and patterns that fit my girls, then added 1/2 inch around for seam allowances. I usually sew using 1/4 inch seam allowance, just because it reduces bulk. It doesn’t allow for much altering, so if you are not sure about fit, use 1/2 inch seam allowances.
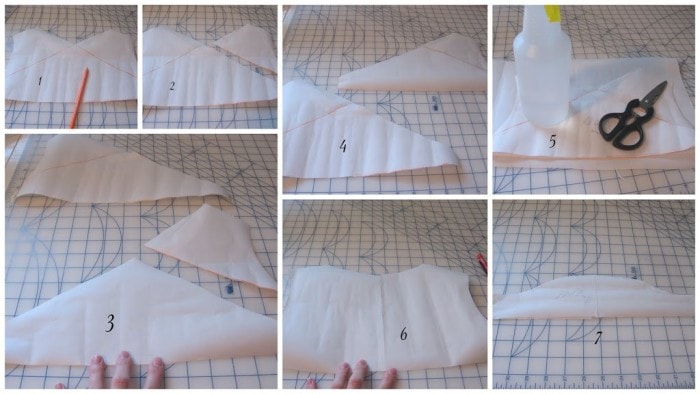 Follow the steps that coincide with the pictures above.
 1. I made the pattern to be a high neck V shape. I then drew continuous lines on each side from the V point all the way to mid way on the side seam.
2. To make the 2 needed pattern pieces for the top front, I cut the top piece off at my markings.
3. Then traced and taped another lower piece onto that.
4. I ended up with the two pieces. Then it dawned on me, I could have just flipped it around because they are symmetrical. Duh.
5. To make the bodice back piece, I traced exactly the outline on my front piece, but with a rounded neck edge. The bottle and scissors are my paper weights, in case you were wondering.
6. I found the mid-line on the bodice back and cut down (or just mark on your pattern a cut line) a good 5 or 6 inches. But not all the way.
7. The sleeve I traced from another basic sleeve pattern, but added some length so I could gather it. After all this was done, I cut out my pattern pieces on the fabric.
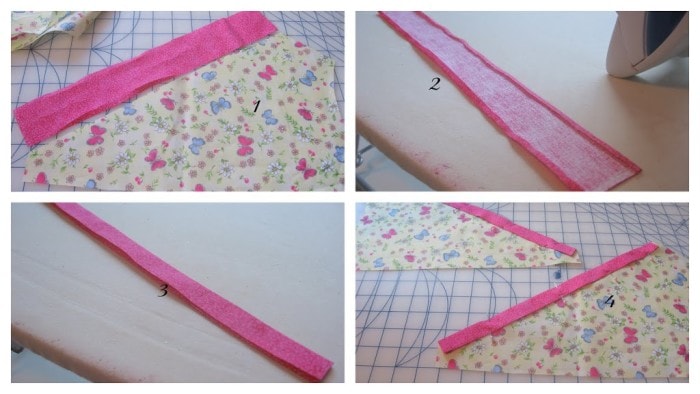 1. I cut 2 inch wide strips long enough for both sides of the angled neckline. I didn’t bother doing these on the bias because it is not a curve.
2. I folded down the long sides of each strip 1/4 inch and pressed.
3. Then I folded it in half and pressed.
4. Then I pinned in along the neck-edge, and stitched it on. Be sure to enclose the folds in your stitching.
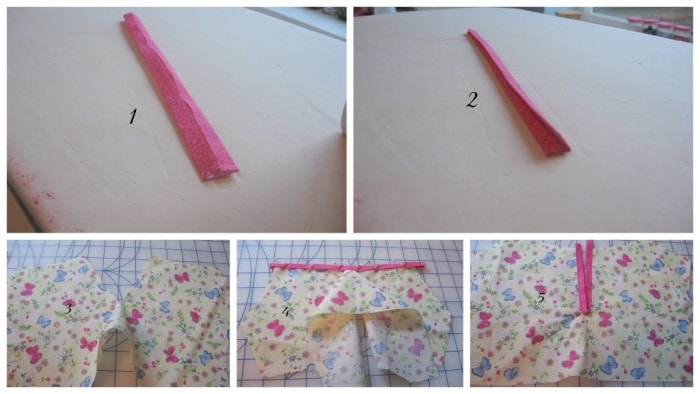 1. To do this, I cut a strip (not on bias) 1 1/2 inch wide and as long as the cut in the back was when it was opened up to form a straight line. Basically, however long I cut it, times 2. I pressed it in the center, then folded the long ends in to meet the center line, and pressed again.
2. Then I folded it back on that center line and pressed again.
3. I opened up the back cut,
4. and pinned and stitched on the band I just created.
5. You may be concerned this will cause a gather in the back, but because in is such a small strip, it is possible to not let that happen. Just be sure to keep it nice and straight as you are sewing it on. When you are done stitching, you can un-straighten it and press it good and it lays nice and flat creating a placket.
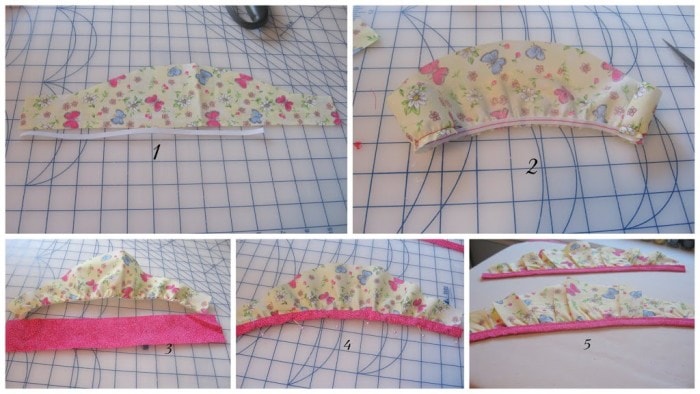
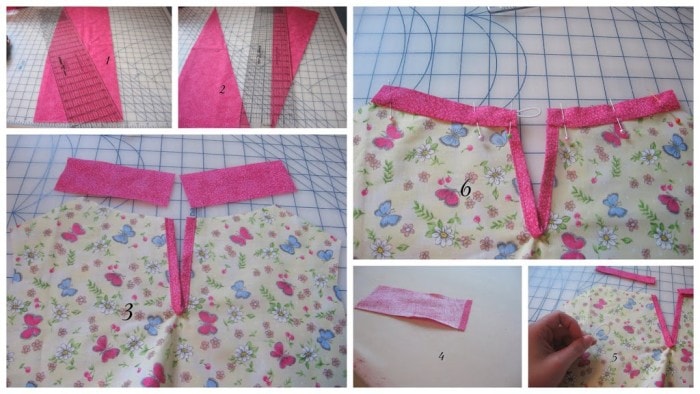 1. The back neck-edge is a curve so you do need to cut a bias strip. Lay out your fabric and cut on the angle.
2. Cut a strip of bias 2 inches wide,
3. and as long as you need to cover the back neck-edge, plus 1 1/2 inches.
4. Then I pressed 1 end 1/4 inch. This isn’t pictured but I also pressed the ends into the center, just like I did for the front neck-edge. You want it to measure the same width as the front bodice contrasting pieces.
5. Then I used some narrow elastic (you could also make a fabric tube for this).
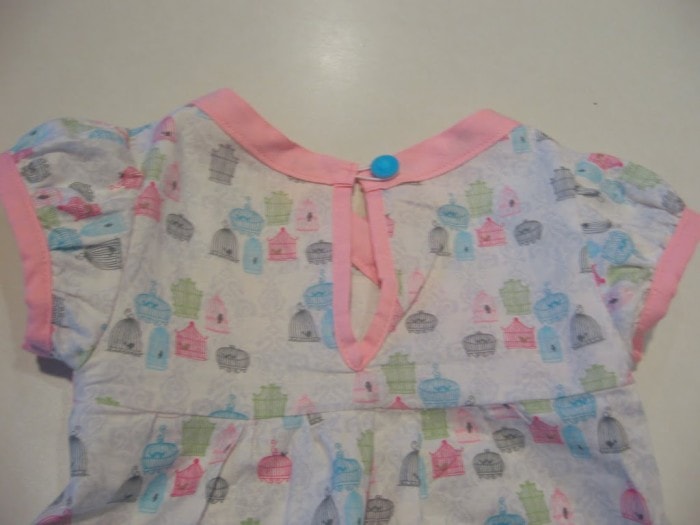
6. I pinned the contrast onto the neck-edge and slipped the elastic loop onto the end. Top-stitch all of this in place. Sew a button onto the other side for the closure, like pictured below.
 1. I used 1/4 wide elastic and cut it about 3/4ths the length of the bottom of the sleeve. (Fit it to your child’s arm.
2. I sewed the elastic on the wrong side of the fabric, stretching as I went to fit the whole length.
3. I used bias cuts for the sleeves so it would give a little with the stretch. I cut it to measure the length of the bottom of the sleeve. I pressed the middle fold and pressed the ends up to the middle fold just like I did for the placket piece. (There really is no method to this folding madness. I realize it is different for each strip but I just did it as I thought it would look good).
4. I pinned the strip in place.
5. Then stitched it on, and pressed to help it lay and gather better.
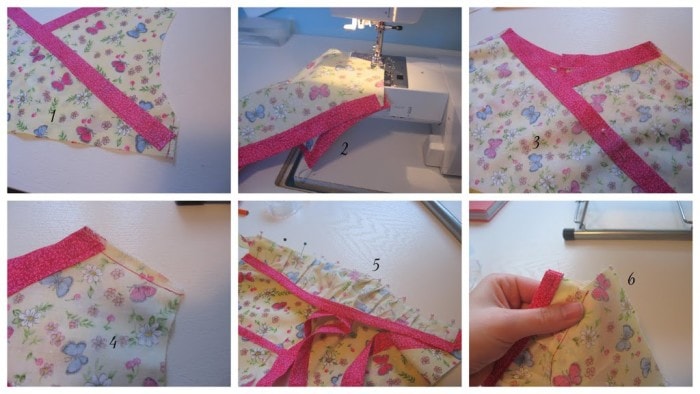 1. I put the two front pieces together and basted them at the side seams to help it all stay together while sewing.
2. I stitched the front and back pieces together at the shoulder seams, wrong sides together.
3. Then I serged the seam, but you could do a zig zag.
4. And then I repeated this photo while making the collage, so that means one less step for you.
5. I gathered the top edge of my sleeve and pinned it to fit the armhole. Then I stitched it in place.
6. This is a picture of where the bottom of the sleeve meets the side seams. I did a continuous stitch on the whole thing and then serged the edges.
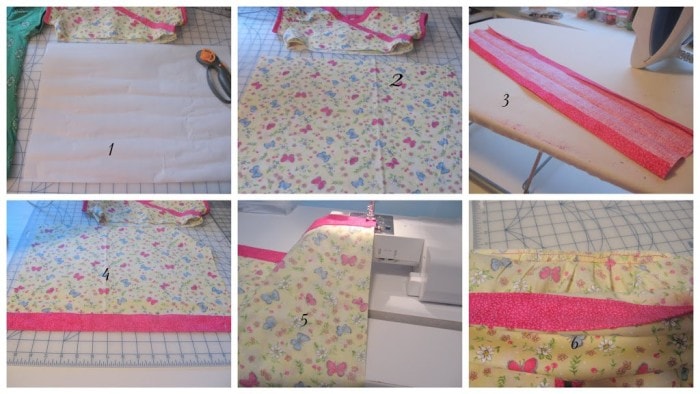 1. Using the length of another shirt as a guide I cut a pattern piece and added about 6 inches in the width compared to my bodice top, to allow for gathering.
2. I cut 2 pieces of this pattern from my fabric.
3. For the bottom contrasting band I cut the needed length of the width of each bottom piece (boy isn’t that confusing) and 4 inches wide. I pressed the ends in 1/2 inch and pressed the center line.
4. I pinned and stitched the band on both front and back bottom bodice pieces.
5. Then I sewed my side seams together (WST), and serged.
6. Finally, I gathered the waistline of the bottom bodice pieces to fit the top, and stitched and serged together.
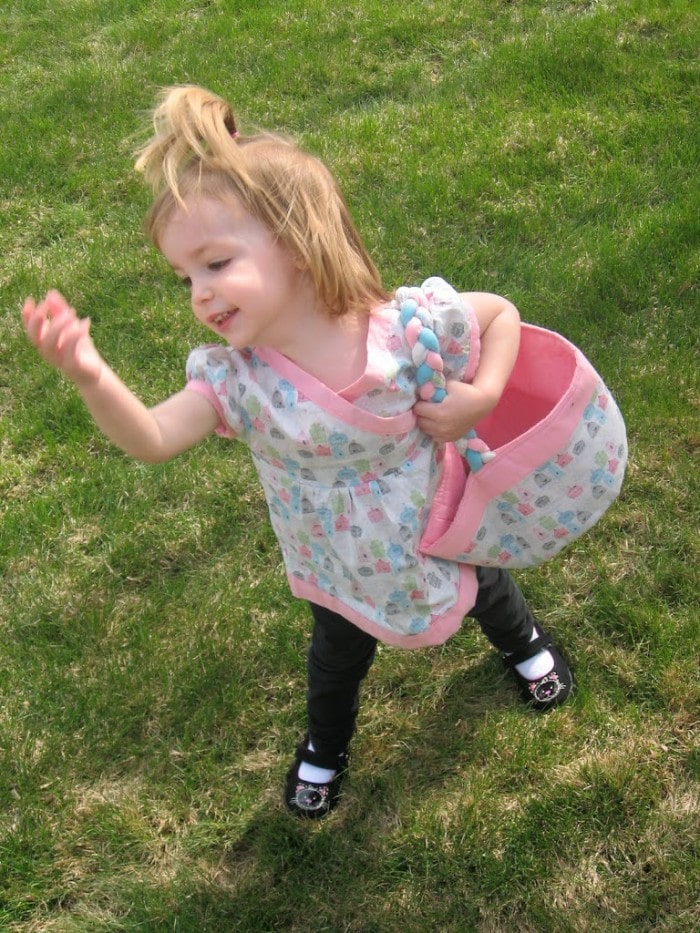
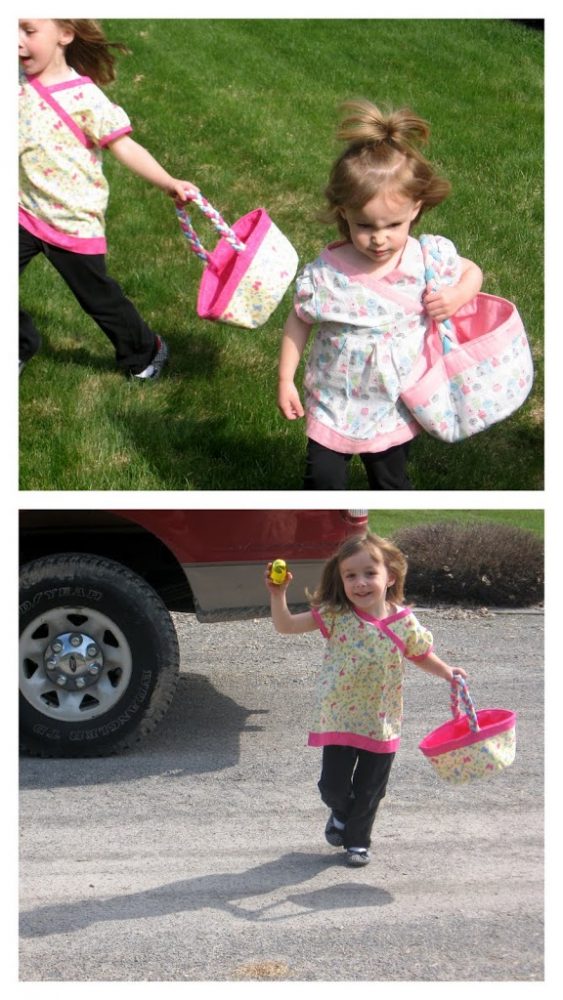
You can also imagine me doing the same pose of relief for getting this tutorial off my mind and into a post.
Enjoy!


SO pretty! Great tutorial!! Her expressions are priceless ;)<br /><br />Thanks for sharing!!<br /><br />My link up ;)<br />http://jandmseyecandy.blogspot.com/2011/06/super-mario-bros-themed-party.html
Just a quick note to let you know that a link to this post will be placed on <a href="http://www.craftcrave.net" rel="nofollow">CraftCrave</a> today [26 May 02:15am GMT]. Thanks, Maria
Super cute! Thanks for sharing! 🙂
Adorable! I absolutely LOVE that bird cage fabric.
I will have to give this a try!