
This post may contain affiliate links, which means I get a small percentage of the sale at no extra cost to you. I only recommend items I love and have had a positive experience with. Thank you!
 Have you ever woke up and realized you had a dream about an old box in a spider web infested corner of your garage? Well I did. I know, a little weird. After the dream I knew that old wooden box had potential.
A year or more ago we used to have milk delivered to us from a local dairy. I loved it until gas prices went sky high and it wasn’t worth the cost to have them deliver. The wooden box I had a dream about was the box they would put your milk in on your front porch. After we stopped getting the milk, the box went into the garage.
So here is the before pictures.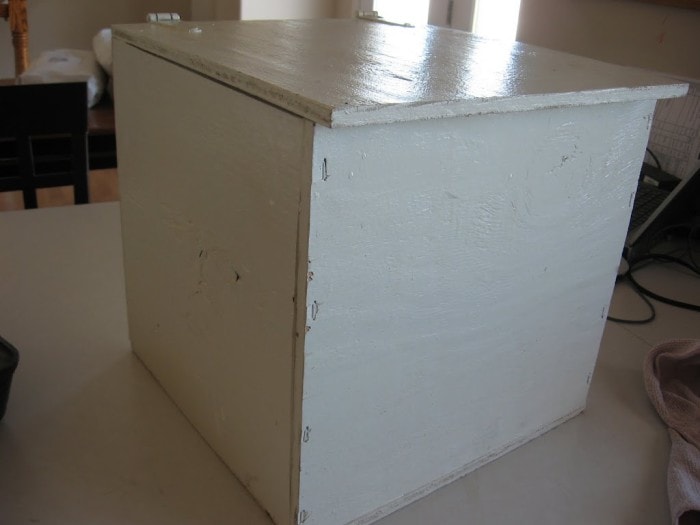 You can’t quite get a good enough picture of all the spider webs. I still can’t believe I pulled it out of where I did.
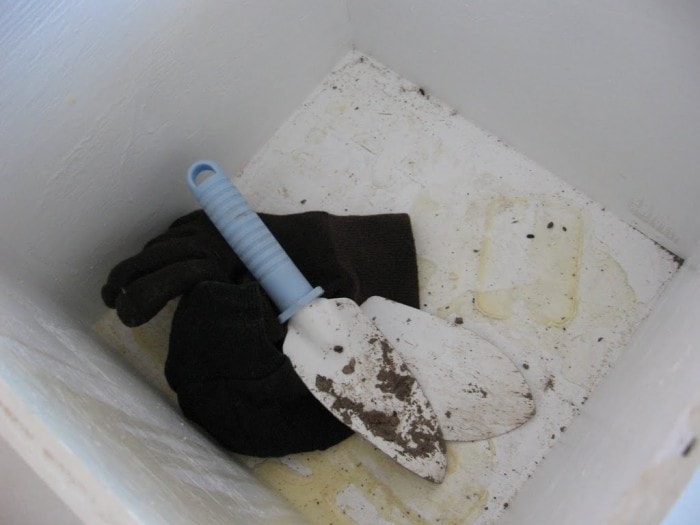 And I discovered where my daughter put the shovel and gloves she was playing with last year. The crusty yellow stuff is 2 year old spilled milk. Ya, that wasn’t so fun to clean off.
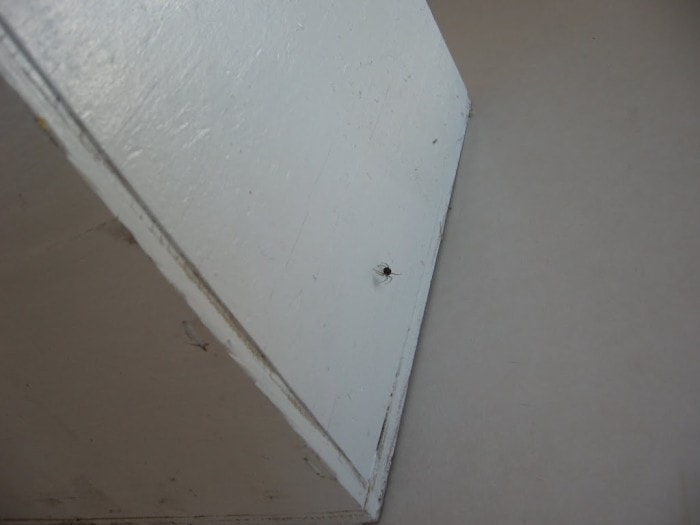
And it came equipped with a soon-to-be squished spider. I shiver every time I think I carried that in the house. I swore then and there if I saw another spider in the house that day, me and that box were through. (Yes I have major arachnophobia).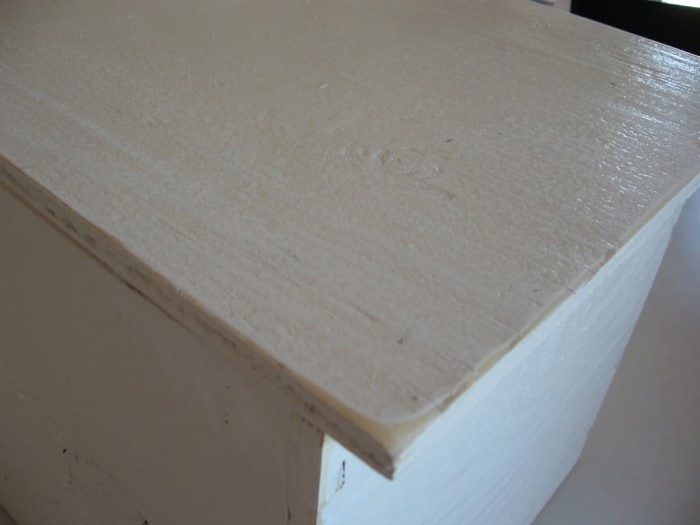 First I sanded the edges really good and all around. Hard to admit, but this was the first time I took out my husbands power tools. It was a rush. I think I’ve opened up a can of worms.
 Then I copied off the font I wanted, and hand drew the symbol I wanted. I am not an artist, as you can see. The paper isn’t blue, that is just my blue walls reflecting on it.
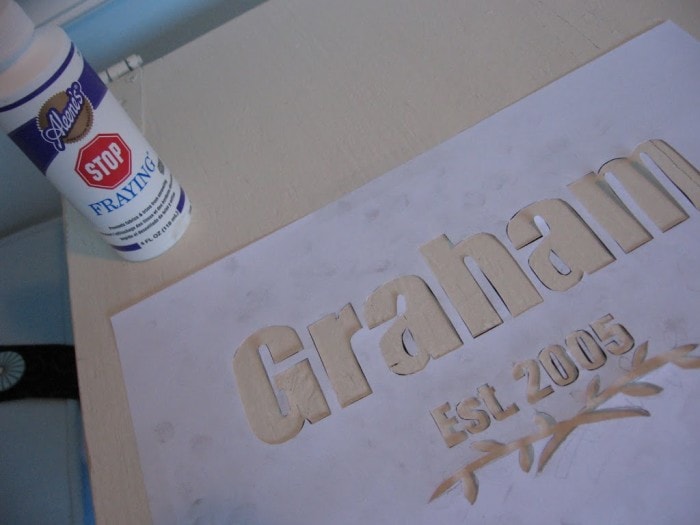
After cutting out the letters with an exact-o knife I taped it where I wanted it. For the little pieces in the a’s and 0’s I stuck them on with fray check. It’s a glue, but I knew I would be able to scrape it off.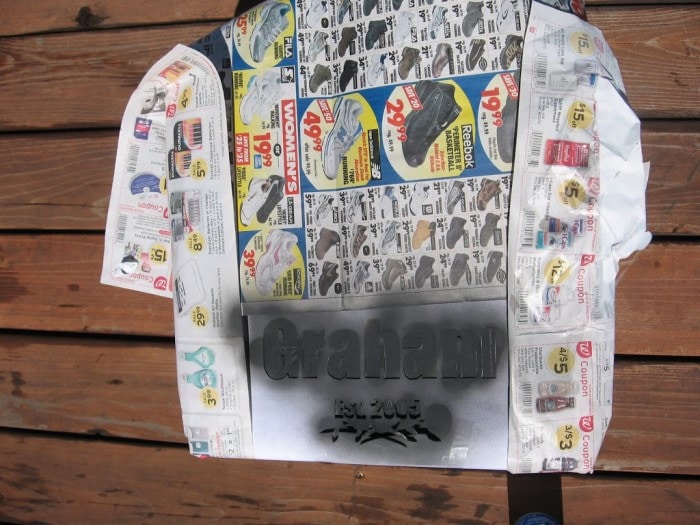 Then I took it outside and spray painted it. Now this is where I will suggest this is a bad idea. The spray paint spread more than I wanted it to. I found with the rest of it, it looks a lot better when I dabbed on craft paint with a brush. Lesson learned. And did you know you can kind of iron on freezer paper to wood? Don’t use very high heat, but the paper will temporarily stick there. It doesn’t work as good as it does on fabric, but it helps with the stenciling process.
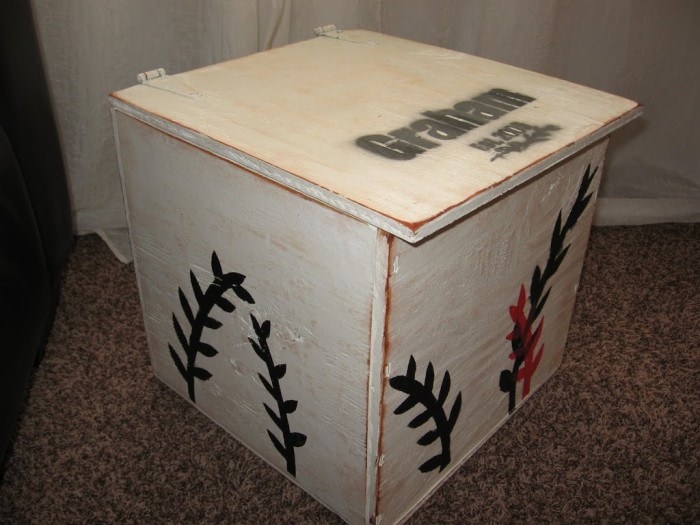
After this I got to anxious to get it done so I forgot to get good pictures. But I just hand drew and cut out stencils of weed like looking things for the sides. Then dabbed on craft paint.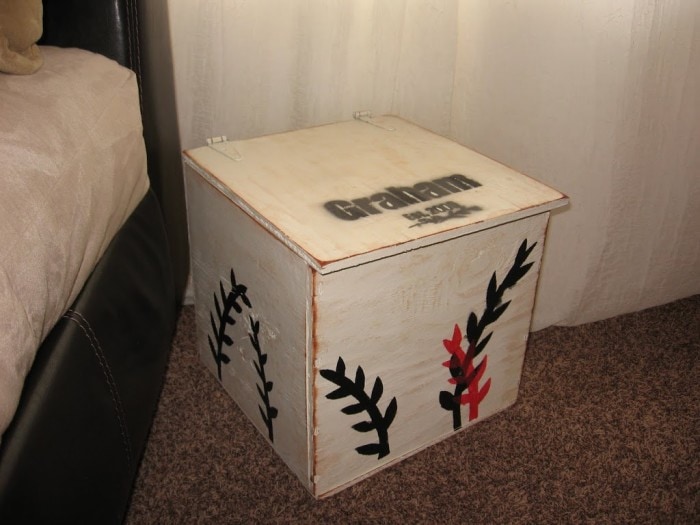 To distress it, I used a natural wood stain around the corners and edges. When that dried I used a distressed ink pad and wiped down the corners and edges even more, and then lightly all around.
 For the inside I mod podged some paper in to add a splash of color.
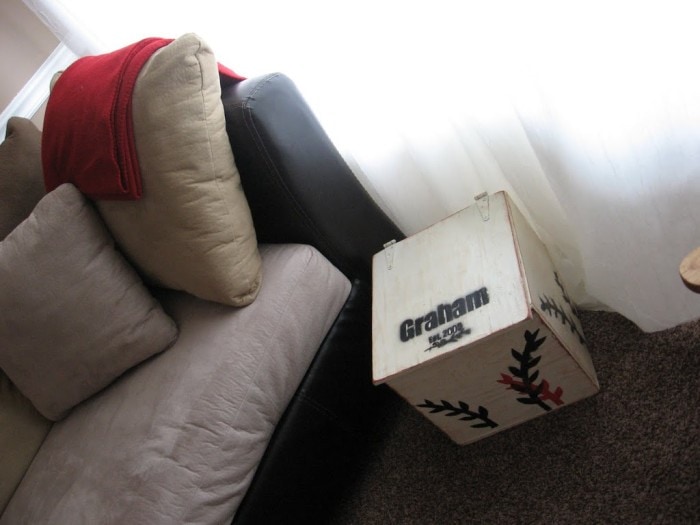
And there she sits in my living room. I’ve yet to decide if it will serve as a magazine holder, toy box, or a place for library books. Didn’t turn out quite like I had dreamed, but close enough. Now that this box has consumed my day, it’s time to figure out how a tornado hit my house, why nothing is done on my to-do list, and why my children are begging for my attention.


I love the way this turned out. I've been wanting to try making my own stencil.. I think I may have to try it now!
Very cute. I love how it turned out. And I am the same way with spiders. Yuck! Thanks for sharing at 'Look at me, I'm SO Crafty!' at Fun to Craft!!
Great redo! Thanks so much for linking to Favorite Things Friday!
Great job. I like the moment of inspiration – just before I fully wake up or just before I drop to sleep are when some of my best ideas come…<br /><br />I like that it can serve as storage – I always need more of that
Great redo! I love how you personalized it! <br /><br />Thanks for linking up to Make it Yours Day!
OK…first of all I'm jealous that you got fresh milk delivered to your house…and second of all…the crate is cute! Looks good!
Great idea! It looks so cute and a super re-purpose.
you are brave for tackling that 2 year old milk! blech! so glad you stopped by the cape on the corner, and for your kind words!
I kinda like the blurred look of the name. VERY cute idea. <br />Feel free to check out http://www.learnandgopollyco.blogspot.com when you get a chance. Looks like we have similar styles!
oh, i would love to have milk delivered–how very fabulous! 🙂
I think it turned out fabulous! I have had dreams about doing new projects too. It can't be helped.<br />Happy you found my blog…of to check out yours out.
Love the box! And thanks for your comment on 3sillymonkees :o)
This turned out so cute! I love what you have done with it!<br /><br />~Morgan<br /><br /><a href="http://meetvirginiaandroo.blogspot.com/" rel="nofollow">Meet Virginia!</a> <br /><a href="http://meetvirginiaandroo.blogspot.com/" rel="nofollow">Meet Virginia!</a><br /><a href="http://meetvirginiaandroo.blogspot.com/" rel="nofollow">Meet Virginia!</a>
How cute!!!<br /><br />m ^..^
Hello! I'm your new follower through Make it your Day! Great site! Visit me at http://www.rockindeals4you.com/?p=1398 and sign up for my giveaway!