This post may contain affiliate links, which means I get a small percentage of the sale at no extra cost to you. I only recommend items I love and have had a positive experience with. Thank you!
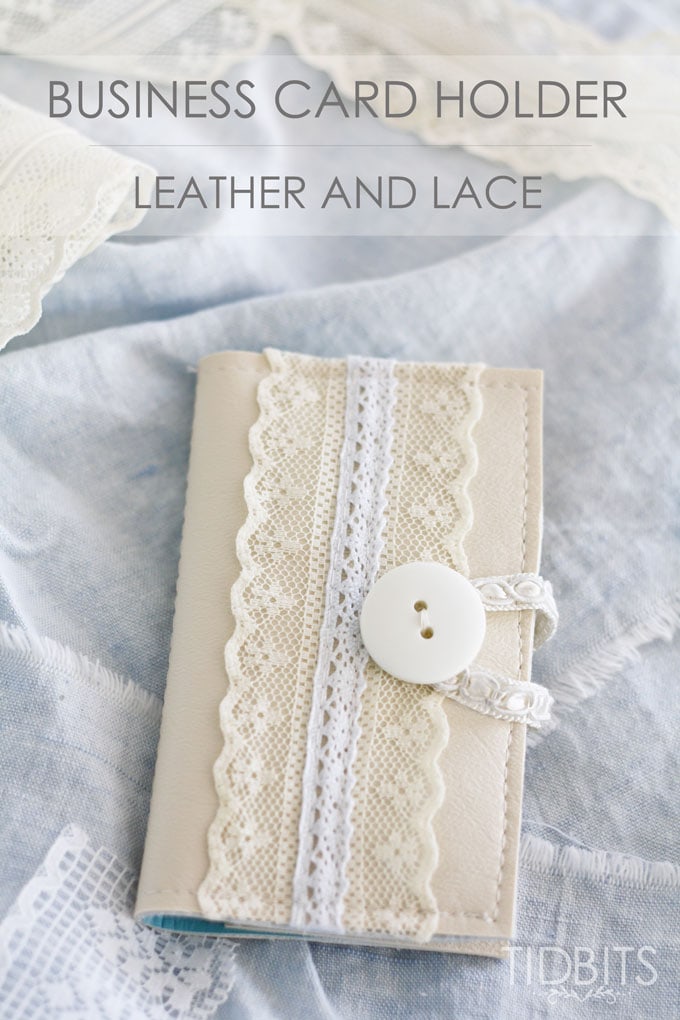
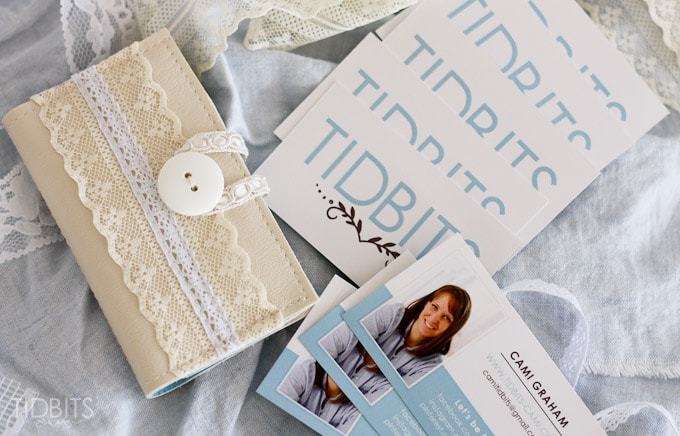
There is nothing that makes you feel more professional, than handing over a business card matched with the words – “here’s my card”.
I may sit in yoga pants all day wiping up dirty little faces, changing diapers, and scrubbing toilets – but one look at that little card with my blog name on it, and I feel like the CEO of something super special. Something I’ve begun that I can be proud of.
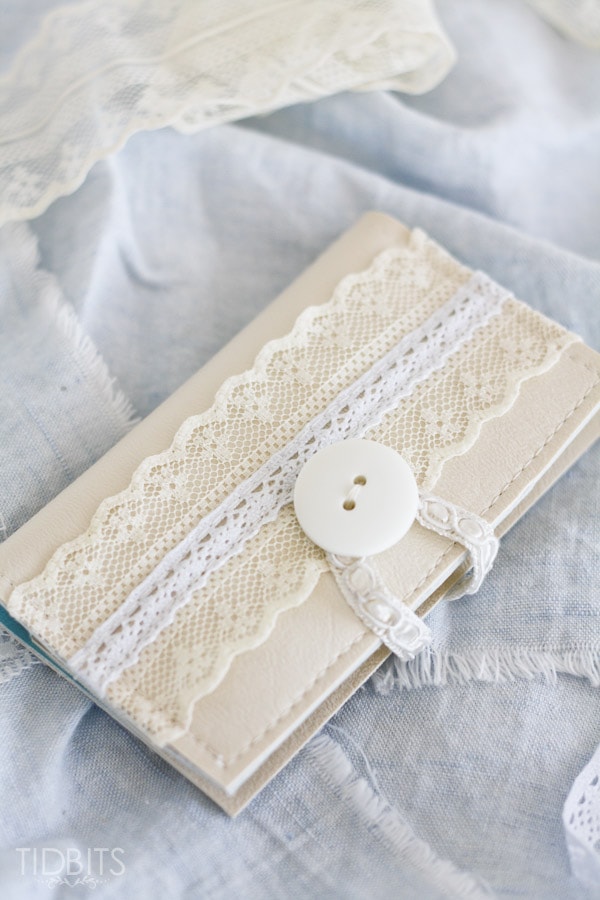
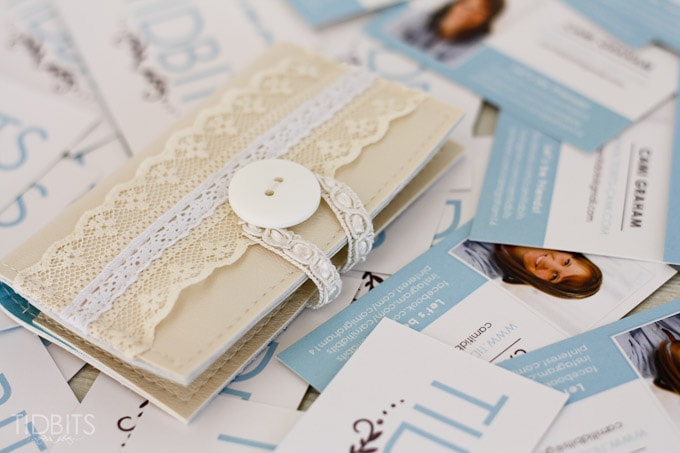
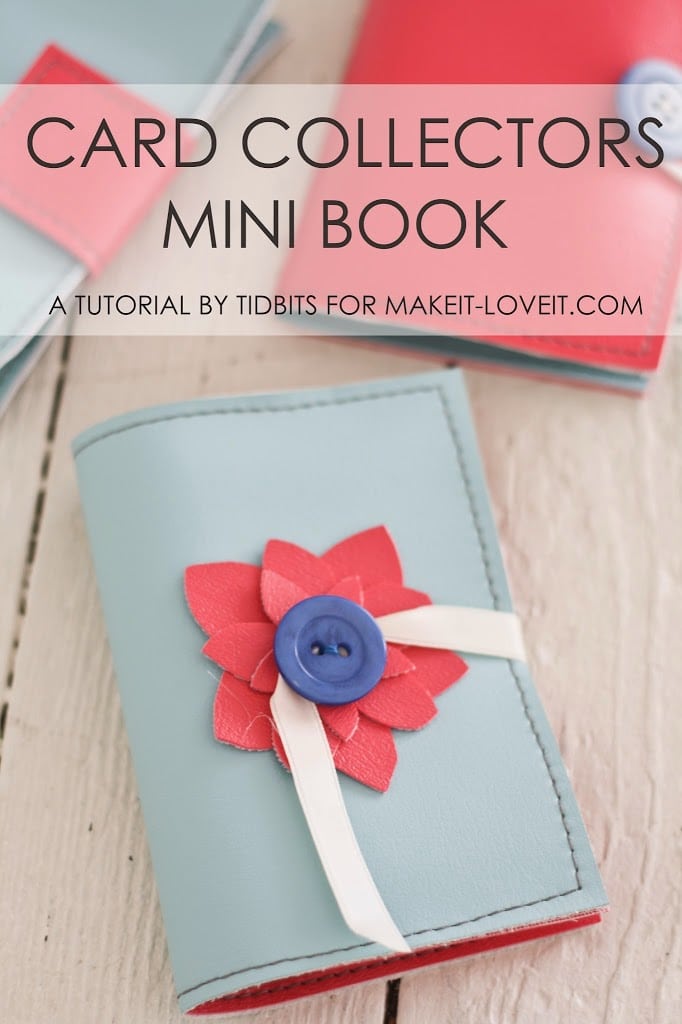
But in all reality, a card is just a card. It’s the business card holder that you whip out, which will make you unforgettable. With a little bit of leather and a little bit of lace (and this quick little tutorial), all the CEO’s in the world won’t hold a candle to this cuteness.
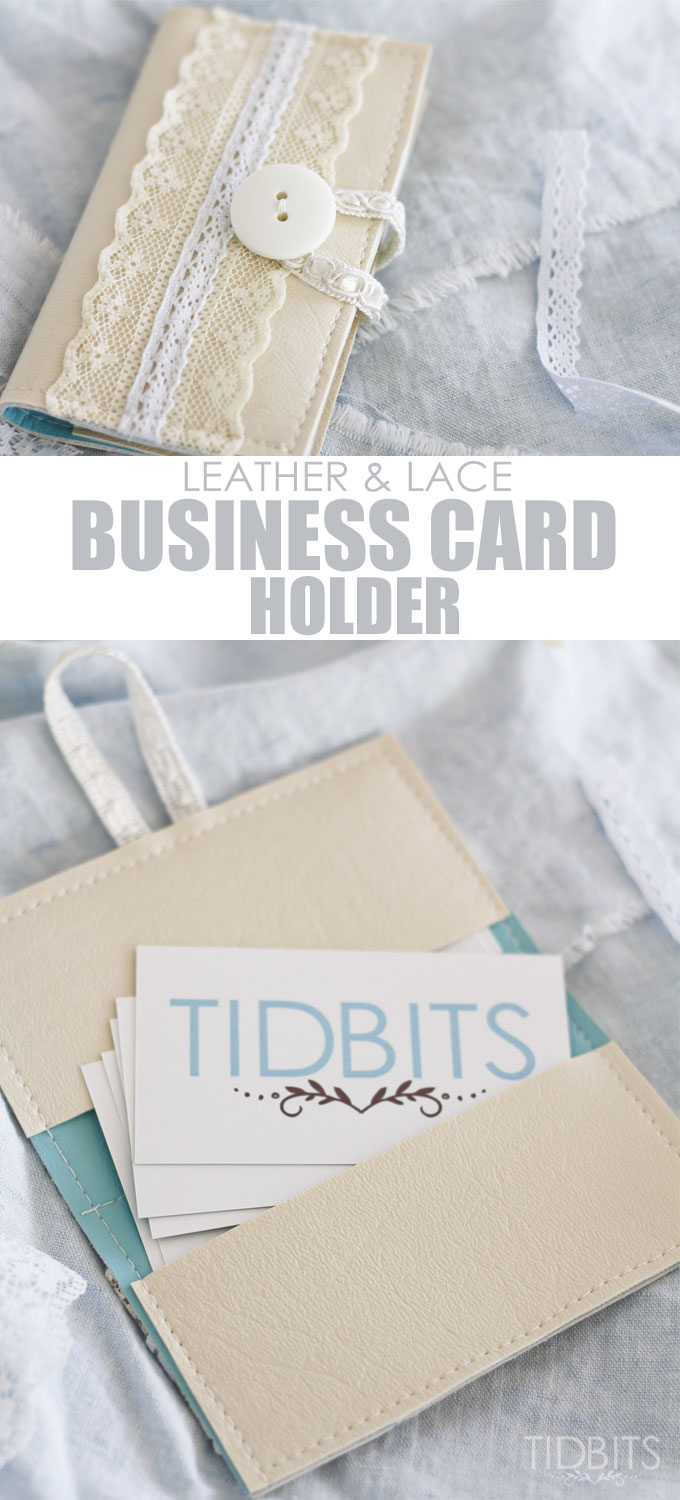
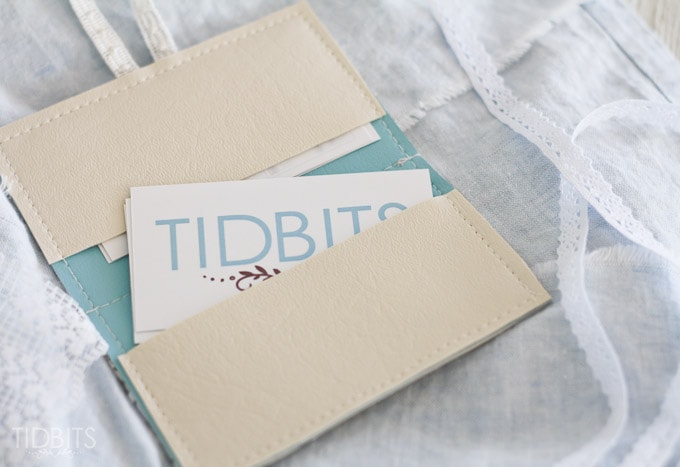
It’s got a spot for out-going cards, and a spot for in-going cards.
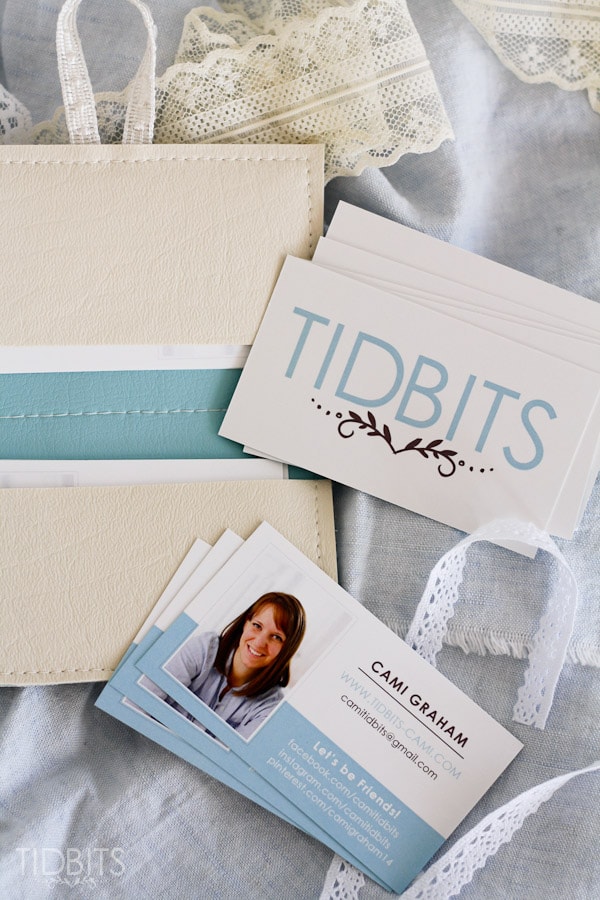
And they are all tucked in there so nicely, not a single corner will be damaged.
I was lucky enough to attend the Build Your Blog 2015 Conference recently, and this holder came in so handy to keep all my cards in one place and to hand out.
You can make this business card holder with minimal supplies, and in just a few very simple steps.
Let me show you how!
Materials Needed:
- Leather
- Faux leather or vinyl will work just as well. The cream colored material is vinyl, and the blue interior is faux leather on my business card holder. (measurements below)
- Lace
- I used a strip of 2 different lace styles, the cream colored and the narrow white strip. You will need to have a strip of at least 5 1/2 inches long, of whatever lace you will be using.
- Button
- Ribbon/elastic/lace
- This is for the closure. Be creative and choose anything you like to loop around the button. I recommend having 4-5 inches in length for your closure attachment.
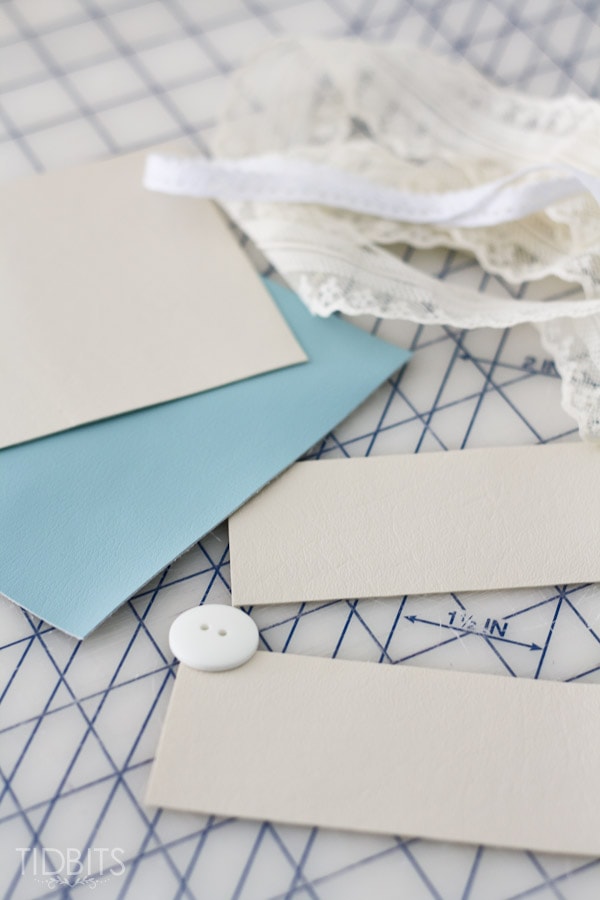
Cut the following measurements from your leather/vinyl:
- For the body (the front and back panels)
- cut 2 rectangles measuring 5 1/2 x 4 1/2 (in inches).
- For the inside pockets
- cut 2 rectangles measuring 2 x 4 1/2 (in inches).
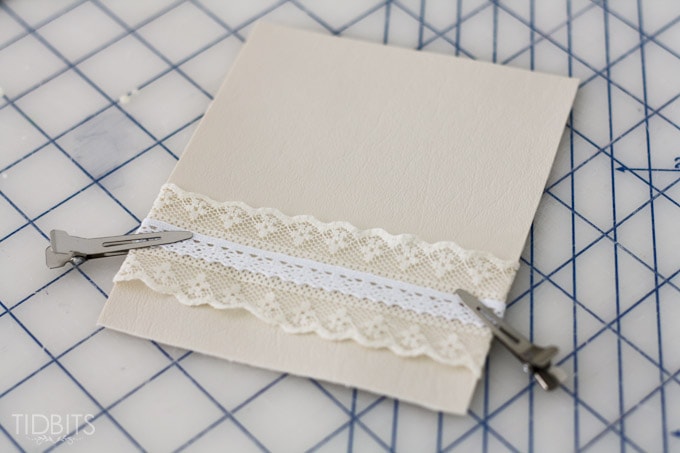
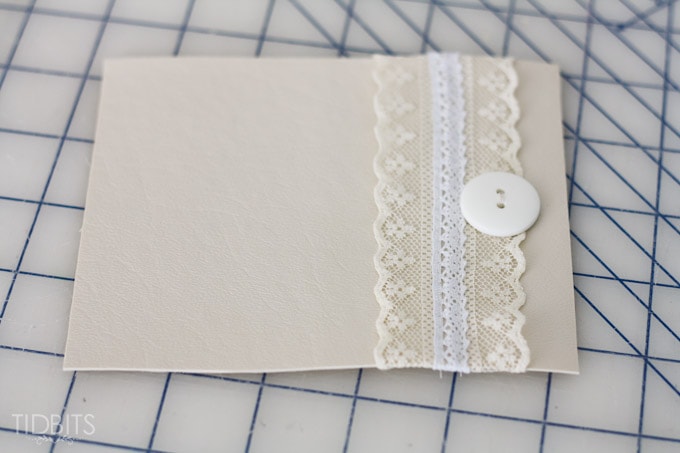
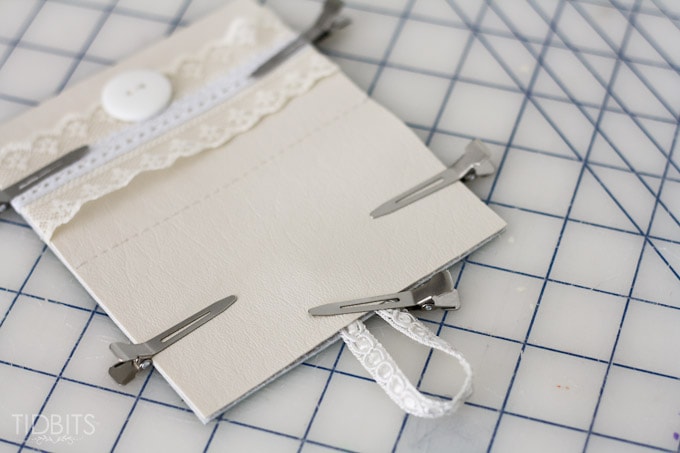
Begin by accessorizing the front cover panel with the lace (or whatever you choose to make it cute). You’ll want to fold over the lace strip towards the inside of the front cover. Clip the lace in place where you want it.
*I love using these hair clips for sewing with leather, vinyl, or laminated cottons. You can buy them in bulk here, for a great price! You do not want to use pins as the fabric will not recover from the holes left.
Stitch the lace to the vinyl to securely attach it. Be sure to remove your clips before they get to the needle.
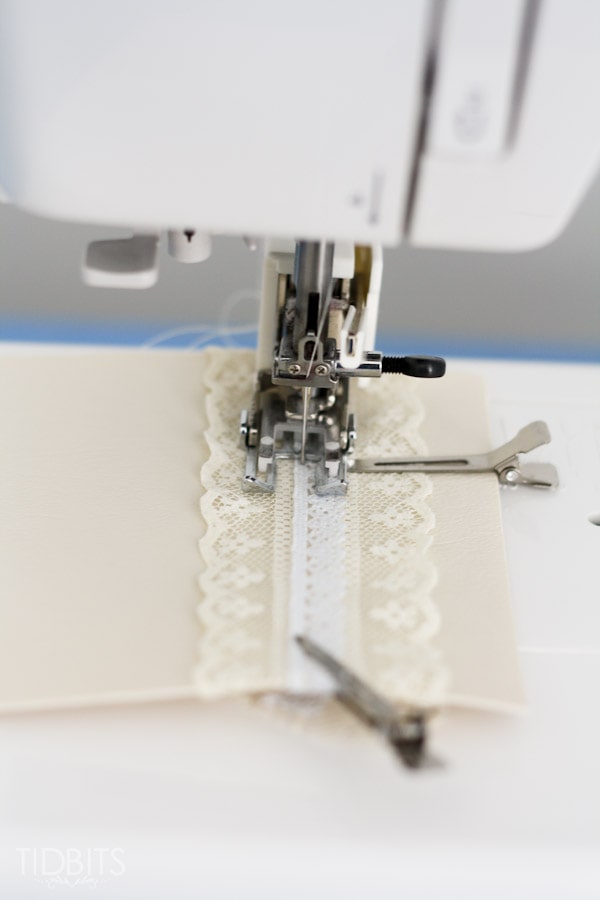
(I have found a walking foot attachment to be very helpful when sewing with slippery or sticky fabrics).
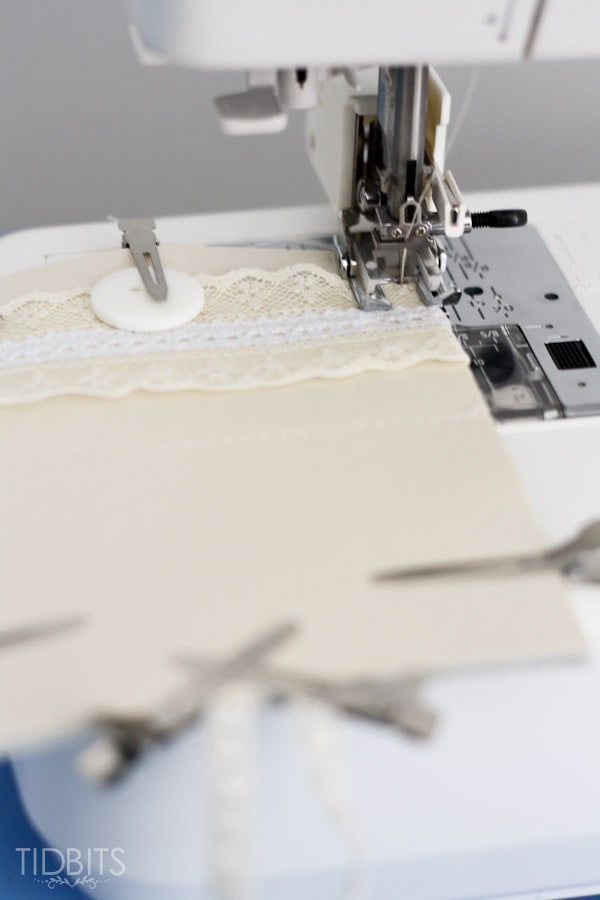
Hand stitch a button to the front panel. Be sure to leave enough room from the edge, so the machine’s foot can stitch around the edges without the button getting in the way.
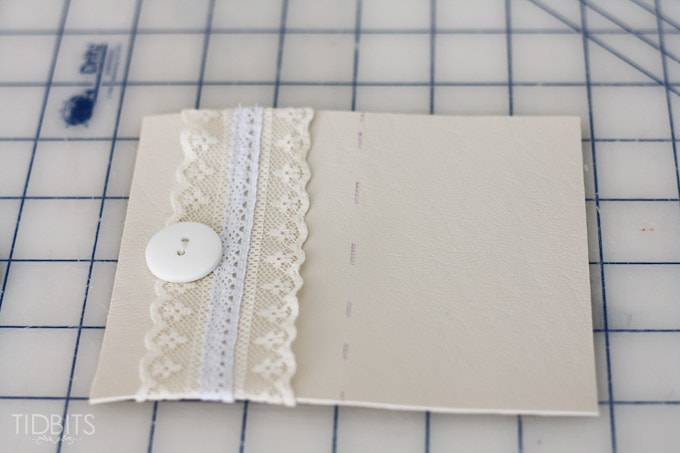
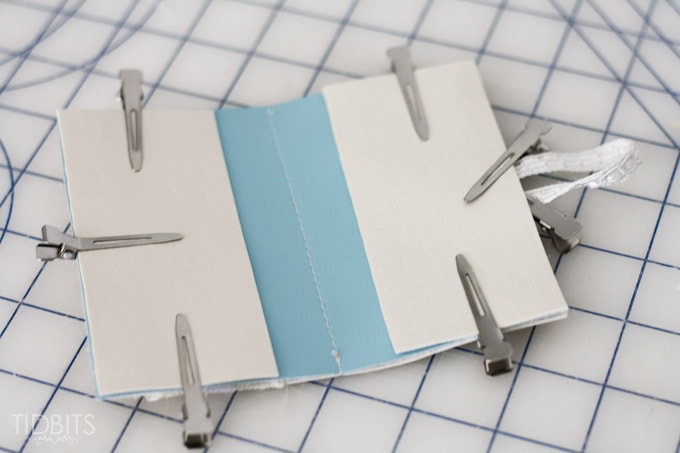
Fold the front cover in half, along the 5 1/2 inch edge to mark the midpoint where the fold will be.
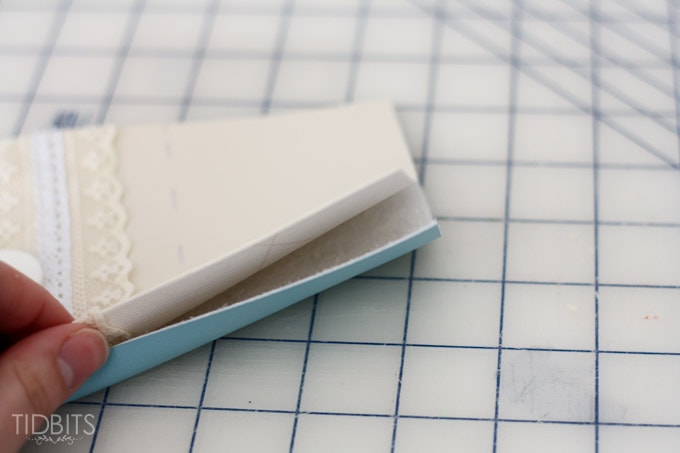
Now stack the inside panel evenly with the front panel, wrong sides together.
Clip them securely together and stitch them together at the previously marked center line.
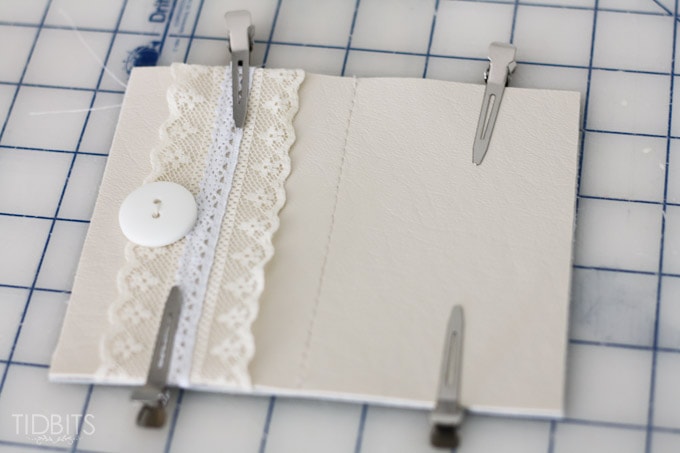
Fold your ribbon closure looped in half, and insert between the layers opposite from the button. Secure in place with clips, as best as you can.
Take the 2 inside pockets you previously cut, and line them up evenly with the edges of the inside panel. Clip in place. Yes, you should have a lot of clips by now.
With the front panel of the card holder facing up, you are ready to stitch all these layers together. The top stitches of the machine tend to look better than the bobbin stitches, so you’ll want to be sure to have the front of your holder facing up. Start anywhere, and put your needle down into the fabric, 1/8th of an inch away from the edge. Increase your stitch length to 3 or 3 1/2. Top stitch around the entire thing, removing your clips as you come to them.
Trim any edges if needed.
Your business card holder is complete!!
How easy was that!
I would love to hear if you give it a try! Can you imagine all the creative possibilities with this simple design?!
*Special thanks to Key Lime Digital Designs for the design of my business card! She’s amazing!
**To see all link parties I love to attend, visit my link party page.
***This post may contain affiliate links, but you can rest assured that I always offer my true and honest opinion of all products and services.


This is so adorable!!! Oh, I require to get my stitching machine out of its box and sprinkle it off, because this is seriously adorable. Pinned!!
Thank you so much for the pictures and measurements! I look so hard for good and simple patterns I can use my leather with, but it’s surprisingly difficult to find patterns I think I can cut out easily. When I try this out, I’ll share a photo if it turns out well!
I would love to see a photo when you’ve got one made up! That always makes me smile. I am truly glad my tutorial could be of use to you and I hope you enjoy.
Great idea! Thanks for the tutorial!
Thank you very much! I do hope it is helpful.