This post may contain affiliate links, which means I get a small percentage of the sale at no extra cost to you. I only recommend items I love and have had a positive experience with. Thank you!
Progress always feels good, even if it is slow and steady progress. 😉
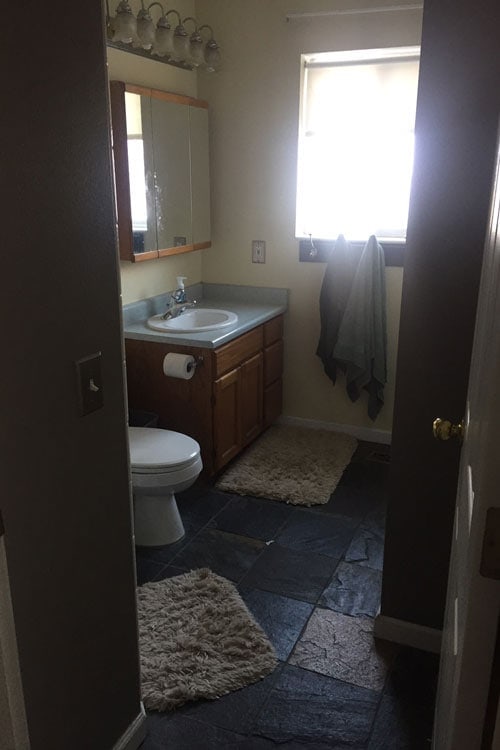
I’ve shown you our master bathroom before pictures as well as inspirational images I’m leaning on during this bathroom renovation. I’ve even shared a design board for products, design elements and DIY’s we plan to bring into this space.
Now I want to show you where we are currently at in the makeover and the steps we’ve taken to get here. This will include a detailed tutorial for the beautiful and budget friendly, DIY shiplap pine wood floors we’ve installed.
It’s going to be good!
Let’s first take a look at where the bathroom stands right now.

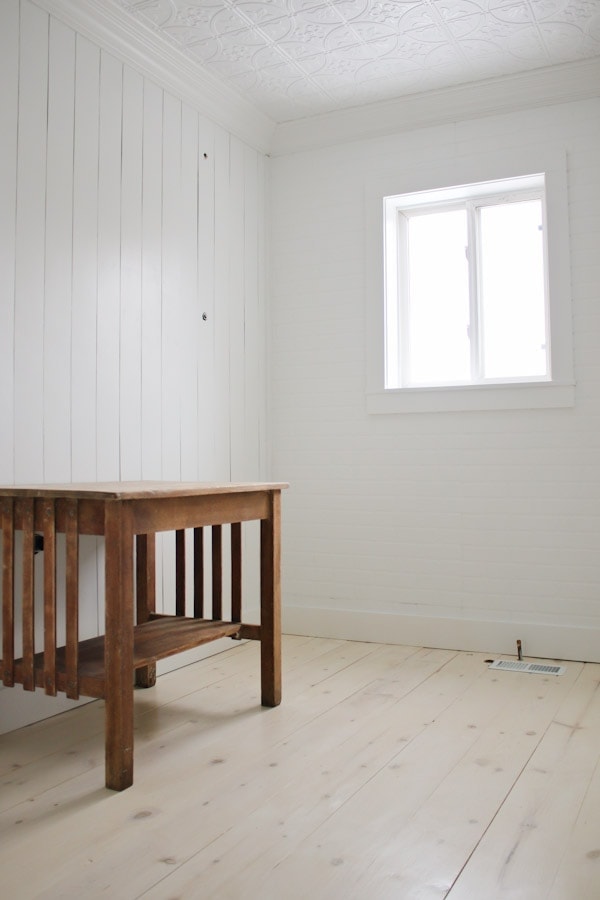
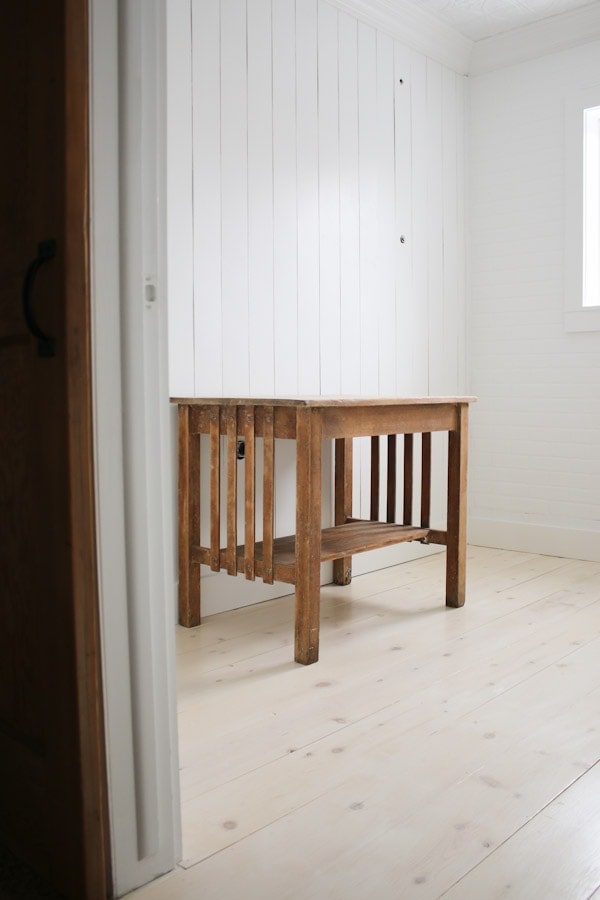
It’s a small space, but I hope you can get the idea.
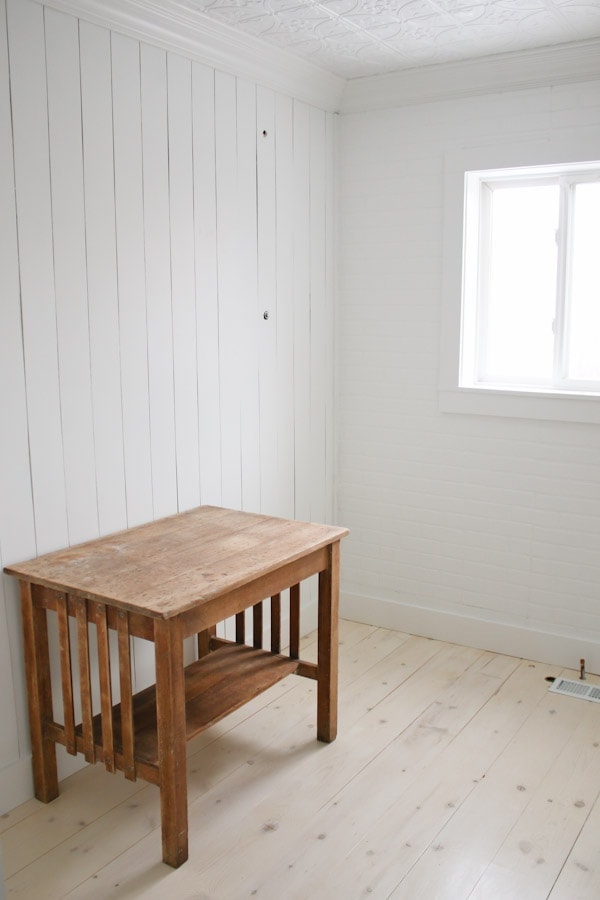
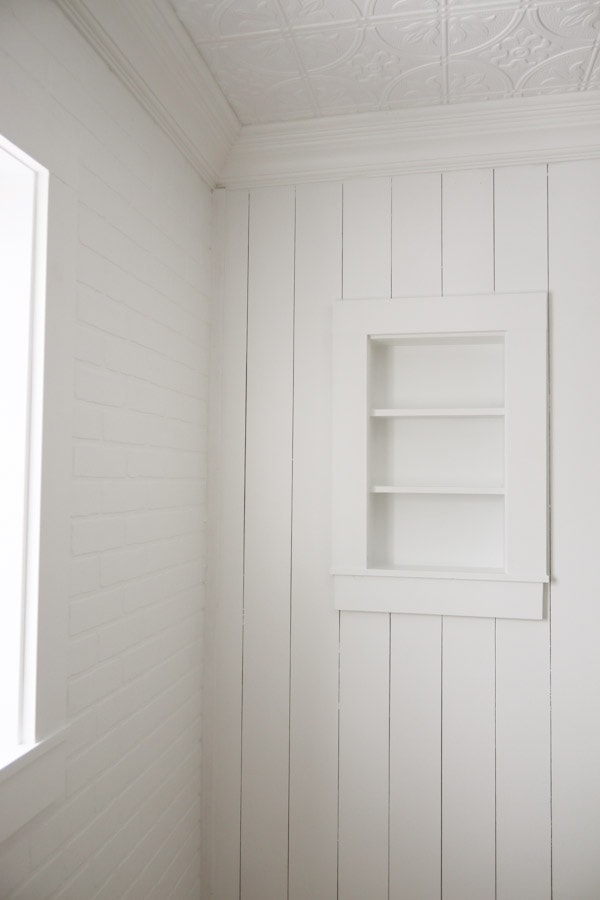
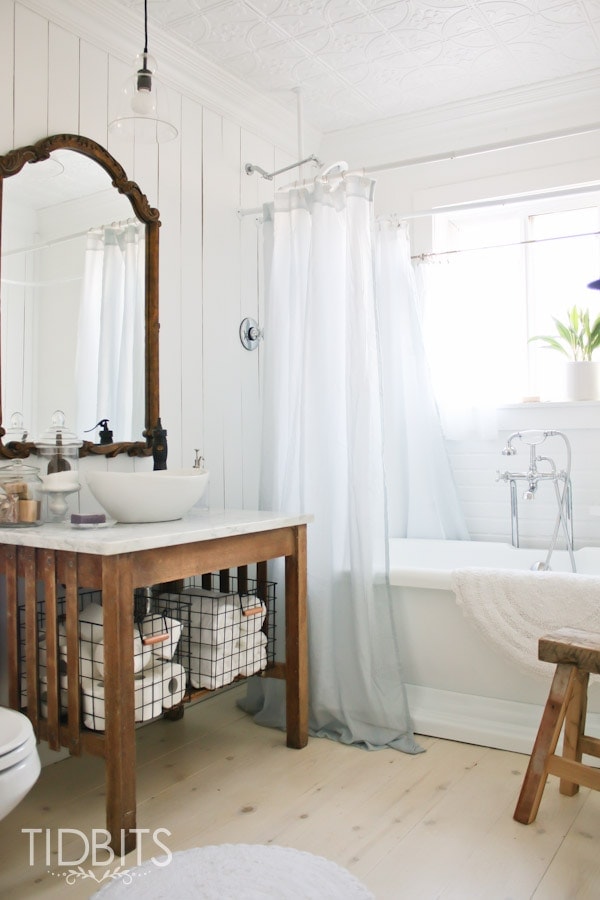
We’ve got the whitewashed shiplap pine flooring down (which steals my heart every time I look in there). Then you’ll notice the DIY faux shiplap walls (otherwise known as planks). On the ceiling we decided to install some faux ceiling tiles we ordered from Home Depot (which also make me giddy). And on the wall with the window, we installed some faux brick, also from Home Depot.
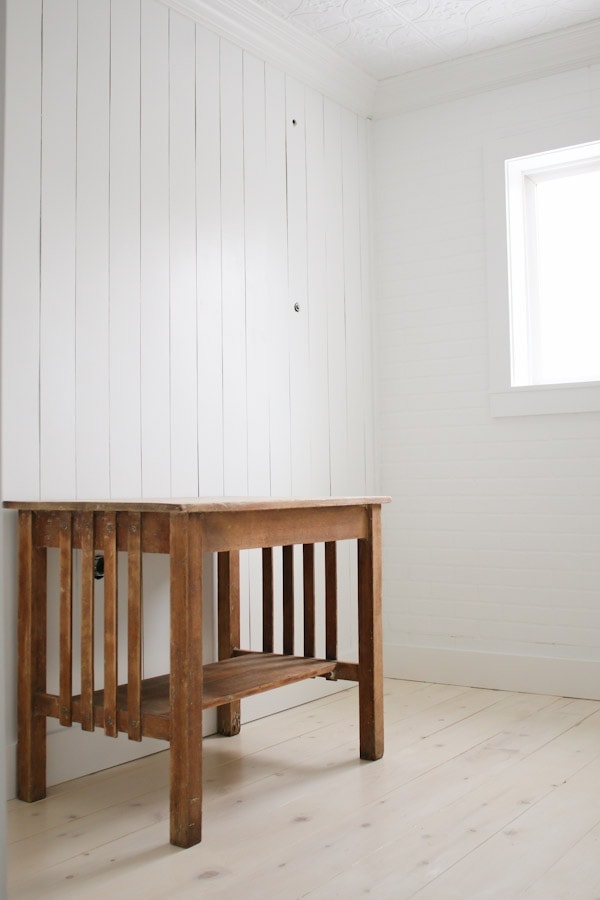
Then we painted the whole space in Super White paint, by Benjamin Moore. It is white and bright and some may call it boring. I, however, call it a lovely multi-textured blank canvas ready for it’s work of art. 😉
Don’t you see how anything you add to the room just pops?!!
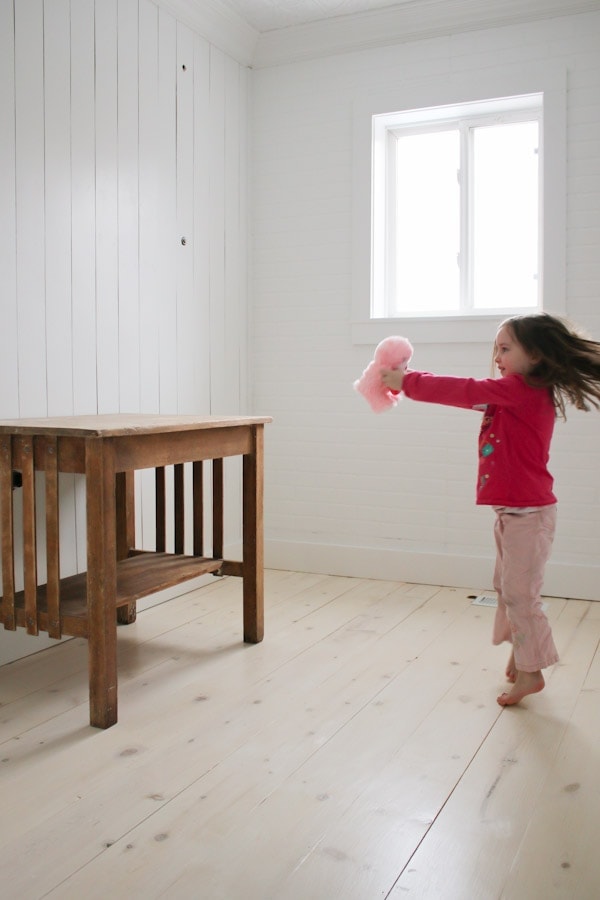
Or makes you spin and twirl?
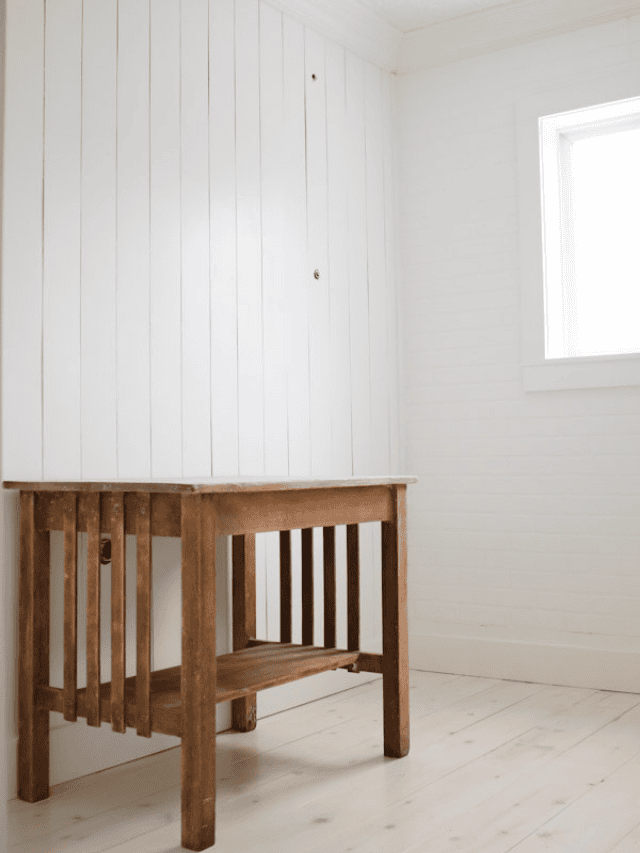
I’ve placed in the room what will be our vanity, to give you a better feel for the size of the room. I found this antique piece at an antique store and talked the guy down from $180.00 to $120.00. I was so excited about finally finding the most perfect piece, I probably still would have walked out with it at $180.00.
But we’ll keep that between you and me.
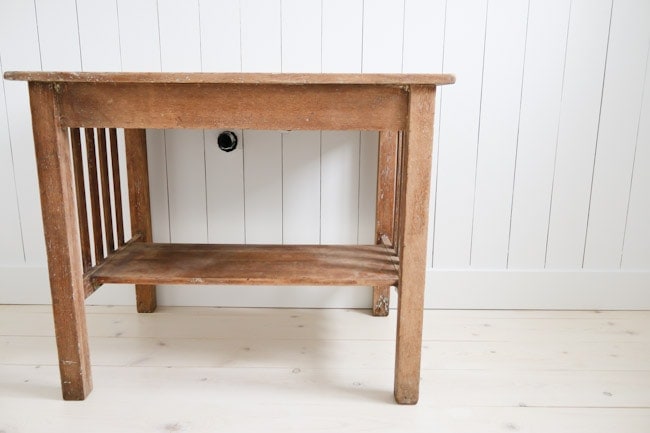
The plan is to actually take the top off (and use it for something else) and replace it with a discounted slab of marble. Then we will install our Joss and Main vessel sink on top of the vanity.
Now I am on the hunt for the perfect baskets to go under.
You may have noticed in my inspirational round-up, I’m pretty infatuated with the idea of a vintage piece, topped with marble and a vessel sink.
On one wall, my husband did some between-the-studs, built-in shelves which I can’t wait to accessorize.
And before I get into the tutorial for the pine wood floors, I’ll show you how we removed the space hogging swing door, and replaced it with a $30 door I found at an antique store.
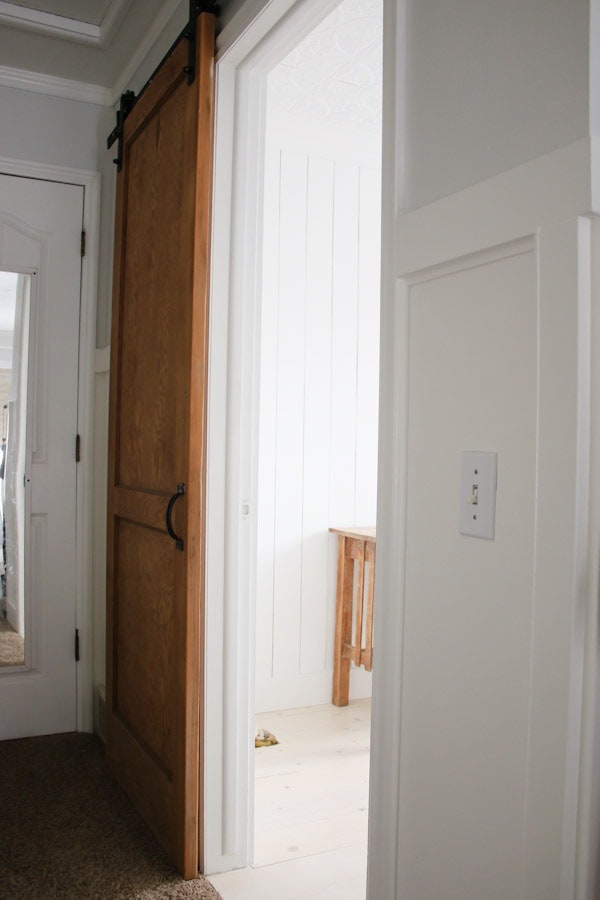
We sanded the door down to bare wood and placed the door on THIS roller track from Amazon. The hallway door opens in the way and hides that beauty, so we plan to swing the hinges around to the other side so it opens the other way.
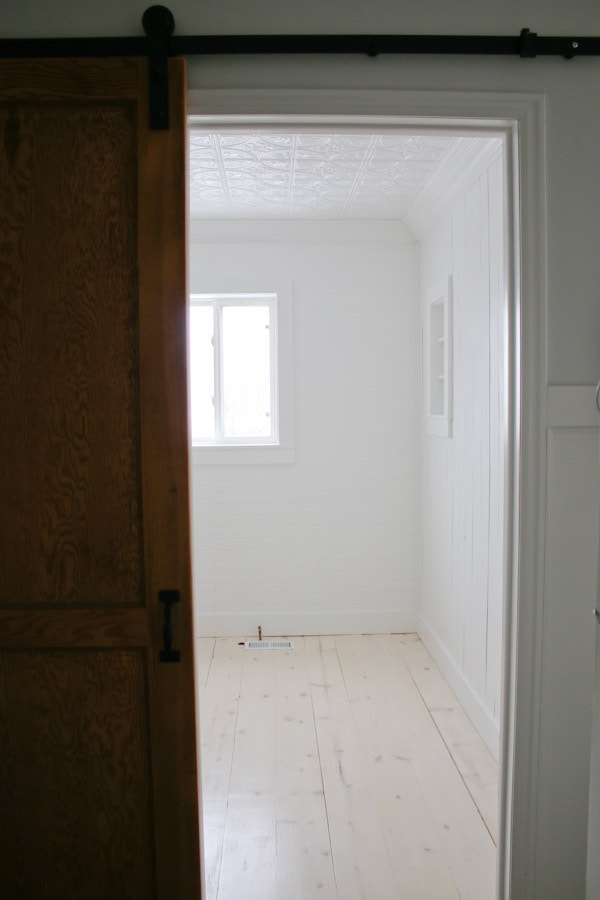
I am really excited about how lovely it looks, but mostly how much space it freed up in our bathroom. The door that used to swing into the space made a whole corner of the bathroom unusable.
But I love how the old door and the old vanity flow very well together.
Now we will be working on the electric, adding the tub, mirrors, custom build storage cabinet, toilet, curtains, and other fun stuff you’ll just have to wait and see.
Now . . .
Let’s talk about how we did the flooring which we figured ended up costing us $1.85 a square foot. This is pretty affordable as far as flooring goes and nothing beats the look for me!
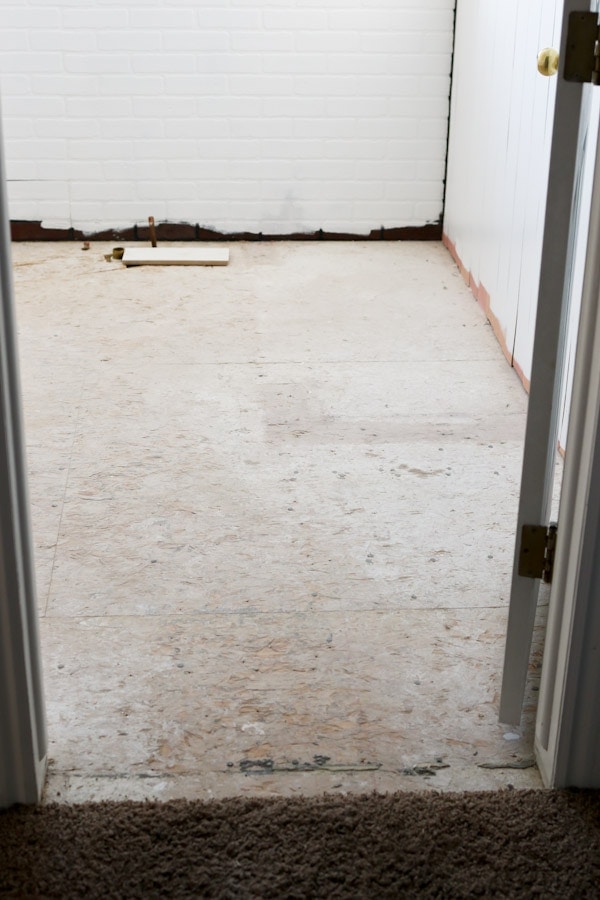
Gutting the bathroom was quite a process and took a long time. It required knocking down a closet, a corner shower and a lot of work for my dear husband to move pipes to fit the new layout plan. It took us a lot longer than expected, but we finally got all the walls up and the sub-floor patched back together.
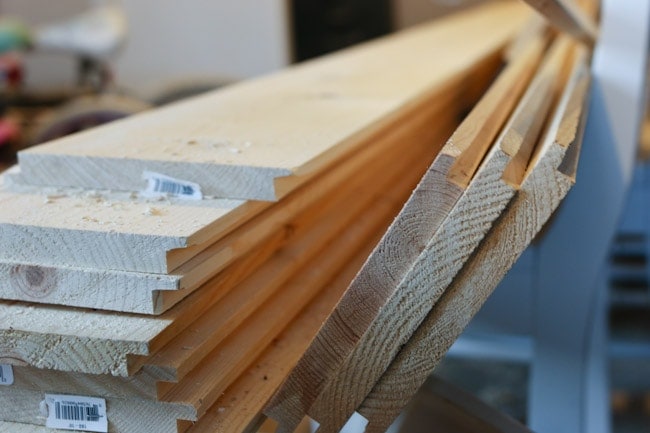
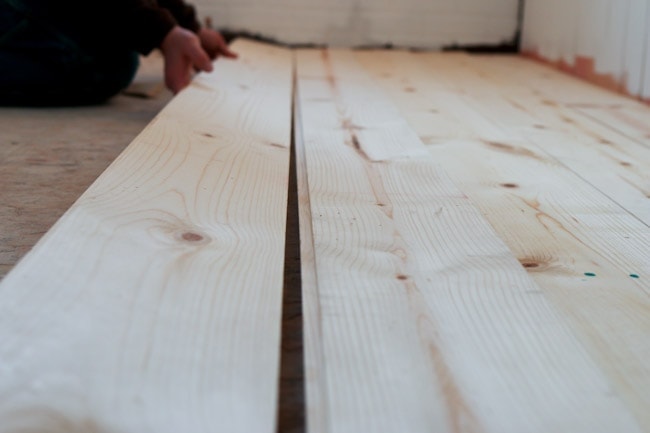
We bought enough pine wood boards to fit the space, and my husband used his trusty router with a 1/2 inch router bit to cut the grooves on the edges (much like a tongue and groove board but they don’t actually snap together).
Then he proceeded to lay them down, interlocking the boards.
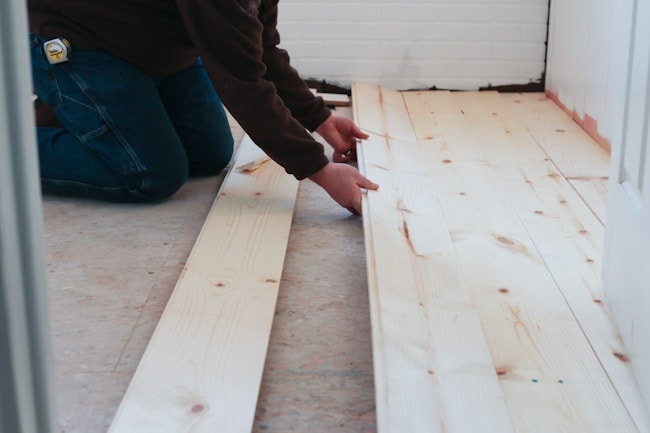
He kept the screws hidden inside the grooves so they would not be seen.
Then we used the following products, both found at Sherwin Williams.
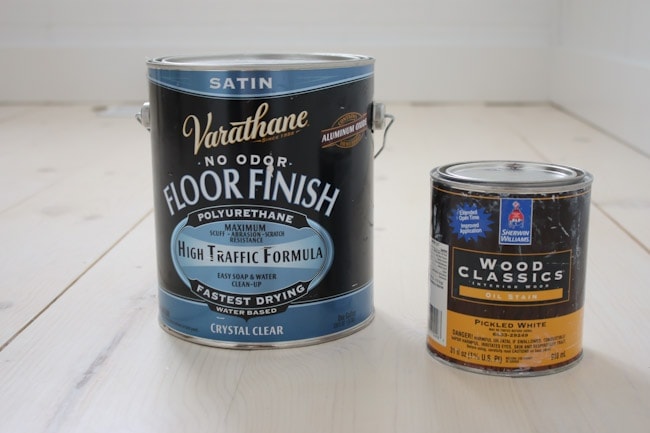
It took 2 coats of the pickled white stain to get to the look we wanted. Then we sealed it with 4 layers of the polyurethane, with a light sanding done before the final layer.
The floors are so smooth to walk on. We will have to be careful about not getting too much water on the wood and between the cracks (like buckets full), but you have to watch that with any wood flooring you have. Pine wood is a soft wood and will ding and dent easy, but I will absolutely embrace and love all the imperfections that come!
We got the idea for the flooring when I ran across this gal on instagram at @m.vintagecharm. Just look at this image!!

I also noticed she did a post on the flooring, HERE. I was head over heals with the look, and knew it would be a good option to try on this small space. If we end up liking it, you just might see it overtake our house! (After the hubs has recovered from this makeover, that is).
As always, my dear readers – I’d love to hear your thoughts! Do you remember the before?
Have things improved?
I sure think so!!
What do you think of the flooring, walls, and the vanity I picked out?
We will just keep on plugging along and you can bet I’ll be showing you when it’s finished!
*Linking up to these parties, HERE.
*We are partnering with Joss and Main for this bathroom renovation. Be sure to keep your eyes peeled for some incredible Joss and Main products showing up in this space!


where did you get the pine flooring?
Was wondering how he shiplap has held up ? Love your bathroom ??
Now that it’s been over a year, have you had any cupping occur? Also, when you said that your husband “hid the screws inside the grooves,” to me that would mean screwing the board only on one side, the side that has the routed edge laying on the floor. Could that be so?
I am putting pine planks in my bathroom, will also create shiplap with my router, but can’t imagine tying only one side of the board to the floor with screws.
Thanks so much.
If you love the look and feel of wood beneath your feet, wide-plank heart is pine flooring. Pine wood floor will transform your bathroom in beauty. Thanks for sharing this article.
Hi Stephen. That is a good question and something I was worried about as well. After almost 7 months we have had zero cupping issues. As for dents and scratches, yes – it is pine wood which is a very soft wood as you probably know. It has dented in a few spots where something heavy has dropped, but I knew it would do this and I actually really love the soft dents around the floor. To me it fits the aesthetics of the room we created. But if you are not going for a vintage worn look, I would not use pine planks for flooring. Hope that covered your questions. Thank you!
Bee- autiful!!
Wow, you’re making it look so fabulous! It’s going to be a beautiful space, I love hearing about the process!! PS – LOVE the vanity!
Thank you sweetie! It was a pretty messy gut job, but the layout was so bad it was all I could think to do. Can’t wait to have a bathroom I enjoy. It’s been a long time coming!
Stunning, absolutely stunning!!!! Wish it were mine,(even though ours are very nice.)
I bet I would enjoy yours . . . because it is finished. Going without a master bathroom is zero fun! Ha! Thanks for coming by!
Everything looks so great – can’t wait to see it all finished – you most certainly have a sweetheart for a husband!!
Yes. Yes I most definitely do! Thanks so much Barbara. I can’t wait to have it done!
I am sooooo in love with your ceiling.! This room is going to be difficult to walk out of each day, especially once you install that amazing tub! The new door is perfect. I keep hearing mixed reviews on this type of roller track in that they are often very noisy. Can you let us know how you have found your track.?
Have a beautiful day 🙂
I can’t tell you how excited I am to disappear into my bathroom and take a nice long soak! It will be difficult to walk out of 😉 I will definitely mention how we feel about having the track door in my reveal. I too have heard the noise issue. Right now I love it so much because of the space it saves. Once it is functional, I’ll probably be able to decide if I would do it in another spot. Thanks for coming by!
The finish on those floors is absolutely beautiful, and I love it with all the white 🙂 Can’t wait to see it all come together!!
Thank you very much! I was so torn on doing a white tile or bringing in the warmth of wood. This way, I have both and I do love it! Thanks for your sweet words!
Talk about a total gut job! I’m loving it! Does that mean hubs lost his shower? Seems to me like you’re coming along pretty fast…of course that’s from where I stand.?
Thanks Susan! It was a big demo job and really messy! We are doing a tub/shower combo. I couldn’t live without a shower either 😉
Gorgeous!!! I can’t wait to see the finished room!
Thank you! I can’t wait to see it finished either! ha!
Oh I just love how it’s coming together! So pretty! Can’ t wait to see when it’s complete!
Thank you so much! I can’t wait to put in the finishing touches. Thanks for coming by!
I love the shiplap, your antique vanity and most of all the sliding “barn” door!!!
Thank you for your sweet words! I’ve always loved pocket doors because of the space they save. I’m excited to give the sliding barn door a go! Love it already and I’m glad you do too!