This post may contain affiliate links, which means I get a small percentage of the sale at no extra cost to you. I only recommend items I love and have had a positive experience with. Thank you!
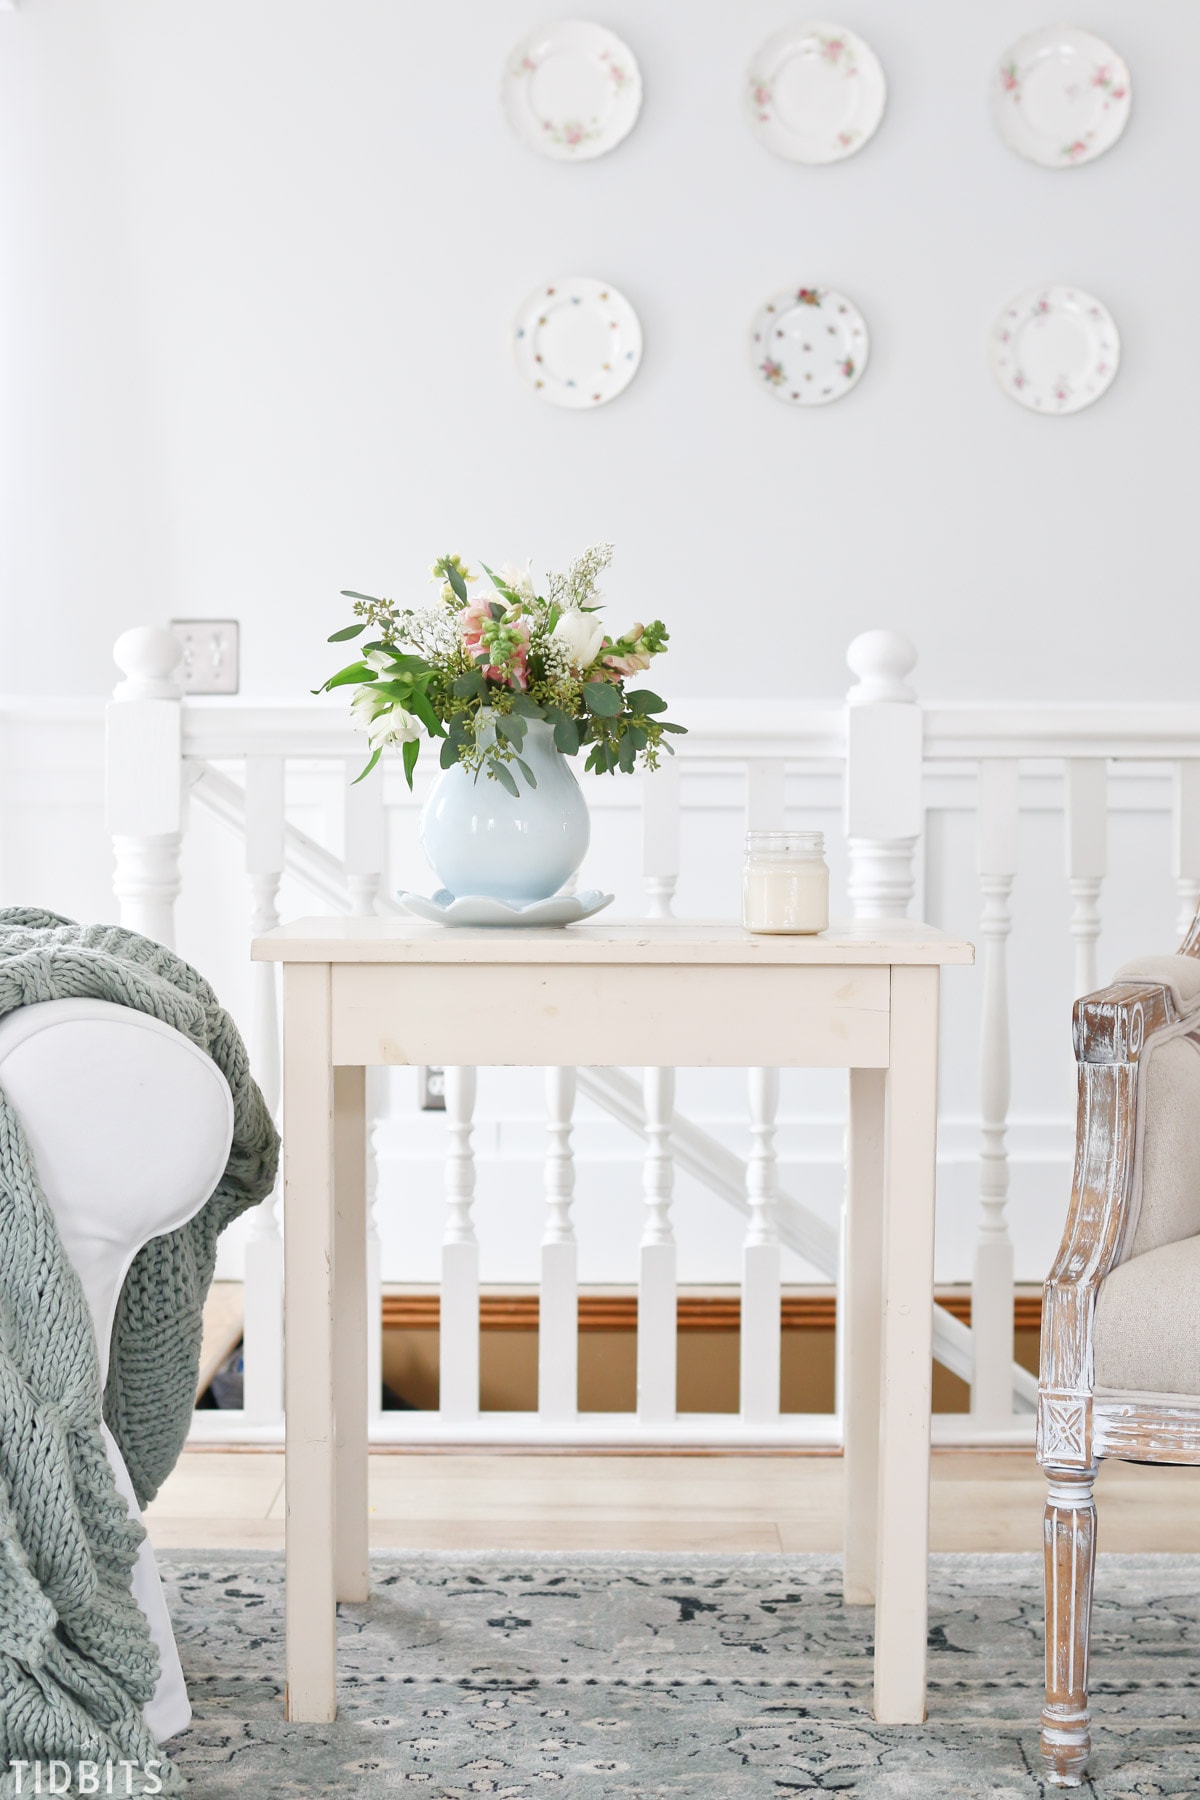
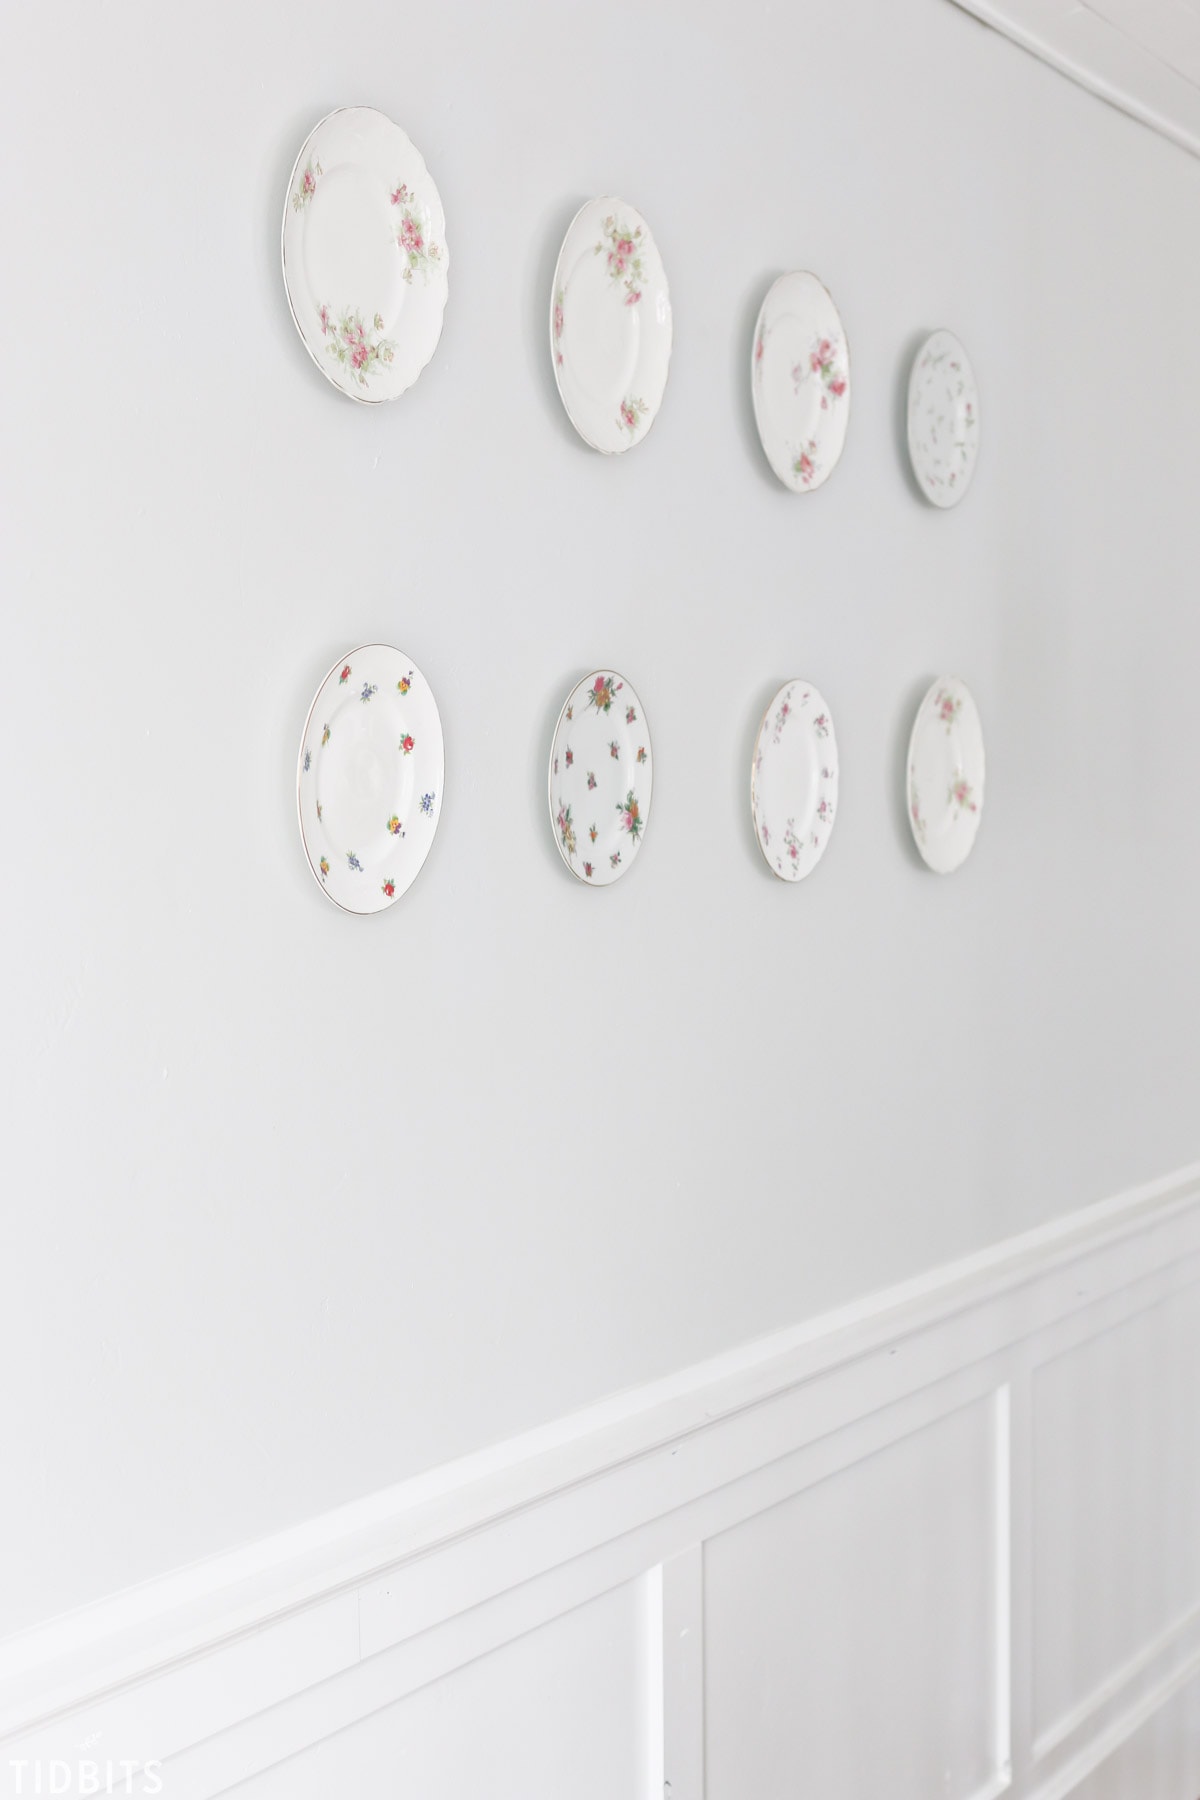
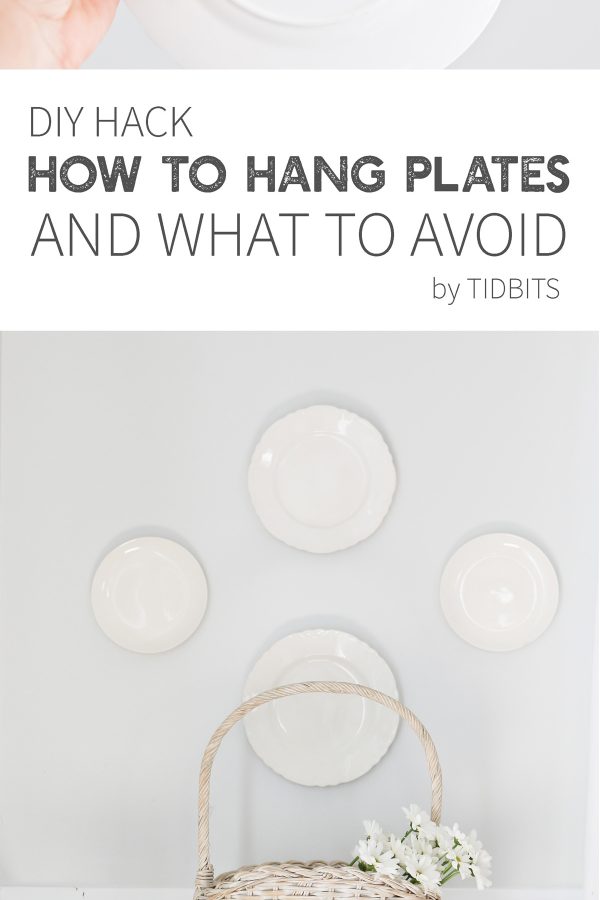
Look no further than the kitchen shelves for beautiful and charming wall decor. Read on to find out how to hang plates on the wall, easily and affordably with this simple DIY hack.
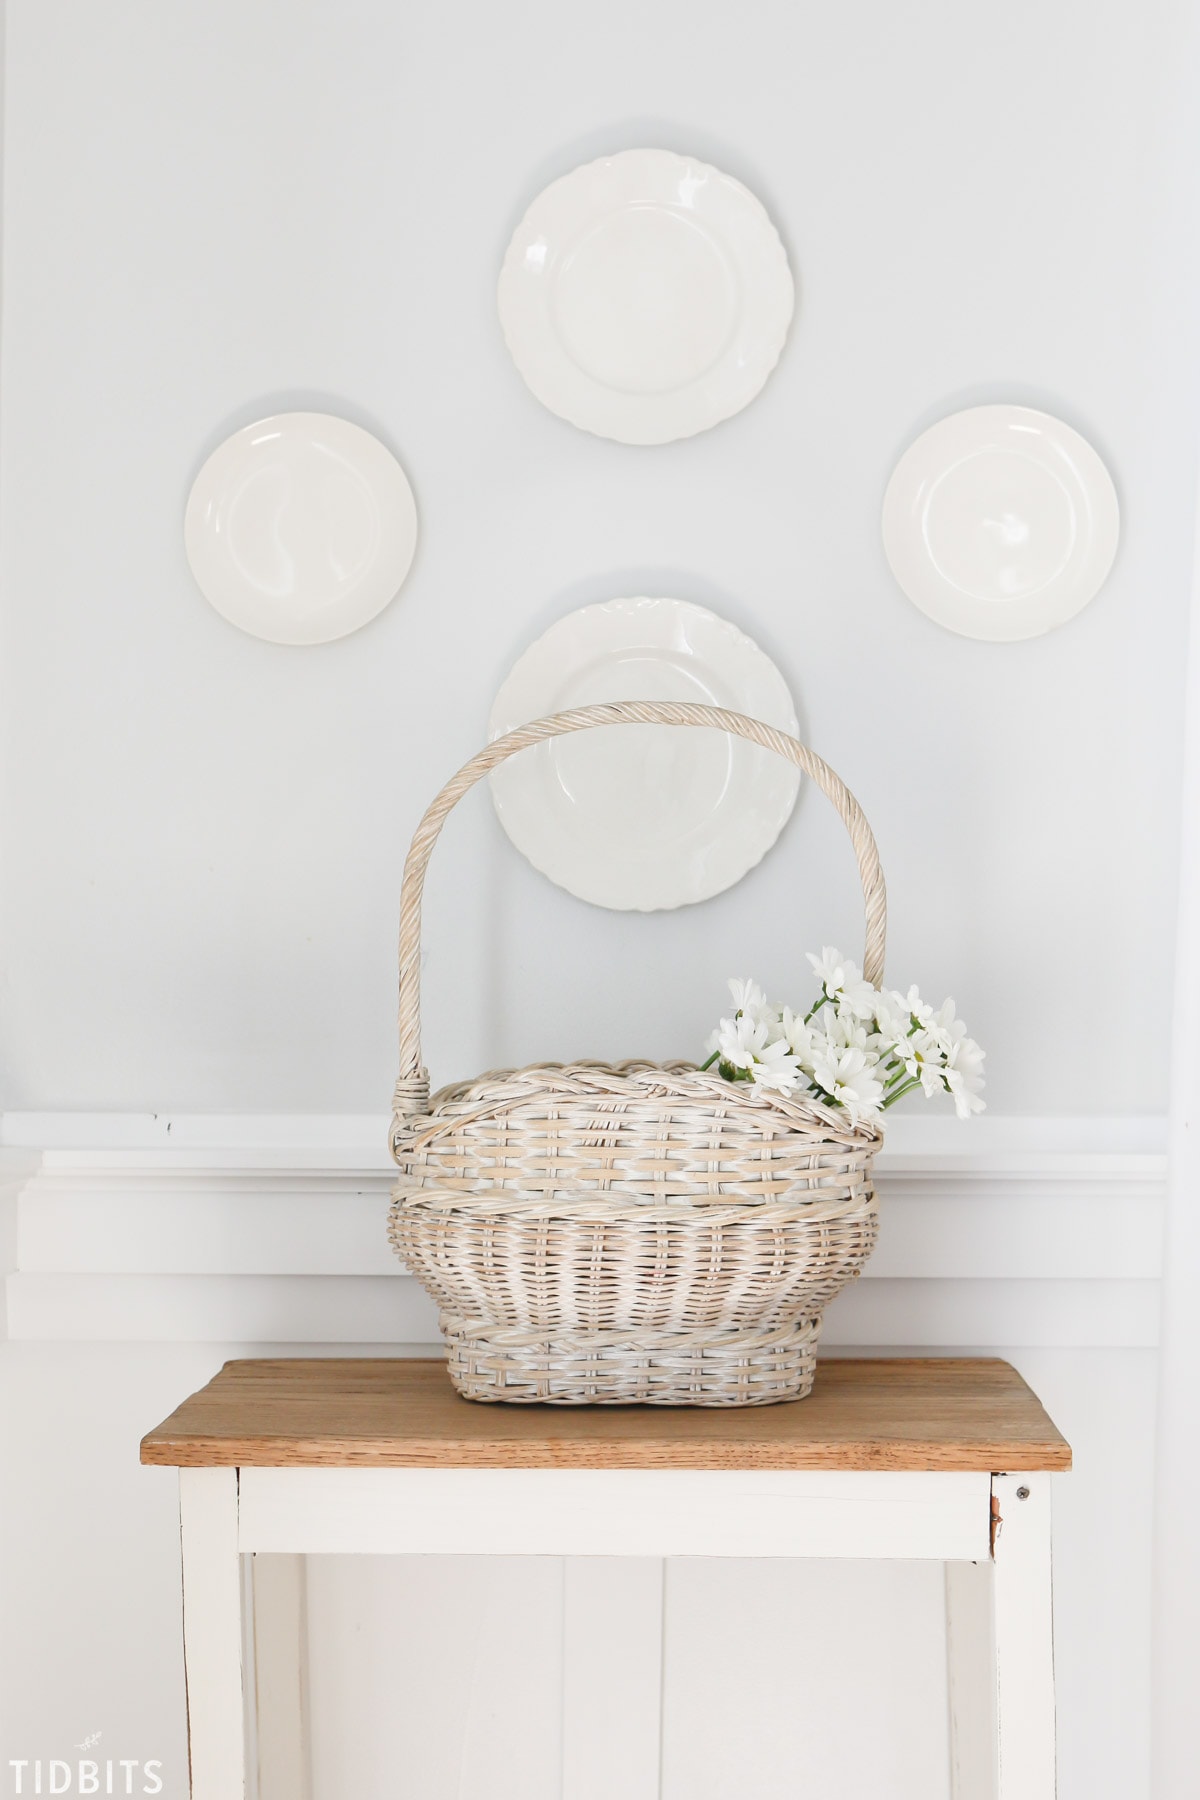
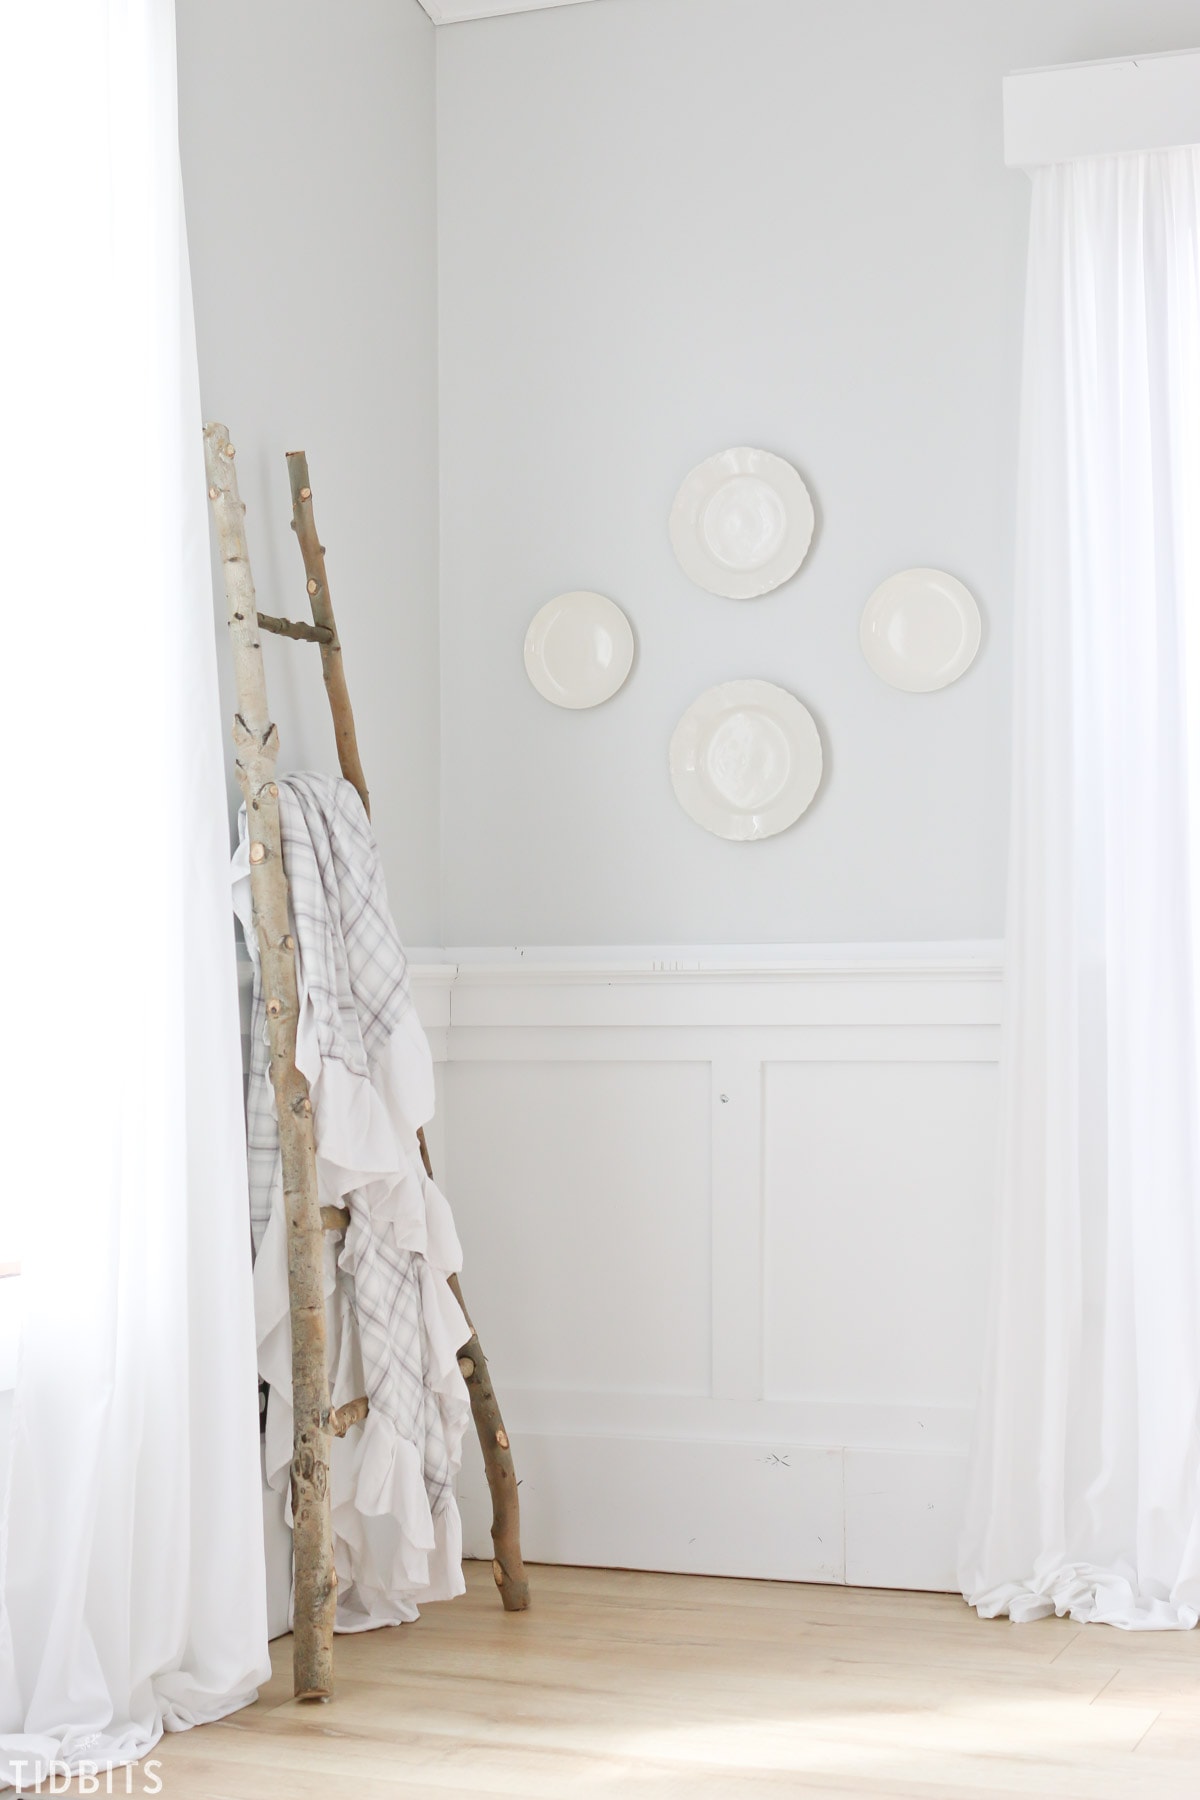
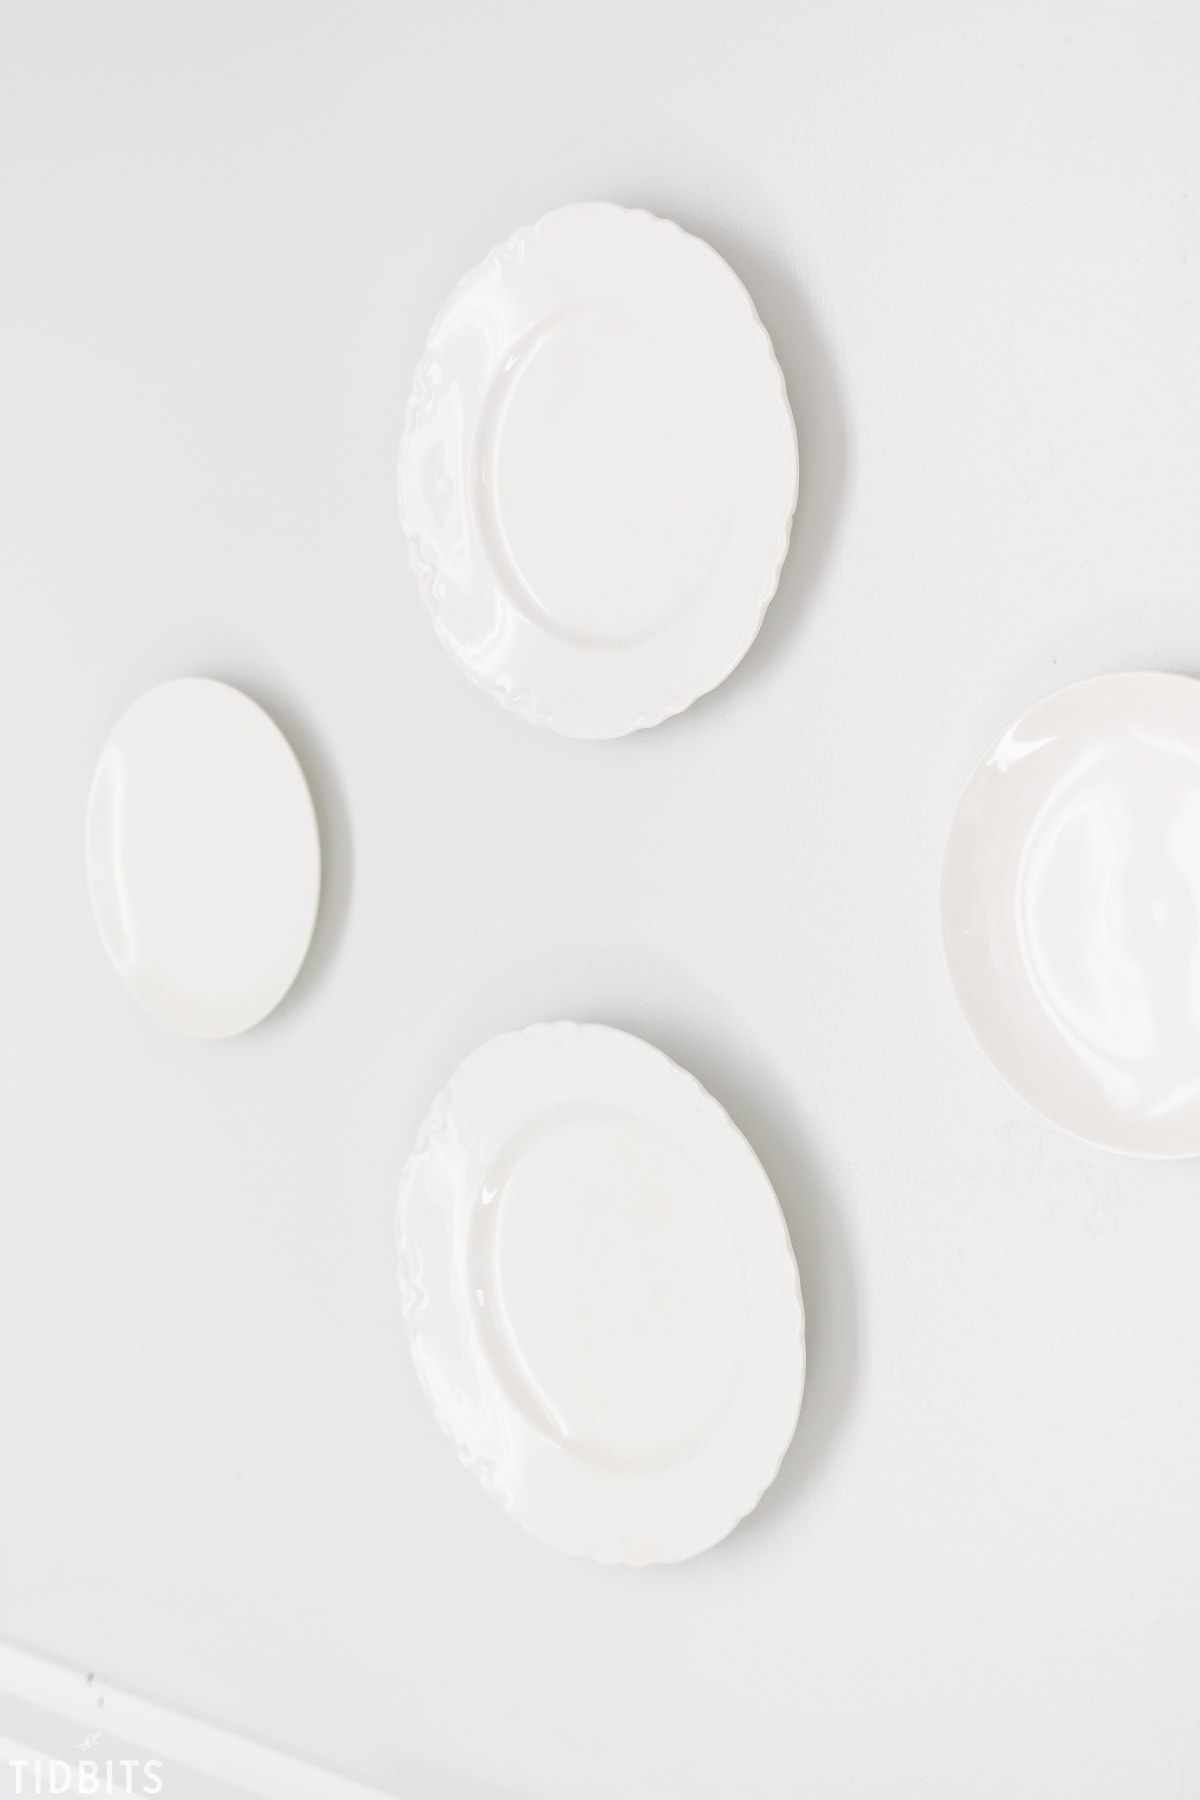
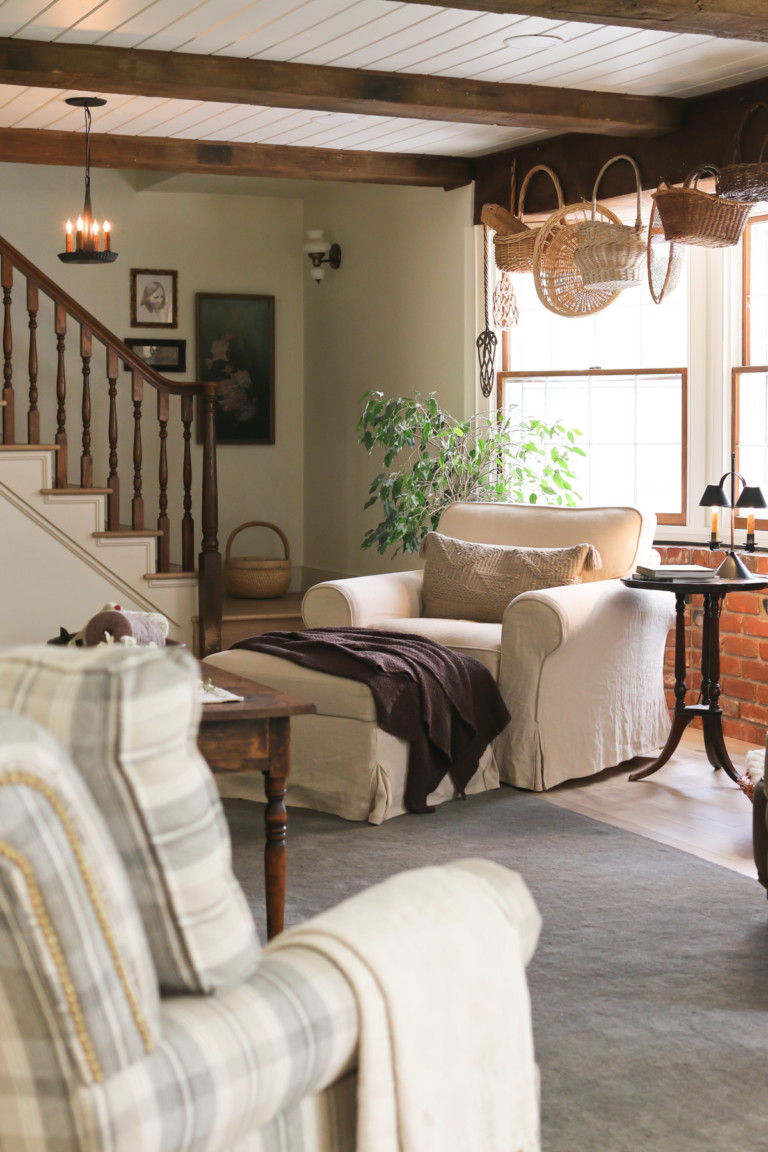
Plates on a wall.
Who’d a thought, huh??
I mean, the concept seems a bit un-natural, but then you put them up there and all is right with the world.
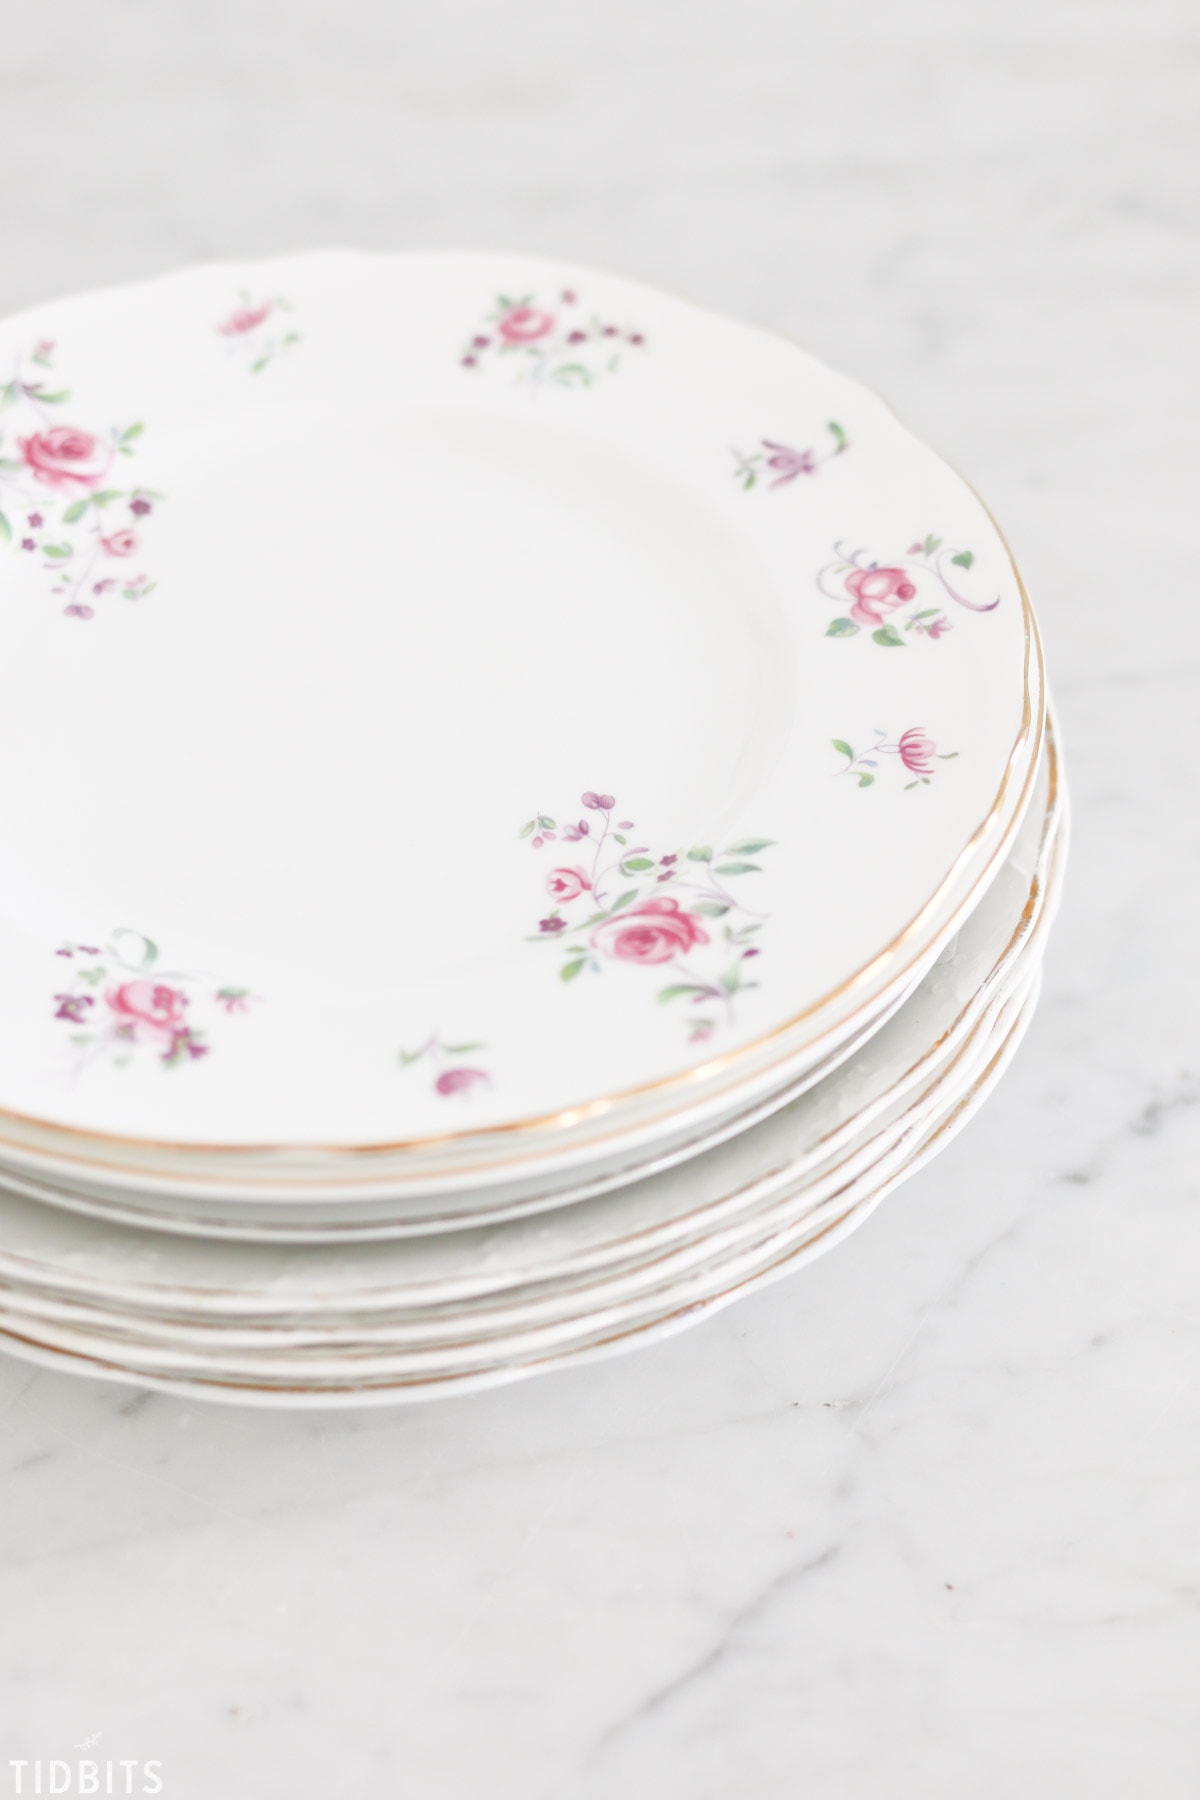
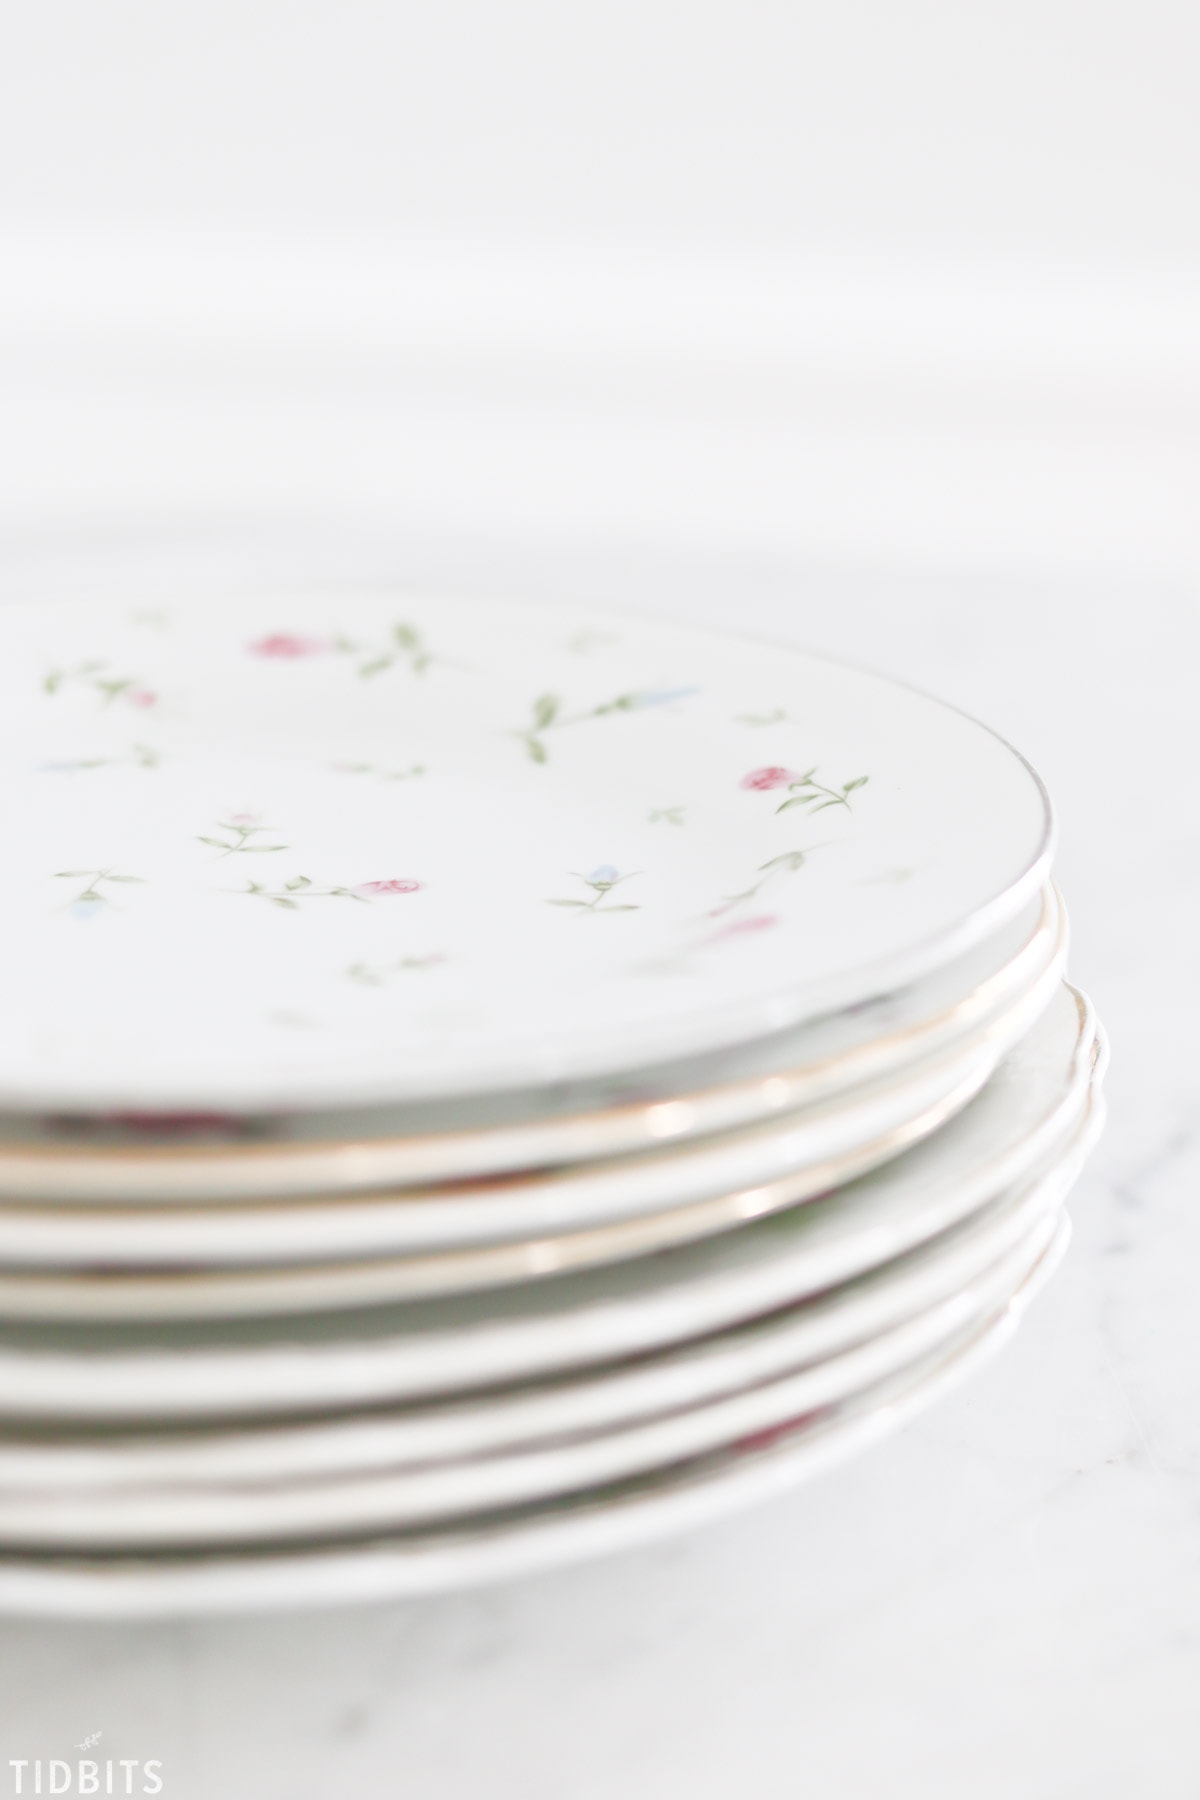
I often find unique plates when thrifting, and have no purpose for the .50 cent item with no matching set to be found, but find myself unable to resist the purchase.
So I buy them, find myself an empty wall, and smile at my incredibly easy, affordable, unique and charming new wall decor that has helped me achieve a darling cottage farmhouse backdrop.
However, through the years I’ve learned not all plate hanging methods are created equal.
I’ve spent money on sticky things and metal things that claimed to do the job, but finally landed on this simple DIY plate hanging hack for secure and clean placement of the plates on the wall.
Let me walk you through my process and list all the household supplies you will need to hang your own plate or collection wherever you desire.
I’ll also include some plate casualty “do not do’s” and offer my suggestions to make this a semi-permanent method.
SUPPLIES:
- A plate or plate collection
- Small amount of felt
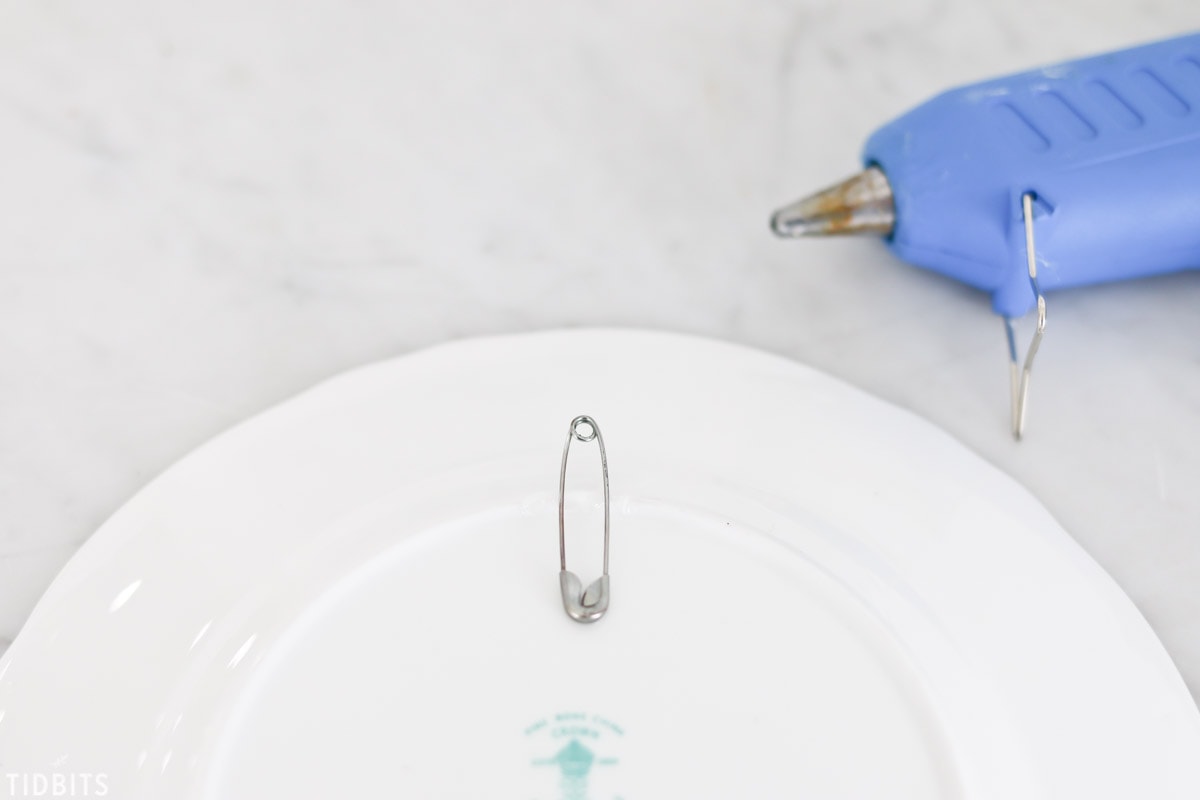
- Medium size safety pin
- Do not use paper clips. While they seem to accomplish the same purpose, I’ve lost a few plates trying.
- Hot glue gun and hot glue
- Do NOT try to use duck tape. Just trust me on this one.
- Scissors
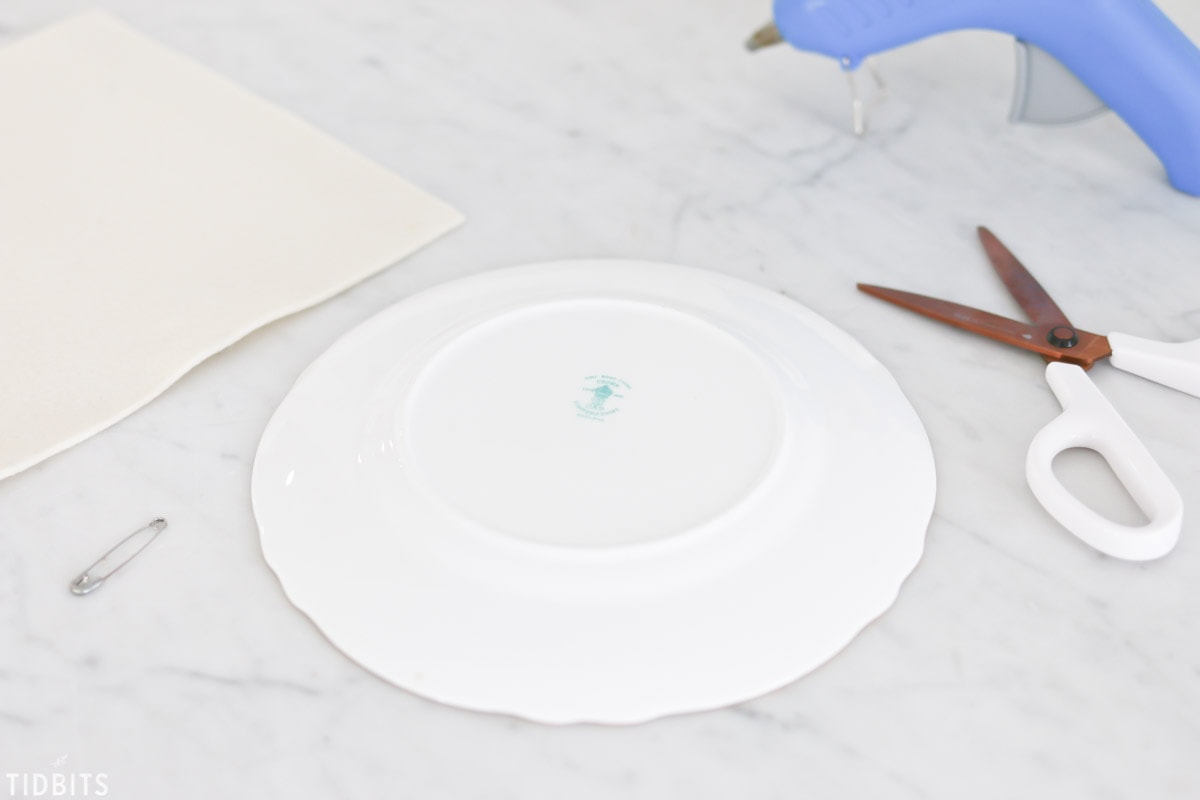
Cut a small square of felt to overlap the safety pin about 1/2 inch around each side.
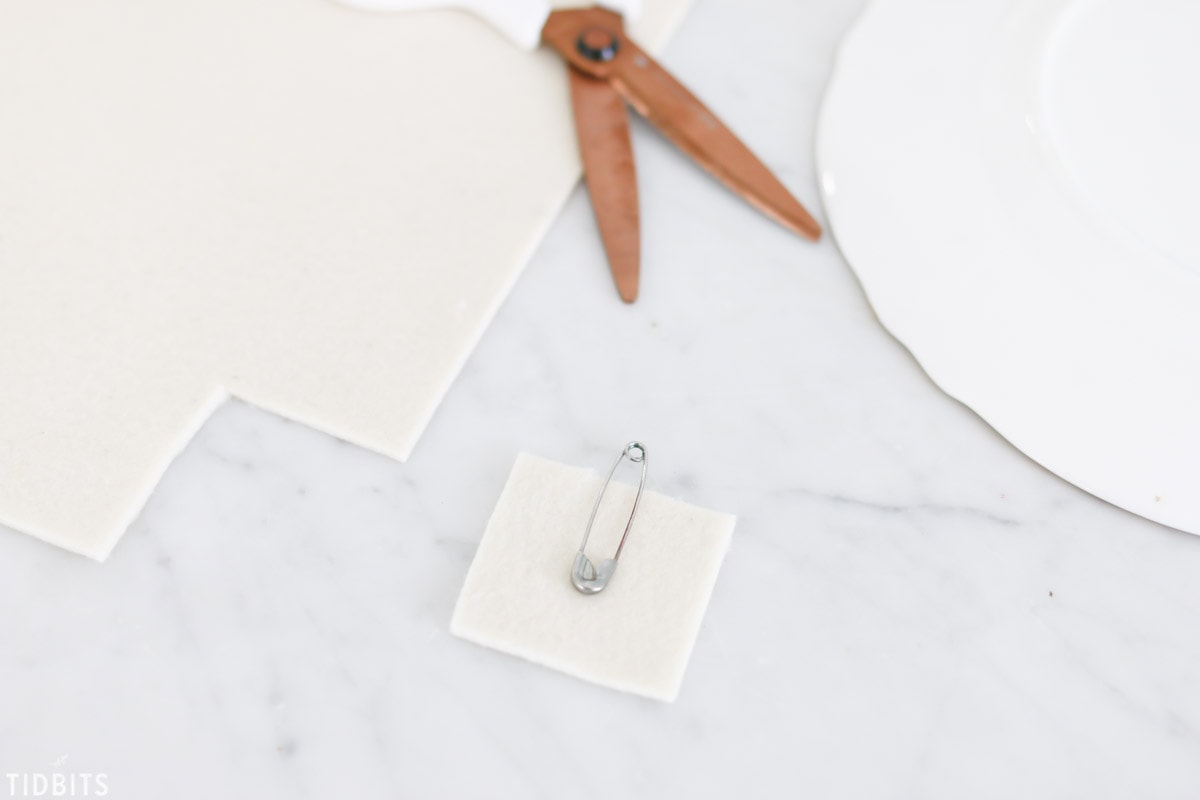
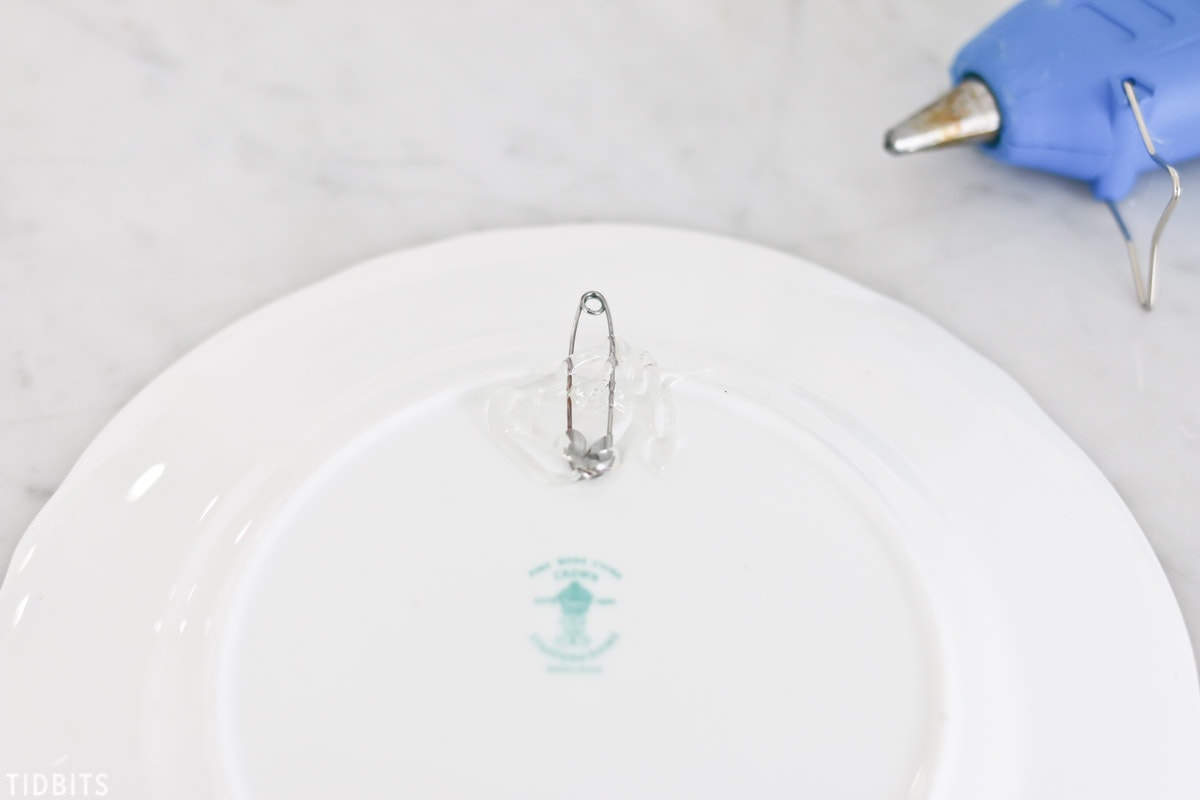
Determine your placement for the plate to hang and add a small strip of hot glue along the inside rim of the back of the plate. Place the safety pin upside down onto the glue with 1/2 inch of the bottom of the pin pointing upwards. The round circle on the bottom of the pin should be pointing to the top of the plate.
*TIP: Be certain your glue gun is heated completely and that the glue is not too old. It will not adhere appropriately otherwise.
Next, squeeze out a large amount of hot glue over the pin and around it on the plate itself.
Ever so quickly, press the felt square over the top of the glue and safety pin. Press firmly in place until the glue dries and cools.
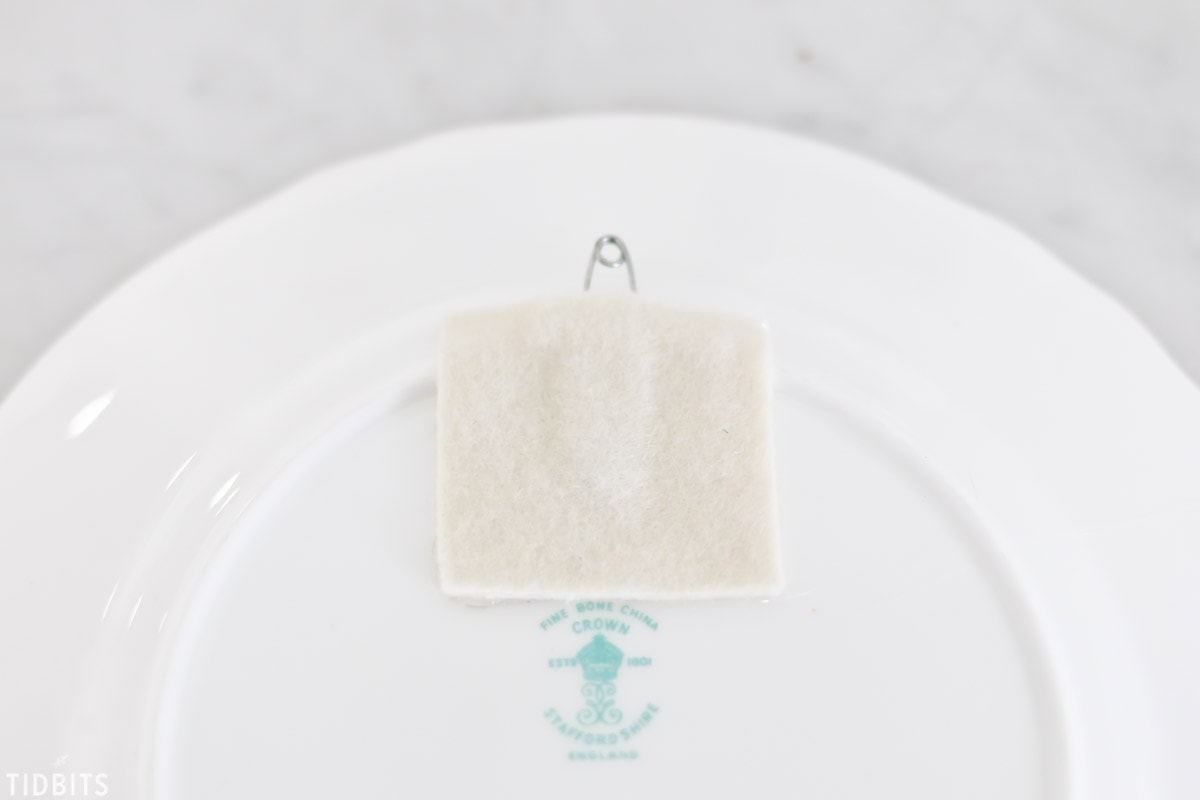
Once completely dry, pull and tug at the safety pin, to ensure a strong hold onto the plate.
*TIP: If it is not secure, remove the entire thing and all the glue bits and try again. Don’t try to simply add more hot glue to the already dry glue.
*TIP: If you ever desire to remove the felt and pin, use a blow dryer on the hottest setting to melt or soften the glue, and gently pull it off.

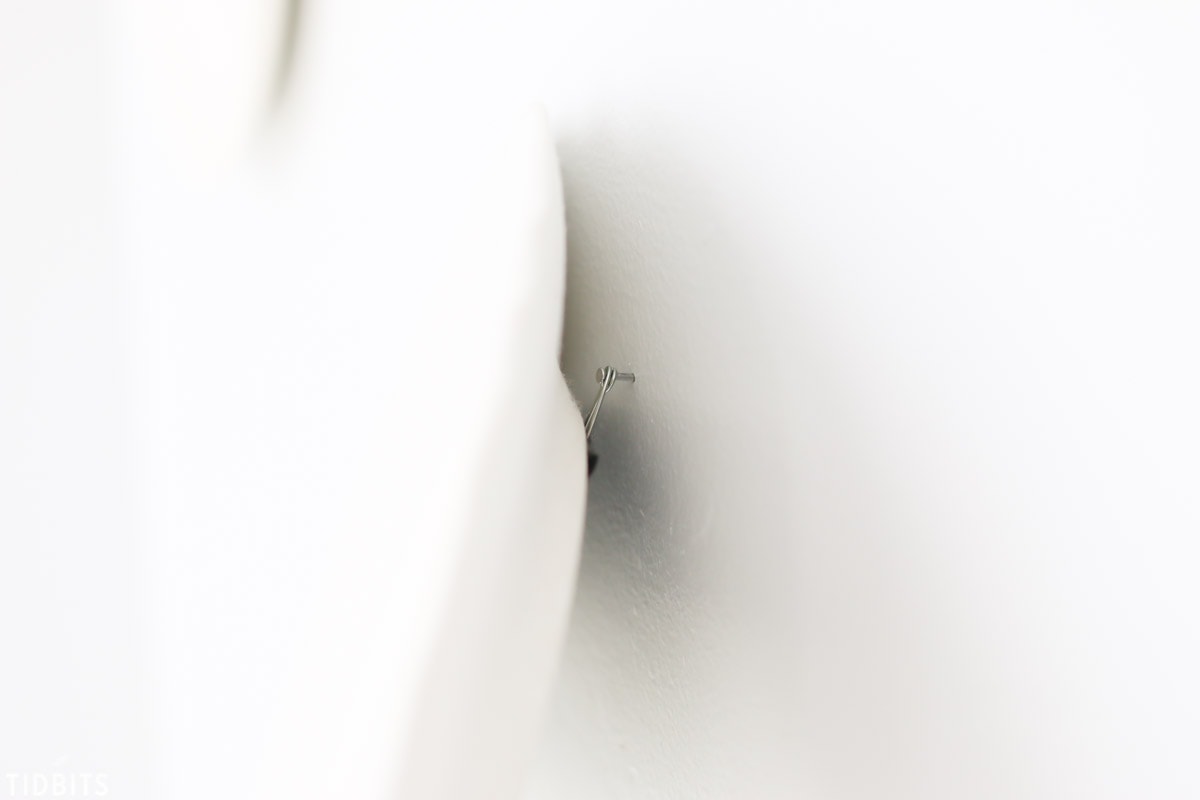
To hang the plate, first figure out the exact placement on the wall, mark it with a small dot, and hammer a small nail into the wall.
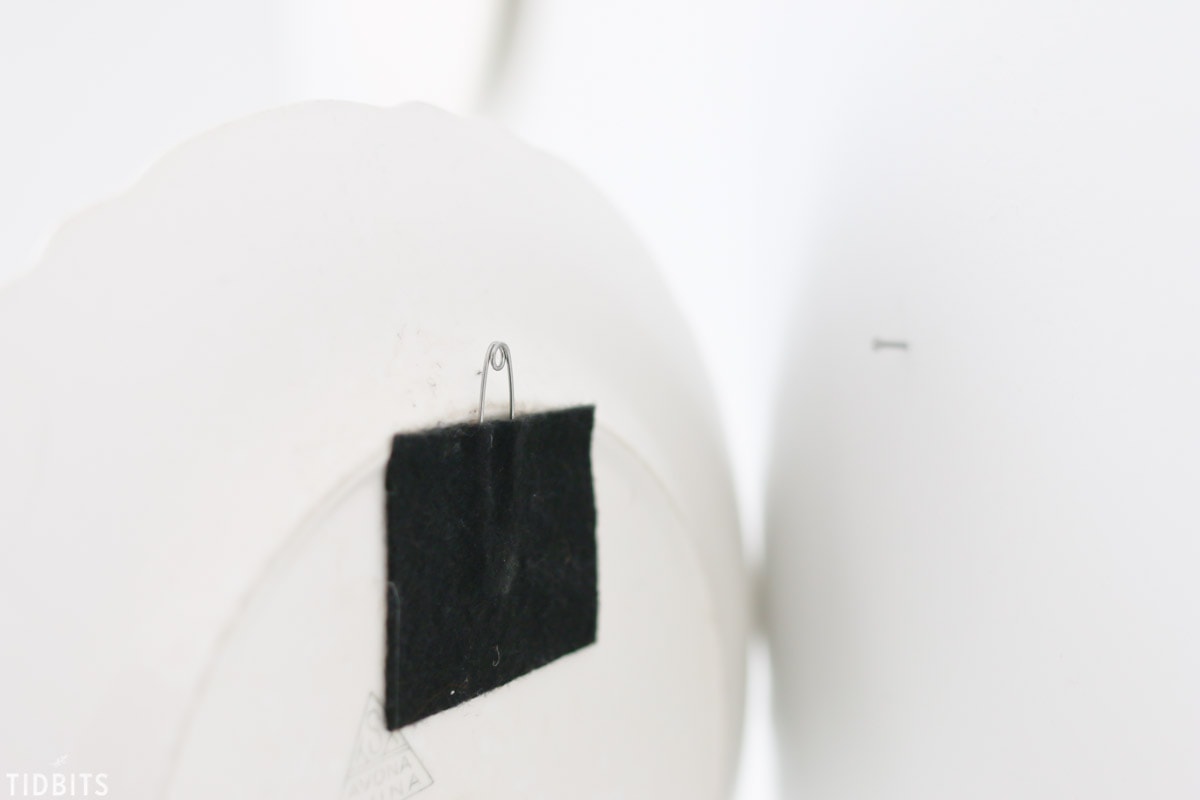
Be sure to hang the plate onto the nail through the small circle at the bottom of the safety pin, which will prevent easy slippage.
There you have it! So easy! Next time you see a lovely collection of plates up for grabs, use them to create interesting wall art in small or large proportions.
*FINAL TIP: You could use really strong super glue as well, but then I believe the felt and pin will be on there permanently or do more damage if you try to remove it. The hot glue stands a good chance at coming off at some point, which is why I use that instead.
What do you think of hanging plates on a wall? Have you ever tried it? Do you prefer a different method? Do you have the perfect wall or plate collection for this idea?
I’d love to know! Let’s chat!

Come back soon!


Thank you for the great idea of felt and safety pin hanger! What an easy alternative! Will try today.
Thank you so much for this! I love hanging plates, and I love your idea.
A long life time’s worth of thrift shop plates and now I know what to do with them. Eternally grateful. Did you think of this your self?
Cami! Thanks for sharing your lovely ideas!
The plate hack is simple amd ingenious using things easily available.
So you perhaps have any ideas around hanging up a decorative plate without using a nail in the wall?
I handpaint decorative plates (would love to show you) and would love to hang them up but as I live in a rented apartment, I can’t make any holes in the wall.. Even tiny ones! Would love an idea please 🙂
What about larger plates and platers?
Have you found that you must place the nail into a stud or will it work without a stud. I want to hang 10 plates from the 1850s in two rows of 5 each. I am very worried about losing even one of them as you can tell they have never been used and are in pristine condition.
YEAH! No matter how many times I’ve pondered this same dilemma, I could not cup up with a safe way to hang my collectable plates. Now I cannot wait to refresh a room simply by using this method. Thank you for sharing this great idea! I can see from the other comments, lots of us had the same problem. You are very kind to post this for all of the plate lovers. Once again, thanks!!!!
I have see a lot of plate hanging image, but no one share how it is being hanged. Thank you for sharing.
Thank you soooooo much for this! I just made spring plates for $1.25 each and couldn’t believe I was going to have to spend like $3 on the plate hangers. And those plate hangers have the hooks on the fronts of the plates! This is so awesome!
What about decorative plates/placques that already have the hole drilled in the bottom edge: how should I hang those?
Cami, I have also used pull tabs like on pop cans with the felt and glue, worked like a charm! You can also use straight pins as nails, they leave even a smaller hole. Just be sure to get the pin hammered in as far as you would a nail. For larger pieces, I would use 2 pop tabs evenly spaced out.
I’m totally unsure if these will safely work, Cami, but for the larger plates and the platter mentioned, I wonder if using much larger safety pins, felt pieces about 3 to 4 inches square, and heavier nails would work!?! I would guess that would all be enough to hold, especially if you use hot glue to cover the entire larger felt square … ?
I love your idea and i love hanging plates, but it can get pricey but not your way. I think they look good hung with a group of pictures, in groups of 2 or 3. I loved your pink group of plates.
Totally love love love this tip! Quick question. Have you tried larger heavier plates or platters? I’m wondering if it would hold. I thought about using two safety pins side by side but am a bit leery. Thanks! Pinned 🙂
I have some plates I’ve been wanting to hang! Not a huge fan of command strips so I LOVE this idea!! So genius!
I have a beautiful platter I need to hang. It’s pretty heavy. Have any suggestions? It’s abut 13X20
I think this is a brilliant idea! I love it and will try it out soon! Thanks!
Thank you for such a clever, practical tip! Definately putting this one to use!
Brilliant!!! After seeing this I had a “slap myself on the forehead/duh” moment! ??? THANKS SO MUCH DOE SHARING THIS PLATE HANGING HACK!
While I think your walls look tasteful, romantic and beautiful, but, I don’t know if I can do this. We have some close friends and the wife is really into collector plates–there is not an inch of wall space showing in her kitchen or dining room because it is covered in plates! I think her plate obsession soured me for life on decorating this way!
Gah! This is so genius. Can’t wait to hang my plates now. I’ve put it off for so long because I was afraid that would fall!