This post may contain affiliate links, which means I get a small percentage of the sale at no extra cost to you. I only recommend items I love and have had a positive experience with. Thank you!
I’m here again, with another Dreamy Whites Knock-off for you today.
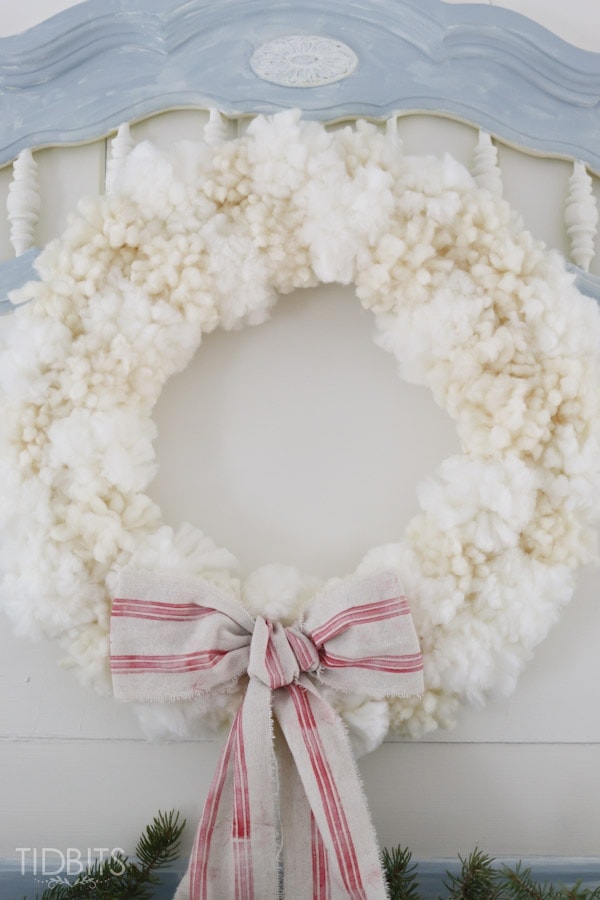
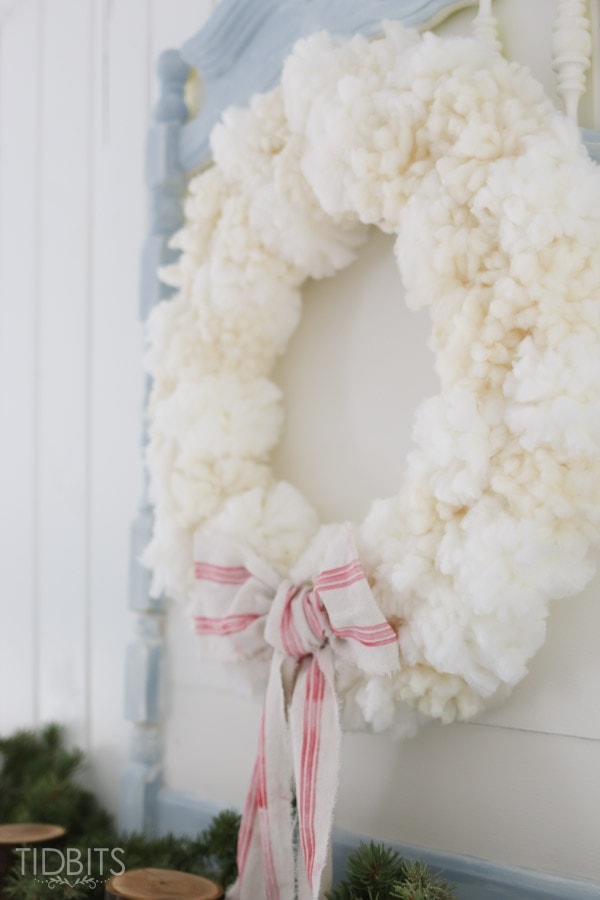
I’ve drooled over THIS Pom Pom Wreath for years, and decided it was time to take matters into my own DIY lovin’ hands.
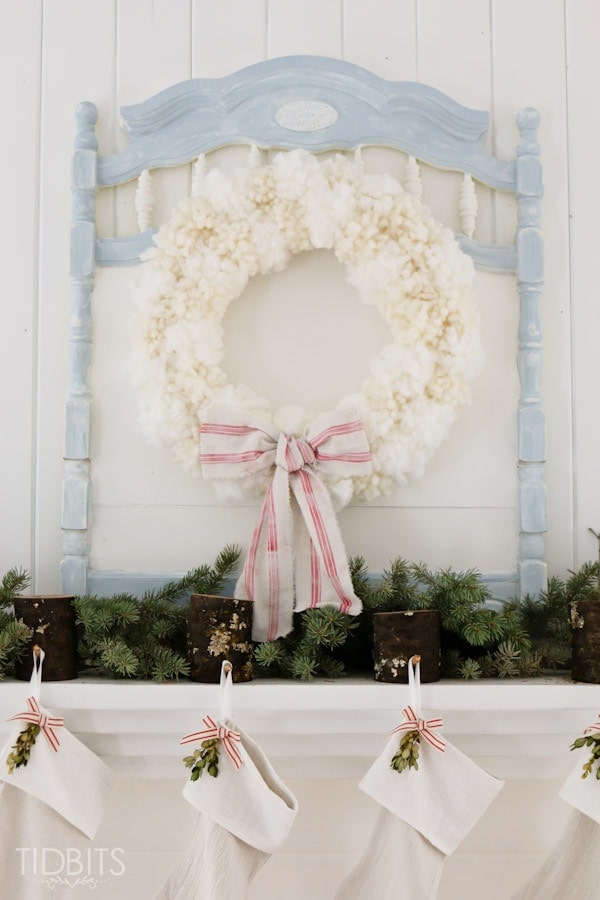
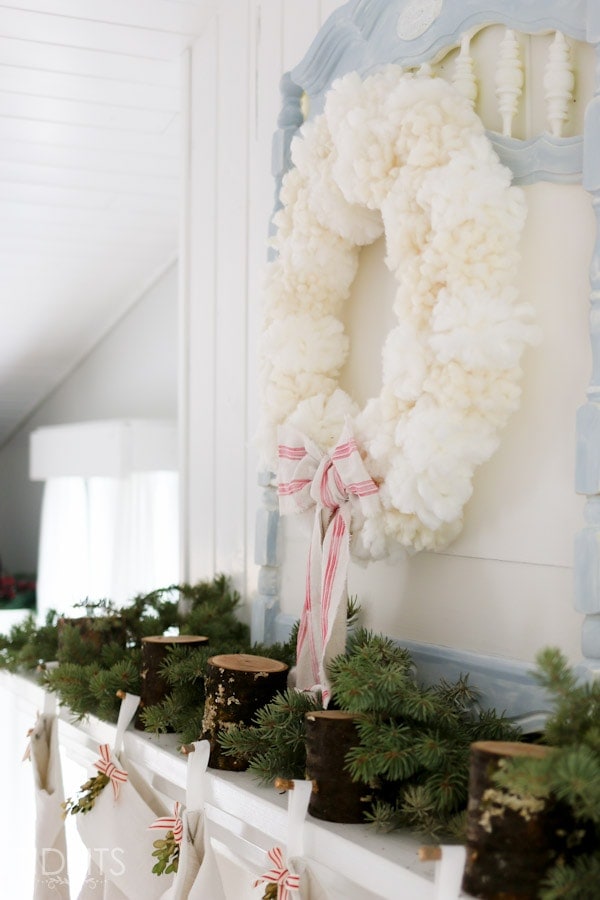
It looks so puffy perfect up on our newly remodeled mantel – which I am just about ready to show you!

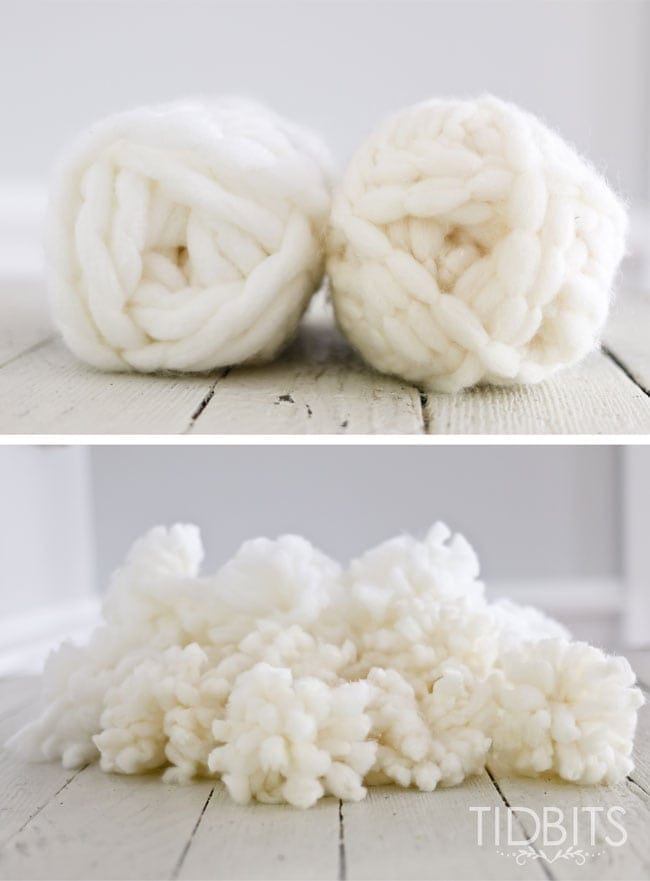
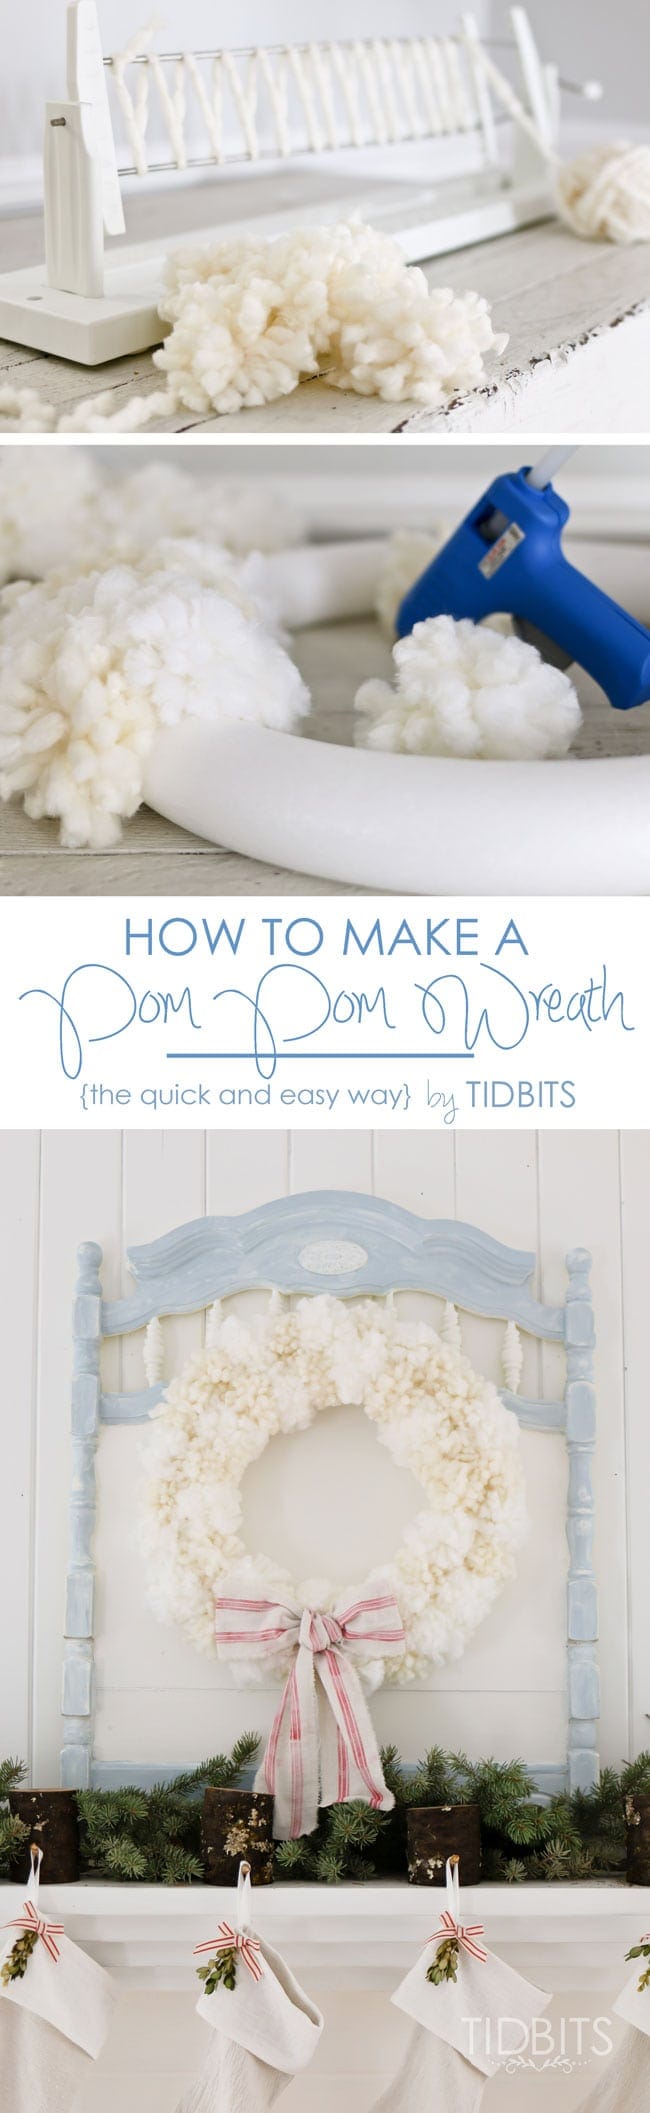
This wreath is made from the fluffiest yarn I could find at Michael’s, and formed into dozens and dozens of luscious little pom poms.
I used a variety of 2 toned yarn, which I thought looked nice.
I am going to take you through the steps to making a pom pom wreath and what supplies you’ll need.
First, I want to discuss that there are many ways to make pom poms. I’ve used my fingers before (which took a bit long), and I’ve seen people using all sorts of handy things to help form pom poms from yarn – such as forks. You could run a simple Pinterest search and probably see many methods.
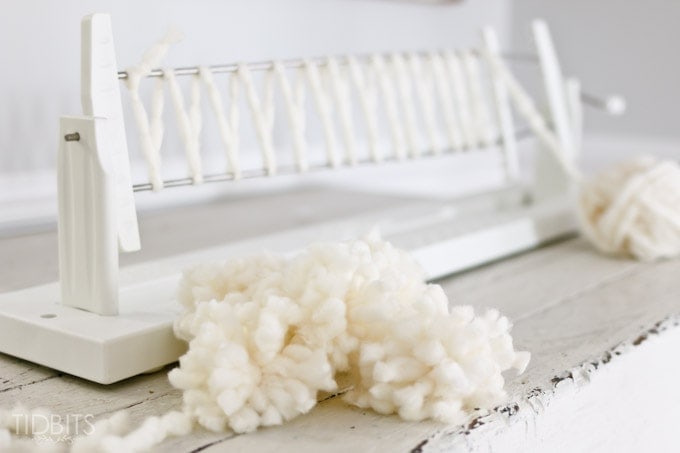
This time, I was able to use this fun and handy contraption called “My Own Fringemaker”, designed and patented by the sweetest lady named Debi.

It is really the most enjoyable tool to use and I have a couple of more projects I plan to show you which I’ve created using the “My Own Fringemaker”. If you want to make your own fringe, tassels, or pom poms – this thing makes it so easy and fun! Feel free to view her Website to learn all about it and to purchase your own.
Debi was kind enough to send this to me and challenged me to see what I could come up with using her tool.
It only took me about an hour to whip up all the poms poms I needed for this over sized wreath – no sewing machine required!
I am really just in awe that she came up with this and all that it can do. I was thrilled to support her and give her a shout out here and I hope you’ll head over and see all of her projects as well, at myownfringemaker.com. Supporting amazing products and inspiring entrepreneurs is a major perk of being a blogger 😉
So let me first show you how to make the pom poms, and then how to attach them to the wreath form.
Supplies:
- Foam Wreath Form
- I love the FloraCraft Brand forms found at any craft store.
- Fluffy Yarn
- Like I mentioned, I found mine at Michael’s. I went with a white and a slight off-white. I used 4 complete skein’s of yarn with a large wreath form.
- Hot Glue gun and glue
- Scissors
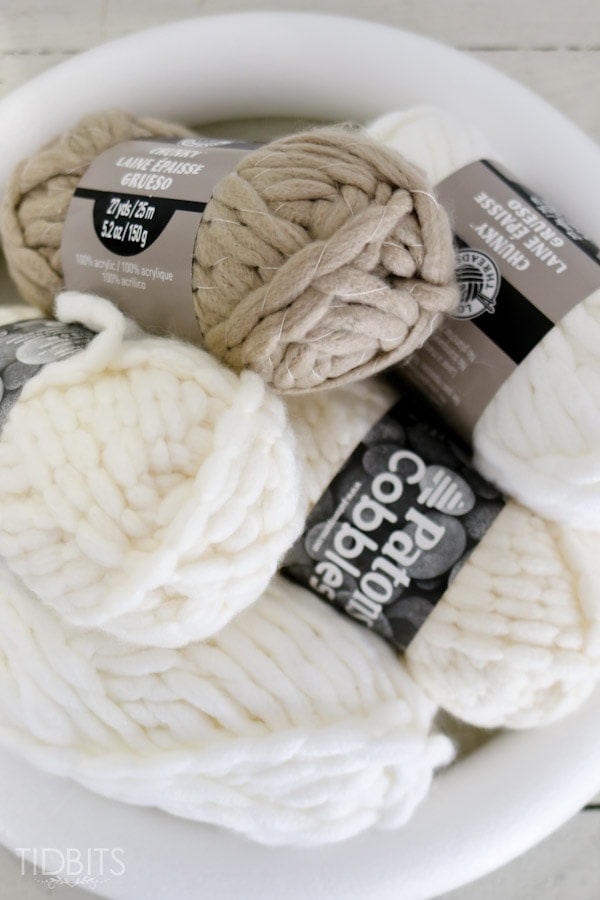
(Brown yarn pictured but not used.)
Instructions:
To make a pom pom with the “My Own Fringemaker”, follow the steps below.
- Tie a knot on the top bar with the end of your yarn.
- Wind the spinning handle with your right hand, and gently guide the yarn across the rods with your left hand. Fill the rods full to the end.
- Slide all the yarn as close together as you can on the rods. If you want it thicker, keep spinning more yarn on the rods and squish it together again.
- Clip the yarn off the spool and tuck the end inside the wound up yarn.
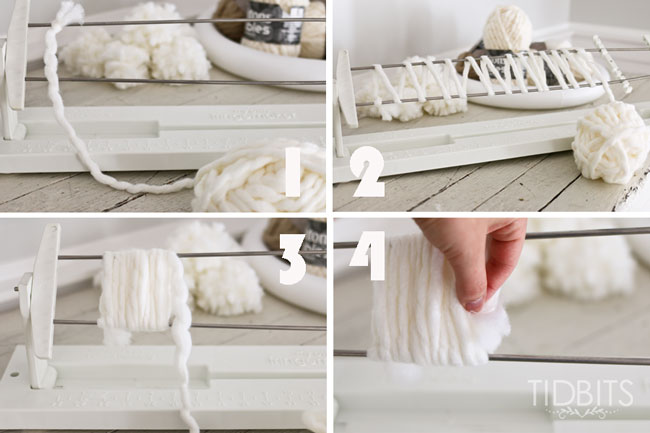
5. Clip off a piece of yarn from the skein about 1 foot long. Loop it behind the wound up yarn and between the rods.
6. Tie that piece as tight as you can in a double knot at the center of the wound yarn.
7. Now simply use your scissors to slice through the top and bottom of the almost formed pom pom, right at the fold on the rods.
8. The pom pom will be completely off the rods and you can fluff and shape and snip any long pieces from your pom pom.
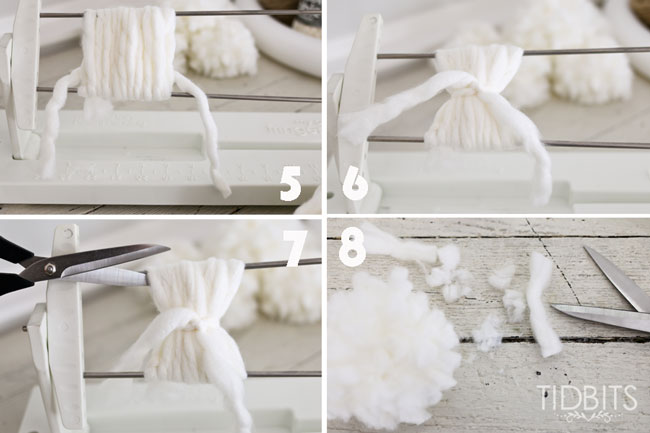
Repeat these steps over and over until you have enough pom poms for your wreath. You may need to continue to make more as needed – but this process becomes very fast once you get the hang of it.
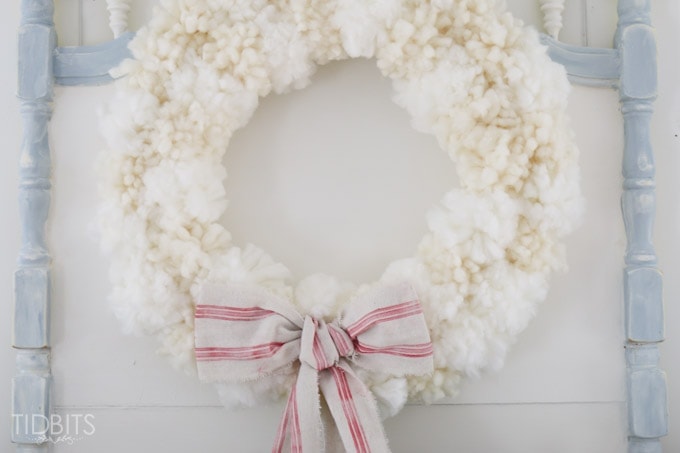
I’ve tried pinning my pom poms on forms before, but they never stayed very well. I’ve found simply hot gluing them on works very well. If your pom poms are large enough, you should only need 2 rows over the form. I glued one to the slight outside and one to the slight inside, making sure they covered the center and overlapped a bit.
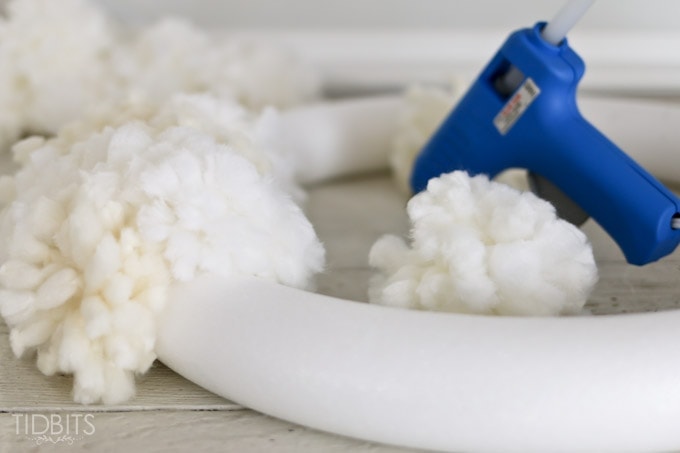
Just dab a generous amount of glue onto the pom pom and hold in place on your form.

Once it was complete, I hung on my mantel piece and attached a DIY grain sack bow made from bleached drop cloth.
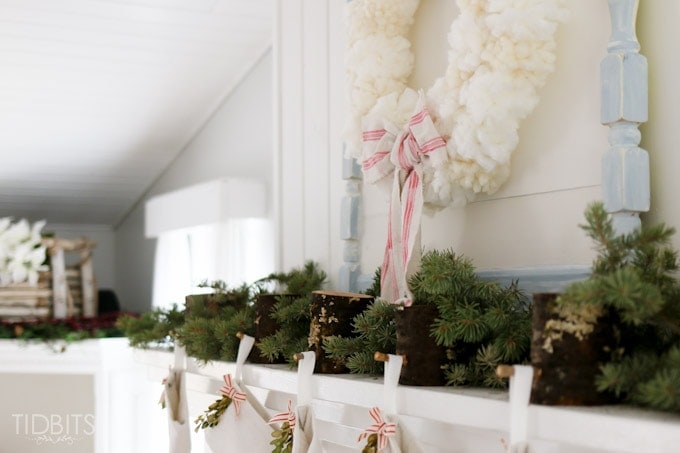
I love how this wreath will look great for all seasons, and adds a nice punch of texture to my home decor.
Be sure to stay tuned to see the rest of our Christmas mantel and to see the other projects I’ve made with the fringemaker. If you subscribe below, I’ll notify you by email for each update.
I would love it if you shared this project and tutorial with your friends! Social sharing images below, and thank you very much for reading!
Feel free to share your thoughts on this project, and ask any questions if you need further clarification.

*Linking up to these parties, HERE.


Your pom pom wreath is lovely! And so easy to DIY! Thank you for linking up with our Creative Spark party – this is one of our featured projects this week! Hope you’ll link up with us again 🙂
Yes, I saw it there as well – the day after I made mine. I did a little scoff at the price and walked away in pride. Haha! Glad you like it!