This post may contain affiliate links, which means I get a small percentage of the sale at no extra cost to you. I only recommend items I love and have had a positive experience with. Thank you!
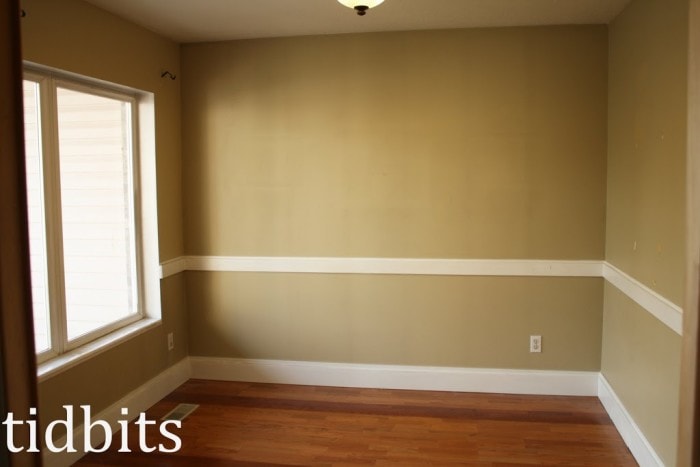
Living Room Before
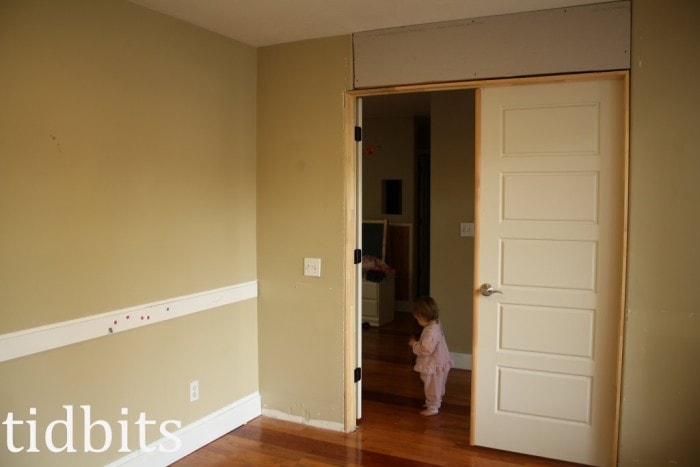
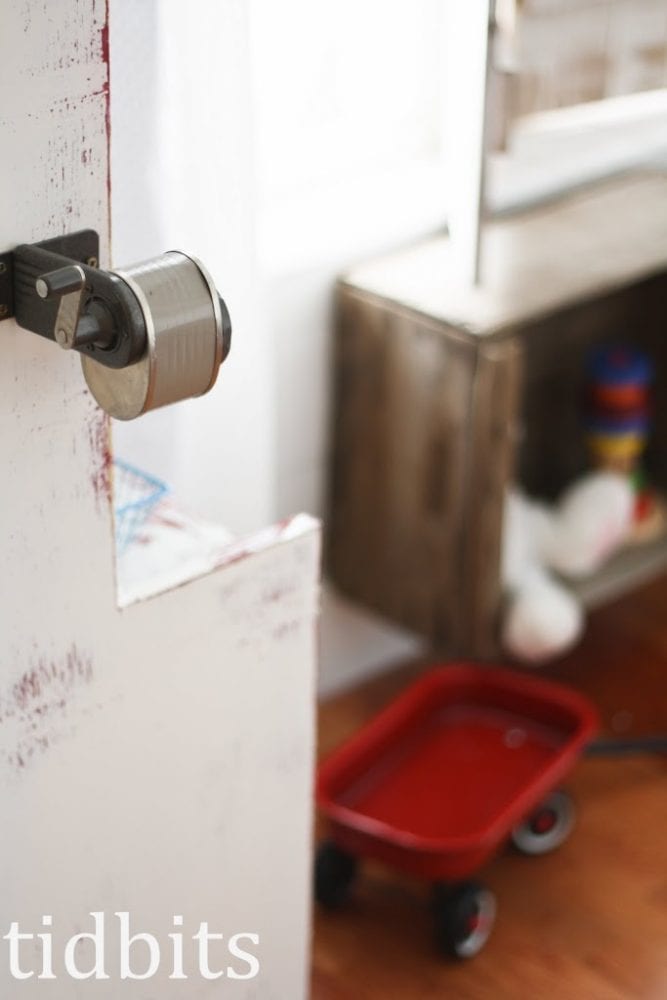
Looking in the other direction, you can see the framing above door that we needed to add in order to install those French doors.
It a bit of an eye sore. Just messy and yucky. Not good for a 6-year old’s innate creativity and certainly not very welcoming. Time for some careful planning and adjustments!
Planking the Walls
We began by going to Lowe’s and having them cut cheap plywood sheets into 6-inch-wide strips for us. They did it for under 5 bucks, which we considered well worth the cost.
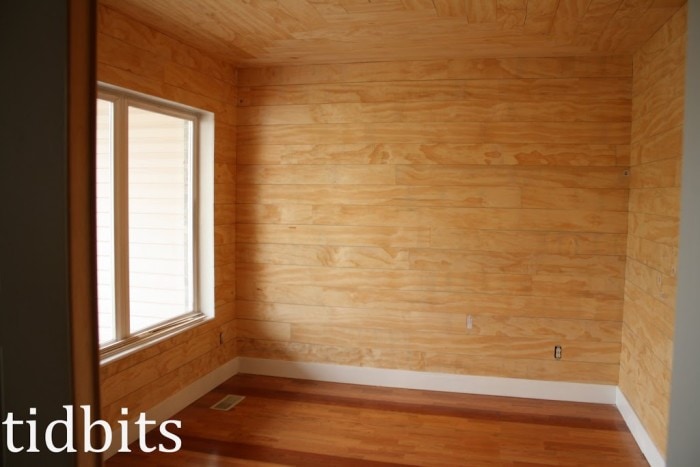
Then my husband took an ENTIRE DAY planking the walls and ceiling. He did a great job, even though he pretty much complained the whole time. He didn’t think it was necessary – but oh how wrong he was. It was indeed necessary for the look I wanted.
(Update: For those who have asked, we didn’t paint the walls before we planked. That would have used a lot of paint. What we did to get in the cracks was spray it. We borrowed a paint sprayer from my brother-in-law and taped up the room. It was so quick to paint!)
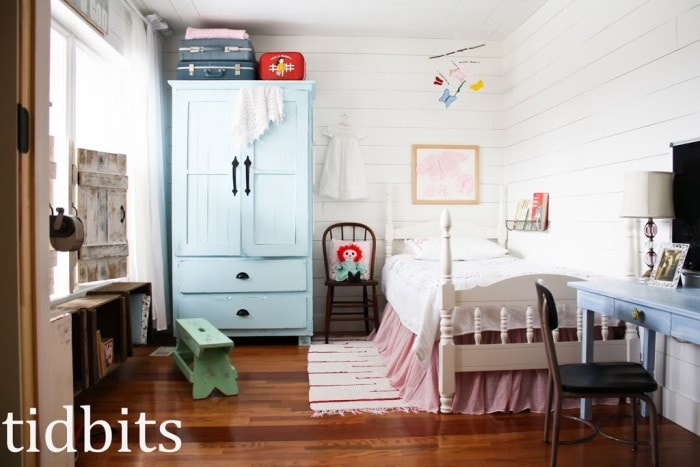
After – Living Room Turned Bedroom

Now I’ll run through the pictures and fill you in on what we made and things that have special meaning.
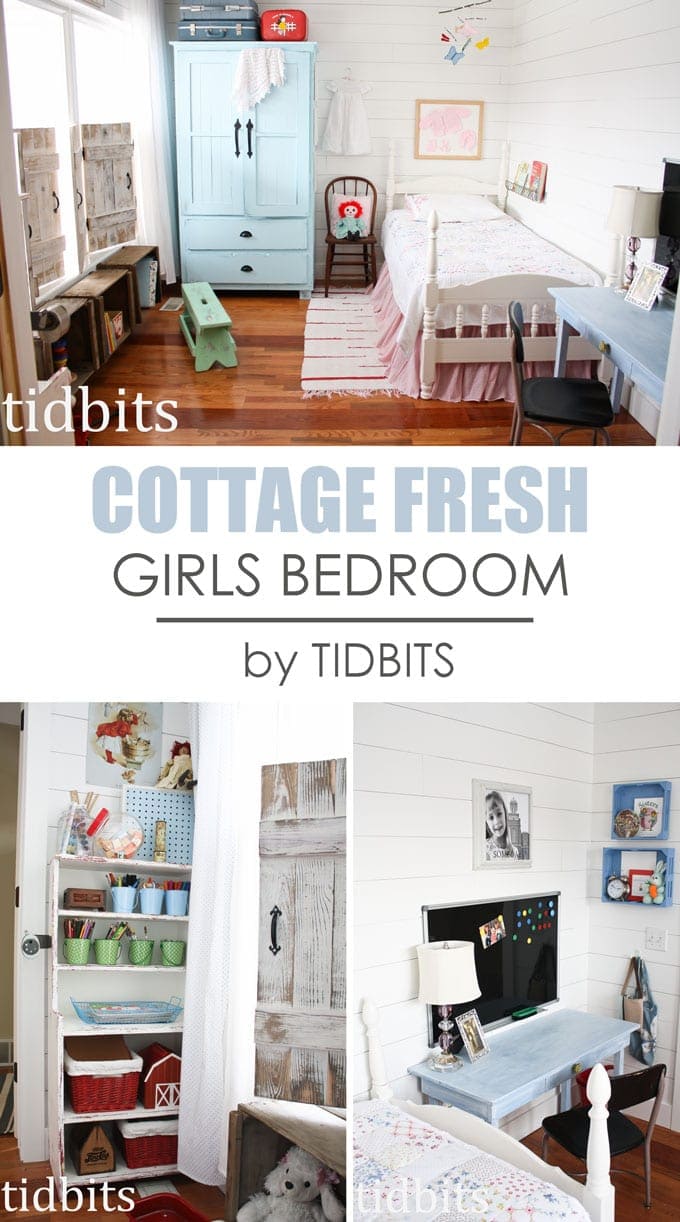
Bedroom Tour and Tips for Converting a Living Room into a Bedroom
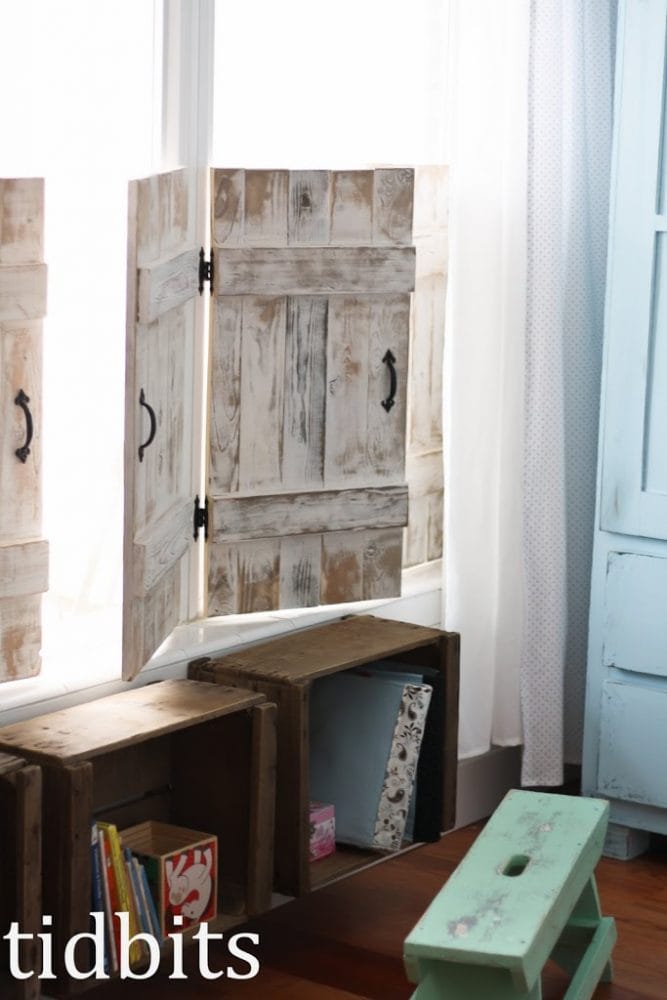
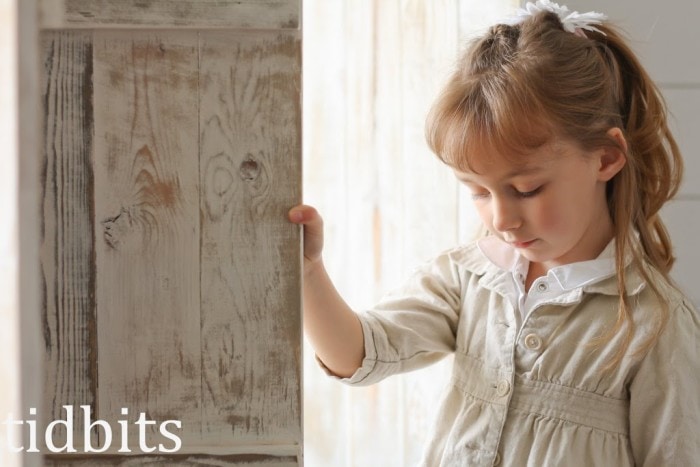
Add Privacy
Let’s start with the window shutters. Because this room is at the front of the house it needed privacy. After researching the cost of blinds and custom-made shutters – I knew we’d need to make our own. My husband pulled those together with a total of 15 bucks in wood.
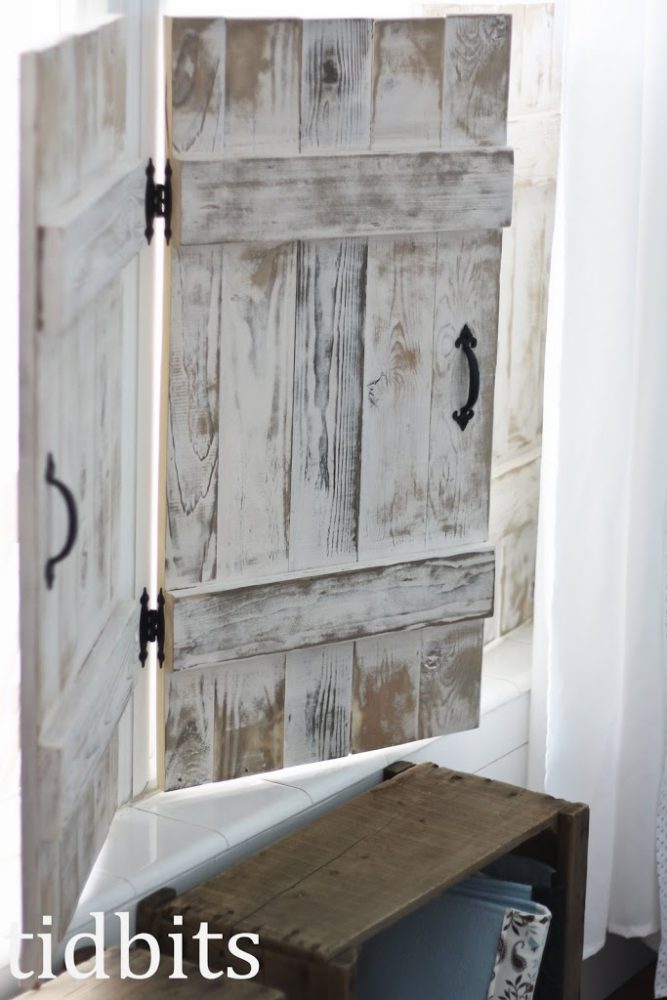
I love that they provide the privacy we want but also allow plenty of natural light to spill into the room.
All the girls think they are pretty fun, and they add some special character to the room.

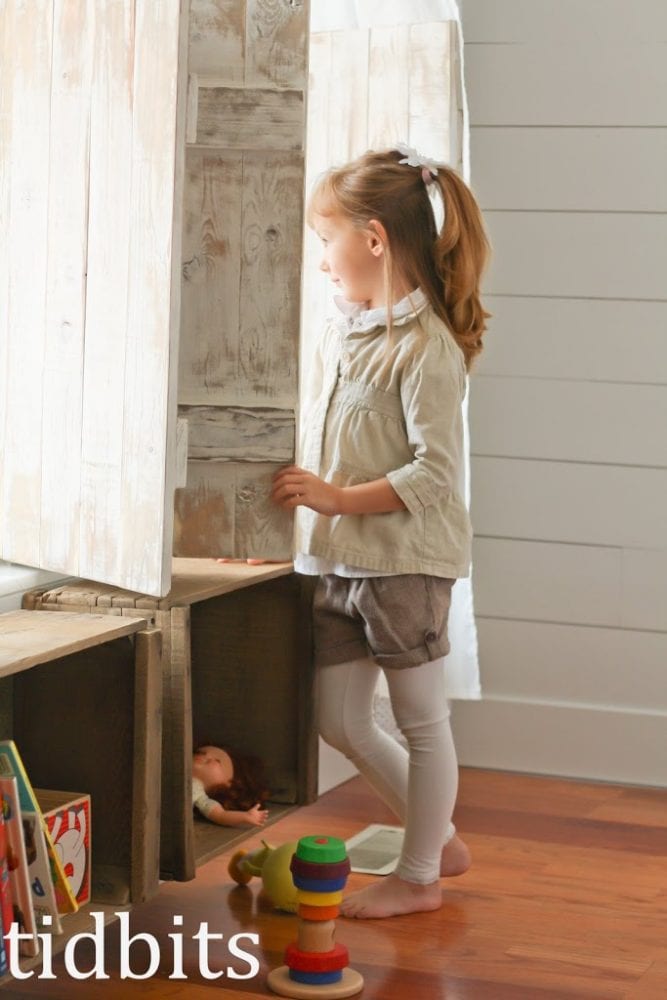
Add Storage
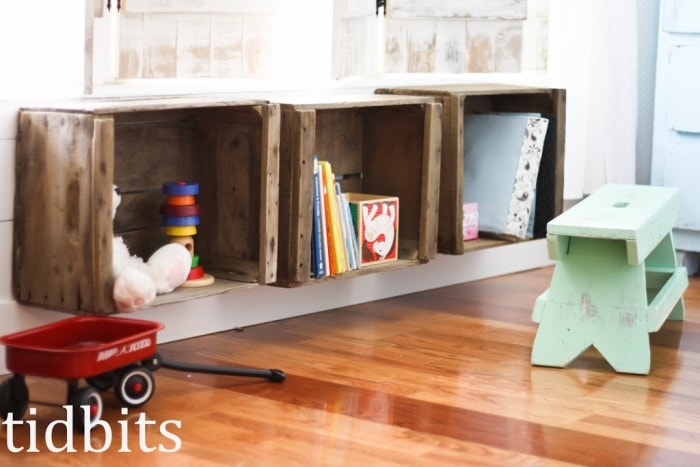
Since we converted this living room into a bedroom, I needed to get creative with storage space. My goal was to make functional, convenient storage, yet maintain the cottage charm I’m going after. A bit of a challenge in this small space, but we made it work.
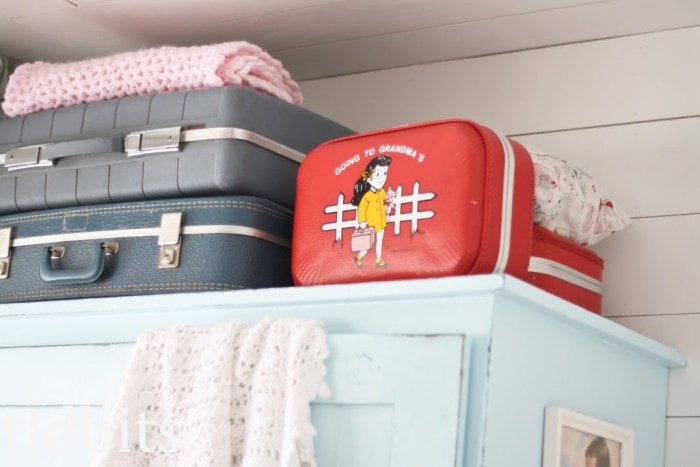
Under the window we bolted on some old crates I bought at an antique store for 10 dollars each. Not a steal – but not too bad either. It made good use of what is normally dead space in smaller rooms like these.
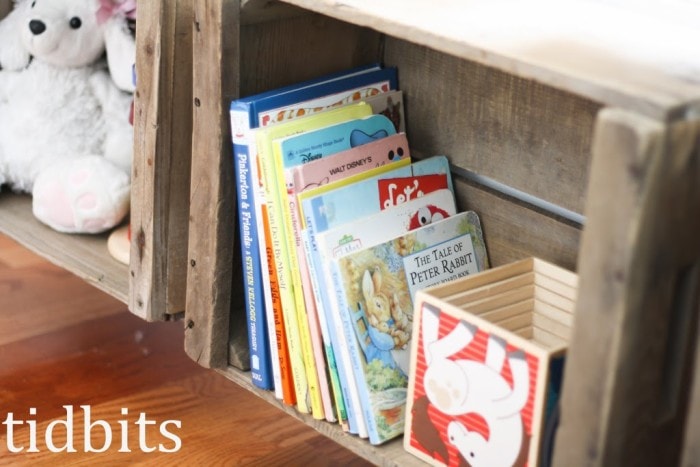
This way we can store and display all sorts of cute childhood treasures and personal items.

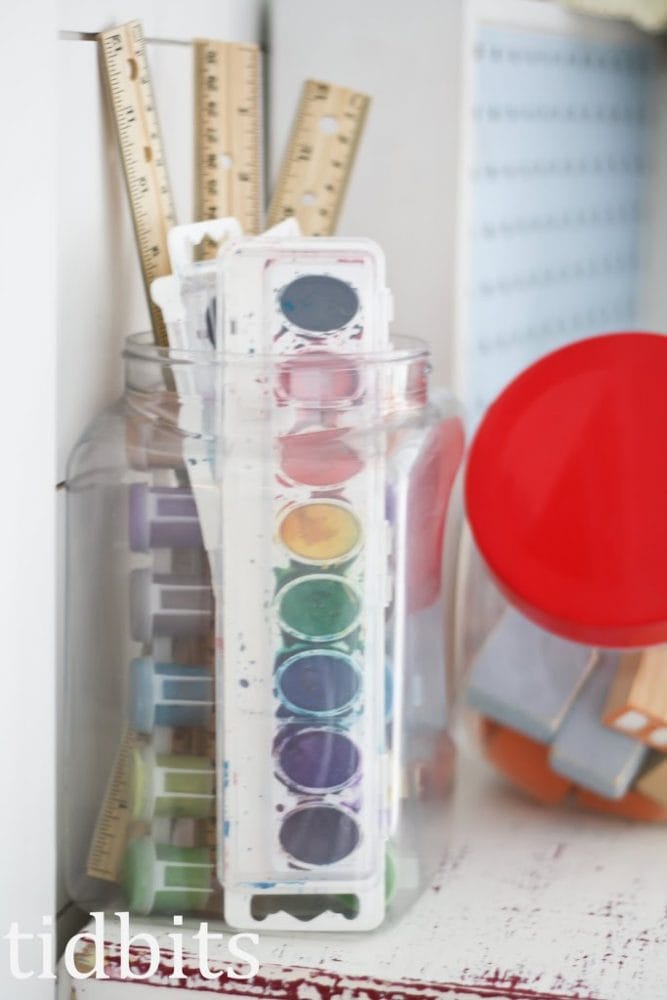
Just to the side of those crates is more storage. My daughter loves arts and crafts so with an old bookcase (bought at a garage sale years ago for 5 bucks) we stocked all the supplies she needs.
The bookshelf was originally red when I bought it. I painted it white years ago. Then sanded it to fit the style of this room. I love the red and yellow paint streaking through after the sanding. This shelf has been through a lot of remodels.
Personalize the Space
We also added any other cute vintage home decor we could gather to the shelf for a home-like vibe.
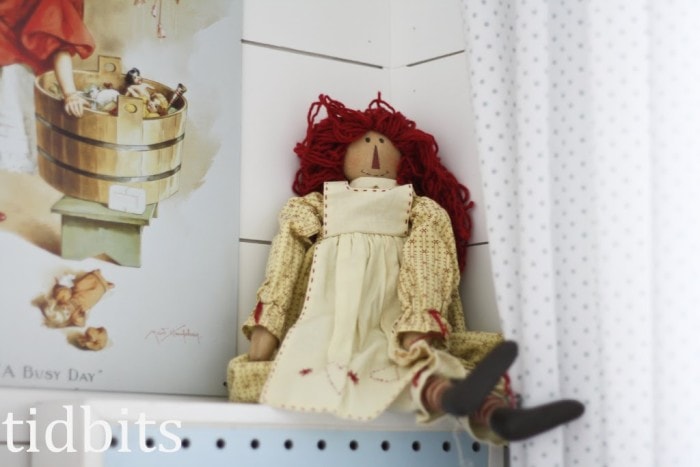
That doll was made for me when I got married by a sweet neighbor lady.
The previous owners of the house left an old school pencil sharpener in the basement, so we put it in her room. Nice touch – I thought.
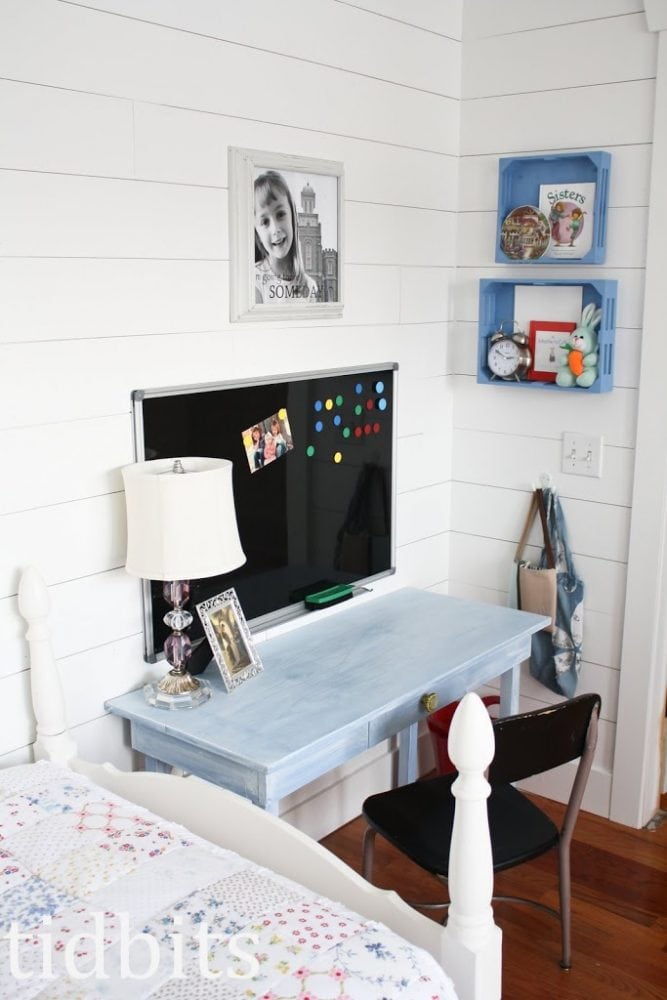
Over by her bed is her worktable nook. It is usually a mess – but I suppose that means she is making good use of it.
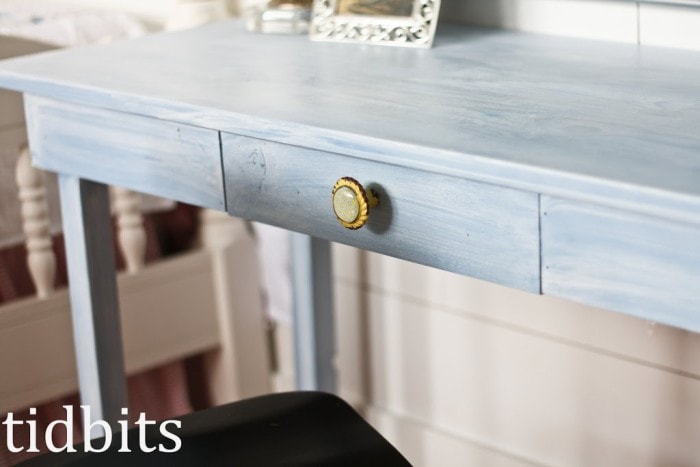
The desk was custom made (for around 20 bucks) by my dear husband. I painted it a dark blue and then took some watered-down white paint and whitewashed the whole thing with a rag trying to leave it as streaky as I could.
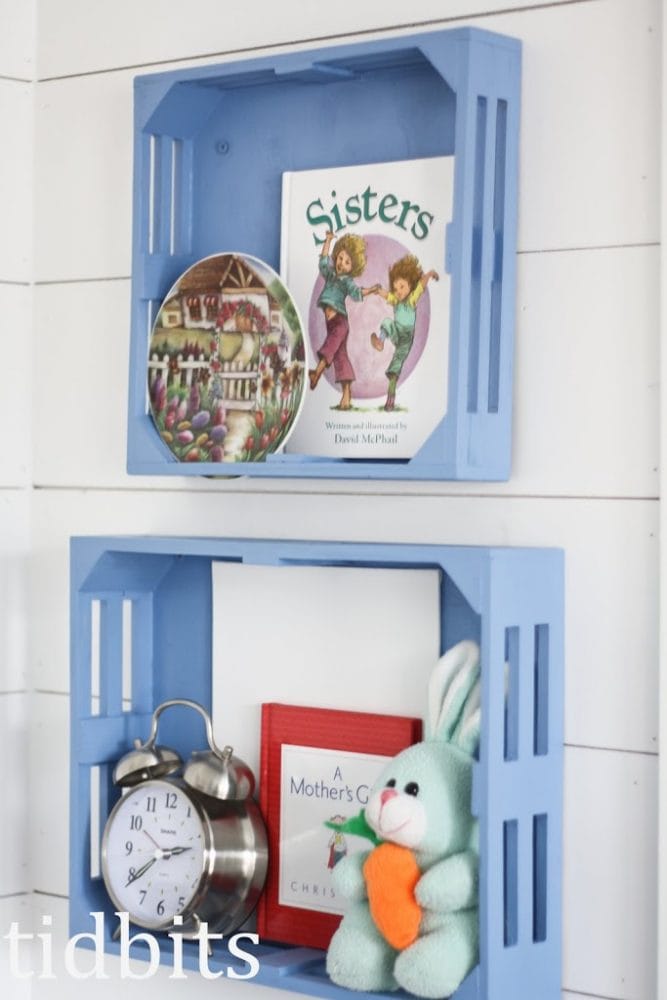
I added more shelving mostly for decorative purposes. These boxes were recycled from old toy boxes. The toy brand Melissa and Doug sometimes packs their toys in these wooden boxes, and I knew I would make use of them someday. I painted them and he screwed them to the wall.
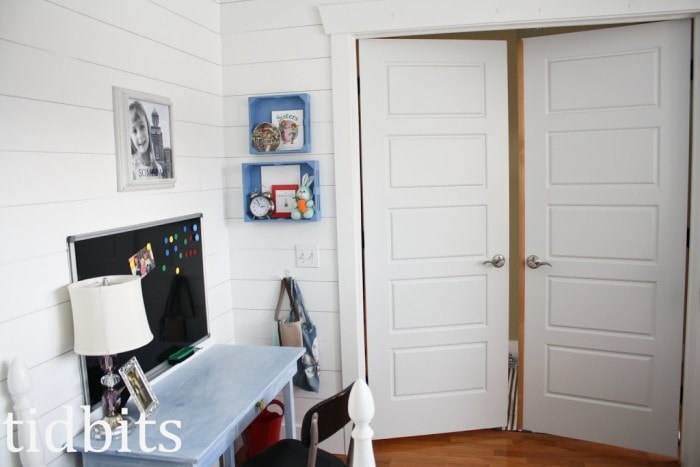
Here is a glance at the room with the doors we added. By her desk is a black magnetic board for her to hang pictures (bought from Hobby Lobby) and some hooks for her bags. The chair for the desk is a hand-me-down from my sister-in-law.
Incorporate Sentimental Items
Now to the bed.
A sofa bed would have been lovely here, but I had something better.
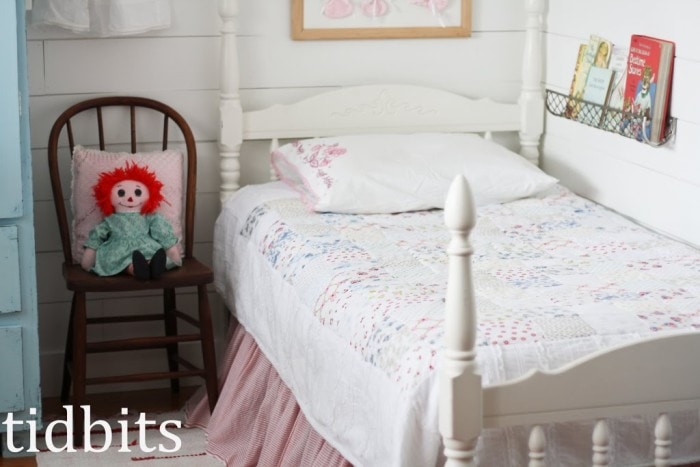
This bed is mine from my childhood. My mother was kind enough to pass it along.
The chair, which doubles as a nightstand, is a genuine antique chair I scored at a garage sell for 15. The Raggedy Ann doll was from my husband’s mother. She makes one for EVERY grandchild. So cool. The lace pillow behind the doll was also made by her.

Add Softness
I made a bed skirt out of red striped seersucker fabric. The rug I bought at an antique store for 30 dollars. I can’t pass up cute rugs! Score!
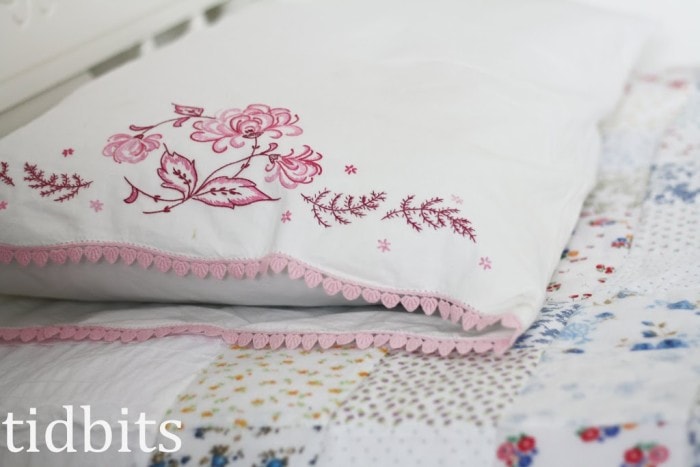
One of my favorite pieces in the room is the pillowcase. It was in my mom’s heirloom linen’s pile which she let me go to town with (I seem to be the only one in the family interested in them). We can’t pin down who it came from but somewhere along the lines of a grandma or great grandma.
The stitches are so pretty. I wanted to showcase this pillowcase without any other distractions. Plus, one pillow makes it really easy for her to make her own bed.
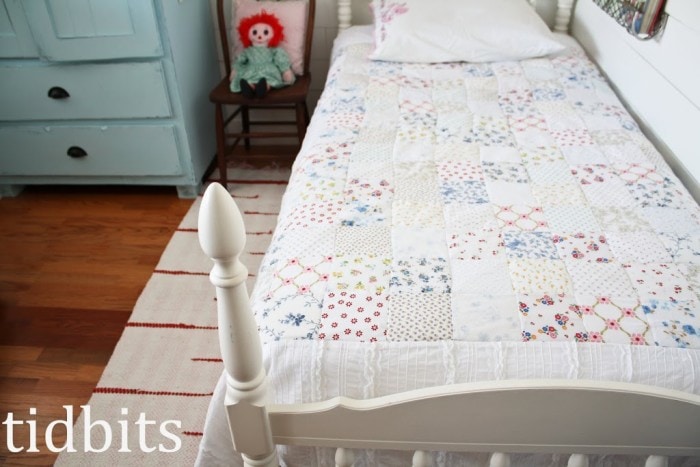
The quilt I made. That was an adventure since I haven’t quilted in years. I cut up all sorts of old sheets, pillowcases, and other vintage patterns I found at fabric stores. I wanted plenty of white. The border fabric was some pre-pleated and ruffled fabric bought at Wal-Mart.
I think the quilt adds the special touch I was looking for in this room. A definite labor of love. Blankets and pillows add so much softness to a space.

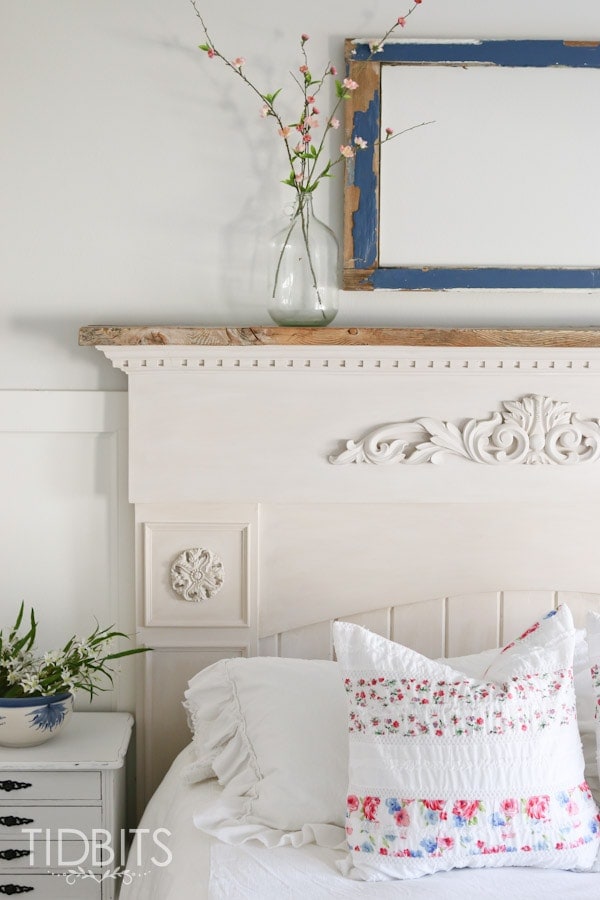
Above her bed I framed a precious baby outfit her Aunt made her when she was born.

And to the side of her bed is her baby blessing dress her grandmother also made her, hanging on a hanger.
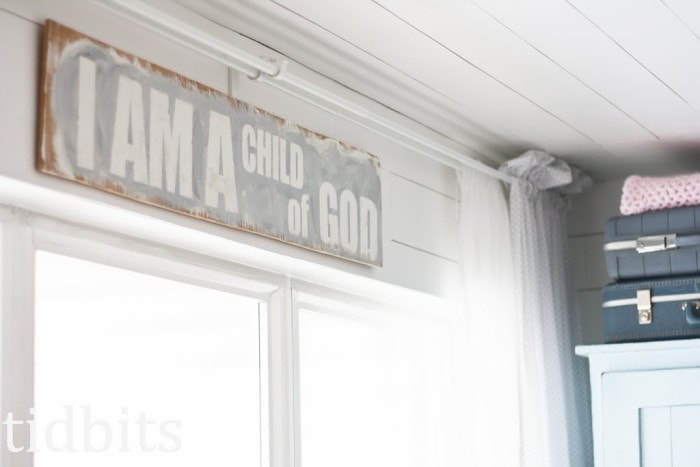
Also, her most demanding request for her room was that it have Jesus pictures in it. She knows how to make her mommy proud. So, I framed some special artwork for her to look at as she goes to sleep.
Add Cozy Touches
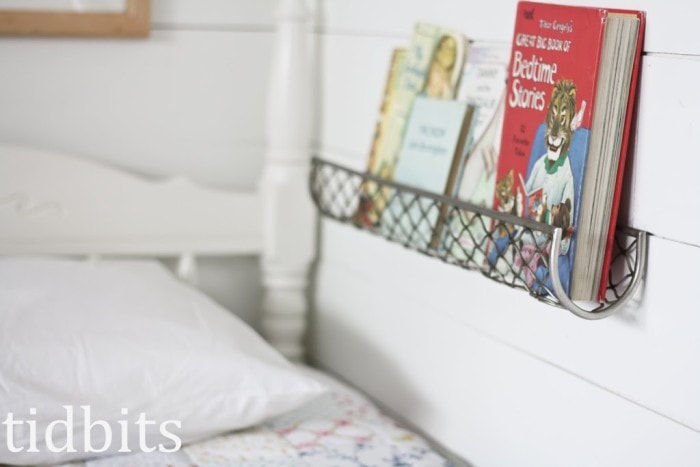
She loves having her own room for the first time and loves her big girl time before she turns off the light. So, we placed a little shelf to fill with books right by her bed. I found this shelf at a thrift store. I think it is an old candle holder – and we just screwed it in upside down. Those books in there now are some of my favorites handed down from my grandma.
Think Outside the Box
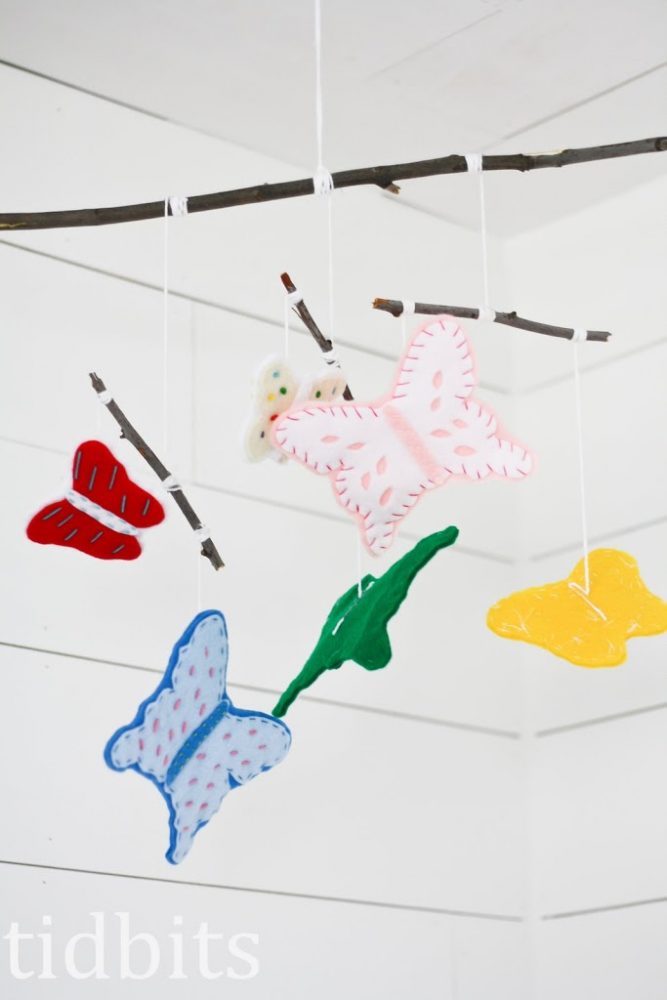
Above her bed, is a butterfly mobile.
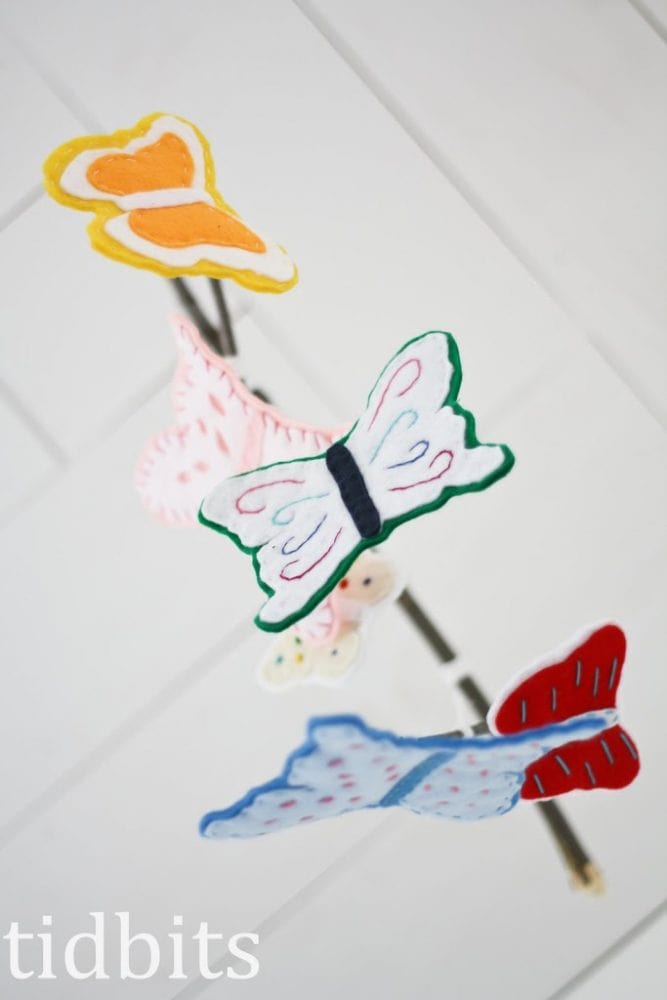
She also wanted butterflies in her room, so this is how I incorporated that idea. I stitched up some detailed butterflies made out of felt and hung them on sticks found in the back yard. She says she loves to look at them.
Use Non-Permanent Storage Solutions
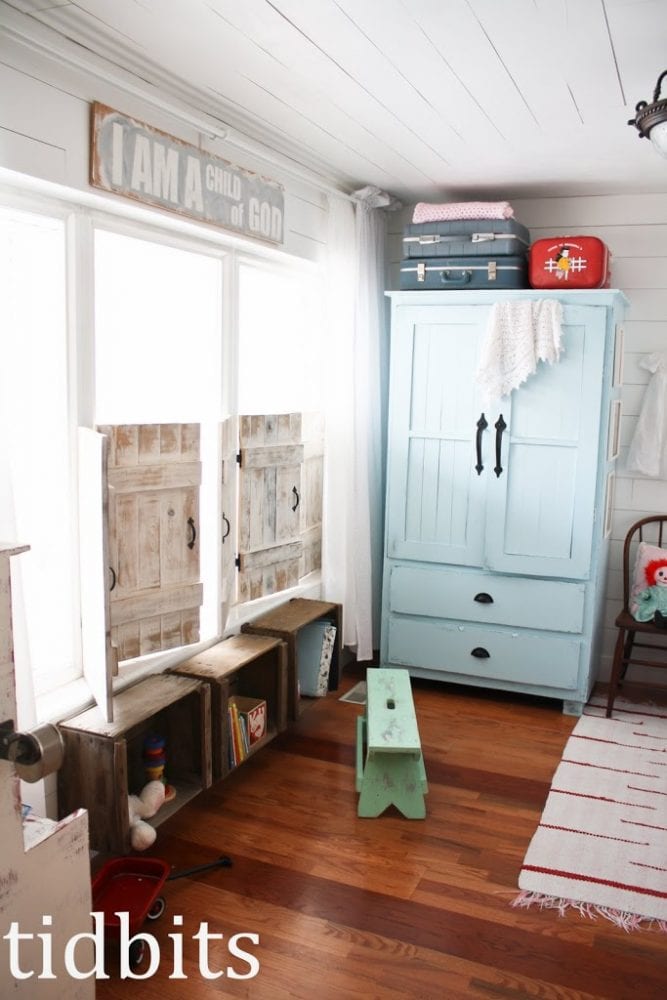
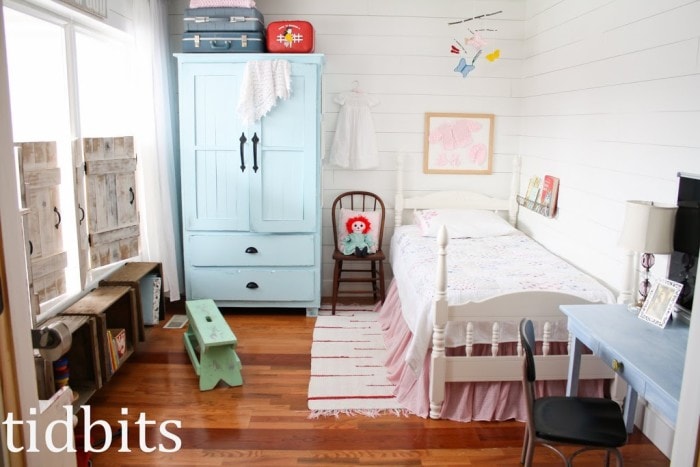
And of course, I can’t forget to mention the wardrobe. With no closet in this room, I knew we’d need to find a piece of furniture to store clothing in. I didn’t want anything permanent. You never know when you might want to transition that bedroom back to a living room!
An armoire or wardrobe is the perfect solution. I convinced my husband to build one for her. I showed him plenty of Pinterest images I loved, and this is what he came up with. How I LOVE this great piece of furniture. And him, by the way.
Make it Fun
I might also add that I found the little green stool at an antique store for 10 dollars. Who says you can’t find deals there? Well, you usually can’t, but I’ve made it a hobby to.
And a quick note on the curtains. The double rod was bought at Ikea (super cheap). I made the curtains out of petite polka dot fabric from Joann’s.
And that is a wrap on our living room converted to a bedroom. Boy did I have fun on this space! Probably more than my husband did.
Next in line is the bedroom for the other little girls. They share, and it is looking pretty scary about now.
I would love to hear what you think of the room! Let me know if you’ve ever converted a living room to a bedroom or guest room. What’s your favorite tip?
Also, here is a pin friendly image for you.
More Home Tours
Check out some of my other home tours and the check back often. The list is always growing!


You can tell her room was made with love.
Beautiful!!
I am incorrect, I went and looked, I have this style from my grandmother’s pile who was born in 1920s, she was big on sewing, she probably made those, (versus inheriting) would be circa 1950s or 60s (which this type looks more like, than the older needlework). So the general era can help you guess if it was your grandmother or great-grandmother, I hope. Btw, you are very lucky to have such a handy husband, does he post building how-tos anywhere? I also love the planking idea, it’s great, and can be adjusted and applied to other things, but I’m now thinking of applying it to my garage in places!
About your pillowcase: I also got to go through the family heirloom linens (strange isn’t it, how only one of us seems to ever want these?) and I have several pillowcases that are of similar style to yours. Now, with me, those particular linens all came out of the pile inherited from my great grandmothers and great-great grandmothers, (all born at the end of 19th C and earlier, my grandparents being born beginning around 1912-1918) and being amongst other craft linens such as doilies, handmade lace pillows, doilies, place-settings, and table-pieces. So, I would say it’s likely your pillowcase came to you from your great-grandmother, as it’s an older time period when that style was popluar.
Enjoying your blog so much!
I love this room! Very nice job! My mother used to make Raggedy Ann dolls as well. She passed away when I was just 18, so I have carried on her tradition of making dolls for all the baby girls in the family.
This is beautiful! I have looked through a lot of your blog, but I had never seen this room. My husband and I are considering planking our vaulted wall in the living room. We haven’t made the leap yet though. We know once we plank it, it is stuck that way. If we would ever desire to take the planks down years from now, we’d have to re-drywall the room because of so many nail holes.
Do you have any thoughts or insight into the permanency of the planked walls?
I LOVE them…we are just having a hard making the jump.
Your home is gorgeous!
Cami-I’m also turning a formal dining room into a bedroom. What size is this room? Thanks for the great ideas.
Jill
This room redo just came thru on the Hometalk email and it is so beautiful! I am in awe that your family has so many heirlooms! I don’t have much family left and they certainly didn’t care about keeping items from our past. You are truly blessed to have such a wonderful family. And I know I said it in the post about your living room but wow your husband is handy and you have amazing design skills. Your home truly reflects a labor of love.
You get the most thoughtful and kind comment award! Thank you so very much. My husbands parents held tight to way too many heirlooms, and I was super excited to get some that I could use in my design without looking like too much. And ya know, it is a labor of love. That is why it takes us so long! Ha!
Love absolutely everything! Especially you incorporating “Jesus” into it. That’s the most important thing you’ll ever teach her. You said she made her mama proud and you’ve made your mama proud.
Oh, you are so kind! I do think it is very important for them to know. Thank you so much for taking the time to comment and give me such a compliment. It means so much to me!
Awsome Job !!! I love all the homie comfy touches. Also I have that green stool, passed down from a greatgrandmother ! yup mine is green with lots of love marks!
Thank you! And that is so awesome you have that stool too! We use it frequently. A classic piece if you ask me.
That is the most beautiful little girl’s bedroom I’ve ever seen!
Wow!! Thank you so much!
So, so pretty! I love all the little touches and how you made so many of the things.The Child of God sign is awesome! The walls turned out SO nice! It really does look like a quaint cottage room now. The before and after are incredible! Your hubby did a great job on the wardrobe. Very pretty! Your girls are lucky to have such a creative mama!
This room is absolutely adorable!! I want you to adopt me!
Beautiful room! I love how everything comes together. I was wondering what the paint you was that you used on the wardrobe? I am in the gathering process for redoing my girls' room! I may have a dresser to paint! Again, great room. Thanks for the inspiration!
Gorgeous room! Any chance you could share with me the color of blue you used to paint the armor, its perfect. Thank you! d
This is absolutely adorable! Wow, you put so much time into this. What a stunning and perfect little girls room!
Beautiful! I would love to know the dimensions of this room.
Everything in this room is perfect! What a lucky little girl. I love it all so much!!!<br />
Saw this over at Better After. Had to pop over to learn more about the room. I so hate blah-builder homes, and I can see that you are turning yours into anything-but. I'm more of a modern cottage gal myself, but I can see that a country cottage is just your thing, and I think it's wonderful. My favorite part is the planked walls, and all the personal touches make the room so special for
LOVE this room. It is so bright and welcoming–what a great room to grow up in! And, how lucky are you to have such a crafty carpenter husband!?!?!? Great job!!!
This is such an amazing kids room. I want my room to look like this!
Just stumbled onto your blog. LOVVVVE this bedroom. Your baby is one blessed girl 🙂
Your a genious Cami!! For reals! I'm about to redo Myas room and sheesh I feel like I better kick it up. I want something snazzy. I love your light bright colors.
What a charming space! I would love to move into such a lovely spot myself! Lucky girl! (and talented mom)
You said you had way more fun than your husband doing your little girls room. Don’t be surprised but I bet he had more fun than he let on. I imagine the pride you both just feel in putting all that time and love into creating such a perfect little place for her. Kudos to BOTH of you for a job well done!
LOVE THIS ROOM!!!!!!!!!!!!! and … she makes Raggedy Ann's?! I love R A's! Does she take orders?!
omgosh! Cami this is beautiful! you are so talented. can't wait to see more of what you do to your home! <br /><br />Blessings from your newest follower -<br />Sara
Thanks for all the comments! I wanted to answer a few questions about the plywood planking. We used 1/4 inch plywood, underlayment. At least that is what my husband told me to tell you. It was pretty cheap, at about 12 dollars a sheet. Lowe's or Home Depot will cut it for you for around 25 cents a cut. My husband only nailed it down. We then sprayed it white with a paint sprayer. I
Your daughter's room is so dreamy for a little girl and big girl, since I am dying to do some white planking somewhere in my home. You and your husband did an amazing job from the quilt to the furniture. I love how vintage it all feels!!!
so adorable! all your details are so sweet 🙂
I LOVE IT!!!!
Absolutely STUNNING! 😀 So much inspiration here!
Came over from Better After also. Of all the beautiful and special things you did for your darling little girl, what comes through mostly, is the LOVE for your child that you put into that room. I'm bookmarking it for sure!
Beautiful room! Found you through Better After and the after is simply stunning! What a pretty place for your pretty little girl!
Found this from Better After also and the pictures just don't do the blog justice! The room is amazing and so wonderful seeing everything there with a purpose. I love it and admire your creativity. Well done
This is one of the best room transformations I have ever seen! Love it! Brought here from Better After.
Stopping by from Better After! I love what you did with that room. What a great way to think out of the box!
I LOVE this room! My daughter wants to make her room more "fancy" so I will have to share this with her. I had her blessing dress in a shadow box at one point, but it fell and the glass broke. Maybe I'll just try to find a cute hanger like you did. How did you do the "I am a child of God" sign?
Wow–love it!!!
So awesome! <br /><br />I started the wood planking project last week on my living room. SO excited to get it finished! <br /><br />You did a fabulous job!
wow, this is amazing!! i love the planks and the shutters. i love the set up!
What a darling room, Cami. Quick question. How many sheets of plywood did you use for the room and about how big is the room? Such a great idea. I love it and you have some great things in there. It always takes longer when you do everything yourself, but it is also worth the effort.
i saw this on better after, too, and am in LOVE!!!!! amazing adorable room!!!!
Found you on Better After. I have to say I LOVE LOVE LOVE this room!! You did an awesome job and I am in love with it! Pinning this one for future reference for my little girl's room.
Wow, this room is stunning! Can not believe that you transformed it to what it is now. You are really talented. I just love it!
We used a paint sprayer to paint the room and it filled in the cracks great.
Found you at Better After, I love what you have done with this room, it looks like an old porch made into a bedroom, great job! Did you have a hard time getting paint between the planks of plywood? Yours looks great, but I saw a floor done and the cracks were obvious.
Here from Better After–you did an amazing job. I love it ALL, but the planks might be just the coolest part of all.
Here from Better After… her room is absolutely adorable. All of it. Your hubby is very talanted too!! So cute.
wow. it's stunning. my girls' room is still naked. =) (i made your aprons for my two girls (3 & 1) for christmas. thanks for the pattern!!!)
You really must move south so you can be my best friend and help me do that to my house. The house next door to ours is for sale and there is plenty of remodelling opportunity there–see? I have to all worked out :O). When we bought our new place I pretty much refused to look at places with a formal living room b/c I thought it was such a waste. Who knew it could turn out so well? Great job!
This room is beautiful!!!!! Agnes from Hungary
This room is beautiful. Great Job. I would love for you to post a tutorial on some of the things…like the bed skirt, wardrobe, and drapes. Love everything!
This room is awesome and so are you! How entirely wonderful! I love each & every little detail. I sent your link to my daughter who has an almost 4 year old that this would be wonderful for her to grow into.. Great ideas! Thanks so much. Have a blessed day!
This room is amazing. I love EVERY detail!
Cami, this is amazing! Someday I want to be as awesome as you! And your husband, I'll be awesome like him too 🙂 I love how every detail has a story.