
This post may contain affiliate links, which means I get a small percentage of the sale at no extra cost to you. I only recommend items I love and have had a positive experience with. Thank you!
Save yourself hundreds and build your own DIY Butcher Block Countertops! Watch our process and discover all the products you’ll need.
Learn how to turn your boring kitchen countertop into a marvelous butcher block counter! This simple change will add a designer touch to your home, without the expensive price.

*This post is sponsored by BLANCO. So grateful to have a sponsor to help me bring this content to you!
If you’ve ever had to live without countertops in your kitchen to use for food prep or have a smooth cutting surface when making meals, you are familiar with the joy that fills your heart when you finally have them.
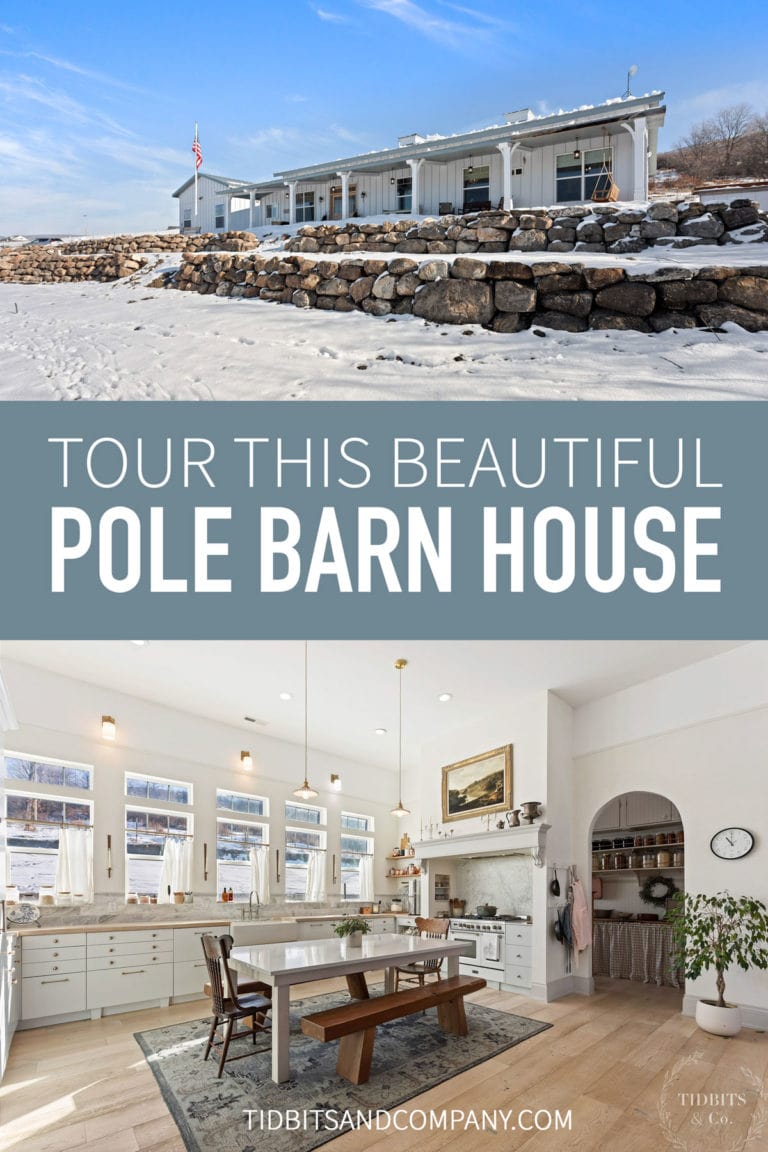
We are chipping away on the progress of our new kitchen in our new pole barn home we’ve built, and I want to share with you an update and our whole DIY process for building our beautiful white oak butcher block island countertops.
UPDATE: See the finished Kitchen Reveal here.
WATCH THIS POST
For a more personal experience, feel free to watch this post! Though I do leave more details in the written post – each is great to help you learn.
SUBSCRIBE TO TIDBITS ON YOUTUBE!
BUTCHER BLOCK COUNTERTOP PROS AND CONS
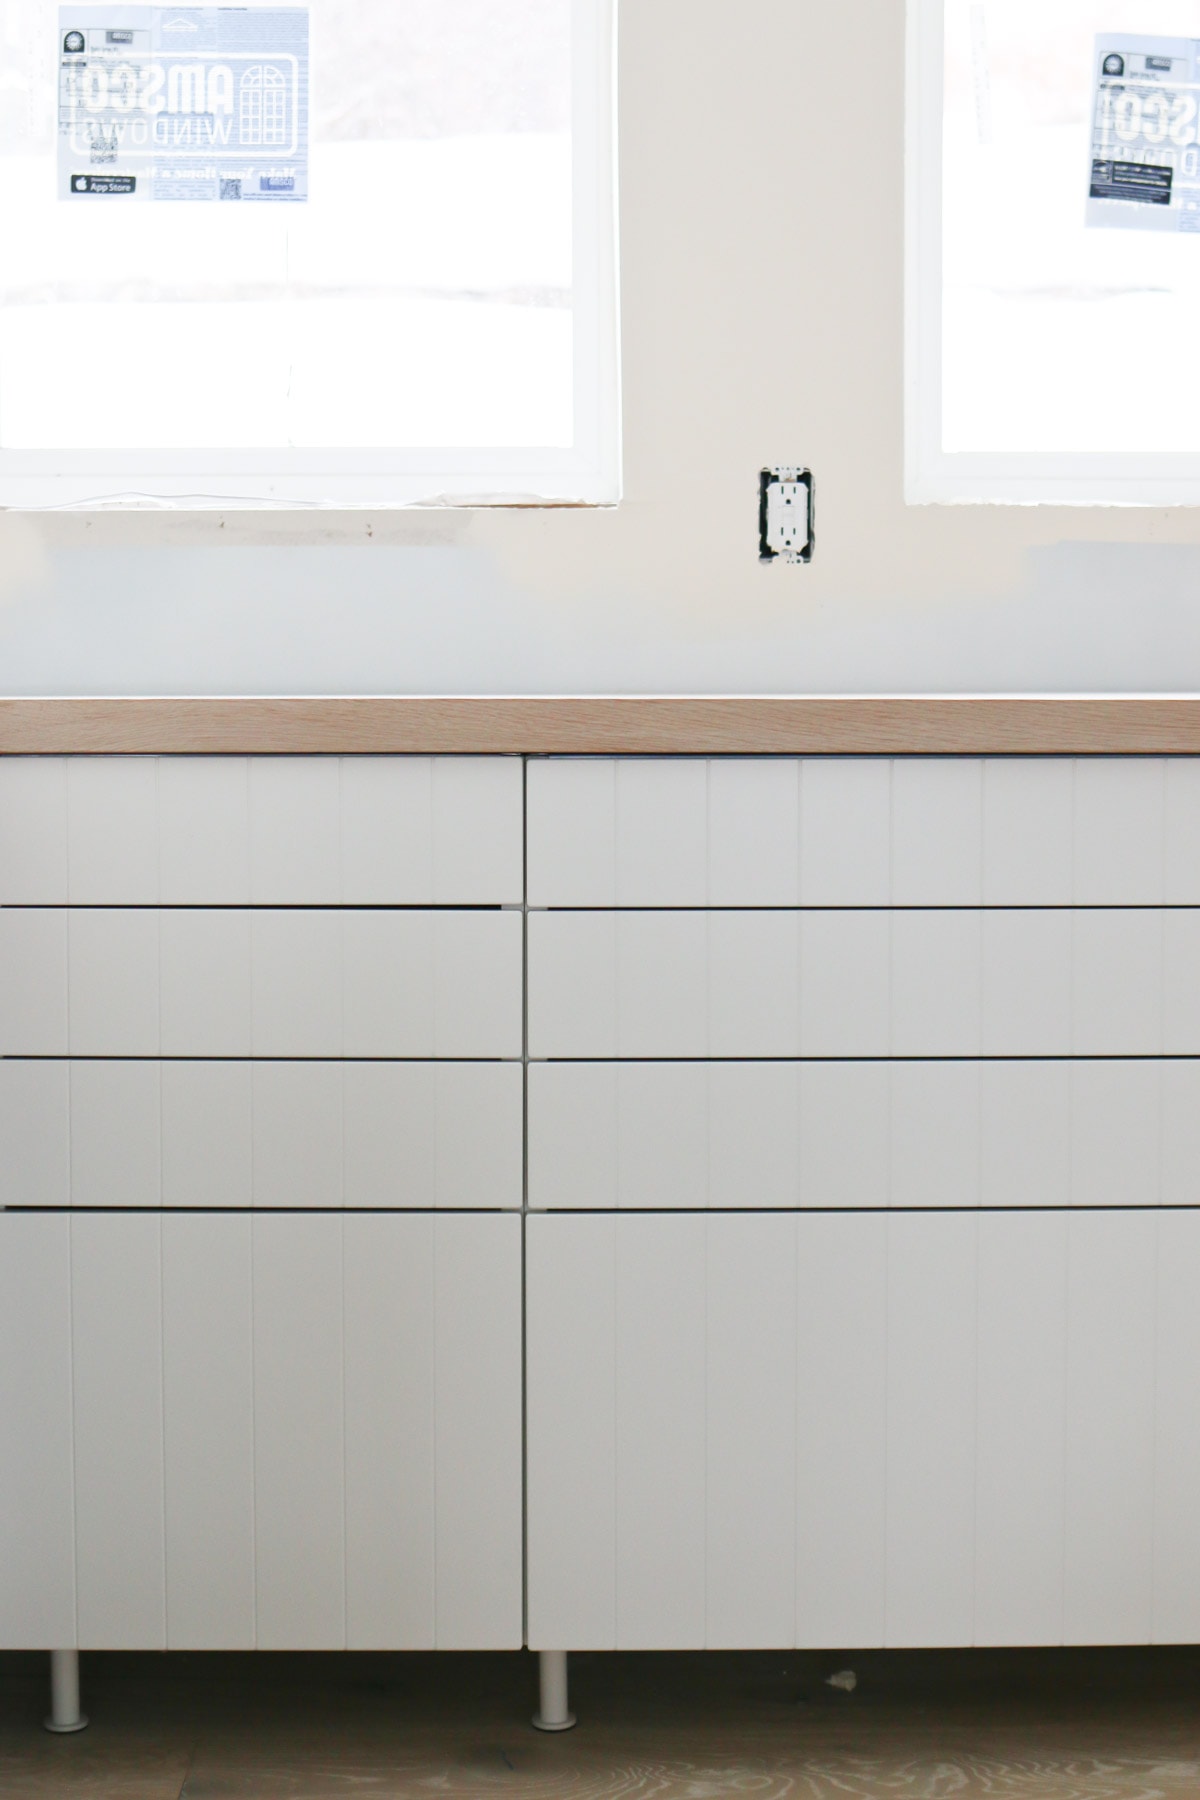
We have a U-shaped kitchen, and we are doing a mix of countertop materials. You can see all our design plans and how we designed this space here.
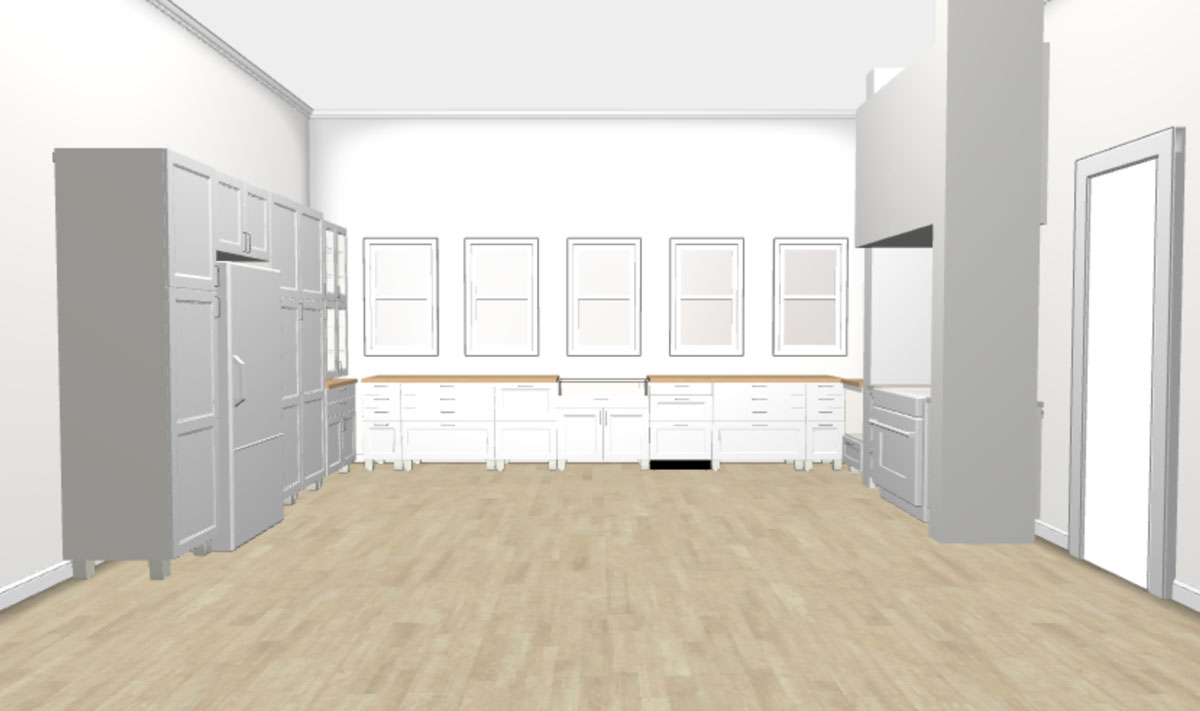
I initially wanted all marble countertops – but after evaluating the cost of this high maintenance material, we opted for butcher block – something we felt more comfortable doing ourselves and would save us hundreds.
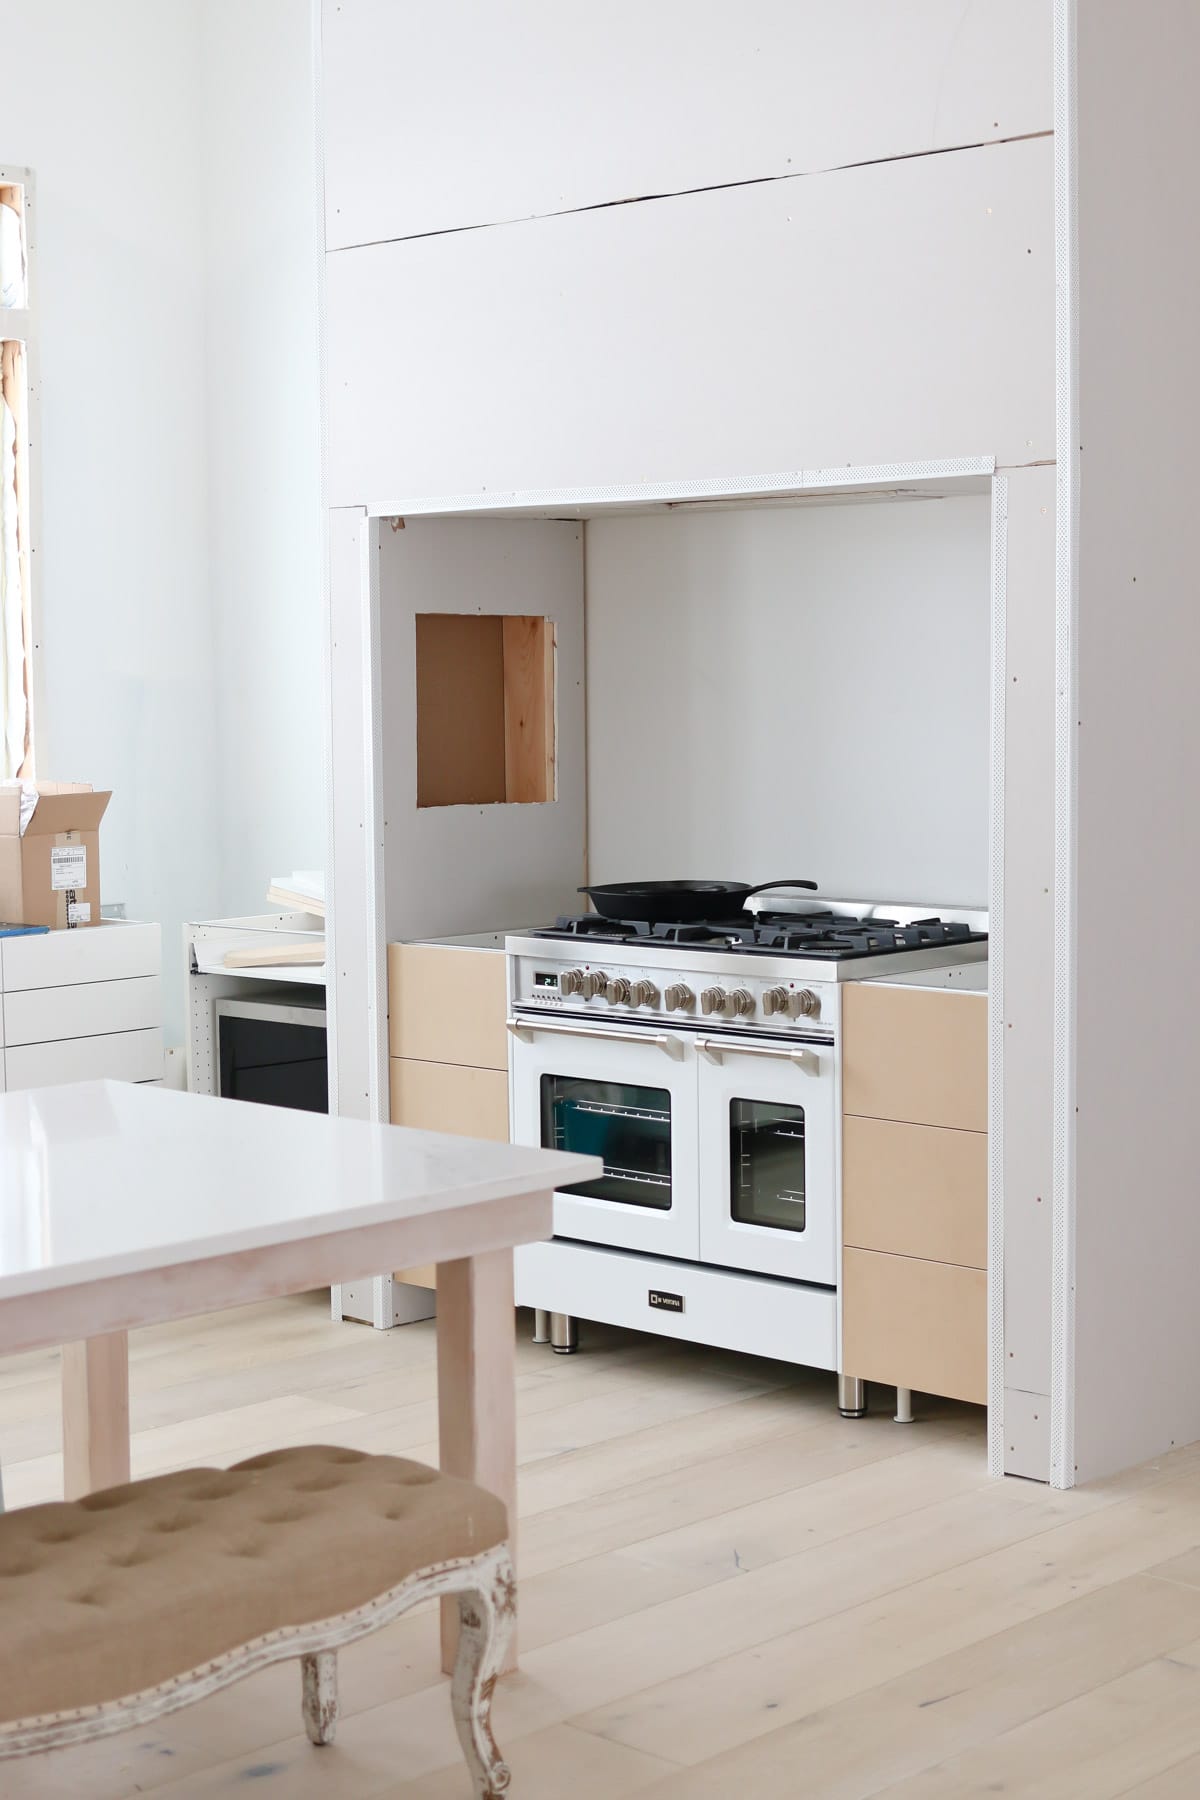
I still really want some Carrara marble in our kitchen, so we have bought some marble remnants at an incredible price and are going to cut and polish them ourselves for this small countertop space on either side of our Verona Range, including a big slab for the backsplash.

You’ll also notice the bit of marble we threw in for this “Stone Tap” section. More on that in a sec!
I think having the mix of the warm wood countertops and my favorite stone will be lovely. Then add the backsplash, which is a small piece of the same wood on the countertops.
TYPE OF WOOD
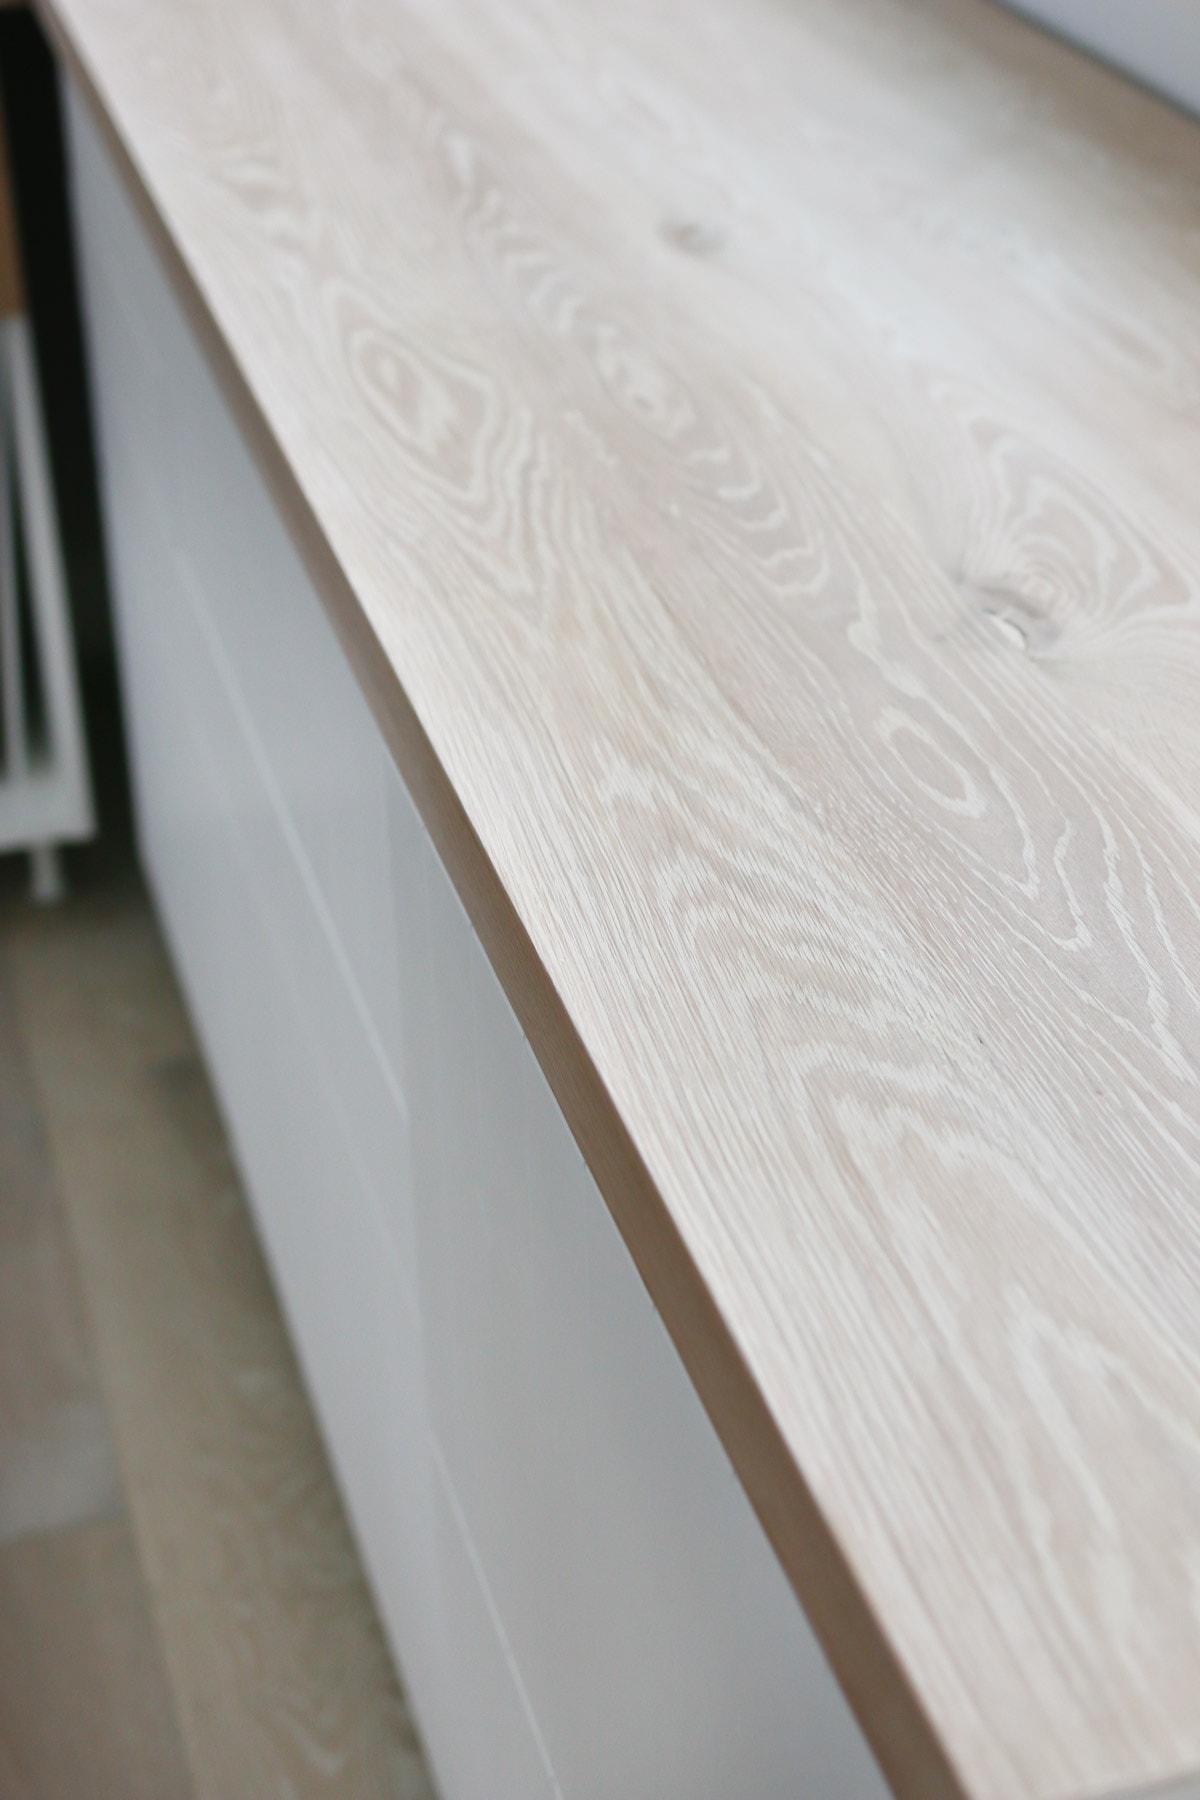
We have used a plank of white oak wood for our butcher block countertops. Oak is hardwood, making it a more durable choice for countertops, compared to something like pine, which is softwood.

White oak is our new favorite wood because it is warm without having dominant red or orange tones in it. We experimented with a sample and decided we loved it when we added a pickling stain and then lightly sanded it off.
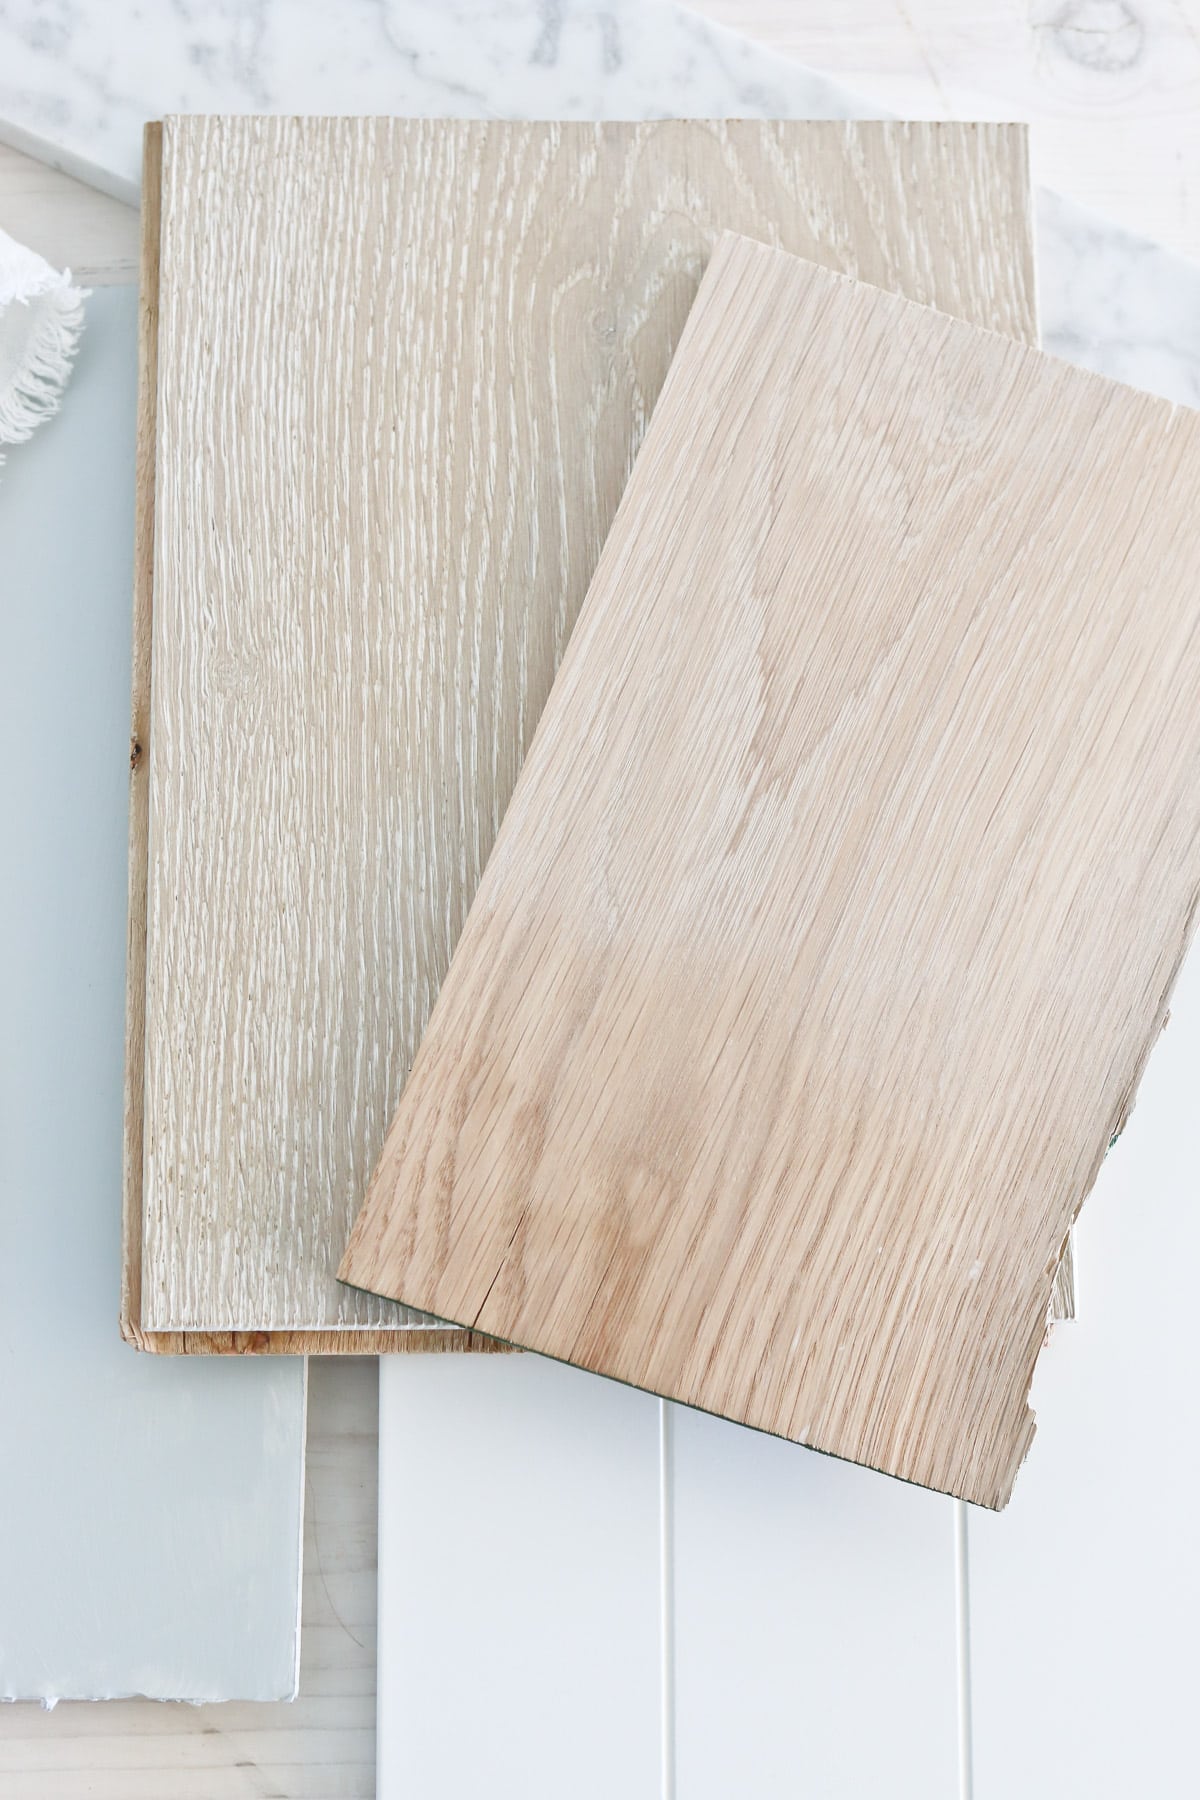
It leaves some white running through the grain and makes the wood overall softer. It is just so pretty. You’ll be able to see that difference in the process shots below.
We found our white oak from a friend who has his own finishing company. We were like a couple of kids in a candy store seeing all the beautiful wood he had. It was a pretty simple choice for us to go with the white oak after seeing how lovely it looked.
HOW TO BUILD BUTCHER BLOCK COUNTERTOPS
I’ll walk you through Mr. TIDBITS’ process for building and finishing these countertops, as well as the products we’ve used.
We started with wood pieces that were 5 inches wide and 1 ¾ inch thick.
For the sake of ease and beauty, we opted to do a face grain butcher block top, meaning the face of the wood is on top, versus a true edge grain or end grain countertop.
You can google those terms and see a whole ton of examples and pros and cons for each.
STEP 1: PLANE AND CUT YOUR WOOD PIECES
Cut and plane your wood pieces before you glue them together. We were so grateful that our friend and wood supplier will run our wood through his industrial planer. By the time we picked it up, it was all planned, smooth, the correct size, and ready to be glued.
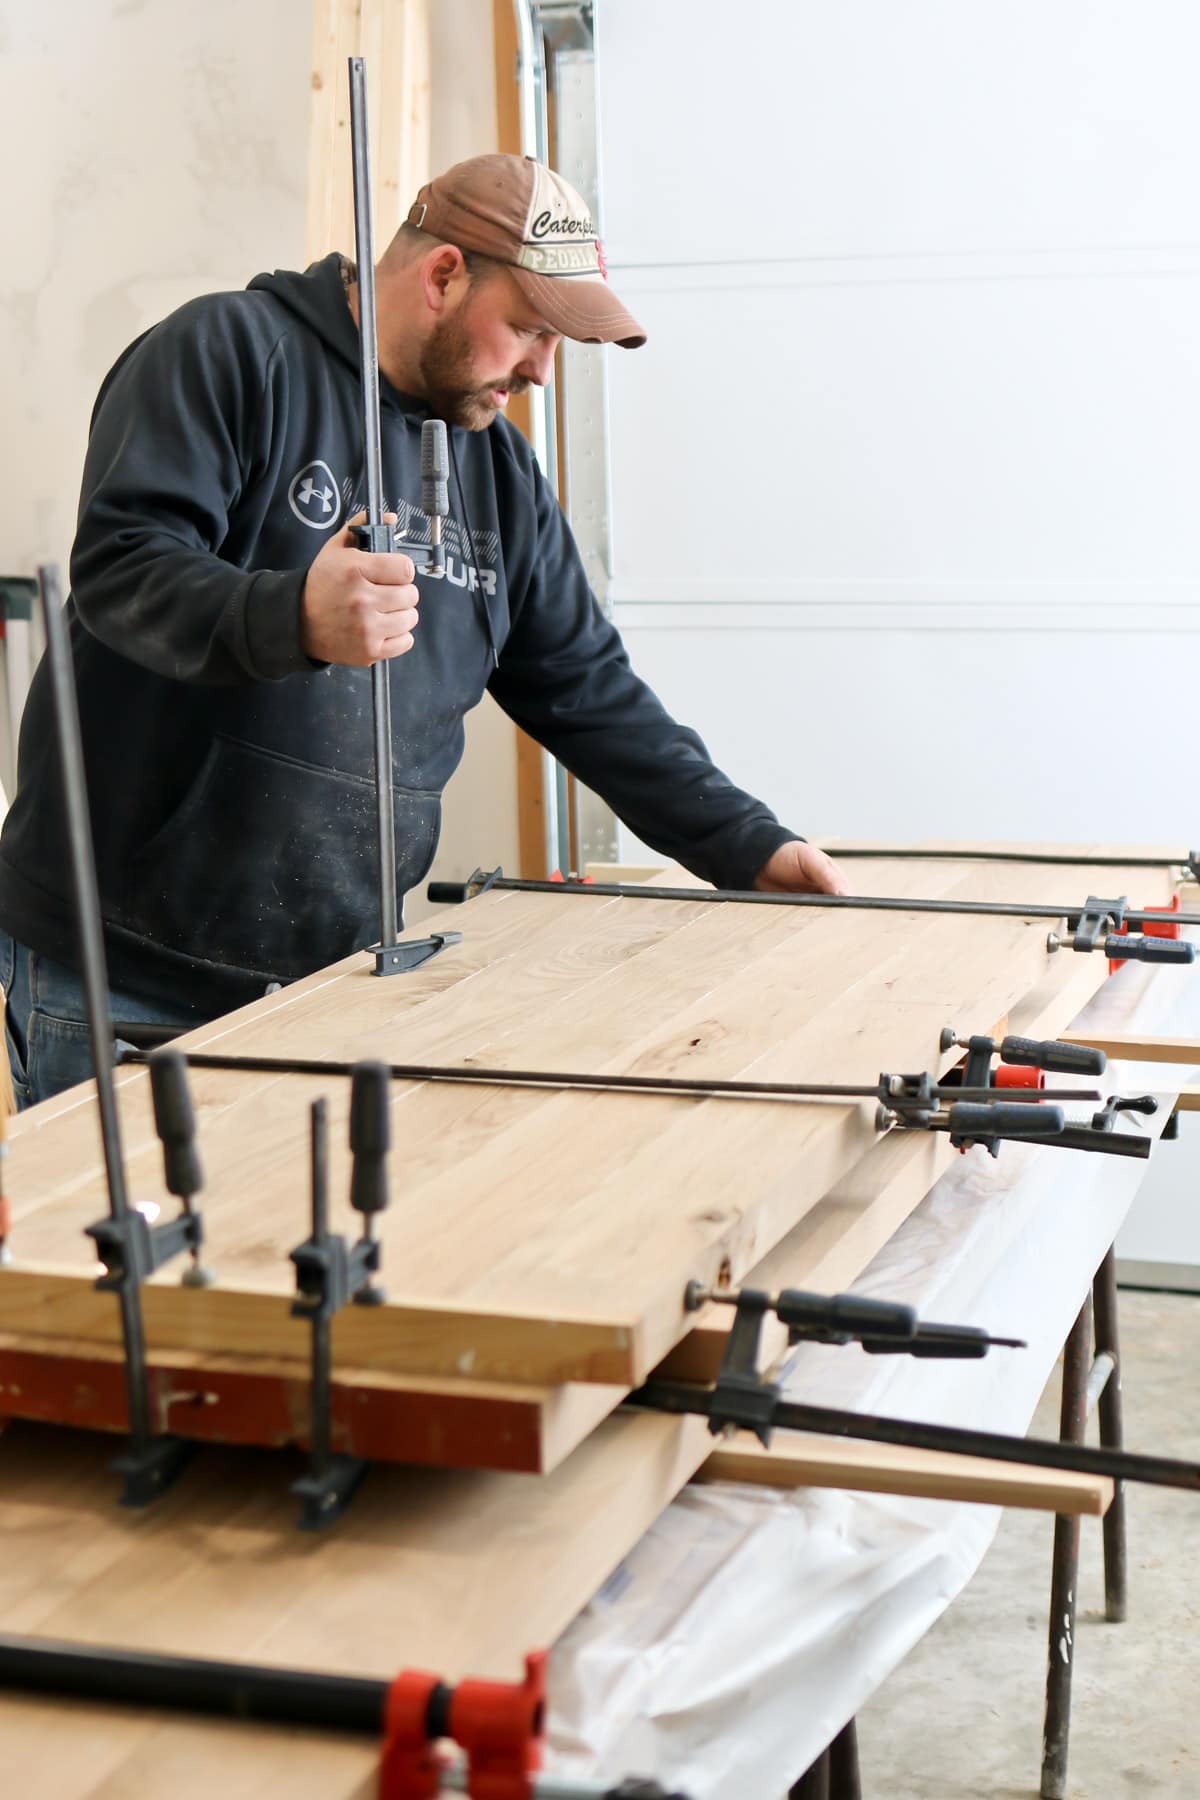
STEP 2: GLUE YOUR WOOD PIECES TOGETHER
Kevin used a lot of wood clamps and wood glue to adhere the pieces of wood together and let them dry sufficiently before moving on. Of course, careful measuring is going to be a huge part of this step as well.
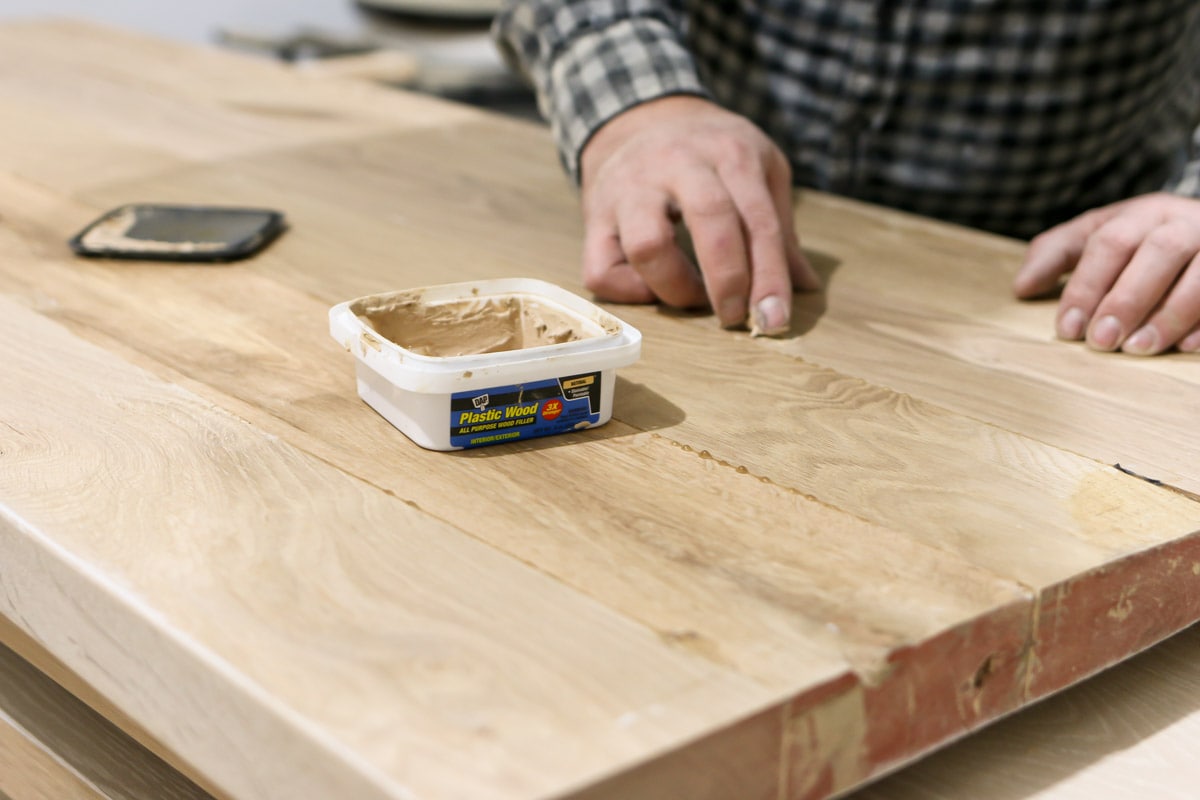
STEP 3: FILL ANY HOLES WITH WOOD FILLER
Once the glue had dried, we used a natural wood filler to fill all the holes and knots in the wood. This rustic white oak has a lot of knots, but we find that adds to the rustic beauty.
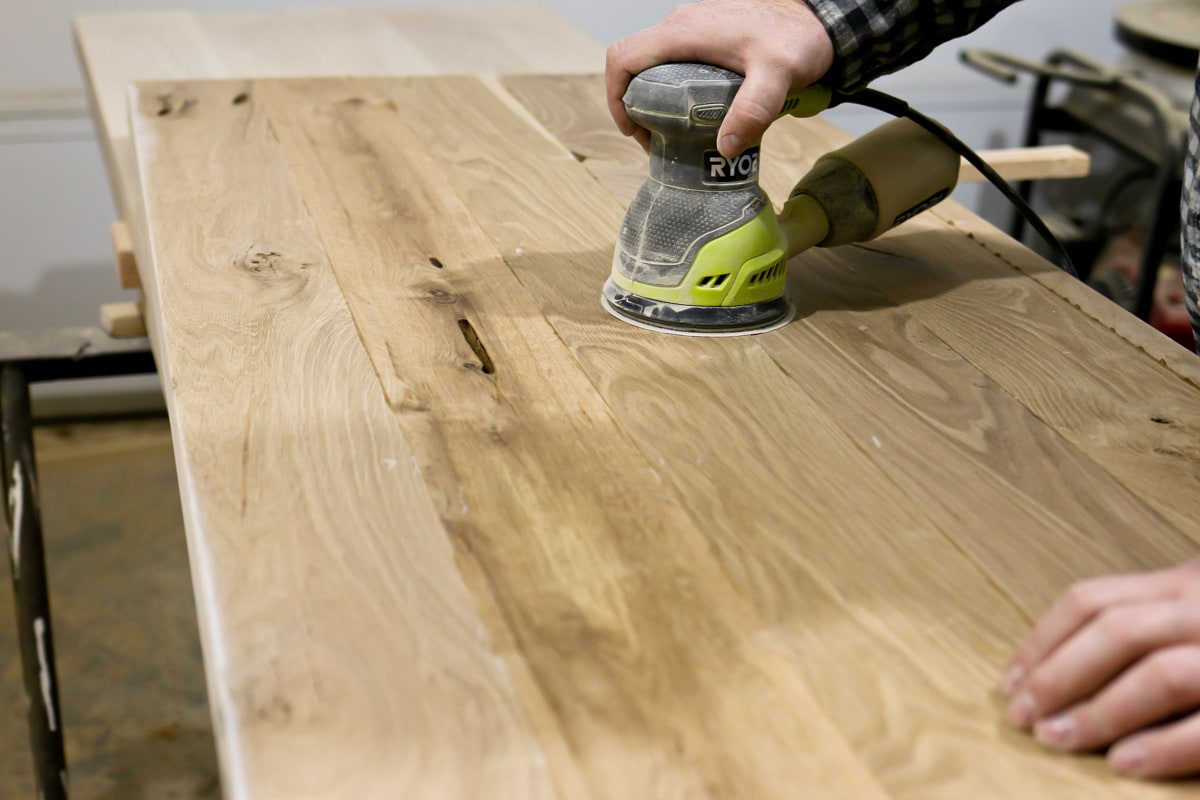
STEP 4: SANDING NUMBER 1
Once the filler was dry, it was time to give it a fantastic sanding with our Ryobi Orbit Sander and make all the wood pieces nice and even while also cleaning off any glue or filler remnants. If you have a planer big enough, running the whole chunk through there would also be a great and much easier way to clean and even this up.
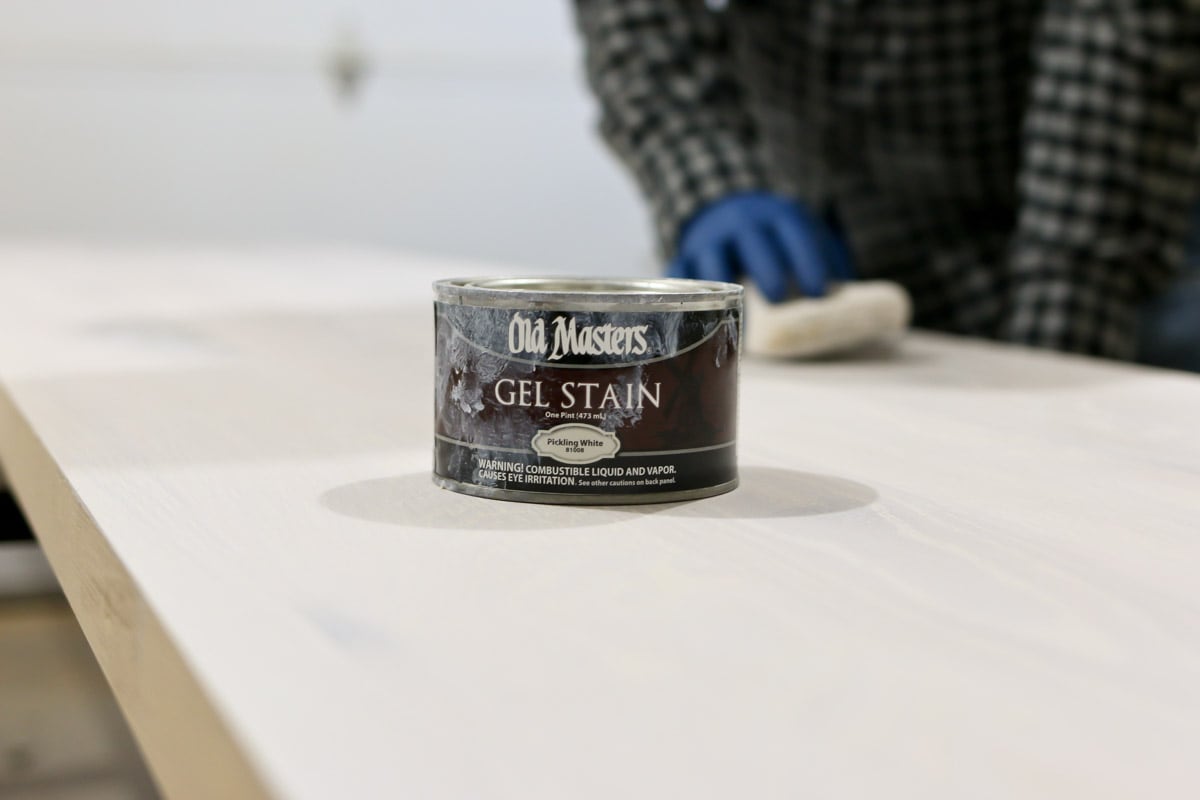
STEP 5: STAINED
He applied 1 layer of pickling stain and let that dry. You may not opt to stain your wood at all, so you could skip this step.
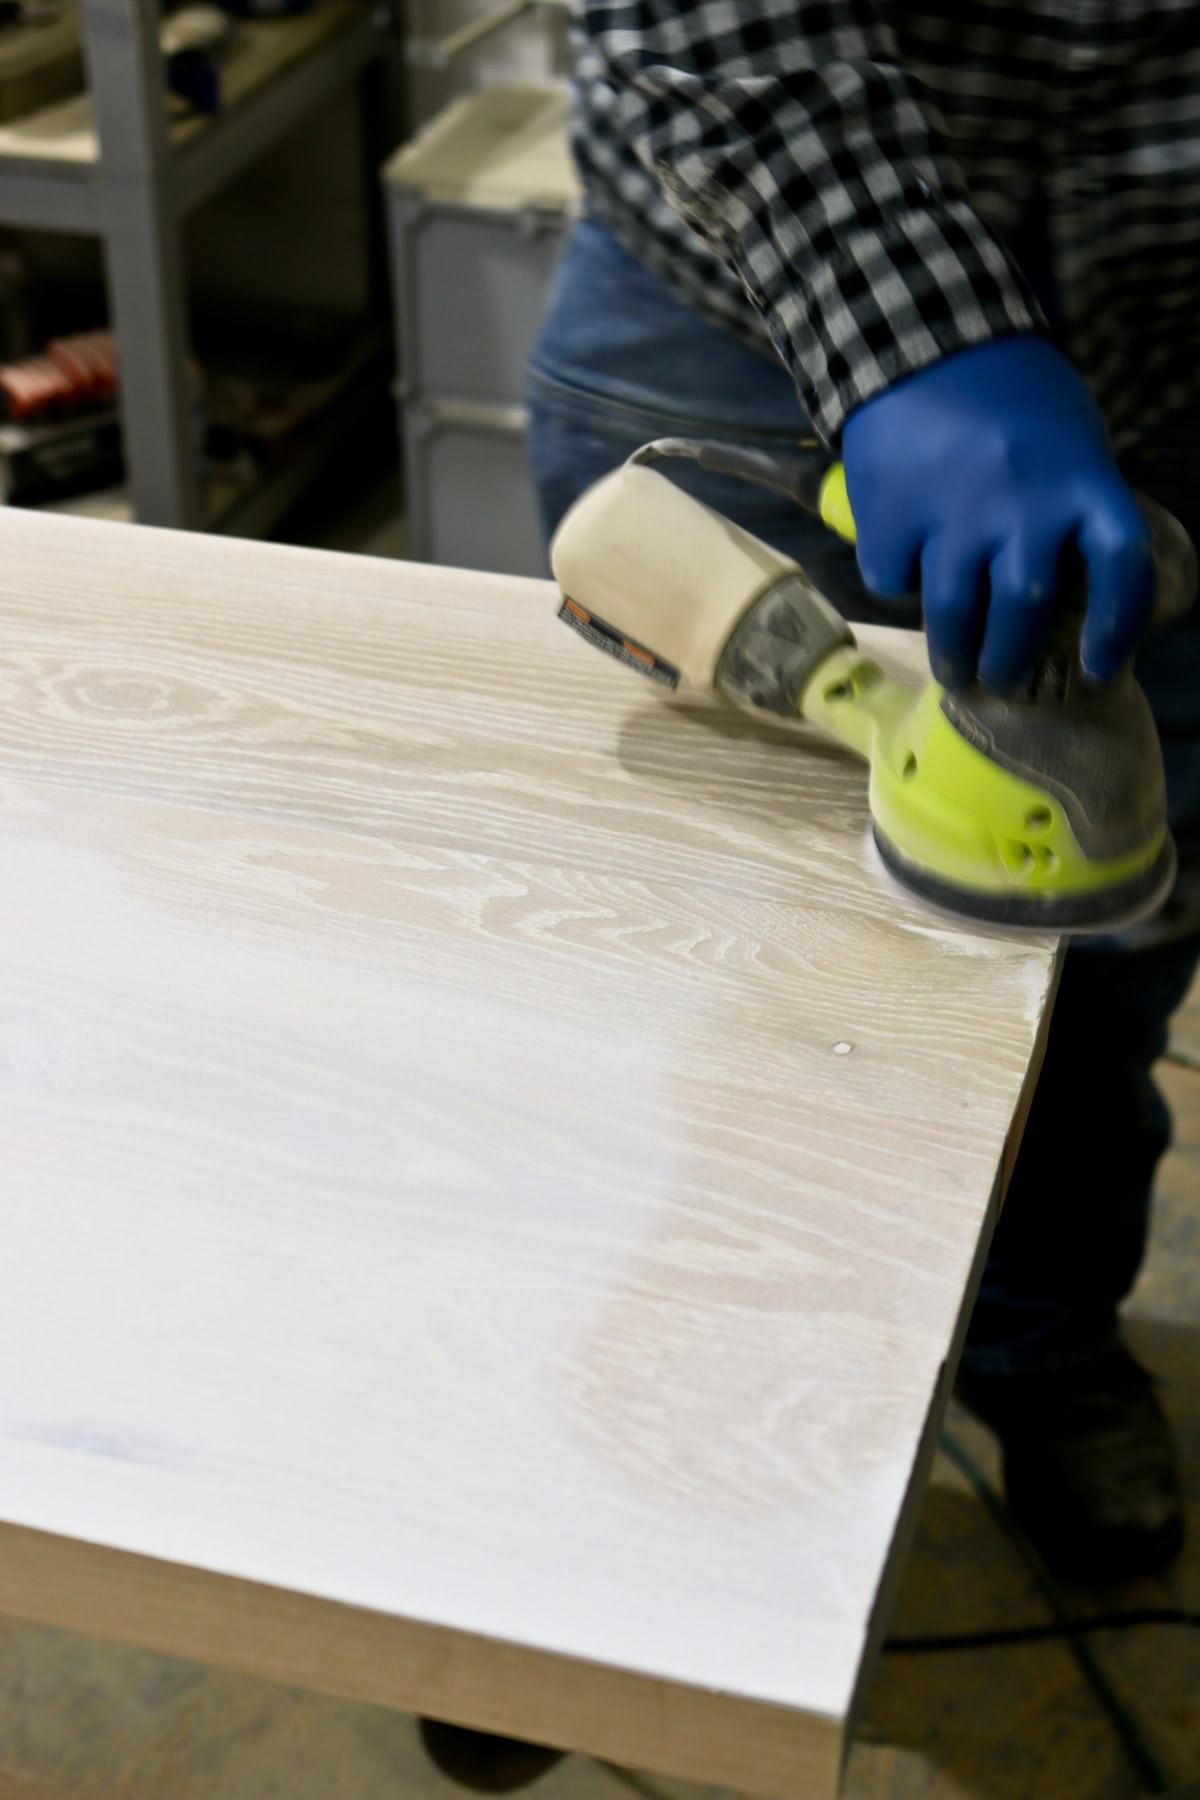
STEP 6: SANDING NUMBER 2
He once again sanded it to remove most of the pickling stain layer, just leaving that lovely white running through the wood grain. If you didn’t stain, you can skip the second sanding as well, but I wanted to show you how it altered the wood tones, specifically for this white oak pickling stain treatment.
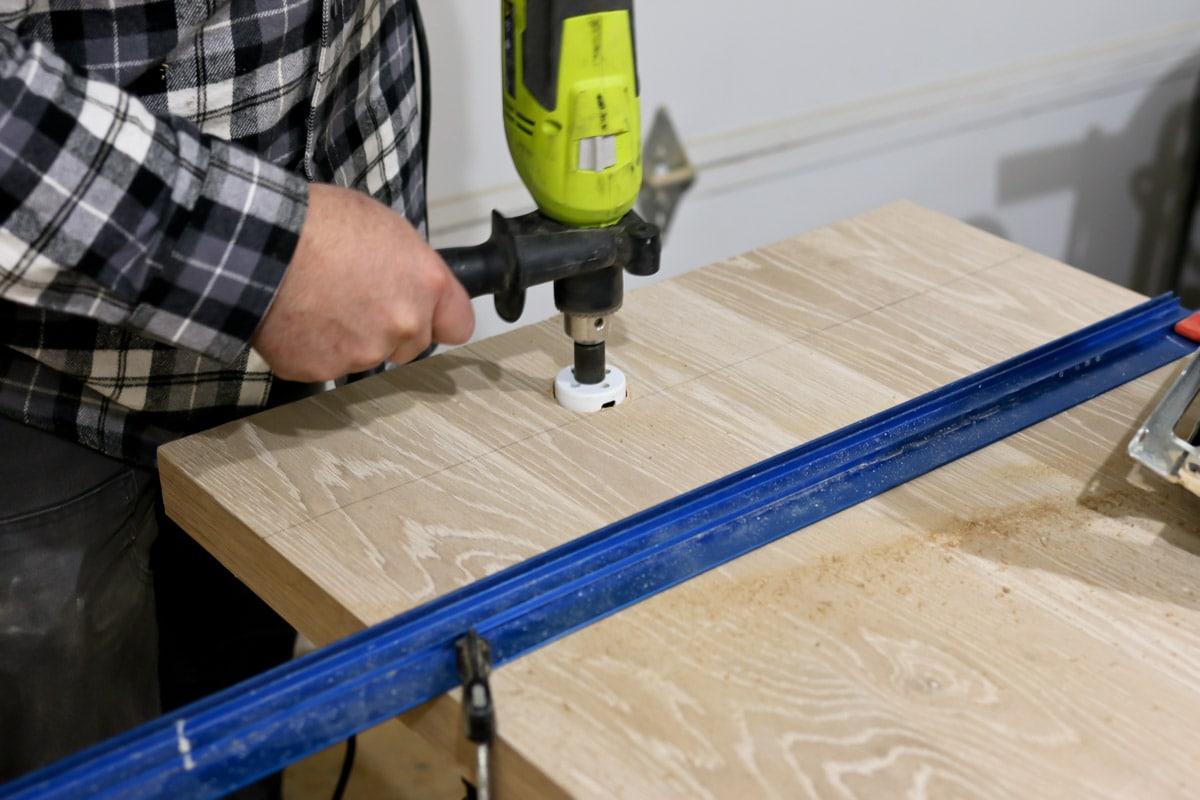
STEP 7: CUT WOOD TO SIZE AND CUT HOLES FOR THE FAUCET
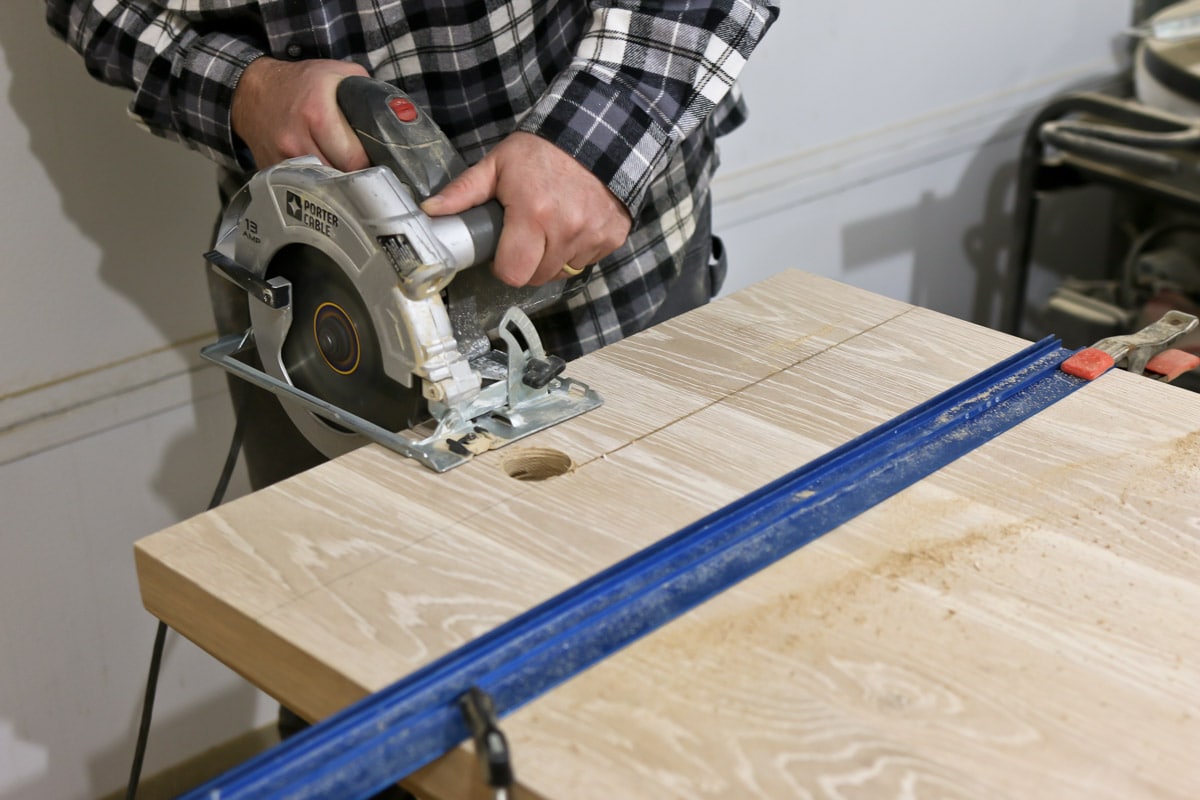
Cutting your block to the right size and cutting any holes for your sink and faucet can be super nerve-wracking! To get even corners, Kevin first made his markings and then drilled a hole in the corner with a 1 3/4 hole saw, to get nice round corners.
Then he cut the spot for the sink.
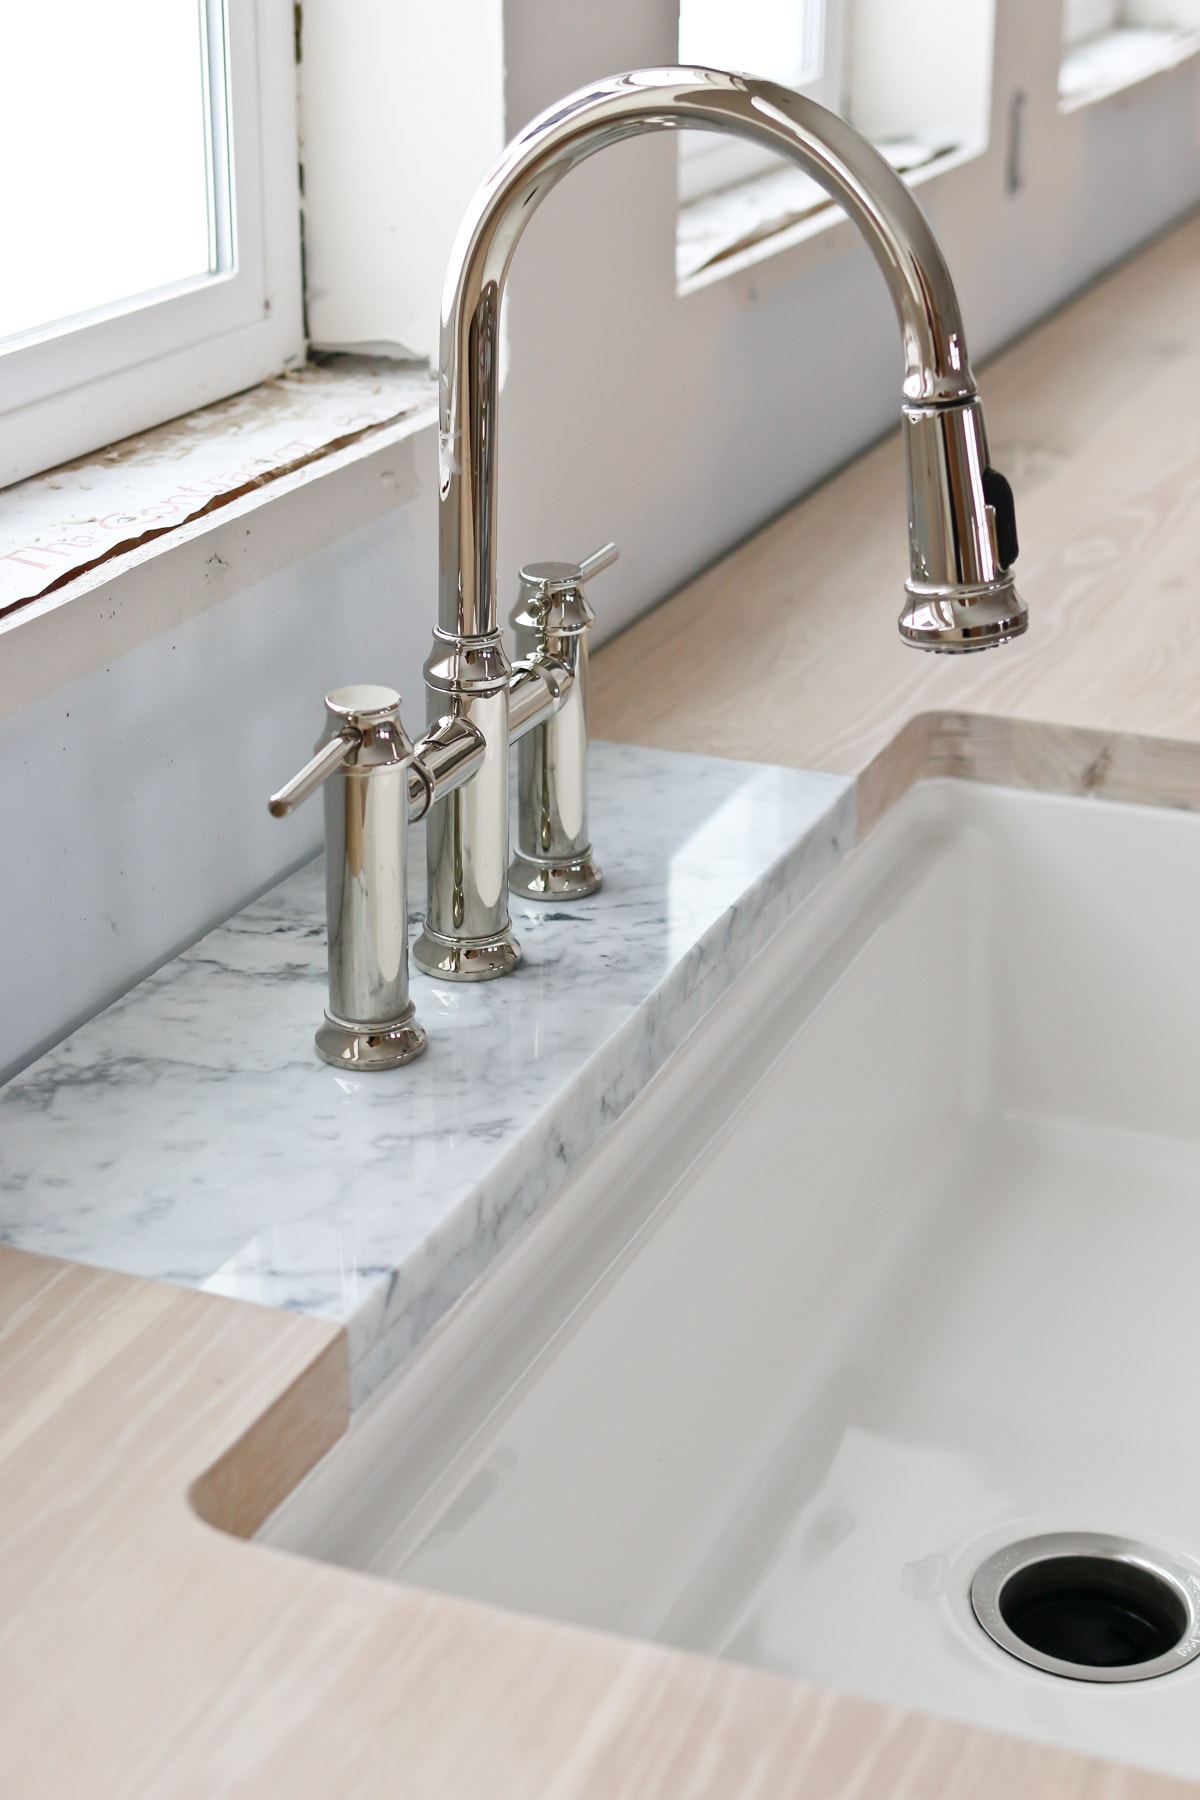
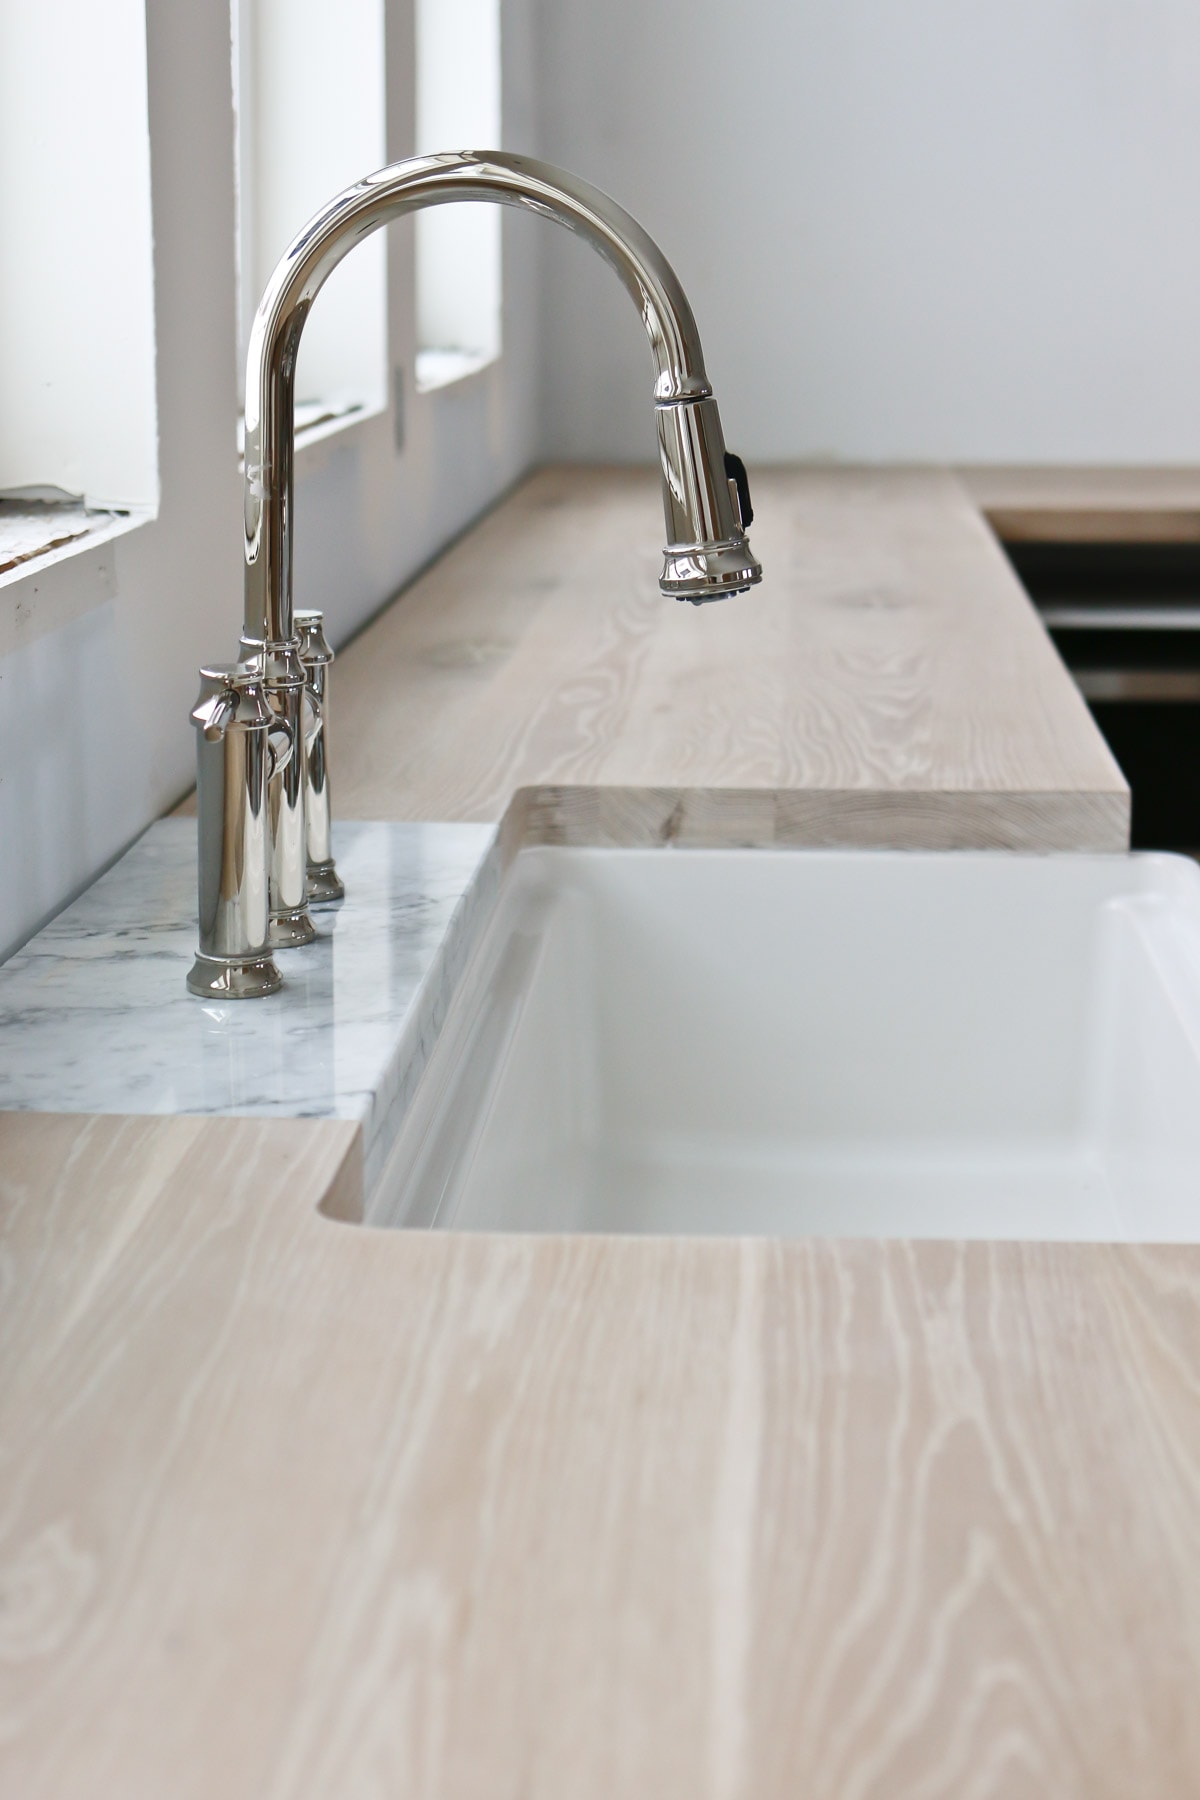
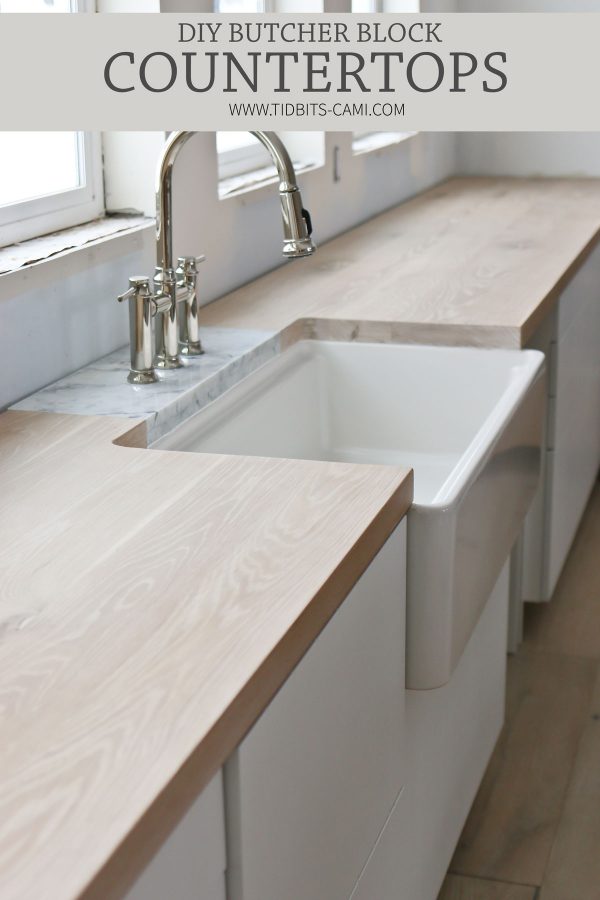
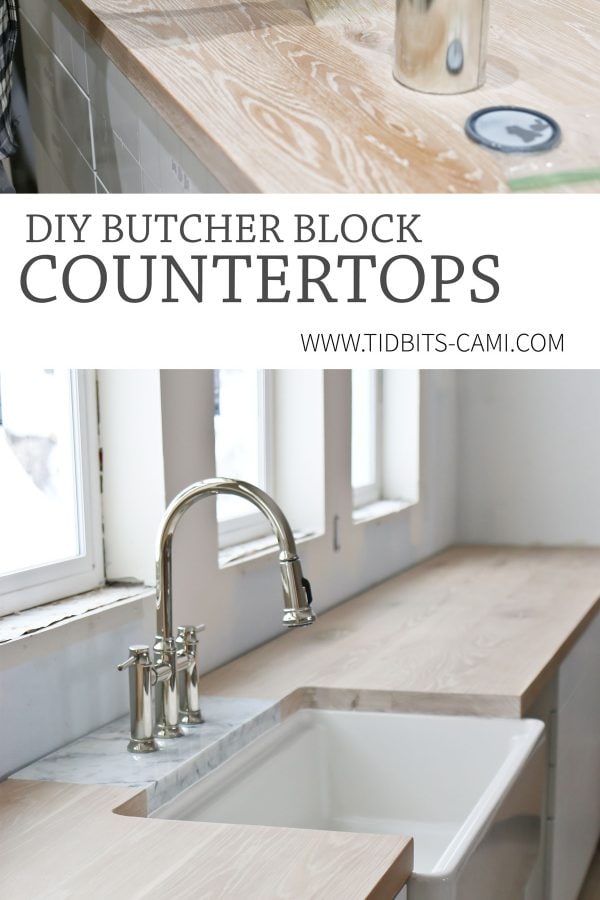
I want to talk to you about this choice we made to add marble around the faucet and the backside of our large, beautiful BLANCO fireclay sink.
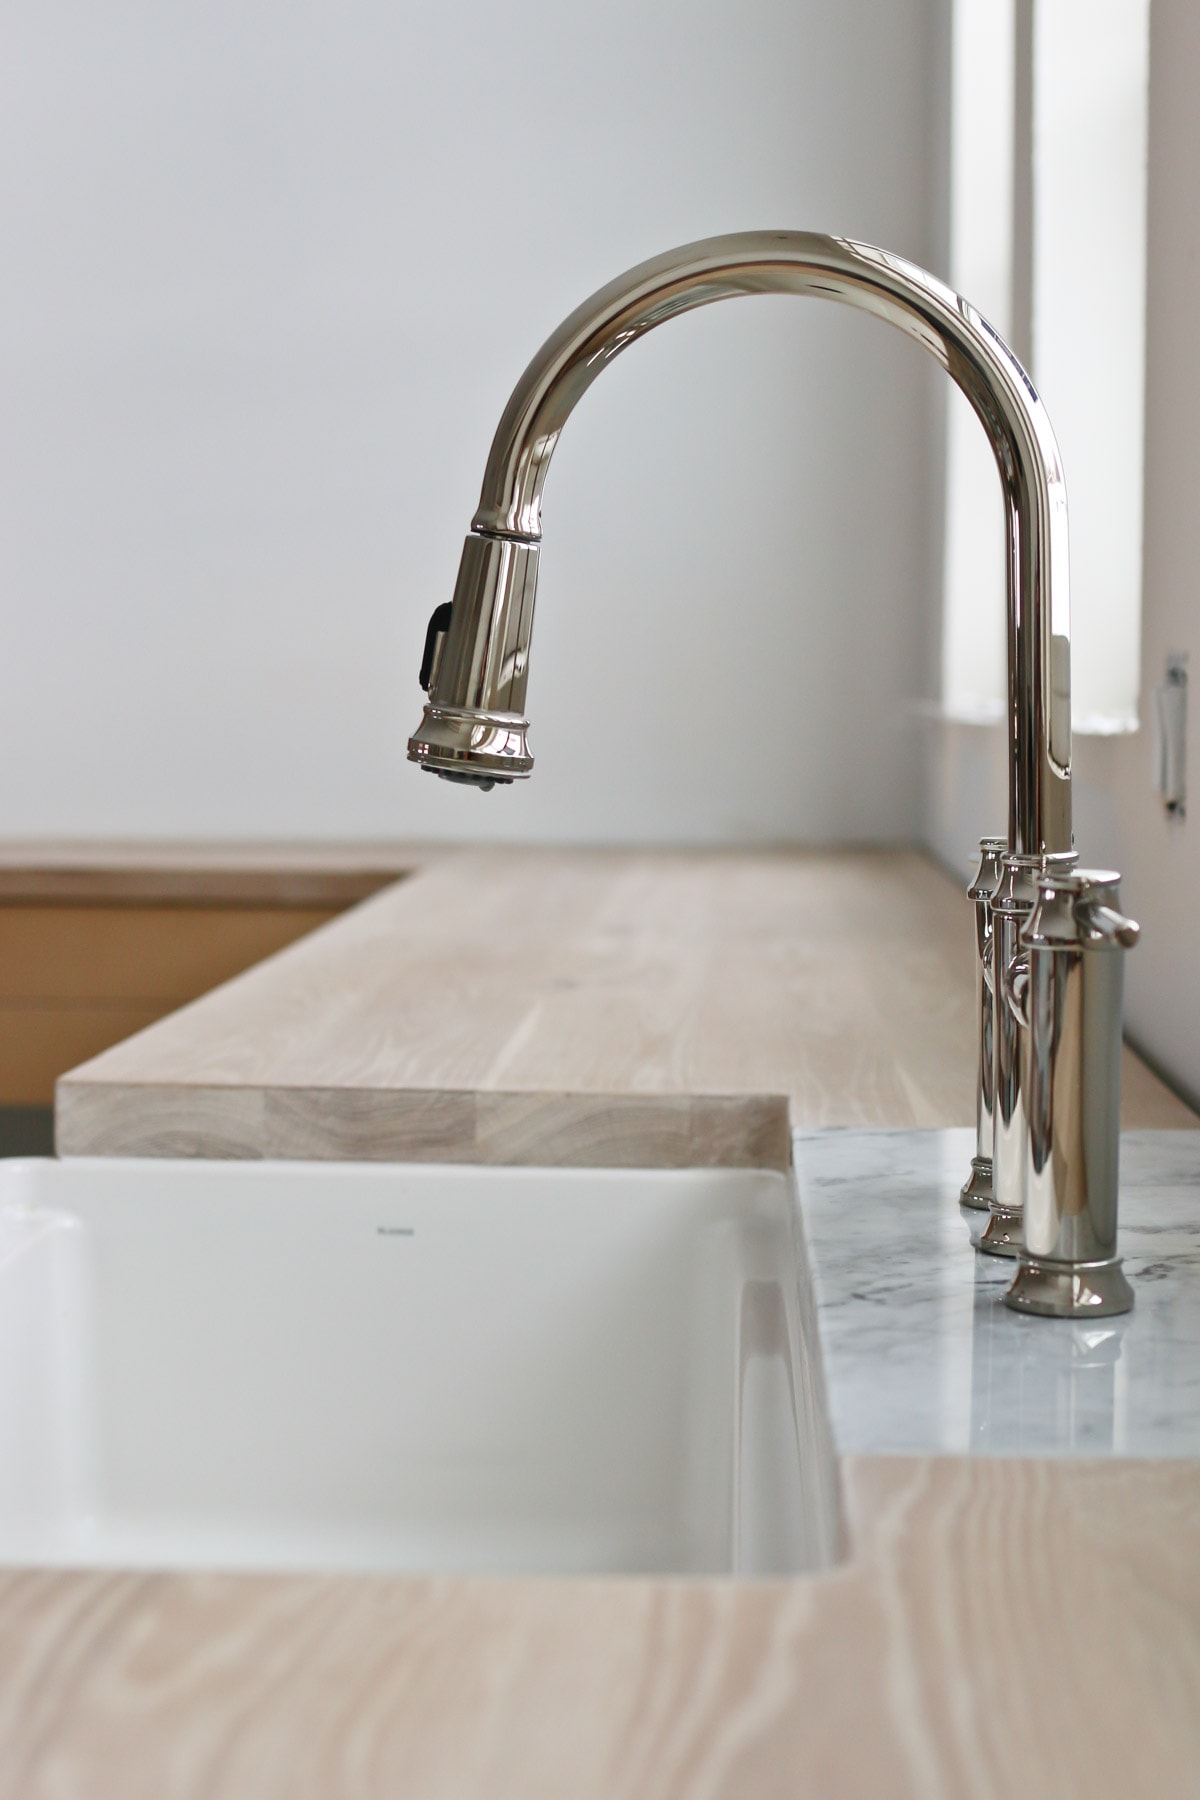
I saw this image on Pinterest (one of my husband’s favorite things for me to say – wink) of a little piece of marble just under the faucet. I thought it was a very interesting concept, and after sharing it on Instagram someone let me know this was called a “Stone Tap”. Something very popular with European kitchen designs, specifically something done frequently by Devol Kitchens when they do butcher block countertops.
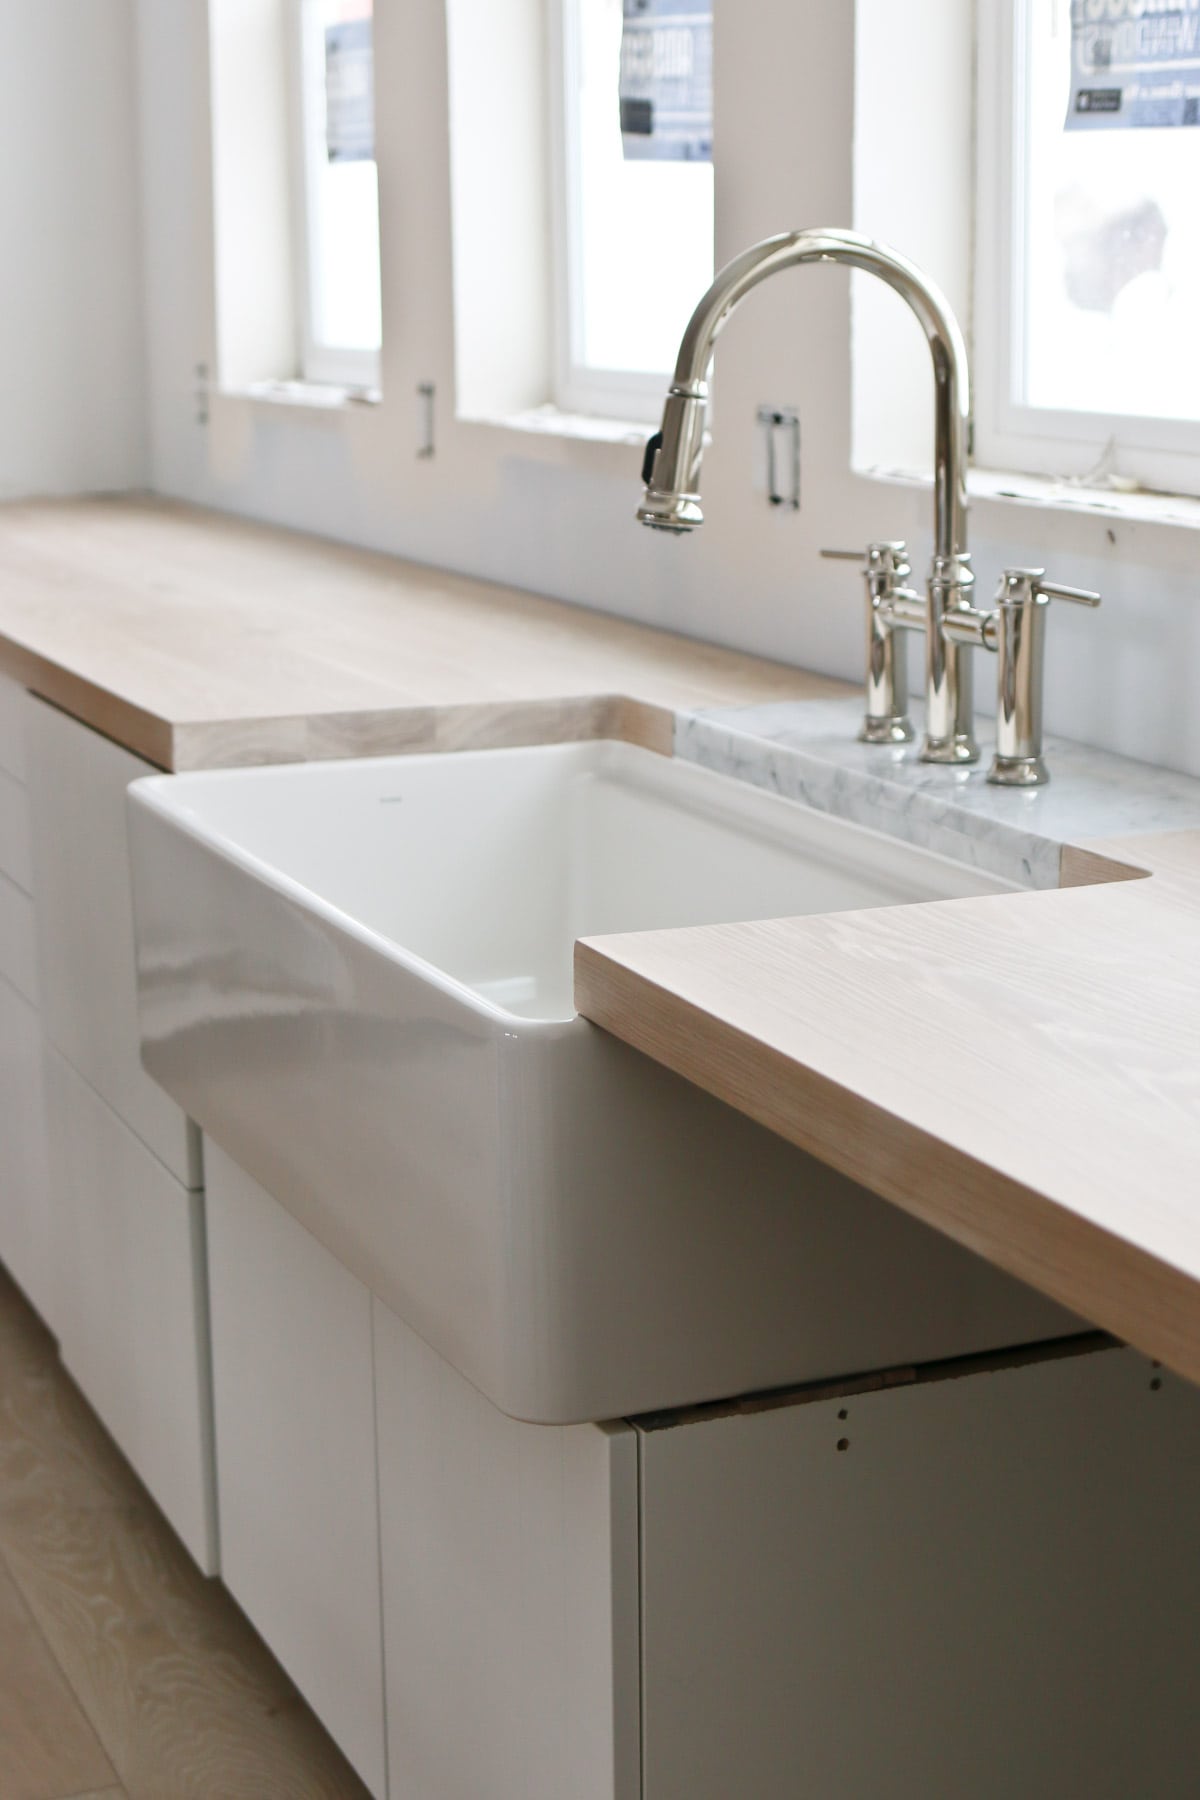
We made a bold move and tried out this idea ourselves but on a larger scale. It makes perfect sense when you think of how much water can drop from your hands going back and forth from the faucet, resulting in a pile of sitting water. Where wood tends to get water damage when compared to stone, we decided this would be a very practical option that would also add a unique character.
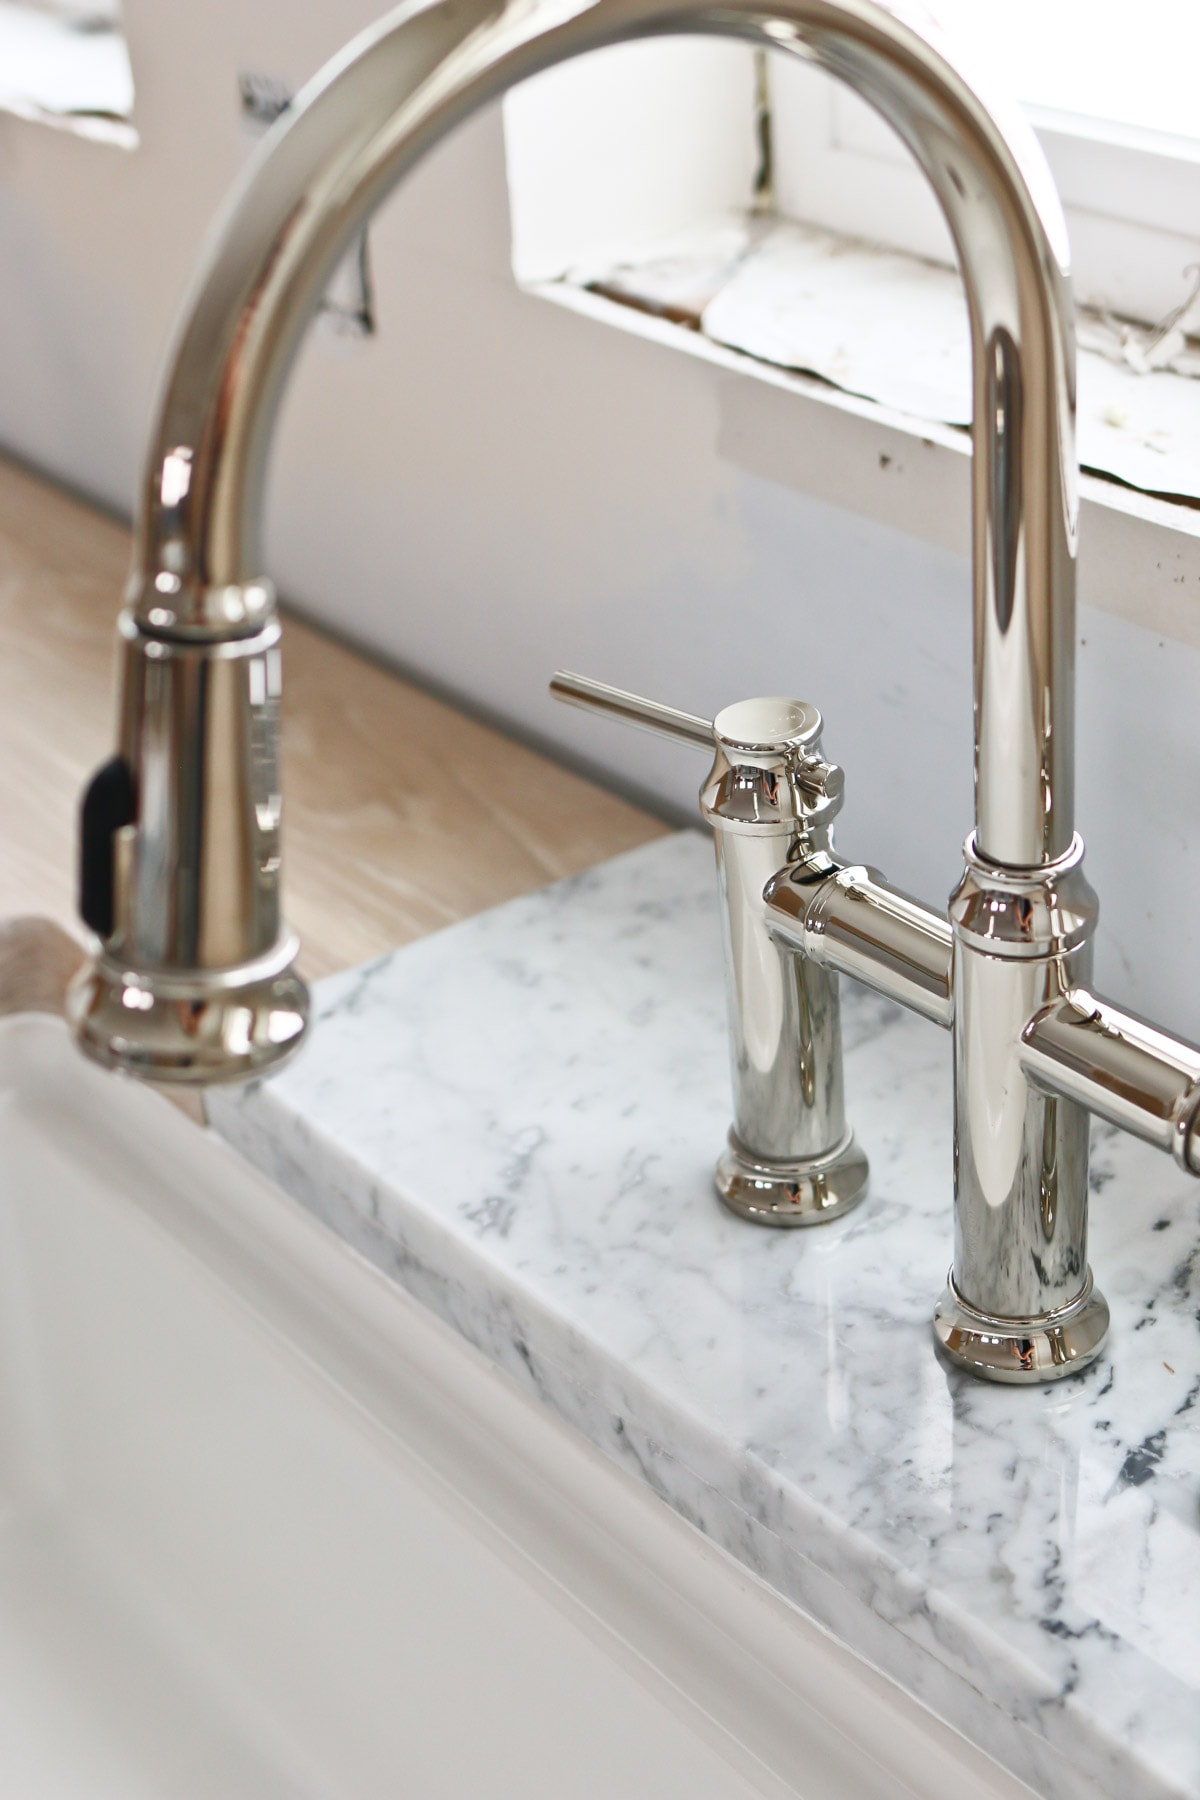
We were very nervous about this idea but cut some marble to fit the backside of the sink only. Kevin used his drill press to cut the holes for the faucet and trimmed out enough marble to make the thickness of the butcher block. I wish we could have found a chunk as thick as the wood, but we were unsuccessful, so we had to join 2 pieces.

Then we caulked along all the seams. This is a unique idea, but I have to say – the results thrilled us! It adds some prominent character to the sink area and I think will help our butcher block hold up much better.
STEP 8: SEALING A BUTCHER BLOCK COUNTERTOP
We knew we had a couple of options for sealing the wood, which, of course, is very necessary for an area that will be exposed to a lot of moisture. Butcher block countertops are not stained and simple food-safe mineral oil is the best choice.
It treats the wood all the way through and allows you to use your countertops as a cutting board if desired. Apply the oil to protect the surface. Where we had applied a pickling stain, I didn’t see our countertop as being food safe, and the stain had already opened up the pores.
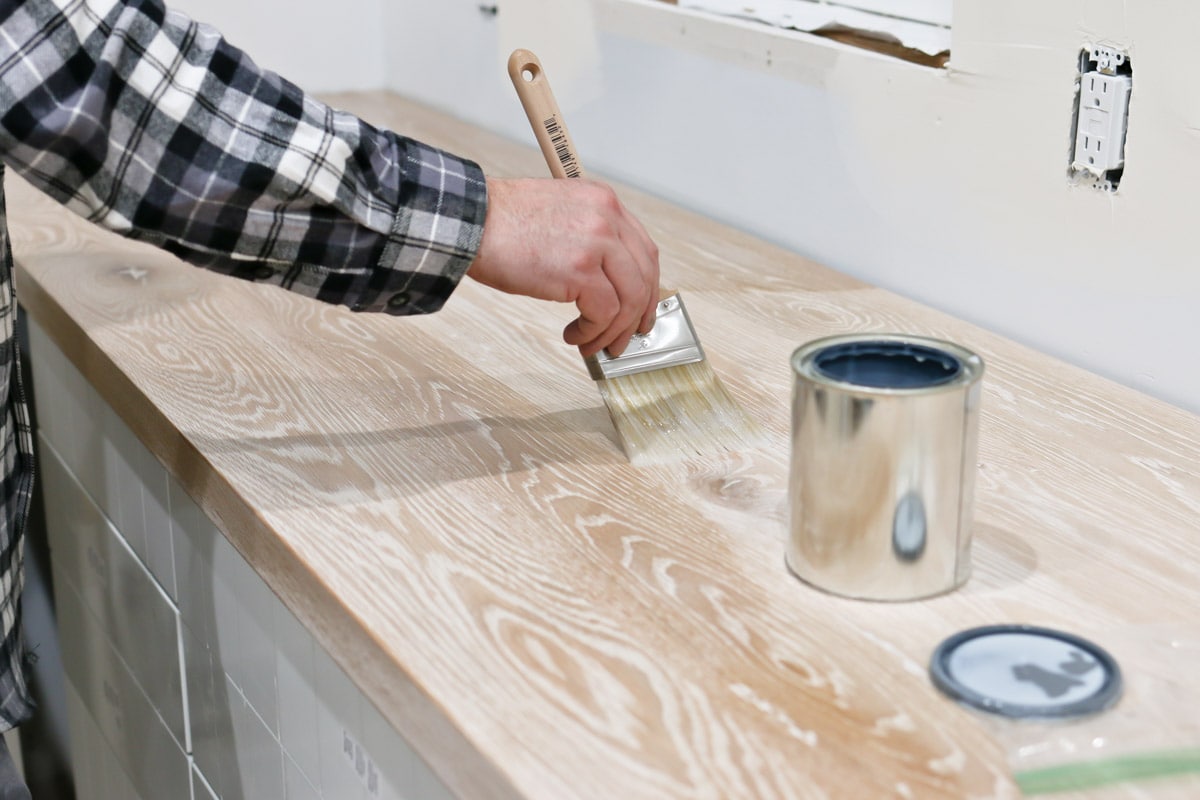
I picked the brains of my local paint shop whom I always go to for these tricky questions, and they highly recommended a clear coat, or polyurethane, which protects your wood from the top.
This treatment risks getting scratched, but I’ve never had a countertop where I didn’t use a cutting board or dishes to prep my food, so this was a fine solution for me. I wanted the wood to keep its natural raw look as much as possible, so they recommended this acrylic-based Benjamin Moore Clearcoat called “Stays Clear”. (Something similar on Amazon)
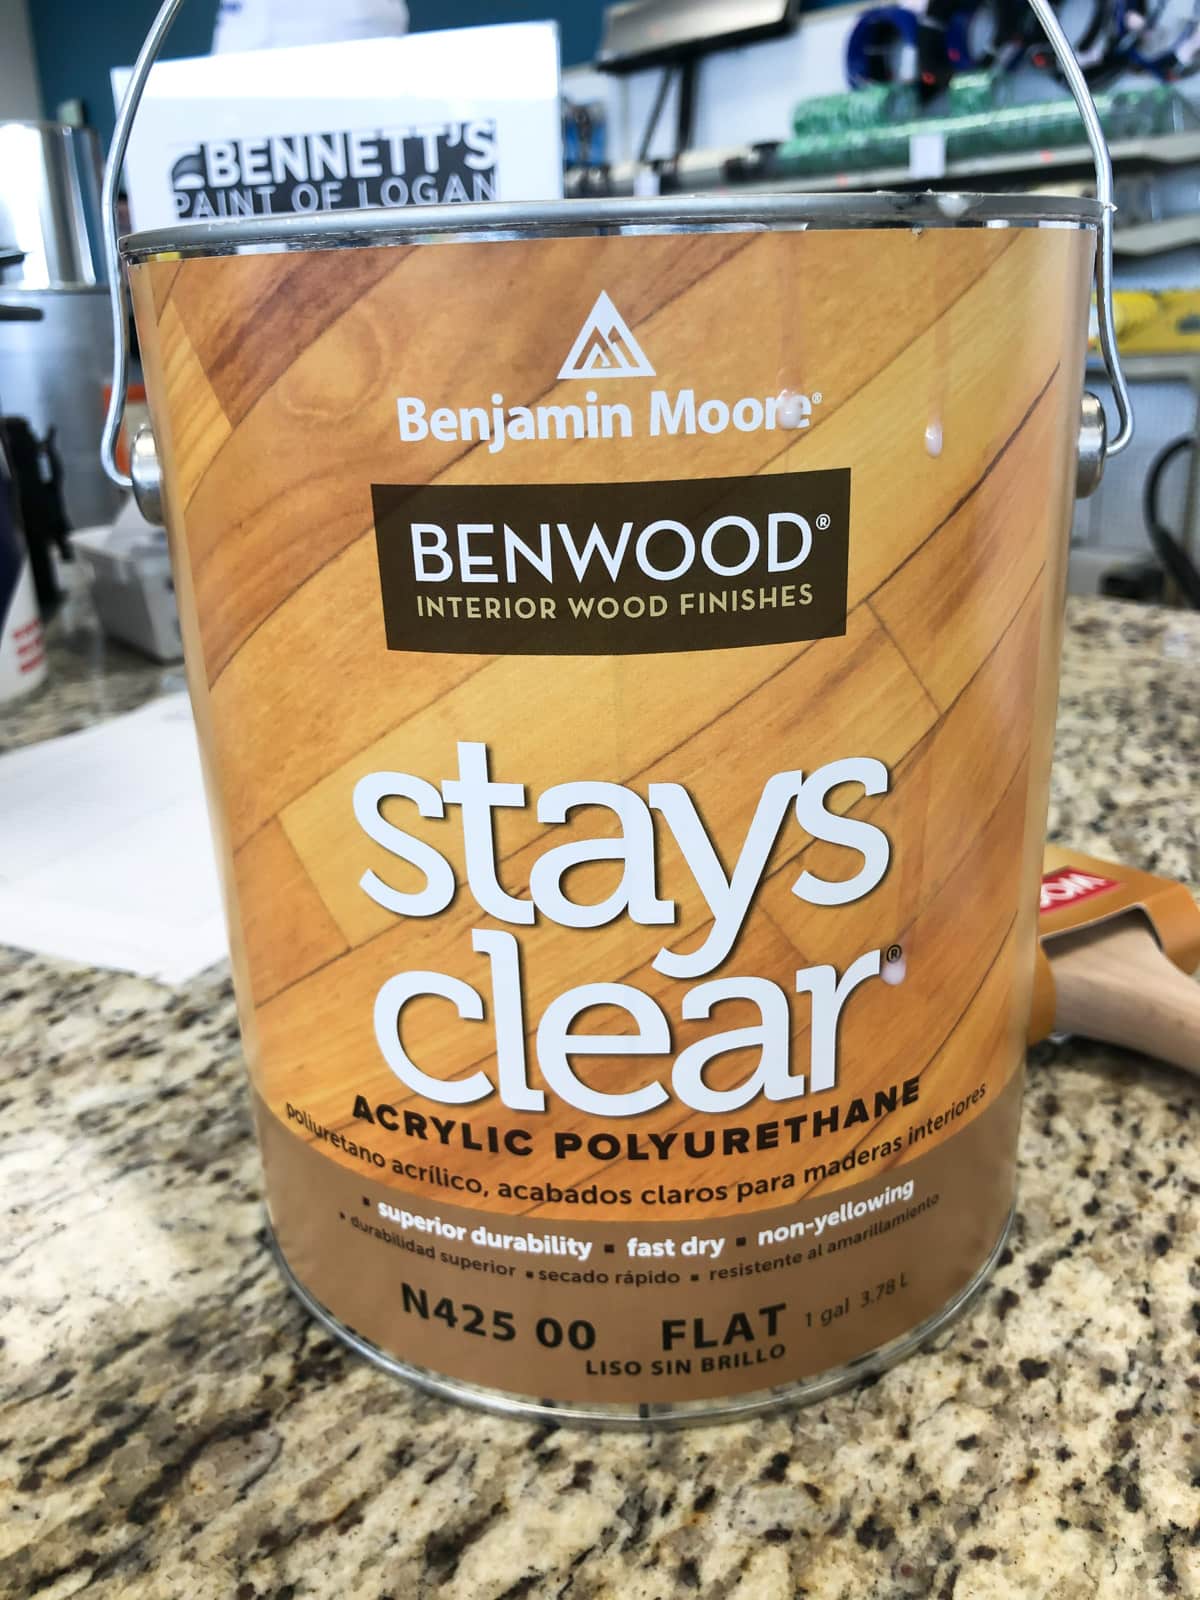
I got the Flat finish to keep a nice matte, natural wood look. I’ve used other water-based clear coats with success, but he mentioned most other clear coats will have a slight cool or warm tint, where this “stays clear”. That all sounded great to me! We may need to reapply a layer every few years, but that’s easier upkeep than the mineral oil, which is much more frequent than that.
One thing we read that made sense to me was to seal the underside of the countertop, which should help prevent excess swelling and cracking of the wood seams – so we also did that.
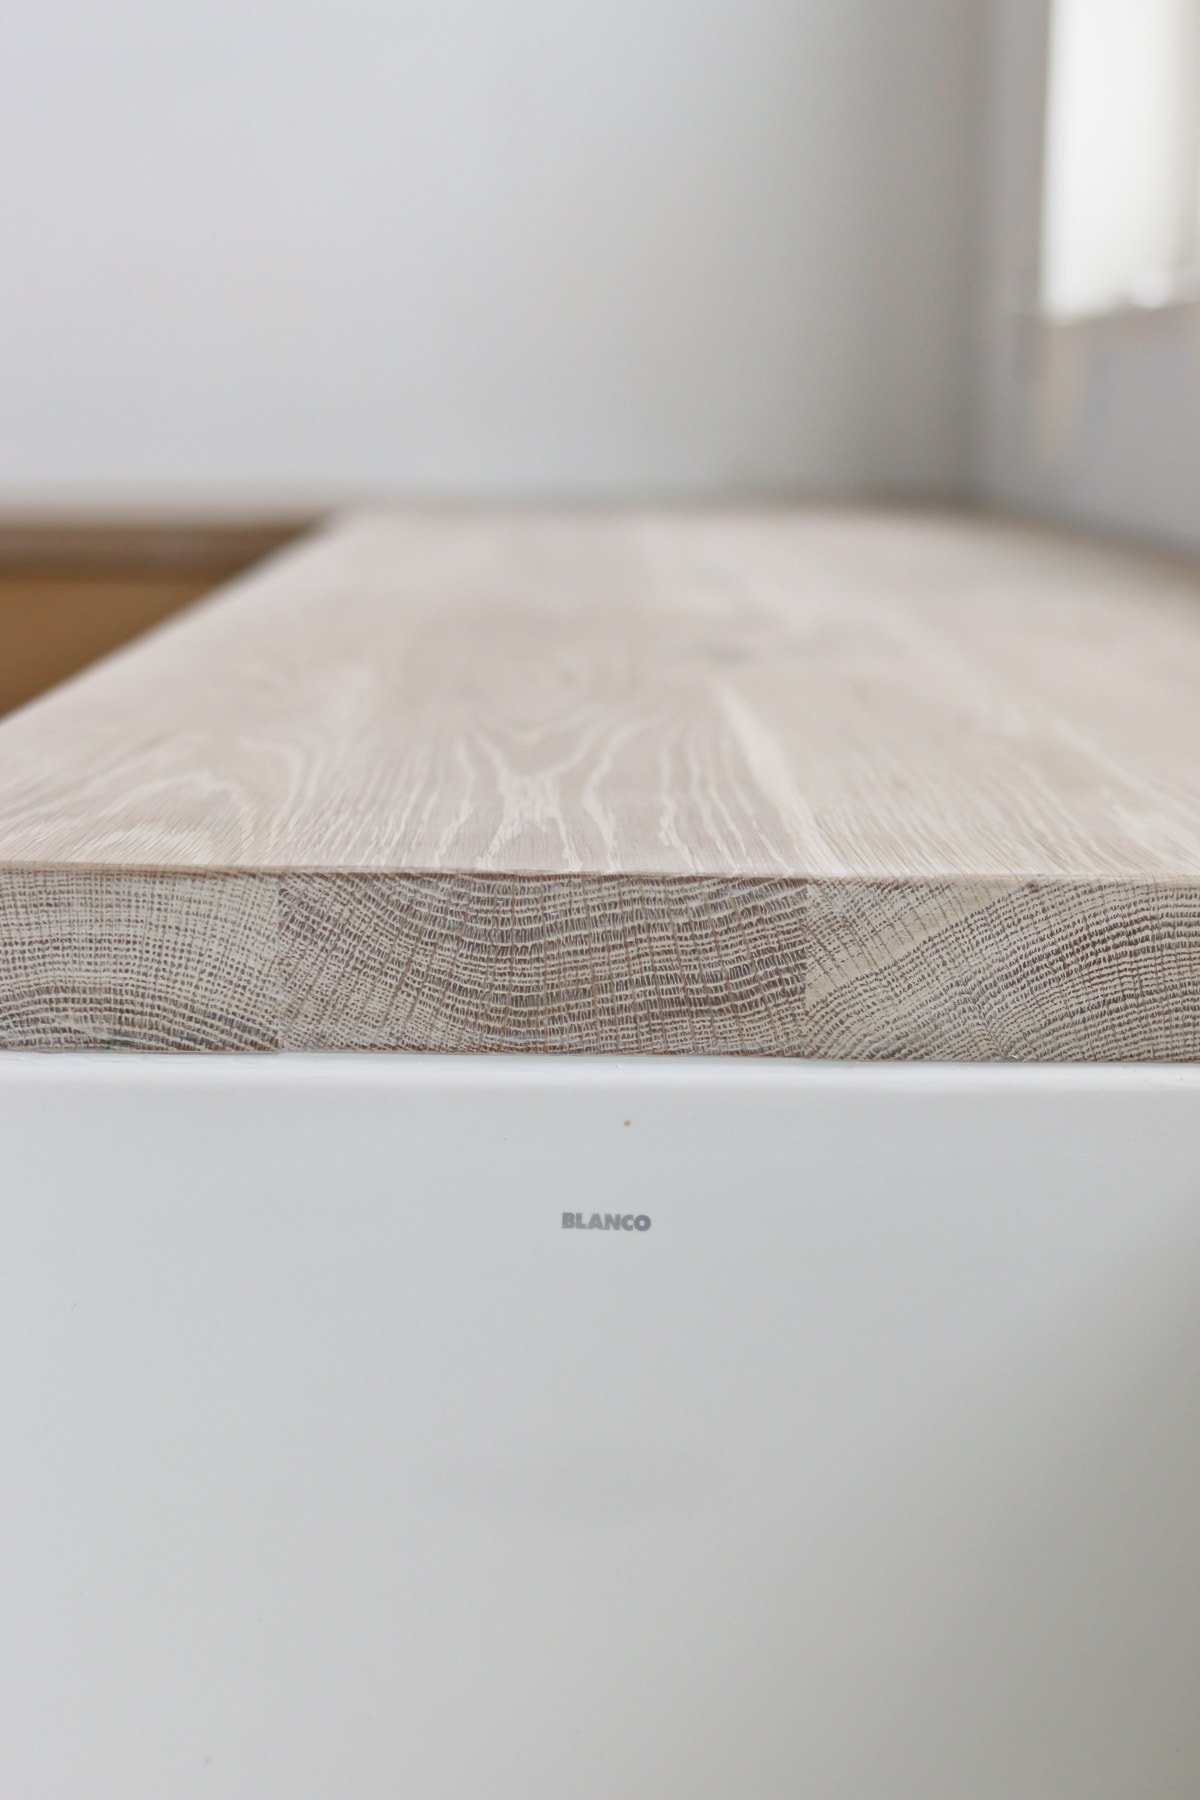
ALL ABOUT OUR SINK
I drool over a large Farmhouse Apron front sink – the bigger the better! I’m thrilled to tell you about one of my kitchen sponsors, BLANCO who worked with me to share this fireclay sink with you.
This particular sink is their PROFINA 36″ Farmhouse Fireclay sink. The color, the texture, the size . . . everything is stunning!
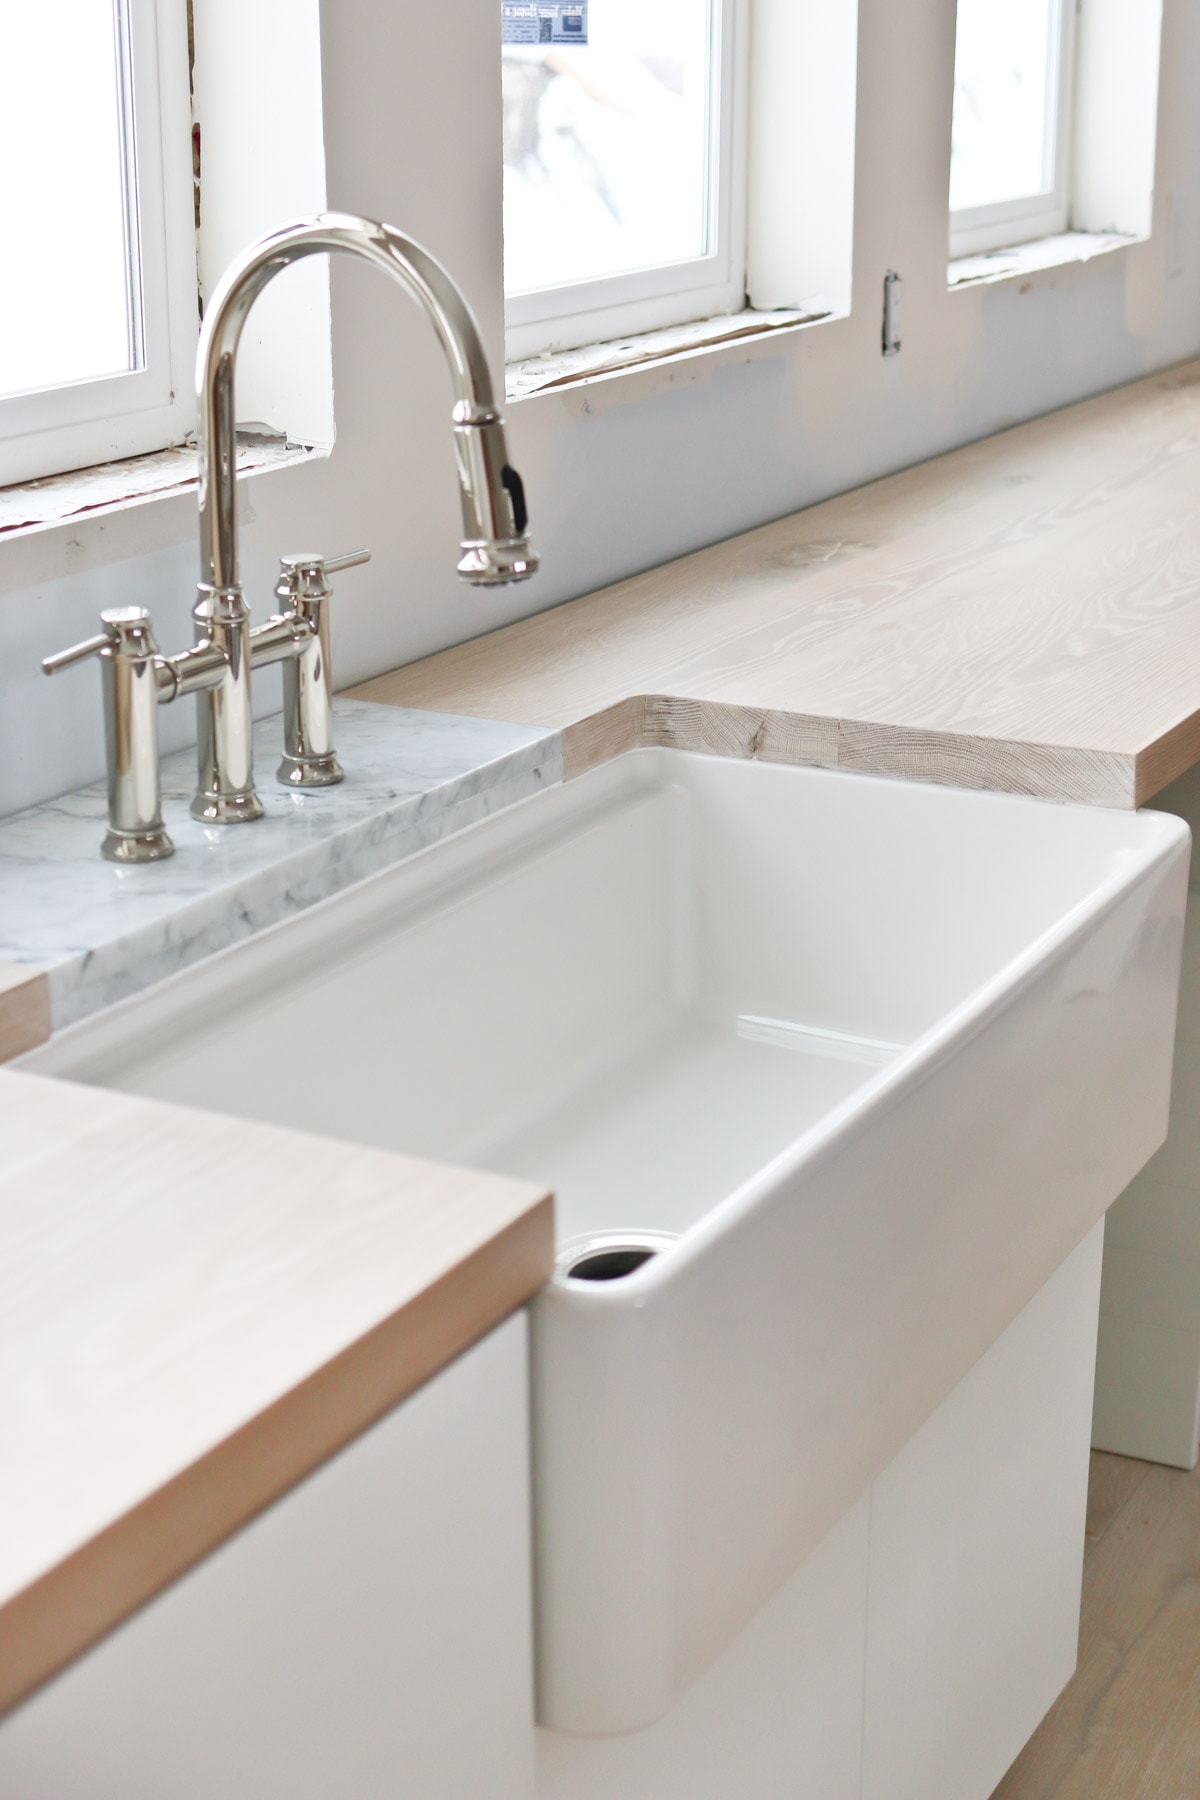
Our pull-down faucet is the EMPRESSA Bridge Faucet, in polished nickel. I love the slightly warm tone without being too warm. It feels timeless to me and looks great with the marble.
I’ll be back in another video and post to share more details on our BLANCO fireclay sink, like how we clean and maintain it.
I’ll be back in another video and post to share more details on our BLANCO fireclay sink, like how we clean and maintain it.

SUMMARY
My husband absolutely loves to work with wood, so this was quite an enjoyable project.
I love the warmth this countertop brings to the kitchen space and how it coordinates so well with our European wire brushed white oak wood flooring and all the other cooler colors and elements in the space.
I hope you’ve enjoyed reading this post and learned a few things. Most of all, I hope it inspired you to create with your hands and discover the joy of doing so.
Be sure to catch the move-in tour of our pole barn home, so you can see how many more DIYs are yet to come! You might also enjoy seeing a round-up of kitchens that have inspired many of my design decisions for this space.
Thank you for reading! Be sure to subscribe to my blog updates!


We just used a pre-made butcher block counter in a small laundry room. I also chose the pickling to keep it lighter and not have it go that ugly butcher block yellow. There is a small section around the sink that I am kind of worried about. We used a matte finish sealer on it, but I’m kind of wondering how it will hold up long term. Because it’s a separate section and small I could eventually replace it with some sort of stone if it doesn’t go well, but I’m hoping it will be ok since it’s an outside the house laundry room and won’t get much use probably.
How did you seal between the counter and the backsplash? In our prior kitchen we had a small butcher block backsplash but I don’t think I want that in our new kitchen.
Omg, I’m so glad I stumbled on your post. I was just reviewing the deVol IG post with that stone “insert” for the faucet and trying to figure out how to fix that stone piece to the wall and sink. Could you possibly share how you attached the marble?
My favorite part is that you saved hundreds because of the guys you knew that had access to all this. I wonder how much it would be to have all these planks planed for my own countertip 🤔 probably not free.
Did your husband just glue the pieces together, or did he also use a joiner?
Love the idea of this as we are planning soon to replace our counter tops.
Y’all did a wonderful job!
I appreciate your post. I’ve been looking at butcher block countertops for quite a while and just didn’t like what I saw until I saw the white oak you used. It is exactly what I had in my mind! It’s so pretty though I do prefer the pickling stain without sanding. Many thanks again for posting.
Hi! I absolutely love you countertop!
Can we have an update on how the countertop react to the water (specially near the sink)? Is it still beautiful after a long time being use?
Thanks!
I have a piece of marble that is actually sentimental and would love to do the stone tap. Do you have more details or recourses on how to make one. We haven’t installed our butcher block counters yet so I have time to work on this.
Beautiful! My husband and I are in the same boat. We just redid our entire house and we don’t want to spend so much of our budget on countertops at the moment. How much did you spend building the butcher block countertop?
Hi!!! Love itttt!!!! Beautiful!!!!
Where I can found the whit gel paint and the matte finish paint?
Absolutely beautiful! My husband and I are thinking about doing something similar. I am wondering how your countertops are holding up with out the traditional mineral oil method. I’m dying to do this but am afraid of cracking or wrapping. On the other hand I want to avoid the orangey look that comes with mineral oil. Thanks!
Do you mind sharing what faucet you used?
Where did you find your white oak for this project? For the life of me I can’t seem to find white oak that thick!! 🙂
Just wondering about only gluing the wood, most sites I see say to drill pocket holes and put in screws as well, thoughts? Thanks.
This is amazing and now my wife and I are going to attempt this! A quick question for you, how much of the Old Masters gel stain did you end up using?
Hi, I love your “Stone Tap” solution as we have the exact problem you described with our walnut butcher block. I have googled and searched for something similar and or using mixed materials but we have a linear shot gun kitchen. Could you guide me towards some other images? I love your white washed look, but we have dark walnut and off white cabinets. So warm tones vrs cooler.
Love, love your kitchen and new house.
Thank you for the inspiration
Georgette
Just beautiful!! How will you deal with the gap between your kitchen wall and the countertop? I may be brave enough to attempt this on a vacation property we have. Thanks.
Great job ! Question, how is the “stone tap” attached to the counter top ?
Thanks
I followed your link to the sink website, hoping to see options and prices plus giving you the referral credit. After tapping at least 8 options I located a map to show potential local-ish sellers. Then I was asked to ‘sign up for a call for an appointment’. This might be an issue exclusive to my area but for me the lack of useable info (price), is a total deal-breaker. I wanted to share my experience, just FYI.
Your kitchen counters, sink and sink tap are all lovely. You and your sweet hubby should be extremely proud!
Cami – I LOVE the counter tops and the marble inset! You have inspired me to replace our pine butcher block counters! You will love these!
I do not like butcher block counter tops, but yours are beautiful. I love white oak.
I have marble in my kitchen and they can be fragile but I love them.
I can’t wait to see your finished kitchen.
They are certainly looking pretty and love the stone tap, what a neat idea. I can’t wait to see it all finished.
Absolutely beautiful! Your husband is an artist! Getting everything perfectly lined up and smoothed out is no picnic. He did a phenomenal job! The stone work too… lovely!
They are truly a work of art! His love and skill warm my heart more than these beautiful countertops. Sometimes we get so sick of the DIY life, but projects like these remind us of the joy in the work. Thank you for stopping by!
Just gorgeous! I love how you combined the marble with that stunning oak. Your husband did an incredible job—that takes a true craftsman! Thanks for sharing—can’t wait to see more.
Oh thank you! I just treasure everything he is willing to make for us – even with all the quarks sometimes. I love the quote, “judge a man not by his abilities, but by his willingness to try”. He will try just about anything I throw at him and I love him for it! Thank you for stopping by!
I am enjoying following your progress in your new home. Everything looks amazing. You have great style and vision. Love the counters and the Stone Tap.
Oh Diane! Sweet Diane! Thank you so much for following along and for your compliments. They mean so much to me!
Oh my goodness! Your kitchen is beautiful! I have never heard of “stone tap” but it makes perfect sense, doesn’t it? Love it!
I know! Why isn’t it a thing in America!? Totally function and very beautiful and I am so relieved it worked out! Thanks for stopping by!
Well done! My favorite part is the Stone Tap! It’s beautiful, but I LOVE that it is so practical in the high water content area. I suspect I may once again have butcher block countertops in my future, and I will definitely keep in mind the Stone Tap idea. The slow process you’re going through to finish your home will cause you to have a more grateful attitude towards the many things we take for granted everyday.
Shannon! Thank you for your comment! It’s my favorite part too, which is such a joy considering I was almost to scared to do it! Cutting into that beautiful wood block was major anxiety on my part! The hubs was sure to remind me if it ended up looking stupid, I was to blame not him. Haha! We will appreciate every little update and change, and I am so thankful to you for following along on this journey!
Are you putting in some sort of toe kick to cover the Ikea metal legs and prevent stuff getting under all your cabinets? is the empty space next to the sink for a dishwasher? I really like the look of the marble under your faucet. You are really hard working people and I can’t wait to see how it turns out.
Thanks for stopping by! Yes, we sure are adding toe kicks and some faux legs. And yes, the empty spot is for a dishwasher. I’m still trying to save up some moolah to be able to get that. All in good time! We work hard, but it is all worth it to us. Remember to take breaks is what we struggle with!
Hey! Just wondering if you knew the grit used on the counters?! Thanks!
He ended it with a 400 grit.
I ABSOLUTELY LOVE LOVE LOVE the butcher block countertop and marble tap…IN LOVE WITH IT, IT’S BEAUTIFUL