This post may contain affiliate links, which means I get a small percentage of the sale at no extra cost to you. I only recommend items I love and have had a positive experience with. Thank you!
The hubs was lucky enough to be sent on a work trip all the way over to France. When he got home, all he could talk about was the food. Everyone knows the French can cook – but to hear it straight from the mouth of a loved one, made me green with envy. Someday . . . someday I will go to France with him. But until then, I am bringing a little bit of France into my kitchen. Now mind you, not in the food kind of way. I’m not naive enough to think that could be possible, with my cooking skills. I am no Julia Child – not even close. But I am hoping these French inspired hot pads with hold me over until I get to experience France for myself.
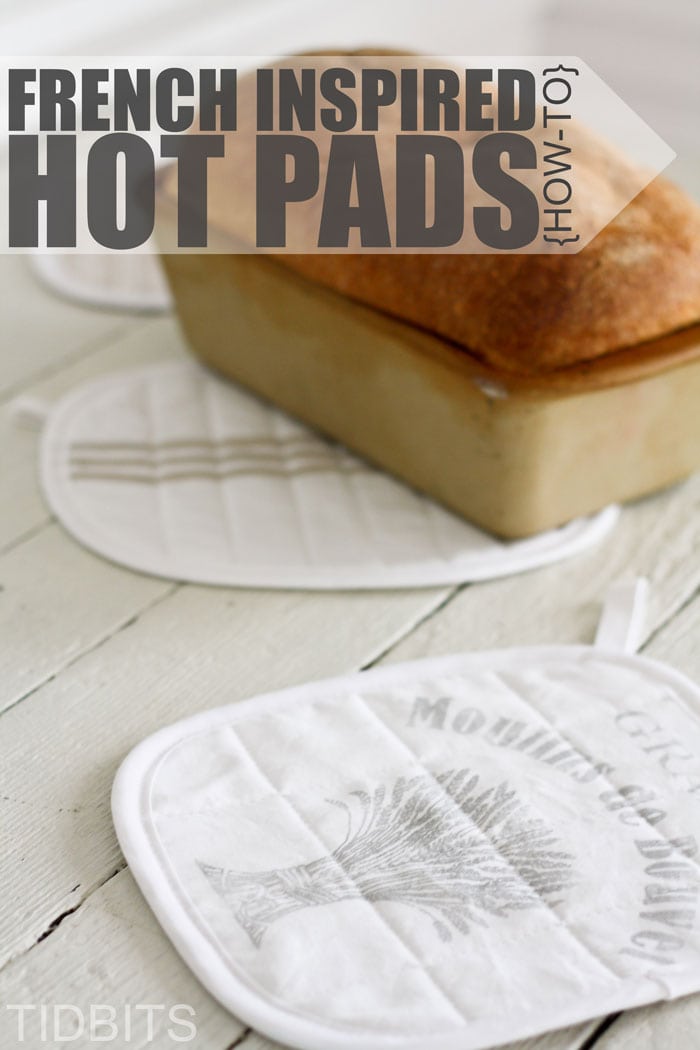
While I do believe their food would be wonderful, it is really French decor that gets me drooling.
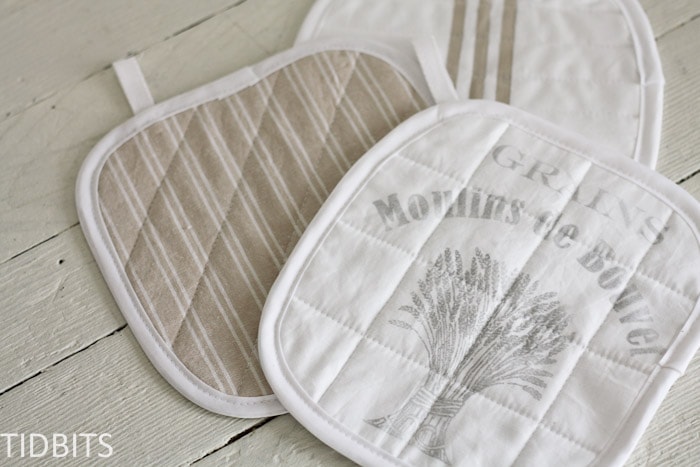
It’s all those grainsack stripes, vintage linens, neutral colors and fancy words {I can’t pronounce} that make my heart skip a beat.
So I stuck those elements on a some fabric, sewed up a simple hot pad (or 3), and now I feel as though Paris were right in my kitchen.
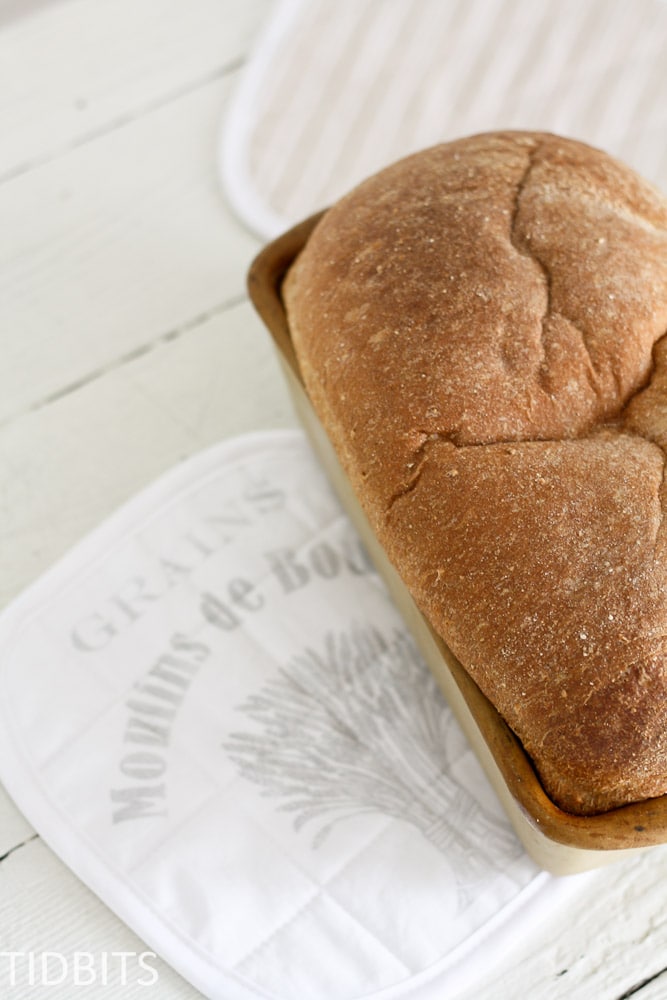
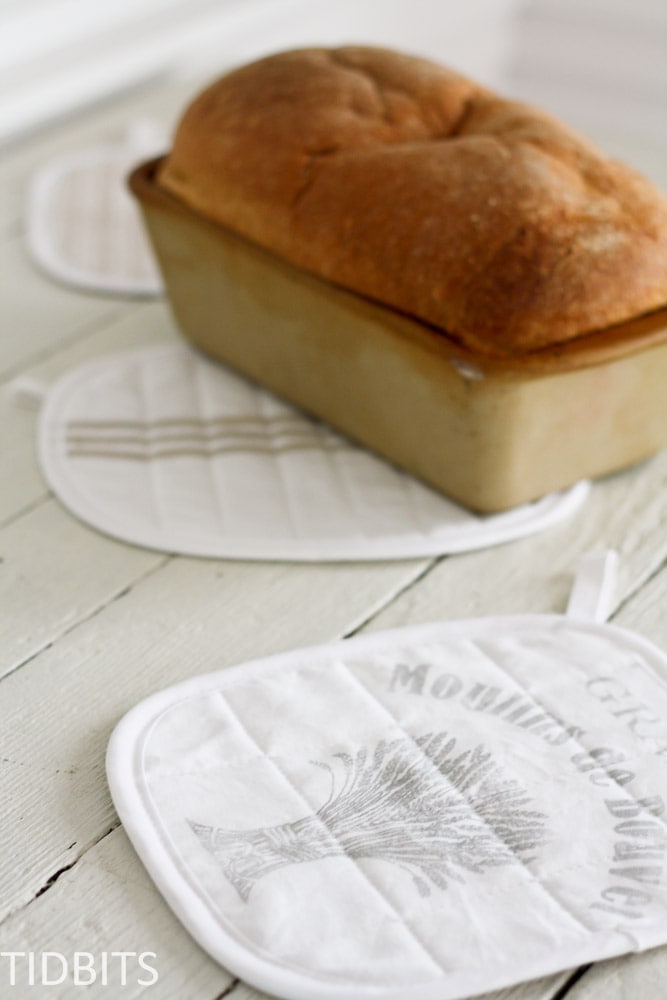
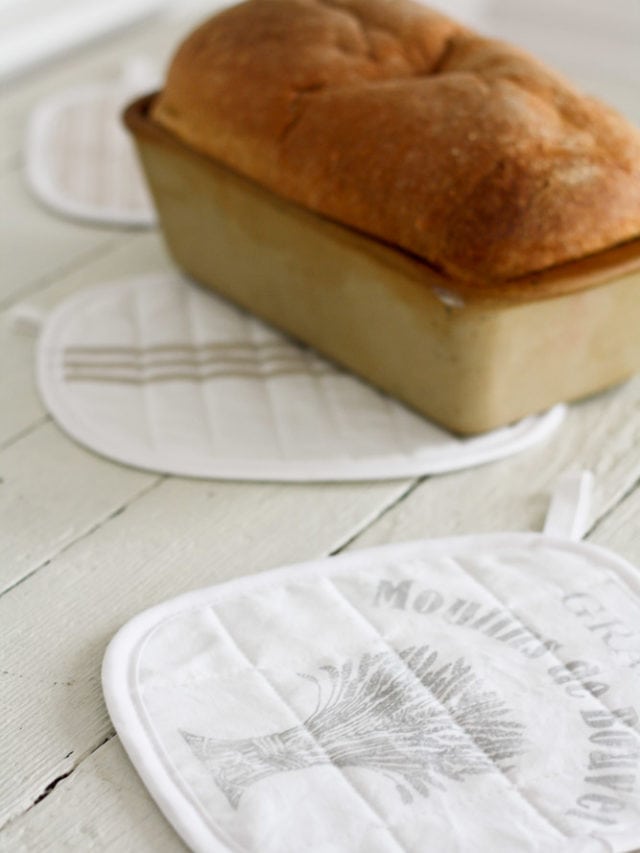
I was so inspired, I made some whole wheat bread just so I could use my hot pads.
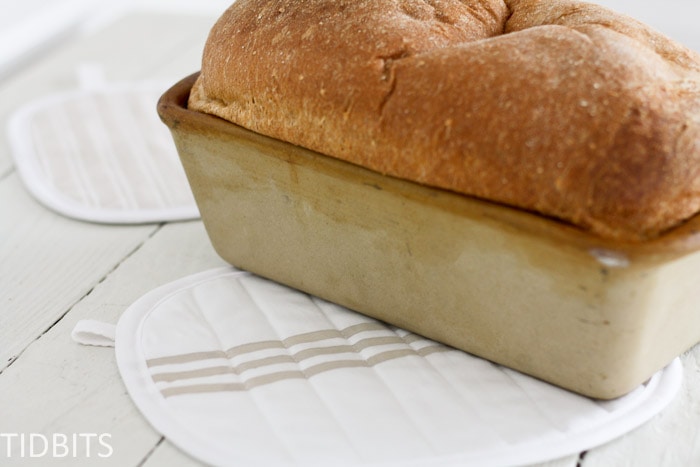
Next up on the menu are some French fries, French Dip, and French toast.
Ya know, all the authentic stuff.

Feeling inspired, too?
Grab some fabric, and let me show you how to make your own French inspired hot pads!
Materials:
- White cotton fabric (or any type of fabric really – you don’t have to be French inspired to follow this tutorial)
- Just enough to cover the front and back of the hot pad. I am not specifying a size, because it is so optional. A hot pad can be any size you want! Just be sure the front and back fabric piece are the same. (Keep reading, and I’ll go into more detail on the design)
- White batting
- I have also used white fleece and it works great.
- You only need 1 cut of white batting the same size as your front and back piece of cotton fabric. For extra thickness on your hot pad, add 2 layers of batting.
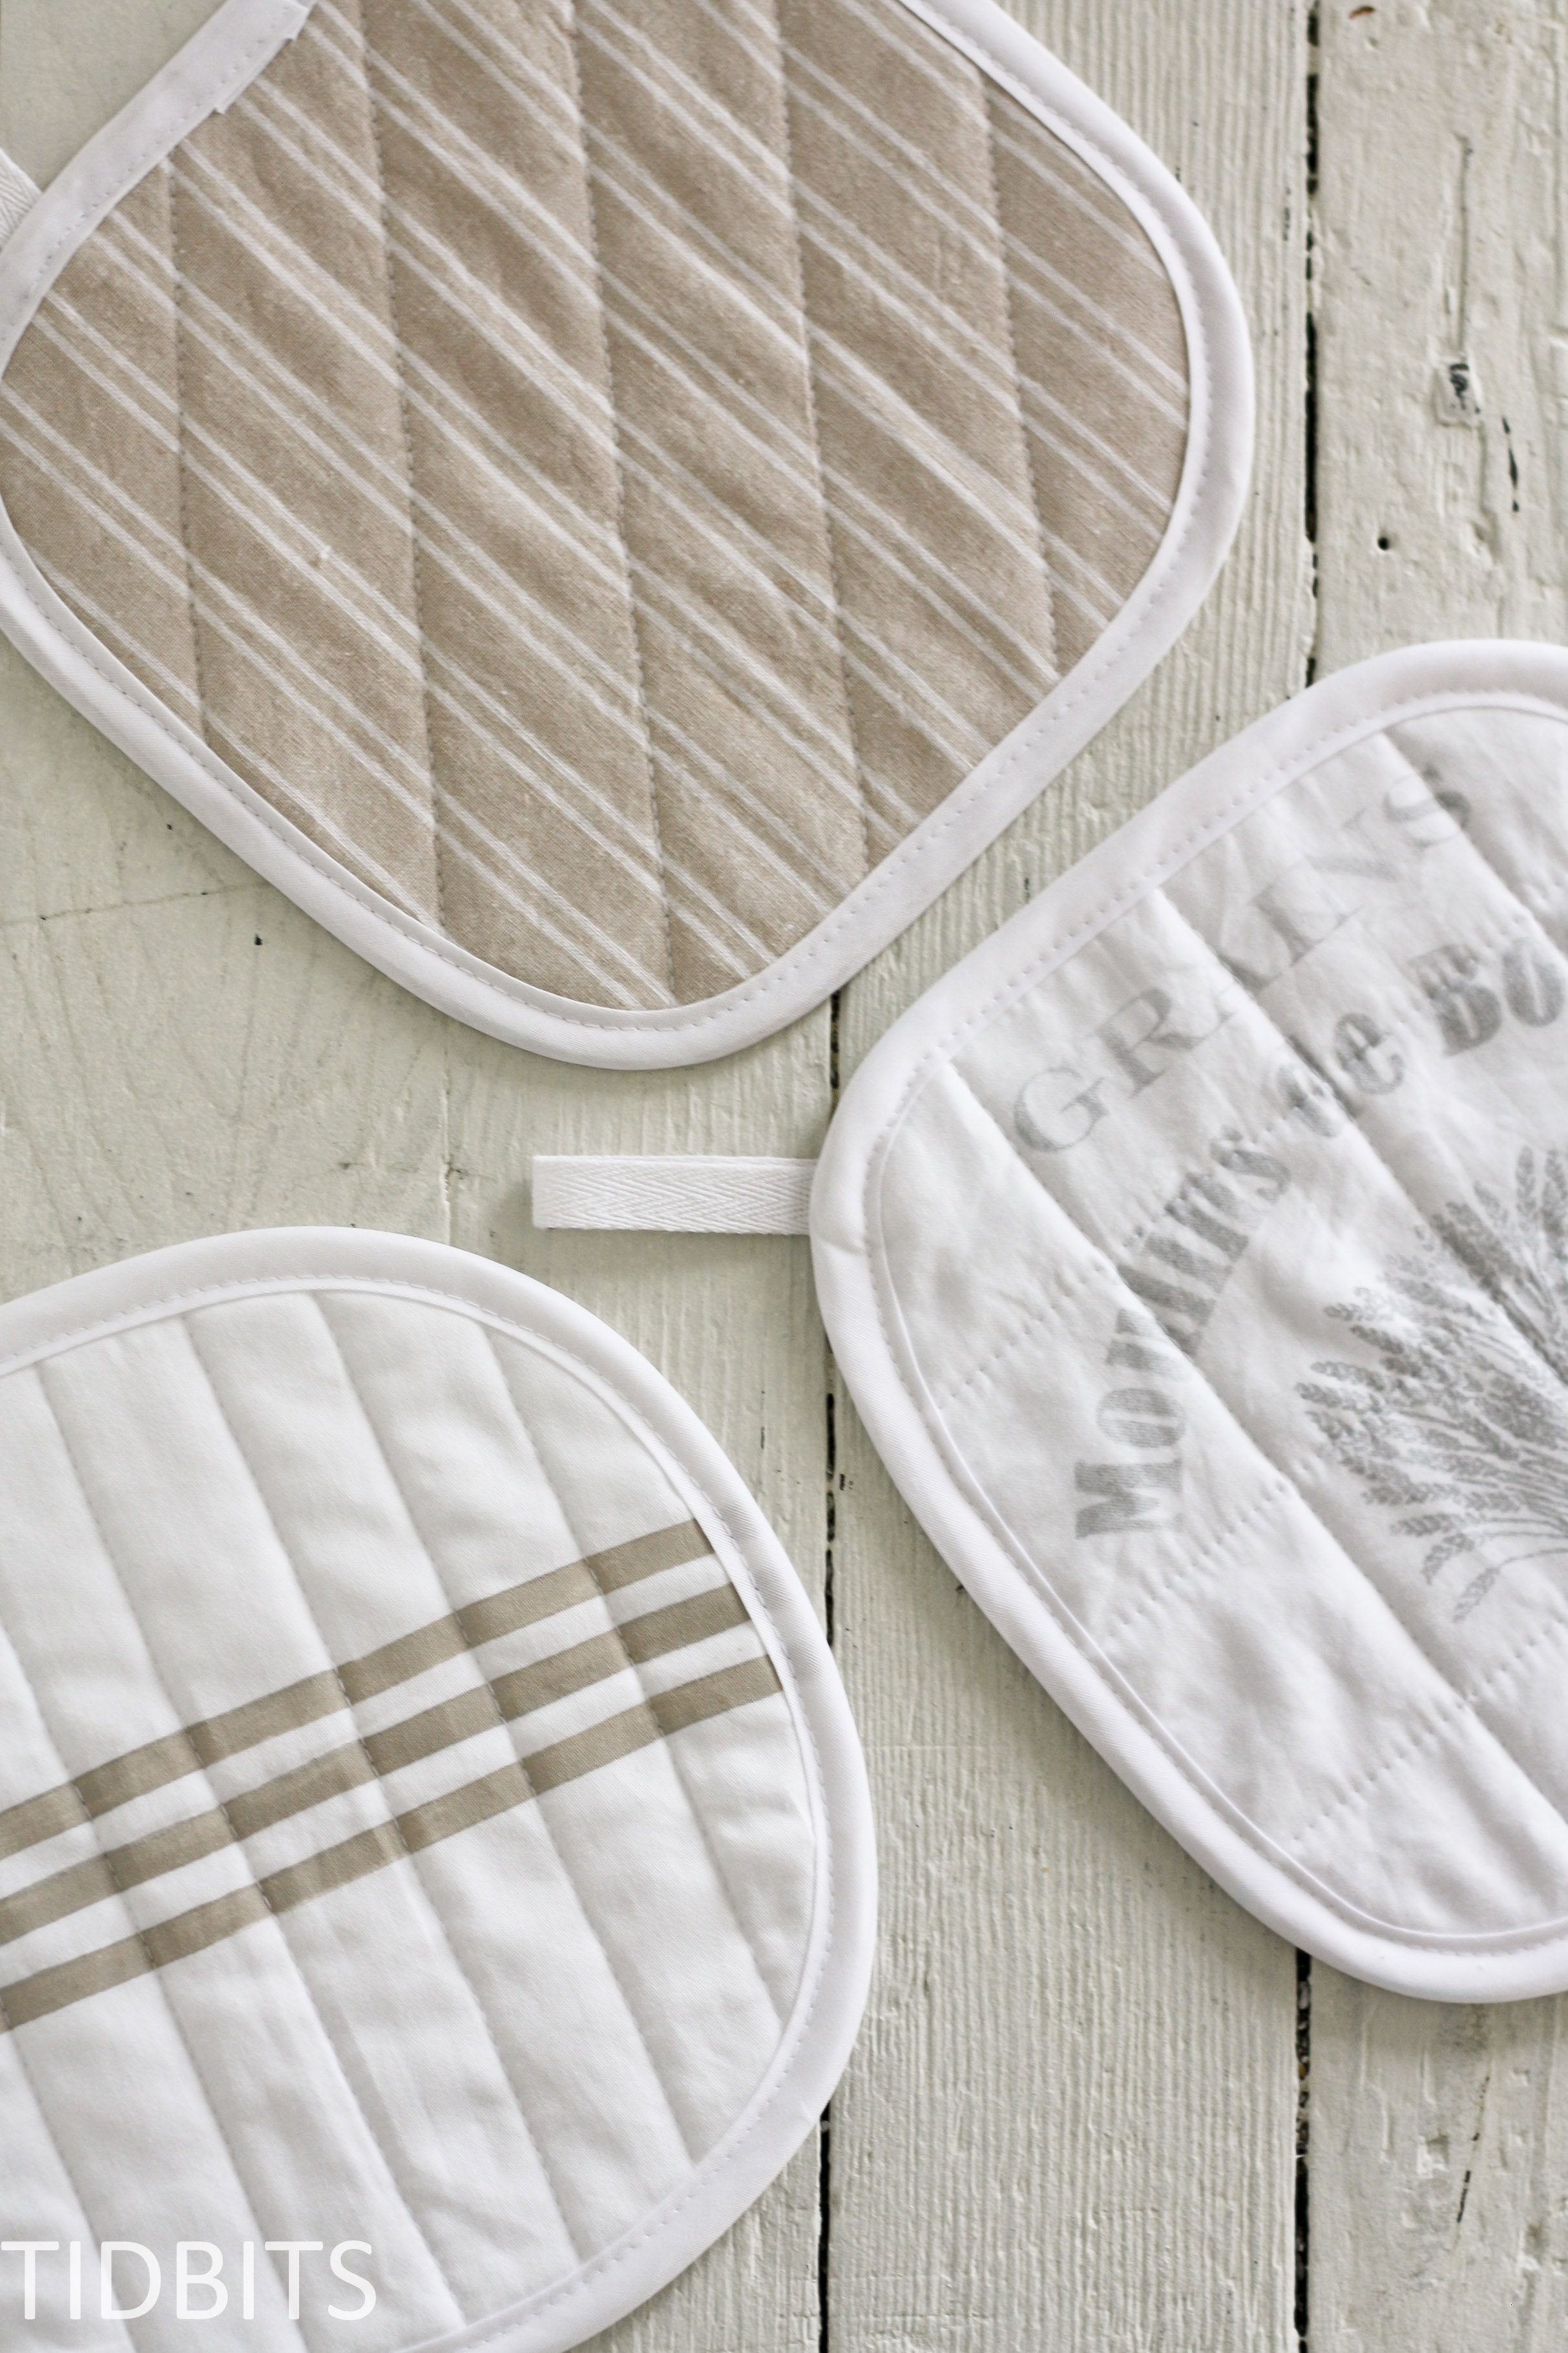
- Pre-made binding
- Any color of choice – I just use the double fold stuff, bought in a package from JoAnn’s fabric store.
- Just enough length to go around your hot pad, plus 2 inches.
- Optional twill tape/ribbon/string
- This is if you want to make something to be able to hang your hot pad.
- At least 4 inches
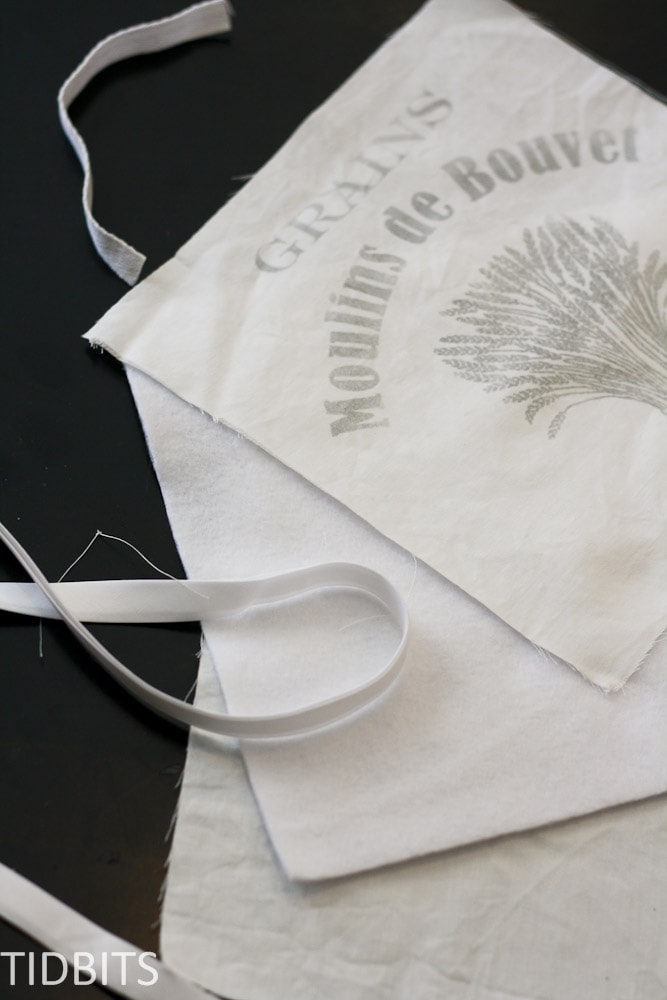
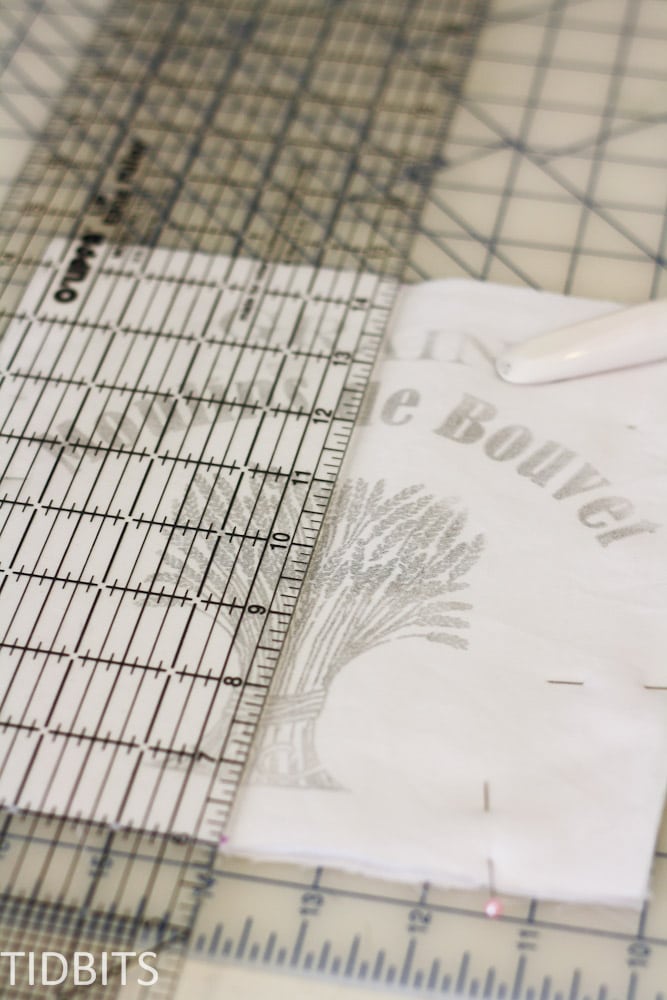
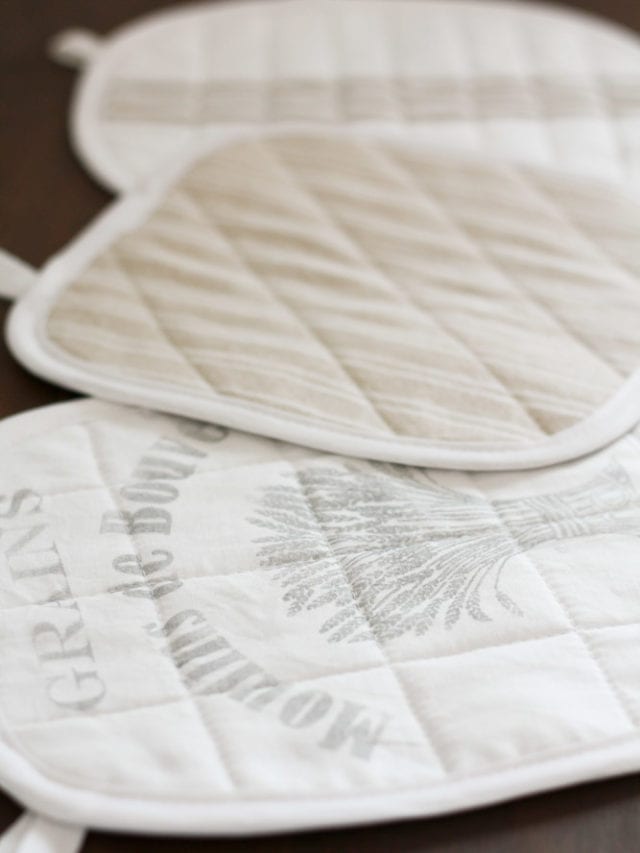
You will want to add any special design to your fabric before you begin to sew. The hot pad you see in my pictures, with the mostly brown color and small white stripes was just made from fabric that already looked like that. For the white hot pad you see with the 3 brown stripes, you just need to paint those stripes on with fabric paint (great tutorial for that coming very soon!). Now, for my favorite hot pad – the one with the grains of wheat printed on and the French words (whatever they mean), can be made so easily! All you need is the free printable which can be found at the Graphics Fairy and some citrasolv, which I found online here.
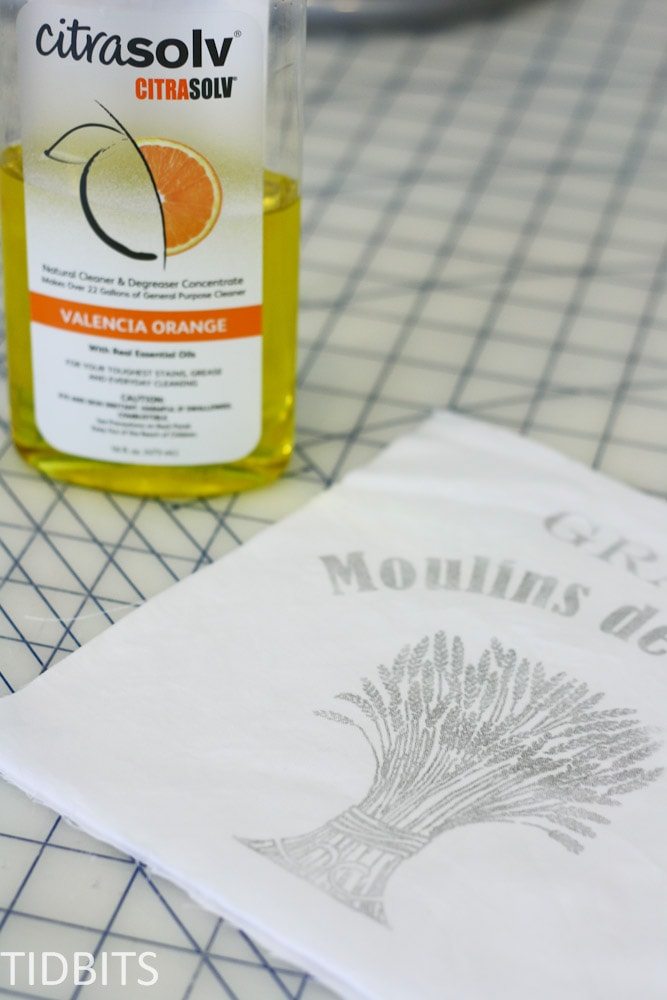
There is a wonderful detailed tutorial about how to transfer the image from a piece of paper onto your fabric, found here. When I am not transferring images with citrasolv, I use it for all my cleaning and my house smells like a smoothie shop afterwards. Love the stuff!
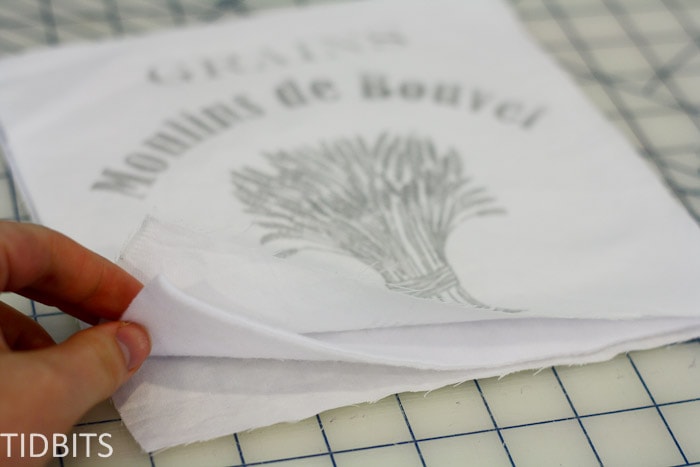
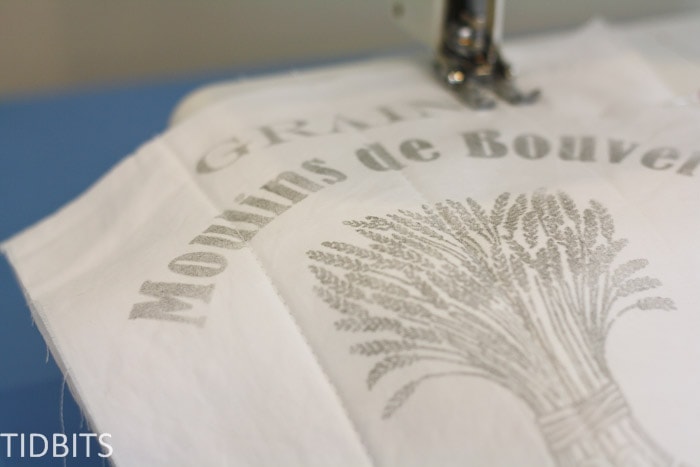
After you have completed your design on your front piece of fabric, you will need to sandwich the batting or fleece layer in between the top and bottom pieces of cotton fabric.
Pin these 3 layers together, and use your preferred method of marking on fabric, to draw lines where you want your stitching to be. You’ll notice on my hot pads, I did some of the lines diagonal, some were side to side and top to bottom, another I just did side to side. It is totally up to you. You could even try some fancy quilting stitch if you knew how to do that.
Beginning at the middle line, stitch on all your markings. You are basically stitching all 3 layers together so they don’t move around, just like you would when making a quilt.
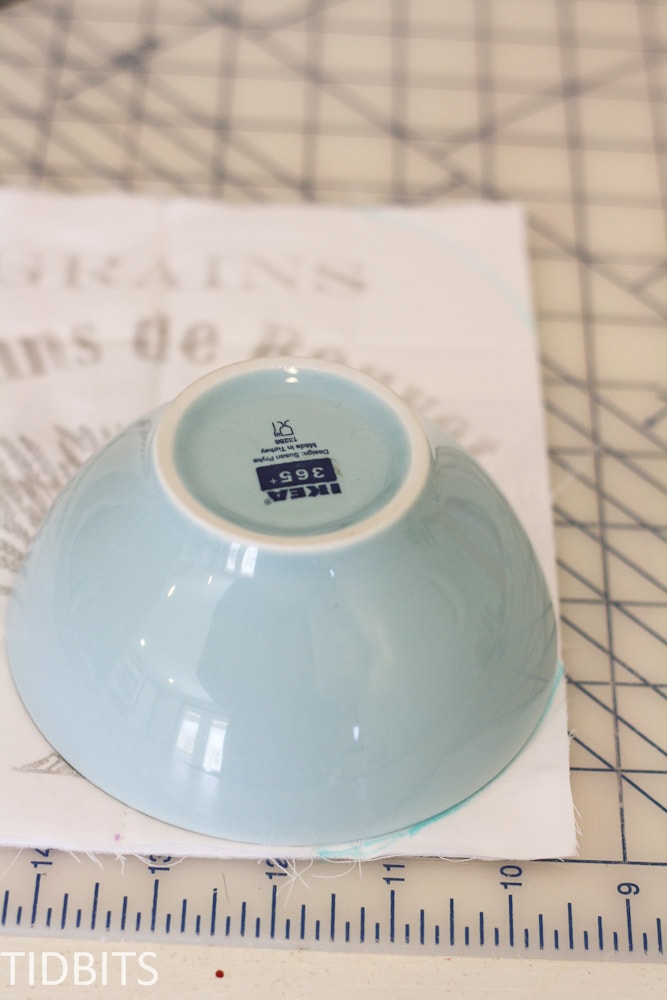
You can keep your corners squared off, if you prefer that – but I opted to round them off which made sewing the binding on so much easier because I didn’t have to deal with corners.
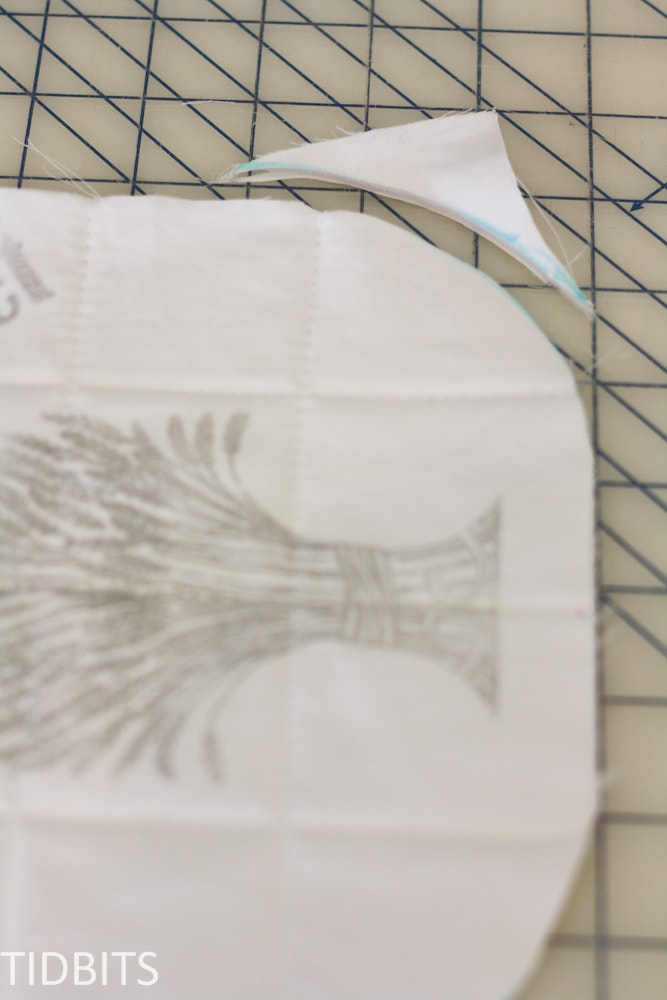
So if you want to round them off, find a bowl and trace the bowl on each corner.
Cut right on those markings, making sure you have a nice curved edge.
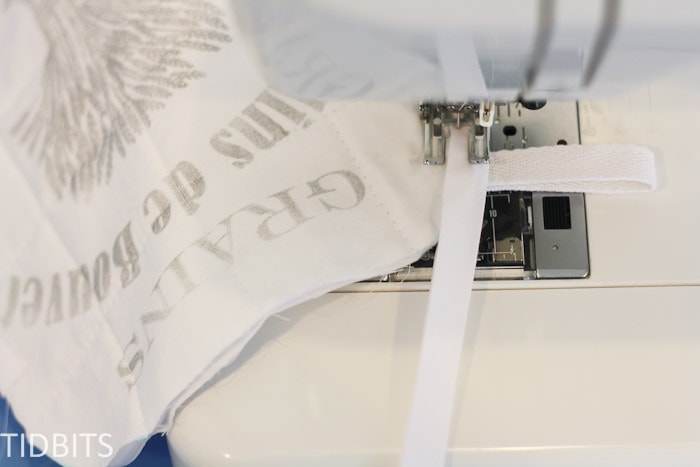
If you would like a hanging hot pad, grab your small piece of ribbon/twill tape/string and fold it in half with the raw ends lined up evenly. Pin the raw ends to the raw edges of the hot pad, where ever you would like it to hang. Just make sure you are pinning to the back side of the hot pad.

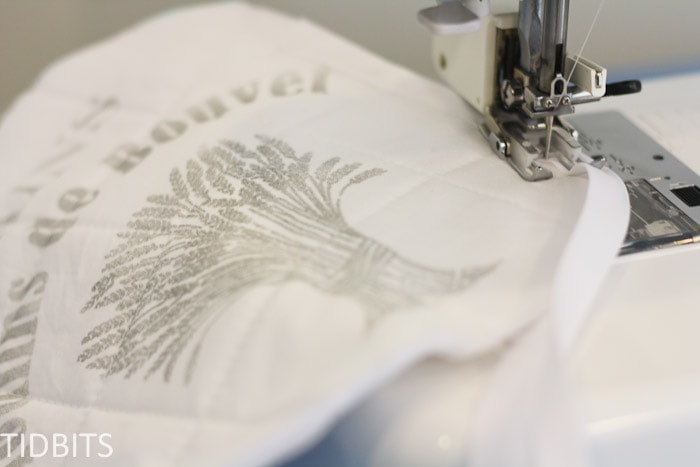
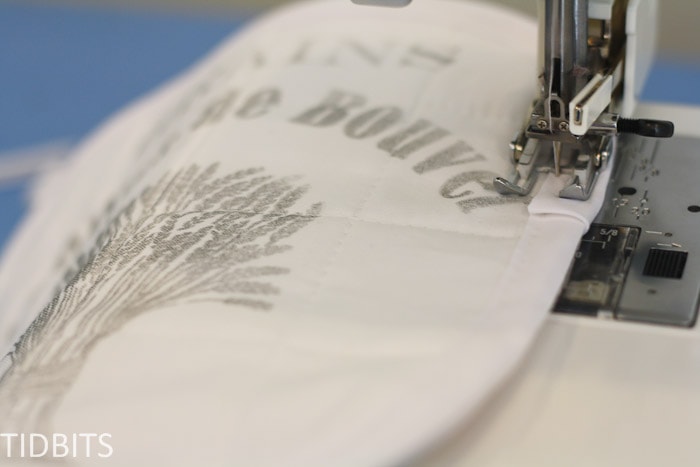
Now you are going to sew the bias tape/binding all the way around the hot pad. Place the edges of the hot pad in between the binding at one end. You’ll notice the binding, when folded, has one edge which is ever so slightly shorter than the other. Place the shorter edge on the top of the hot pad when you are sewing, so you are more likely to not miss the back side of the binding when stitching it down.
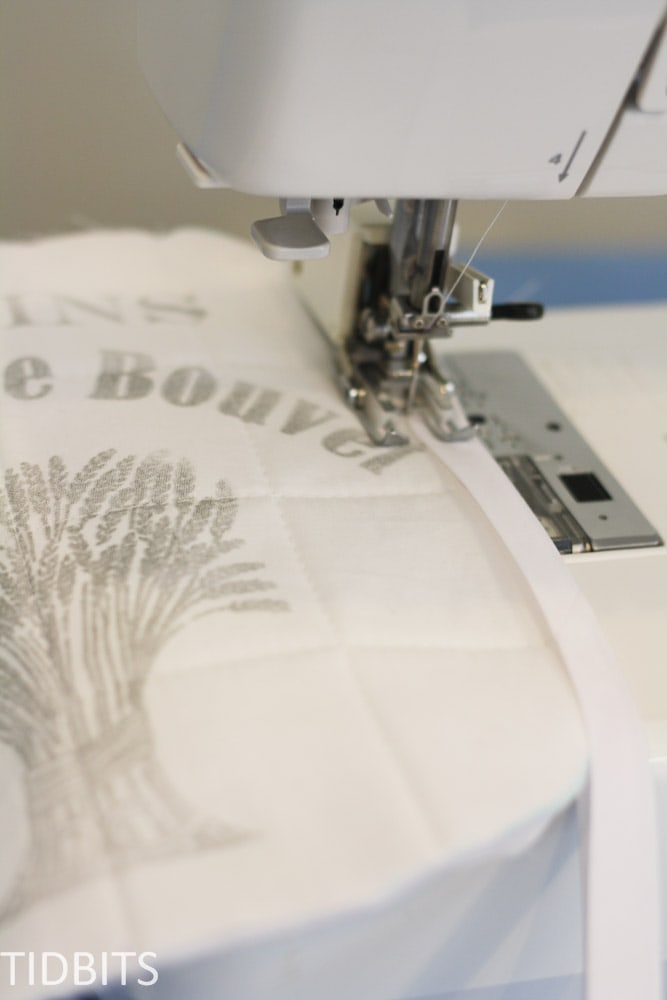
Slowly sew the binding on all the way around the hot pad, inserting the hot pad into the binding as you go.
For the part where you encounter the hanger – you want the edge of the hanger piece to be inside the binding, but it is currently pinned down towards the back of the hot pad, and you need it facing up. Simply keep that end inside the binding, and fold it upwards before you stitch the binding on in that spot. This will add a bit of bulk to that spot, so move slow and if you need to take your foot off the foot pedal and use the hand-wheel to ensure it doesn’t go to fast and break the needle.
When you come to the point where the ends meet up, fold the edge of the binding into itself, hiding the raw edges as you stitch it completely down.
And that is it! So easy, you’ll want to make some for your friend!
Or, if you are done sewing – share the idea on Facebook, Pinterest, Twitter or Google+, so others can add a little French inspiration to their kitchens as well!
Au revoir!
*This post may contain affiliate links, but you can rest assured that I always offer my true and honest opinion of all products and services.
**To see all link parties I participate in, visit my link party page, here.


Hi there, I saw your post on the french inspired hot pads. I was hoping you could share the name of the foot you’re using for the binding.
Absolutely love these! I’m a sucker for anything French inspired. And the color is so perfect! Even though it’s a bit ambitious for my sewing abilities, I might have to give these a try! Thank you for sharing!
You totally got this!! And . . . so great to meet another French inspired enthusiast!
You are one amazing girl.
Anne – that is always appreciated! Thank you so much!