This post may contain affiliate links, which means I get a small percentage of the sale at no extra cost to you. I only recommend items I love and have had a positive experience with. Thank you!
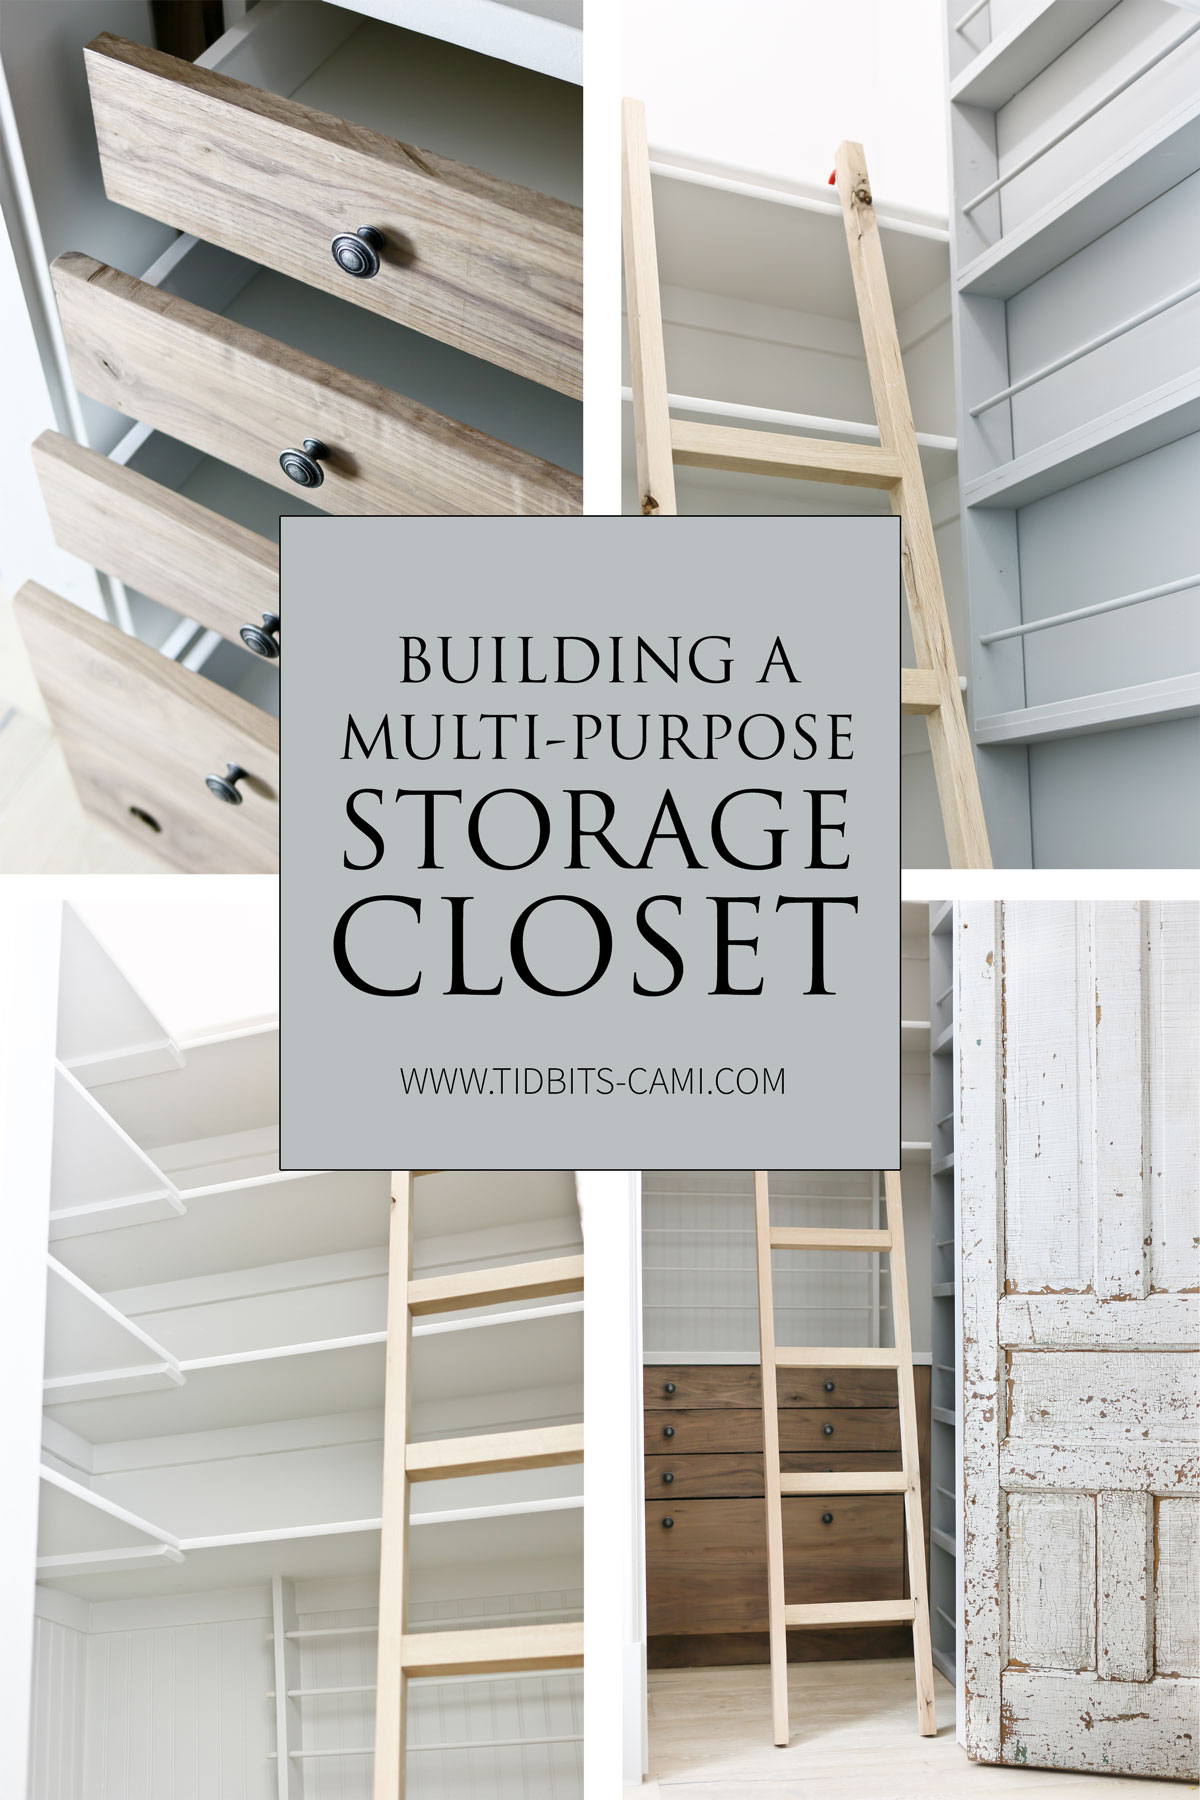
Showing you how we added shelves, drawers and storage to make the most of this multi-purpose storage closet space.
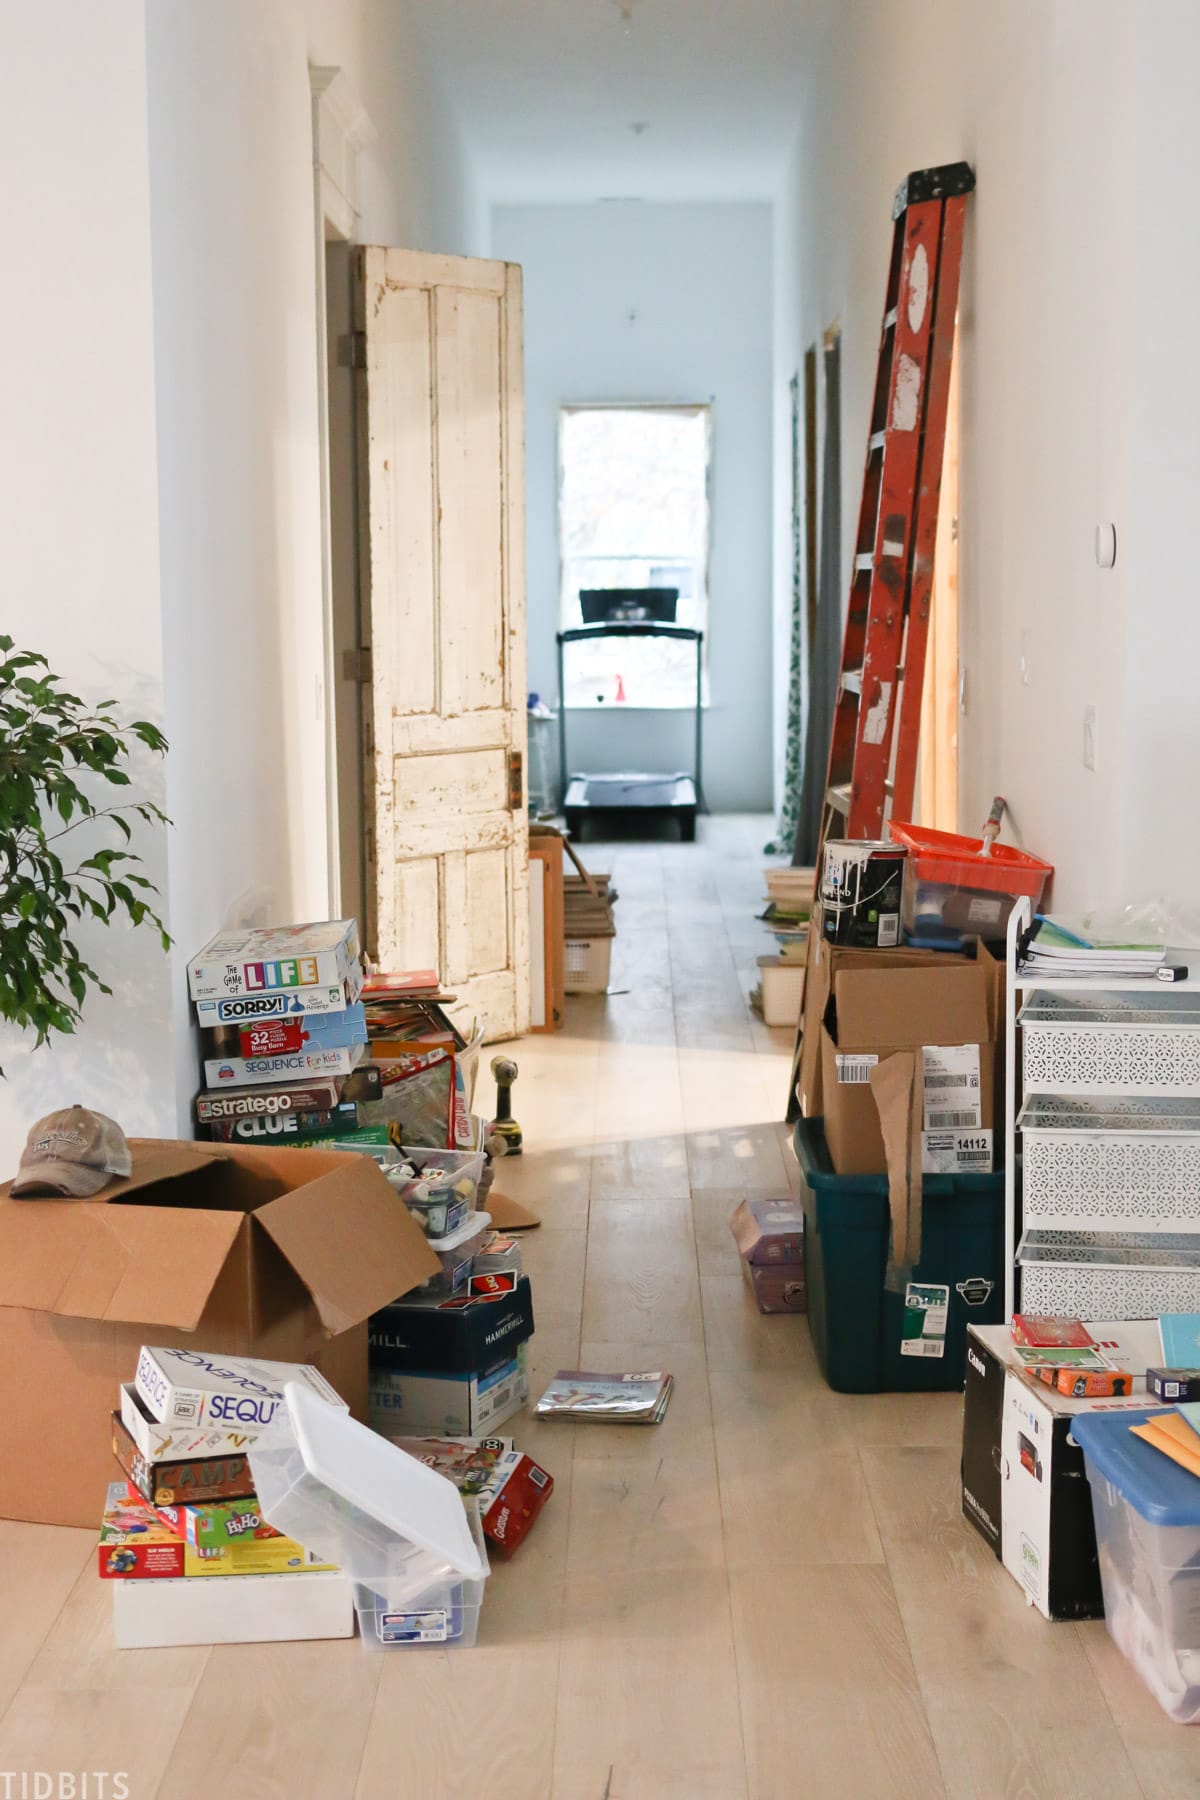
Our need for storage in our new, very unfinished pole barn home is hitting top priority. My heart and soul is getting very tired of seeing boxes and totes line the walls.
WATCH THIS POST
Check out my video for this post and get extra footage!
So after we finished the kitchen, we decided to begin work on our multi-purpose storage closet in the hallway. I haven’t filled it up yet, because I wanted to show you first how we built shelves and storage to fit “all the things”.
Perhaps you have a closet like this in your home – one that has to function for a lot of purposes! This small closet here in our hallway is in fact our only storage closet, besides the ones in each of the bedrooms and the large pantry.
This is certainly not ideal for a family of 6, but if you’ve been following along on our pole barn home journey, I’ll remind you that this is not necessarily our dream final home. We placed this home on a beautiful spot on our 25 acres and the 5 year plan is to transition it into a rental or vacation home of sorts while we build again.
We just didn’t feel adding money and time into a lot of large storage areas would be a necessary thing for this home.
But alas, I still have the challenge of making this single storage closet work for us. Lucky for me, we lived in an RV – so I am pretty equipped with the skills of small space living. This closet will become an art closet, linen closet, home library, utility closet, work storage closet, craft closet, office closet . . . and so much more.
Let me show you how we made the most of this tiny space.
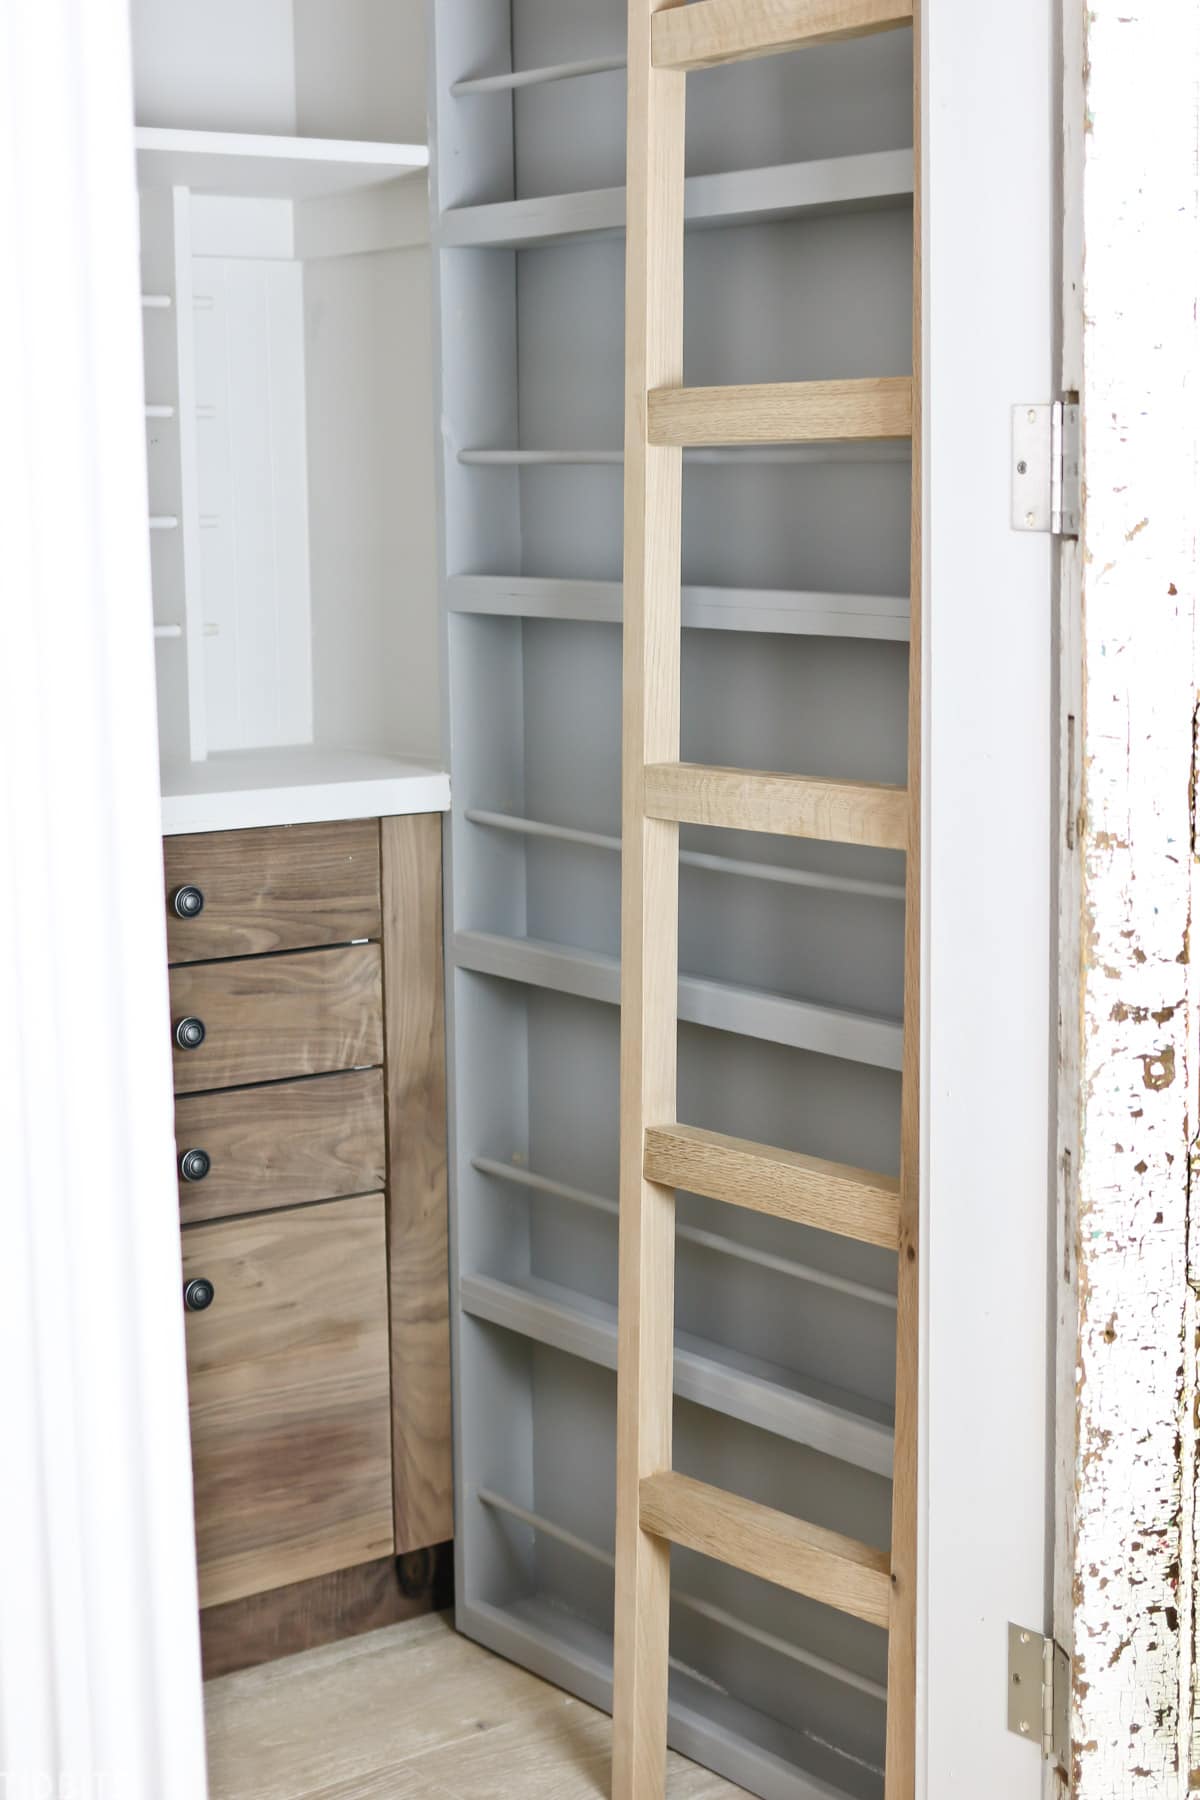
We used every single wall to its max capacity. With shelving extending all the way up to the 12 foot ceiling, countertop space, DIY drawer units, and a built-in wall mounted bookshelf – no surface will be unused.
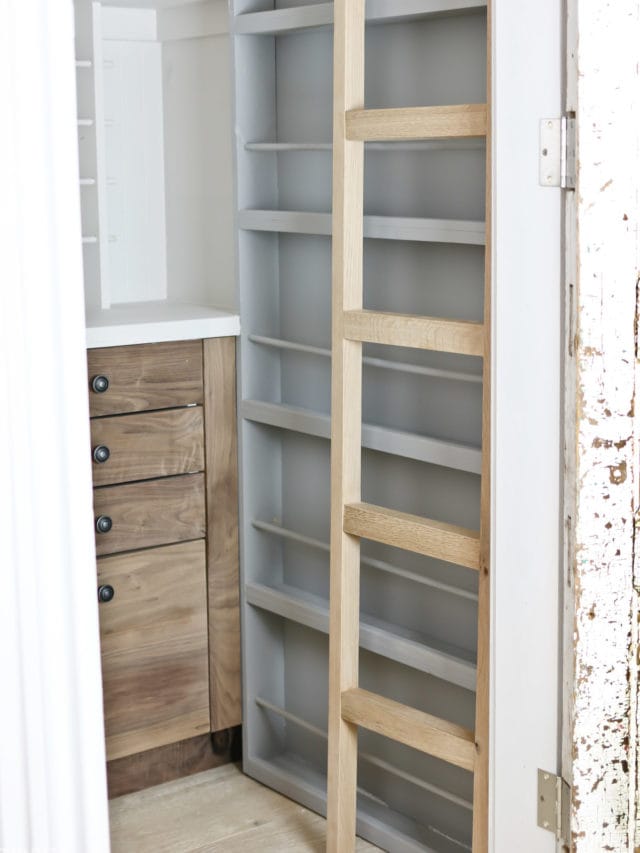
WALL MOUNTED BOOKSHELF
When we were faced with a wall that was certainly not deep enough for shelving, I knew it would be the perfect spot to build some wall mounted vertical bookshelves.
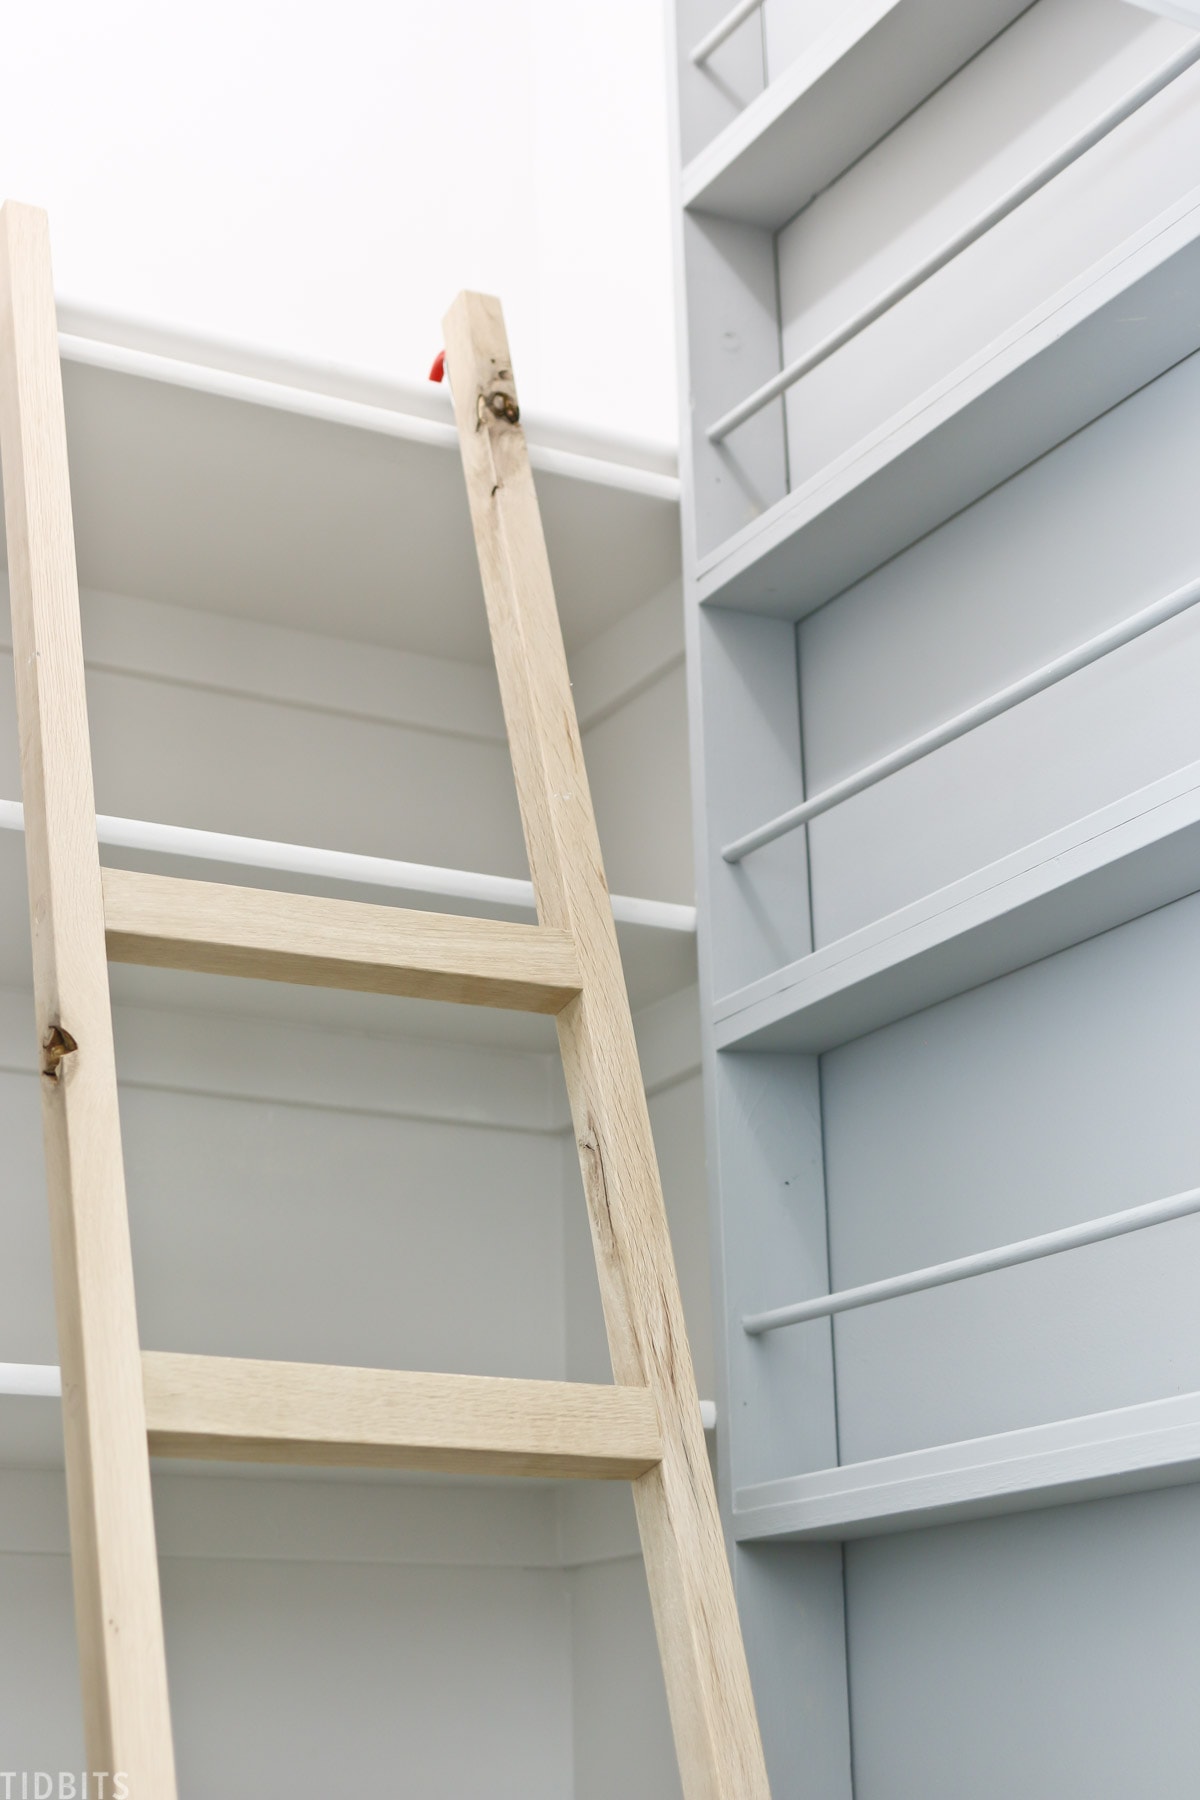
You’ll see a lot of spice racks turned wall mounted bookshelves on Pinterest, but I wanted a more built-in look. My husband put together this tall rack with all the appropriate ledges and dowels to hold books and attached it right to the wall. I had some fun with a pretty blue paint just for these shelves, to add some contrast and style – even if it is just a closet.
I’ll be able to keep much of the kids books down low and easy for them to grab, and our books and magazine collections up high.
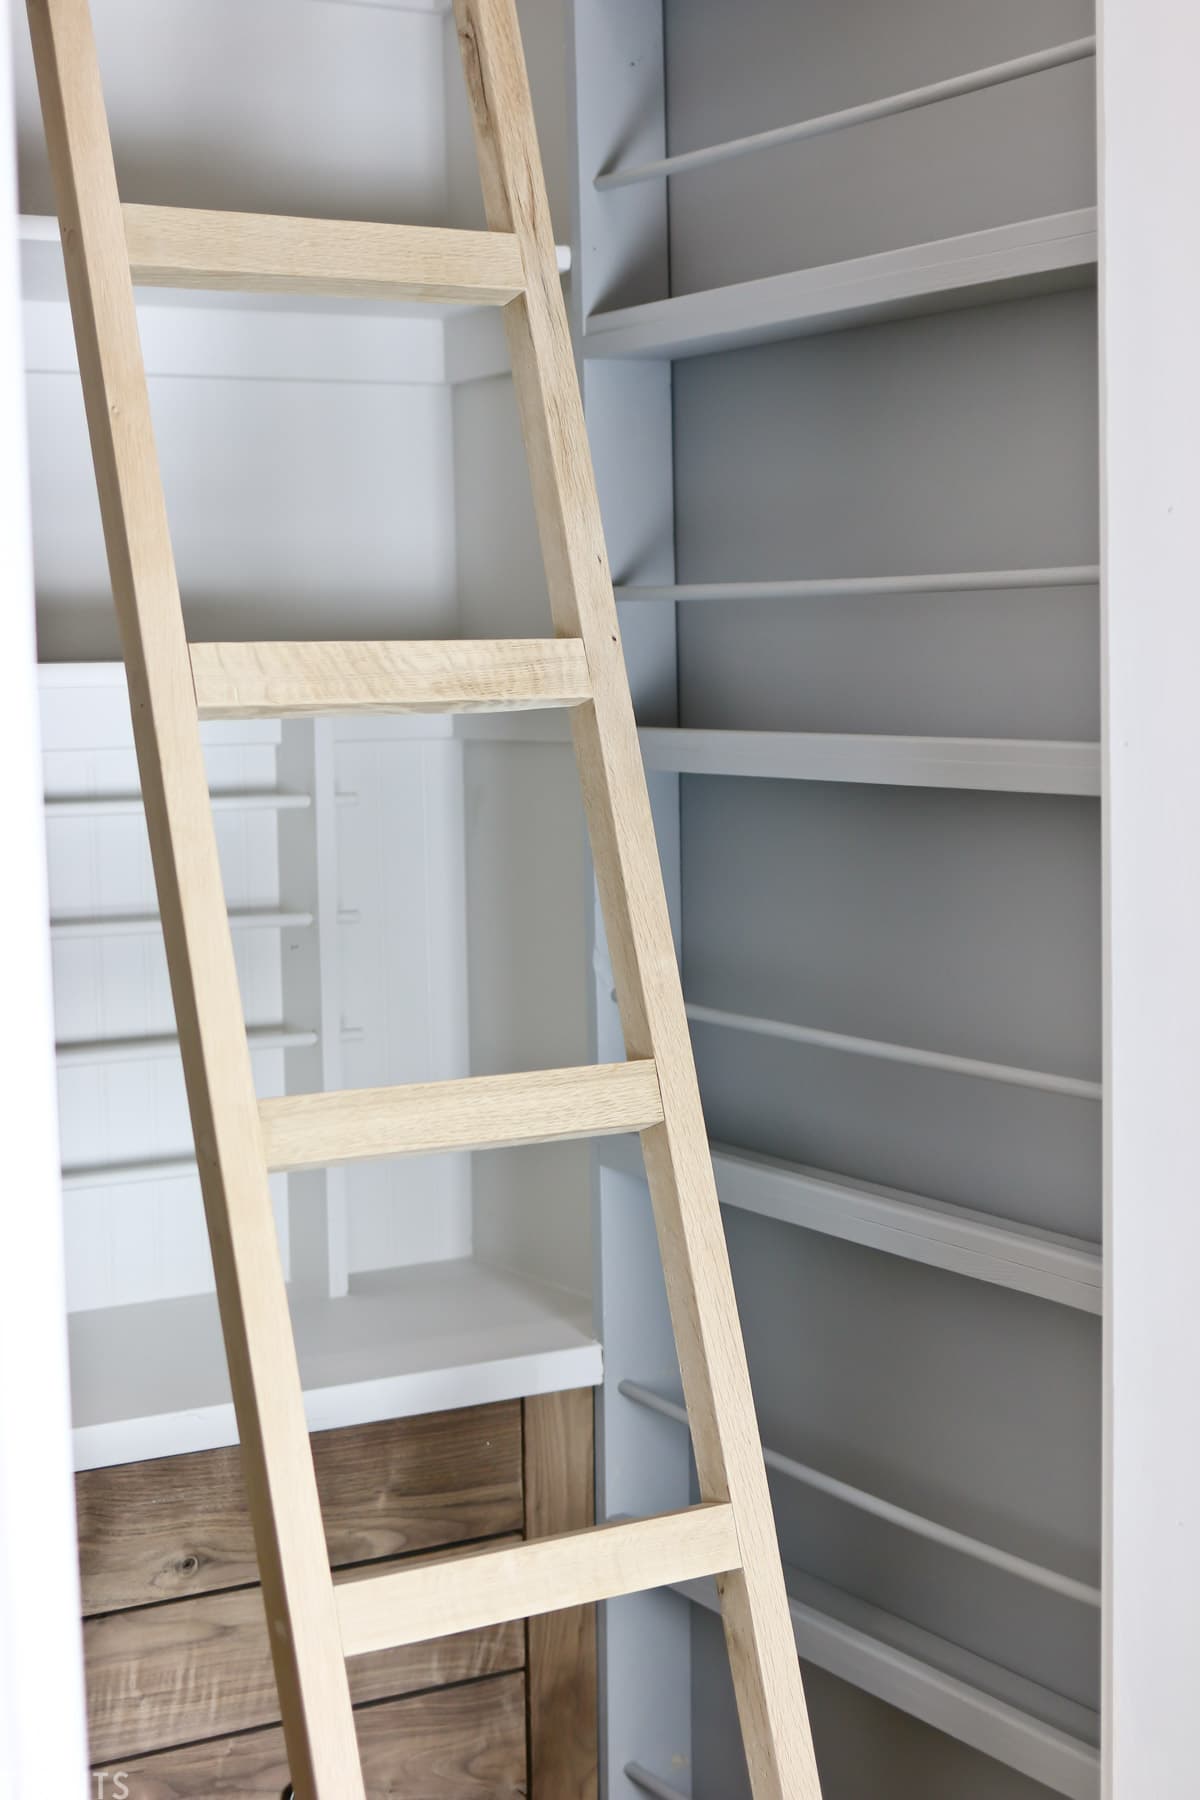
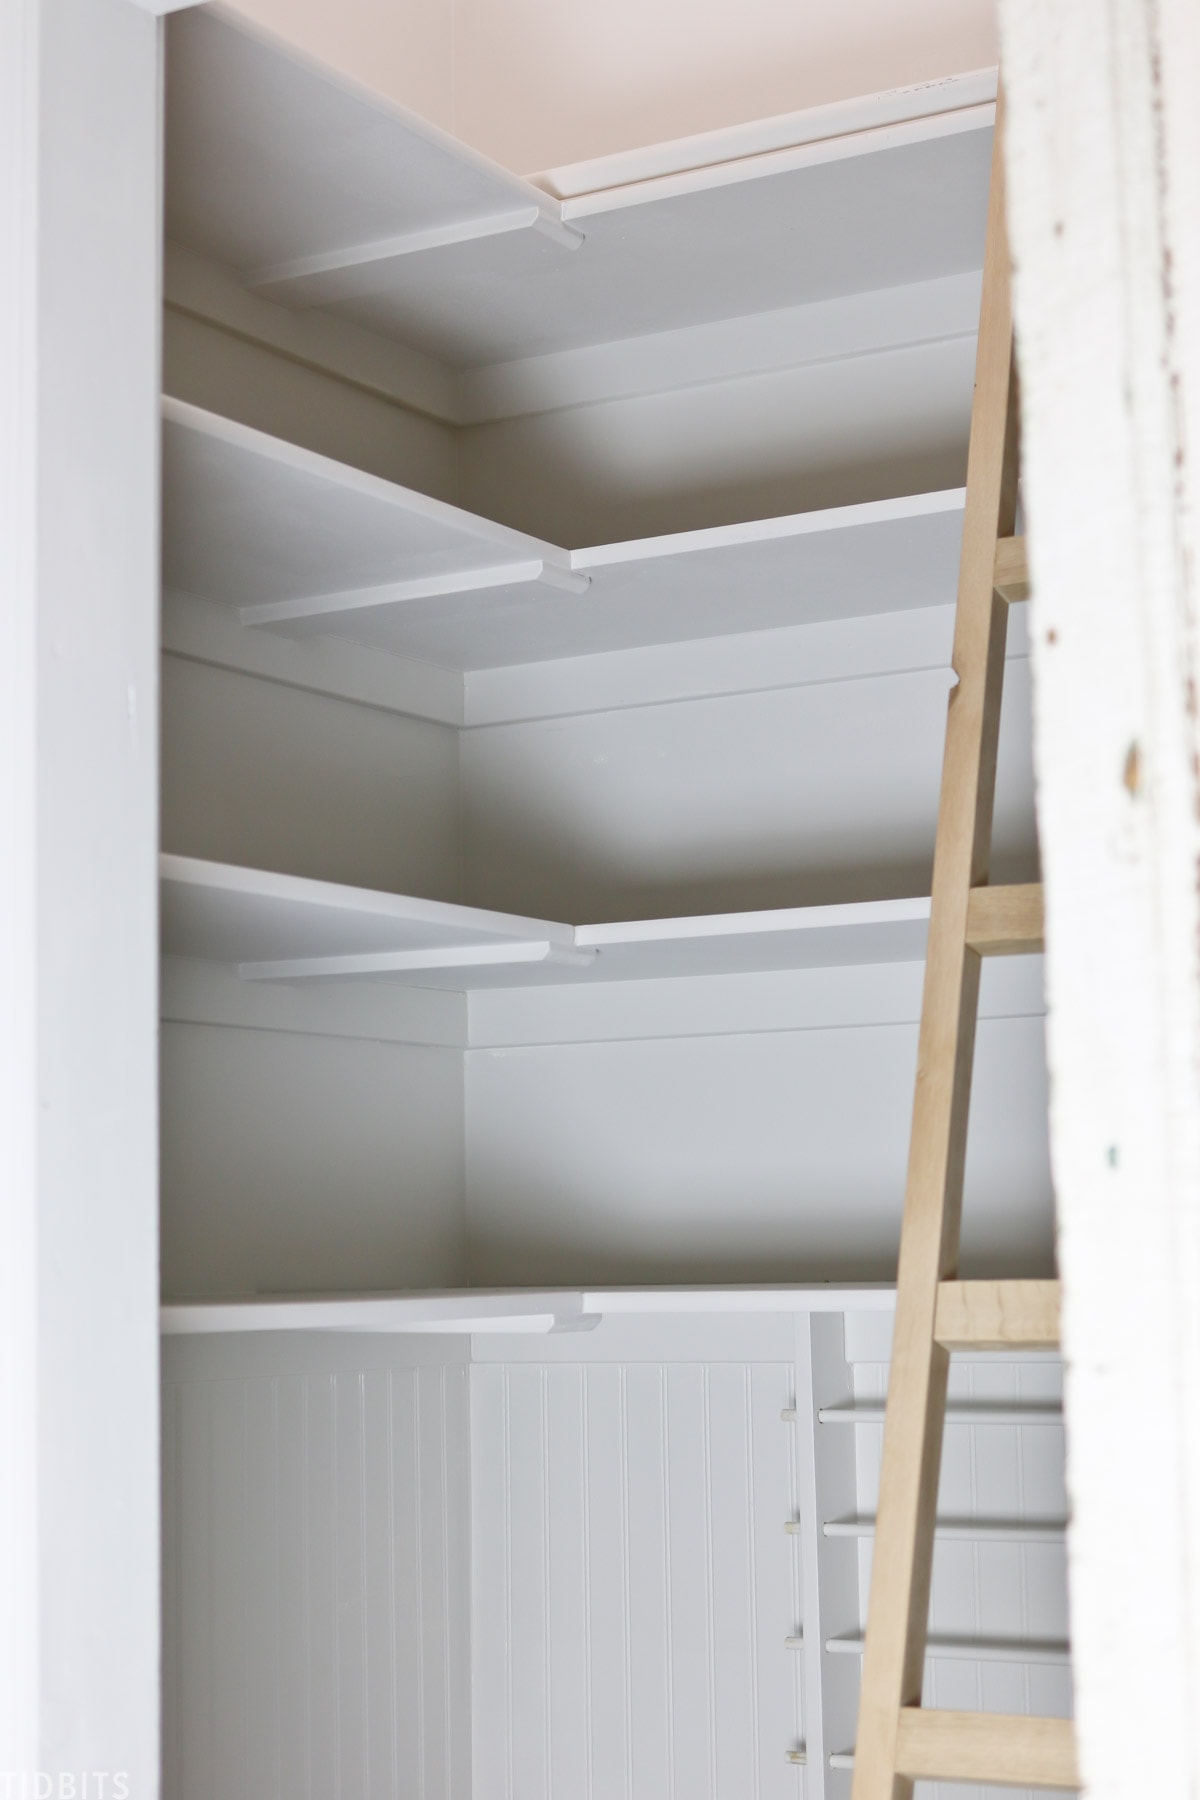
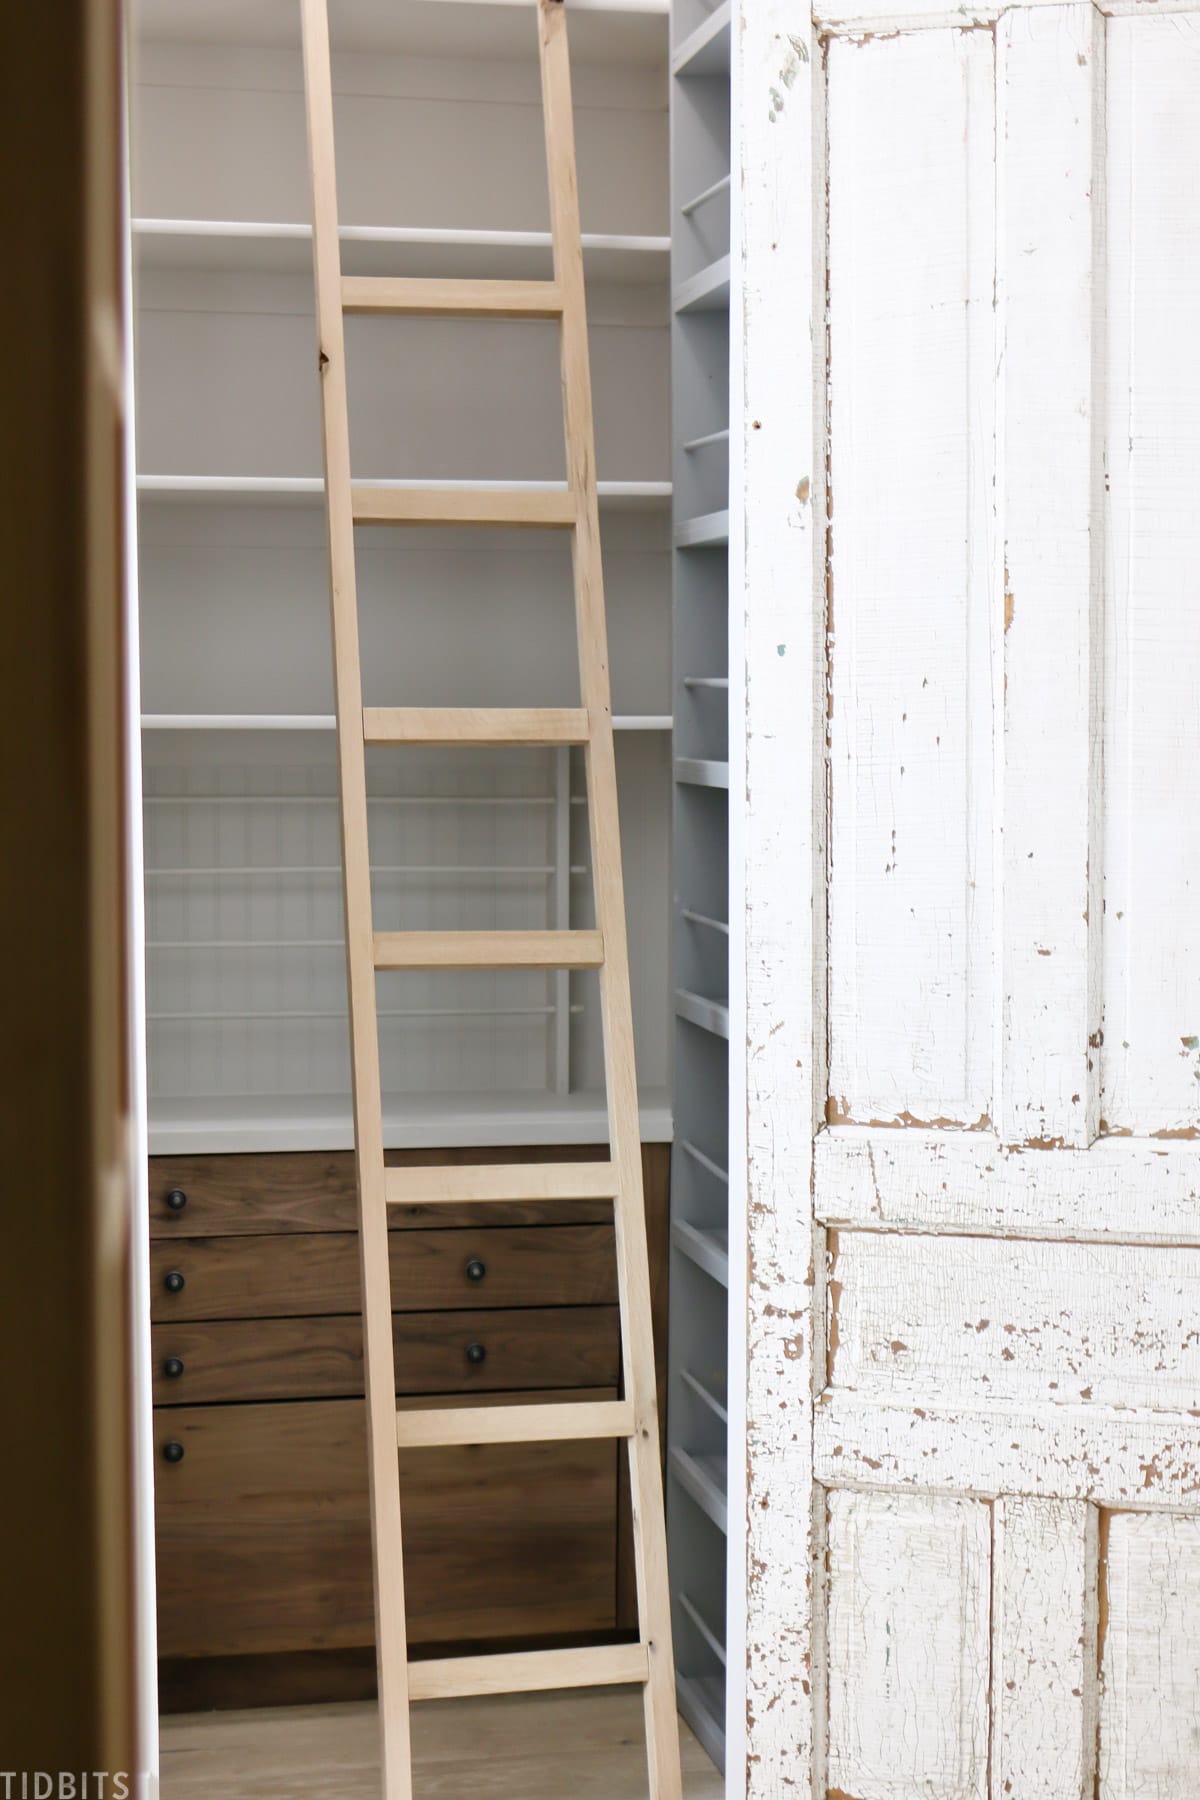
12 FOOT CEILINGS IN A CLOSET + LADDER
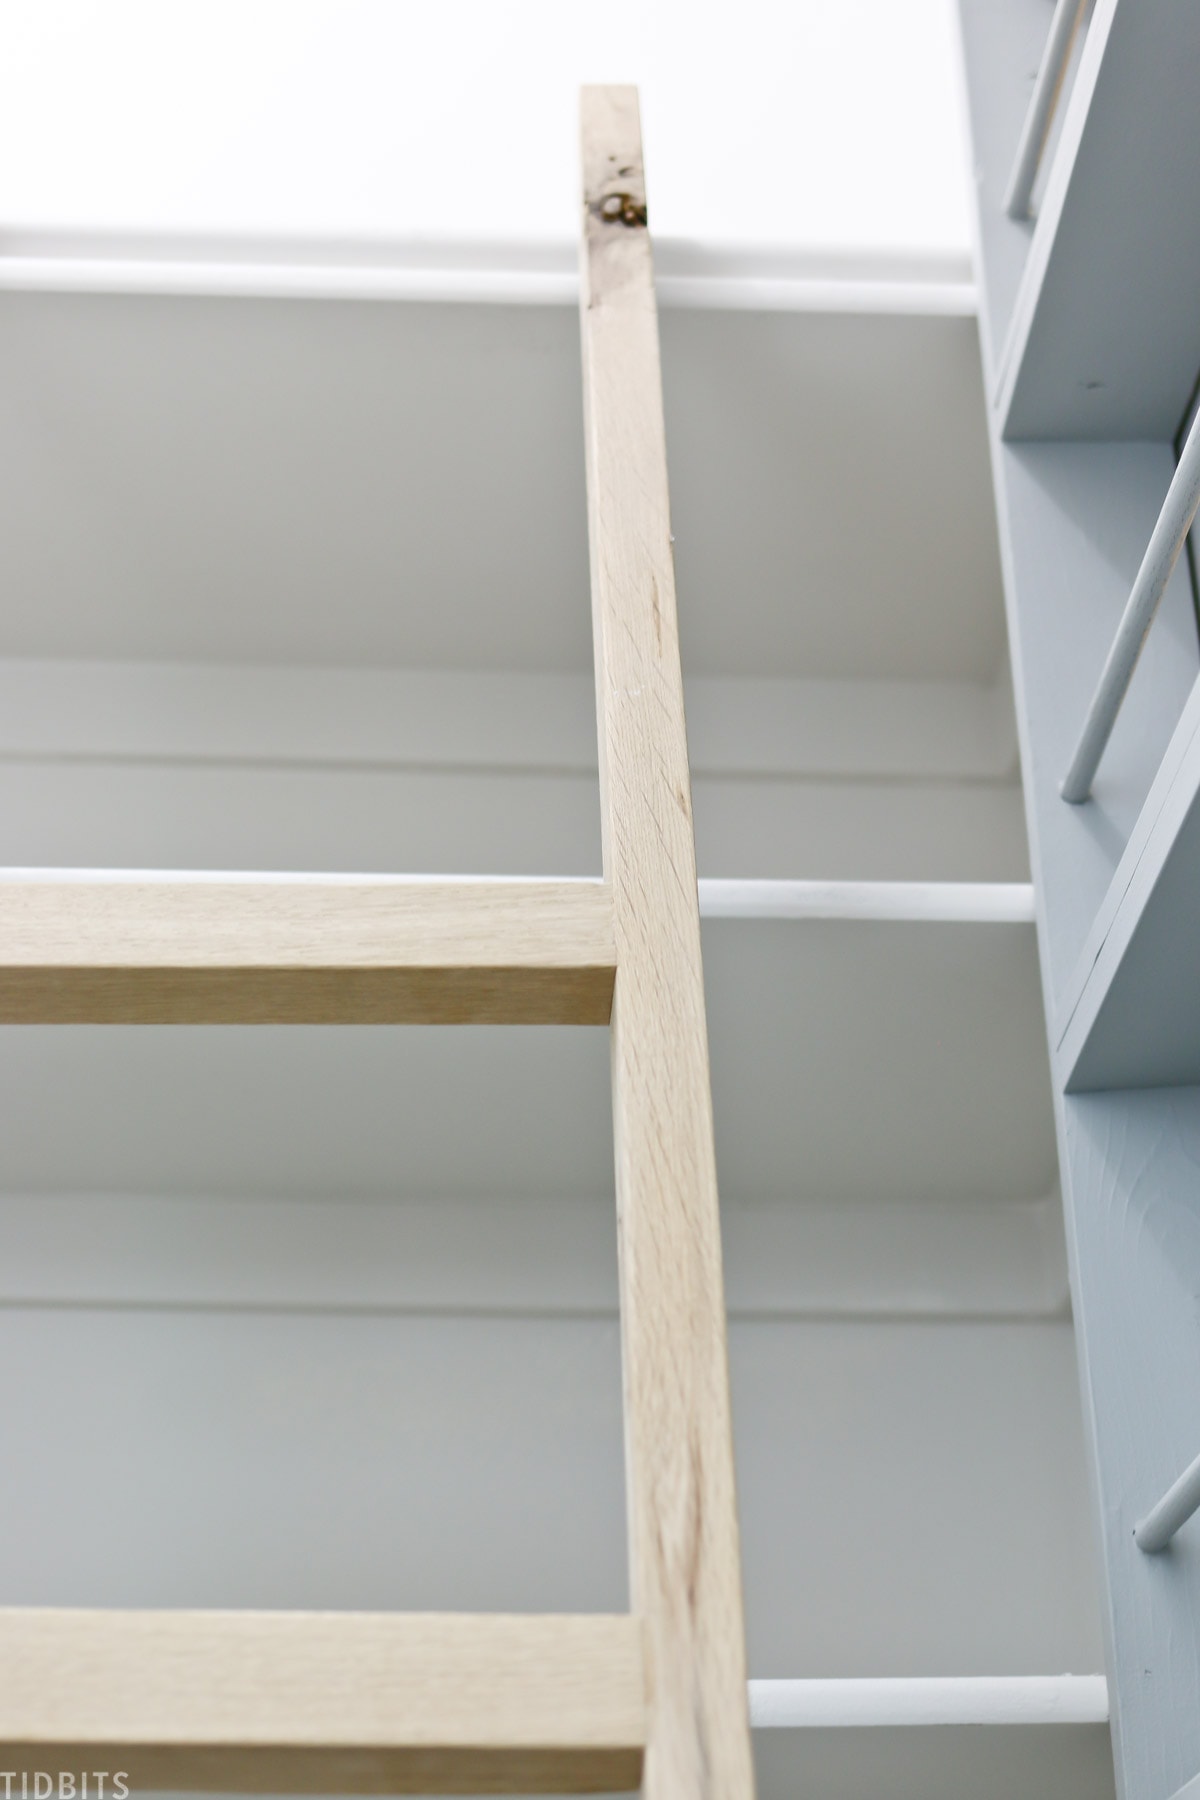
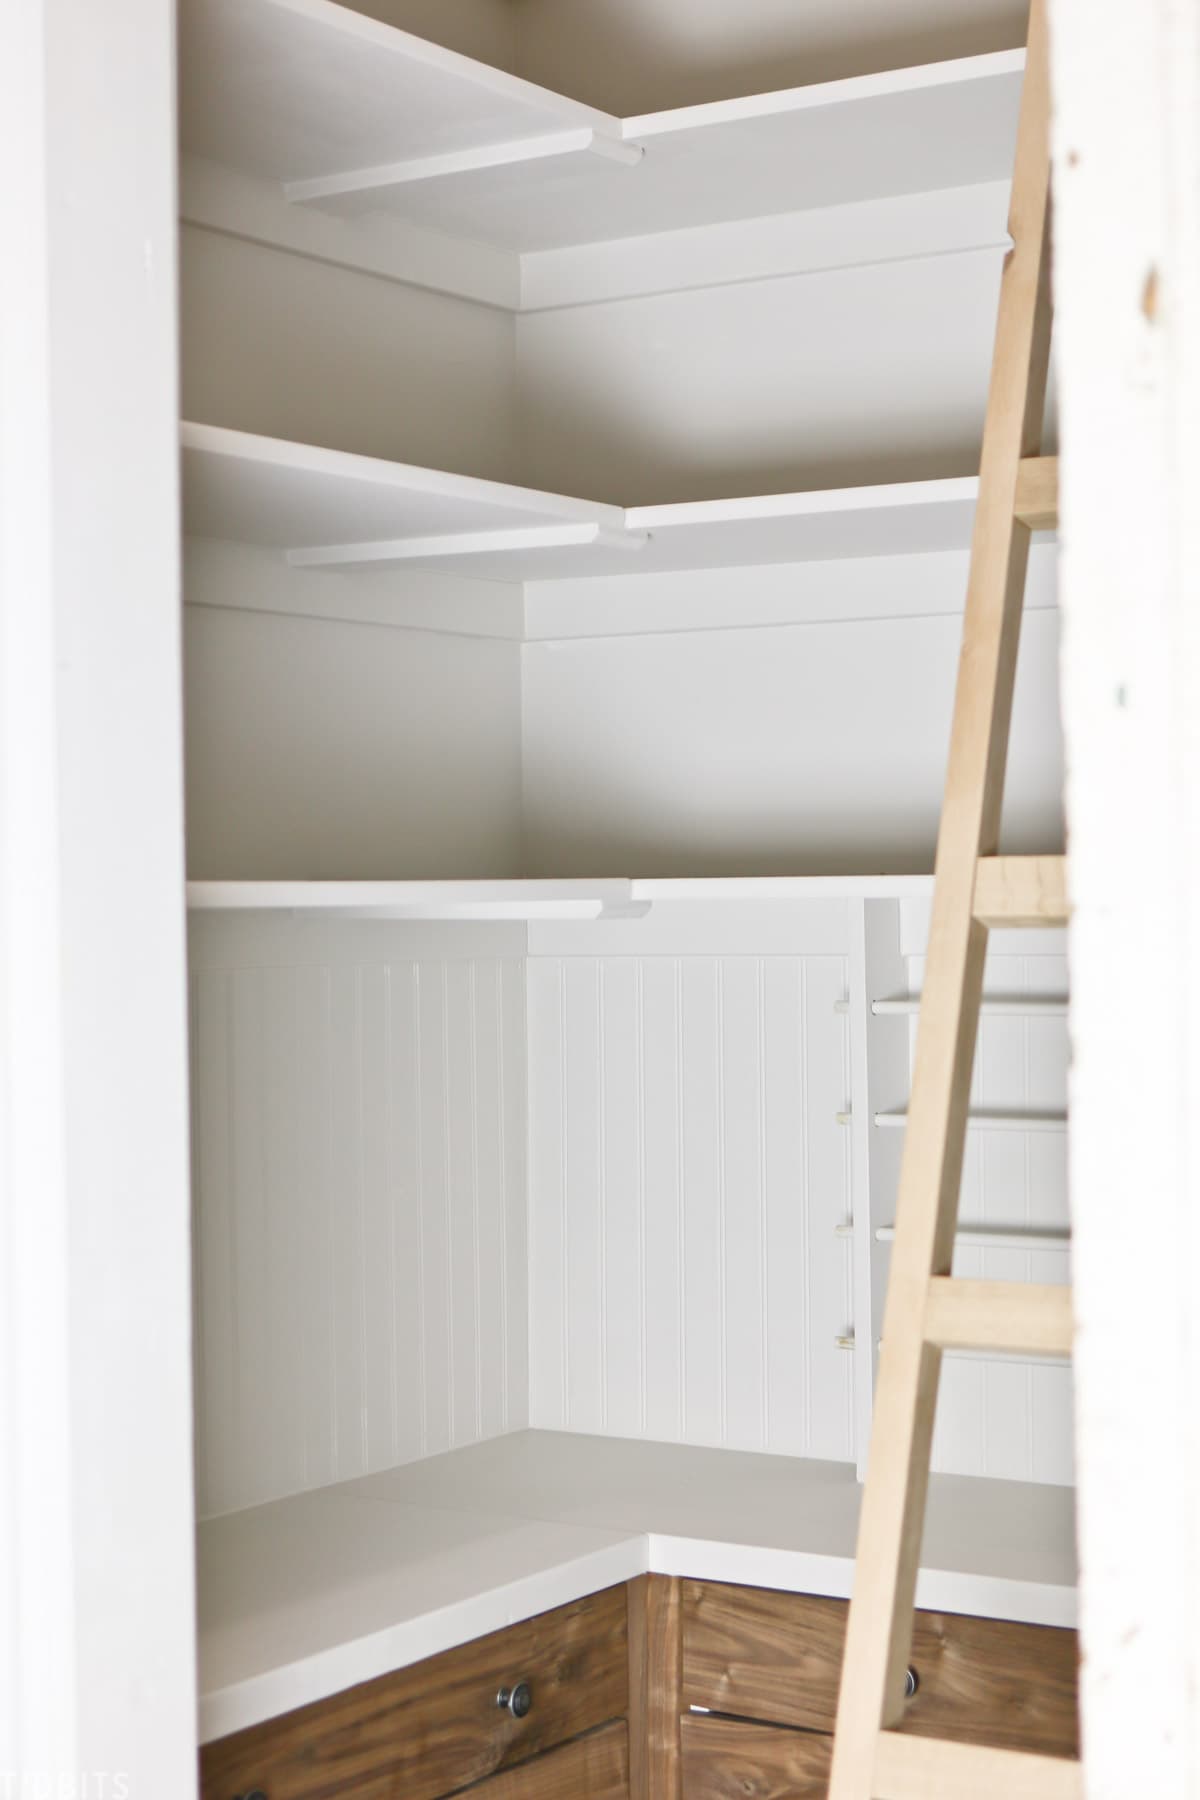
You might be wondering how we will get to all the items up high. My husband built a sturdy ladder out of white oak to latch to the top or sit to the side.
It’s a little of a nerve wracking climb for some of us, but we can easily keep this ladder in here and quickly grab the items up high.
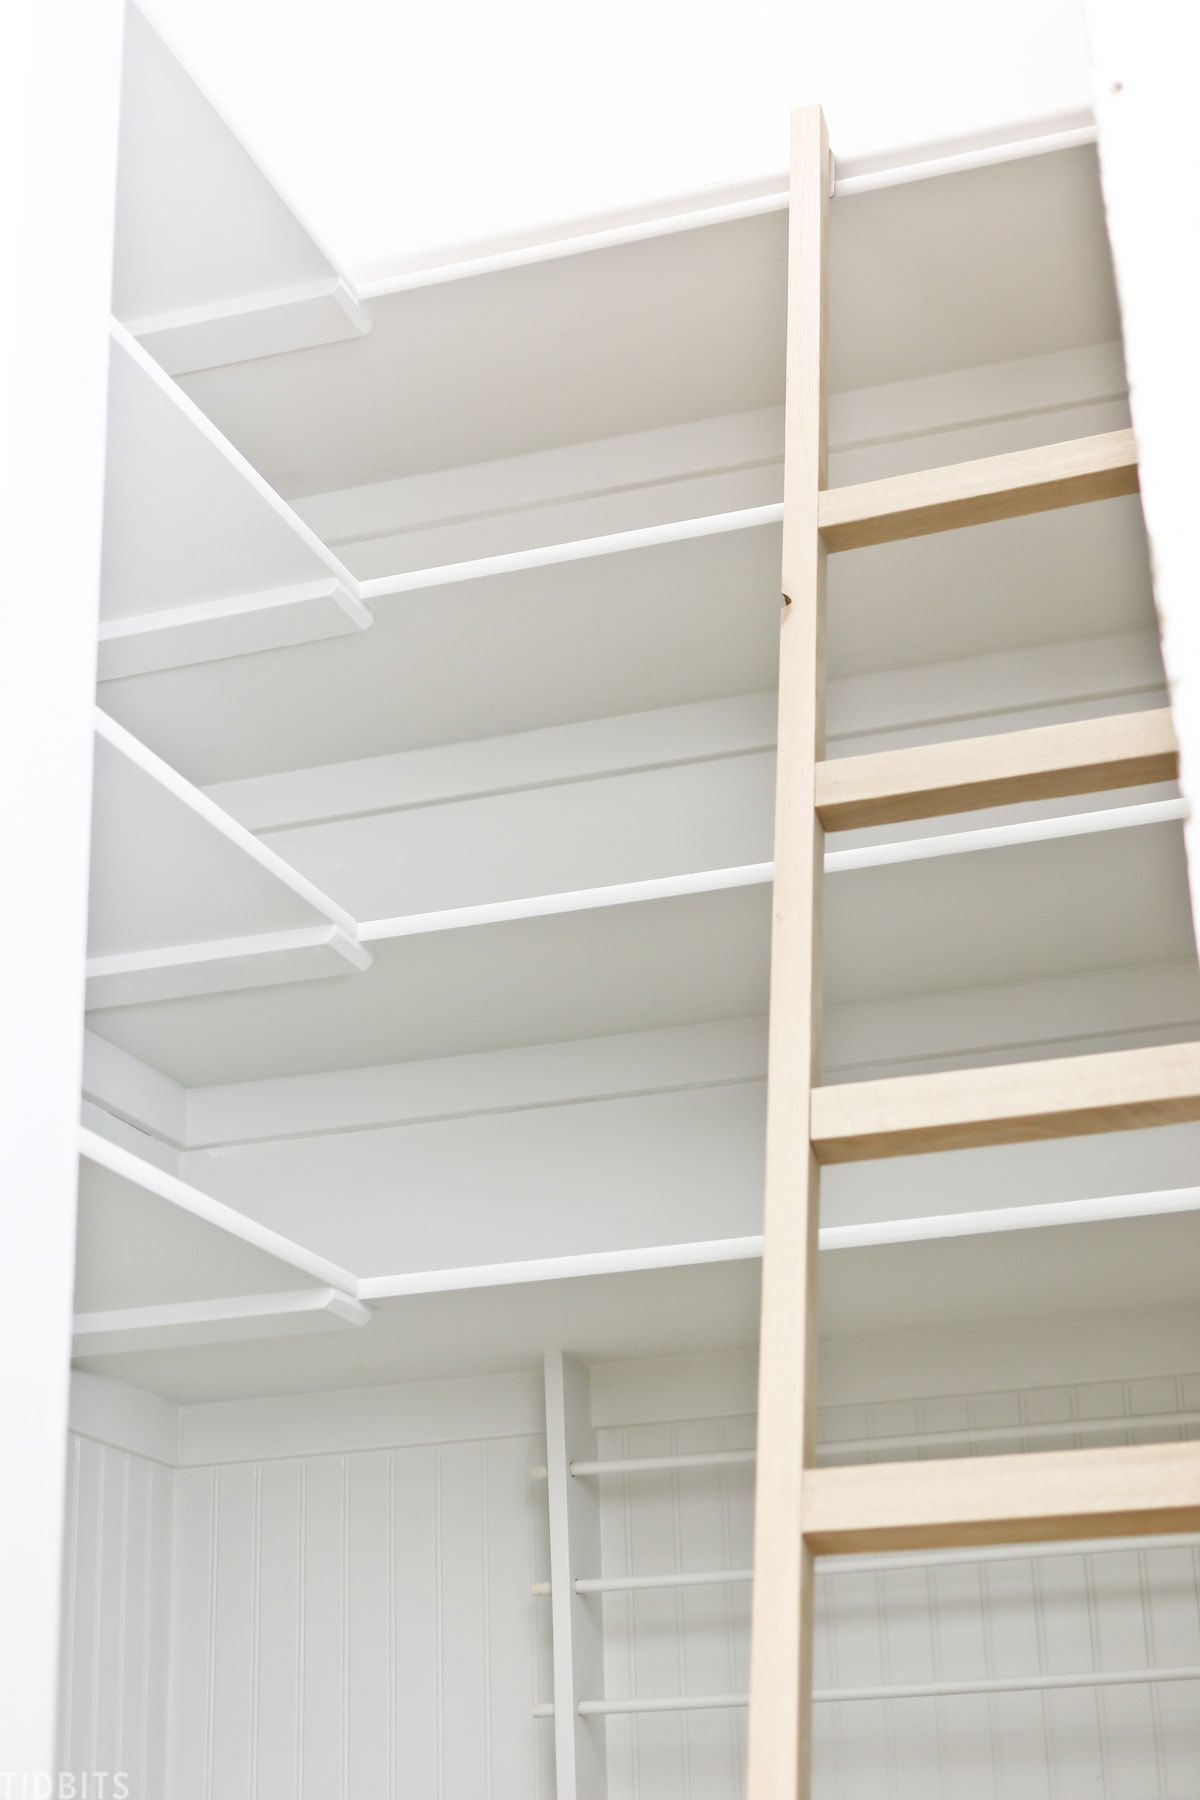
We had debated lowering the ceilings for the closets, but decided we would need as much storage as possible – even if that meant vertical storage. I’m thinking those high spots will be great for placing travel suitcases, and other bulky items we use very infrequently. Those top shelves will NOT function as a bed or play area, like my kids have suggested.
CLOSET BUILT-IN SHELVING
Let’s take a quick look at the shelving in here. My husband just built simple shelving for both these walls.
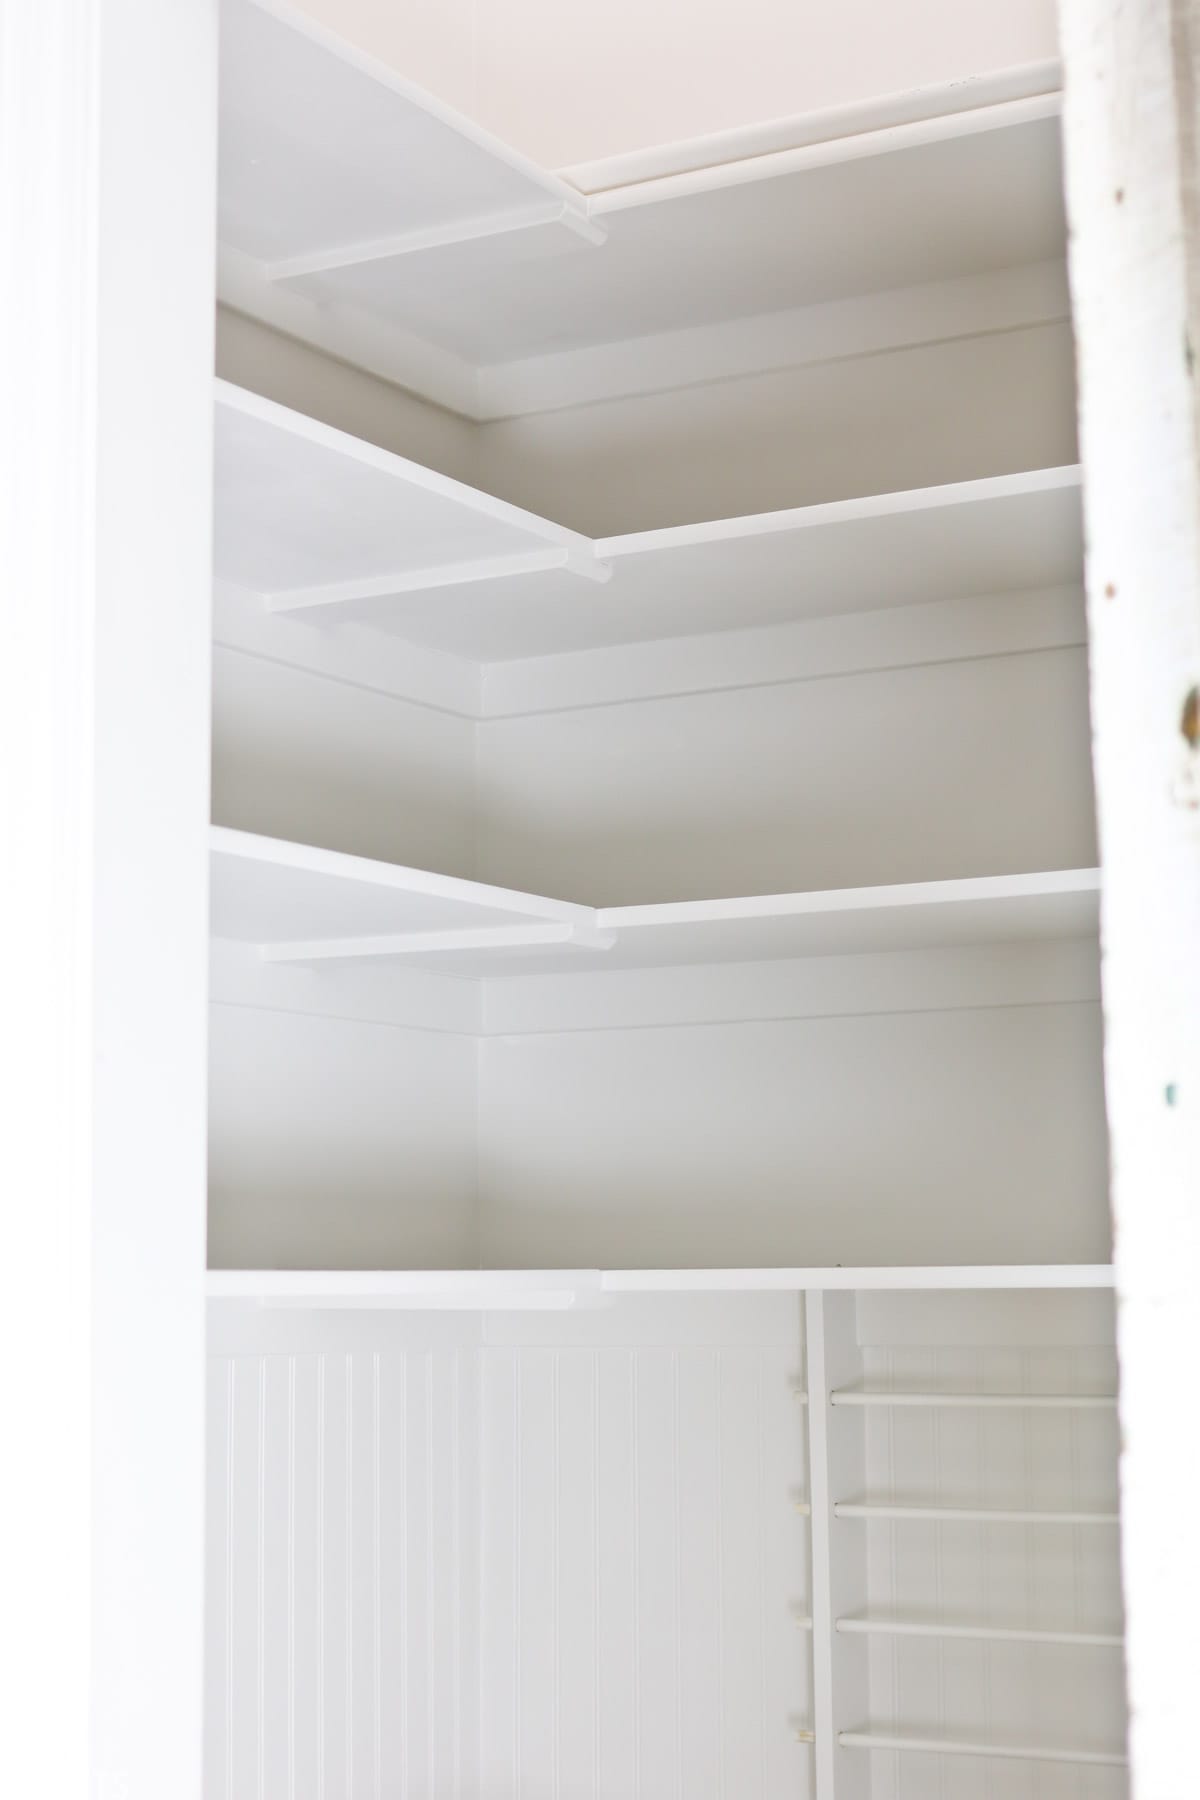
They are made out of MDF and spaced 14 inches apart. Then we just painted them with a simple creamy white.
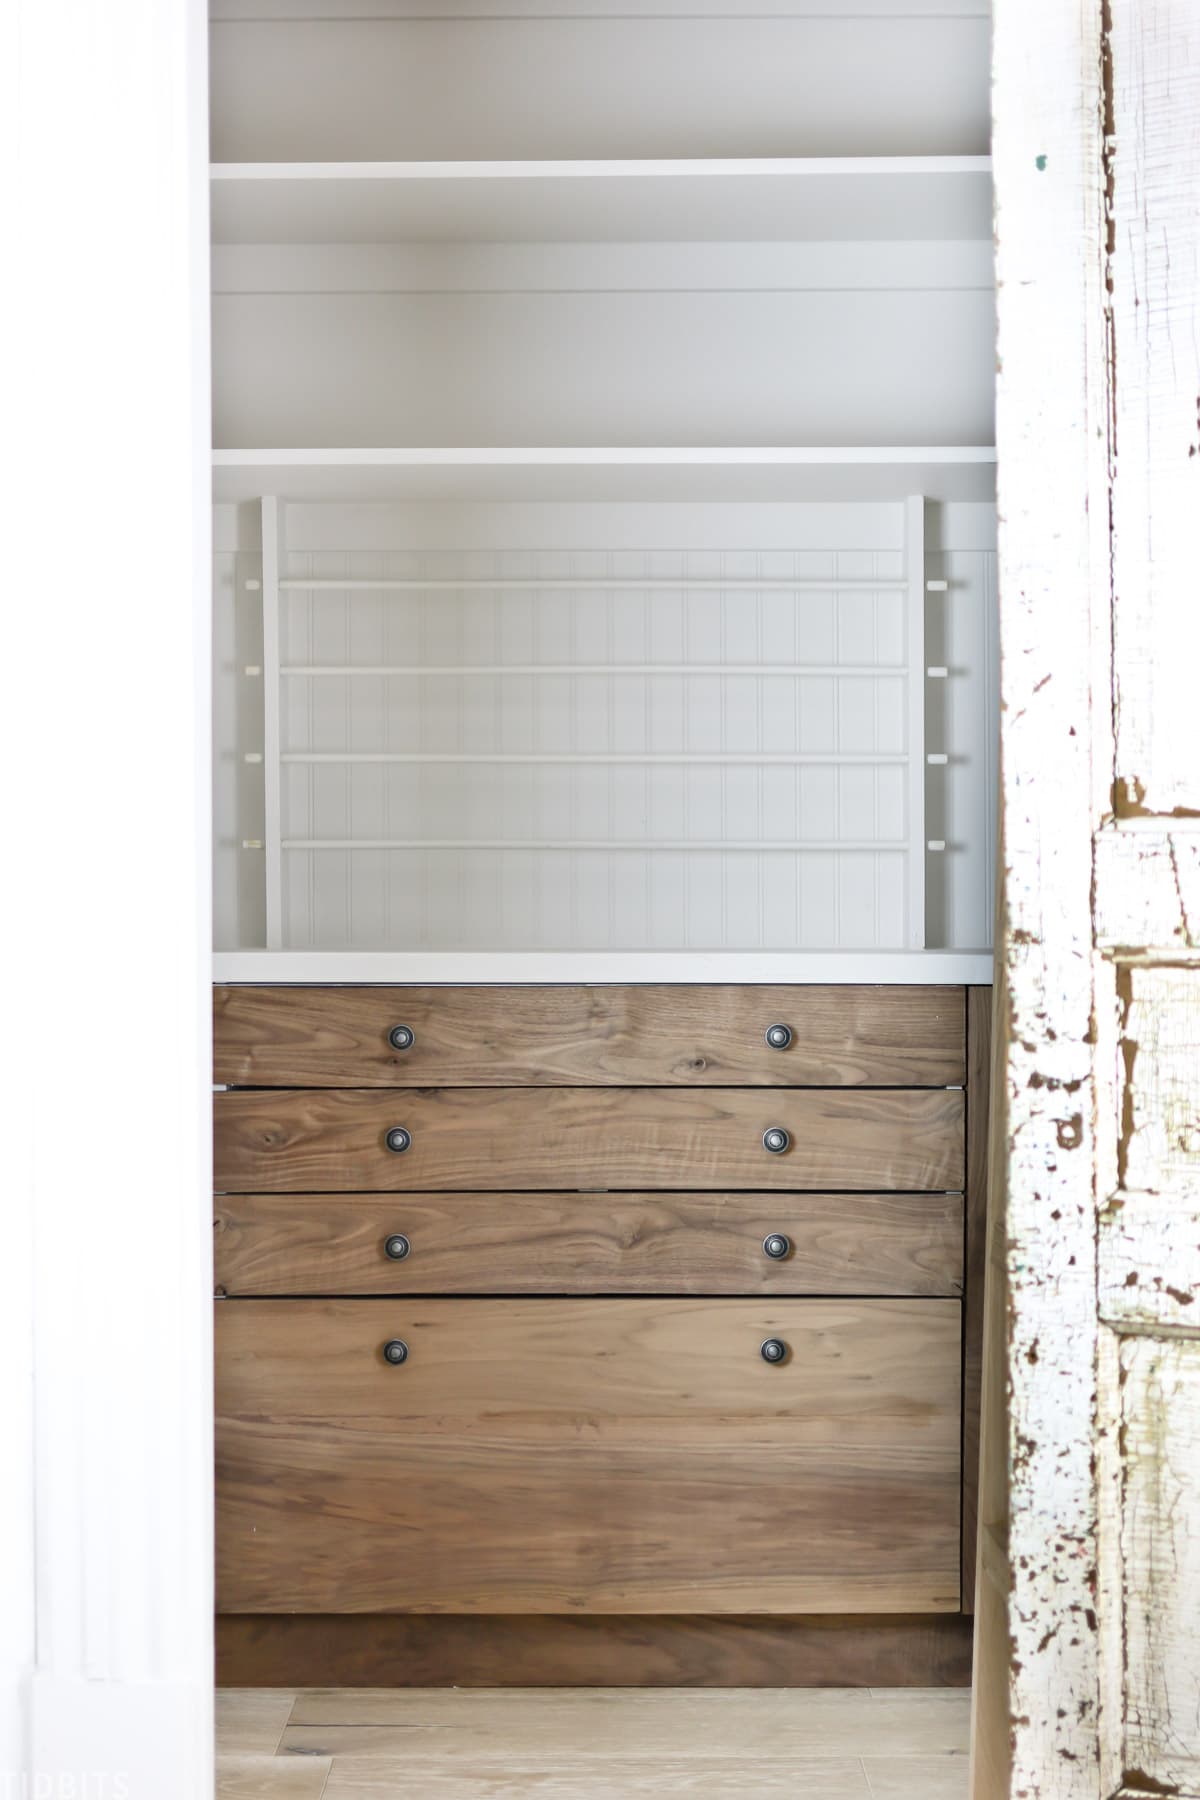
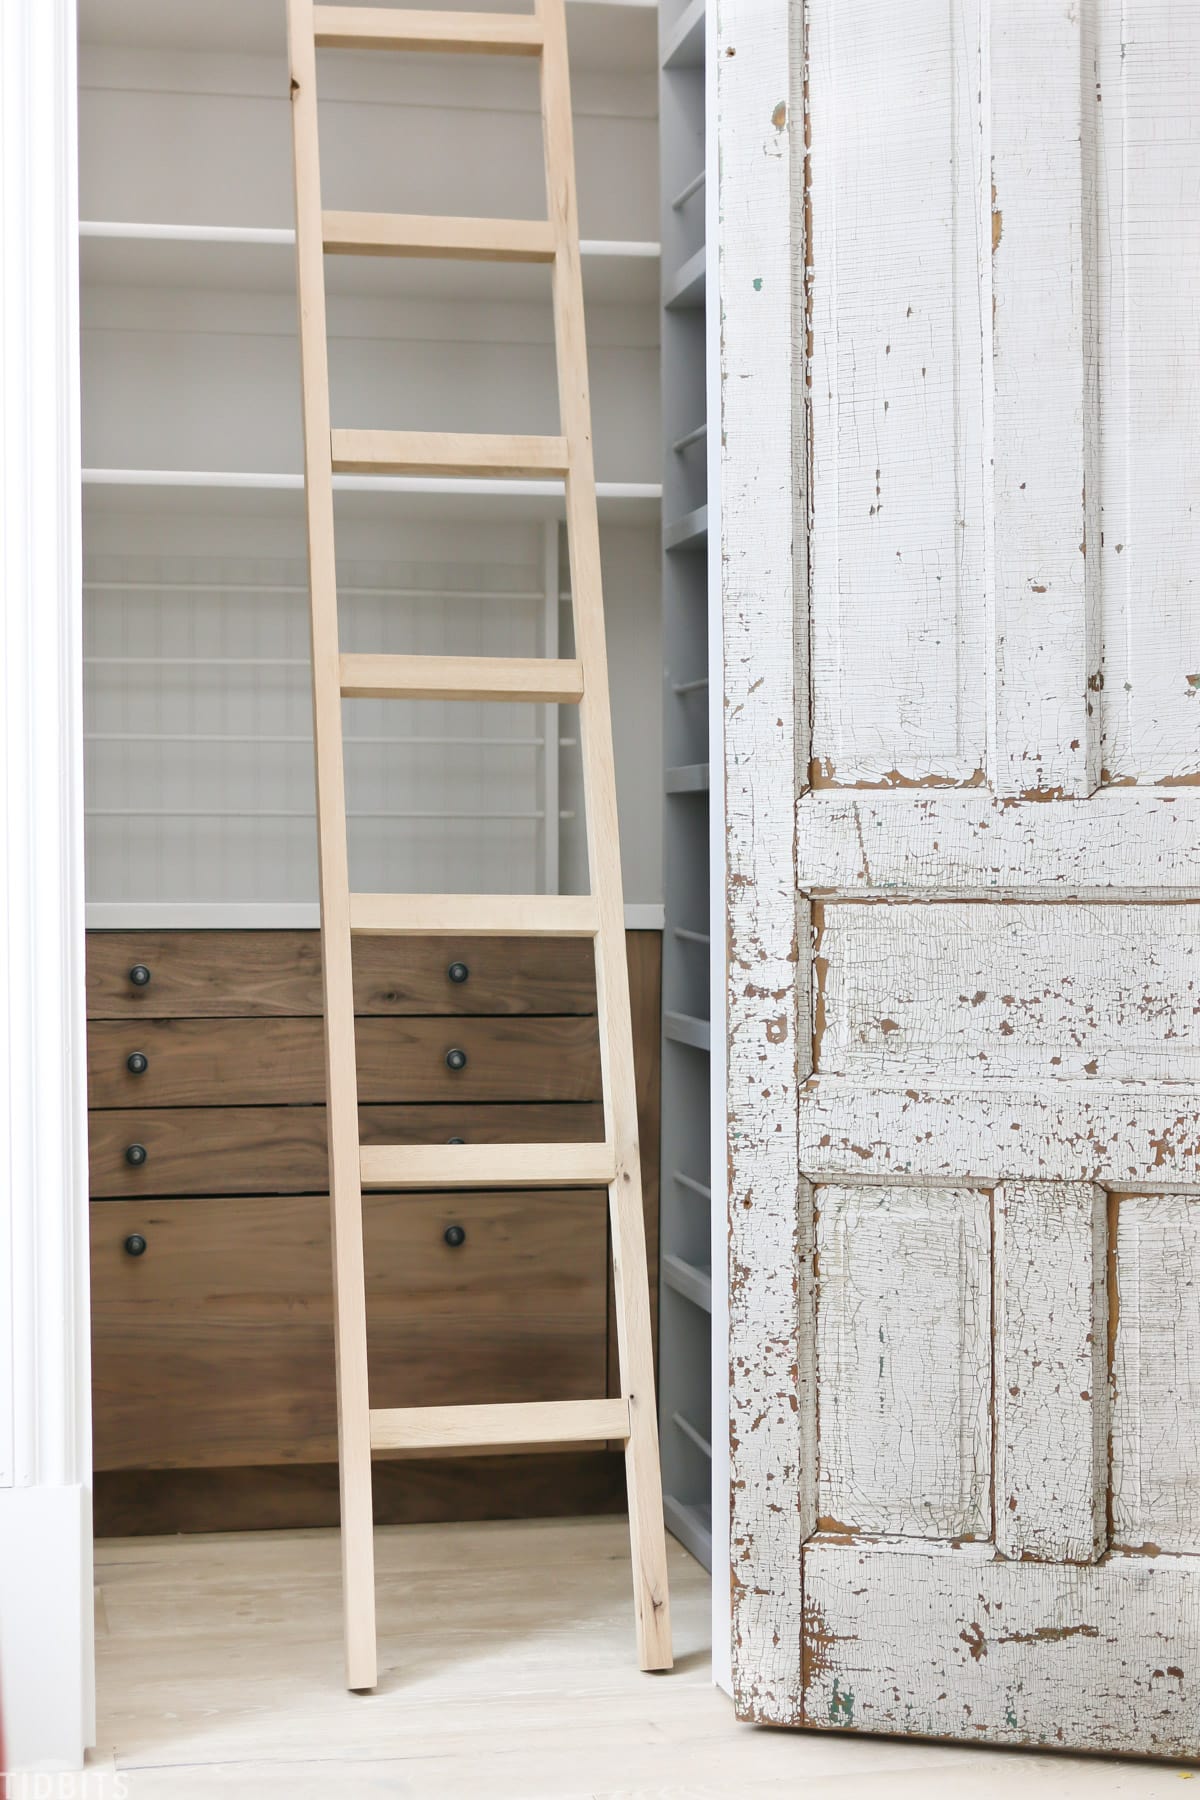
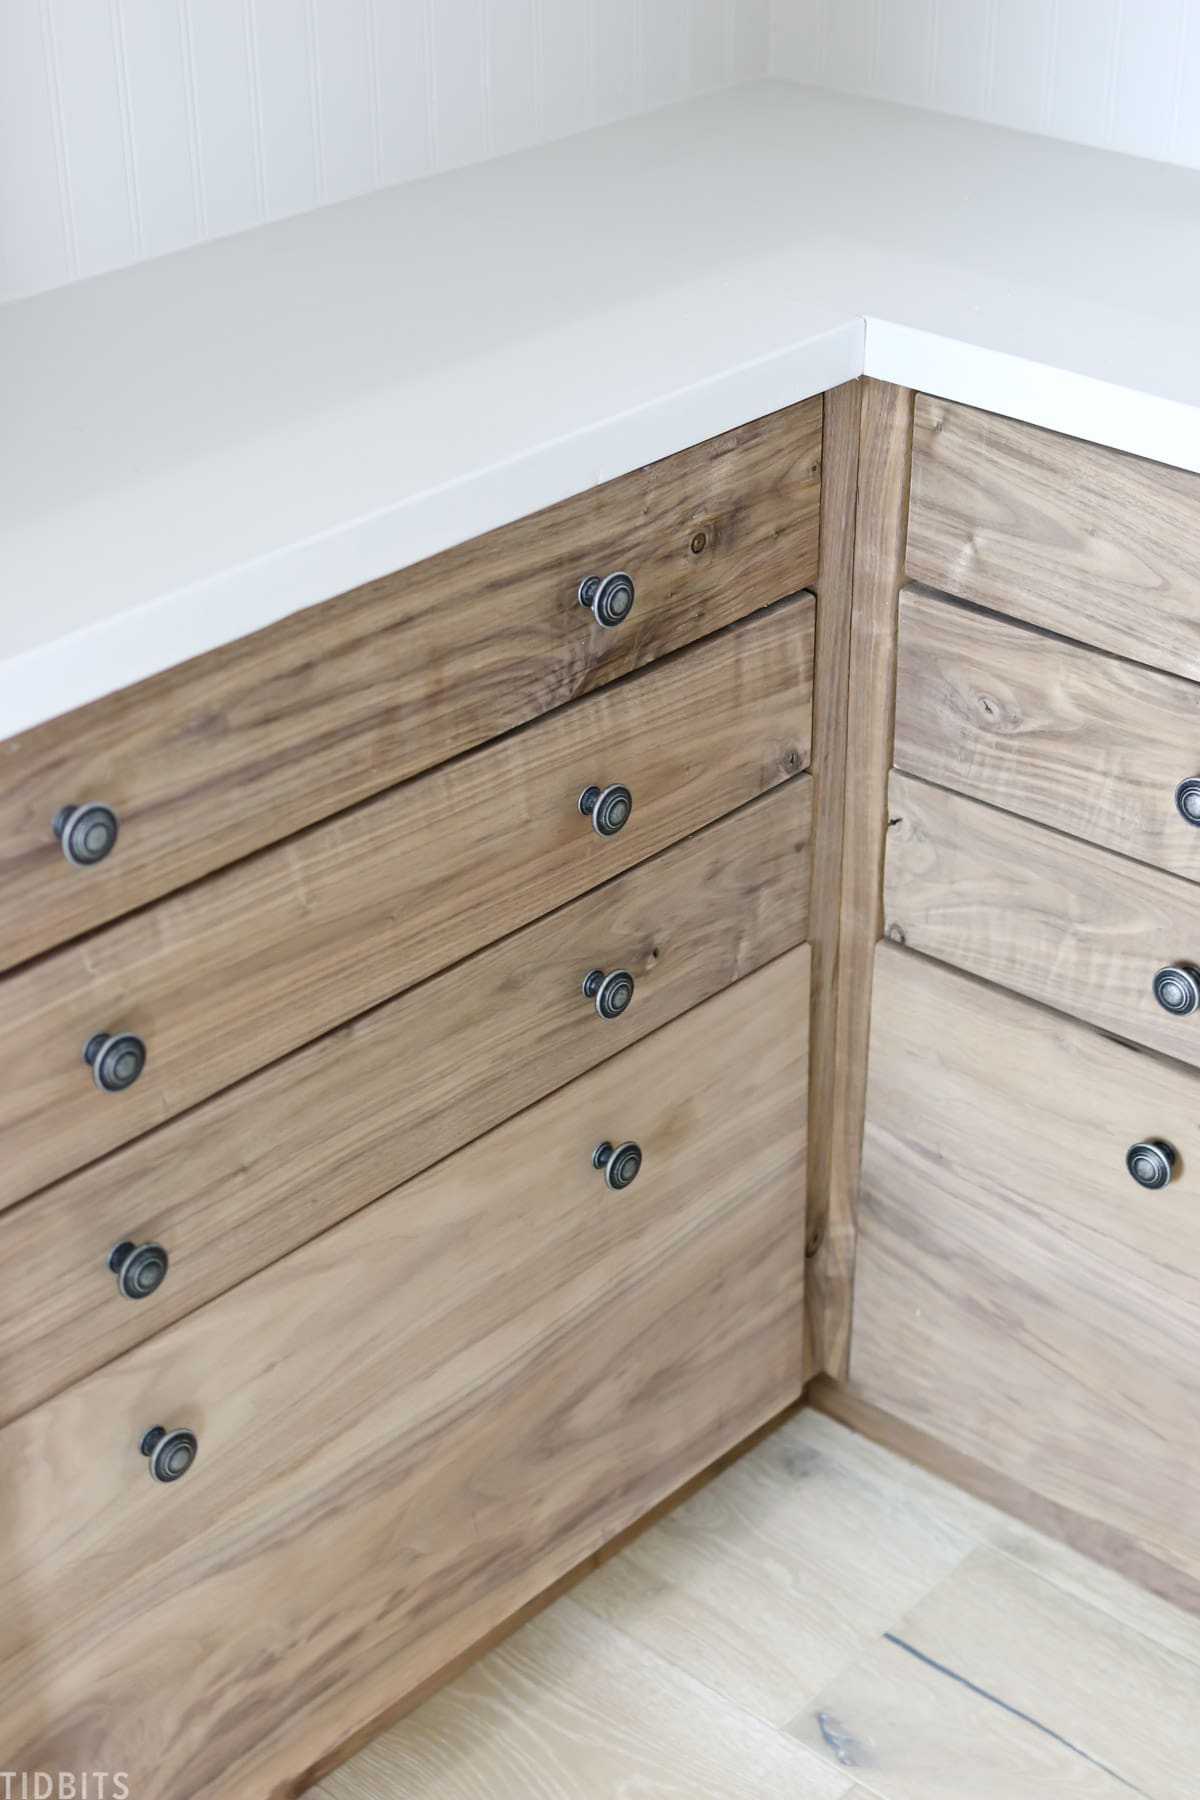
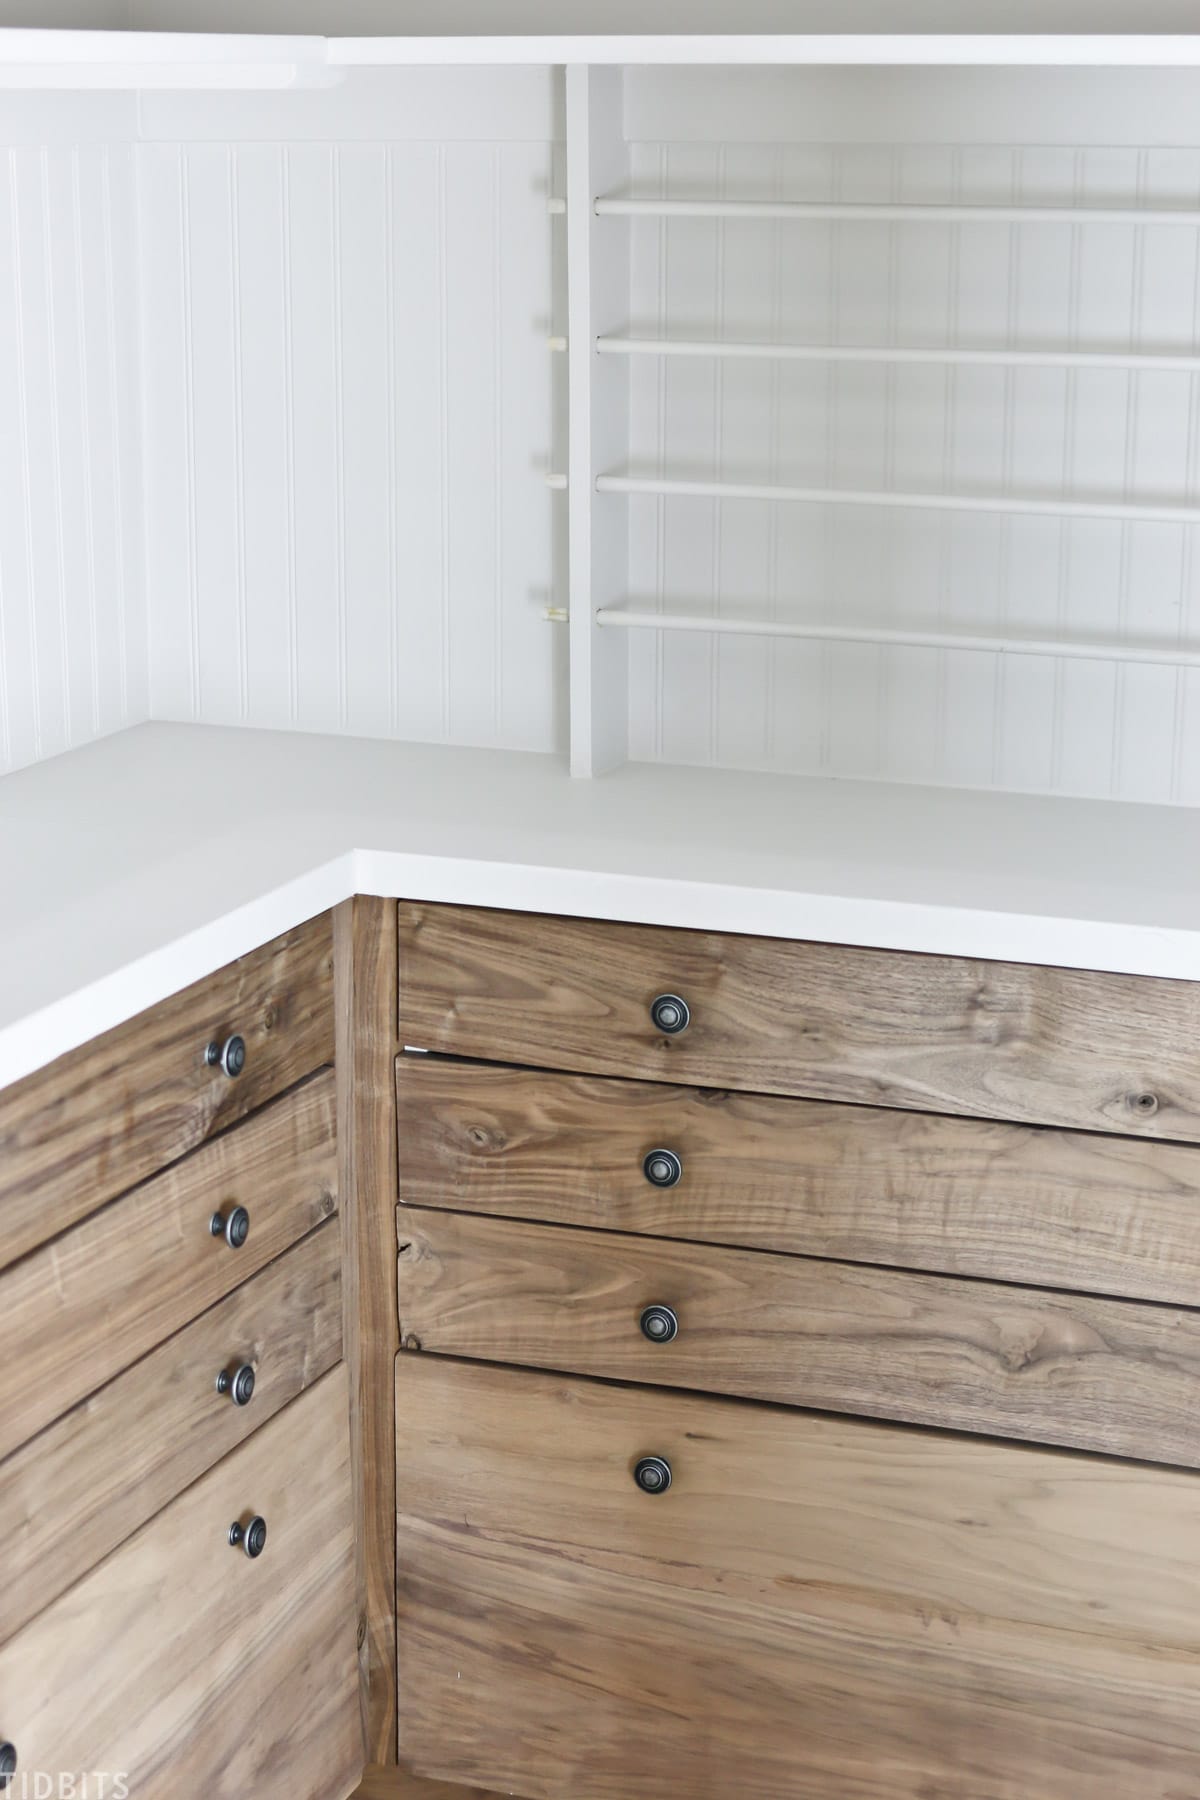
CLOSET DRAWER UNITS
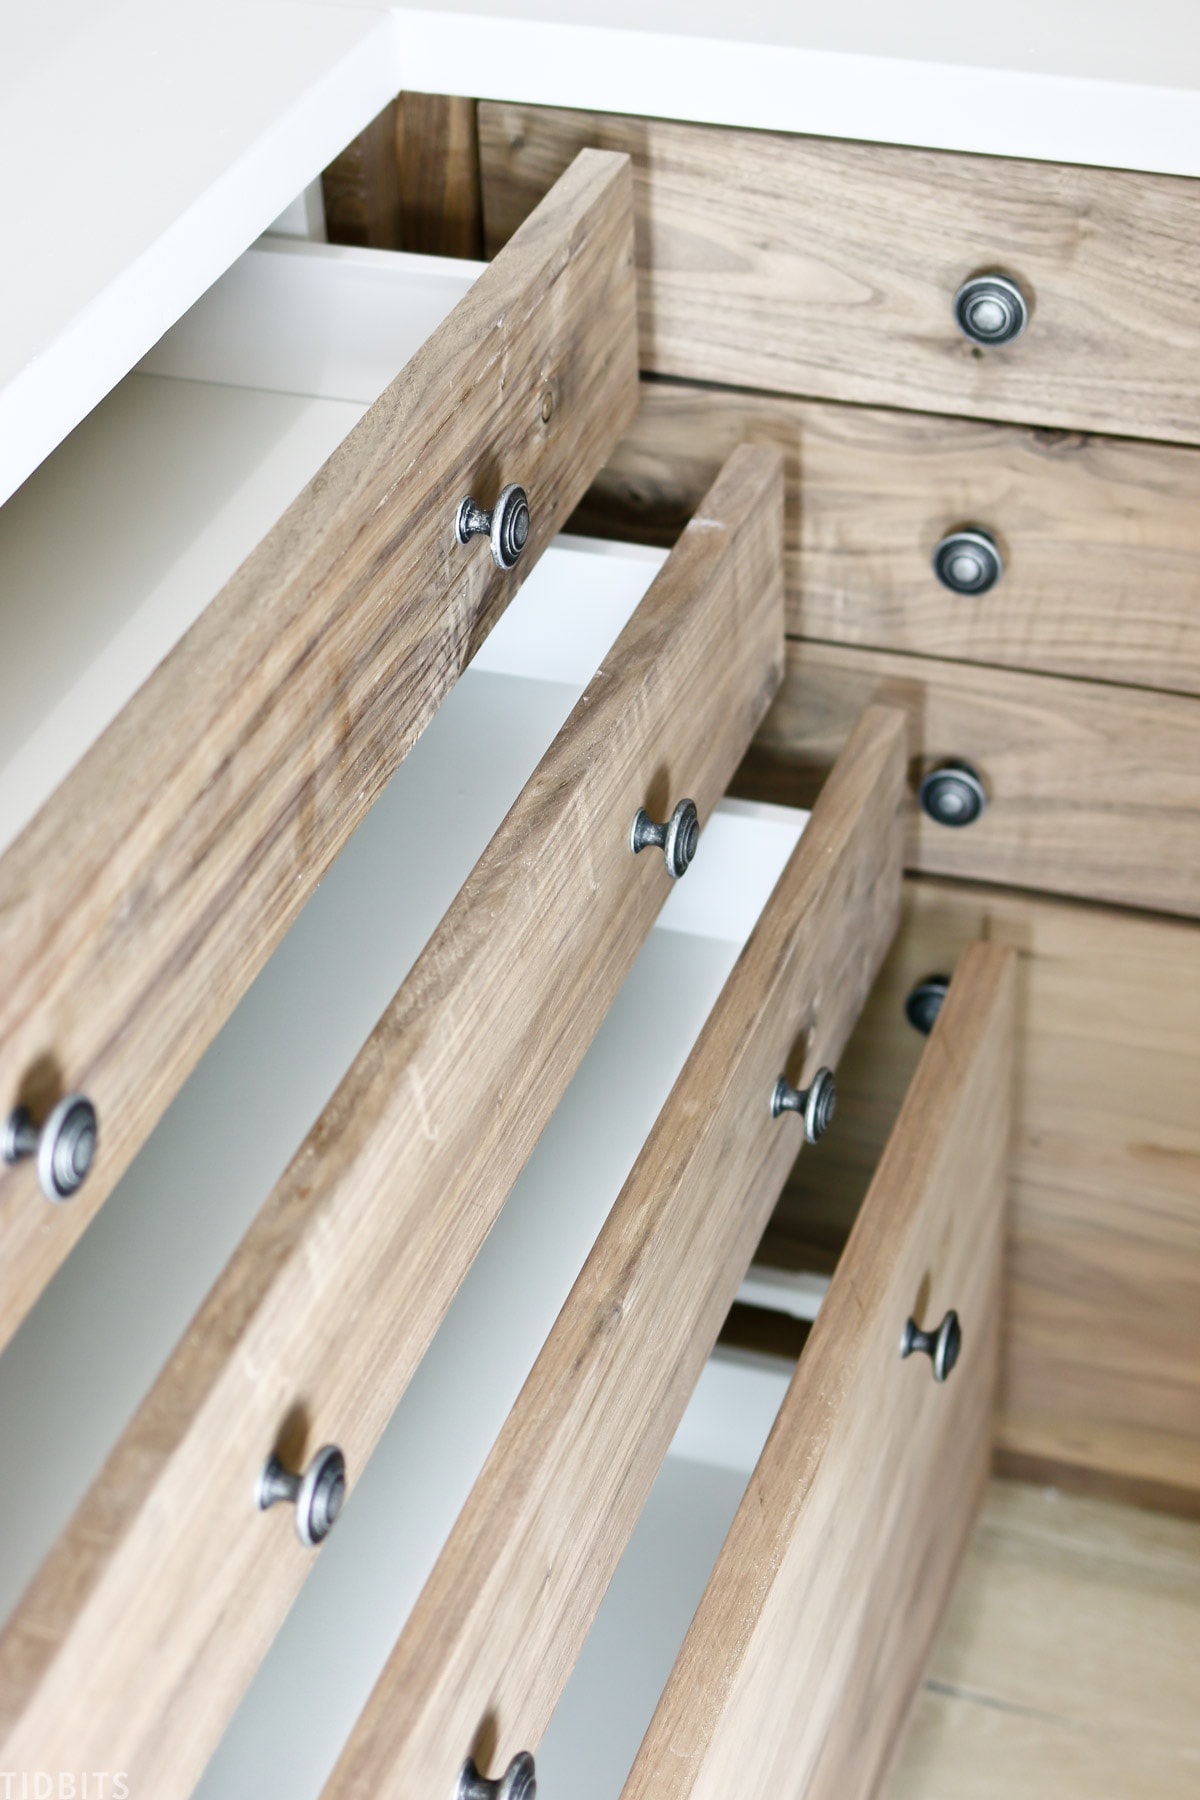
Alright, let’s talk about these drawer units. I really wanted a variety of storage possibilities in here, because like I said it will function for many storage purposes. As I thought it through, I knew drawers would work better for stashing art supplies and other kid items close to their reach, and where they can be tucked away nicely and out of site.
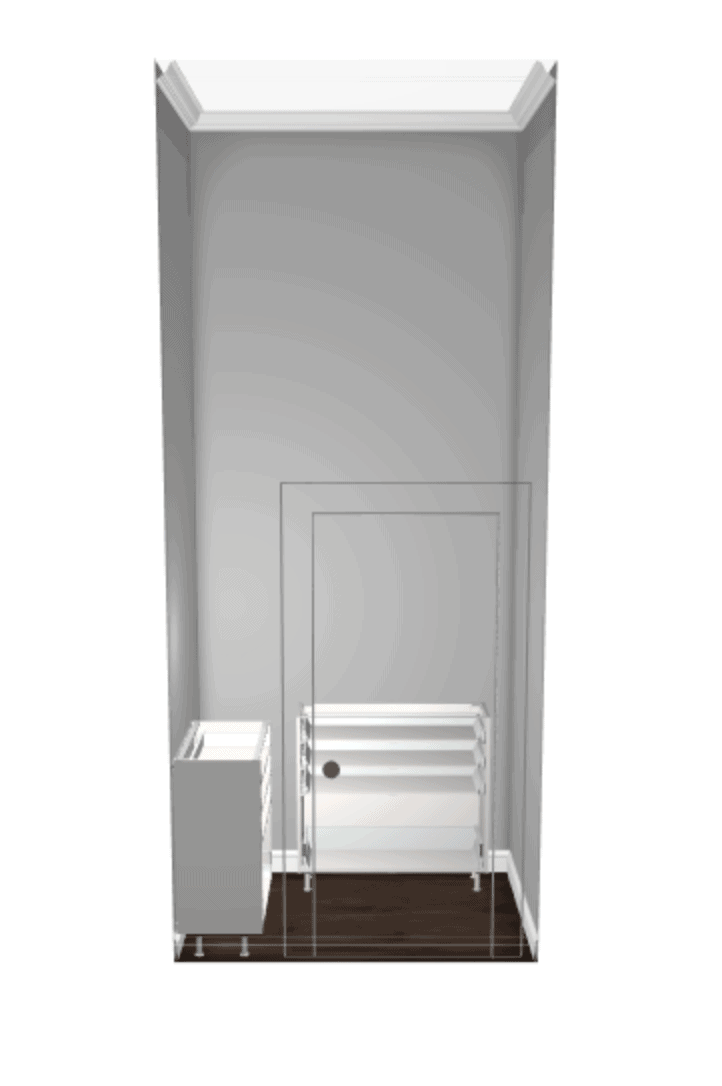
As we discovered while designing our kitchen, IKEA sells drawer units that are as shallow as 15 inches, which worked perfectly for this small closet.
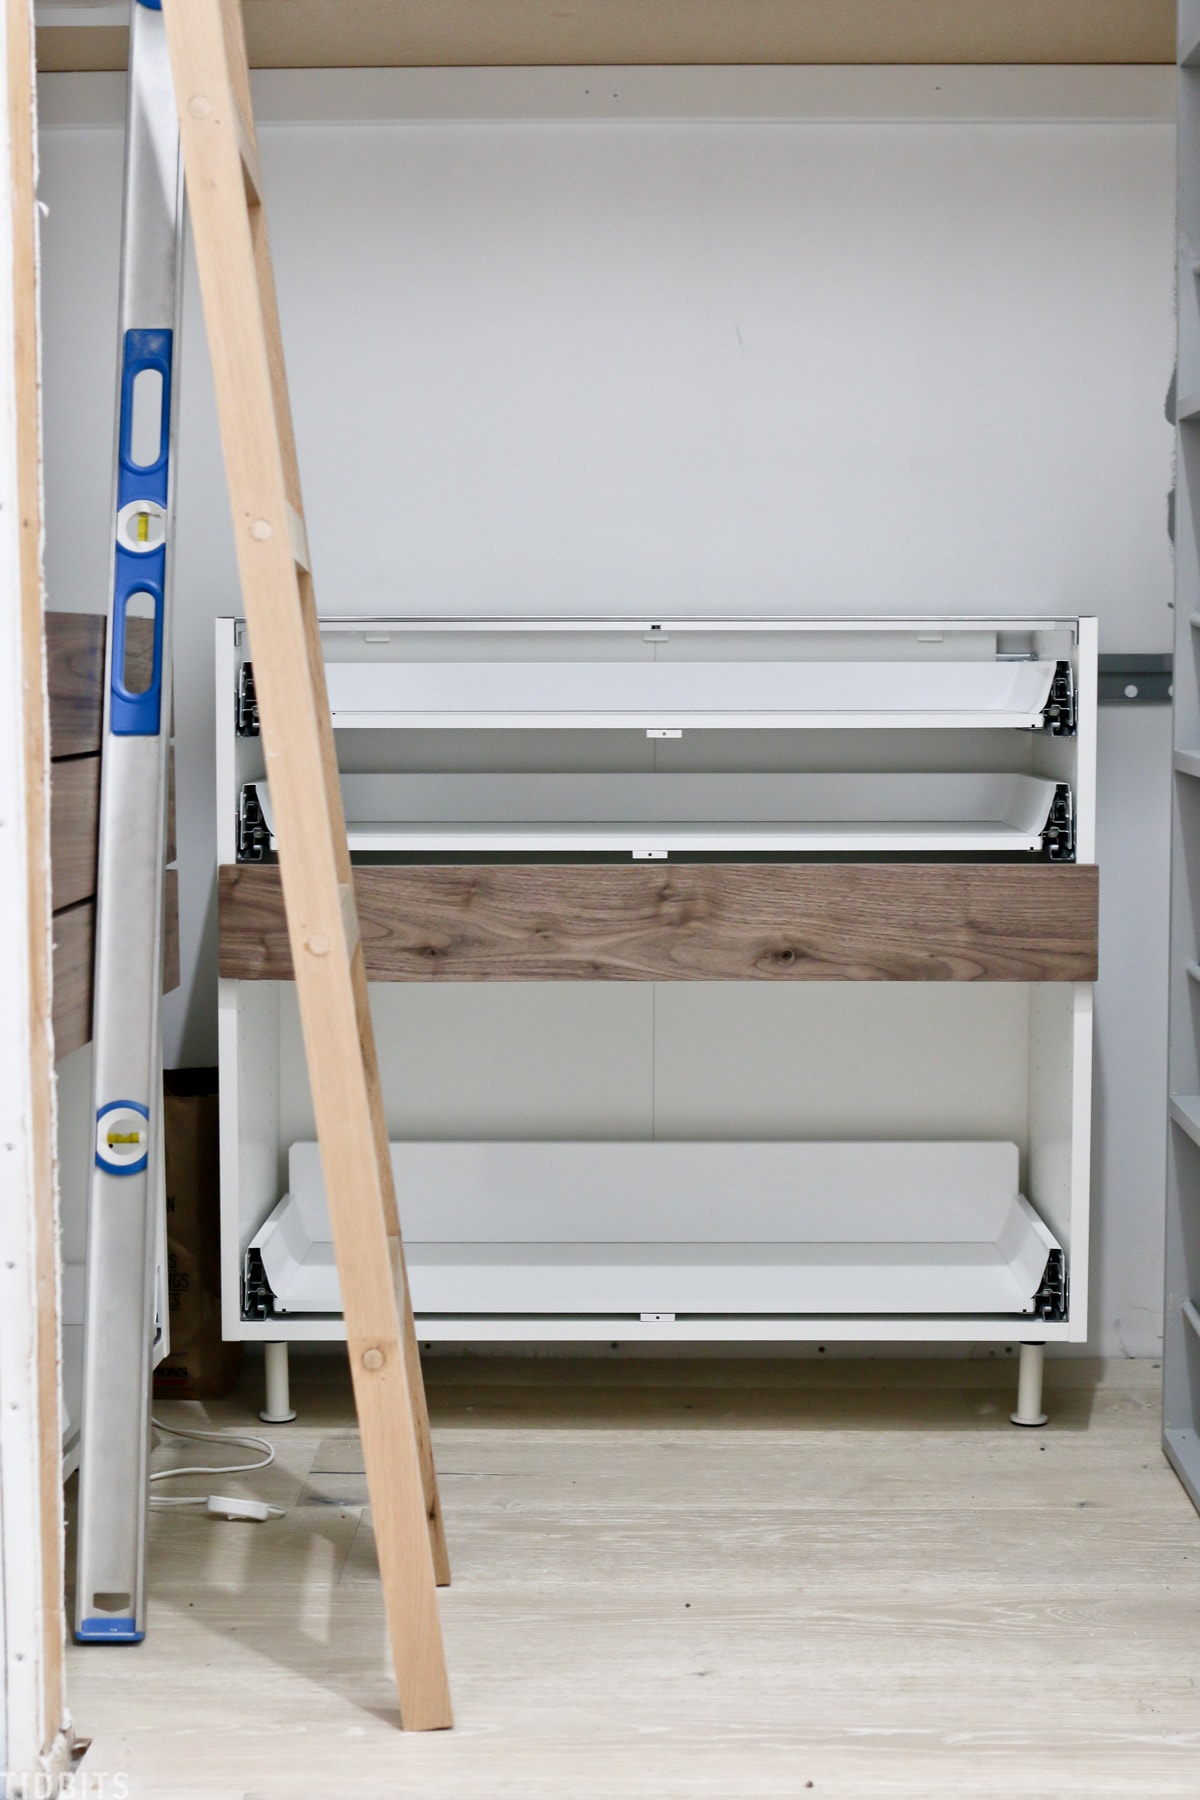
We were able to use their mockup designing program, and make sure it would all fit like we needed it to.
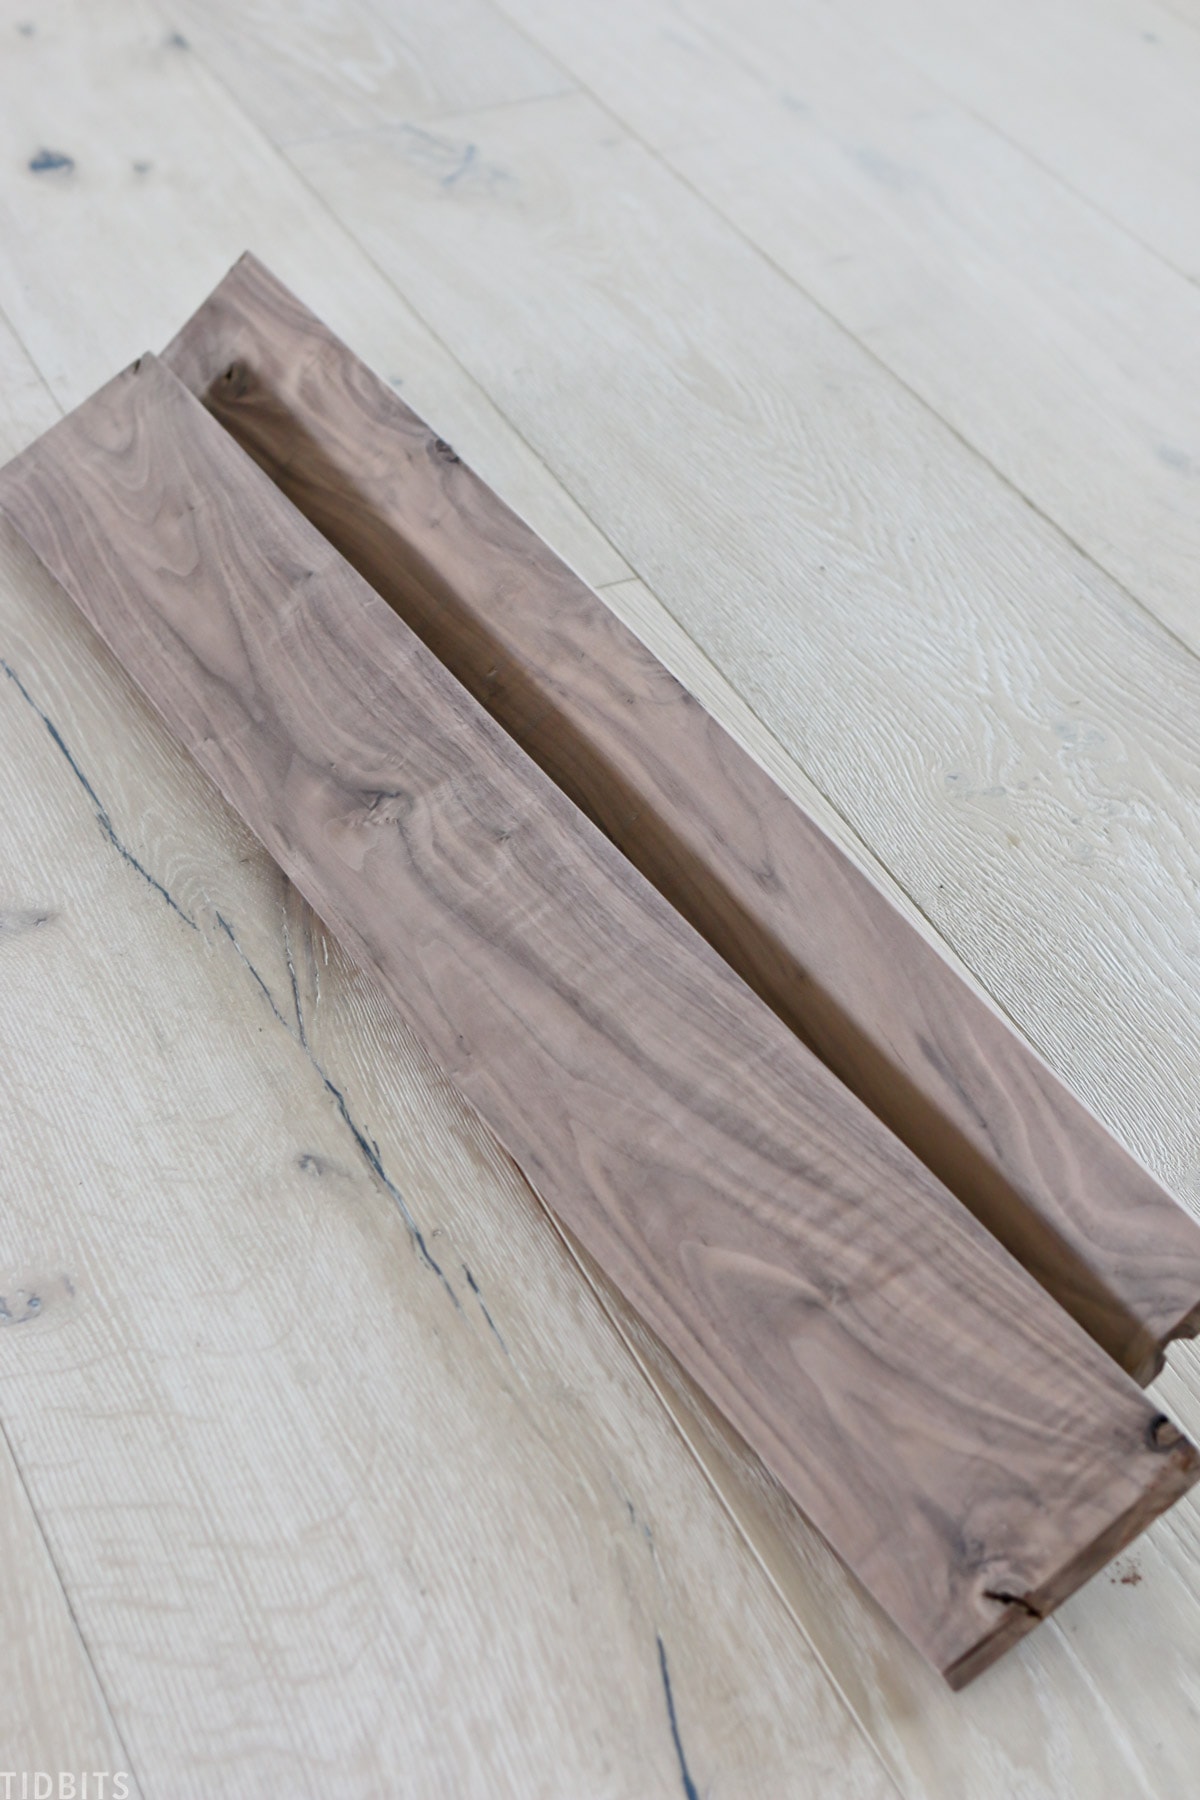
However, I wanted to play around with a custom look, and at the same time wanted to save money by building our own drawer fronts. I have been wanting to use some dark walnut wood for a project for a long time, so this seemed like good time to do that.
If you watched my video on the things I regret doing in our kitchen, you’ll know we made the mistake of paying high dollar for custom flat panel fronts. Once we received them, we knew they would have been soooo easy to make ourselves – but that is just how we tend to think. We love the affordability and function of IKEA drawers and cabinets, and now feel empowered to use them to create our own look in our own spaces – just by building our own fronts for them.

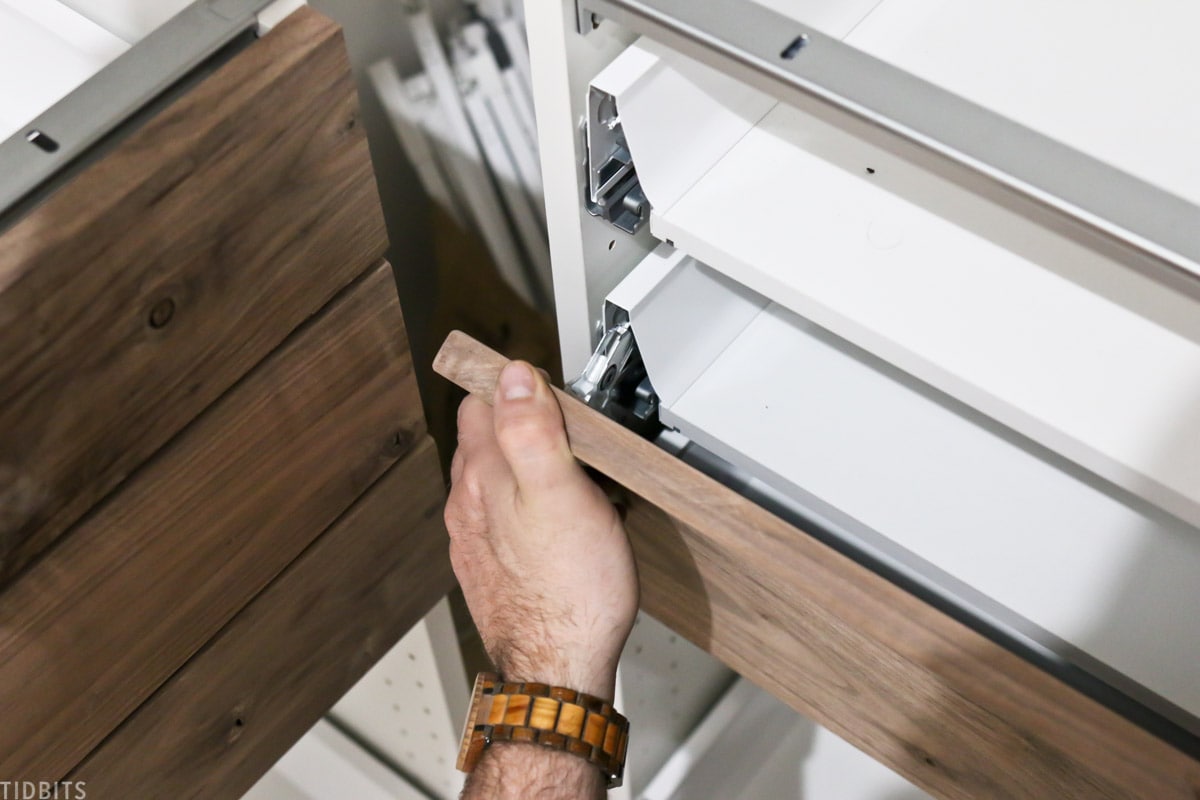
If I get enough requests, I’ll go into more detail on this in another post, but we simply cut boards for each drawer front, and attached the provided hardware right onto the board.
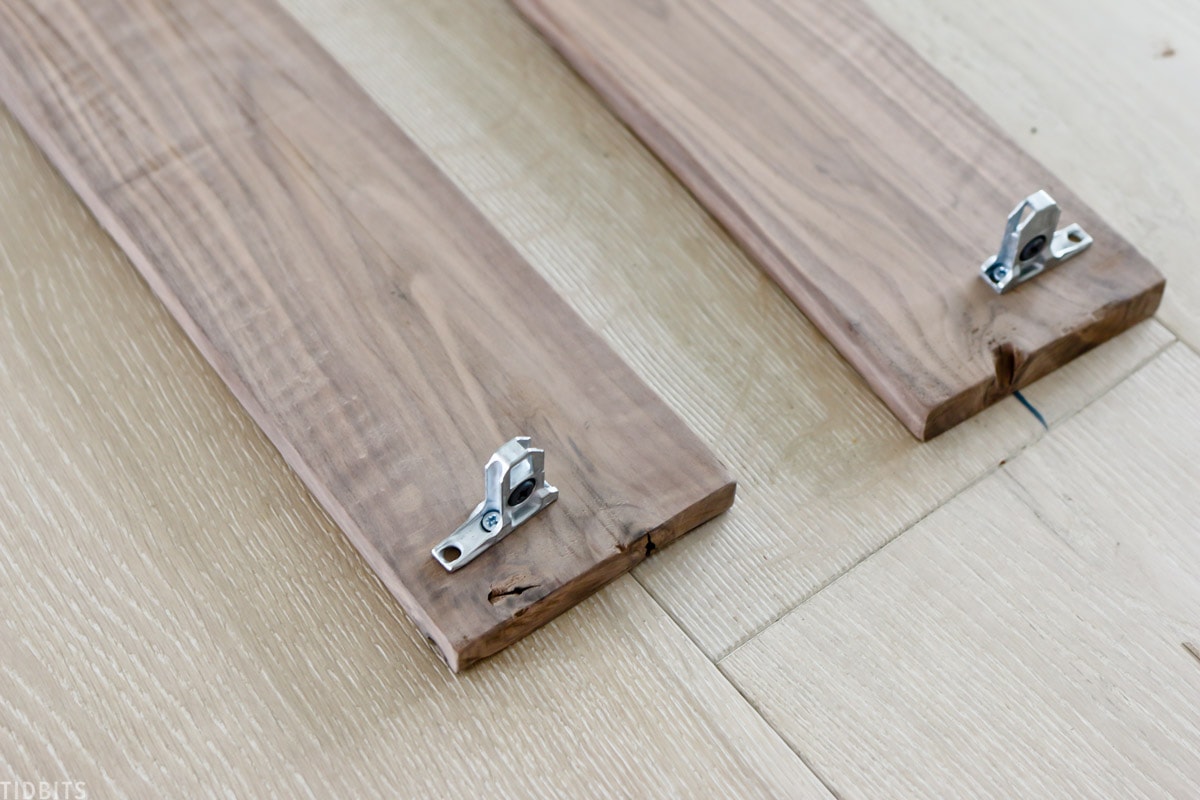
Flat panel cabinet fronts require a bit more, such as drilling the appropriate size hole for the hinges, but the drawers are really extremely simple. Once the hardware is on, it just snaps into place onto the drawer unit.
The filler pieces for the corners and toe kicks were just a simple flat board as well, screwed into place to make it all look nice and seamless.
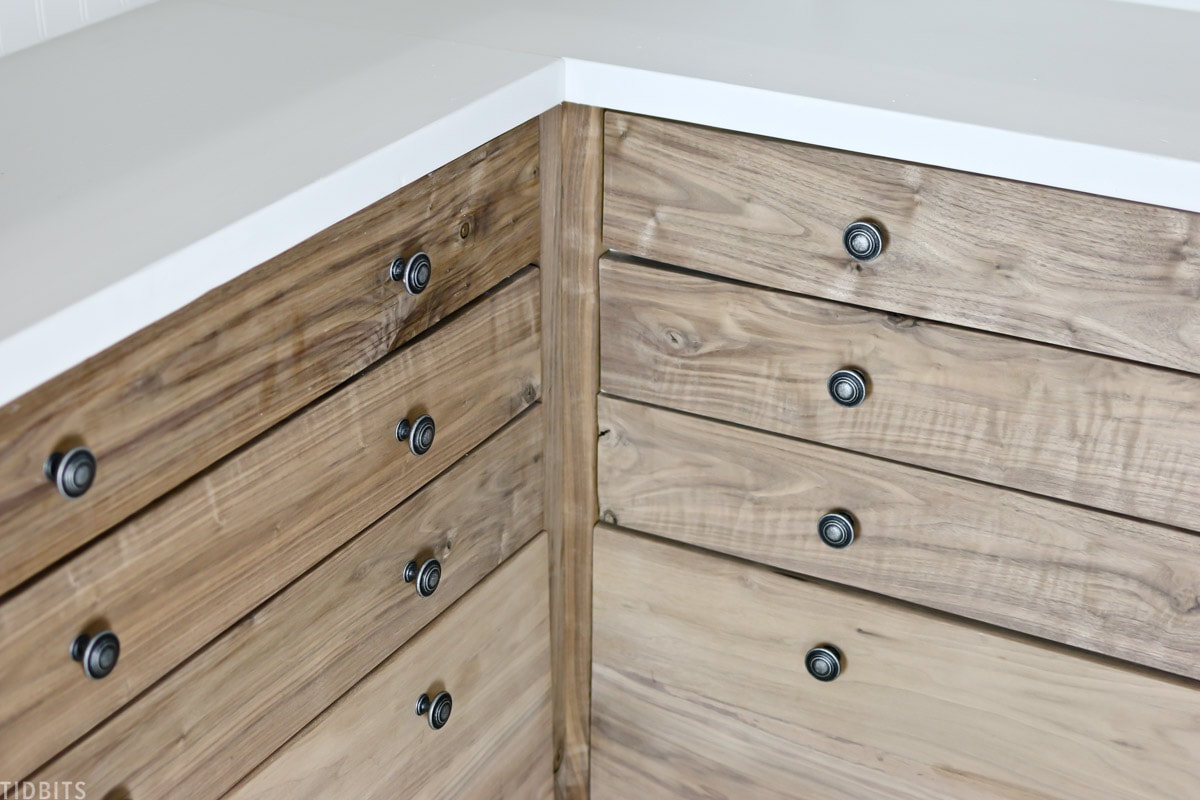
Finally, I found some distressed black hardware on Amazon, and these drawers look great!
COUNTERTOP
To top the drawers off, we added some DIY butcher block countertops, which we ended up painting the same color as the walls and shelving.
I first debated getting some stone remnants to cut to size, and really upgrade the space, but when I went to check the price on the remnants, I was just unwilling to spend $400+ for a closet countertop. Instead, we opted for really inexpensive pine boards, and put them together much like we built our kitchen countertops. I didn’t like how the pine looked with the wall color and walnut, so we ended up just painting them.
You usually don’t see countertops inside a closet, but I knew it would be handy. I plan to place our big wireless Canon printer in here – for easy access when I need a really nice print. I’m thinking it could also work as a makeshift command center, where kids can file away schoolwork and things that need to be sorted through. Overall, I’m really excited to have a bit of countertop space in here.
BACKSPLASH WALL STORAGE
I also plan to use this backsplash area to the max. Mr. TIDBITS already made me this handy rod storage, where I plan to keep my go-to neutral wrapping paper and the kids big roll of art paper – and other gift wrapping supplies.
I’m thinking I could also install some of those rods to hang buckets where the kids could keep art supplies and what not. Haven’t thought all this through as of yet, but I know I’ll make the most of it. Again, I thought of adding some really nice tile to upgrade the backsplash in this space, but I just couldn’t justify the cost for a closet. So we threw up some beadboard, painted it, and I think it looks just fine.
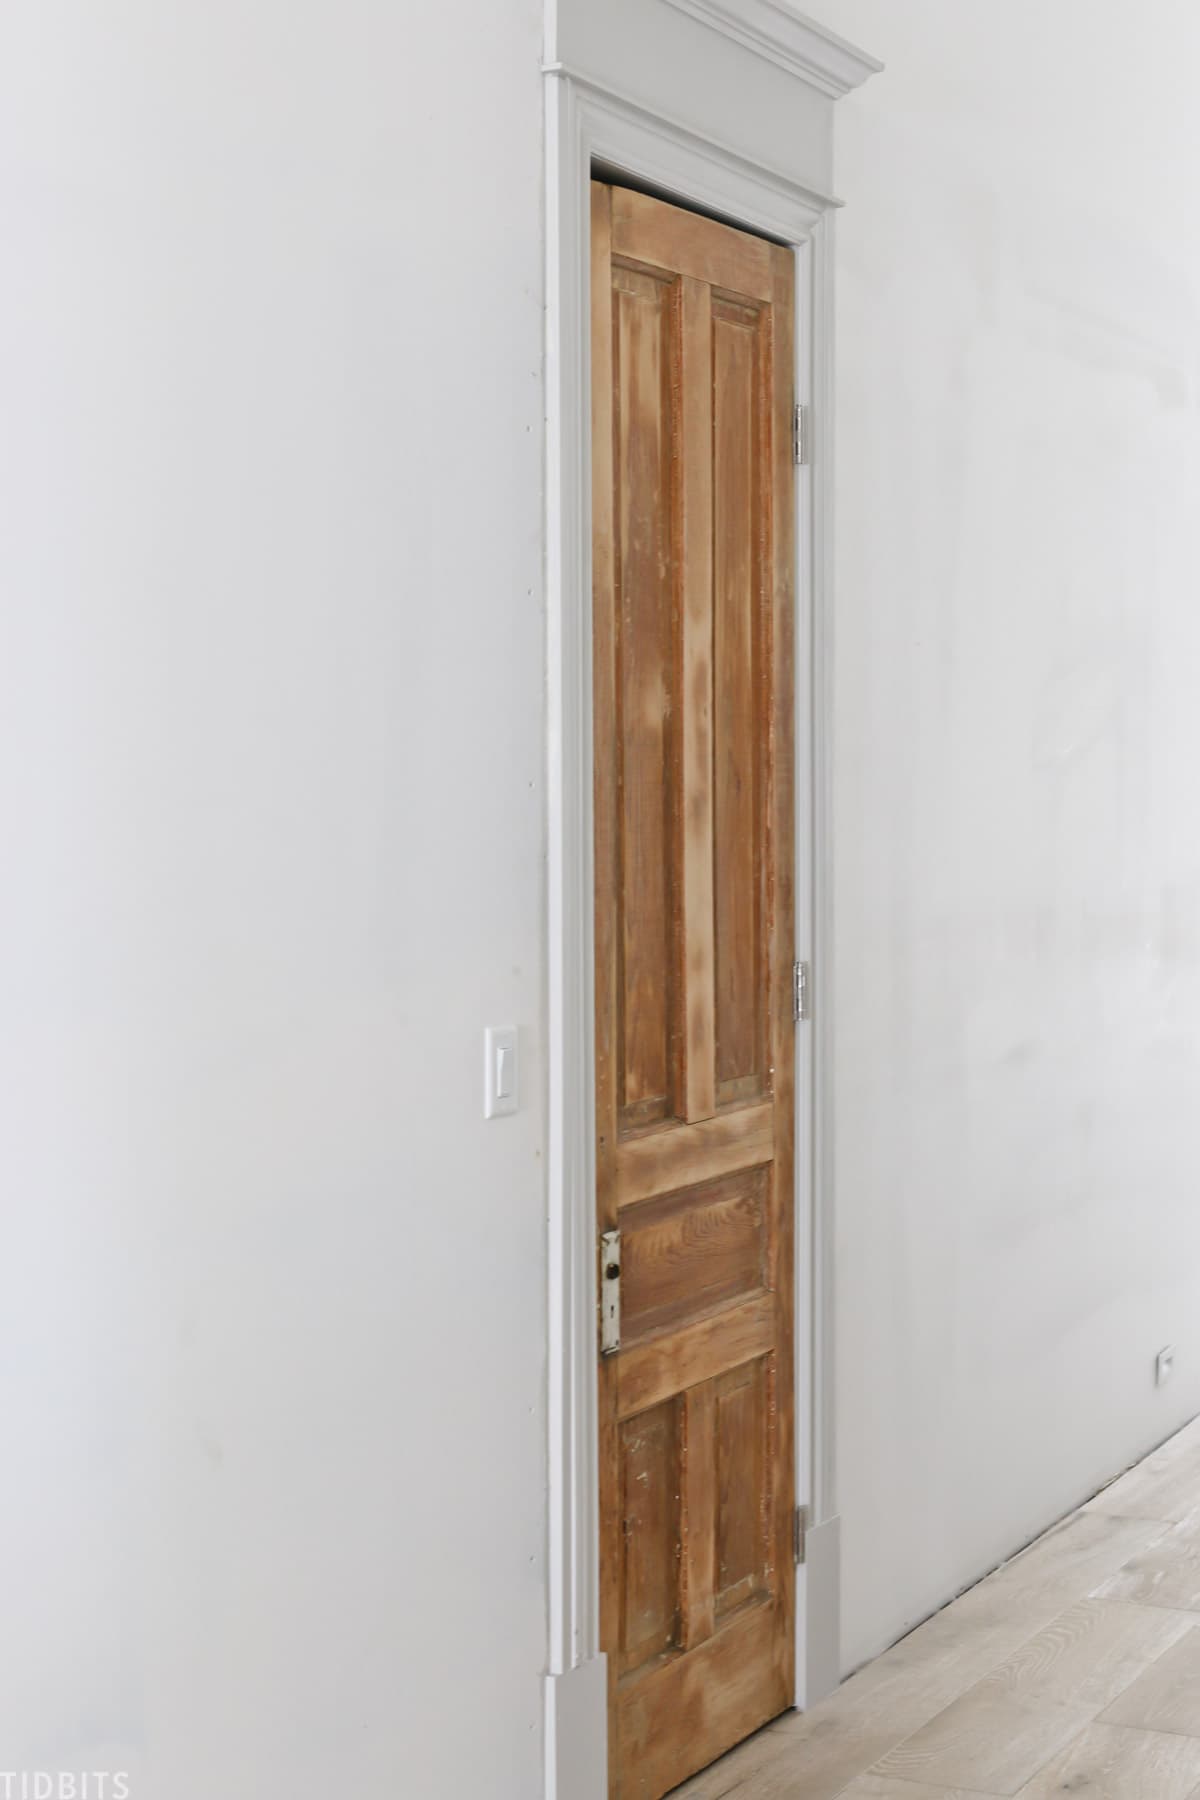
THE CLOSET DOOR
Finally, a few words on the closet door. It’s a vintage beauty that I bought off my sweet friend Holly from Vintage Farmhome. It was previously a really chippy piece, and I just couldn’t help but think I would like it better if it was sanded down to the raw wood.
I hope Holly doesn’t get angry that I did this. I love chippy paint things, but I wasn’t feeling it for this door. We have these tall 8 foot doorways and I’m trying to take my time to find really unique doors for each room – and this tall door fit perfectly! I am thinking the wood tones are still a bit too orange so I might play around with stains to see what will happen. If you have any suggestions, I am all ears! I might be having some vintage loving regrets.
Alright my friends! That’s a wrap on this really-hard-to-photograph storage closet project – at least for now. I’ll be honest, I’m just going to organize the mess of stuff we have sitting in the hallway that we pulled out of storage, and get it all put away as best as I can. It may take me some time to figure out a nice system in here to share, but I love showing how we organize so I’ll likely be back to walk you through how it all turns out. It’s definitely going to be a real life sort of closet, but I’m excited to have some sort of order in our unfinished home.
I hope you’ve come away with some storage ideas – or at the very least, felt more grateful for the finished storage in your own home. It is not easy living with no storage, I assure you.
So grateful to you for reading my post today. If you liked it, I would love it if you would subscribe to my YouTube channel and my newsletter so you catch all the progress and DIY’s on our new pole barn home.
Thanks for watching! I’ll be back soon with more inspiration for do-it-yourself living.


Beautiful Storage Closet. It looks much bigger.
Flawless completion.
What are the closet dimensions? I saw the height was 12′, & the depth & width?
Hi Cami, I LOVE your closet! Can’t wait to see it when you have it filled up. I wanted to let you know that the link to your friend’s Instagram, Vintage Farmhome, is not working. Thanks so much for sharing your journey with us.
hey girl- love the closet! so cool! How are y’all doing in this craziness? Praying all of this will be over soon. and Trusting in God!!
I wish my husband was handy and pretty. Those drawer fronts are to die for.
You did a fantastic job of maximizing the space, Cami! And you’ve given me lots of ideas for orgainzing our own pile of stuff. 🙂
Great post and love how well you utilized the corners. I am dealing with 2 small pantry closets with wire shelving which drives me crazy, your RV storage tips helped me out immensely. Love your house and all the insightful tips you provide. Keep up the great work!
Hi Leslie! I’m so grateful some good came out of that RV ;). I kid. I kid. Really truly grateful for your support and so glad my ideas help! That’s what keeps me going!
Hi Cami, Love the whole project! Regarding the door, I wanted to offer a suggestion. I have a similar door that I stripped and it was the same deal – too orange for my liking. I bleached it and it really toned it down! I can send you a pic if you’re interested 🙂
xx, Kathy
Hi Kathy! I’d be so so grateful if you sent me a pic! I’ve been nervous about the whole bleaching thing, so I’d love to see it! Thank you! You can email me at cami@tidbits-cami.com
Wow! What I would give to have a closet like that! I want to see it after you load it ????.
Haha! What I wouldn’t give for a finished bathroom! Working slowing to organize it so it functions well without getting too stuffed. I’ll be excited to share! Thanks for stopping by!
Just watched this video on youtube and you mentioned that you thought the closet door was still too orange.. I had bought some old table legs for an island that my husband built me. The legs were out of red oak (that had had a protective finish on them that I removed) and the rest of the island was out of white oak (new wood). I wondered how I would ever get them to match and I really wanted a matt, unfinished look to the wood. Anyway, I took the legs outside and used bleach water on them….It took the red/orange color out of the wood and wasn’t hard to do at all. Then I used a liming wax on all of the island. Everyone thinks it was an old pastry table from Europe!
I just recently found your channel and love it! Excited to go on this “dream journey” of yours with you!
Hi Sheri! Thanks for stopping by from my channel! I’m dying to see the island you mentioned and the results! I’m going to have to check out the bleaching treatment. That might be a great solution. Thank you so so much for your suggestion and for following along!
I love it! Our little farm house has 2 – that’s right – 2 closets. One for each bedroom. I’ve had to get creative and purge a lot . As we are discussing closing in the garage for a living room/dining room combo, I know one of the things I want is a decent closet. This gives me some practical ideas. I’m so glad you share!
Oh man! I thought we had it bad ;). I bet you have to get very very creative with your 2 closets! Purging is definitely key! I have a feeling we will be getting rid of 90% of what’s left in storage after we finish and stock this house. I love your ideas for using the garage space! Brilliant!
Wow! I would be beyond thrilled with a closet like that! I love the drawers on the bottom, the ladder and everything about it! Nice work!
Haha! Closet envy is a real thing. Let me show you our pieced together bathrooms. You’ll feel better ;). Thank you so much for stopping by Elizabeth! It feels so good to make progress!