
This post may contain affiliate links, which means I get a small percentage of the sale at no extra cost to you. I only recommend items I love and have had a positive experience with. Thank you!
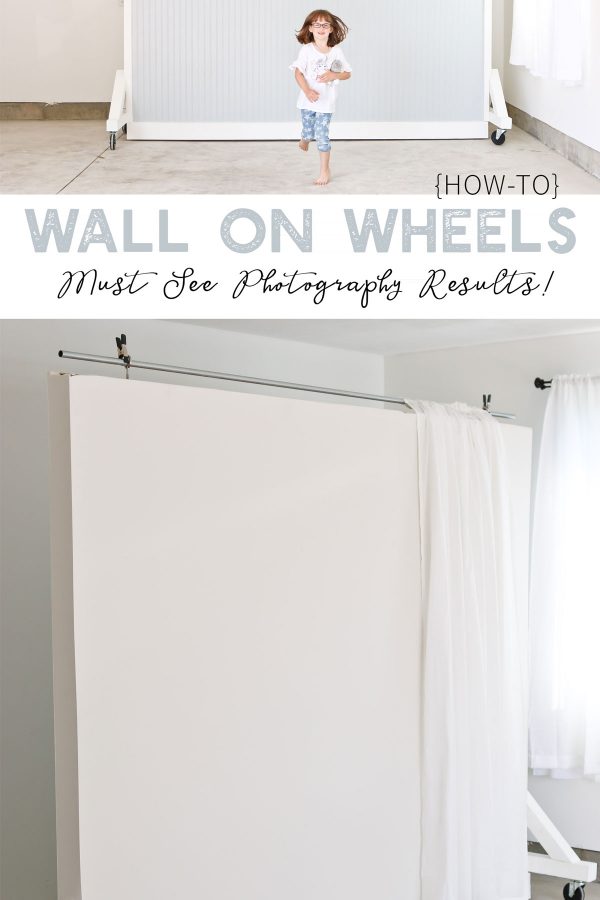
No picture-perfect home . . . no problem. Catch the DIY tutorial and photo results for this dual-sided Wall on Wheels photography and filming backdrop, which is key to our garage studio while here in our temporary rental home.
*This post is sponsored by Ryobi tools. All thoughts, opinions, and photos are my own, and I’m so grateful to have the support of a company we love! Be sure to check out Ryobi Nation for more inspiring how-to’s and tutorials.
Have you ever found yourself thinking – man I get so sick and tired of taking down and setting up tripods, lights, microphones and other filming and photo equipment? Or perhaps you’ve dreamed of the perfect place with the perfect soft lighting to stage and photo products, people and passions?
I’ve had those thoughts, multiple times in the months we have been in our rental home.

Can you relate? Look no further than your garage and this tutorial, my friends! Mr. TIDBITS and I will walk you through start to finish on this building project, made 1000 times easier with our handy dandy green Ryobi tools.
Let me demonstrate the bright, soft directional lighting I was able to achieve in our garage with this backdrop. You can also get a better idea of the size with a wee little 7 year old in front of it.
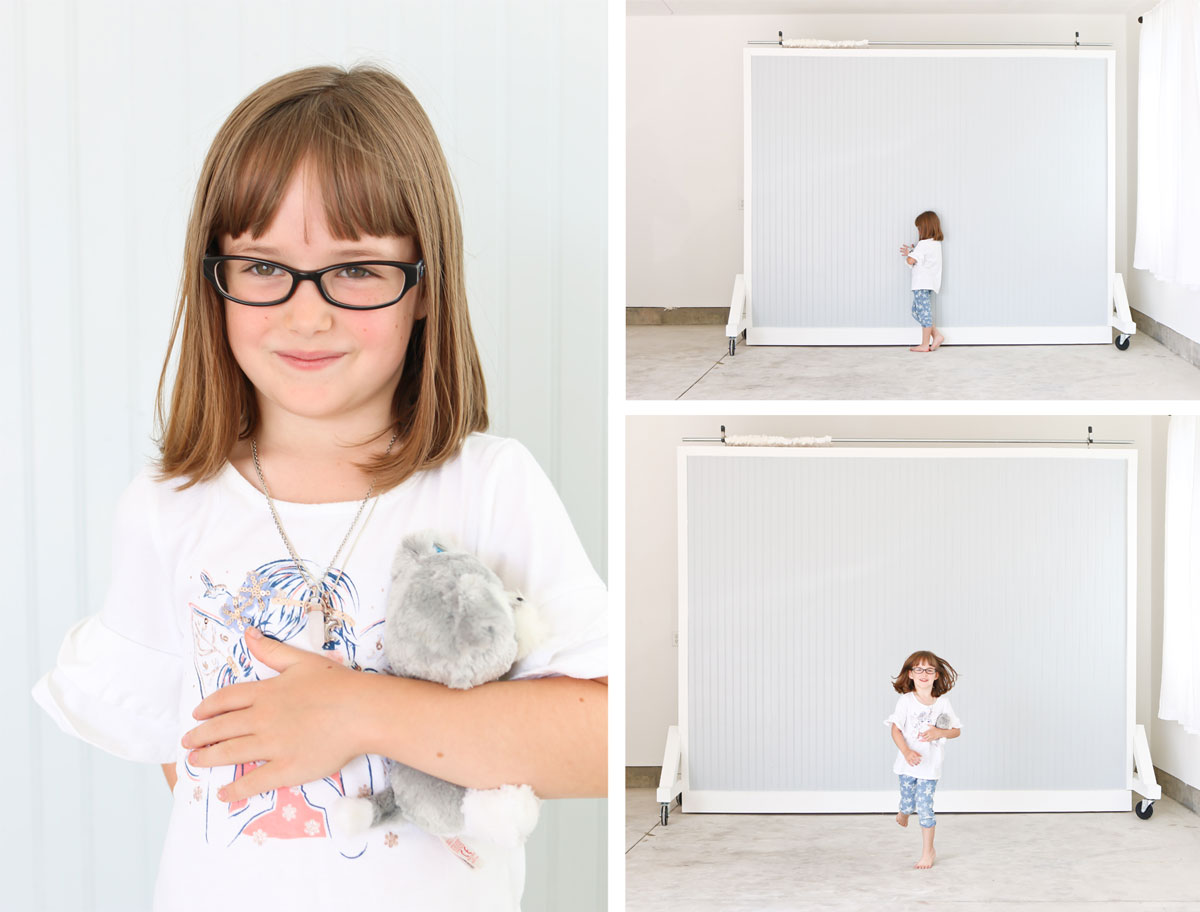
Here is the kicker. Normally post processing my photos in Lightroom is a large part of how I get most of my light, bright and soft photos. I was amazed when I went to edit this batch. I hardly had to adjust my sliders and my go-to self created Presets were waaaay too effective. I’ll even be able to easily move the wall to play with shadows and different directional light.

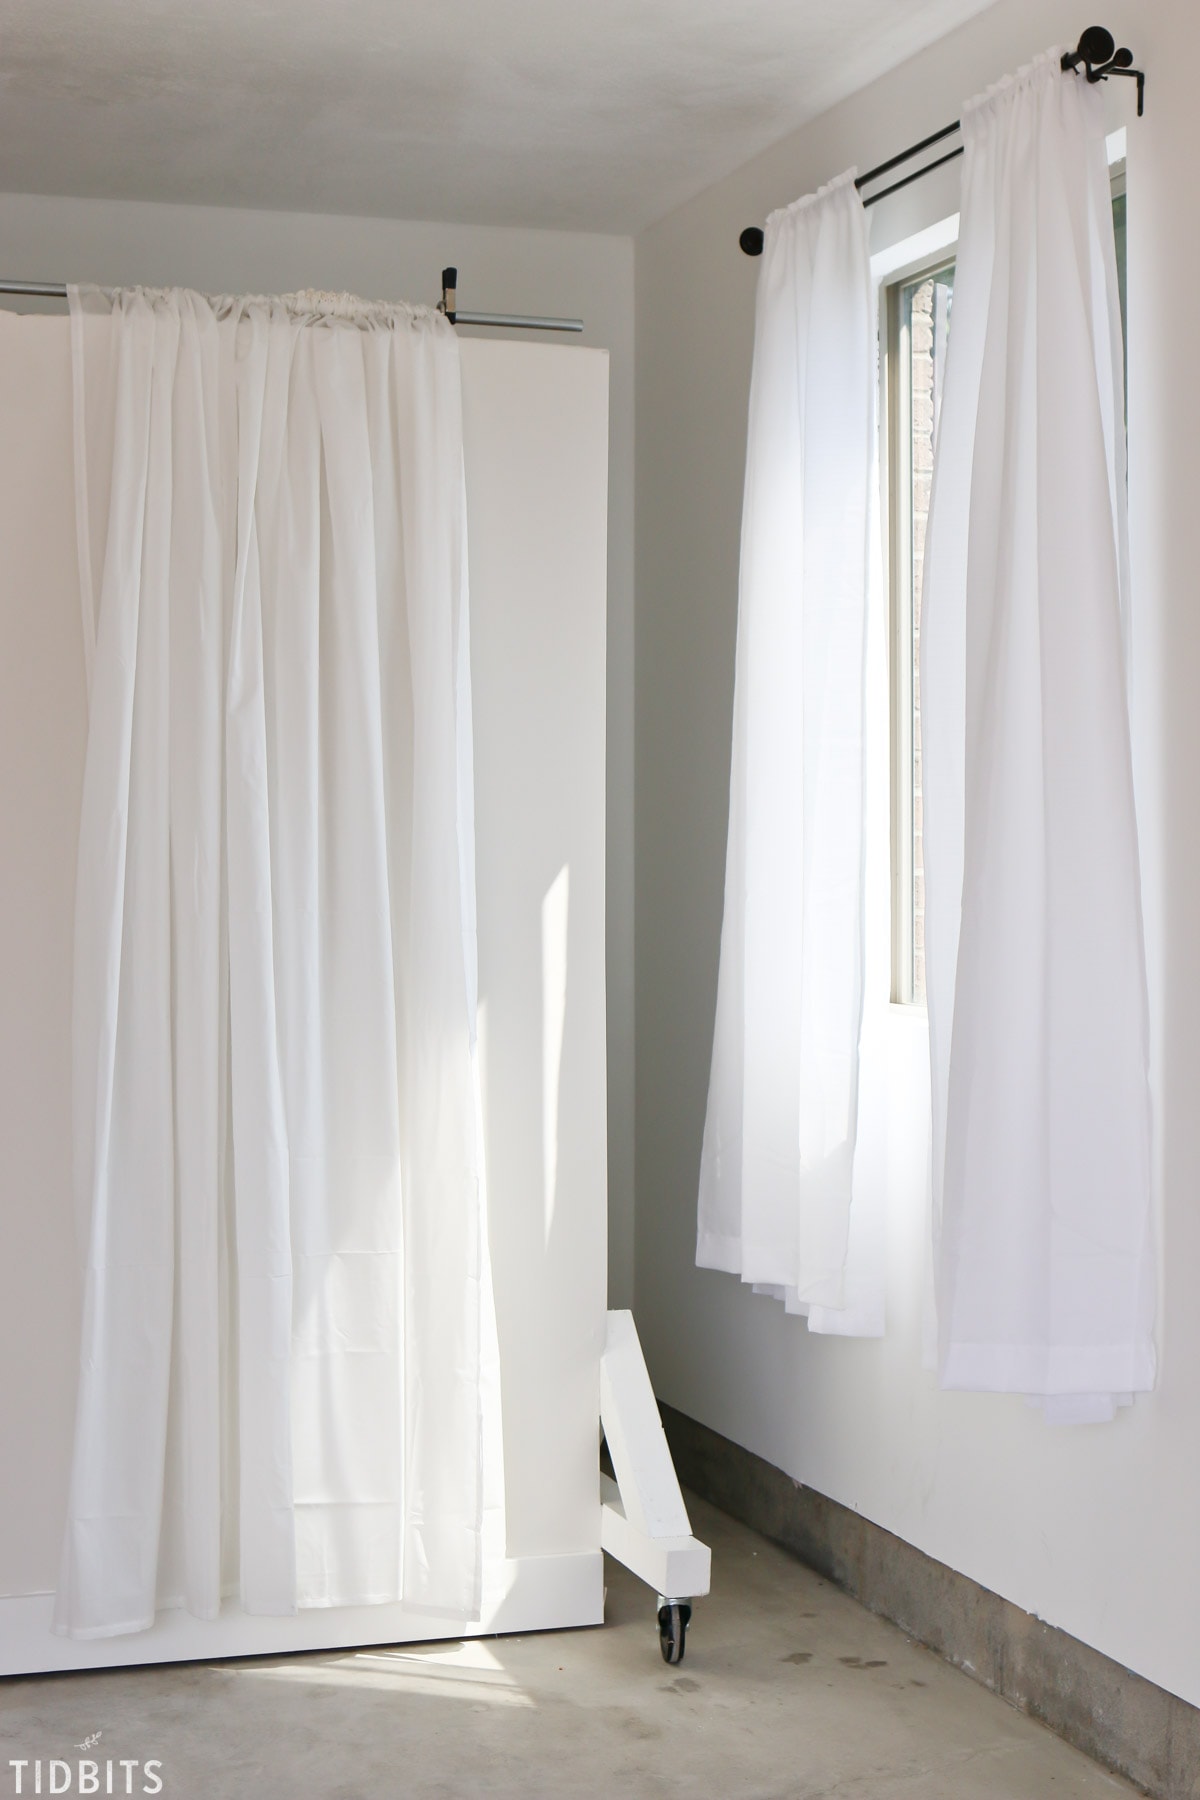
I discovered how much I love garage directional lighting years ago while taking photos of my husbands building projects, so I knew it would make for a great temporary studio. We have the added bonus in this garage of a side window, to which I added a layer of sheer and solid white curtains to filter the light any time of day.
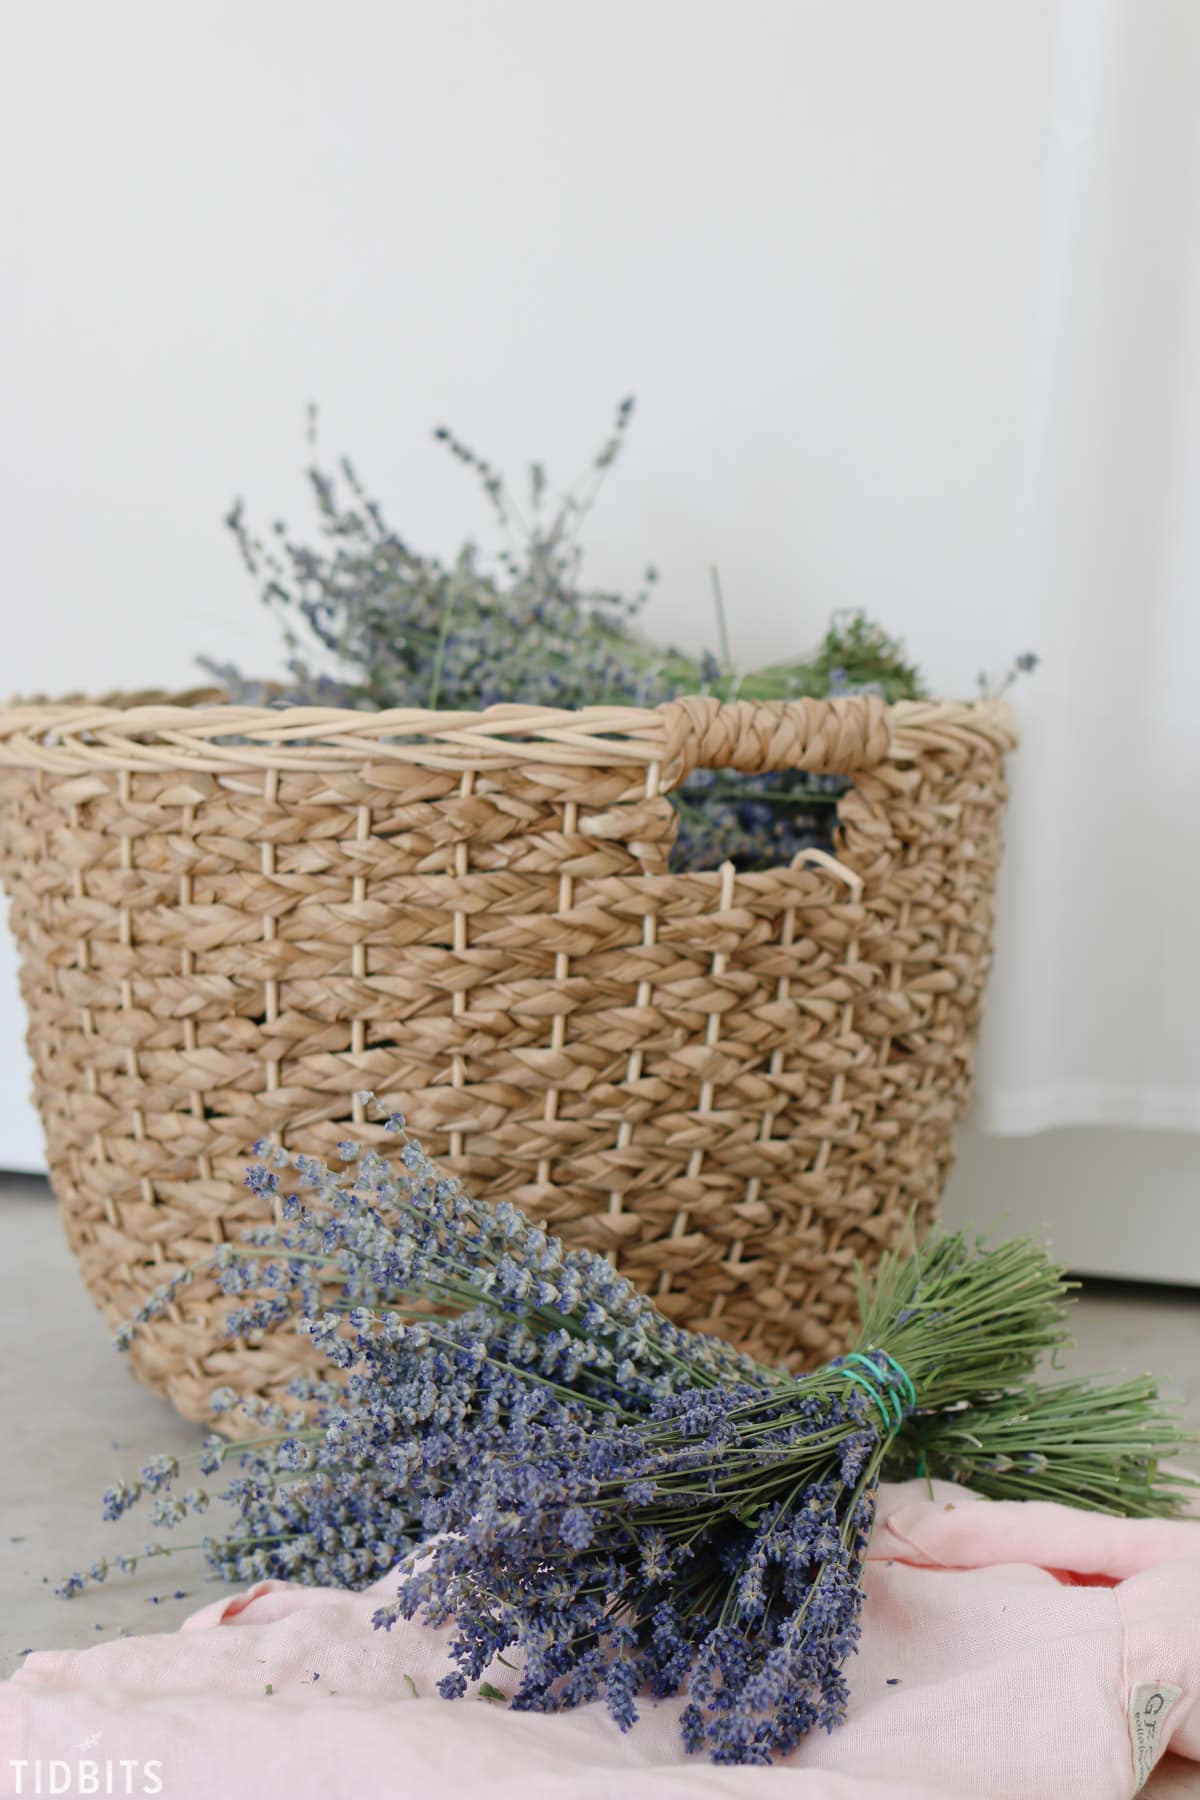
Here I played with some of our lavender harvest to see how the shots would turn out. Let me know what you think!

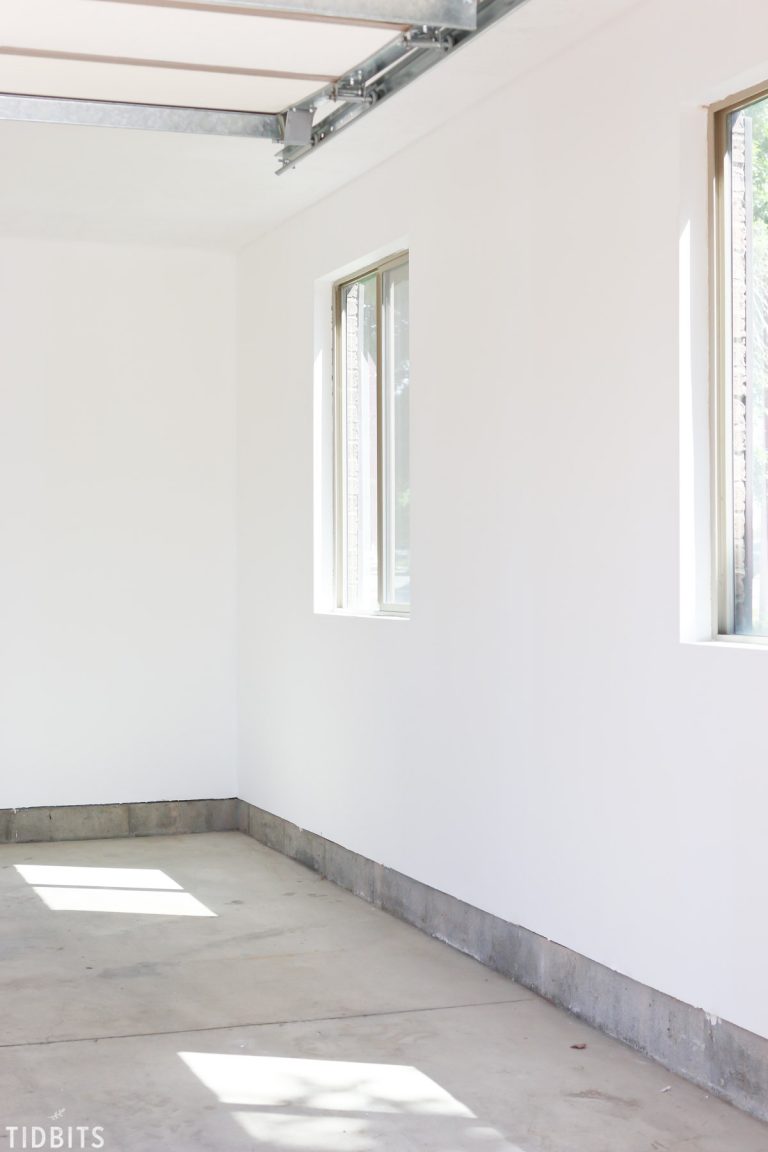
The only thing bothering me is the gap we had to leave under the baseboard, which allows us to roll it and move it. I’m on the lookout for some affordable faux roll-out flooring to help with that problem. Let me know if you know of any sources! Thank you!

You might also like to see what our garage looked like before we painted the walls.
And if you are curious why we can’t use the inside of our rental, these images of the dark and brown space might clarify (nice, but far from my style). Why are we in a rental home? Find out HERE.
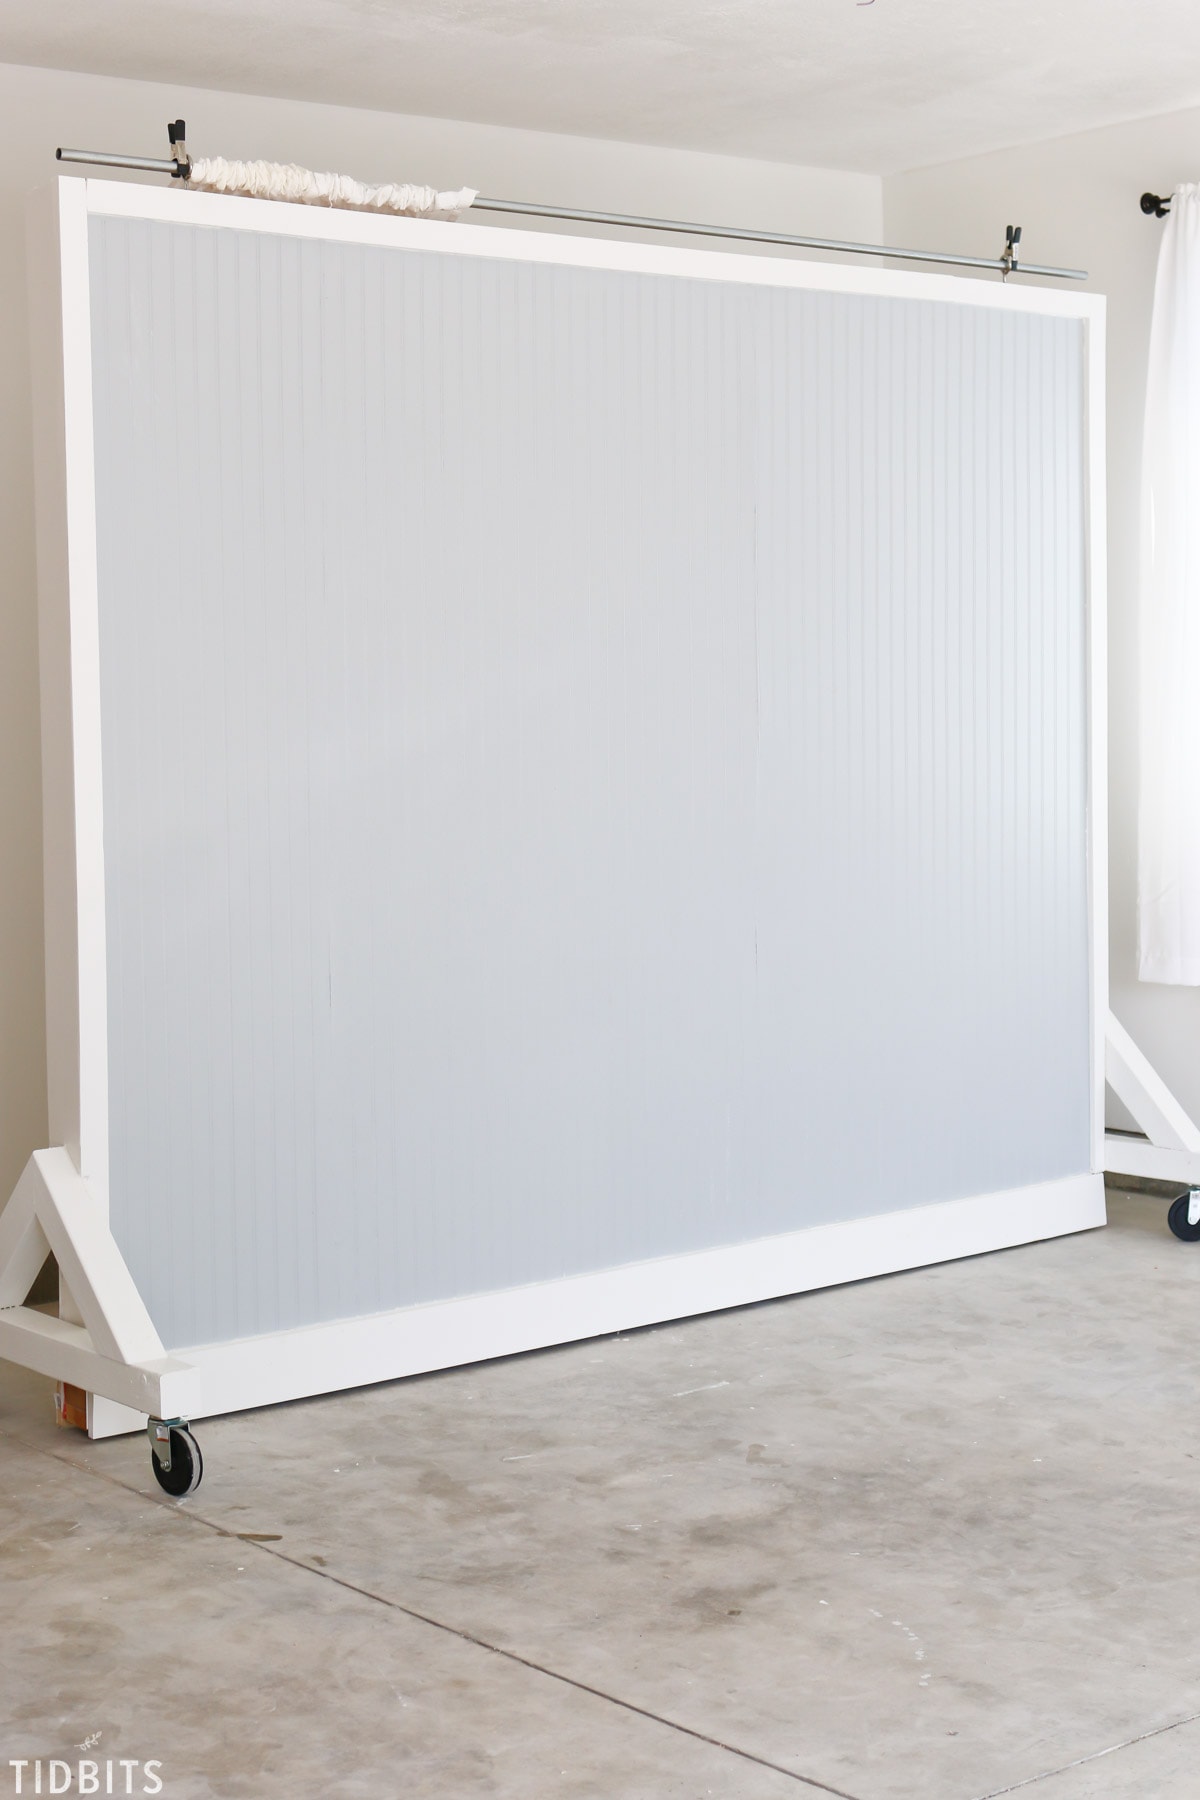
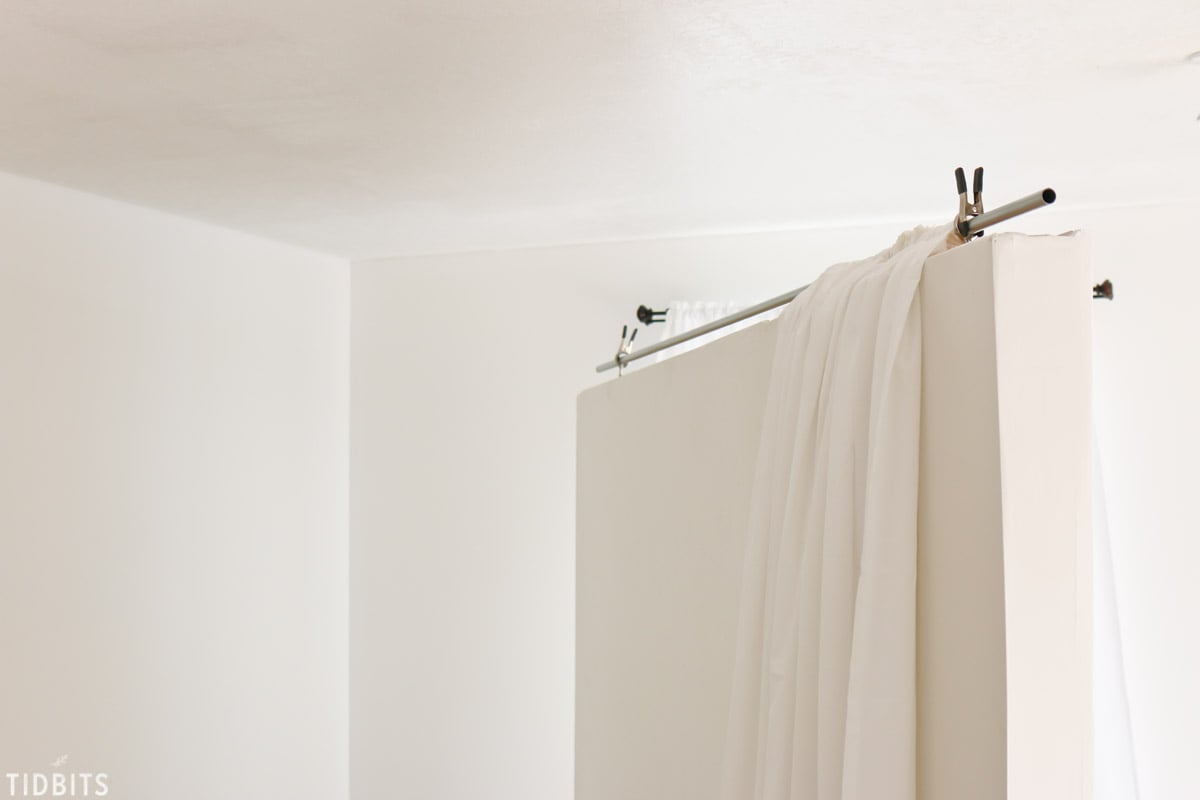
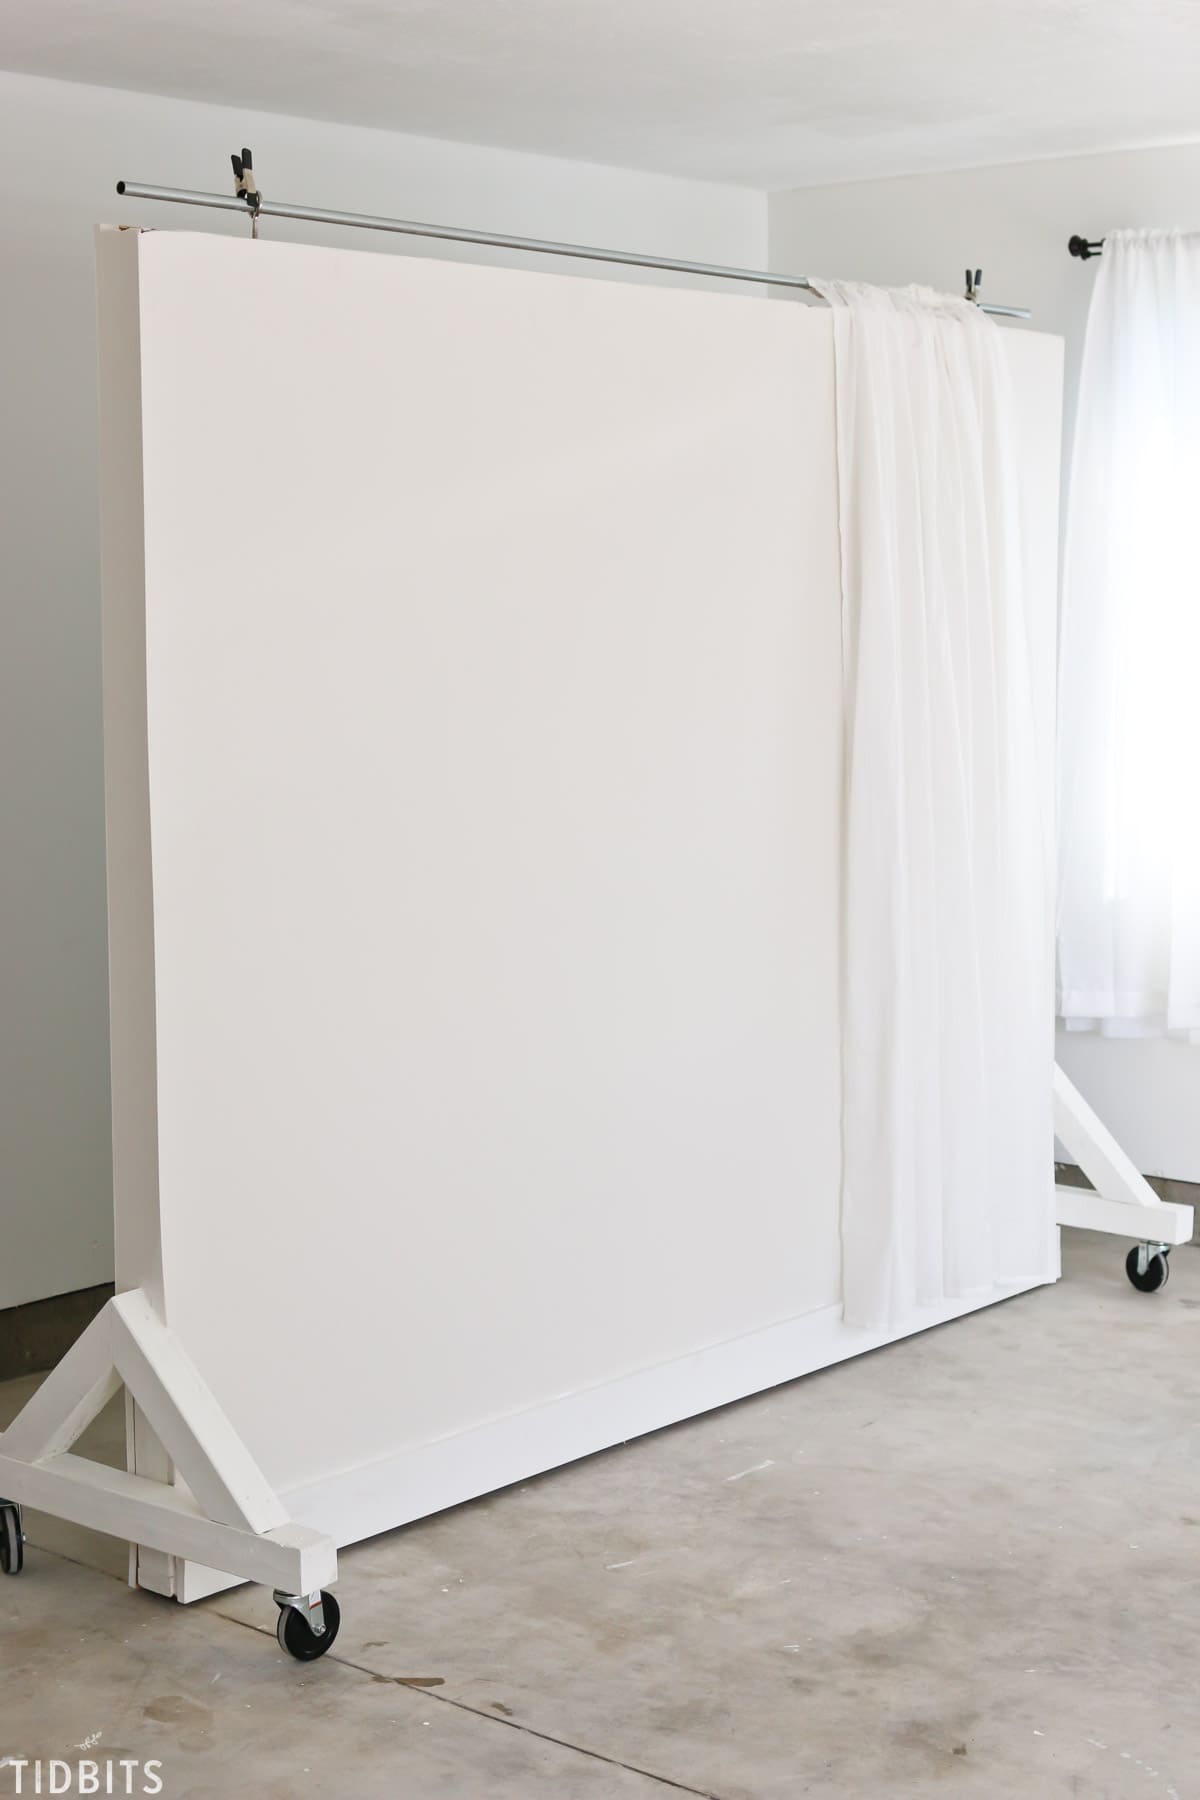
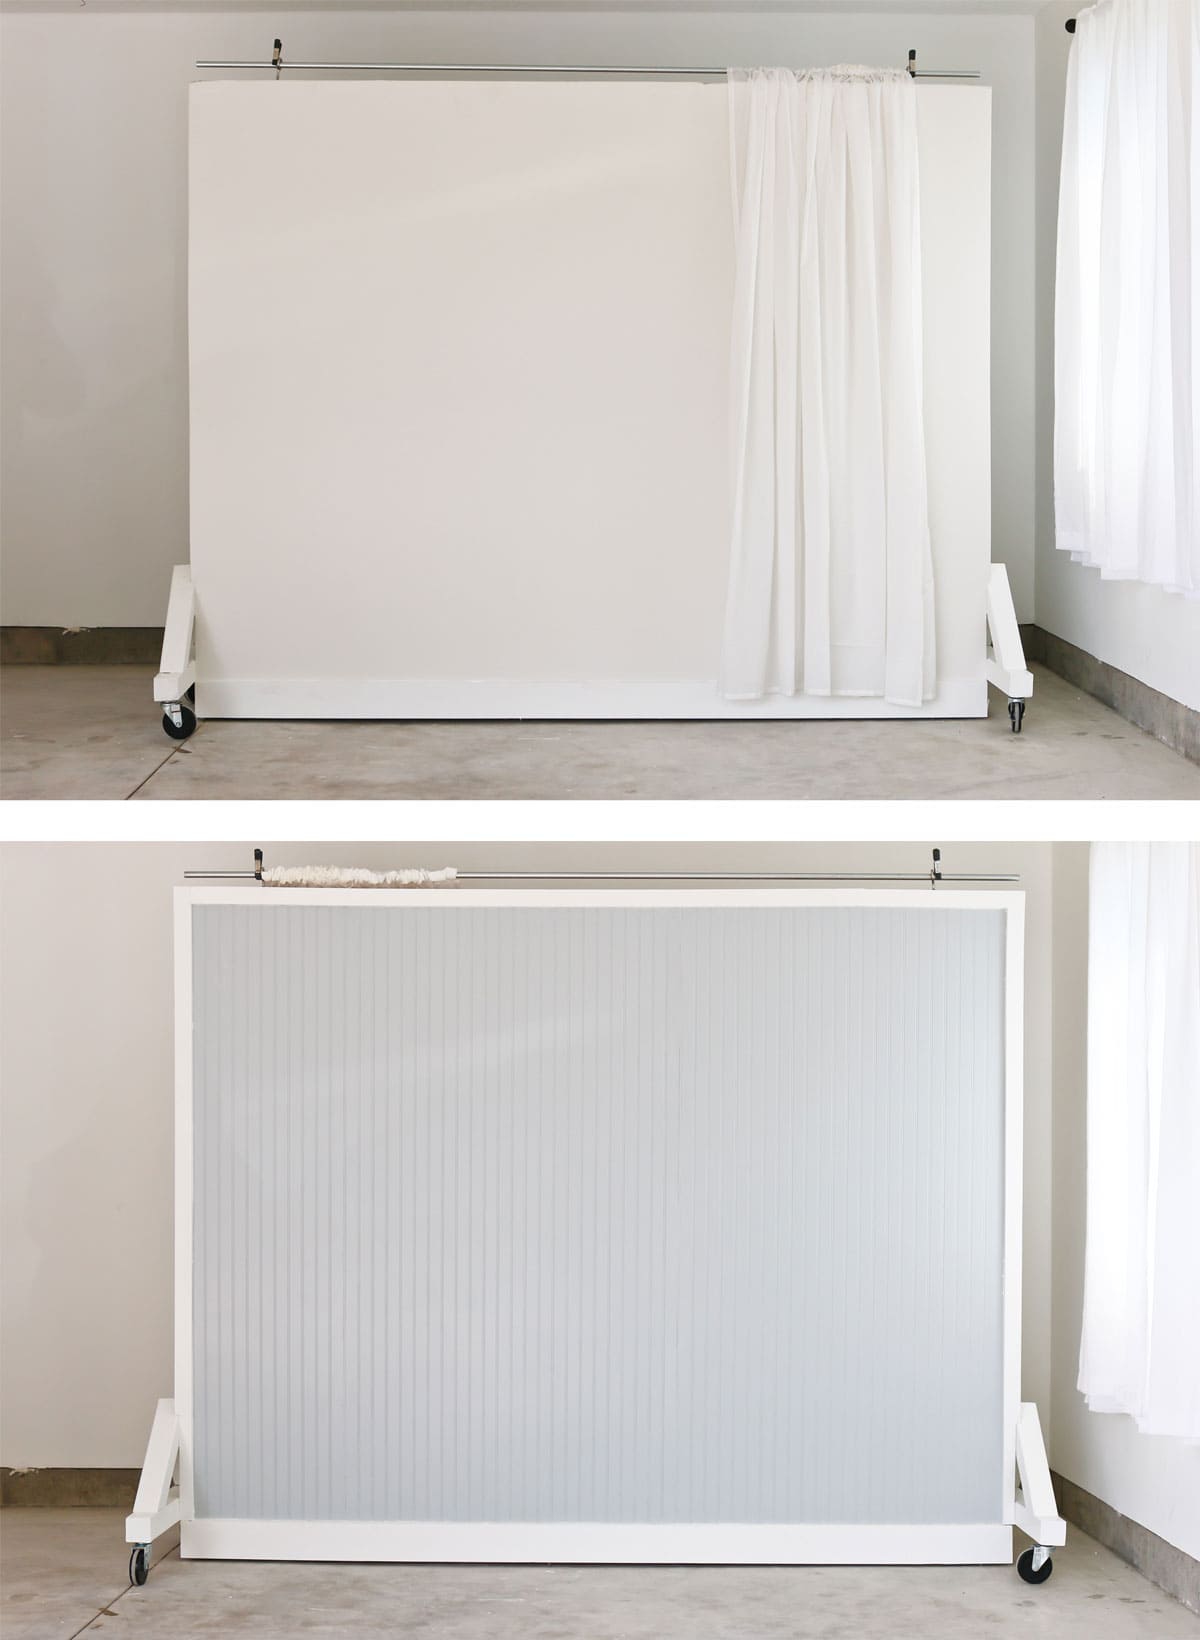
We added a bar on top to hang drapery or other backdrops like photographers seamless paper and other creative options that might present themselves.
And you noticed both sides of the wall right? One is a smooth, creamy white wall and the other a blue bead-board wall. The paint colors are Benjamin Moore, China White and Silver Lake. White trim is Super White.
I imagine changing out the color when needed will be an easy swap. Moving and rotating this big wall is a breeze with the swivel castors.
Now, this is not my ideal situation for running a home decor business, but we are bound to make the most of it.
Let me know in the comments below what you could do with a wall on wheels? Better yet, what creative adaptions have you had to make when finding yourself in less than ideal situations? I’d love to hear of your ingenuity!
Let’s get started on the tutorial! I hope this comes in handy for some of you! Maybe you don’t need it now, but be sure to PIN IT for your someday dream studio set up. Be sure to stay tuned to see our rolling table for the space and how we organize our other necessities to make this one power house of a garage!
POWER TOOL TIME!! – How to Build a Wall on Wheels
*Turning all commentary over to the hubs, Mr. TIDBITS (aka Kevin – my amazing builder man). I take no responsibility for what he may or may not say about me 😉
SUPPLIES FOR PHOTOGRAPHY BACKDROP/WALL ON WHEELS:
*CLICK HERE FOR MY AMAZON STOREFRONT WHERE YOU CAN FIND SOME OF THE TOOLS WE USED – or click the links below. Most the smaller supplies we found from Home Depot.
**Also find RYOBI Tools at Home Depot.
***These are my affiliate links. See my disclosure here.
Tools
- Ryobi drywall screw gun with phillips bit
- Ryobi impact driver with phillips bit, 1/2 inch socket and 9/16 socket.
- Ryobi drill
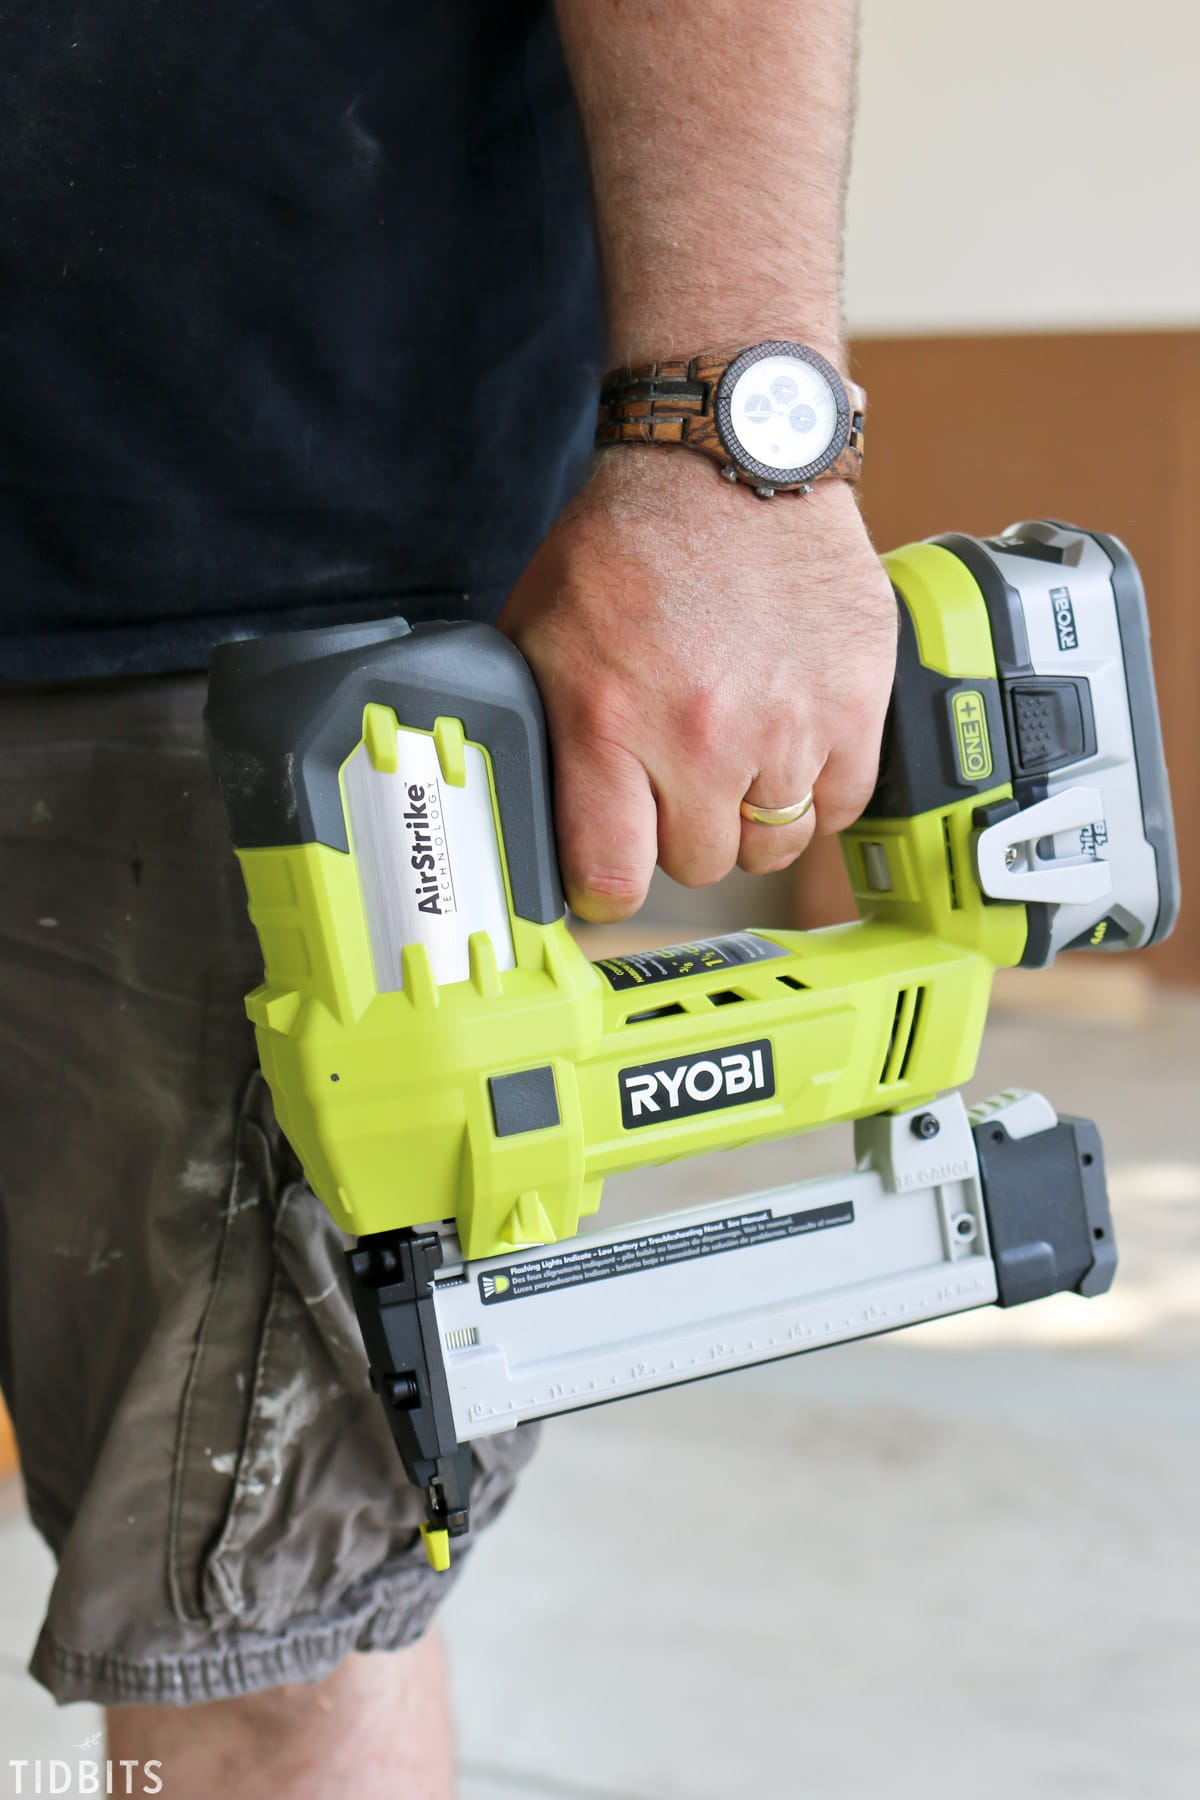
- Ryobi narrow crown stapler
- Drywall knife
- Paint supplies
- Carpenter knife
- Sanding pads
- 3/8″ drill bit
- 1/4″ drill bit
- Saw
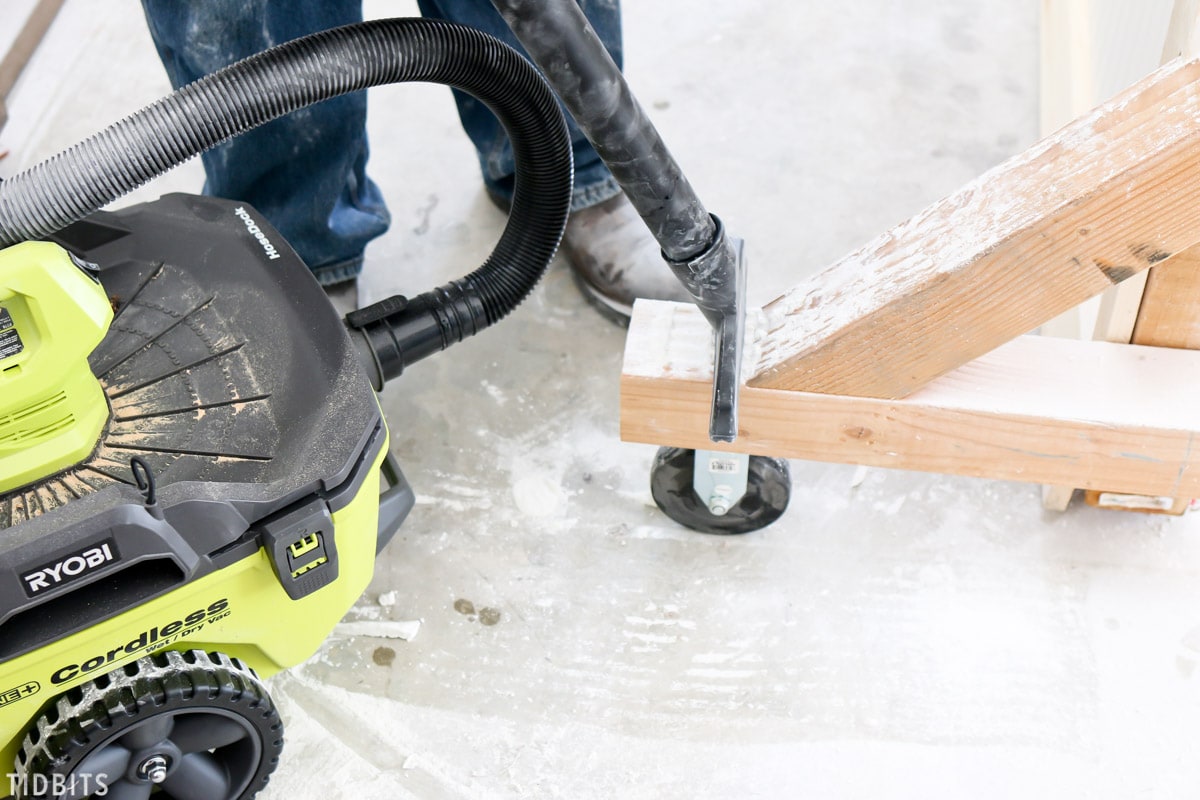
- Ryobi Cordless Wet/Dry Shop Vac
Supplies
- 6 – 2x4x8 studs
- 2 – 2x4x10 studs
- 2 – 4x4x8 boards
- 2 – 1x6x10 pine boards
- 3 – 1x2x8 furring strip board
- 3 – 4×8 sheets of beadboard
- 2 – 1/2″x4’x10′ drywall board
- 1 * 2x2x1/2″ drywall panel (used to complete the ends of the walls, if you want to cap the top then buy two of these boards)
- Drywall joint tape
- Drywall joint compound
- Drywall screws
- 1 box – 2 1/2″ grabber screws
- 4 -1/2″ x 5″ lag bolts
- 16 – 3/8″ x 1.5″ lag bolts
- 1 box – 1″ narrow crown collated staples
- 1 box – 1.5″ narrow crown collated staples
- 4 – Casters
- wood filler (for staple holes)
- Paint
- painters caulk (white)
- wood glue
- safety glasses
- Conduit rod (for curtain holder)
- Clamps
- Steel hooks
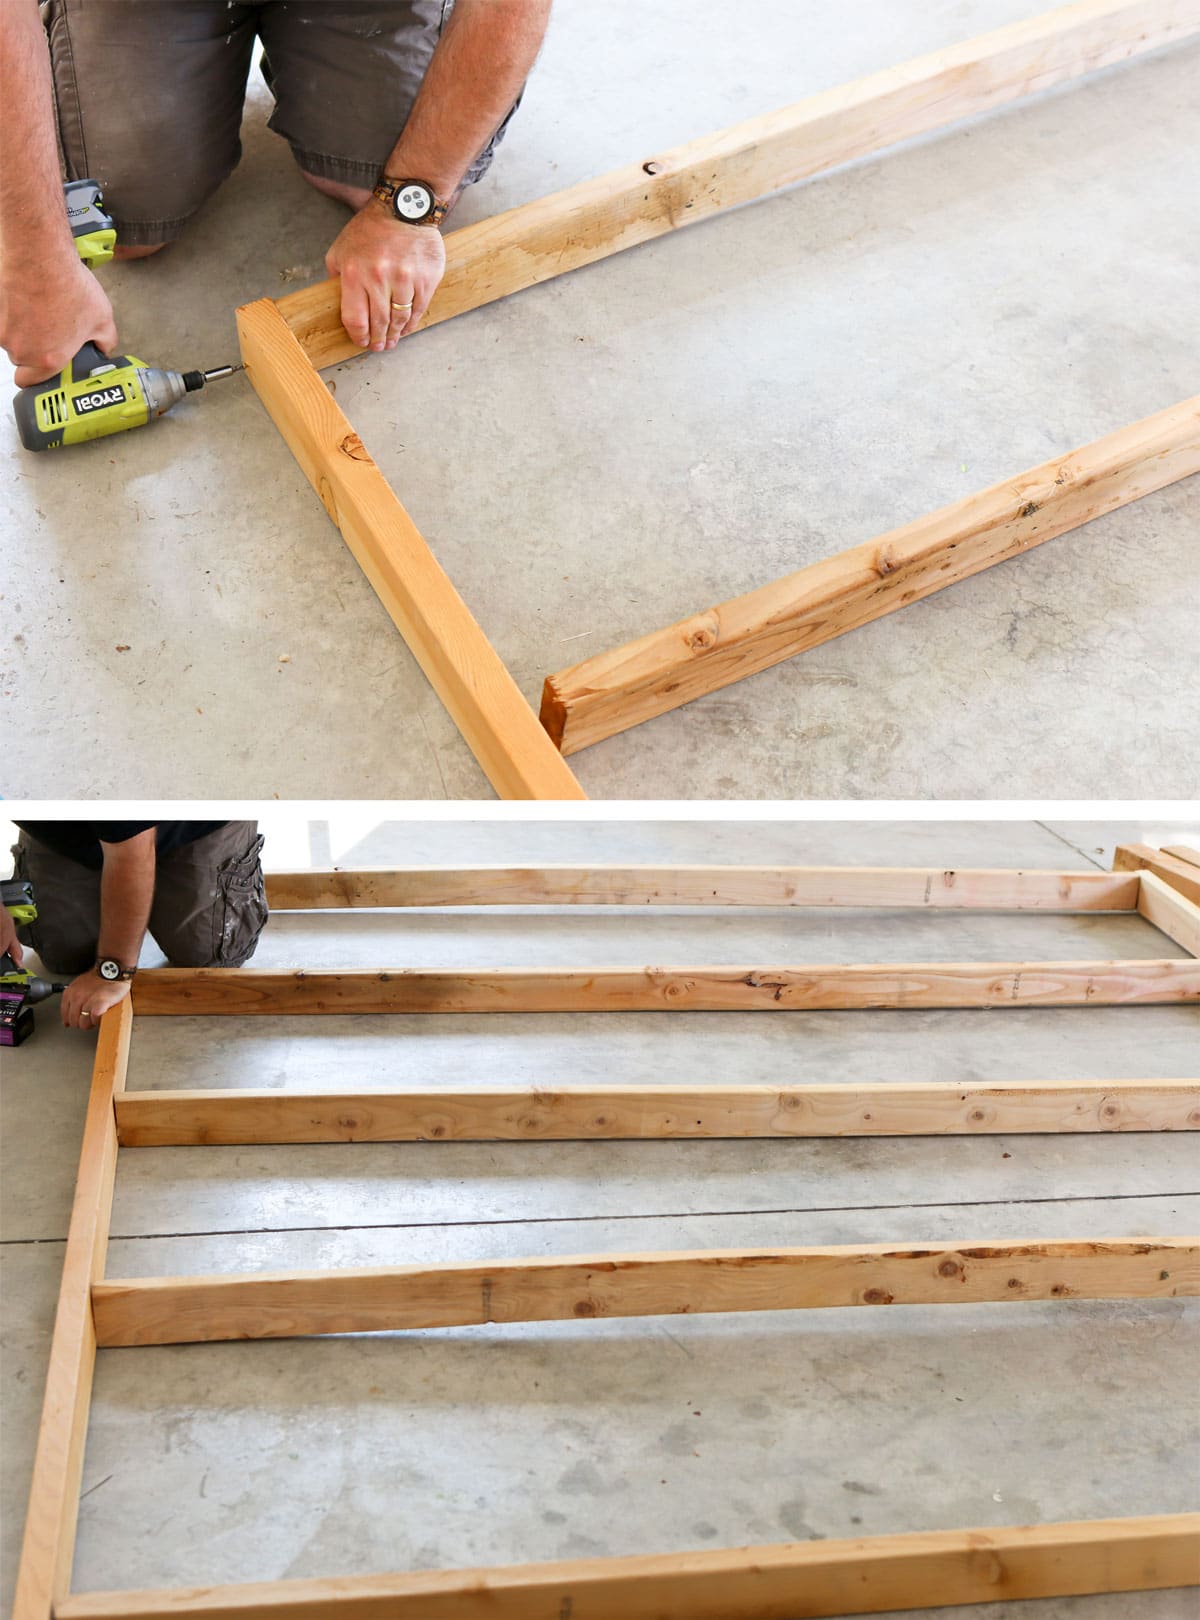
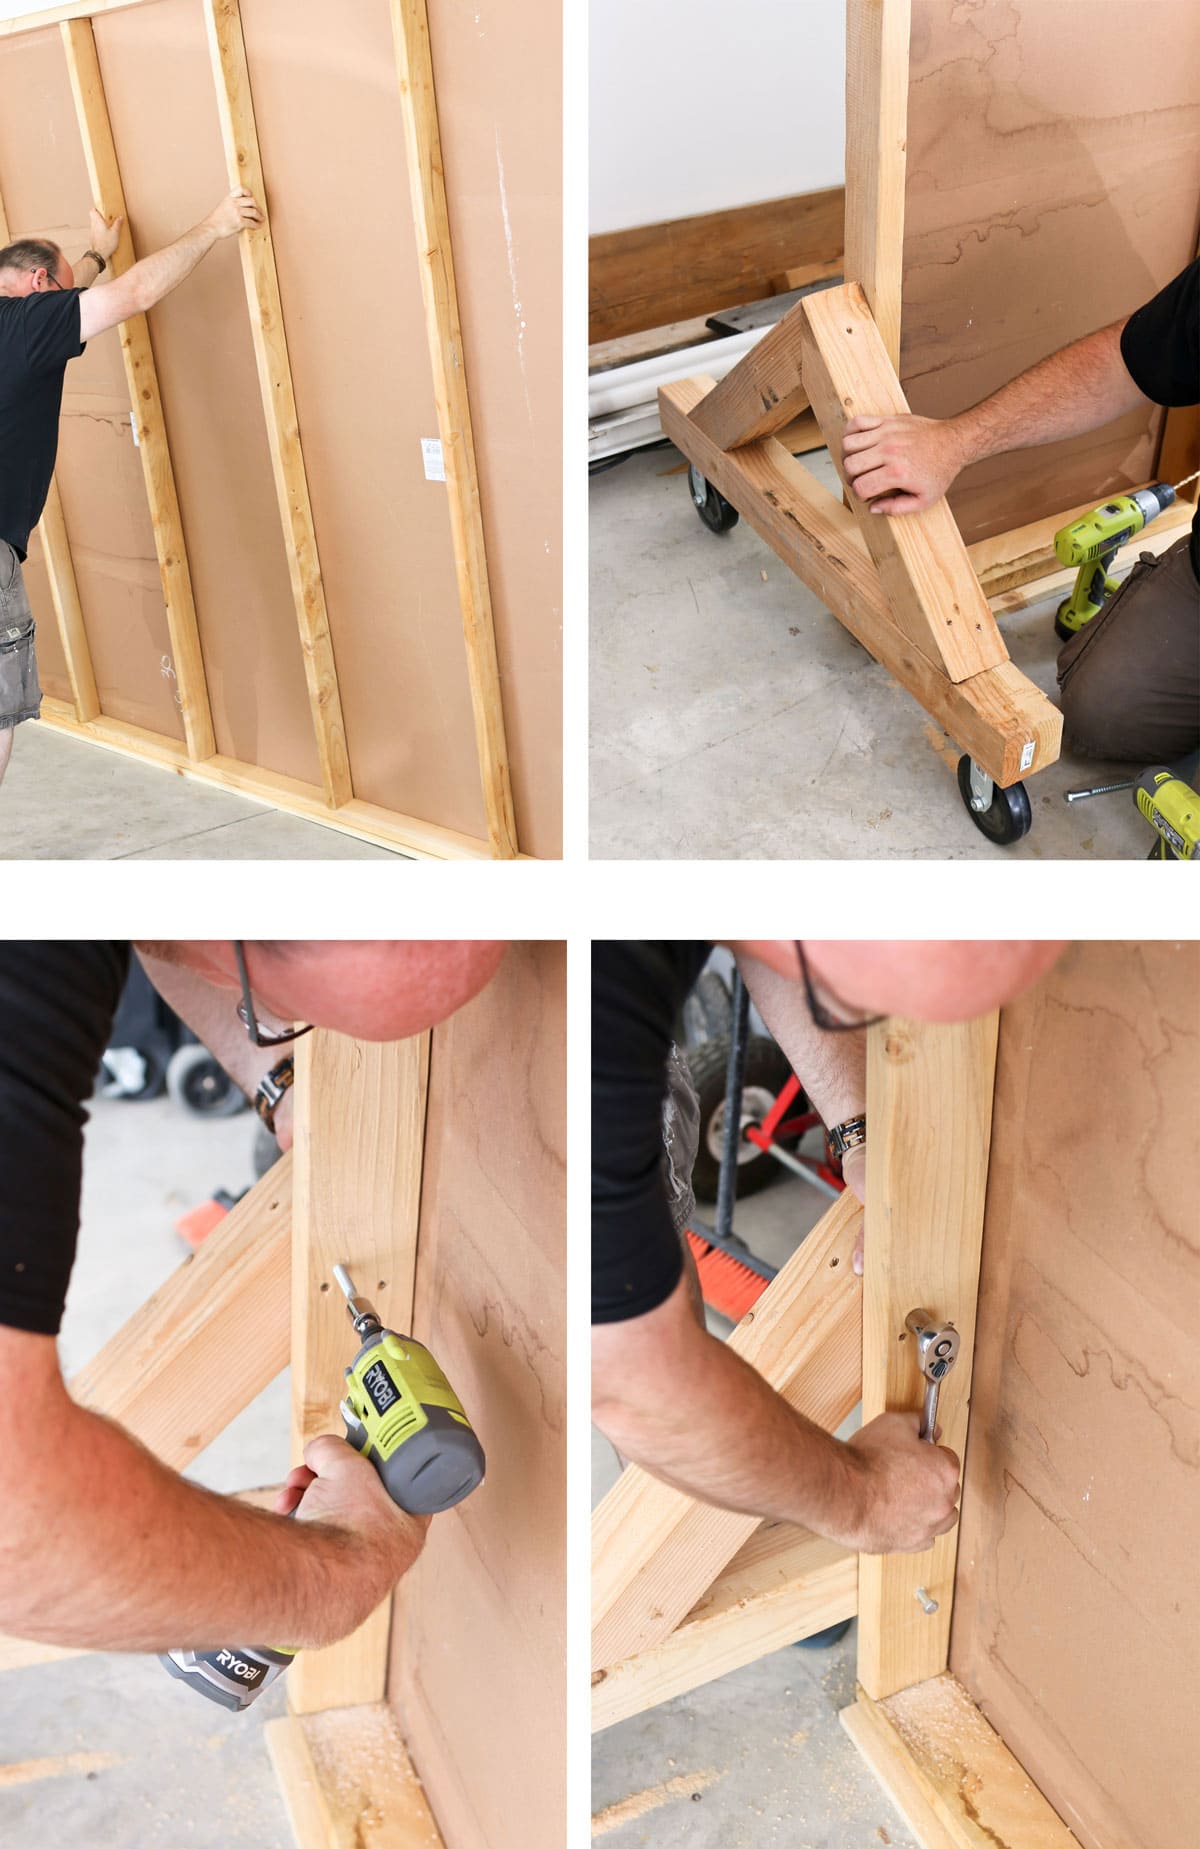
Start by laying out the studs with the two 10 foot long studs on the top and bottom of the wall and the 8 ft studs spaced two feet apart. Use the grabber screws to attach them to the 10 ft studs.
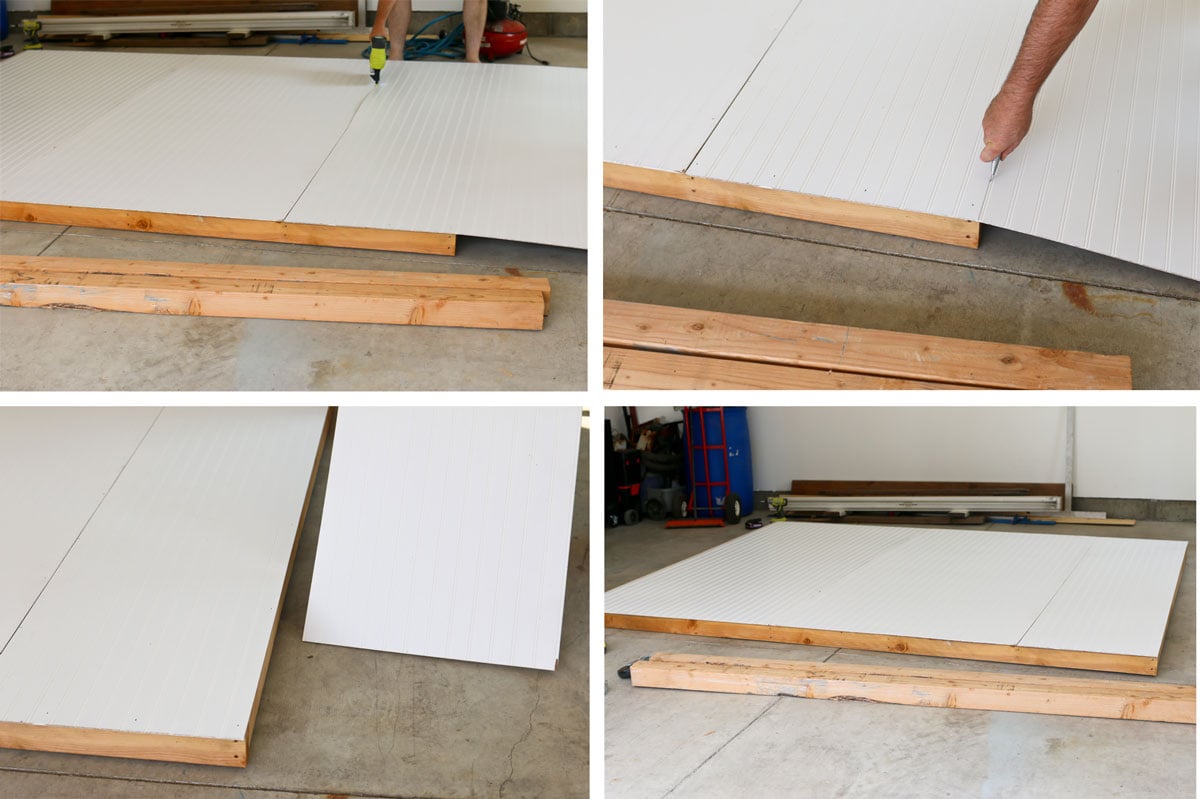
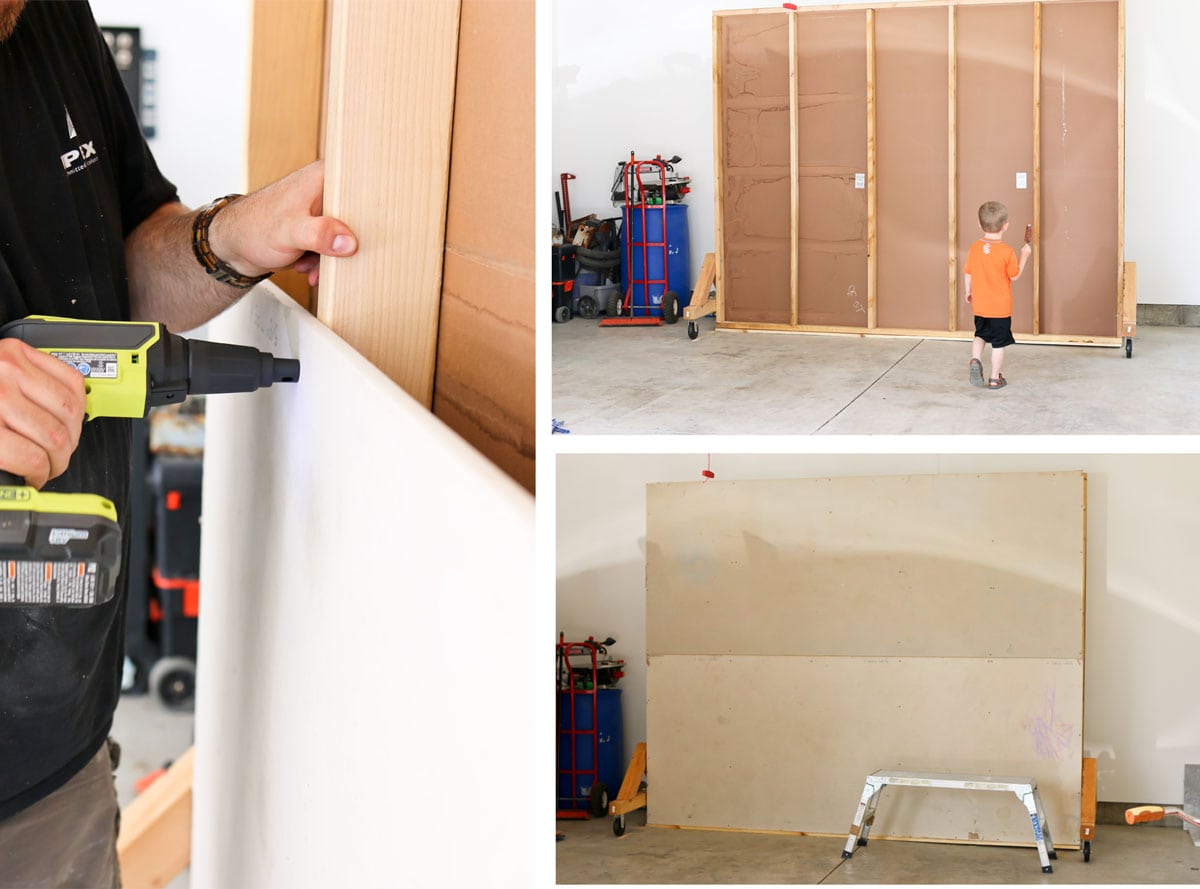
Lay the beadboard on the wall with half the stud showing so that two sheets can be nailed onto the same stud. Use the staple gun to staple one corner of the bead board down. Measure the diagonal length on opposite corners and make sure they are the same length. This will make sure the wall is square.
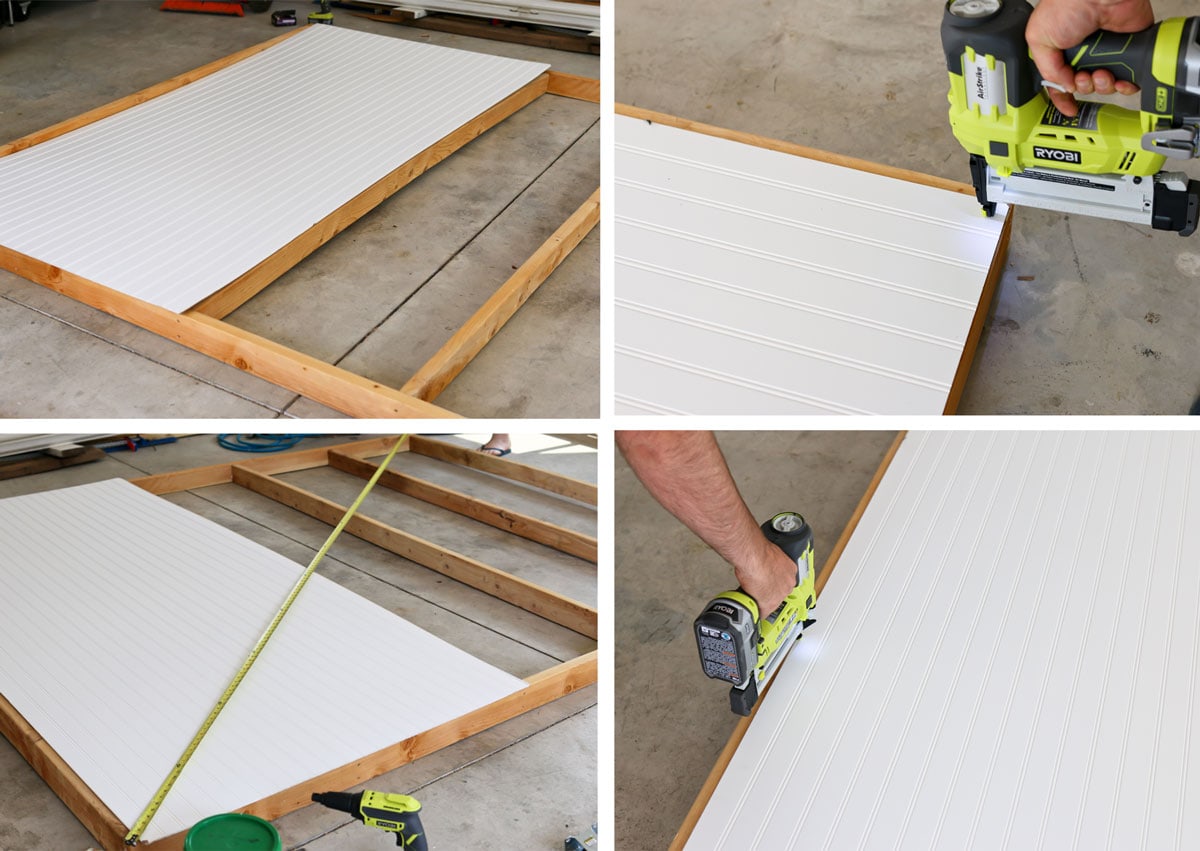
Finish stapling the board down and lay the next one down and staple it down. The last board will be cut in half lengthwise but I like to staple it down and cut it with a carpenter knife so that it will break off.
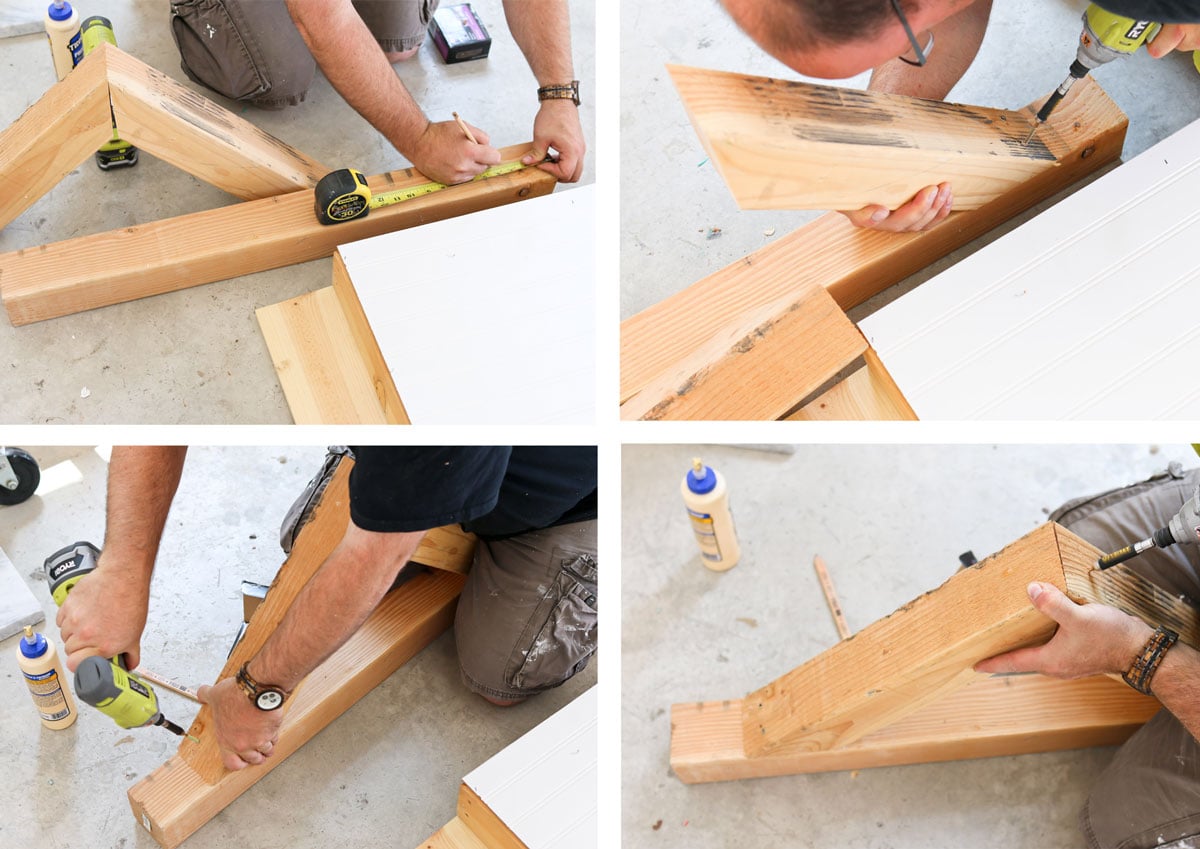
Cut the 4×4 boards at the following lengths:
- 2 at 36″
- 4 at 19 3/4″ with 45 degree angles on each end (19 3/4 inches is the long measurement or point to point).
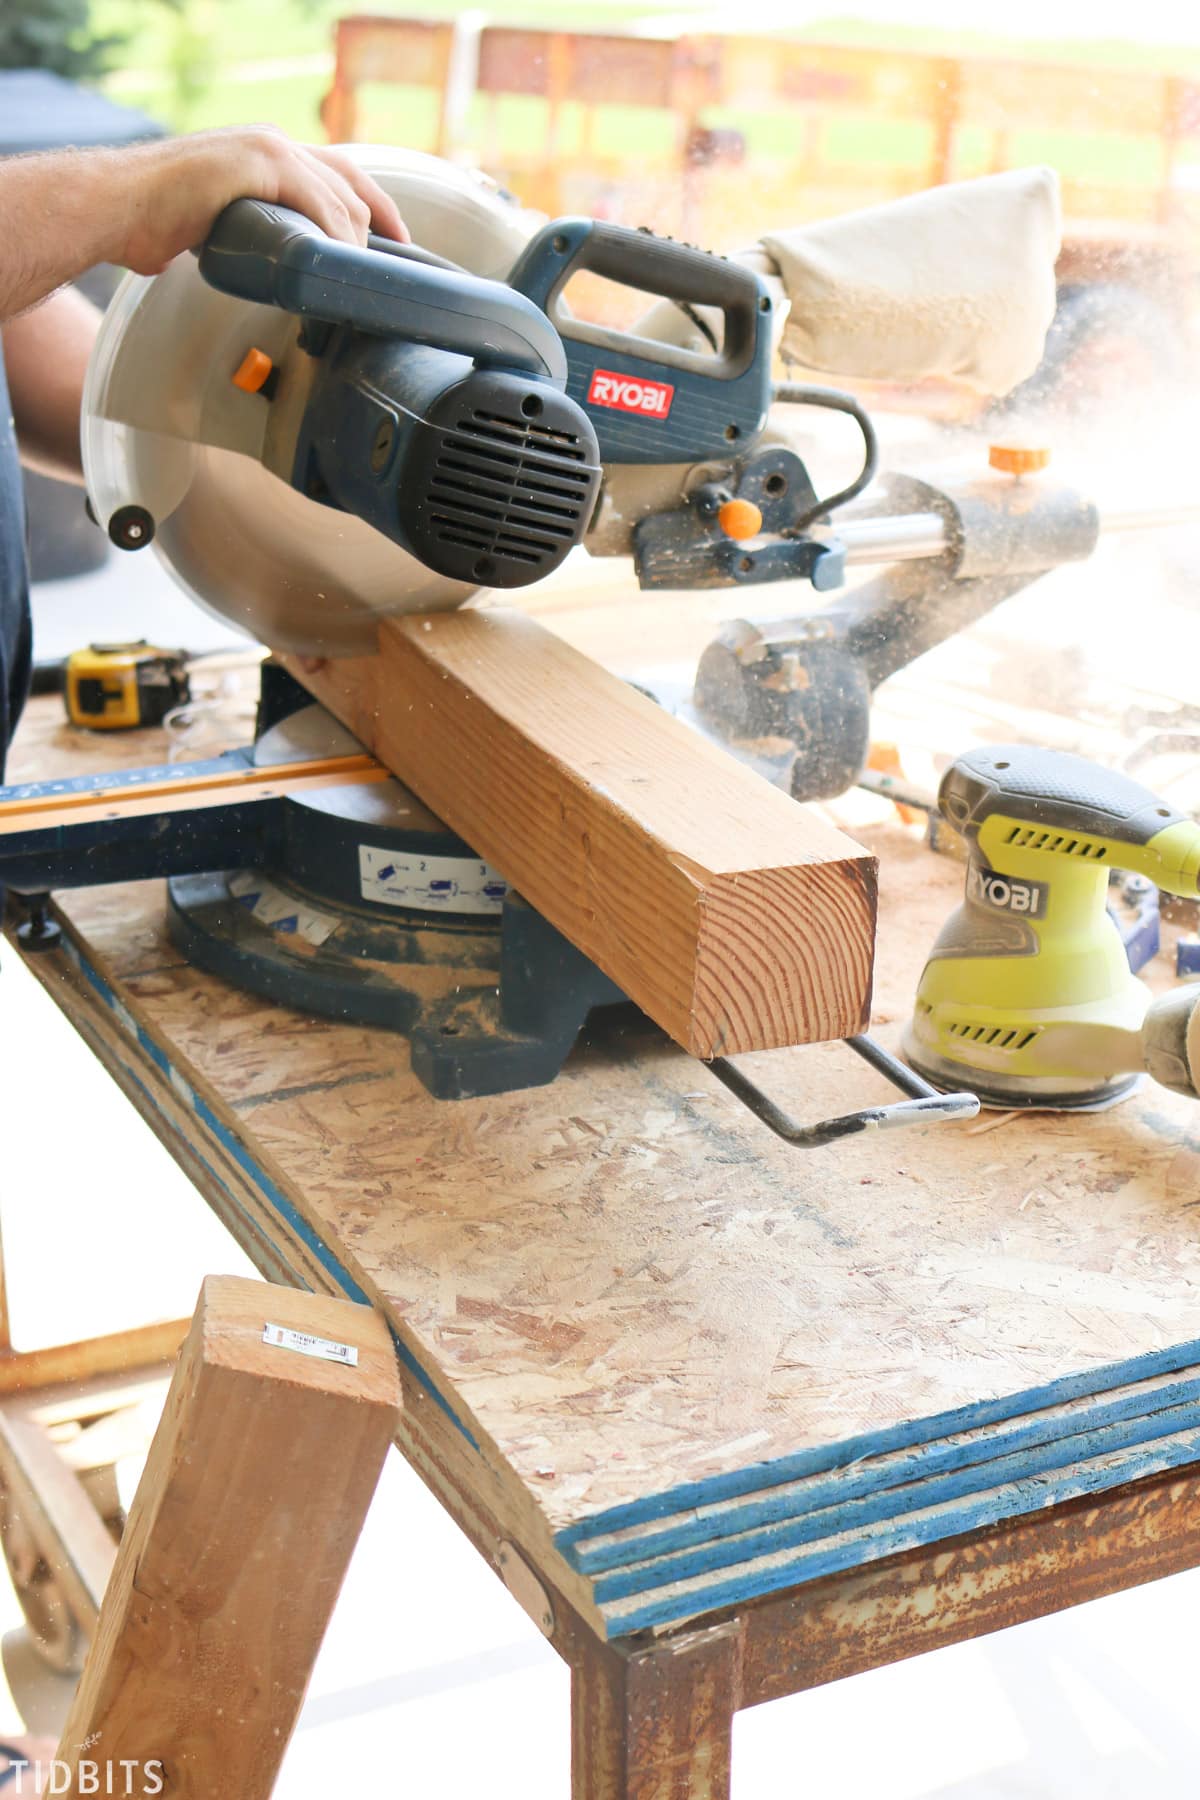
Measure 4 inches from one of the ends of the 36″ board and glue and screw (2 1/2″ grabber screws) one of the angled boards at this point, measure 4 inches on the other end and repeat. Attach the two angled boards at the top, again with glue and screws. Repeat with the remaining boards.
Attach the coasters to the bottom of the 4×4 assemblies using the 1/4″ drill bit to make a pilot hole and using the impact driver with 1/2 inch socket to drive in the 3/8″x1 1/2″ lag bolts. Stand the wall up on one of the 1×6 boards underneath it (this is so that you have a 3/4″ clearance under the wall when finished). Attach the 4×4 assemblies to the two ends using the 3/8″ drill bit for a pilot hole and the 9/16 socket and impact driver to drive in the 1/2″ x 5″ lag bolts. I had to ratchet in the lag bolts for the last inch or so because I only had a 4 inch long drill bit. At this stage you can remove the 1×6 board underneath the wall if you want, I left it in as long as possible because it helped keep the wall from wandering away)
Attach the drywall board using the Ryobi sheetrock screw gun. Make sure you give your kids some ice cream while they watch you toil, labor and sweat over this project. I would hate for them to overexert themselves.
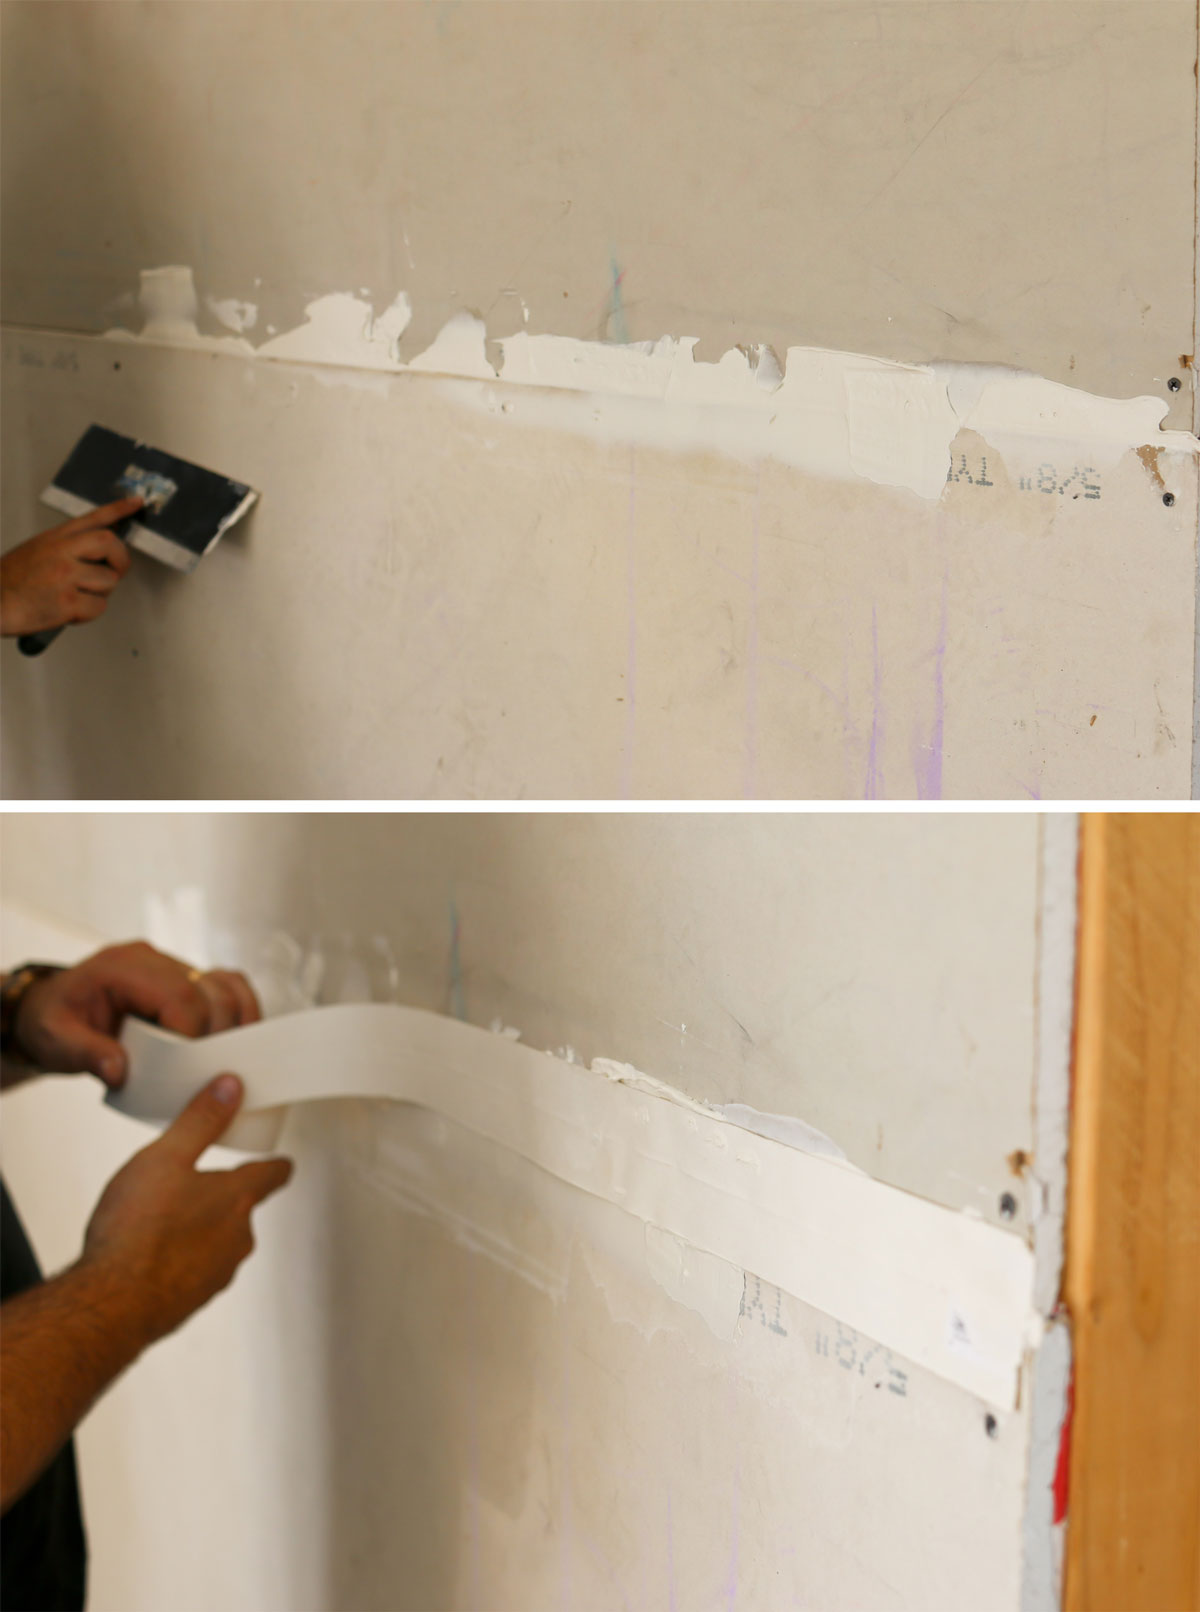
I will be the first one to admit that joint compound and me are not friends. I do not like this part of installing sheet rock so I have never learned to do it well – like they say “passion breeds excellence” but I say “Lack of Passion breeds mediocrity”. For a small project like this I can get by ok, so the first thing to do is spread joint compound over the joint, make sure to cover the area well so that the joint tape will completely stick down. If you don’t have enough under the tape then it will bubble up in that spot and no amount of joint compound over the top of it will solve this problem. Once you spread a liberal amount of joint compound, press the tape into the compound along the joint. Then cover the tape with another layer of joint compound, using the drywall knife to spread it thin and even. This is the first of several layers so don’t worry about it being perfect. Just cover the tape and fill in the uneven portions. Wait till the compound is completely dry then sand down the raised portions and uneven spots. This stage is where you learn to spread the compound out as even as possible, if not you will be sanding for days. Apply another layer of compound after sanding and repeat these steps until you have a flat even wall with no evidence of any dips or joints. I ended up with 4 layers since the sheetrock wasn’t in the best of shape. Joint compound will crack if it is too thick so several even layers is always better than one thick one.
Sanding the wall will make a giant mess so be sure to have a vacuum ready for clean up. The Ryobi cordless wet/dry vac is a game changer.
The final steps are to install the 1x6x10 base boards and the furring strips on the bead board side to frame the wall. I used the Ryobi staple gun with 1 1/2″ staples. Fill in the staple holes with the wood filler, caulk the cracks, then pick a paint color and paint as desired.
For a curtain or photo backdrop holder, we used an inexpensive piece of conduit, a couple of clamps for other potential backdrops, and secured it all in place with steel hooks.
I’d comfortably put this project at an intermediate level. It came together faster than I thought – giving me plenty of time to begin work on the next TIDBITS project. As she so often says, the blog never sleeps.
Didn’t he do an amazing job?! I was there to photo all along the way 😉 . Well . . . most of the way.
Thanks so much for reading, and I’ll be back to share the rest of this space as we move along.


Hello, I love your idea. I’m just curious about the stability. I am thinking of building one with drywall on both sides and wondering how “top heavy” and/or “wobbly” these are? Photography studios always have active little children running around and it *has* to be very sturdy and not fall over on someone.
Hi, my name is Mac. I just want to know if it is possible if you can construct the same wall on wheels. I am based in New York and not familiar with construction. I will be having my own design studio soon. And was wondering how much it would cost for 2 wall on wheels with curtain rod. Exactly how you made it. I hope to speak to you soon. Thank you.
Hey, I’m using your plans to build a backdrop wall and used shiplap nail gunned directly to the studs and have the wooden shiplap just on one front face of the wall. My question for you is if you think I need to adjust the footing to ensure it’s not “top heavy” and tips over?
I would like to see how you incorporated the 2x2x1/2″ drywall panel for the sides.
Looking into building something like this with a mirror for my sister that is about 4’Wx 6’H. Do you have any suggestions?
These are some great tips! And you’ve got it right; it makes a massive difference. Choosing the right Shop Vac For Drywall Dust can be pretty tricky, but this guide made it a lot simpler! Thank you so much for writing; this was helpful!
I am using your design with some modifications to use as a staging photography wall for my furniture refinishing business. Mine will be 6’ tall by 8’ wide. Thanks for posting this design!
estimated material price?
What are the dimensions of this built? And how do you attach shorter backdrops for cakesmashes to this?
This is amazing! Thank you for the instructions. I wasn’t sure how long to make the mitered pieces and have been searching. You guys rock! Beautiful job!!!!
Any safety issues do you think? I would love to build something like this for our studio, but have to be 100% sure that won’t fall over one a kid who thinks it might be fun to lean on it. ideas?
Hi! Can I ask for more specifics on how you used the hooks to mount the rod?
Is it 8 foot by 10 foot?
What size is this wall once built?
Thanks for sharing such a wonderful post and I really liked it. The big wall looks amazing and especially I liked the swivel castors. Any equipment is only as good as the castor wheels attached to it. Hence, taking care of your castor wheel is must and you can never underestimate the importance of castor wheels in the daily activities, inside and outside the house.
What a clever Mr Tidbits! I’ll take him off your hands for a while anytime!
Perhaps you could hang long sheer curtains the length of the wall and have them pool on the floor or just touch the floor as you wish.
My suggestion for the flooring gap would be an extra thick throw carpet, what do you think? You could also use some plywood to butt up to your movable wall then add a regular thinkness throw carpet to it. How about lament flooring over the plywood? Your husband did a fantastic job with the wall, he is a hero!
Super idea!!Thanks so much for it..I think my husband can use it to build me a smaller “wall” that I can use when I do vendor shows,outside events,and even parties!Love it!❤️
Glad you like it Rosanna! That’s such a good idea and way to use a wall on wheels! I bet it would come in way handy for events and shows. But yes – go smaller or you are going to need one big trailer to haul it! 😉
Looks great, check out the Rockler workbench caster kit 4 pack to raise and lower the wall to get rid of crack.
Oooooo! Thanks for the suggestions! Checking it out!
It’s beautiful, but please, please get your guy some kneepads! Those pictures of him kneeling on the concrete physically hurt me to even look at. I hope that doesn’t come across as negative. He did a wonderful job and I know this will serve you well.
Hi Georgene! Your comment made me laugh. He totally has knee pads! Just chooses not to wear them unless he is working on flooring or something extensive. I don’t know how he does it. It hurts my knees just watching him too! Thanks for stopping by today and making me smile. 😉