This post may contain affiliate links, which means I get a small percentage of the sale at no extra cost to you. I only recommend items I love and have had a positive experience with. Thank you!
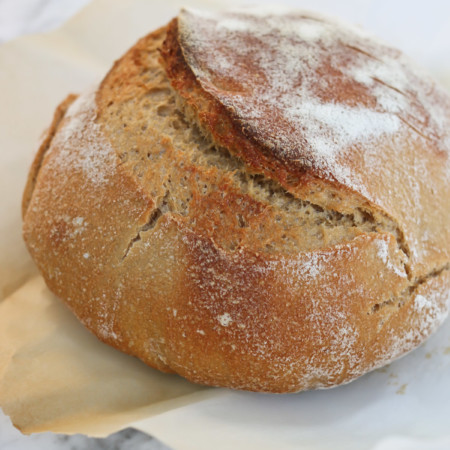
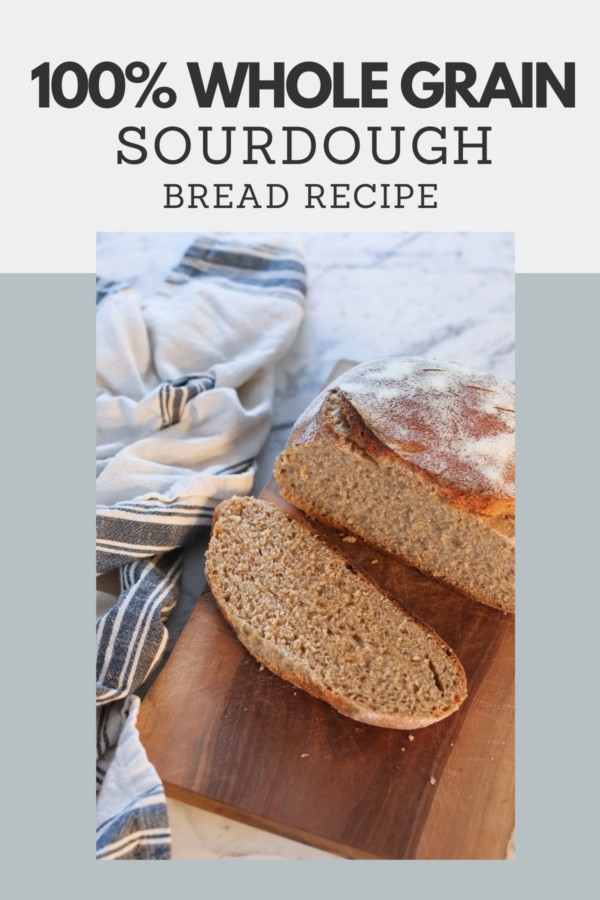
My go-to recipe for making 100% whole grain sourdough bread, artisan style. This bread is hearty, filling, gut friendly and incredibly nutritious.

Homemade whole grain sourdough bread is going to rock your world. Trust me on this – it’s amazing!
Don’t be intimidated. It doesn’t matter if you’re a bread-making pro or a new baker, you can absolutely bake the artisan loaf of your dreams. I use a simplified, no fuss recipe that I’m excited to share with you today.

We’ll start with freshly milled hard white wheat to give our loaf incredible flavor and texture (you can also use hard red wheat). Then I’ll walk you through the step-by-step process of making a gorgeous loaf of whole wheat sourdough bread. You’ll be enjoying nutritious, hearty and delicious bread worthy of a bakery!

Table of contents
- Watch the Video
- Watch Me Make This Bread on YouTube !
- Benefits of Sour Dough Bread
- Benefits of Freshly Milled Whole Grains
- Whole Grain Sourdough Bread Printable Recipe Card
- Where to Buy Ingredients and Supplies
- Ingredients
- How to Make Whole Grain Sourdough Bread
- Tips for Making Whole Grain Sourdough Bread
- FAQ’s
- Want More Recipes?
Watch the Video
More ways to watch
Watch Me Make This Bread on YouTube!
Benefits of Sour Dough Bread
Sour dough bread is made from what is called “fermented dough”. That just means that we use a natural form of yeast to help the dough rise and develop flavor and texture.

Traditional whole wheat bread will use dry baker’s yeast for this process, but for sourdough bread we use a sourdough starter made of wild yeasts and lactic bacteria. Sounds fancy, but it’s really just a simple mixture of water and flour that have been allowed to ferment into a bubbly, live mixture.
The fermentation process for sour dough bread requires more time to rise or proof, but it rewards you with fantastic results:
- Better Flavor – Fermentation puts the “sour” in your dough, literally. It adds a nice tangy kick that you don’t get with regular bread. So good!
- Longer Shelf Life – Compared to regular yeast bread, bread made from fermented dough contains natural acids that naturally preserve the bread.
- Better Texture – The fermentation process allows the gluten to develop into a chewy, airy, dough with great crust and crumb texture after baking.
- Easy to Digest – Complex starches and gluten get broken down during fermentation, making it easier to digest. Great for those with gluten sensitivities!
Benefits of Freshly Milled Whole Grains
I love me some freshly ground or milled whole wheat flour. Whenever possible, I like to grind my own wheat just before baking bread for the freshest, most delicious flavor possible.

As a bonus, freshly milled whole grains, like the hard white wheat used in this recipe, are packed with nutrients and health benefits. A much better choice than store-bought refined flours.
- Nutrient Dense – Freshly milled whole grains contain protein, fiber, vitamin E, complex carbohydrates, B vitamins, healthy fats, antioxidants and minerals like iron, magnesium and zinc.
- Free from Preservatives – You can rest assured you’re not getting added preservative chemicals or oils when you mill or grind your own flour.
- Great for Digestion – Freshly milled flour contains all parts of the wheat kernel, unlike processed flours that remove the fiber-rich bran and germ. That means you get a bread flour that is packed with fiber to keep your gut healthy and happy.
- Heart Healthy – Antioxidants and fiber can help lower cholesterol for a healthy heart.
- Blood Sugar Control – With a lower glycemic index than refined flour, freshly milled whole grain flour is a great option for anyone trying to watch their sugar intake.
- Amazing Flavor – Freshly milled flours, like the one used in this whole grain sourdough bread, just taste better. Slightly nutty and fresh as can be. Much better than the store-bought version!
Whole Grain Sourdough Bread Printable Recipe Card
100% Whole Grain Sourdough Bread
Ingredients
- 475 grams freshly milled whole wheat flour (hard red or hard white wheat both work for this recipe)
- 400 grams non chlorinated water
- 100 grams active and bubbly sourdough starter
- 15 grams of salt
Instructions
Preparation
- Make sure you have an active and bubbly sourdough starter. This means it is at its peak rise after feeding. Depending on the temperature of your environment, it could be anywhere from 4-8 hours before you mix up your bread.
Making the Dough
- Place a large bowl on your scale and measure out the flour and water. Mix these ingredients until just combined. You may use your hands or a sourdough whisk, just try to avoid over mixing at this point.
- Cover and let the dough rest and fully hydrate (autolyse) for 30 minutes to an hour.
- Weigh your salt and sourdough starter, and add this to the dough, mixing thoroughly with your hands. Stretch and fold the dough at least 4 times. Let rest another 30 minutes.
Stretch and Fold Process
- Complete at least 6 stretch and folds before allowing your dough to bulk ferment. You can choose to do this about 20 minutes apart, or 15 minutes apart for the first 3 stretch and folds, followed by 3 more stretch and folds every 30 minutes. As you continue this process, you will notice the dough getting more stretchy and pliable each time.
First Bulk Fermentation Process
- After the completion of all 6 stretch and folds, cover your dough with plastic wrap, a damp towel or reusable bowl covers, and allow to rise and ferment in a warm place until about doubled in size. This may take up to 8 hours, or less in a warm environment. Watch it carefully so it does not over-ferment and begin to collapse.
Shaping Your Dough
- Lightly flour or wet your surface and scrape dough onto your prepared surface. Stretch the edges out until you have formed a square-ish shape with your dough. Be careful not to overwork the dough and release all the air from the stretch and fold process.
- Fold in your dough from top to bottom and then from side to side. Flip over and proceed to form your dough into a ball and spinning or scraping it gently against the countertop to seal the folds.
- Let it sit for a bit while you prepare your bowl or banneton basket. To do this, flour the linen liner or a tea towel, and press the flour into the fibers of the cloth. You can use whole wheat flour for this, but I like to use all-purpose flour or rice flour, as it works a little better to help it not stick to the dough. If using a tea towel, place it inside a bowl, suited for the shape of bread you are making.
- Flip your dough upside down into the prepared bowl. Pinch together any seams. Cover with plastic wrap, insert inside a plastic grocery bag, or cover with the bowl covers.
Second Bulk Fermentation Process
- Let your covered dough sit inside the fridge for up to 10 -14 hours in the refrigerator. You will know when it is proofed sufficiently when you press in with your finger and it slowly bounces back.
Baking Your Sourdough Bread
- Place a covered dutch oven into your oven and allow it to preheat together at 475 degrees Fahrenheit. It is best to let it heat up for about 45 minutes to an hour. This gets it very hot and ready to help your bread rise quickly.
- When you are ready to bake, take your dough out of the fridge and flip over onto some parchment paper. Score with a razor. Do at least one deep score, but feel free to get creative with shallow scoring for more detailed designs. You can also dust it with more flour previous to scoring to have your designs be more prominent.
- Remove your dutch oven from your oven, and carefully place dough with parchment paper inside, and cover with the lid.
- Bake for 25 minutes, covered at 475 degrees.
- Remove the lid, lower temperature to 425 degrees, and bake for another 15 minutes.
- Once done baking, remove bread and allow to cool completely before slicing into the bread.
Where to Buy Ingredients and Supplies
If you’re in need of some excellent wheat, I recommend these organic hard white wheat berries from Azure Standard or this Grand Teton brand from Amazon. Both are fabulous!
To make your bread making simple, I’ve grouped these ingredients, plus my favorite equipment and supplies together over on my Moonsift bread making supplies page. Check it out for links and full details!

Ingredients
Here is what you’ll need to get started on your delicious sourdough loaf. Please note that these measurements are weighed in grams, rather than measured with cups. Weighing the ingredients allows you get more accurate and consistent results, so grab that food scale.
- 475 grams freshly milled whole wheat flour (hard red or hard white wheat both work for this recipe)
- 400 grams non chlorinated water
- 100 grams active and bubbly sourdough starter
- 15 grams salt
How to Make Whole Grain Sourdough Bread
Preparation
Make sure you have an active and bubbly sourdough starter. This means it is at its peak rise after feeding. Depending on the temperature of your environment, it could be anywhere from 4-8 hours before you mix up your bread.
Making the Dough
Place a large bowl on your scale and measure out the flour, water and starter. Mix these ingredients until just combined. You may use your hands, just try to avoid over mixing at this point.


Cover and let the dough rest and fully hydrate (autolyse) for 30 minutes to an hour.

Weigh your salt, and add this to the dough, mixing thoroughly with your hands.


Stretch and fold the dough at least 4 times. Let rest another 30 minutes. Wet hands help the dough not stick to your hands.
Stretch and Fold Process
Complete at least 6 stretch and folds before allowing your dough to bulk ferment. You can choose to do this about 20 minutes apart, or 15 minutes apart for the first 3 stretch and folds, followed by 3 more stretch and folds every 30 minutes. As you continue this process, you will notice the dough getting more stretchy and pliable each time.


Whole grain dough is not as stretchy or glutenous as a loaf made with all-purpose flour but trust the process and continue forcing the dough to stretch as much as possible.
First Bulk Fermentation Process
After the completion of all 6 stretch and folds, cover your dough with plastic wrap, a damp towel or reusable bowl covers, and allow to rise and ferment in a warm place until about doubled in size. This may take up to 8 hours, but I like to speed up the process a bit by placing it in my oven with only the light on. Watch it carefully so it does not over-ferment and begin to collapse. In the oven with the light, it usually takes 5-6 hours for me.


Shaping Your Dough
Lightly flour or wet your surface and scrape dough onto your prepared surface. Stretch the edges out until you have formed a square with your dough. Be careful not to overwork the dough and release all the air from the stretch and fold process.


Fold in your dough from top to bottom and then from side to side. Flip over and proceed to form your dough into a ball and spinning or scraping it gently against the countertop to seal the folds.


Let it sit for a bit while you prepare your bowl or banneton basket. To do this, flour the linen liner or a tea towel, and press the flour into the fibers of the cloth. You can use whole wheat flour for this, but I like to use all-purpose as it works a little better to help it not stick to the dough. If using a floured tea towel, place it inside a bowl, suited for the shape of bread you are making.

Flip your dough upside down into the prepared bowl. Pinch together any seams. Cover with plastic wrap, insert inside a plastic grocery bag, or cover with the bowl covers.


Second Bulk Fermentation Process
Let your covered dough sit inside the fridge for up to 10 -14 hours in the refrigerator. You will know when it is proofed sufficiently when you press in with your finger and it slowly bounces back.
Baking Your Sourdough Bread
Place a covered dutch oven into your oven and allow it to preheat together at 500 degrees Fahrenheit. It is best to let it heat up for about 45 minutes to an hour. This gets it very hot and ready to help your bread rise quickly.
When you are ready to bake, take your dough out of the fridge and flip over onto some parchment paper. Score with a razor. Do at least one deep score, but feel free to get creative with shallow scoring for more detailed designs. You can also dust it with more flour previous to scoring to have your designs be more prominent.


Remove your dutch oven from your oven, and carefully place dough with parchment paper inside, and cover with the lid. You can add a couple of ice cubes underneath the parchment paper to help create steam, which can help the bread rise up better.

Bake for 25 minutes, covered at 500 degrees.
Remove the lid, lower temperature to 425 degrees, and bake for another 15 minutes.
Once done baking, remove bread and allow to cool completely before slicing into the bread.

Tips for Making Whole Grain Sourdough Bread
- The fresher your flour is from the mill the better. That’s why I love to grind my own flour and prefer to grind it to a very fine flour.
- If you want to double this recipe, I suggest keeping the ingredients in separate bowls, and just making them at the same time. You want to ensure each loaf has the appropriate measurements, which you can’t always guarantee if you just cut them in half.
- This recipe makes 1 loaf, equal to approximately 10 servings. If you won’t finish it within a week, slice it up and freeze individual slices for some quick delicious toast.
FAQ’s
I prefer the lightness that the hard white wheat gives to this bread. It turns out great every time! Ancient grains like kamut, spelt and einkorn behave very differently and need a different recipe.
You can use hard red wheat in this recipe, but you’ll sacrifice a bit of the light texture for it. For other whole grain varieties, I will have other recipes with different measurements and processes that suit that grain.
I have found storing the bread in beeswax lined linen bags to be the best way to keep it fresher longer.
Want More Recipes?
Now, go cut yourself a nice slice of this lovely bread. You’ve earned it!

I hope you enjoyed this whole wheat sourdough bread recipe. Once you’ve done it a couple times it will be your new favorite way to make bread. (At least, it is for me. I’m a bit obsessed with sour dough!)
If you want to try some other great recipes, check out:
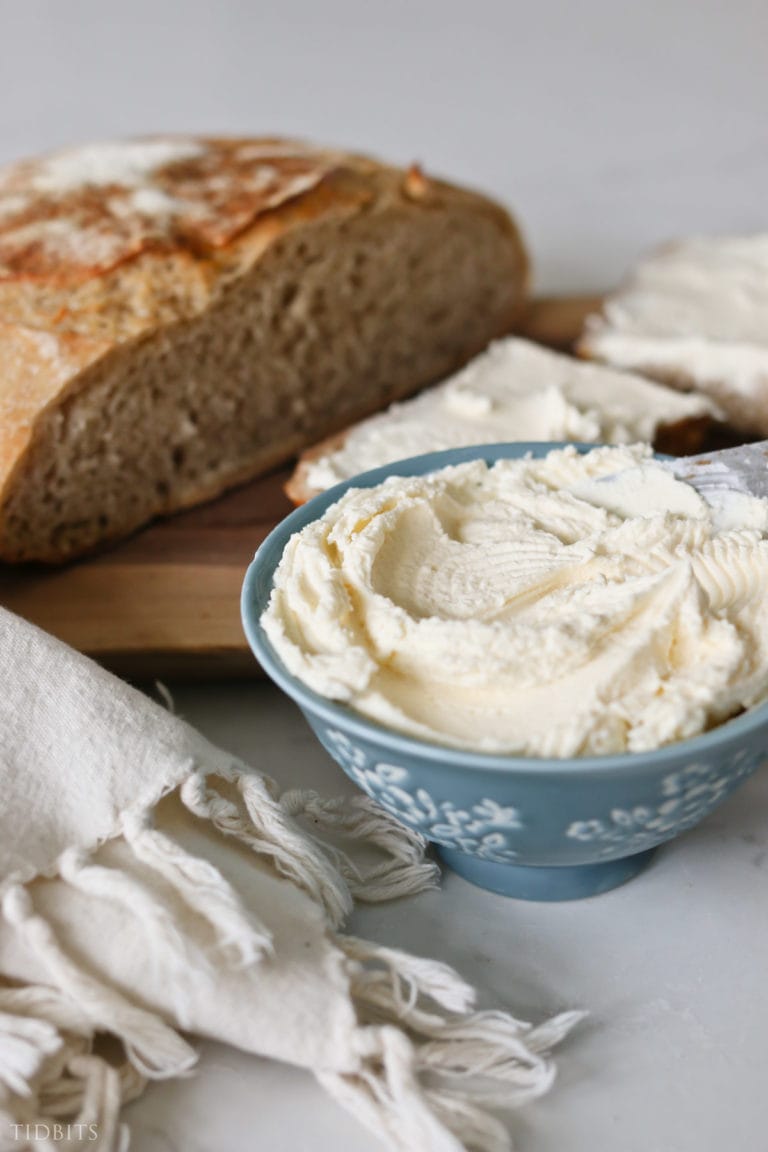
- How to Make Cream Cheese with Raw Milk
- Multigrain Pancake Mix
- Easy and Healthy Lavender Berry Jam
- Healthy Chocolate Chip Garbanzo Bean Cookies
- Sarsaparilla Root Benefits and Tea Recipe
- Fresh Pomegranate Salsa Recipe
- Healthy Fresh Peach Pie Recipe
- The Best Tomato Soup with Fresh Tomatoes
- 100% Whole Grain Einkorn Sourdough Bread Simplified
- Healthy Whole Wheat Cinnamon Rolls


I’ve read other posts of yours about using sunflower lecithin to bread. Can I add to my sourdough recipe to help extend the shelf life? How much should I use per 1060 grams of flour? I use a combination of organic bread flour, einkorn and spelt.
I was wondering about adding the sunflower lecithin to my fresh milled wheat sourdough recipe as well.
That would be a fun experiment to try! I’m sure it would only help, and do no harm. I haven’t personally done that but now I want to. Thanks for the thought!