This post may contain affiliate links, which means I get a small percentage of the sale at no extra cost to you. I only recommend items I love and have had a positive experience with. Thank you!
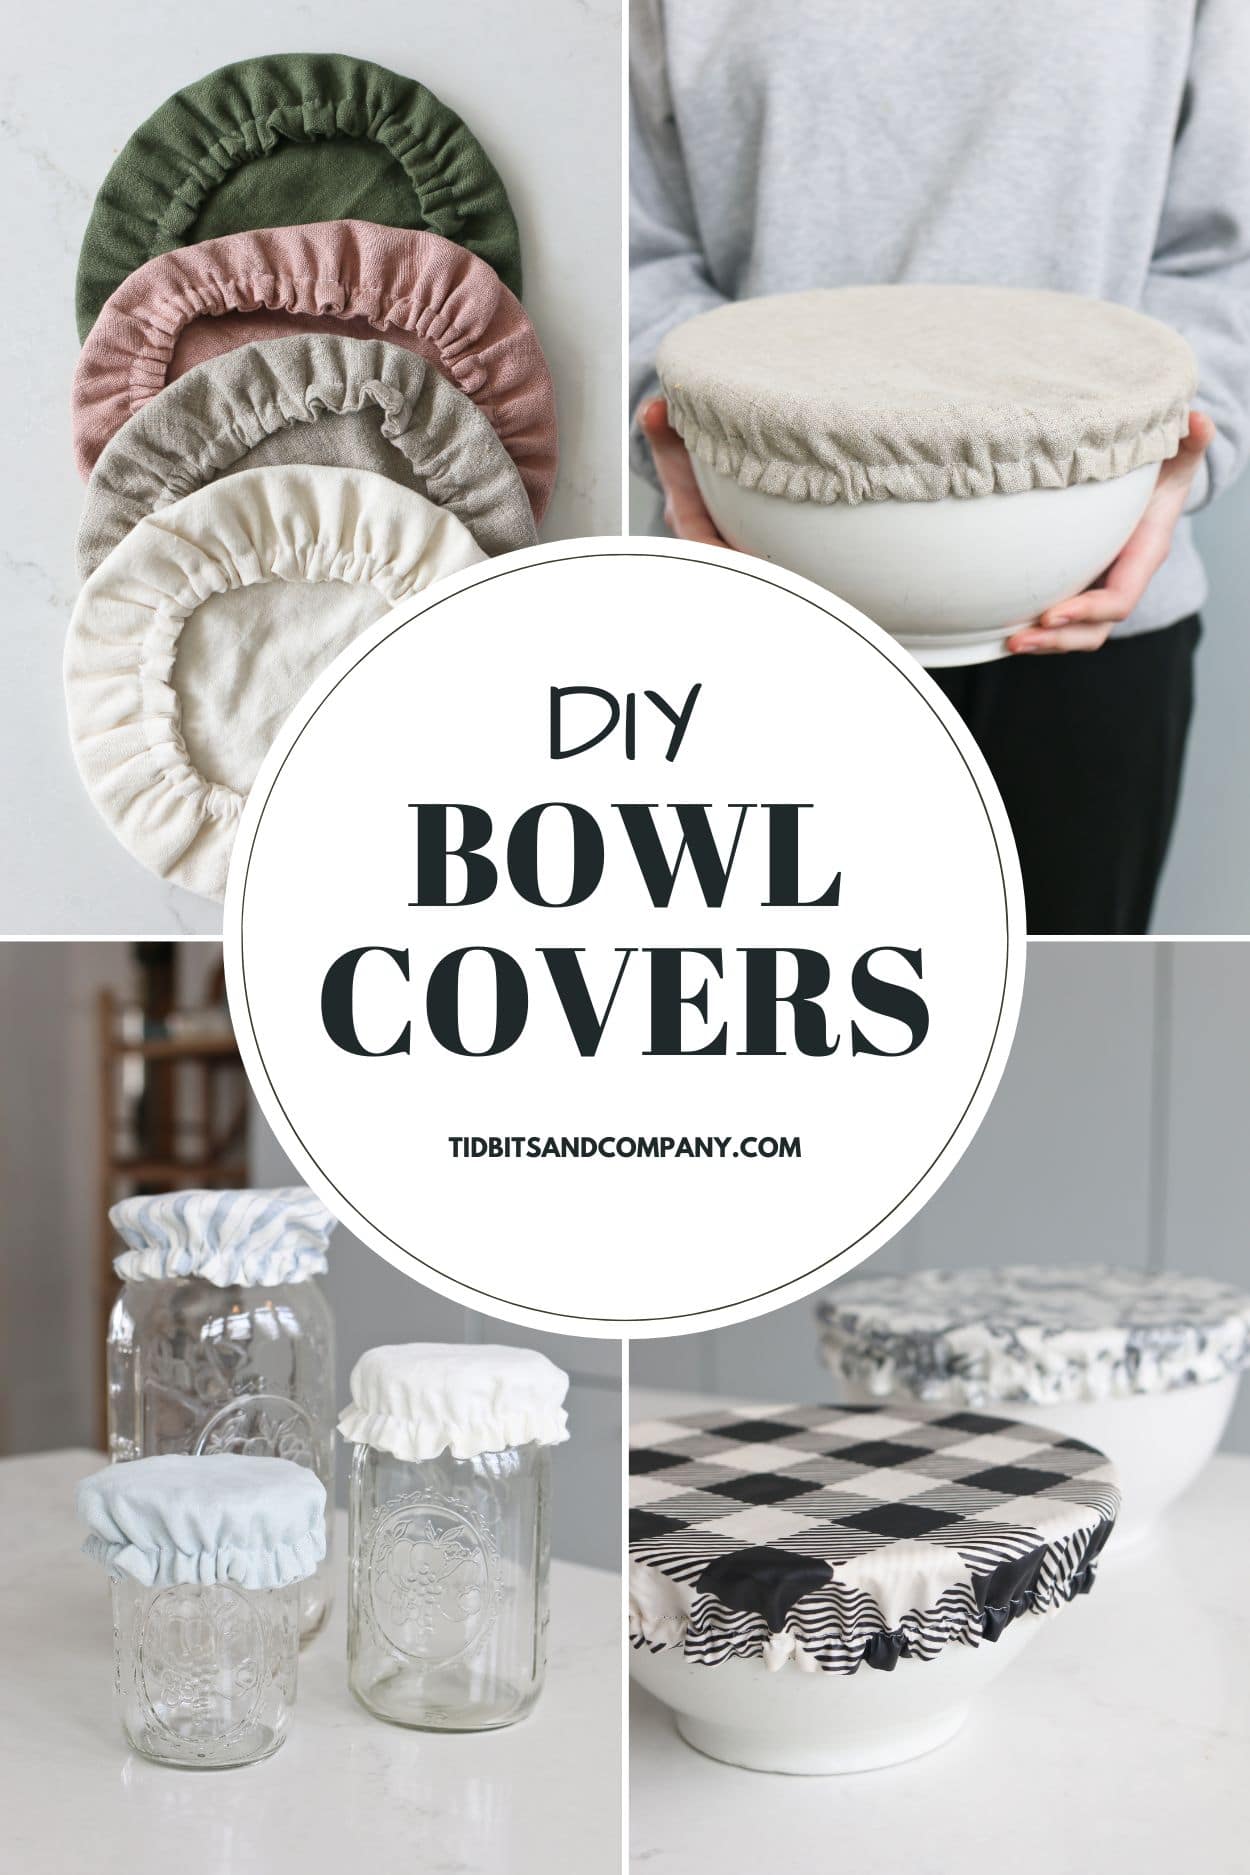
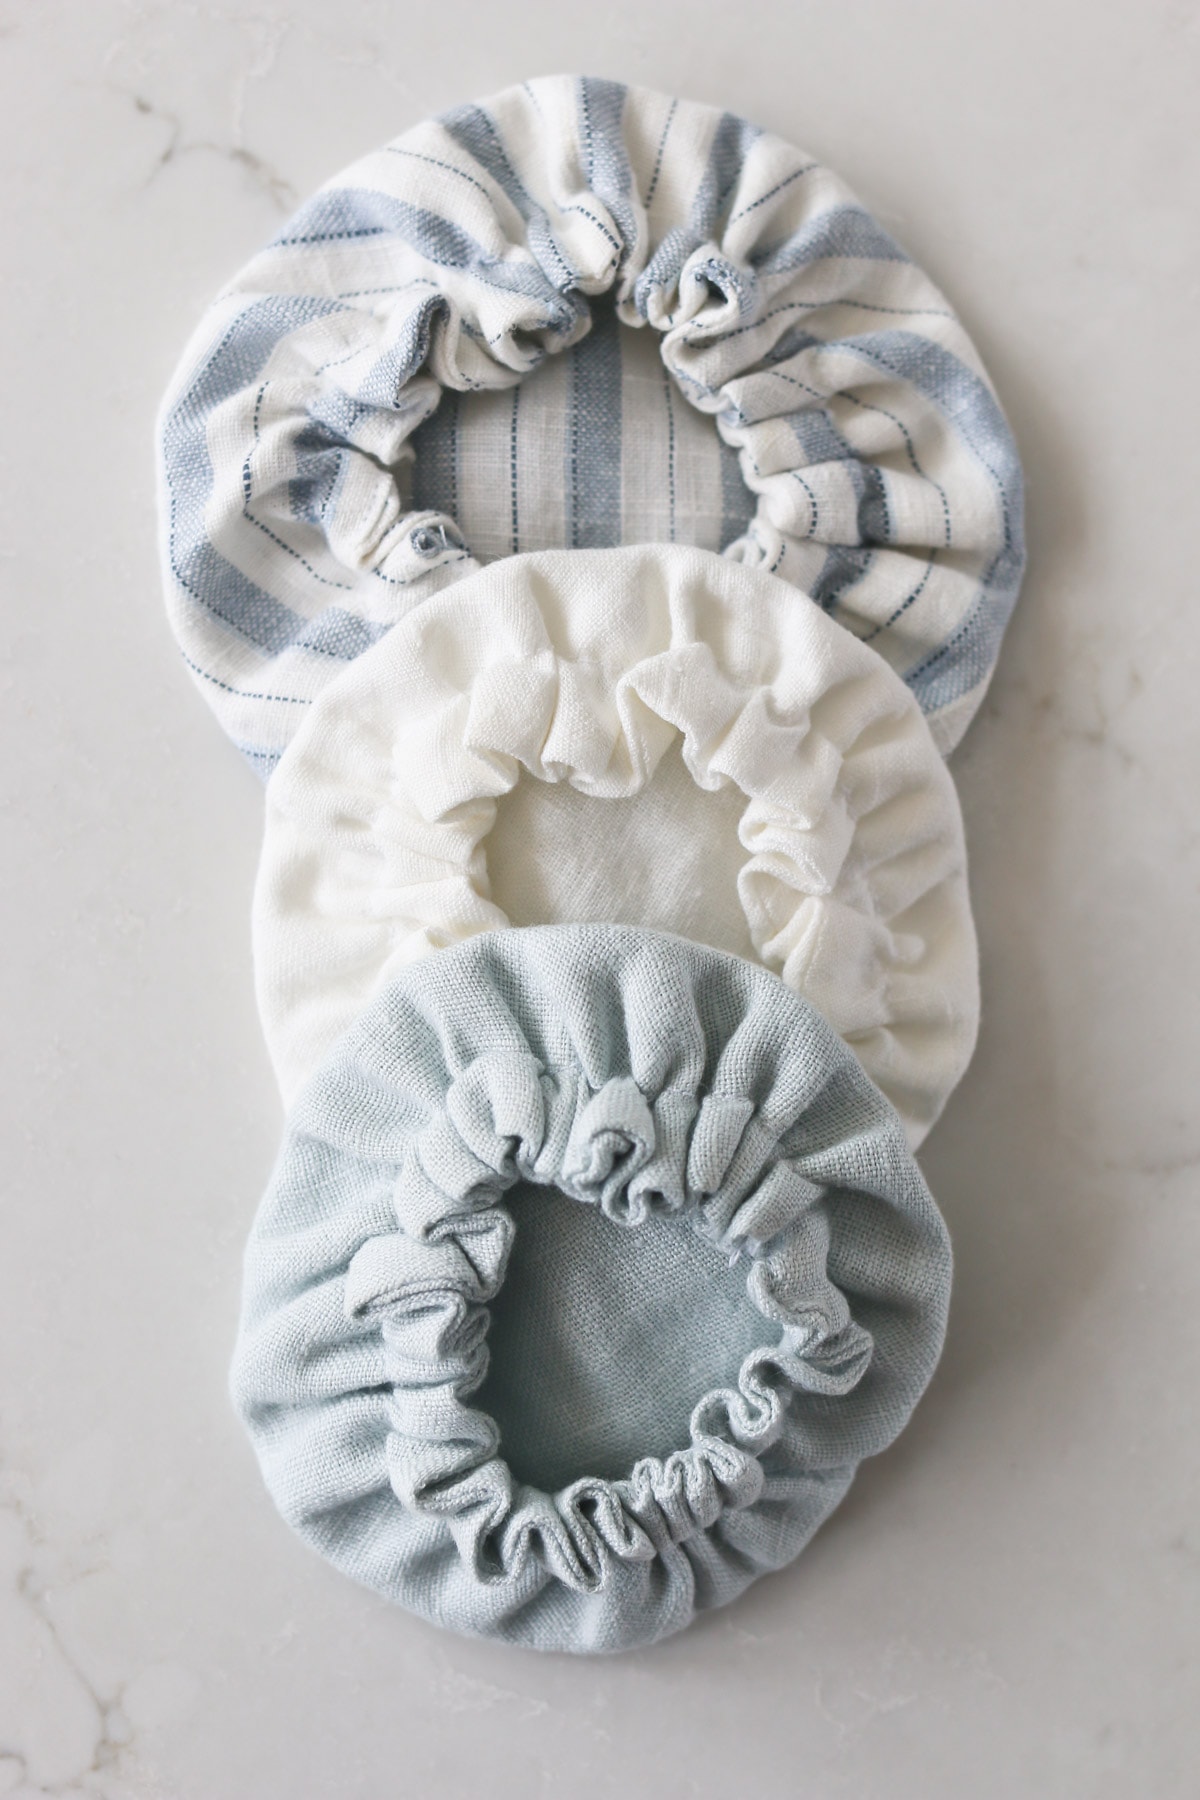
Make perfectly-fitting reusable bowl covers for your favorite dishes. You’ll love the convenience and cost savings from this simple sewing project!
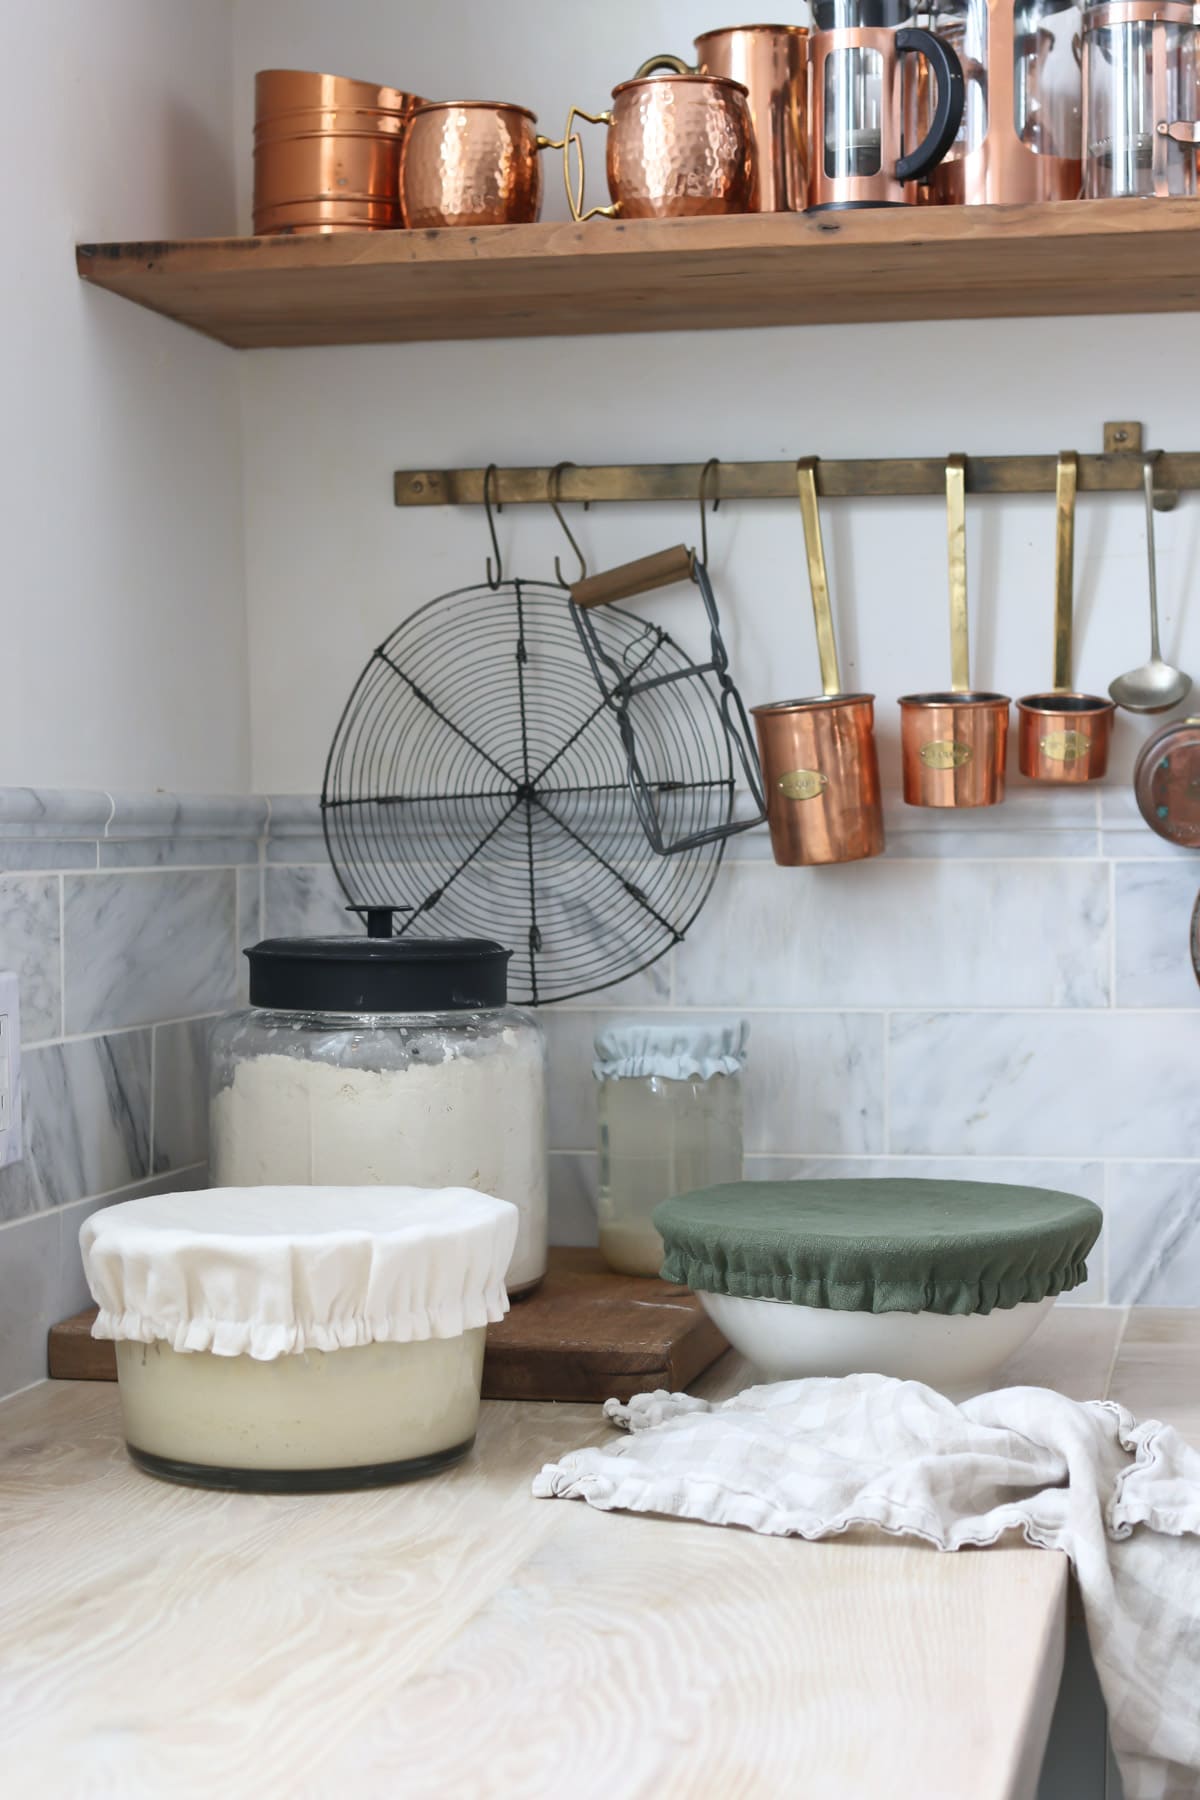
I don’t know about you, but there is always a bowl out on my kitchen counter or in my butler’s pantry.
I’m a lover and maker of homemade bread. Bowls of bread dough or sour dough starter are just a part of my everyday life.
I also have large serving bowls with no lids and bowls that used to have lids but no longer do. All of these bowls got me thinking – it would be so nice to have reusable fabric bowl covers! Especially ones that were custom made to fit my dishes, my needs and my personal style.
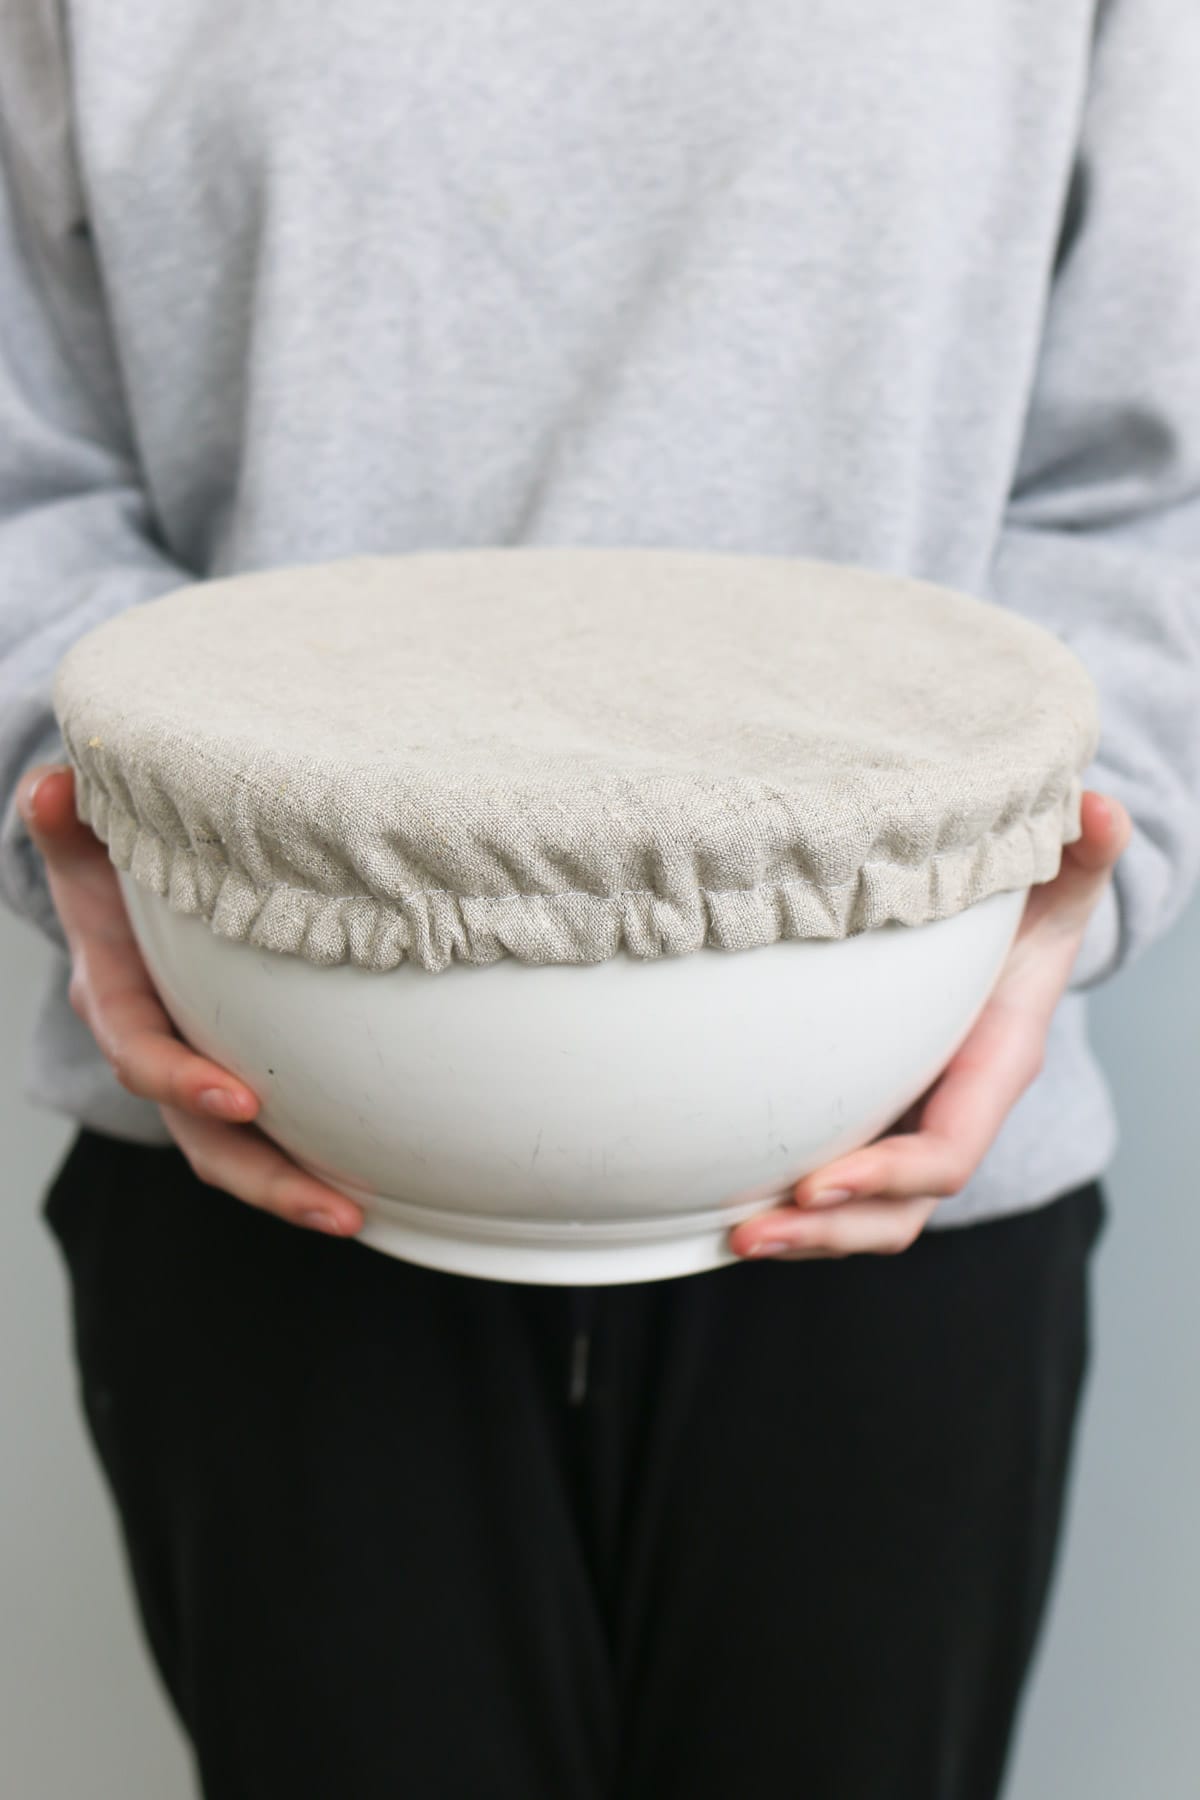
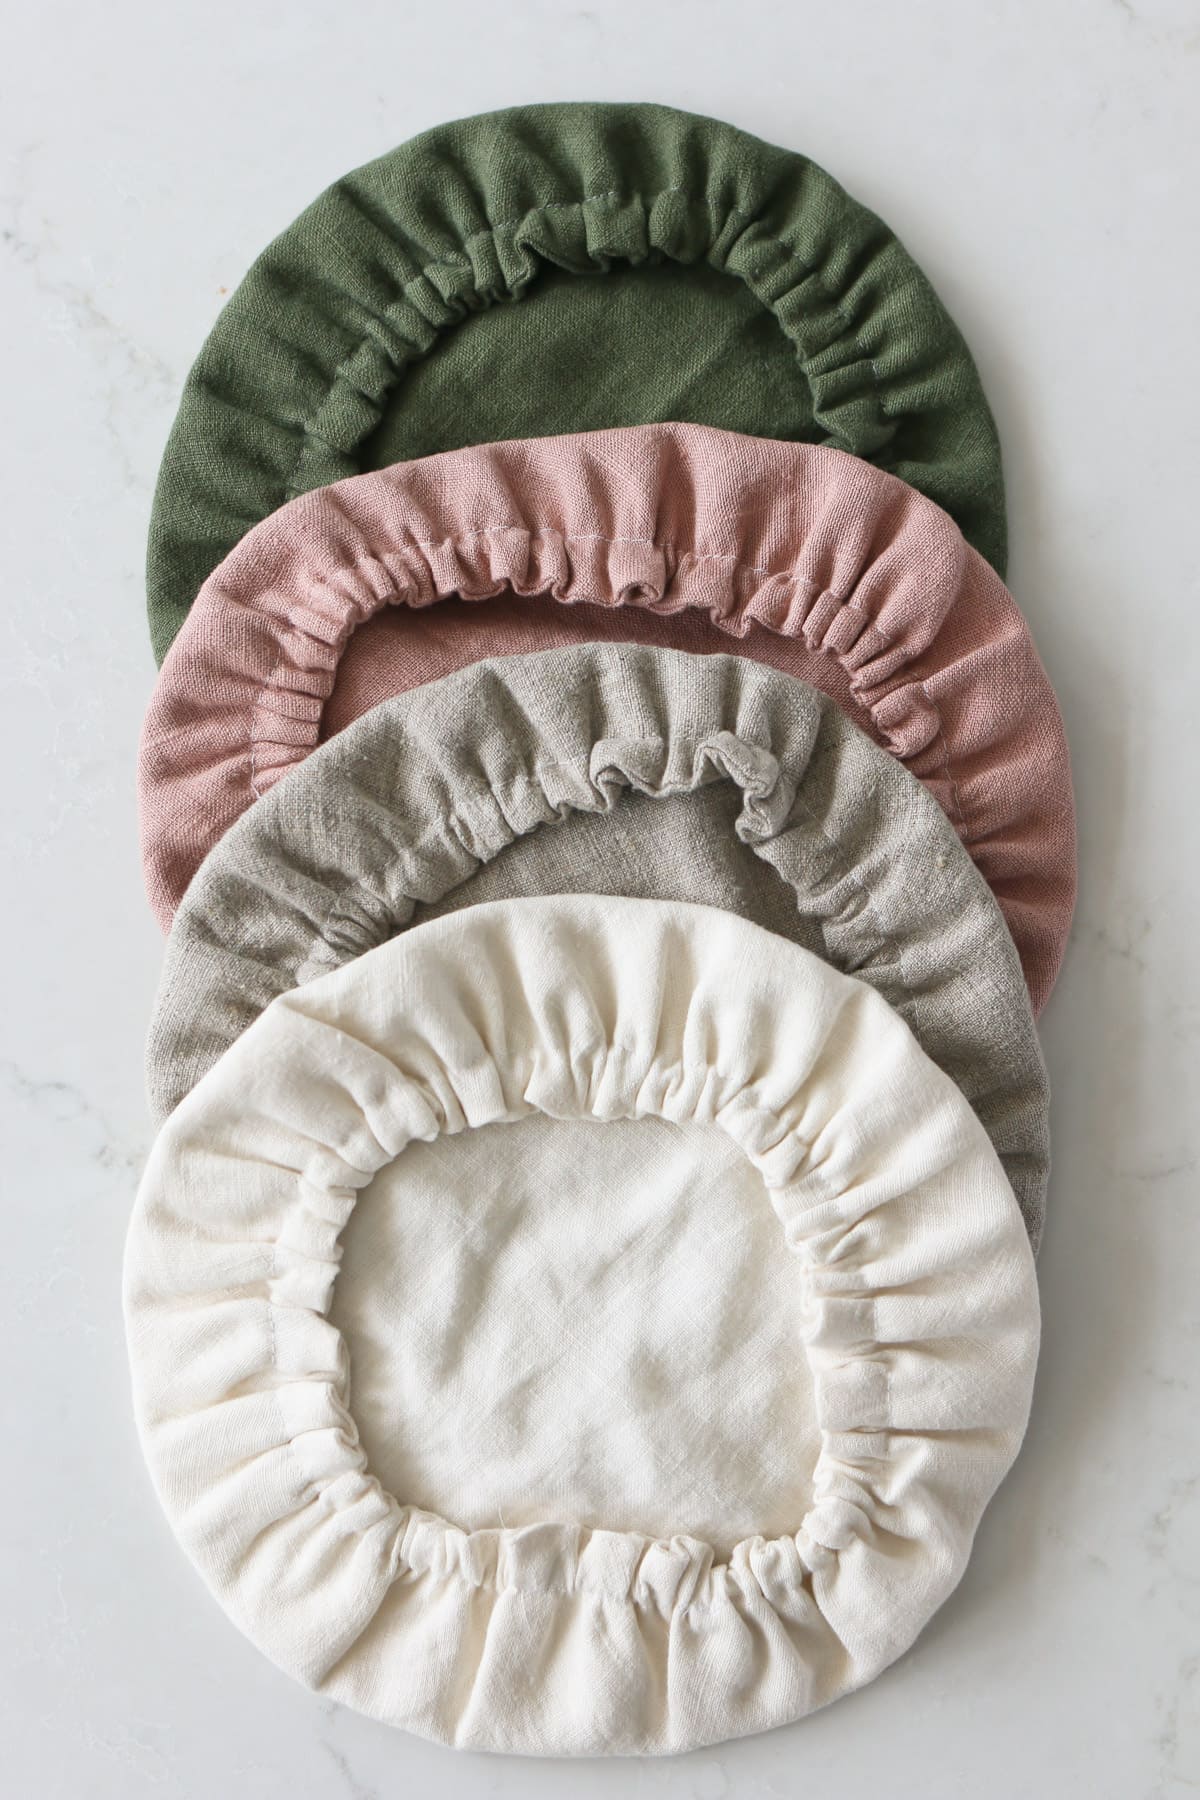
So, I made myself some reusable fabric bowl covers and I gotta tell you the truth. I love them! They are so practical, so cute and so easy to make!
I’ll walk you through my process for making these bowl covers step-by-step. If you prefer to watch my video tutorial, just click on the YouTube button below.
More ways to watch
Find this post on YouTube!
Let’s get started!
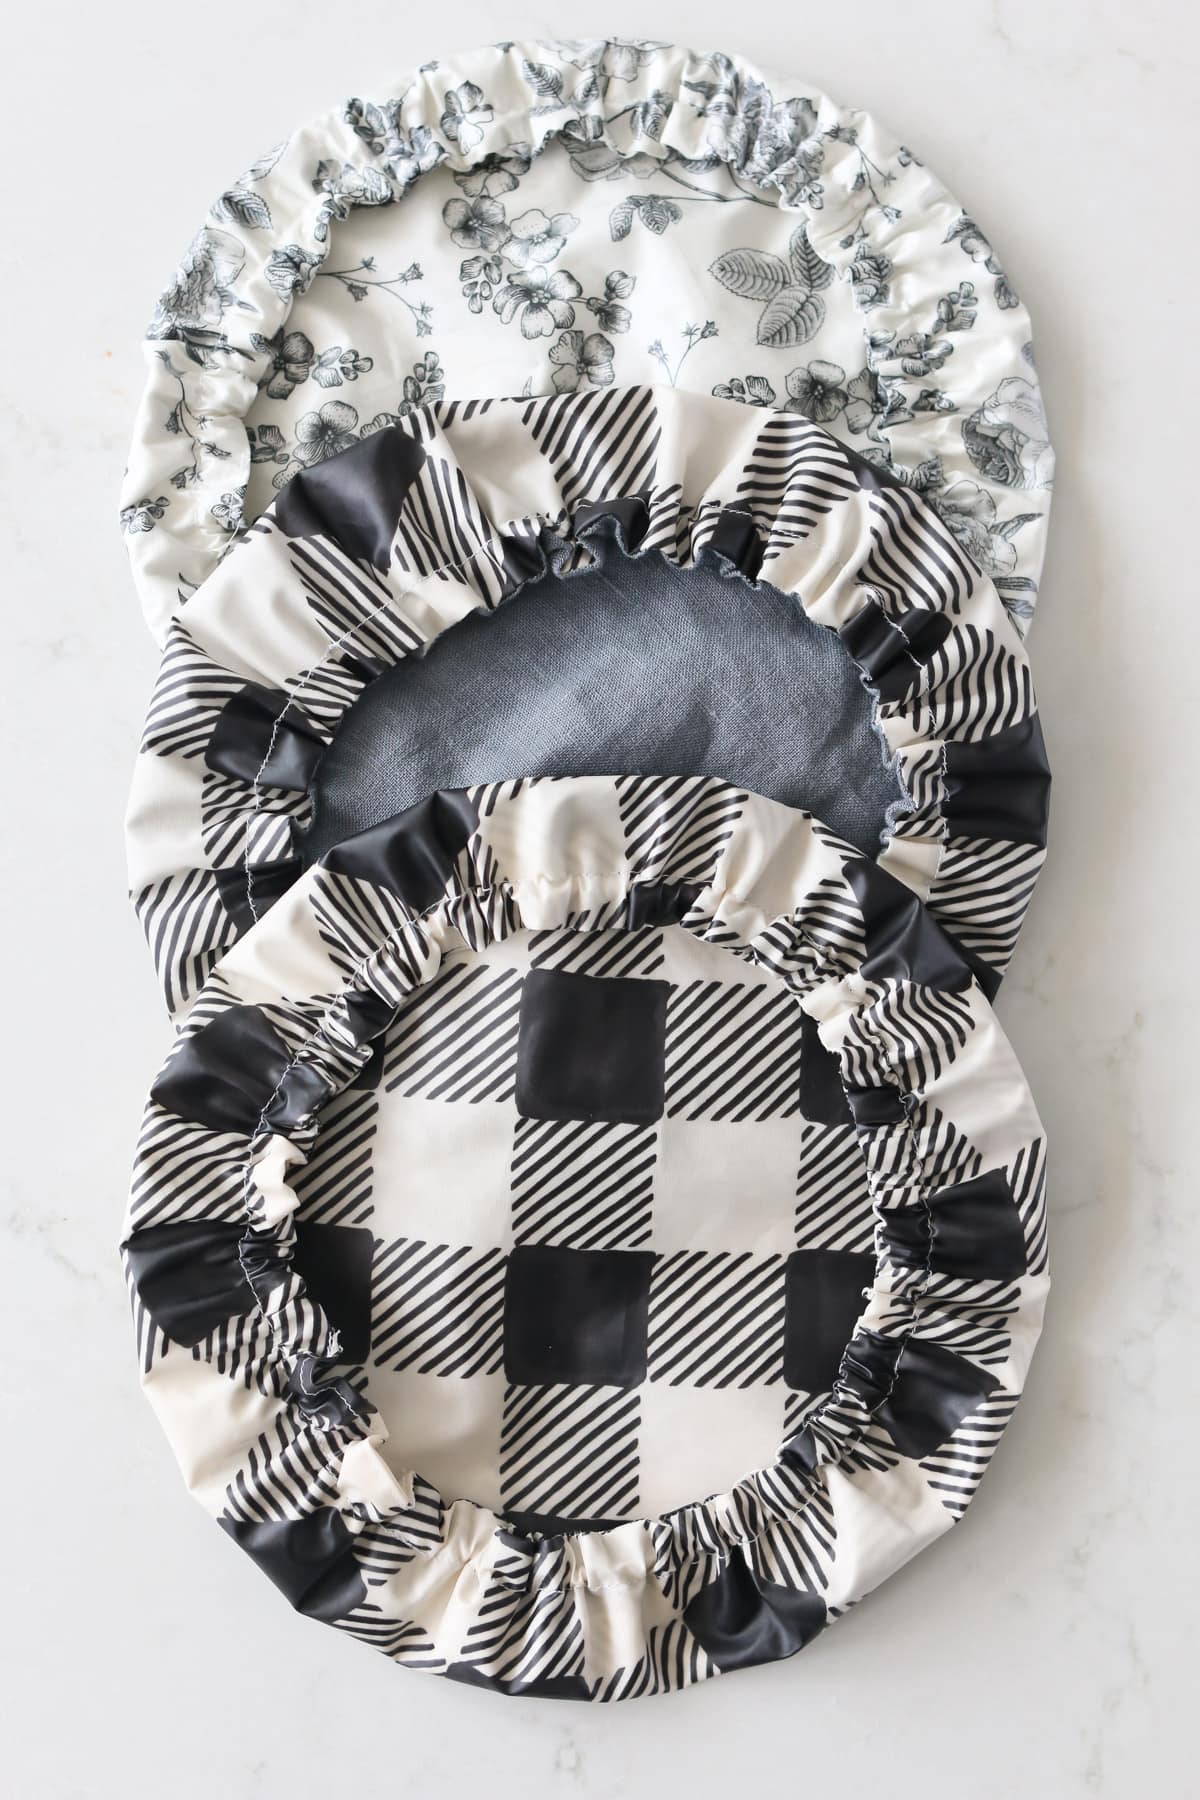
Table of contents
- Find this post on YouTube!
- What Makes Reusable Bowl Covers so Great?
- The Best Materials for Making Reusable Bowl Covers
- Supplies for Making Reusable Bowl Covers
- How to Sew Reusable Bowl Covers Step-by-Step
- Step 1: Prepare Your Fabric
- Step 2: Make Your Pattern
- Step 3: Cut and Pin
- Step 4: Sew the Two Pieces Together
- Step 5: Notch and Press the Seam Open
- Step 6: Turn the Cover Inside Out and Press
- Step 7: Sew the Elastic Casing
- Step 7: Add the Elastic
- Step 8: Final Elastic Measurement and Stitching
- Step 9: Stitch the Opening Shut
- Step 10: Press to Finish
- How to Clean Reusable Bowl Covers
- More Sewing and DIY Projects
What Makes Reusable Bowl Covers so Great?
Reusable fabric bowl covers are a fantastic alternative to lids, plastic wrap, aluminum foil or towels. I love them because:
- They stay in place! No slipping off like towels or getting stuck to itself like plastic wrap.
- They save more money over time vs buying aluminum foil or single-use plastic wrap.
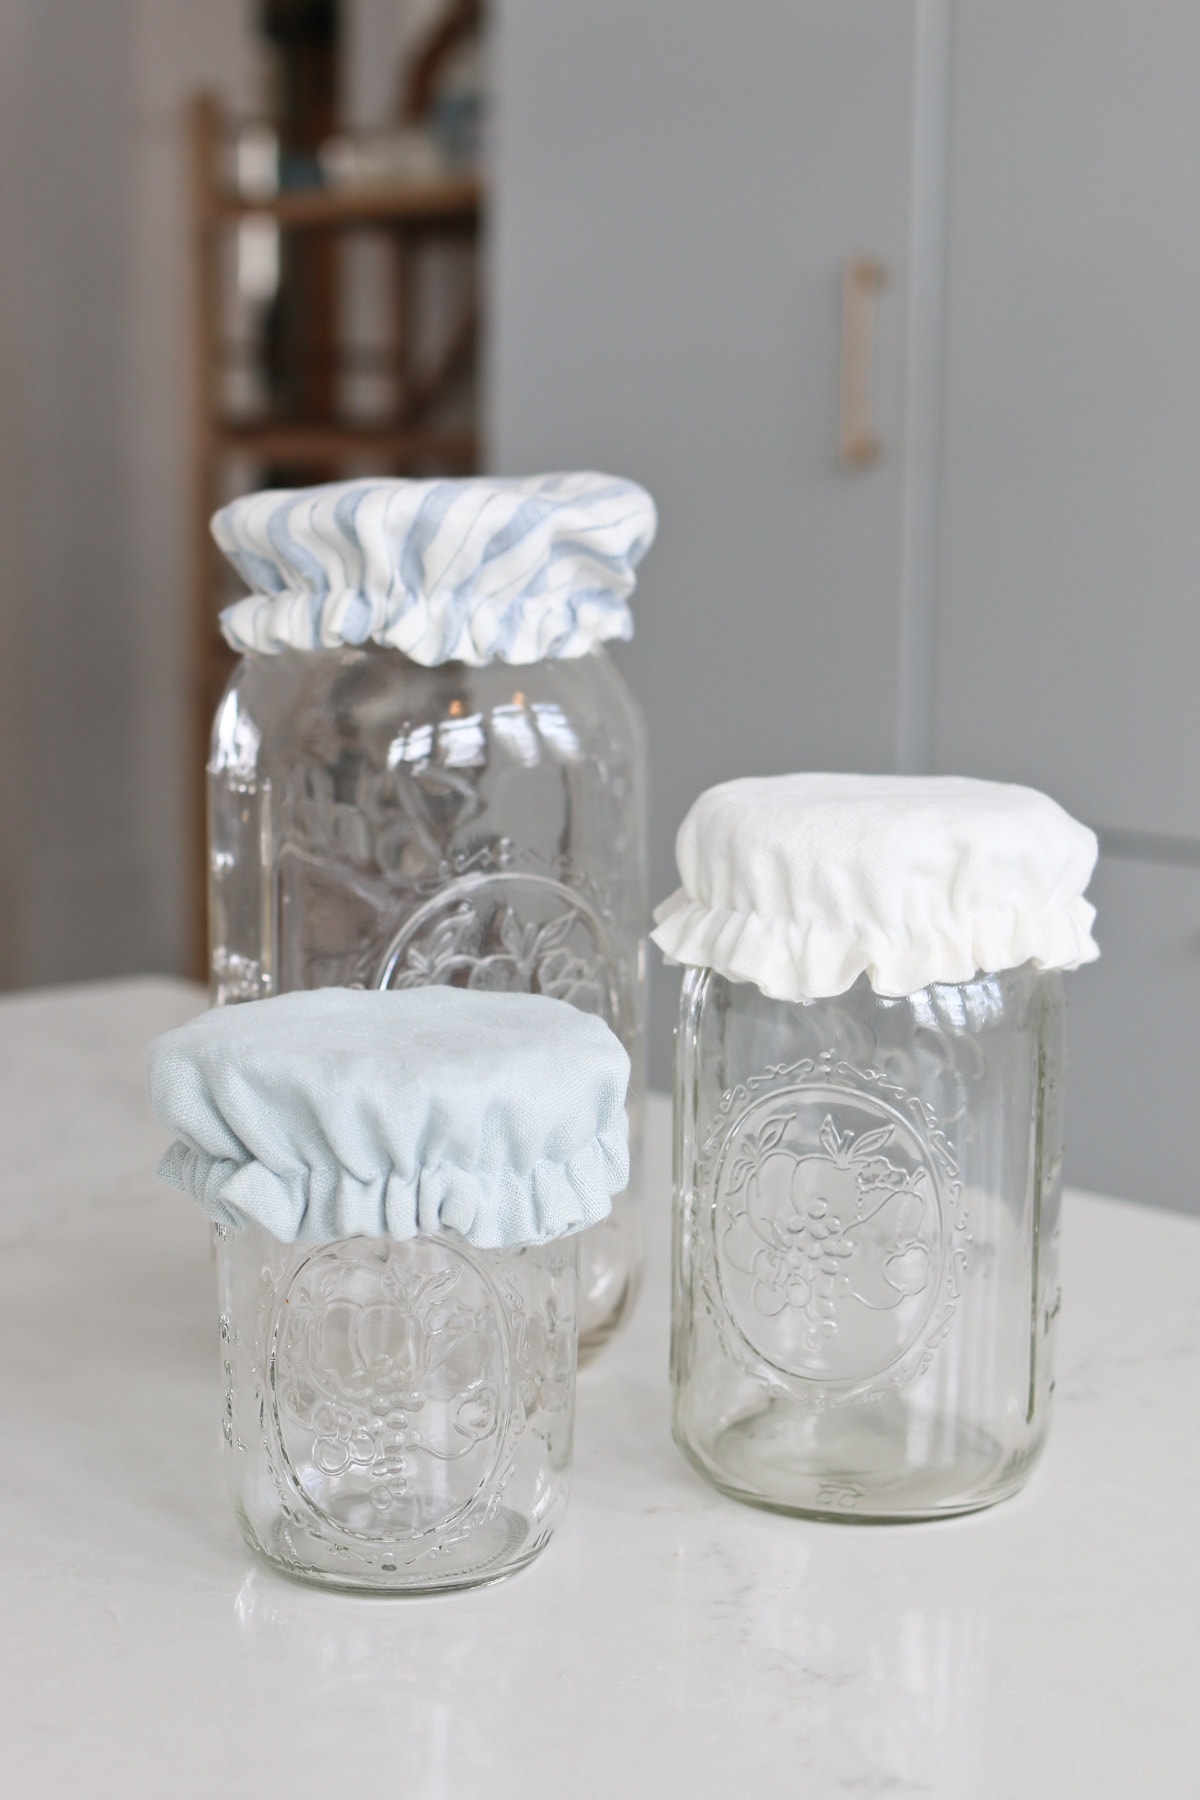
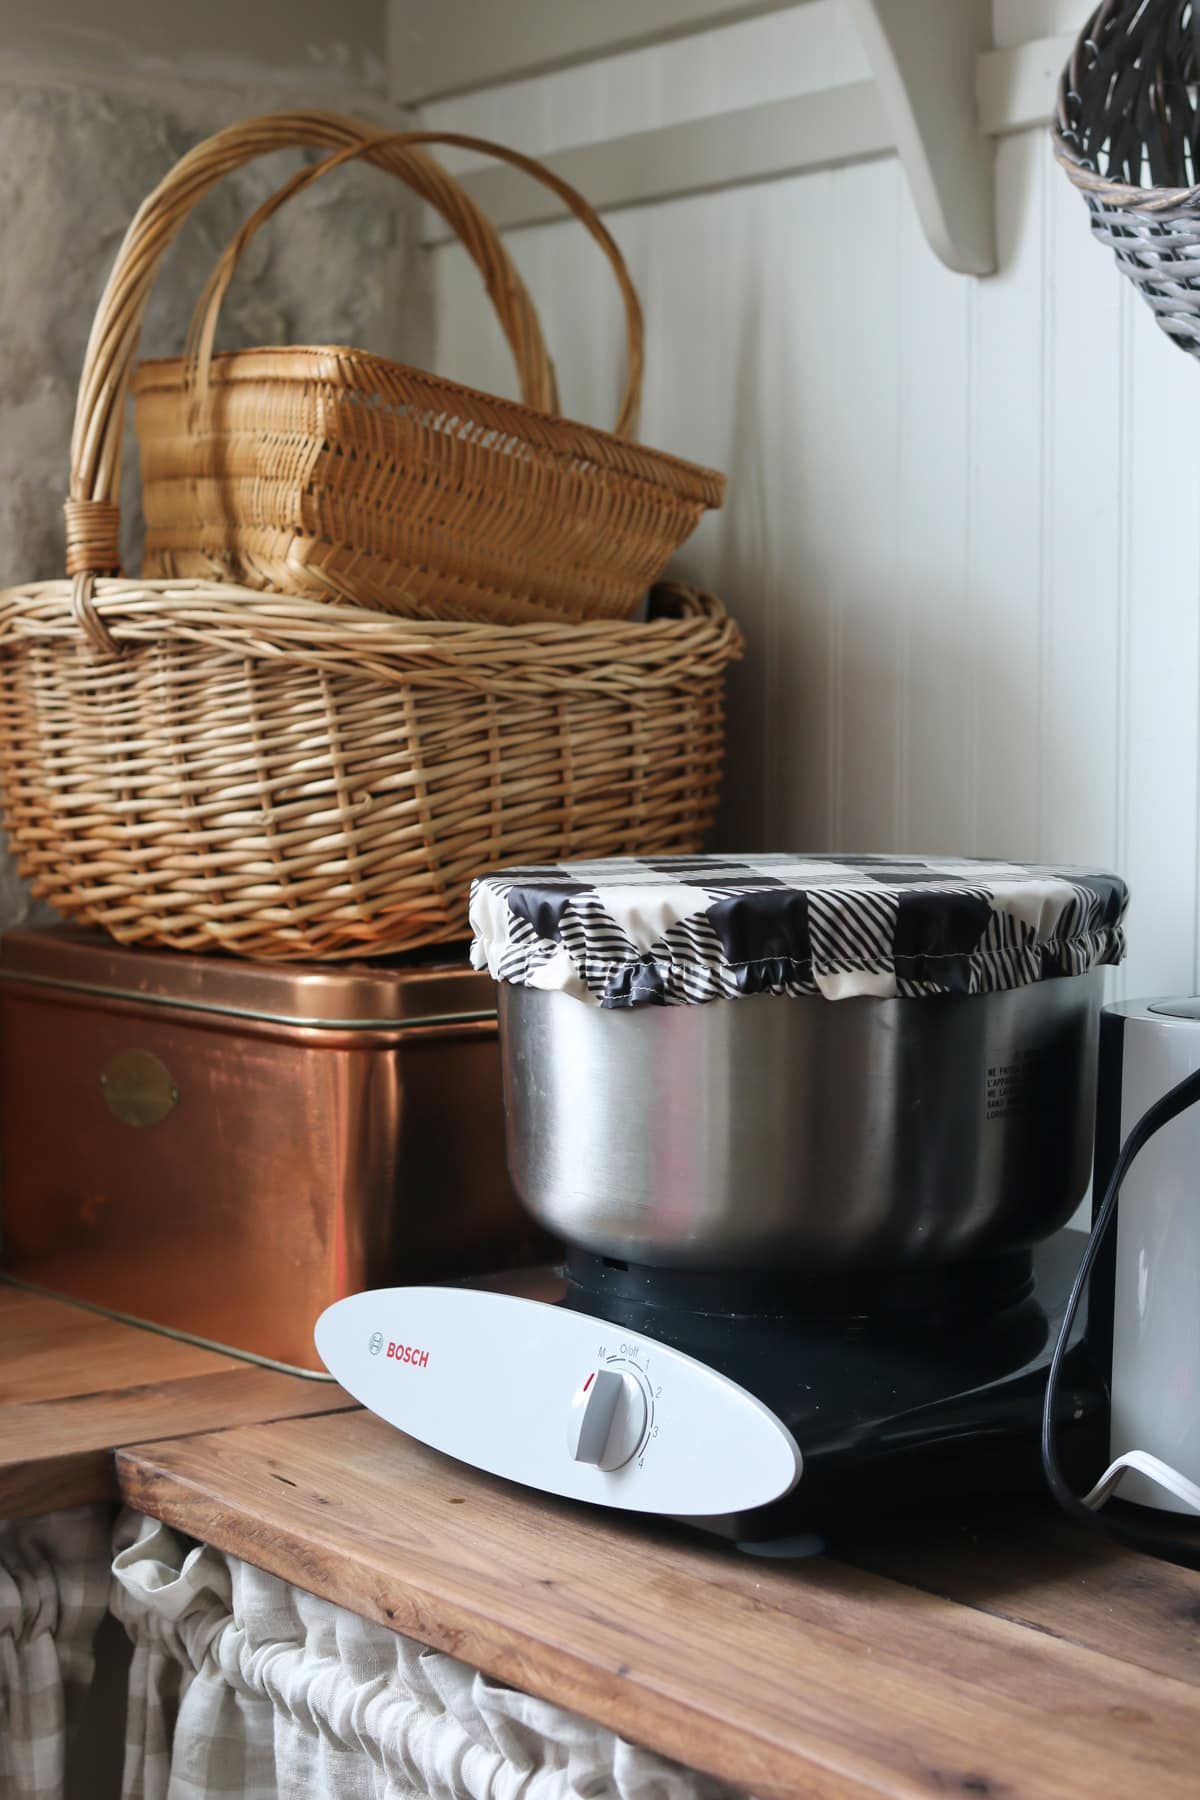
- You can make reusable bowl covers to fit any bowl or jar regardless of the container size.
- They can be made with breathable or non-breathable/water resistant fabrics to fit your needs.
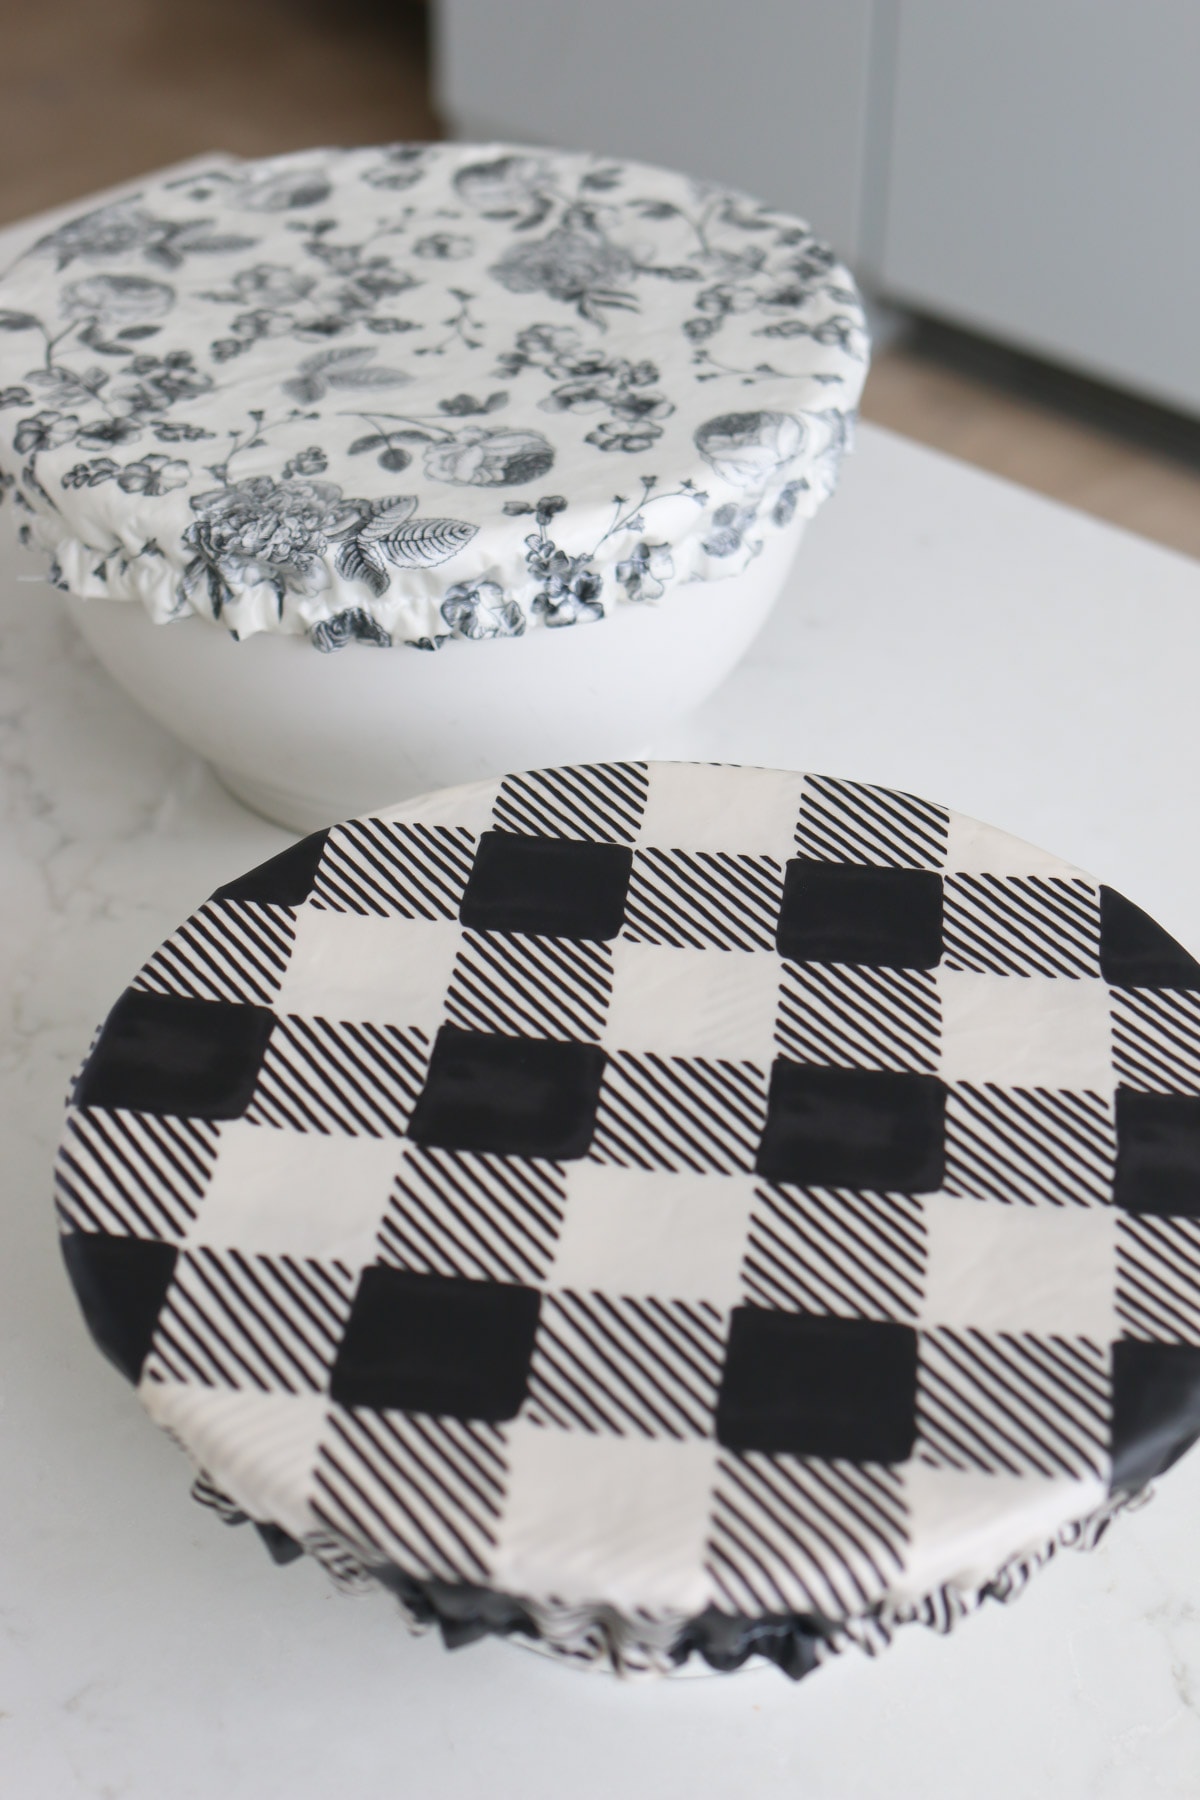
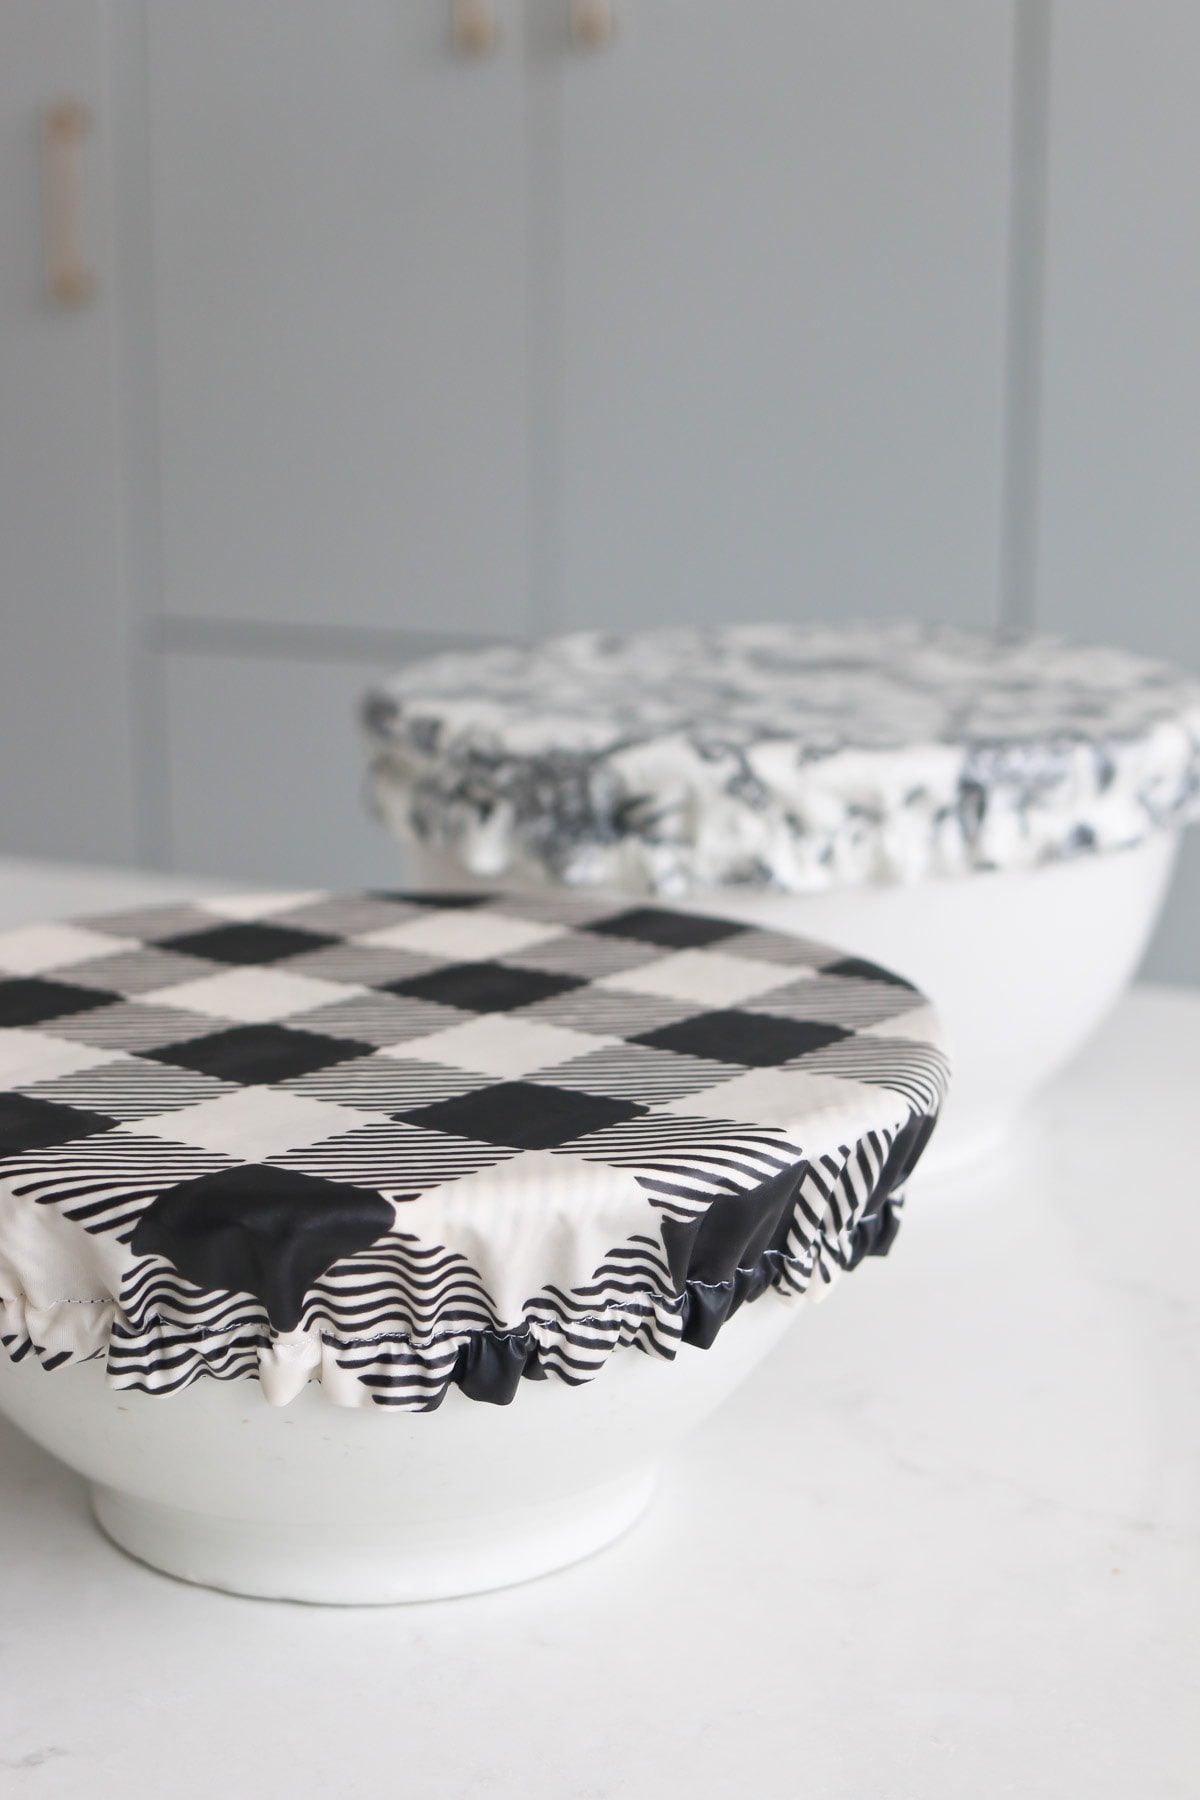
- It’s easy to match fabric bowl covers to your individual style or color scheme. (Bonus: these covers are double sided so you can choose to have 2 looks in 1!)
- Fabric bowl covers are easy to clean.
- It’s an environmentally friendly way to reduce single-use plastics in my household.
- DIY bowl covers make fantastic gifts.
- They are fun and easy to make. It’s the perfect sewing project for beginners!
Whether you’ve got a big salad bowl, a casserole dish or a tray of cookies to cover, fabric bowl covers will be your answer. You’re going to love them!
The Best Materials for Making Reusable Bowl Covers
You can choose from quite a few fabric types for your reusable bowl covers. I recommend:
- Linen – linen is my favorite material to use for bowl covers. It’s very breathable, which makes it a great cover for things that need a little air flow. Linen is easy to sew. It’s washable and improves with age. It also has antibacterial properties.
- Cotton – cotton is another great option for bowl covers. It’s inexpensive, easy to sew and washes well. Cotton also comes in tons of different colors and patterns to suit any style.
- Oil Cloth – oil cloth is water resistant. That makes it a great candidate for non-breathable bowl covers or covers that need to be airtight. Oil cloth is also water resistant so it wipes up easily and resists staining.
You can also try other materials, like a linen cotton blend for your bowl covers. And for those of you who want to make non-breathable or water resistant covers, you can use iron-on vinyl which will laminate your fabric to achieve the same affect as oil cloth.
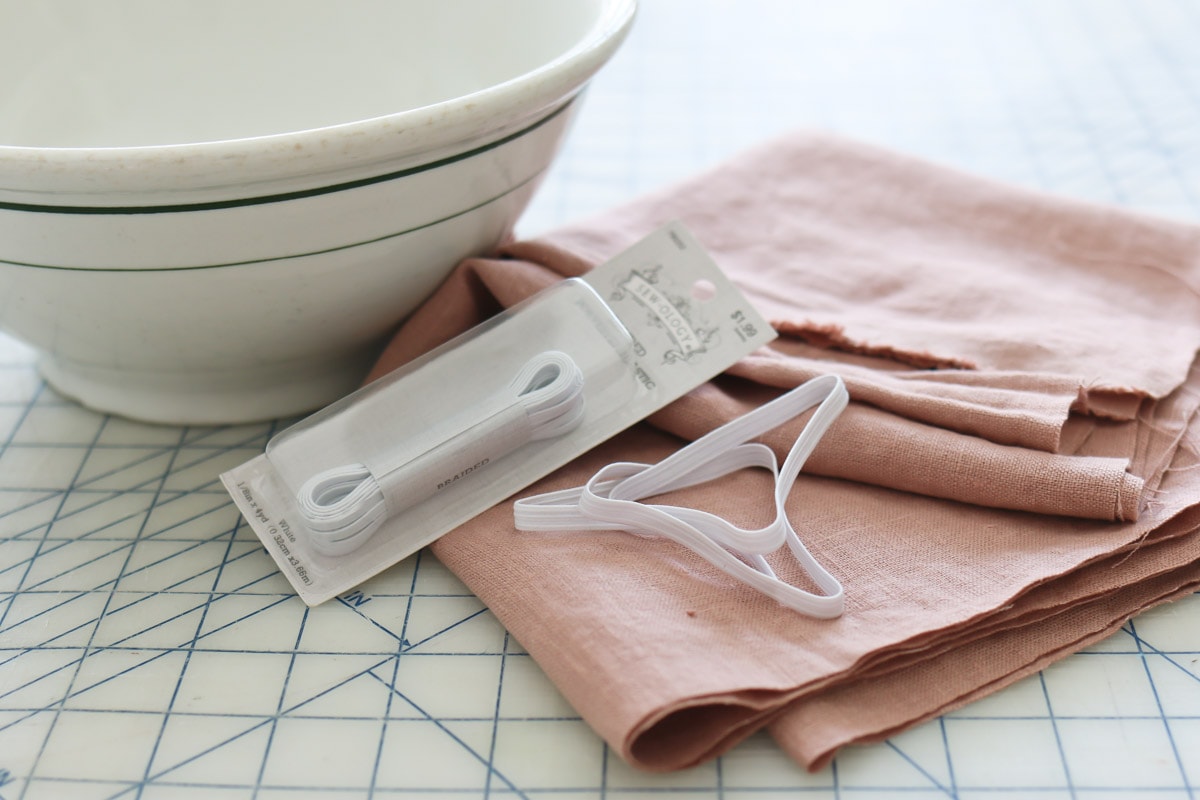
Supplies for Making Reusable Bowl Covers
To get started making these bowl covers you will need:
- A sewing machine
- An iron
- Fabric
- Braided elastic
- Thread
- Scissors or a rotary cutter and mat
- Straight pins or clips
- Safety pins
- Iron-on vinyl (optional – if making water resistant/air tight covers)
To make your project preparation easier, checkout my Crafts and Sewing Products Moonsift page. You’ll find links to all the supplies I used to make these darling fabric bowl covers.
How to Sew Reusable Bowl Covers Step-by-Step
These bowl covers are really easy to make. Let’s break it down into steps.
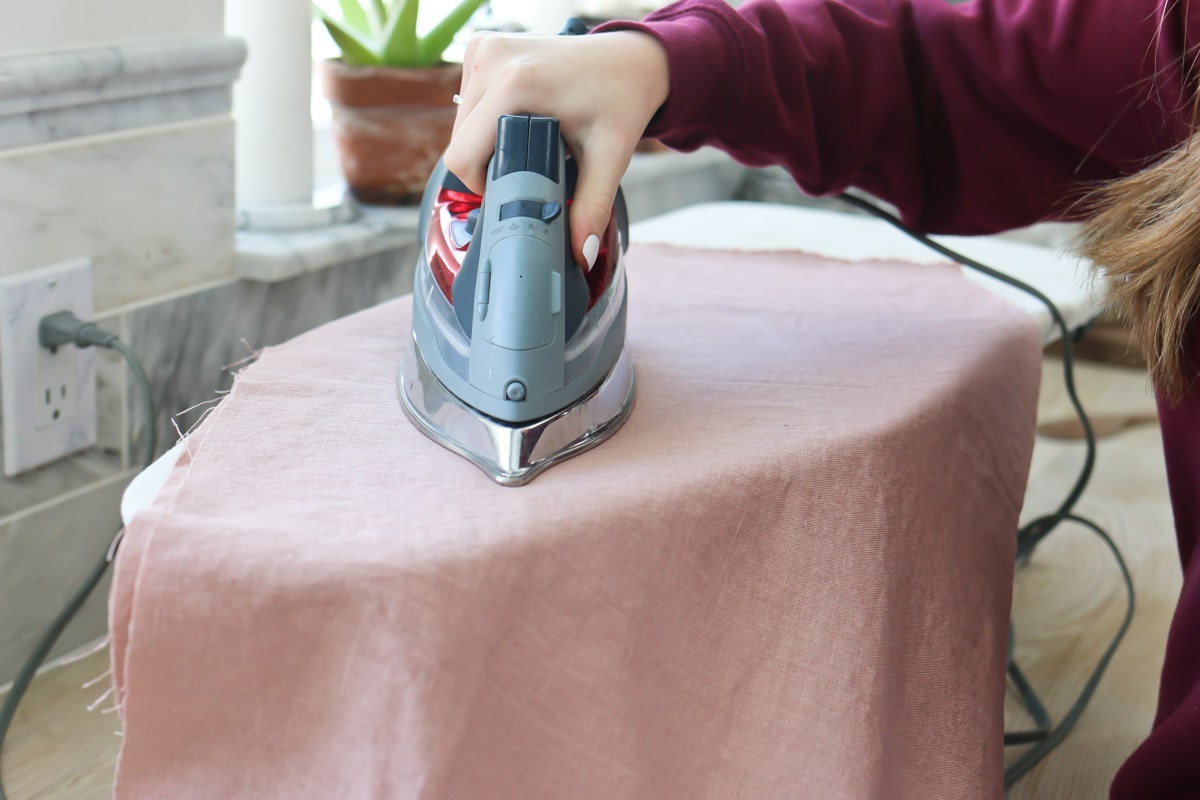
Step 1: Prepare Your Fabric
First off, select your fabric. You’ll want to wash and dry your fabric to get any potential shrinking out of the way. Iron your clean fabric to get a nice smooth surface. If you’re using oil cloth or laminated fabric, you can skip this step.
If you are using iron-on vinyl to laminate your fabric, you’ll need to use a hot iron to press the vinyl and fabric together. Follow the directions on the vinyl transfer for details.
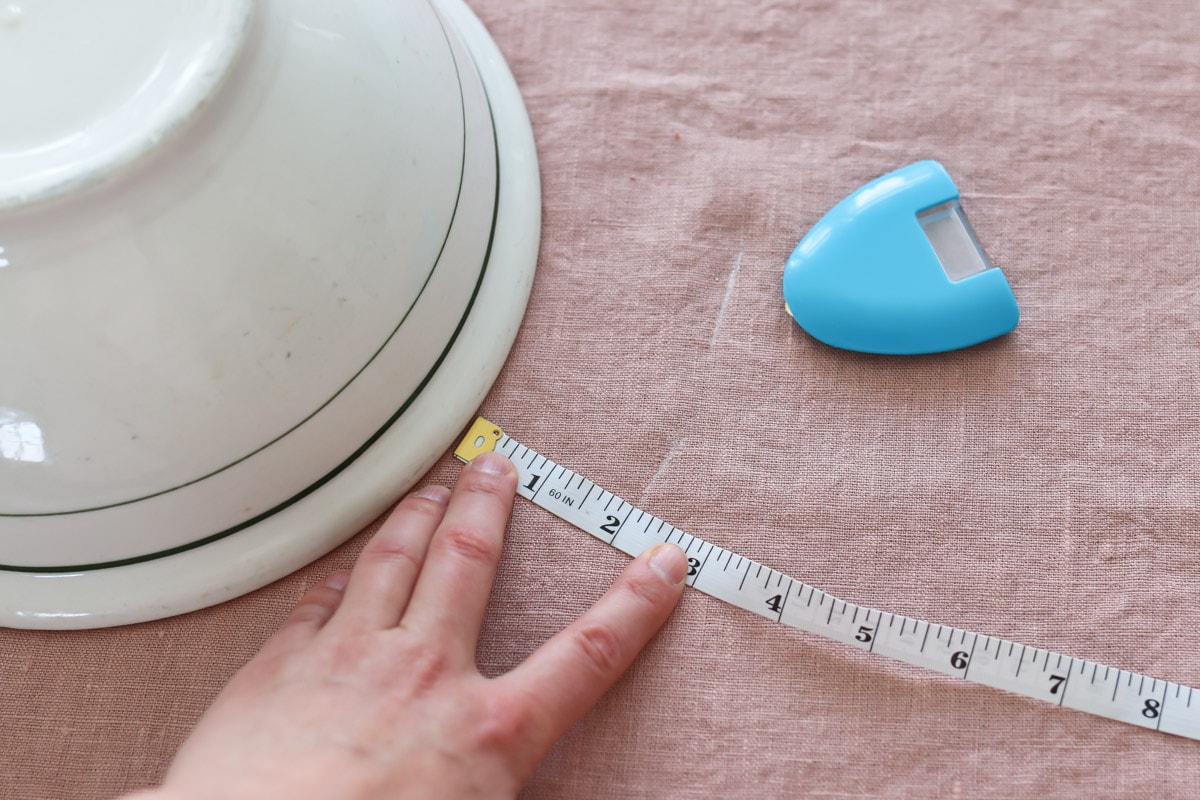
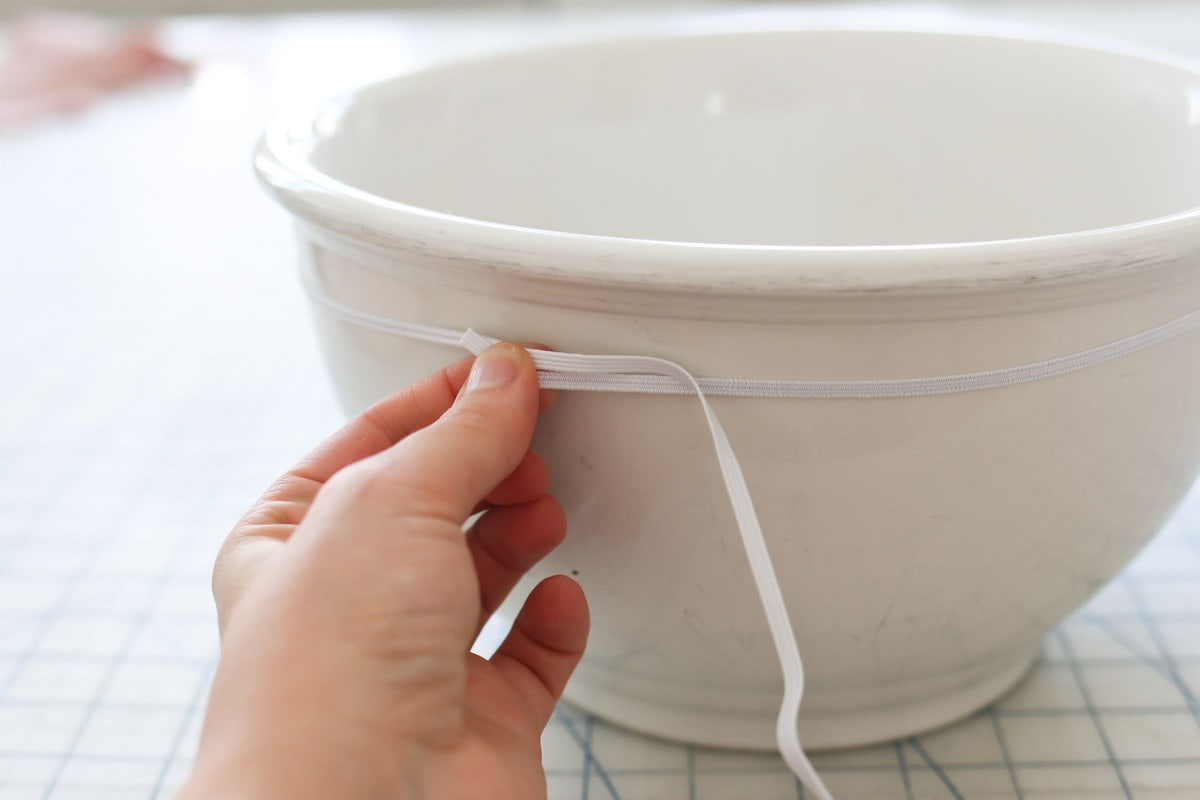
Step 2: Make Your Pattern
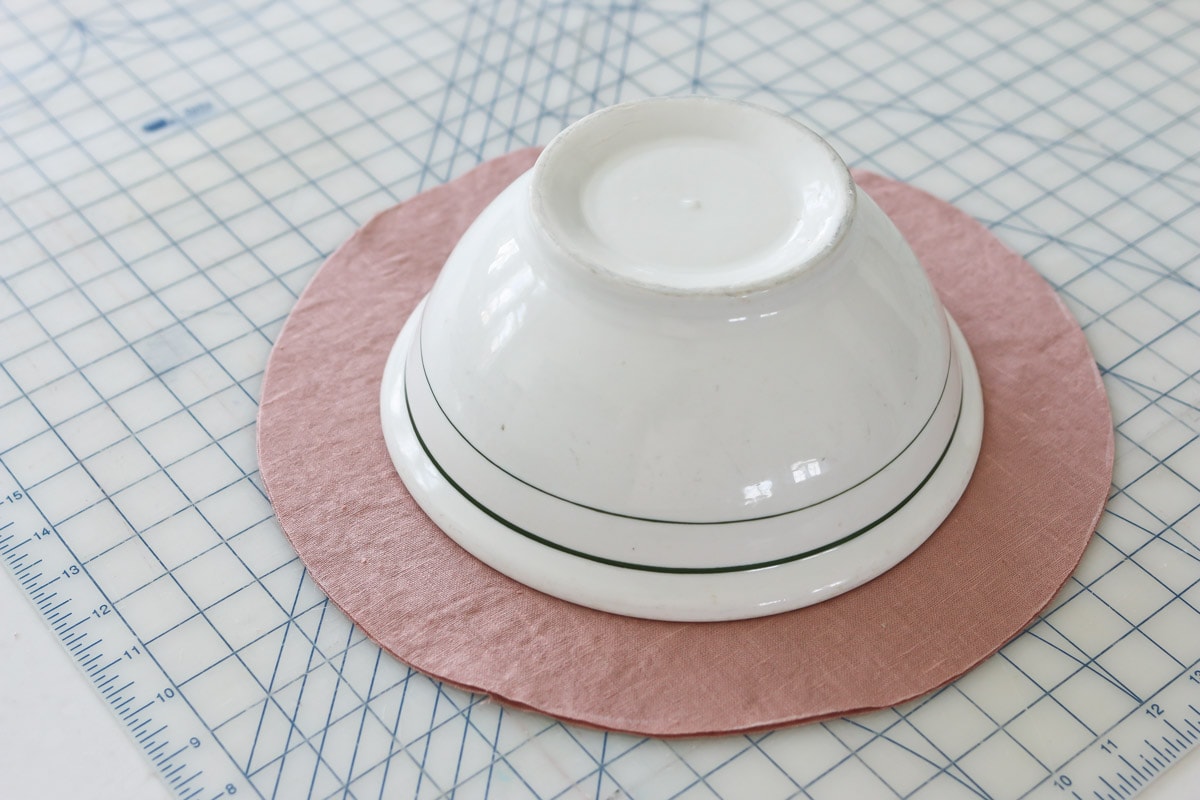
Take your prepared fabric and lay it out. Select the bowl or jar that you would like to use as a template. Lay the bowl upside down on your fabric. You need to make sure that you have enough fabric to cover the opening of the bowl plus an additional 2 inches of fabric beyond the bowl rim. Mark where you will cut your fabric.
Remember, this will be a double sided cover. The easiest thing to do is to have your fabric folded in half so that you only need to measure and cut once. If you’re using different fabrics on either side of your bowl cover you’ll need to measure and cut both fabrics.
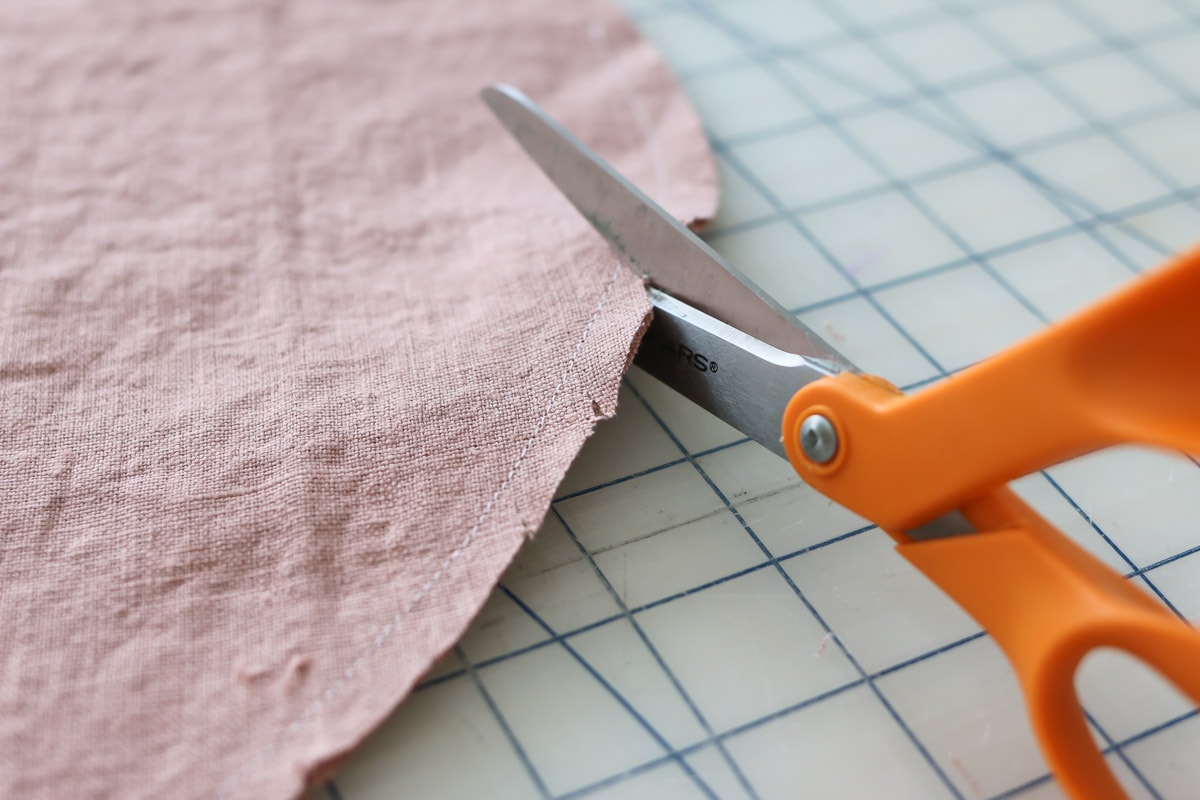
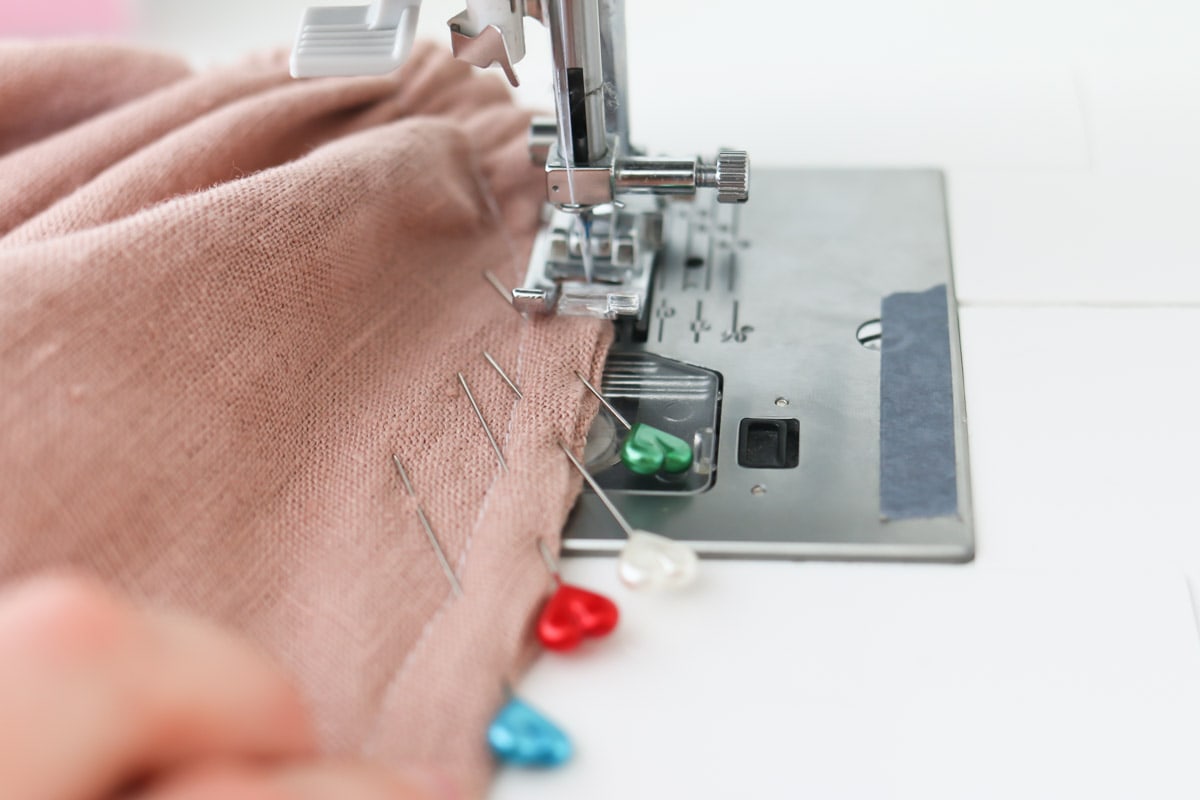
Step 3: Cut and Pin
Cut your fabric out along the markings that you drew.
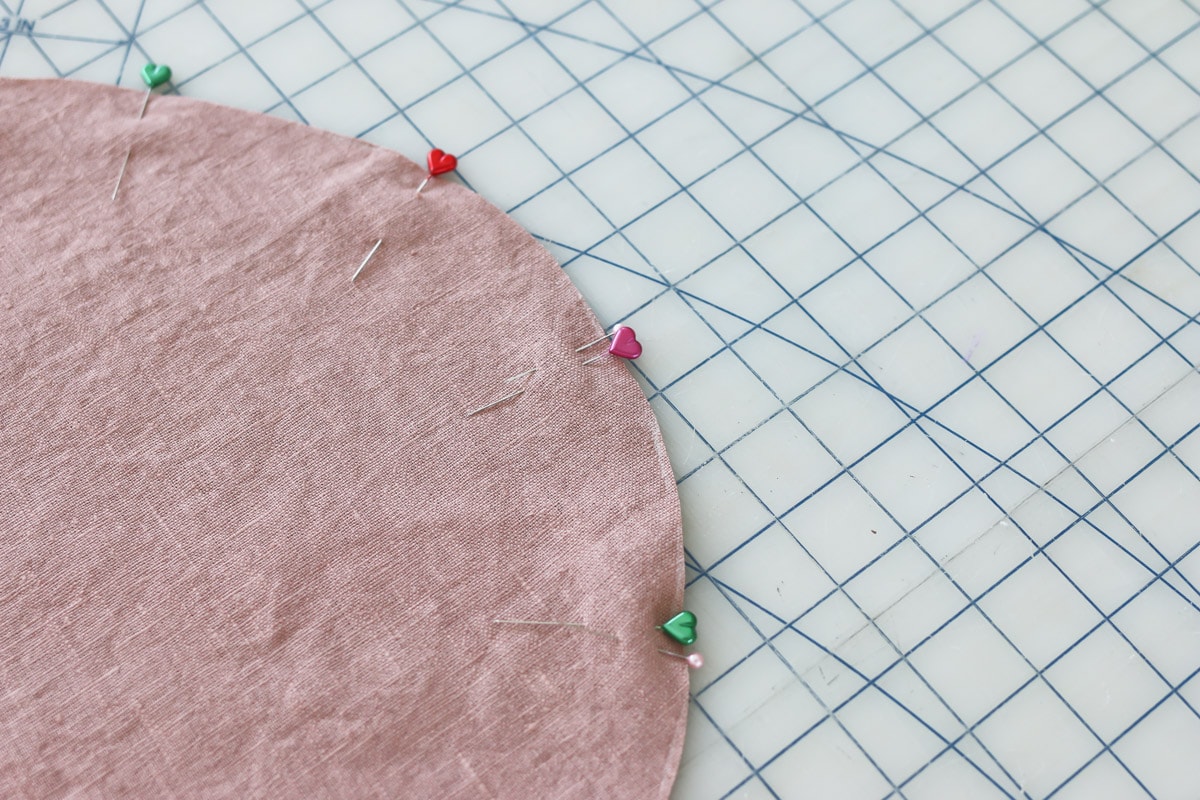
With right sides together, pin or clip your fabric pieces to each other. I like to put double pins a few inches apart in one area to remind myself to leave that space open so that I can turn the cover inside out.
Step 4: Sew the Two Pieces Together
Sew the two pieces of fabric together. Use a straight stitch and a 1/4 inch seam allowance. Remember to leave an opening so you can flip the cover inside out.

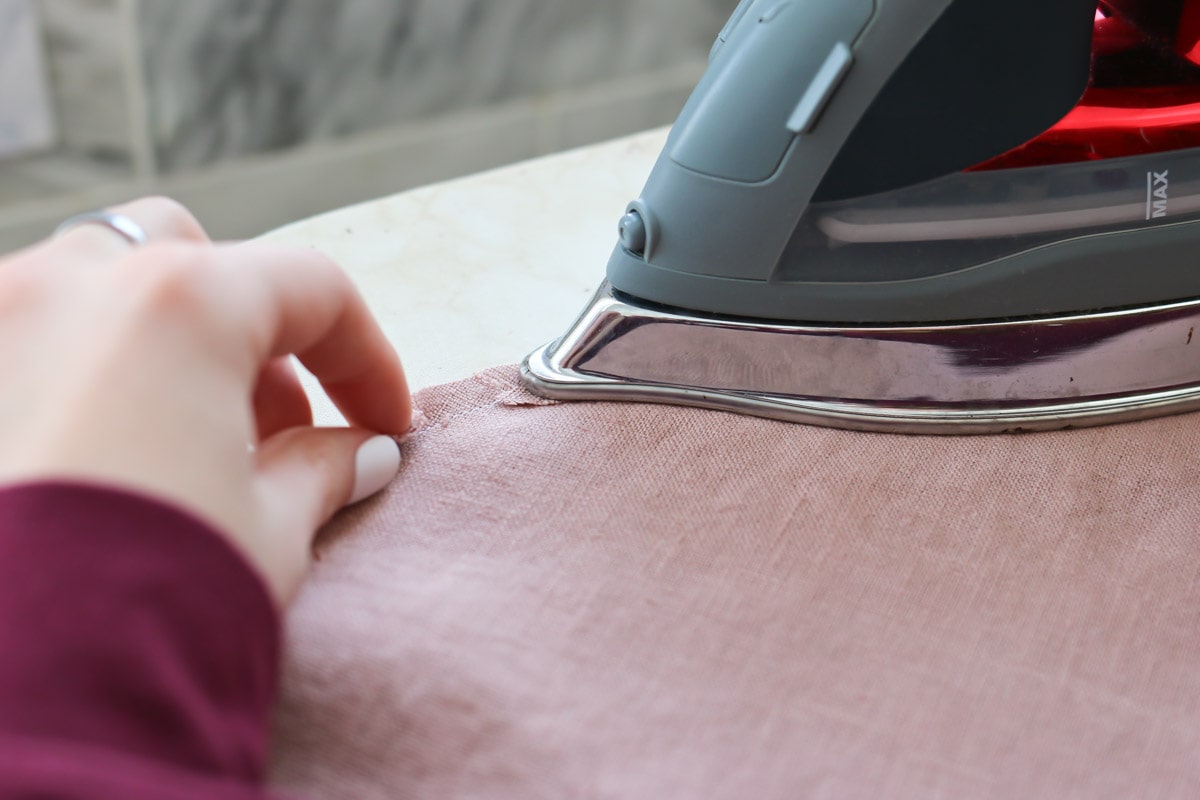
Step 5: Notch and Press the Seam Open
Once my two pieces of fabric have been sewn together, I like to cut little notches along the seam allowance. This allows the curved seam to lay nicely when it’s finished. Just be careful to not cut into your line of stitching.
Next, press the seam open with an iron. This is another step that will give your finished bowl cover a nice look and help it lay correctly.
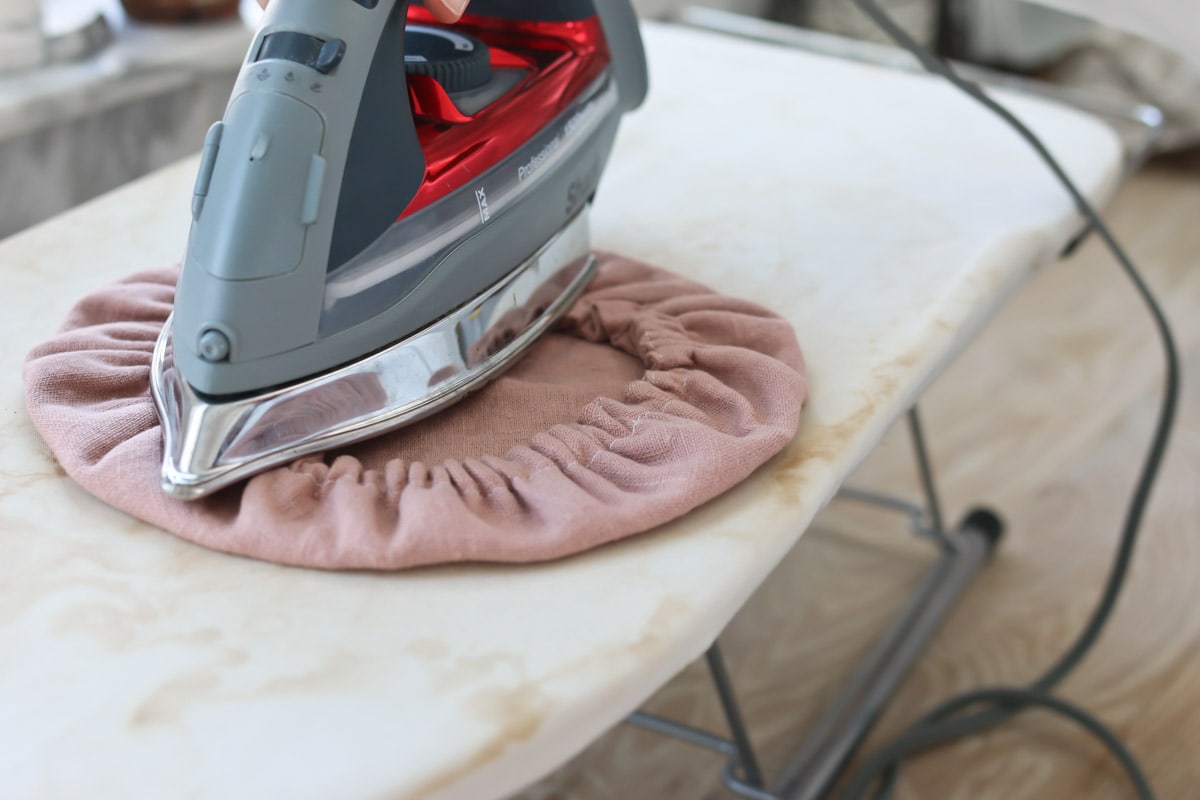
Step 6: Turn the Cover Inside Out and Press
Now, it’s time to turn your reusable bowl cover inside out. Begin by pushing and pulling the fabric through the opening that you left when sewing the two sides together. I like to use something like a wooden spoon to stick into the cover and help push out the edges of the fabric that are hard to reach.
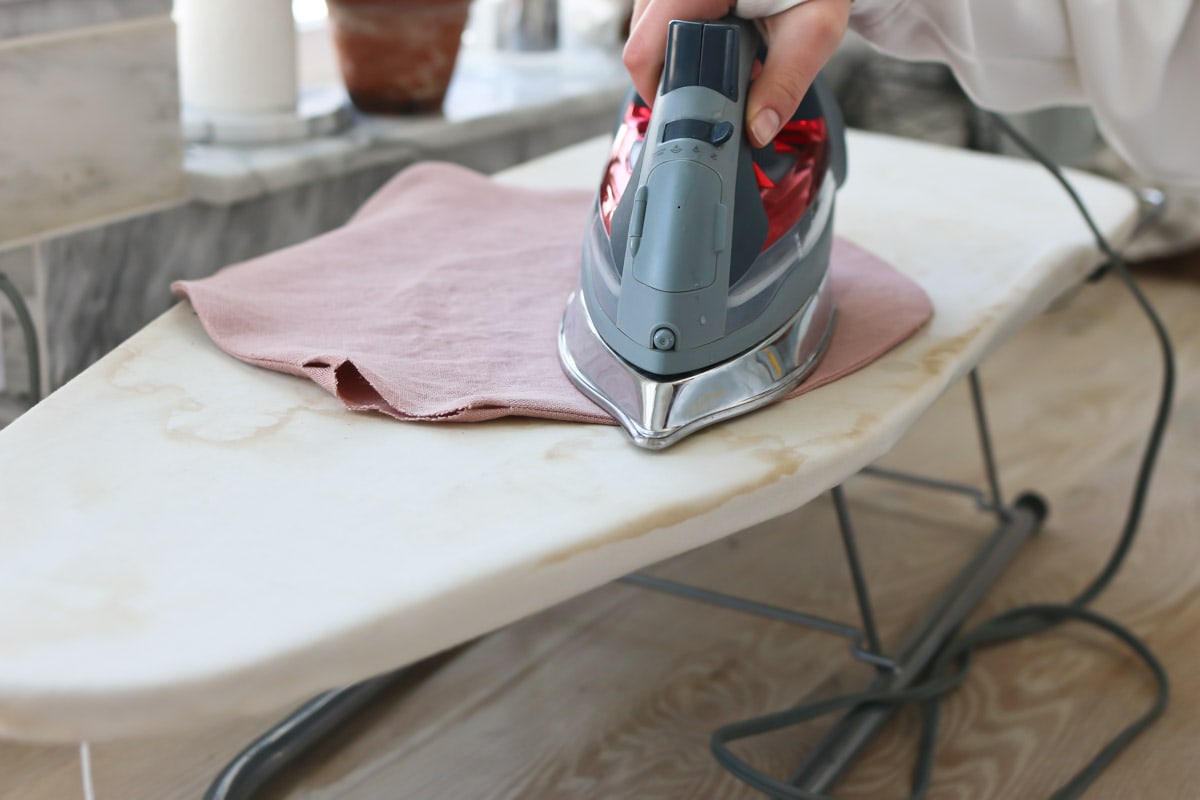
Once the cover has been turned inside out, I like to iron it to press everything nice and flat before I begin sewing the casing or channel that the elastic will be fed through.
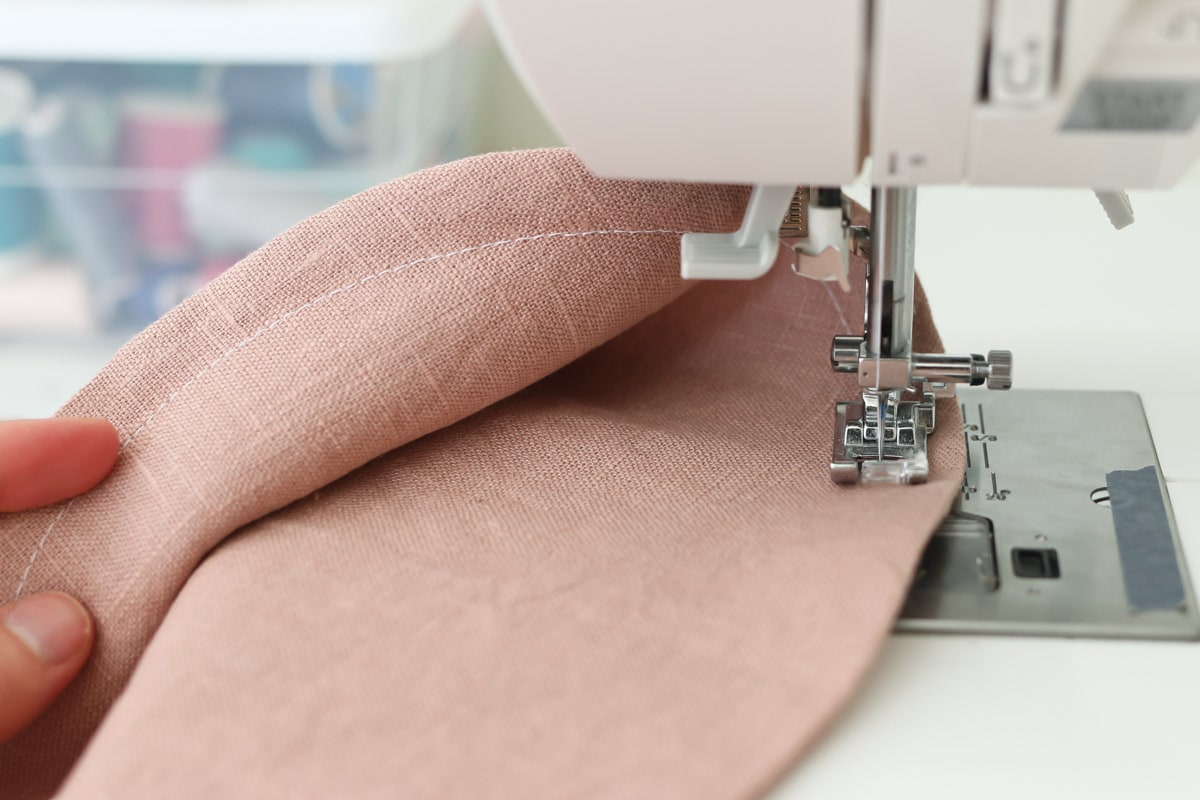
Step 7: Sew the Elastic Casing
At this point you’re going to use a another straight stitch to sew all the way around the perimeter of your cover. Give yourself a 5/8 inch seam allowance. You don’t need to leave an opening this time.
Step 7: Add the Elastic
Next, it’s time to add the elastic.
Take your elastic and stretch it around the bowl to measure how much you’ll need. Make sure the elastic is a bit snug. Cut the elastic to that length and attach a safety pin at each end. You’ll adjust the final length of the elastic in the next step.
I like to pin one end of my elastic to the opening so that it doesn’t accidentally get pulled into the casing. Take the other end of the elastic and feed it through the casing. You can use the safety pin to feel the end and push/pull the elastic through the casing until you reach the opening.
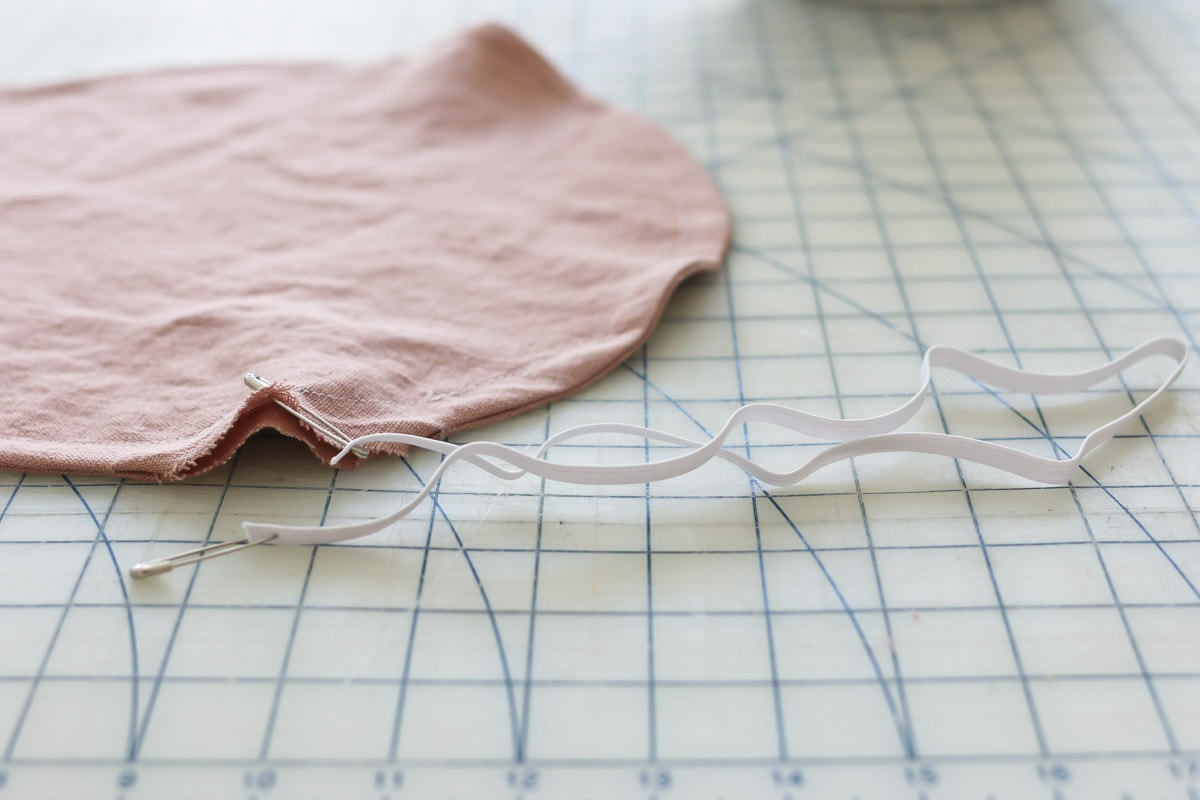
Next, safety pin the two end of the elastic together.
Step 8: Final Elastic Measurement and Stitching
Take your cover back to the bowl. Slip it on and see how it fits. Experiment with stretching the elastic to see how tightly you would like it to fit on your bowl.

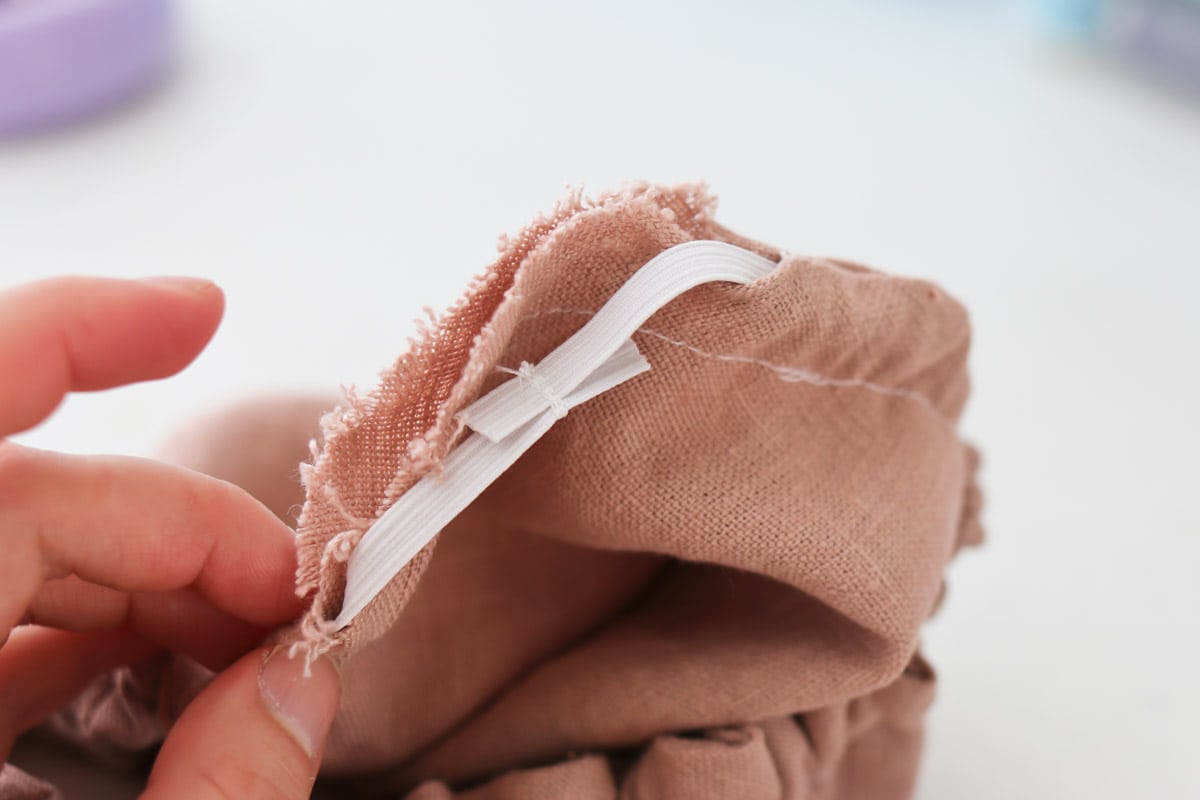
Once you figure out where you want it to be, mark that spot. Return to the sewing machine and stitch the elastic together securely at your desired spot. Trim off any extra elastic.
Step 9: Stitch the Opening Shut
Now, it’s time to stitch up the opening to your casing.
To do this, use your fingers to turn under the raw fabric edges. Pin the two pieces of fabric together with the raw edges hidden between them.
With pins in place, carefully sew along the edge to close the opening . If you prefer to hand stitch the opening you can do that instead.
Step 10: Press to Finish
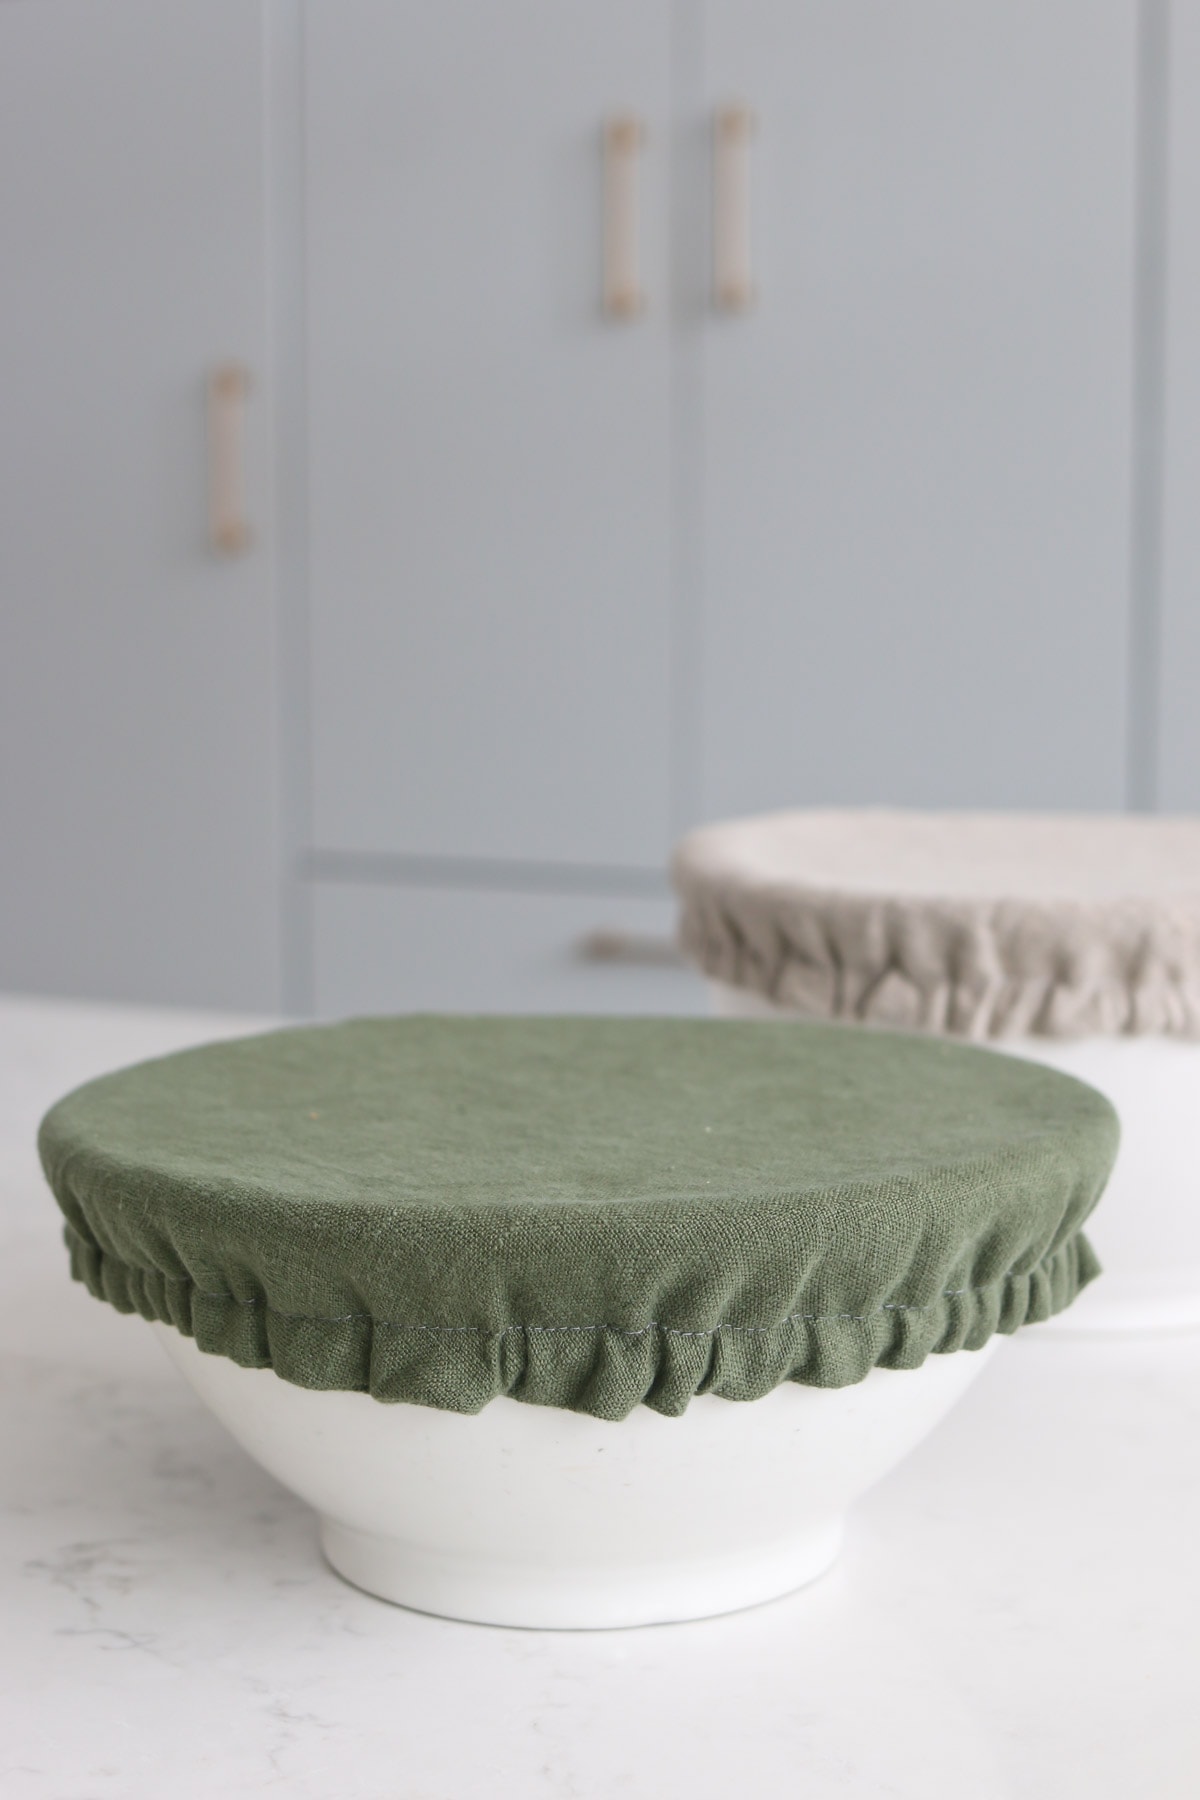
As a finishing touch, I like to give my bowl cover a nice press with an iron to get it nice and smooth. This step is optional, but I think it makes the whole thing look more polished.
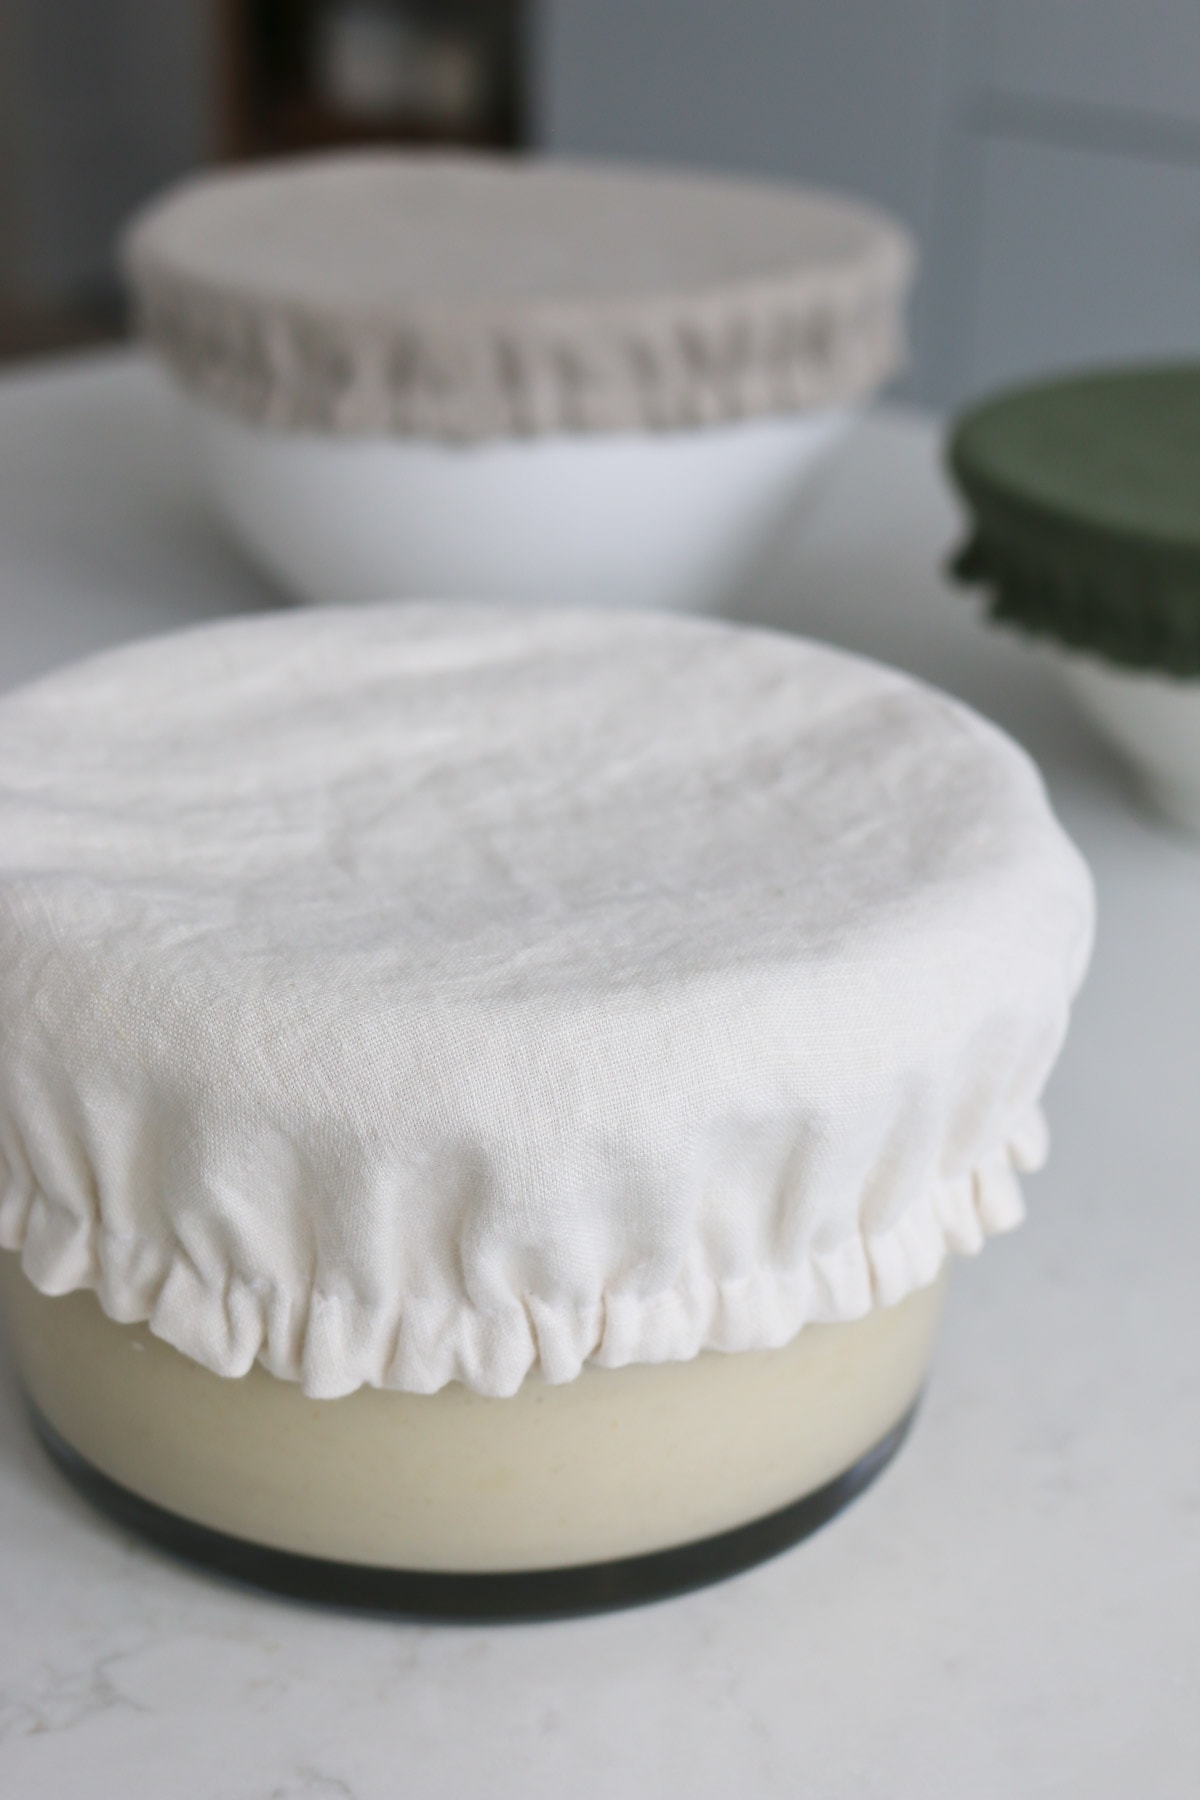
And voila! You have an awesome, custom-fitting bowl cover to use and enjoy over and over again!
How to Clean Reusable Bowl Covers
Your diy bowl covers are super easy to clean. For linen, cotton or other standard fabrics, just toss them in the washing machine with a gentle detergent or some natural soap nut laundry detergent. Follow the fabric recommendations for washing temperature and drying methods.
For oil cloth or laminated fabrics, simply wipe them with a soft soapy cloth and rinse. Don’t put oil cloth or laminated fabrics in a dryer. Instead, hang these covers up to dry.
More Sewing and DIY Projects
There you have it – an easy sewing tutorial for reusable bowl covers. You can make yours to fit any large or small bowl or jar. These bowl covers will also stretch to fit many of your trays and pans. They are one of my new favorite kitchen items. I hope you’ll give them a try!
If you like sewing and diy projects, try one of ideas listed below. Happy sewing!
- How To Make Cabinet Curtains: An Easy And Cute Sewing Tutorial
- DIY Linen Tea Towels | Upcycle Sewing Project
- Reversible Pillowcase Tutorial
- 20 Easy Tutorials for How to Sew a Pillowcase
- The Lazy Quilters Easy Quilt – No Measuring Required!
- DIY Boys Old Fashioned Linen Shirt and Pants
- DIY Pinch Pleat Curtains
- DIY Linen Lavender Eye Pillows
- How to Make a Quilted Pillow Cover with Video Tutorial
- 10 Easy Quilt Patterns for Beginners | Start Here to Avoid Overwhelm
- DIY Linen Scarf
- DIY Ruffled Duvet Cover
- Fall Flannel Quilted Pillow
- Apron Patterns with Kid Friendly Design
- What to do with Old Shirts | Party in the Back Dress


Just to be sure, when using laminated fabric or oilcloth, do you use linen or cotton on the other side? Thank you!
It works now. I was able to see your products.
I make crochet covers for mason jar lids for when I make milk kefir, water kefir and kombucha. For a wide mouth lid of about 3.25 inches, I use crochet cotton of # 3 or 10. I make a circle starting out with 6 chains, Then I do single crochet increasing 6x on each round to a circle of 3.5-inch diameter. Lastly, I do several rows of single crochet with no increases. It uses up my stash and is great relaxing, fiddly work when hanging out with friends and family. I would not use them in the summer, Fruit flies may get in. The crochet must be very small. I use a c hook or smaller for #3 cotton and a 0 hook or smaller for #10 cotton. Now I will sew some covers and the fruit flies won’t get in.
I was not able to get to your Moonsift page. When I clicked on the link, which directed me to Moonsift. I got the message, Collection Private or Not Found. Please help. Thanks
Oh I am sorry! I checked the settings and made them public, so you could try again. But everything in the crafts board is also linked directly on this post in the text links. I hope you find what you need!
I loved this tutorial with all the great photographs and appreciate the oil cloth option! I’ll be making these throughout the year for Christmas gifts. Thanks Cami!
I was thinking to do the same this Christmas! They are super fun and easy to make, especially after you make it through the first one.