
This post may contain affiliate links, which means I get a small percentage of the sale at no extra cost to you. I only recommend items I love and have had a positive experience with. Thank you!
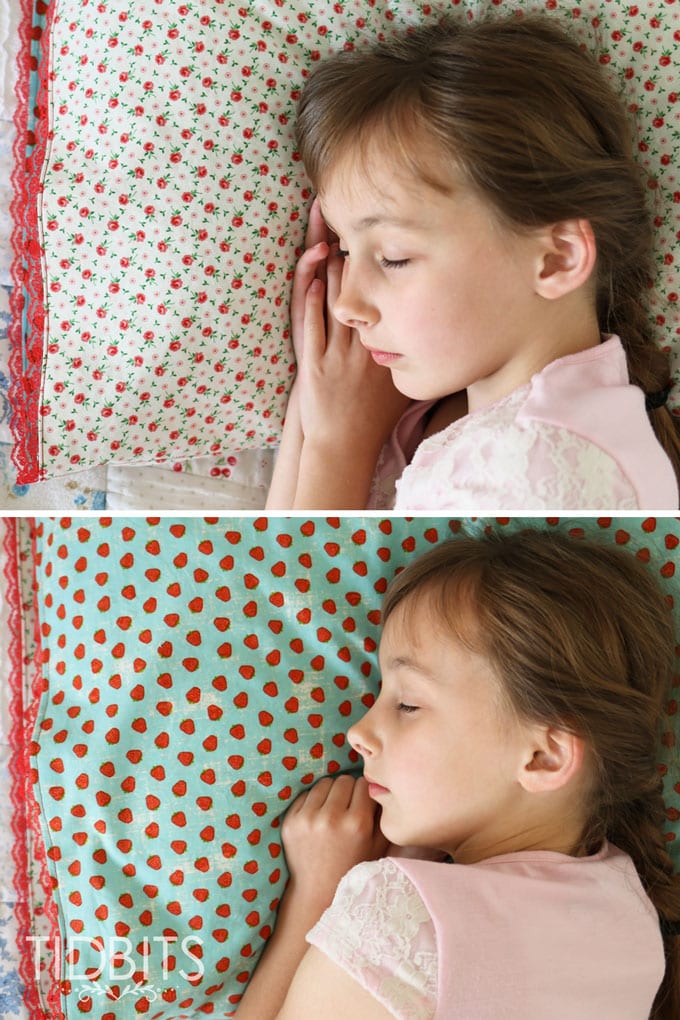
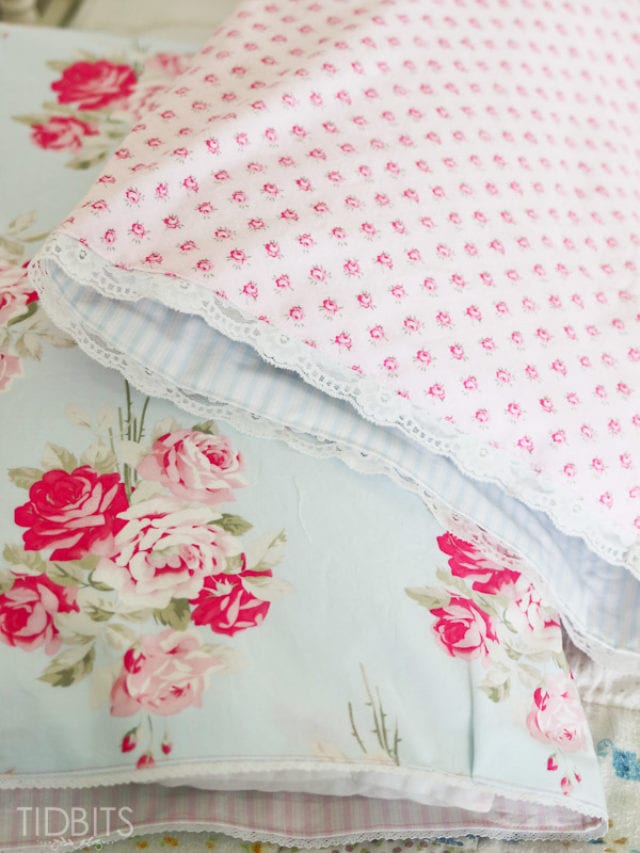
Making a personal touch to any bedroom to spruce it up can be as easy as switching up the bedding. Making this reversible pillowcase is an easy DIY project that you will enjoy doing in just a few hours.
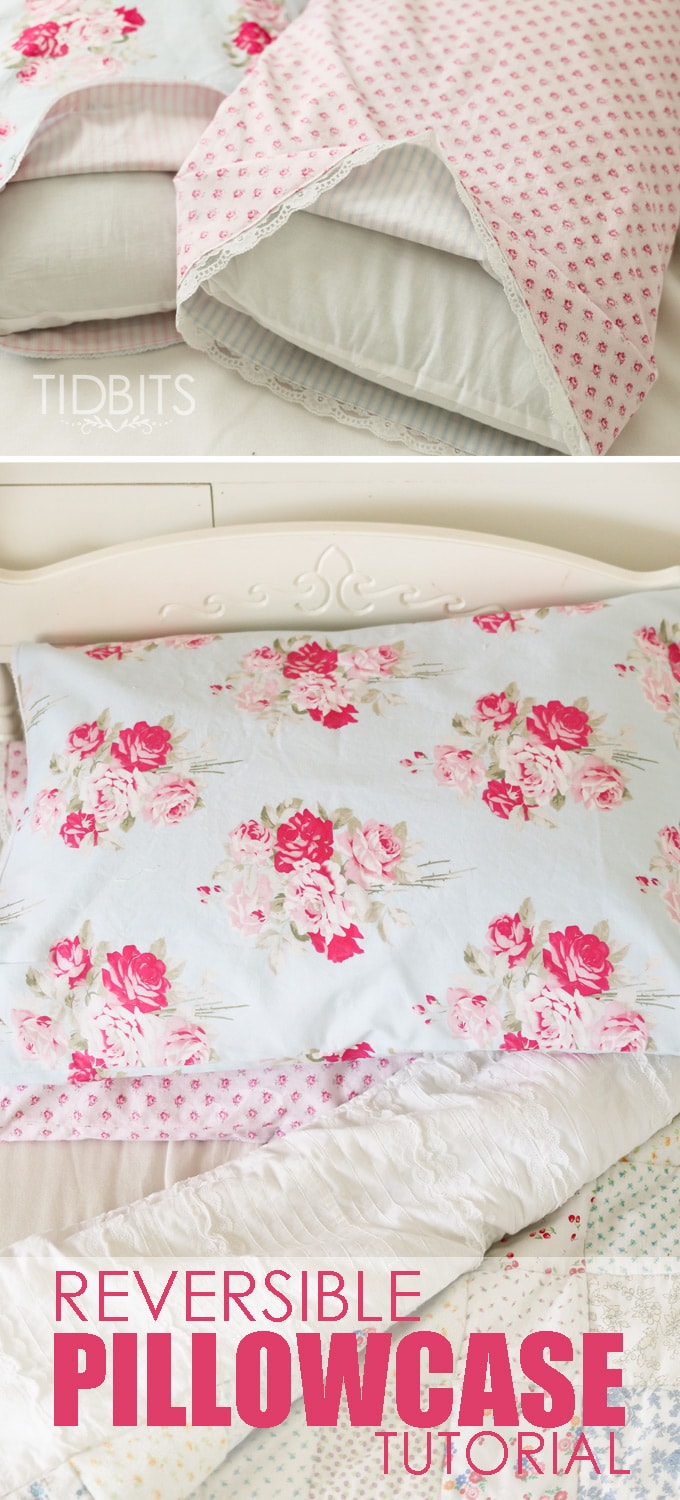
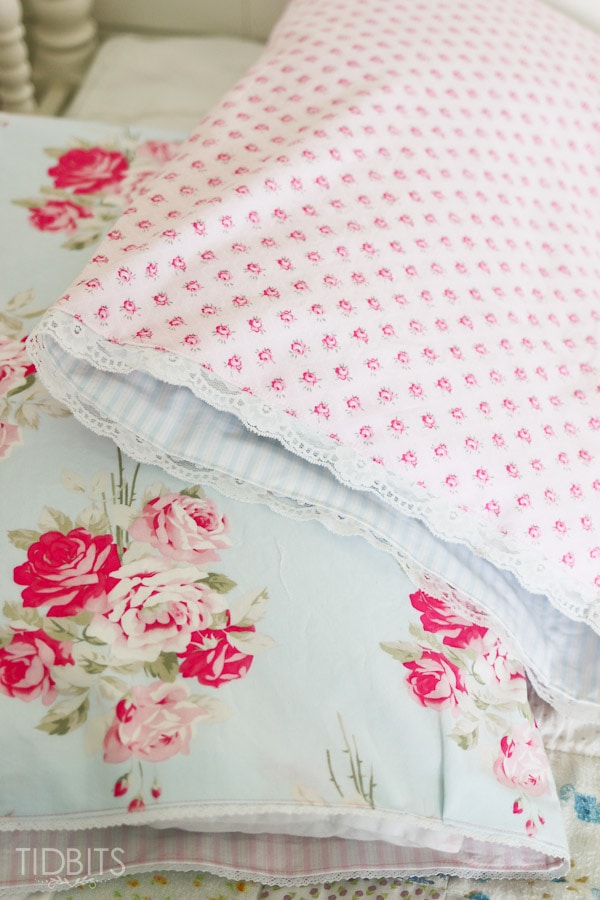
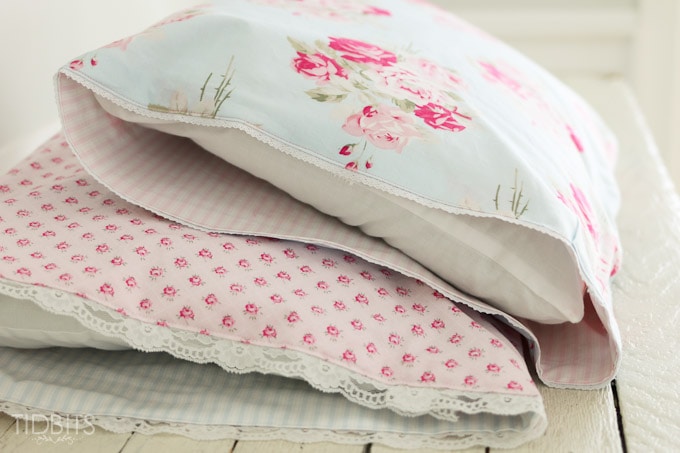
A reversible pillowcase makes a great project because you can customize it to fit your own decor preferences. Imagine decorating for the holidays with a Thanksgiving-themed pillowcase on one side, and Christmas on the other. Or how about St. Patrick’s Day and Easter? The possibilities are nearly endless.
This easy-to-make reversible pillowcase project is also great for using up that fabric that you bought at a great sale. Choose some complimentary fabrics for each side, or switch it up, the choice is yours. You can express your personal style any way you’d like.
I’ll walk you through how to make this easy DIY pillowcase and you will be on your way to changing up the decor in an afternoon.


Now for the reversible pillowcase tutorial!
Materials:
*All measurements are designed for a standard size pillow, with the pillowcase finished measurements to be 20 x 26 inches.
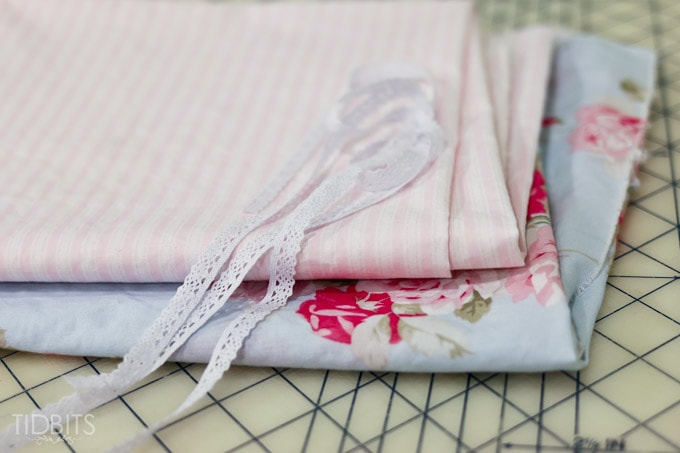
- 1 yard of fabric in 2 varieties
- So buy 1 yard of the 2 types of fabric you wish to have on each side.
- Quilters cotton works great for this.
- Choose fabric which is 44-45 inches wide.
- All fabric seen in this post was bought through Fabric.com
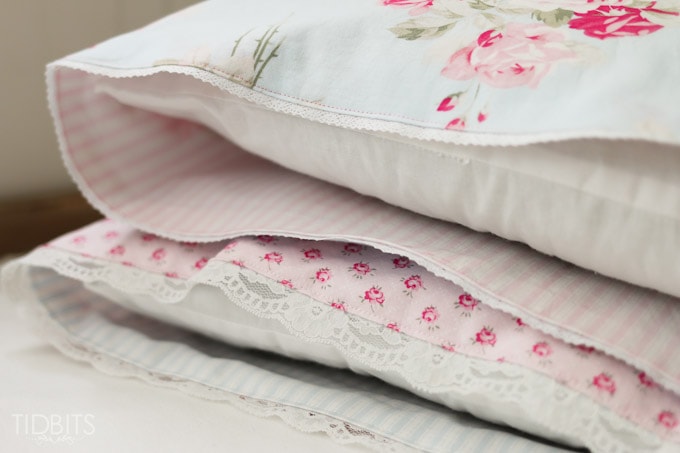
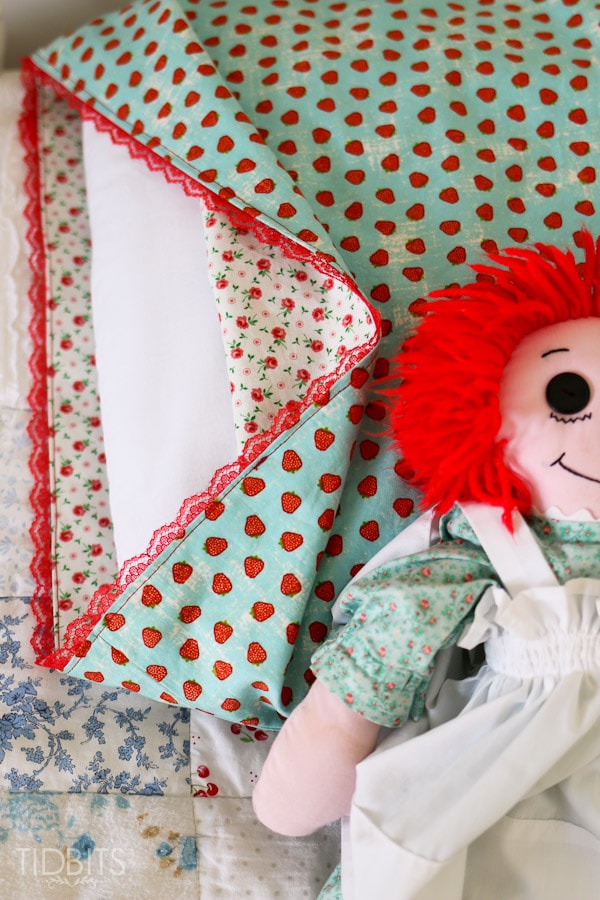
- 46 inches of Trim
- This is optional. I used lace around the opening of the pillowcase. You could use nothing or be creative with any type of trim for the outside edge.
First, prepare your fabric by pre-shrinking it. Simply throw it in the washer and dryer. This is so important when working with 2 fabrics, because one may shrink at a different rate than the other and it will cause your project to be all wonky after washing. Trust me.
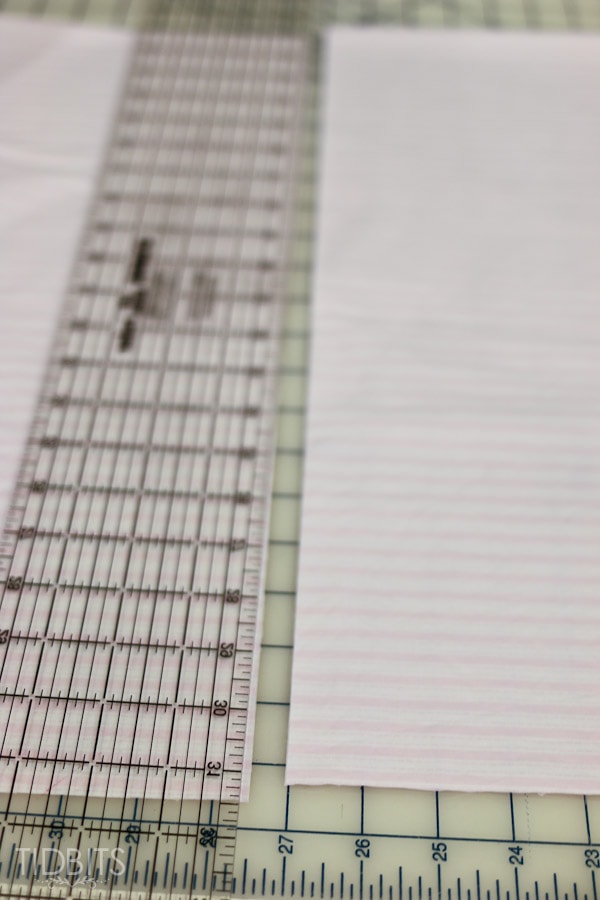
Next you need to get your fabric on grain. To do this, fold your fabric selvage edge to selvage edge. Snip in about 1 1/2 inches off one end and rip all the way.
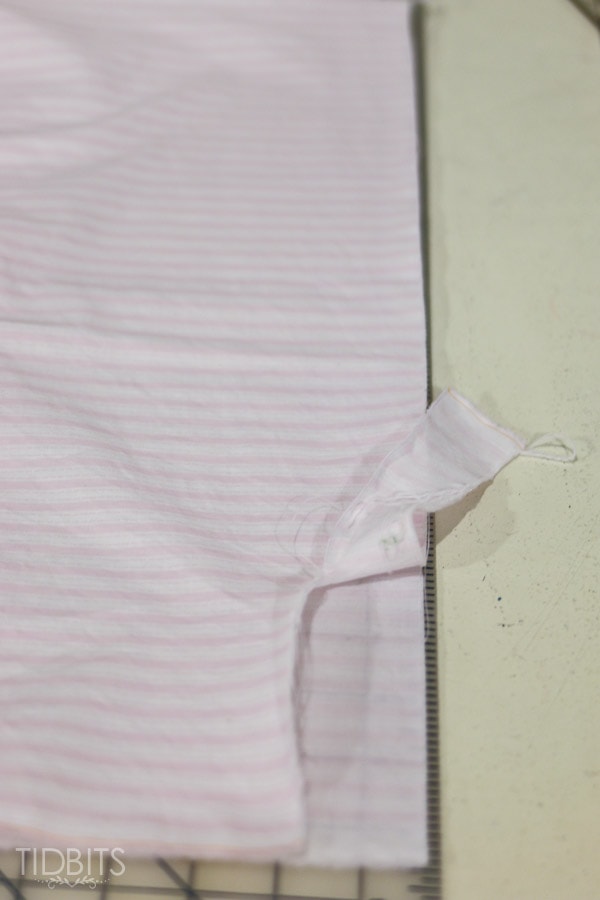
This will leave a frayed edge, so cut the end off about 1 inch in to get your edge nice and even.
Then you will need to cut your selvage edges off.
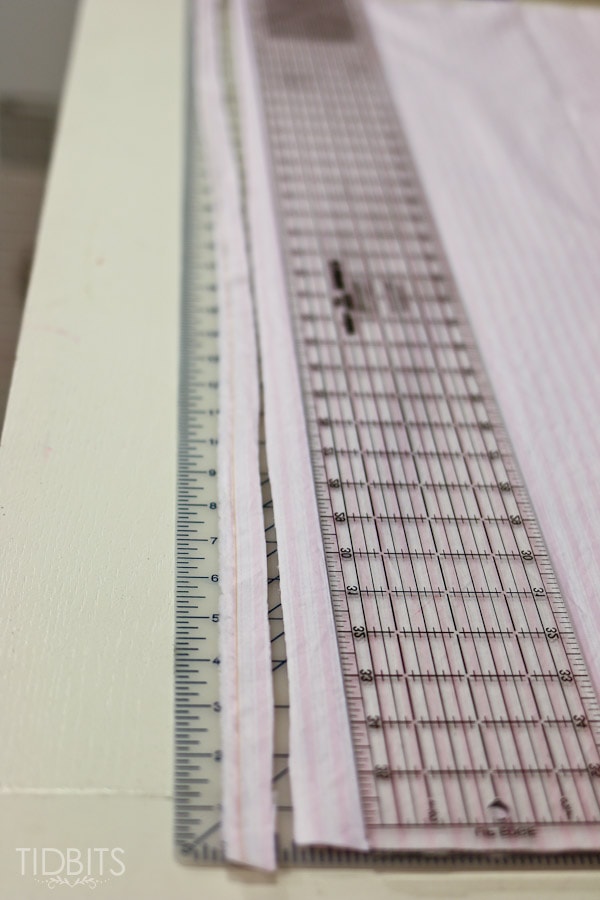
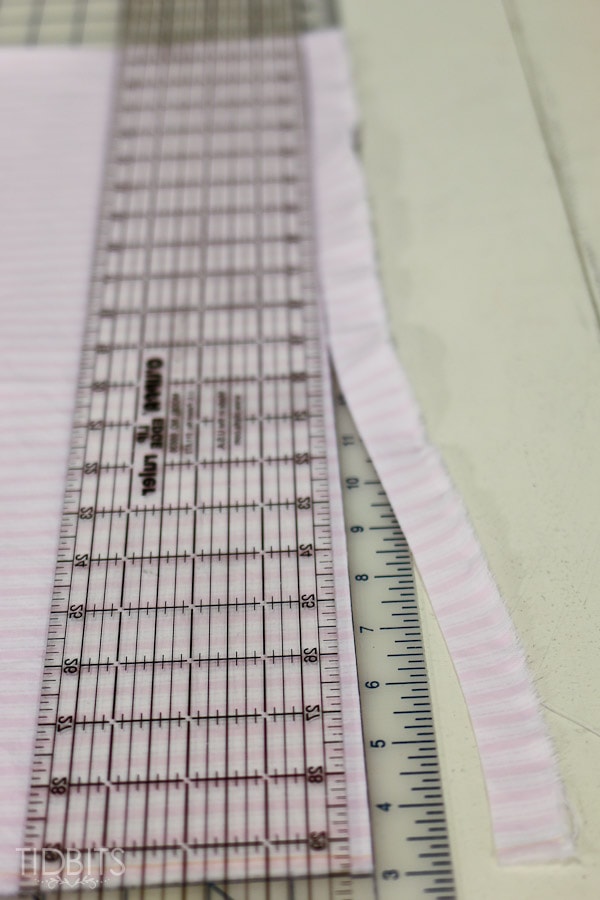
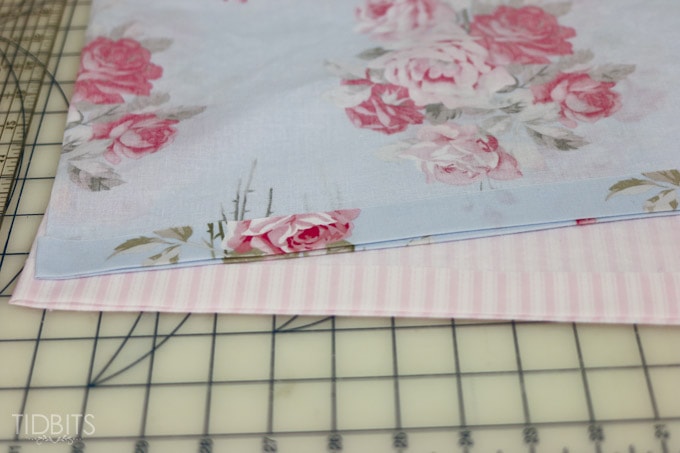
Now that your fabric is prepped, you need to cut a piece of fabric measuring 27 x 42. It is easy at this point, with your fabric folded. Just measure 27 inches from the edge (the one you ripped and cleaned up), and cut those 2 layers. Then make sure your fabric measures 21 inches long while folded (making it 42 when opened up). Trim off on the bottom if needed.
Cut this 27 x 42 inch rectangle out of both of your fabric. Stack them up and make sure they are lining up as close to perfect as you can.
For both pieces you will stitch down the 2 open sides, as shown in the lines below. Keep the top open, and don’t stitch on the fold.
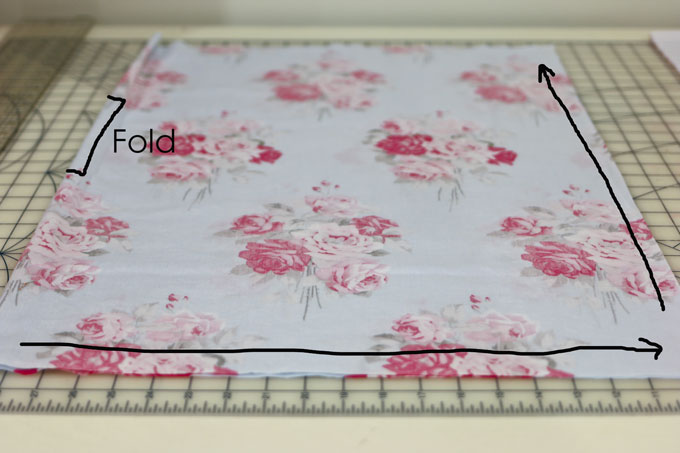
Sew 1/4 inch from the edge.
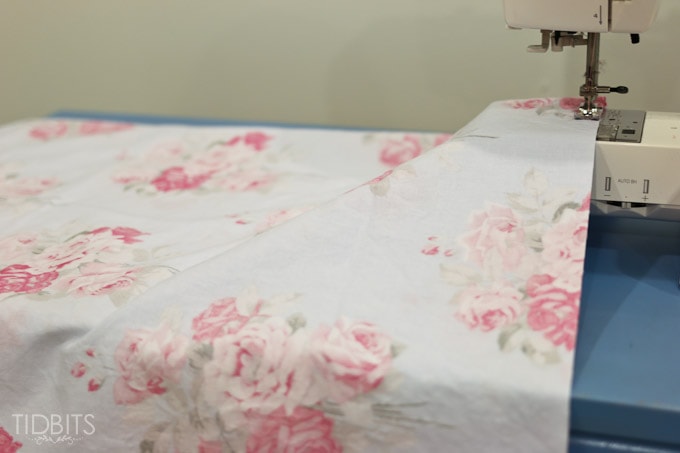
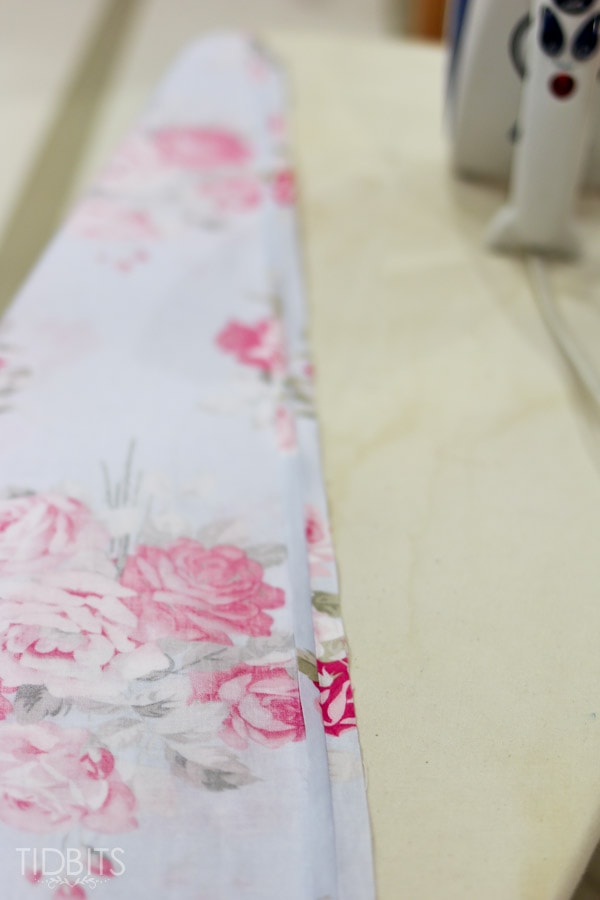
Press all your seams open. This is essential to getting a professional look.
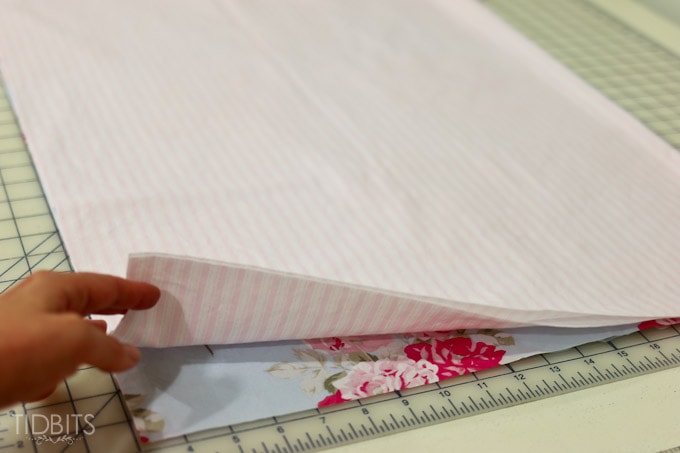
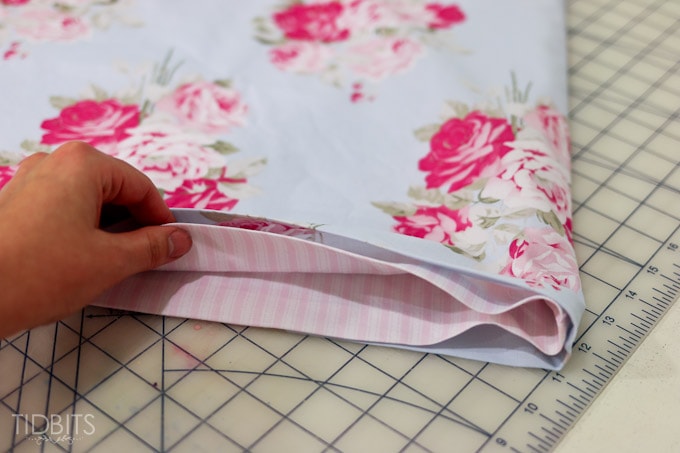
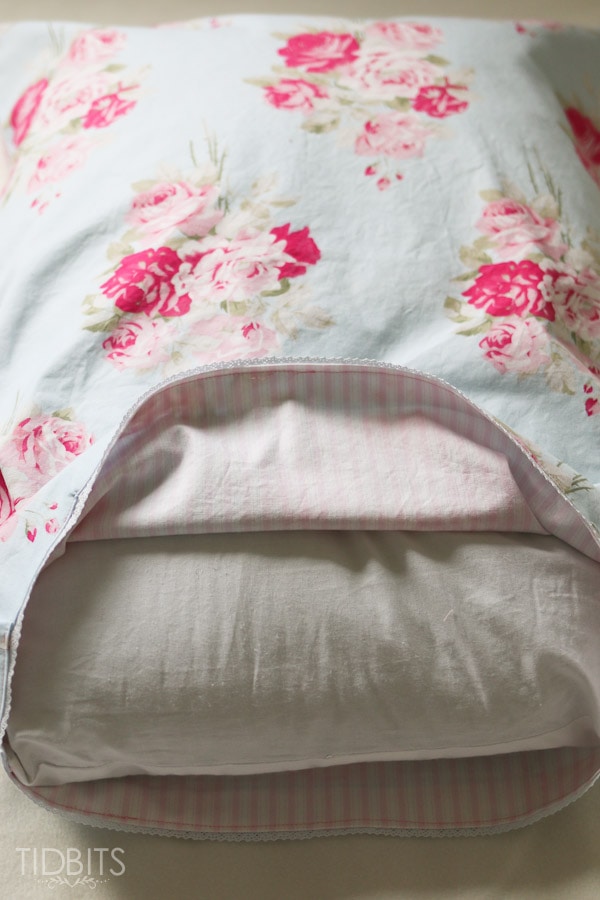
Before you flip this right side out, fold the open edges down 1 inch, wrong sides together and press in place. Do this for both pieces.
Turn just one of the pillowcases right side out. Insert the other pillowcase that is wrong side out, inside of the other. Match up the side seam and the top edges where you folded and pressed. Pin in place.
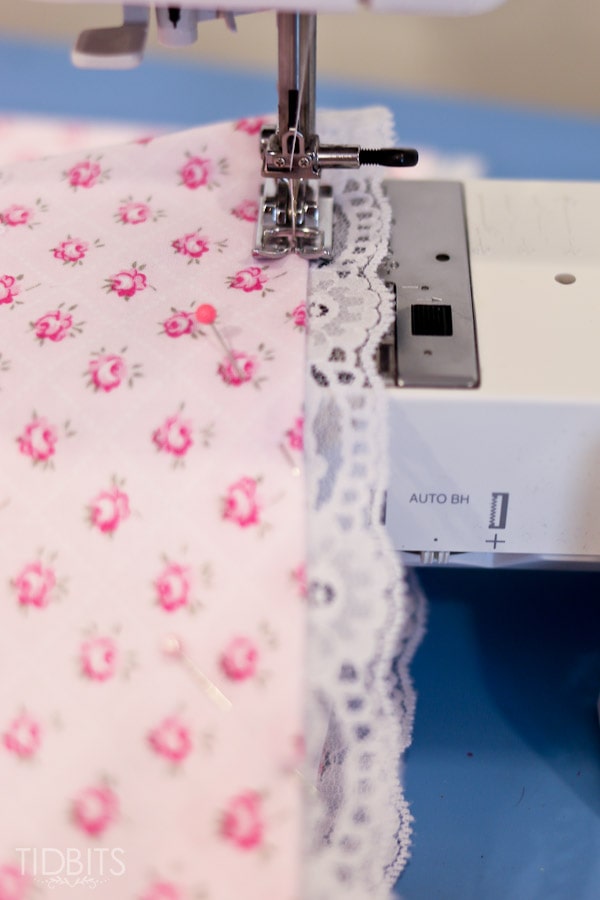
If you are adding a trim to the open edge, now is when you will need to insert the trim between the layers and pin generously in place.
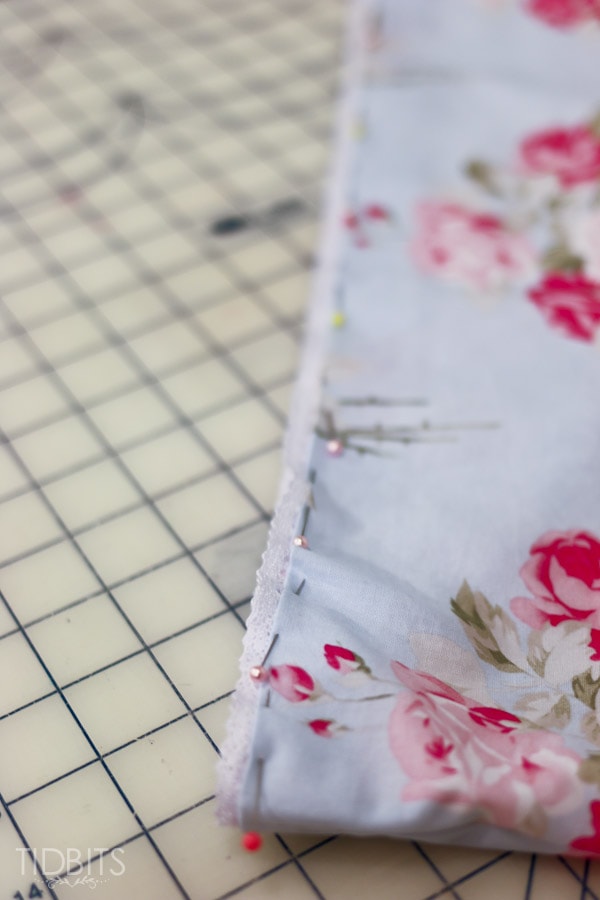
Stitch around the entire opening, 1/8 inch away from the edge – securing the layers and trim in place.
Press it all nicely, and your finished!
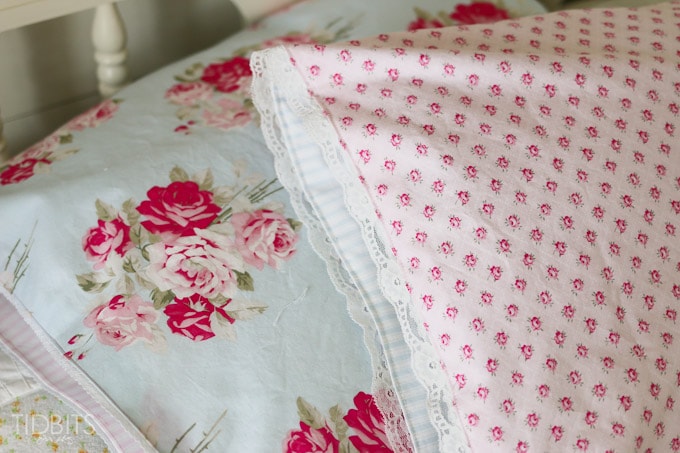
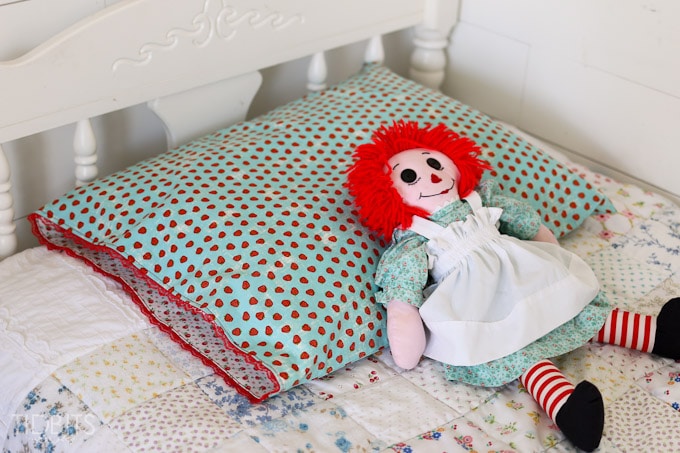
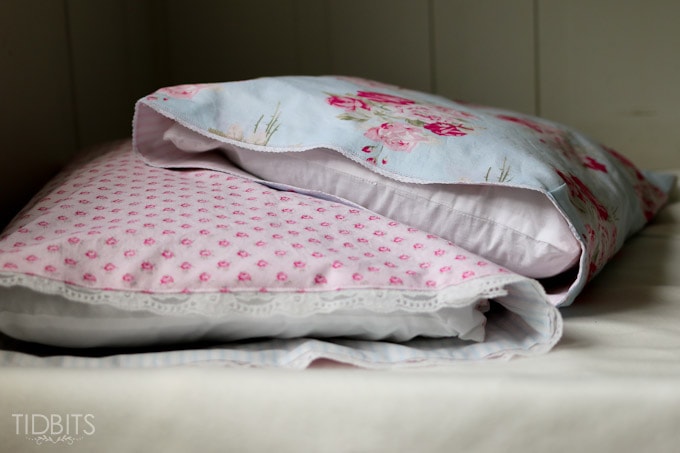
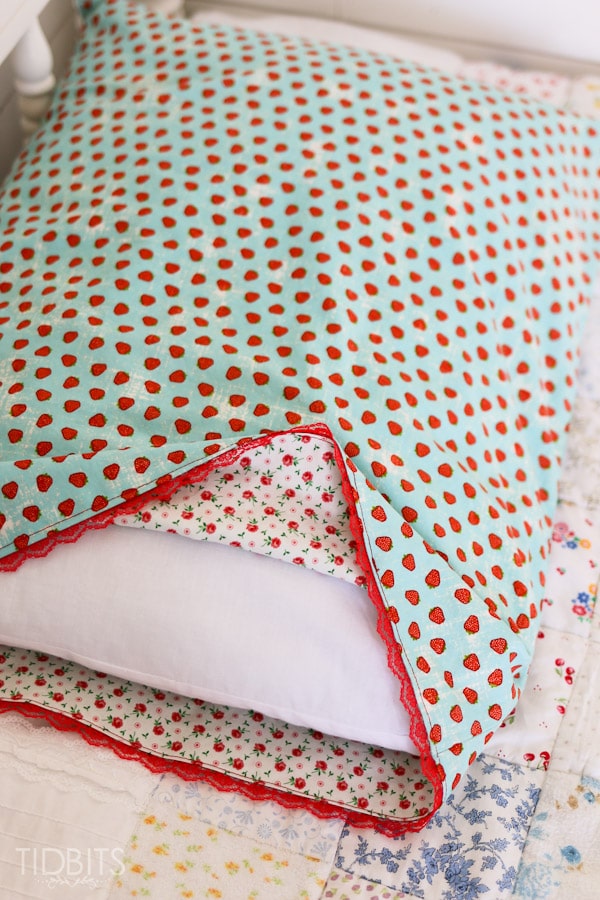
Pick the side you want on the outside and insert your pillow, and change things up whenever you please.
I’m excited to give this a try for holiday seasons. Thanksgiving on one side, and Christmas on the other. My kids would love that.
Be sure to leave a comment below to enter the pillow giveaway! Make sure you enter your email address so I can contact you if you win!
Good luck!
*This post contains affiliate links. But rest assured, I never recommend a product I do not use and love!
**View my link party page, here.


Did you make a video for this? Or, is there a printable version?
I’m sorry, I didn’t. This was posted long before I made videos.
2020…giving this a try. Home and trying to be most frugal and adapt to MAX productive! Keep ya posted. Be blessed!
I was looking for a tutorial on making pillowcases and found your tutorial. it is genius and the photo of your sleeping daughter with the cutest profile – just made me melt.
without sounding like “the princess and the pea” is regular quilting fabric soft enough to sleep on? i know some lines are softer than others. any you could recommend? or am i being too picky? thanks!
I just looooove these pillowcases!??????. I have recaptured my love for sewing since I retired and my obsession at the moment is pillowcases. So thank you for your lovely ideas!
Only problem is , what do I do with them all???
I never leave messages but these pillowcases were just too cute and so vintage looking. They reminded me of my grandmother’s before linens. You idea about the holidays will just tickle my kids and husband! Thanks so much-glad I found this.
I’m so in love with this idea!!!! Can’t wait to try it!
I LOVE THIS!!!
thank you so much for posting this!!!
What great pillowcases for my grandkids. Thank you for sharing!
What an great idea!! My grandchildren will love the ones I’m going to make for them!!!
What a great idea. I think a few are in order for my grandchildren for Christmas. Thanks for the tutorial
Great tutorial! At last, something to use up all of those “gotta have” pieces of fabric! Thank you!
Thanks for the tutorial. My grandkids are going to love me.
Great idea to make reversible pillowcases. Nice tutorial as always. I’d love to win the new pillow.
Oh my gosh…What a cute idea! I am seeing visions of holiday pillows in my head. 🙂 And that pillow sounds amazing. I have tried so many pillows trying to find “the one” and this one sounds like it! Great job!
I am always looking for a comfortable pillow. I miss the latex pillow of my childhood. It had a honeycomb configuration in the middle and I could even hide things inside without noticing them while sleeping.
Love the idea of making reversible pillowcases! Yours is the best tutorial on pillowcases, since I discovered the “burrito-style” case with French seams!
Thanks so much for sharing.
Annette from Spanish Fork, UT
Great tutorial and such an easy gift to make! The pillow sounds great!
you know I have a lot of experience sewing but pillow cases give me issues why?? But I love your instructions thank you so much. And now i can have two Great instructions thank you so much
I love pillows on a bed makes it feel special
I make and send a pillow and pillow cases to my grandkids.
You’re brilliant! I love this idea and your choices of fabric are just what I would use – already have some in my stash 🙂 Thank you for sharing your tut with us!
This is so great of you to share. Thanks, and thanks again! Happy sewing!
I am finding it so difficult to stay asleep all night I cannot afford to buy an expensive pillow only to have it not work any better than what I have. I would love to try this pillow. I will definitely try the pillow case.
Loved your tutorial, the pillow cases look so peaceful and inviting.I will be sewing some:)
Great idea, my mother lives in some retirement facility . Her room is small so I think this will be nice for her to be able to change her case as desired.
What a fantastic way to use these reversible pillowcases. I watched my grandmother through retirement homes, and I agree – any way to make them feel at home and like it is a space for them is well worth the effort. So glad I could help!
What a cute idea! I have trouble getting to sleep and would love to try this pillow. I’ve tried everything I know to induce a better night’s sleep.
Thanks for this tutorial. I will try making the pillow case. You recommended the sheets from this company that makes the pillows. I hope they don’t shrink. Margie
I’ve since received their microfiber sheets, and haven’t noticed any shrinkage. They are super comfy! Thanks for coming by.
What a great idea. Pretty enough to leave on top of the bed spread, making it easier to children to make their beds. Instead of lace, I will add pipping to the edge of the ones for the boys.
These are just so sweet. I love each and everyone of your reasons for making a reversible pillowcase…..not that you need to justify it ?
Great tutorial. Can’t wait to try. Re pillows. I have spent a fortune trying to find a right pillow. Thanks.
I would love to try the pillow, I need a new one desperately because of neck and back problems. I have pulled out fabric already to start the pillowcases, soooo cute. Thank you, Nina
I really like the reversible pillowcases. Like the directions. They seem very straight forward. I would really like to win the pillow form. It sounds amazing.
Thank you for this tutorial. My grandchildren love the pillowcases I make them and this will be really special.
This is a great idea – Thanks for the tutorial.
thanks for the great tutorial!
What a great idea! Can’t wait to start making some. Thanks for sharing!
Fast and easy to make for our local kid’s charity. Thanks.
Wonderful for matching my patchwork quilts thanks for the tutorial
lOVE THIS DOUBLE PILLOWCASE,CAN’T WAIT TO TRY IT.
Love this idea! I make pillowcases for family (mostly the grandkids) but have never tried a reversible one. Looking forward to choosing fun fabric (my husband wants a baseball/basketball one!). Thanks for sharing this!
They came out so pretty, and I love the fabric. Thanks for the tutorial. I may elect to choose flannel as one of my fabrics; this way I’ll have both, a chilly and warm weather pillowcase in one!
I luv the pillow cases!!!
Pretty pillows thanks for the tutorial!
Going fabric shopping soon to make the pillowcases..Tutorial is great and oh how I would love to win the pillow.
I’ve been looking for something like. Now I have. Thanks!
A wonderful tutorial and such an awesome giveaway. Thank you!
Totally using this tutorial. What a great idea!
Awesome tutorial and the pillow looks so comfortable!
Count me in for the Linenspa pillow giveaway! I have yet to find a pillow that will allow me to get a full-night’s sleep and I’d LOVE to try this one…which will, of course, be covered in a reversible pillowcase!
Thanks for the tutorial and the giveaway!
So Pretty!! Thanks for the Inspiration and a chance to sleep comfty!! Smiles.Cindy
Love love love your pillowcases. The fabrics are beautiful! Thanks for the tut and opportunity to win!
Great tutorial…. very cute idea.
I love this! Thanks for sharing this, I have lots of hoarded fabric that this will be perfect for!
Love these pillowcases. I will be keeping these in mind next trip to the fabric store.
I can totally relate about your husband not stealing your pillow! I laughed because that is so me! Thanks for sharing the tutorial. Pinned for my DIY list of things to do. I am not good at sewing but this looks pretty simple so definitely worth a try.
This would be great to do with my daughter. We could make some for my grandbabies! teachinmomma123abc at yahoo dot com
my wife would love these pillow love to win these for her. thankyou, ken
LOVE these!! What a great idea!!
These are so adorable! What a great tutorial! I need to make a bunch of these. And the pillow looks so comfy!
I’ve made many pillowcases, but I never thought to make them reversible! What a great idea. Thanks for the tutorial.
I have been looking for a good quality and supportive pillow to replace my old one. This pillow looks very comfortable! I also love the idea of your reversible pillow case – may have to try this!
Memory foam pillows are the best!
I have been looking for a better pillow. This looks great!
Love, Love, Love this idea!!! Thank you so much for sharing. I love the idea of Thanksgiving & Christmas!!! :0)
I love the pillowcases. Thanks for the opportunity to win the pillow. This would help with my snoring .
Awesome idea and just in time!
I would love to try a new pillow! Thanks for the chance to win!
I love the tutorial and anxious to try it mainly to dress up my beds. I would love to win the pillow, I have been searching for months, bought several and hated them. The last one was a bamboo pillow and didn’t like it either. Soooo I am back to using my old, wornout one.!!!
I love pillows – especially if they give me a good nights sleep.
I can’t wait to try this for my grandchildren.
I’ m just starting up on sewing again and this is a sweet and cute project for me. Now I just have to find some cute fabric for my twin toddler boys. Thanks for the tutorial.
So excited I found this site. I am making the envelope pillowcase.
I just found this site and am so excited! I am new to DIY so I am thrilled to find something I can do.
Pretty and clever! I have to try this for sure!
Love the tutorial! And could really use a good pillow!
I love these pillowcases, especially the vintage/
Shabby chic look! I get bored and like to change things up a bit so these would be great! Nice for gifts too. Please enter me in the pillow drawing. Ive had 3 neck surgeries and can never find a good pillow, tho I must have tried almost every kind there is. I often wake up with numb hands and can’t turn my head from sleeping in a bad position. I could never afford to buy one but would be so lucky if I won one! Thank you for sharing your tutorial. I’m going to try these. 🙂
Love this tutorial! Thank you for sharing your time & talents! Your girls are precious.
The pillowcases are just precious. :o) I love the fabrics that you used. I know what you mean about being a pillow snob!!! Thanks for the chance to be a part of this wonderful giveaway!
I love your pillow cases! They are so sweet & look like a fun project! They would make nice gifts, too. I will have to check out Linenspa. We could all use a great pillow! They’re so hard to find!
Just found your website. Love your creativity and sense of humor! Thanks for sharing your ideas with all if us.
Thanks for the great tutorial! Your cases are beautiful. I love the idea of a holiday one too.
I love that there is more than one way to sew a pillowcase! This one looks great for girls or boys.
Thanks for the wonderful tutorial and that memory foam pillow looks amazing too!
I can’t pass up pretty fabrics either! I’m totally going to make some of these!
I love these pillowcases,I’ll be making some for sure!!! Thanks for the chance to win a pillow, too.
Great site! I have been using a memory foam pillow for the last four years. It has helped with my migraines and helped with my insomnia. It would be amazing to have this one considering mine is wore out. I would love to make a cute pillowcase for it as well!
Cute pillowcases! My granddaughter is a beginning seamstress and this will be a great project for her. Thanks so much.
Love the idea of a reversible pillowcast and your tutorial is easy to understand. Thanks for the inspiration.
This looks like something even I can do! Love the fabrics you chose! Thanks for sharing.
These are so cute! Definitely something I would like to try.
This reminds me of making pillowcases for my daughter when she was little!
Love your cases ….looks really easy…I see birthday and Christmas gifts….I see lots of cases in my future. Thanks
What a super lovely giveaway <3
Love your idea! I’m not much of a seamstress but I might have to try this. I love small prints that match but don’t match☺️. I have some neck problems. I might have to try one of these. It would still be cheaper than a massage.
I have sewn for many many years, love to read all the new ideas out there. If I brought this to a quilt retreat many
many sewers would want the instructions
Adorable fabrics..you have great taste. I wish I had learned to sew!
This is a fun tutorial! And my neck could really use that pillow!
This pillow case makes me wish I could sew!
Can’t wait to make these pillowcases for my girls too!! And what an awesome giveaway… Thanks for a chance!
This is darling and such a lovely project. Your tutorials are always so well presented. Thanks! Can’t wait to make a reversible pillow case.
Beth
Love it! I’m cutting fabric for two of these right now. Thanks for the tute & giveaway!
Makes me want to learn to sew.
So pretty and what a great idea, beautiful little princess too.
You can give me sewing lessons anytime! Such a fun pillow case! You are so talented!
I just found your site about a month ago and have enjoyed reading all of your posts. I love this last idea of the reversible fabric pillow case and plan to make a few for our home. Your fabric choices are beautiful!
Thank you so much,
Yvonne
I love these pillow cases! SO CUTE! I just bought fabric to make new pillowcases but now I may have to go get more to make them reversible, I love that idea and had never thought of it before! And I have been looking for a new pillow and eyeing this one. Winning would be awesome.
This pillow look as though it would be wonderful. The reversable pillow case is a great idea. I have many pillows that go on all different size beds. I can now match any case to any sheets. thanks for the directions.
I love the rose pattern fabric! These pillow cases are so pretty and a great idea. I also love to change things up sometimes and what better way than reversible pillowcases. Awesome!
Great tutorial. I’m going to practice and if it turns out good I’ll have some nice pillow cases for my grandson.
These pillow cases!! So darling! Such an awesome blog post! And the pictures are seriously so great!!!!
WOW… You make it look so easy that I really feel as though I could do this without messing up! Thank you…
I absolutely love everything about these pillow cases! Genius! Plus, it is giving me just one more reason to buy cute fabric 🙂
LOVE this! How nice is it to have change literally at your fingertips! Great idea and tutorial!
What beautiful pillowcases! I love the idea of them being reversible. 🙂
I can totally understand about being a pillow snob!!! I have been on a quest to find the perfect pillow all my life!!! I drive my husband crazy buying new pillows all the time trying to find the right one. I truly believe that if I could find the right one, I would sleep better. I would love to try the Linenspa pillow!
the word see was supposed to be in there but my computer decided to send me a pop up in the middle (ugh). It should read:
“This is such a great tutorial. I can see lots of holiday possibilities w/this. 🙂 Thanks for sharing!”
🙂
This is such a great tutorial. I can lots of holiday possibilities w/this. 🙂 Thanks for sharing!