This post may contain affiliate links, which means I get a small percentage of the sale at no extra cost to you. I only recommend items I love and have had a positive experience with. Thank you!
I wasn’t going to do it.
I was going to march over to the Halloween store and buy the kids their costumes this year. There was just no time to make them myself. At the very least, I was going to make them choose a costume from the overflowing chest of dress up clothes.
I just didn’t have time.
And then they each told me what they wanted to be for Halloween.
And that was the end of the logical, practical thinking.
I just couldn’t resist the visions dancing in my head.
Why this year, of all years, did they finally decide to do the costumes I’ve dreamed of making from the moment I gave birth to a daughter.
So I did what any insane mother would do.
And stayed awake for 3 days (well, almost) in order to make 3 girls their dream costumes. (Or were they my dream costumes? Hmmm.)
Well. Now that I am caught up on my sleep, I can say – it was so worth it!!

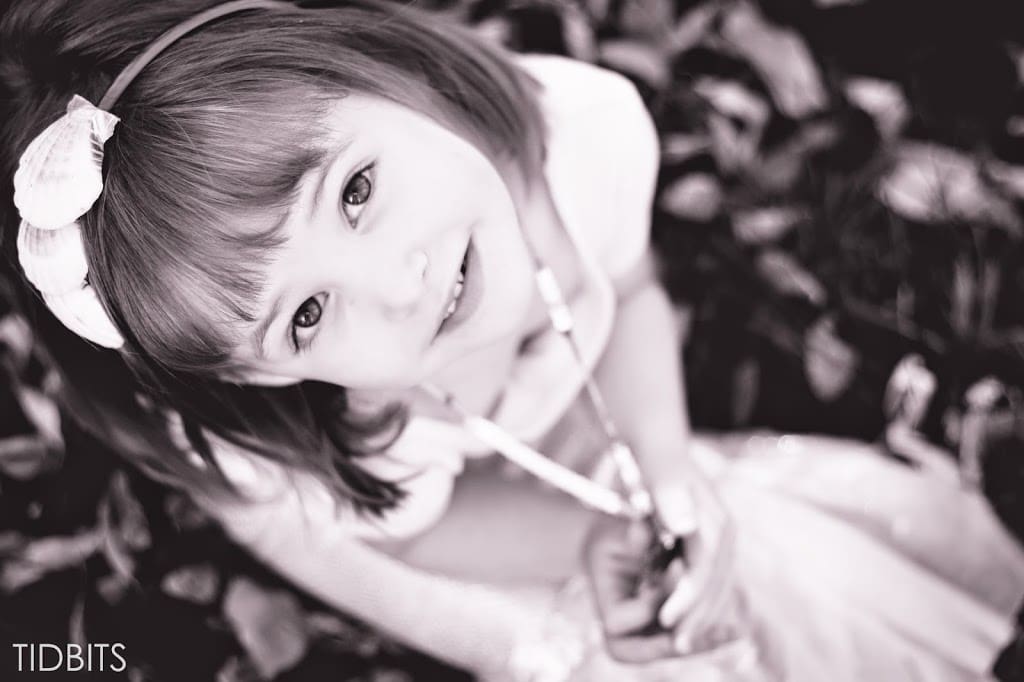
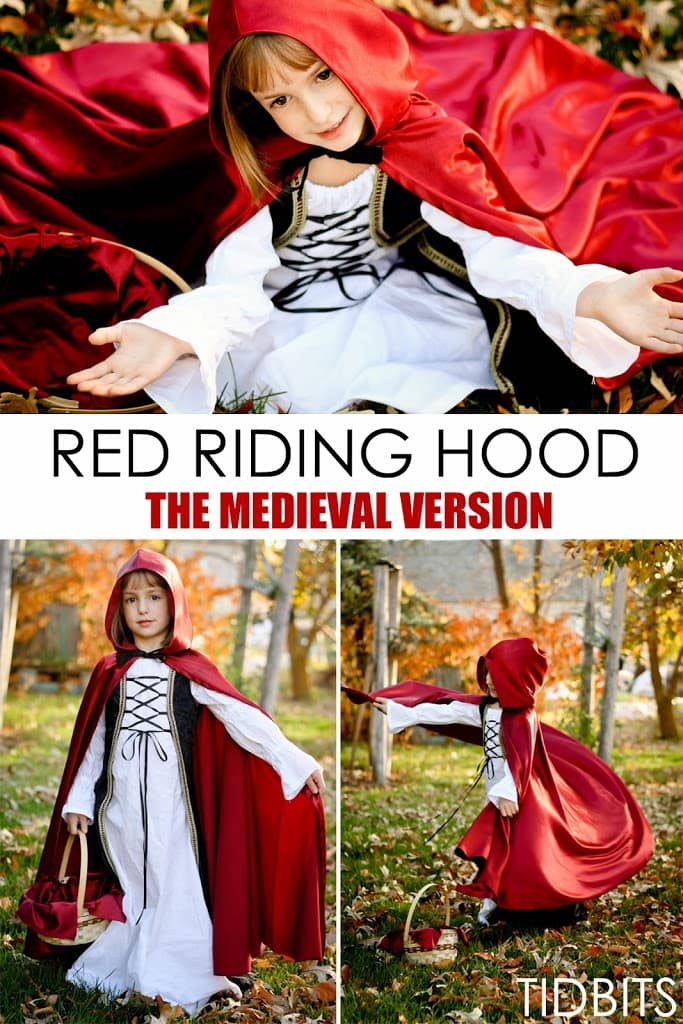
My 3 year old was sure and certain, from the moment we mentioned Halloween and cavities.
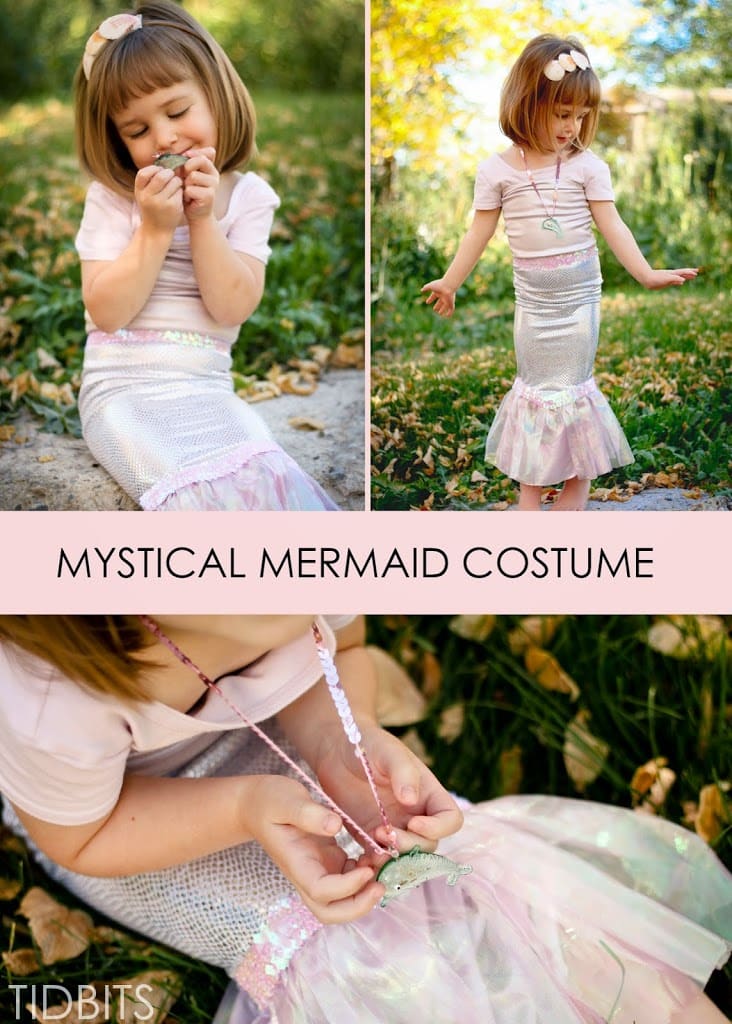
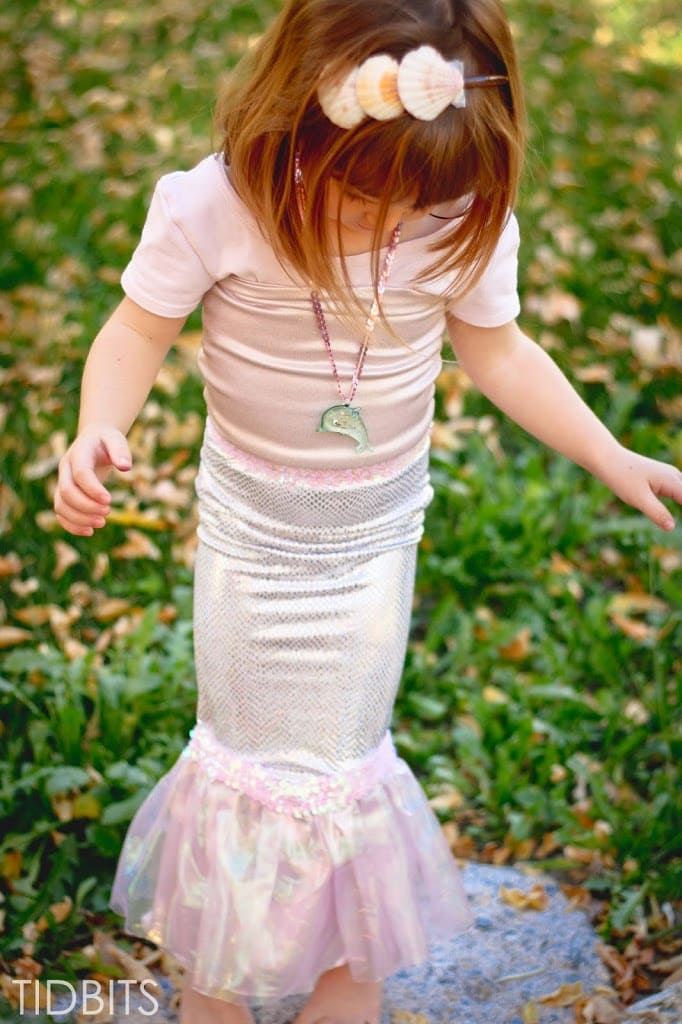
She was to be a mermaid.
Boy, was I grateful when she didn’t say “I want to be Arial.” That would have completely disagreed with my vision of a pink and silver mystical mermaid.
I love that she isn’t too old yet to be so specific.
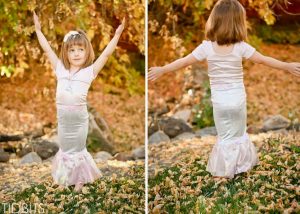
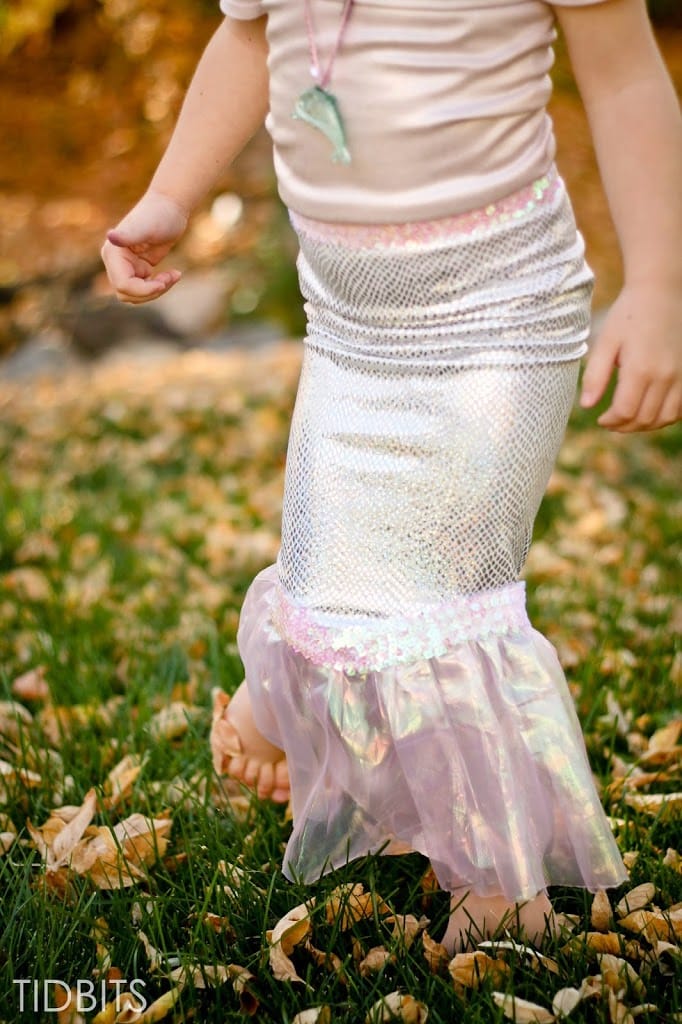
So I designed this costume to be tight, fitted and perfectly shiny.
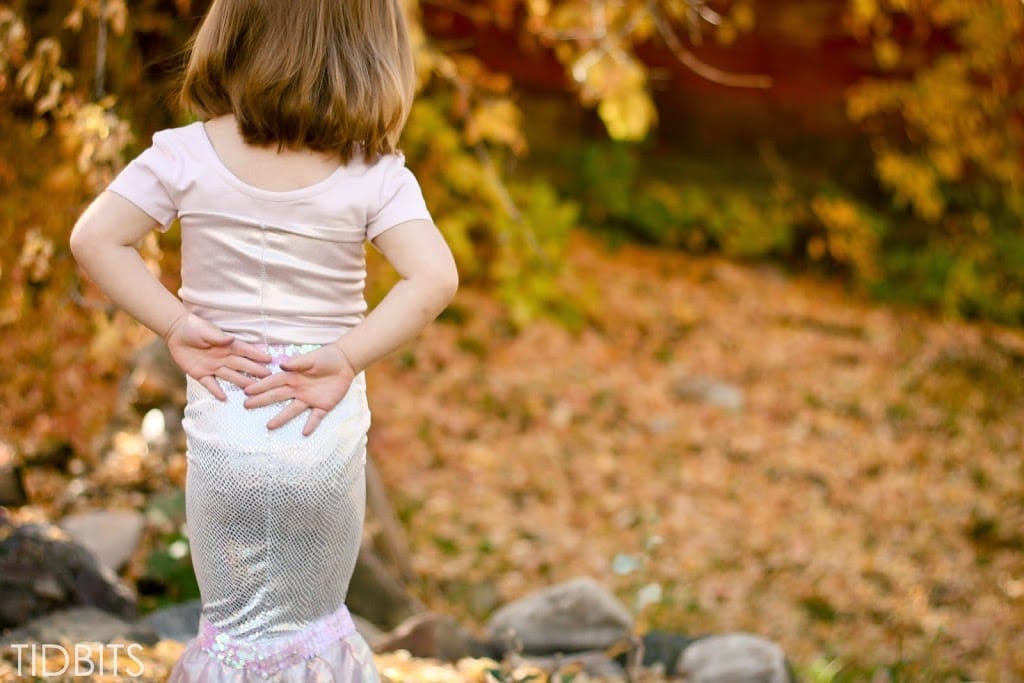
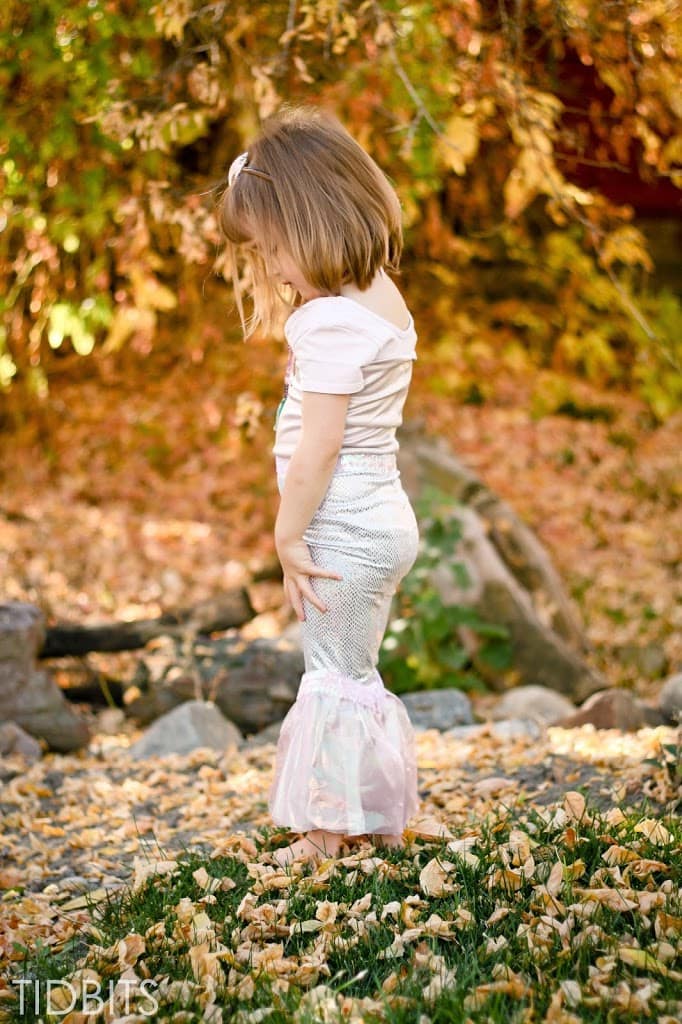
My favorite part is her little bum. Wish you could see her waddle around in it.
Simply adorable.
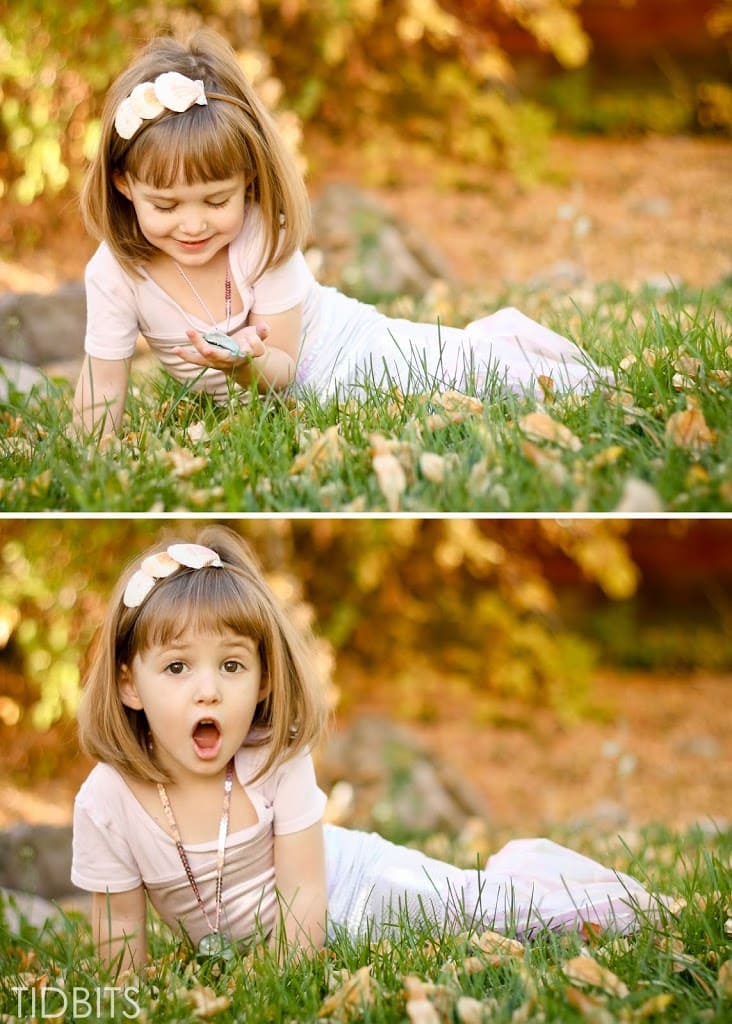
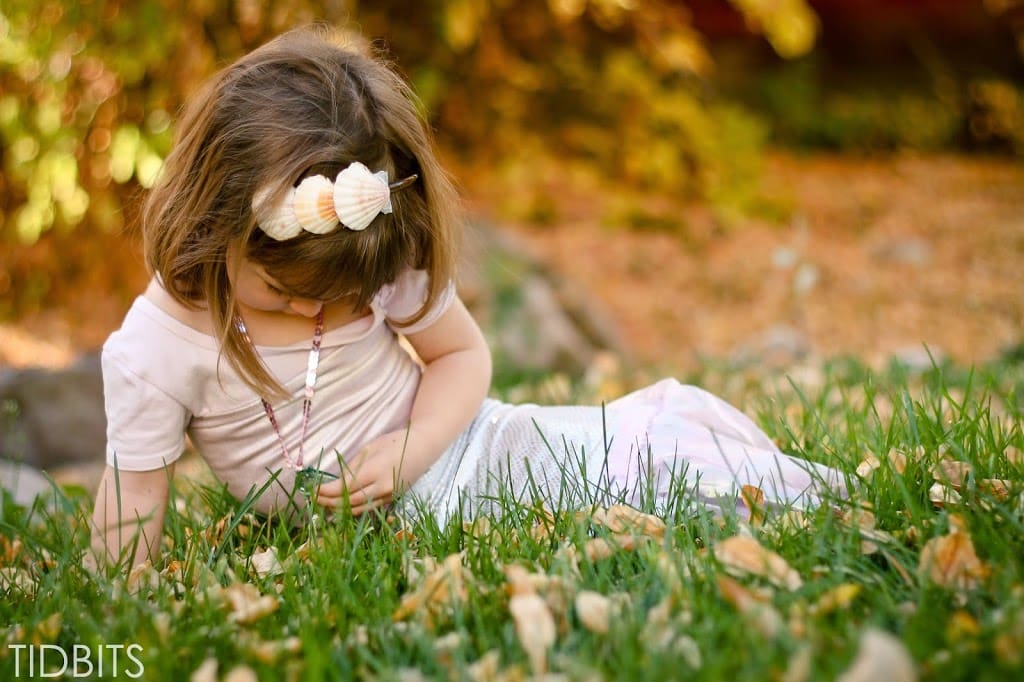
She loves to sit and flap her legs around, as though she has a fin.
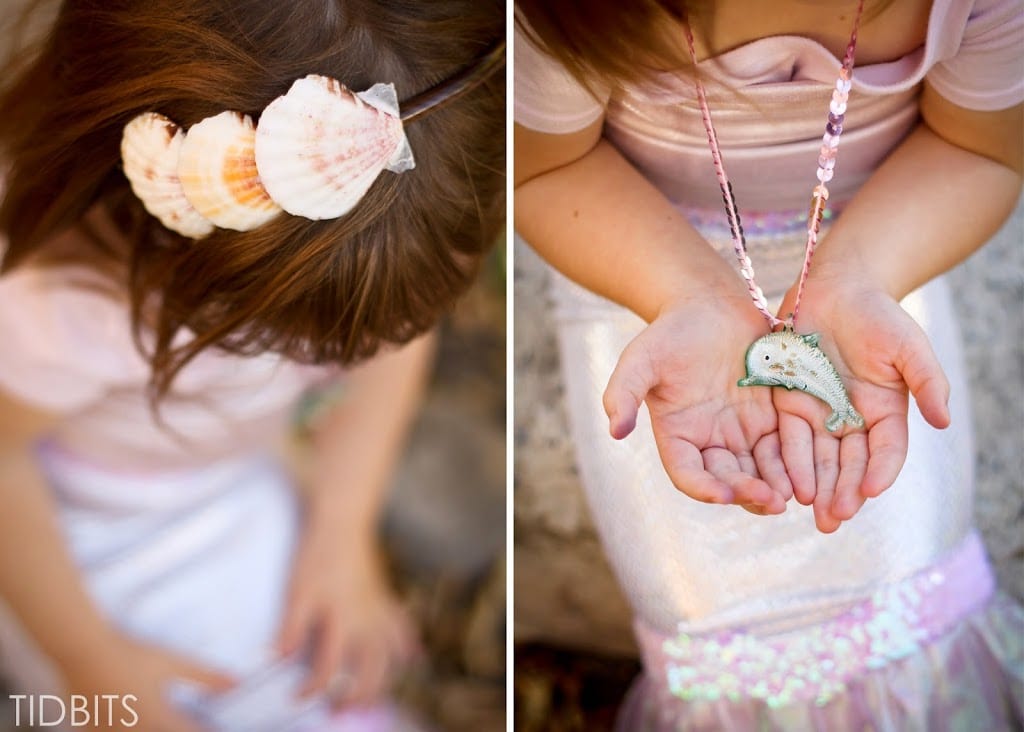
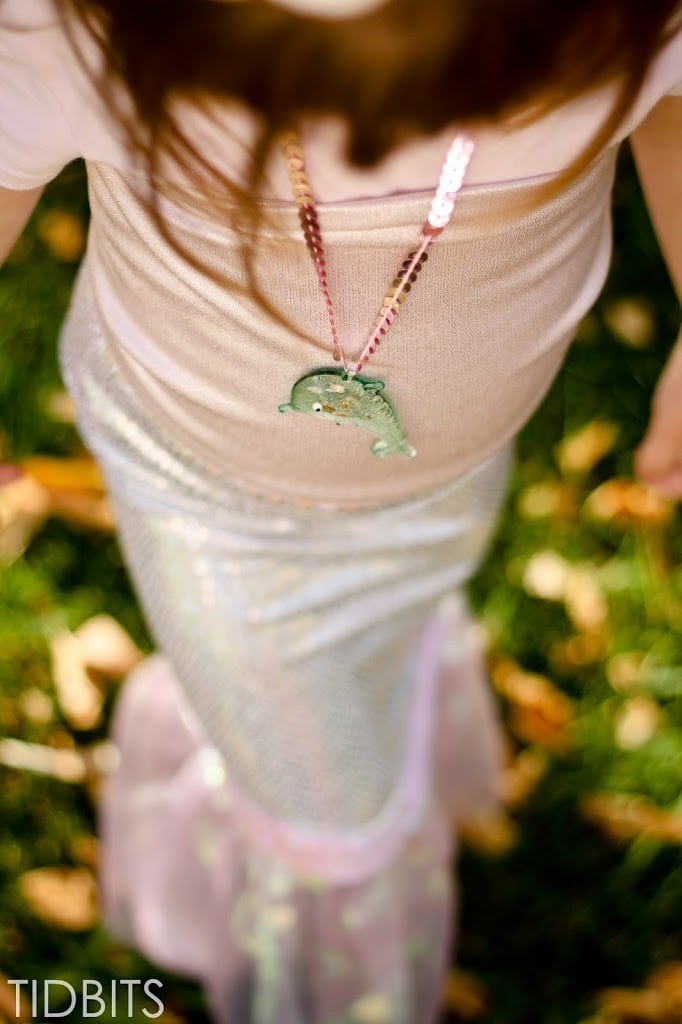
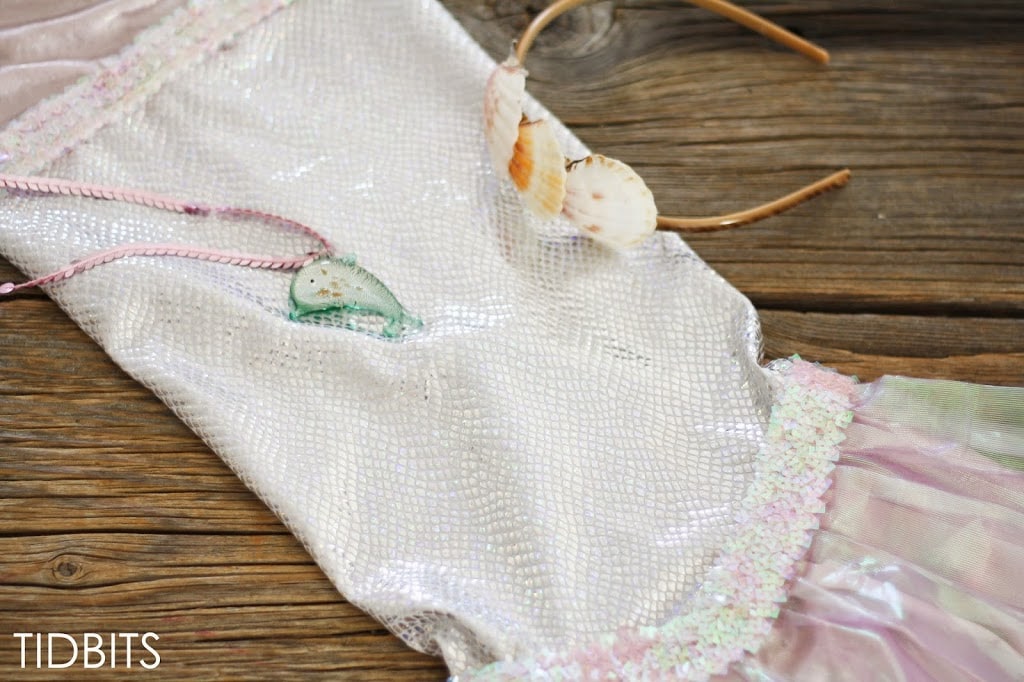
And she is completely mesmerized with the dolphin gem (bought from Joann’s). I may or may not have told her, it holds magical power that would help her speak to dolphins.
But combined with the sea shells glued to a headband, I can’t imagine any dolphin wouldn’t want to tell her how cute she is!

The costume is entirely one piece, and it was so easy to sew up. Her legs are tight together, but she seems to be able to move around just fine in the cutest little strut that makes us all giggle.
I apologize for anyone wanting a tutorial for this. I love to offer instructions but when it comes to costumes, sometimes the freedom of just creating makes it all the more enjoyable.
But here are a few basic suggestions/steps I took to make it up.

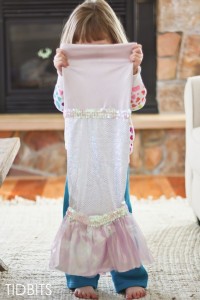
For the fin, I basically pinned scaley looking fabric around her, tapering down towards the feet and ending just about mid calf. After I slipped her out of it, I made a seam in the back where those pins were. That gave me the basic pencil shape of the bottom.
Then I gathered the same fabric with some shiny organza around the bottom and attached it to the pencil shape skirt. To hide the seam, I hot glued the sparkly trim around. I could, and probably should have, hand sewn it around, but I am way too impatient for such things.
For the top, I basically made a yoga waistband, large enough to cover her torso. Then attached that to the skirt, adding the trim along the seam again.
I have her wear a pink dance leotard under it.
I have to say, the costume is a hit with the 3 year old.
And I can’t wait to see her waddle around begging for candy!
Stay tuned for the rest of the kids costumes!!


Well you've done it again…amazing! Wishing I had a magical necklace, maybe one that would help me sew? I am "that mother" who had my girls just pick a costume from their dress up stash this year. Although I did make flower headbands for them…that's gotta count for something right? 😉