
This post may contain affiliate links, which means I get a small percentage of the sale at no extra cost to you. I only recommend items I love and have had a positive experience with. Thank you!
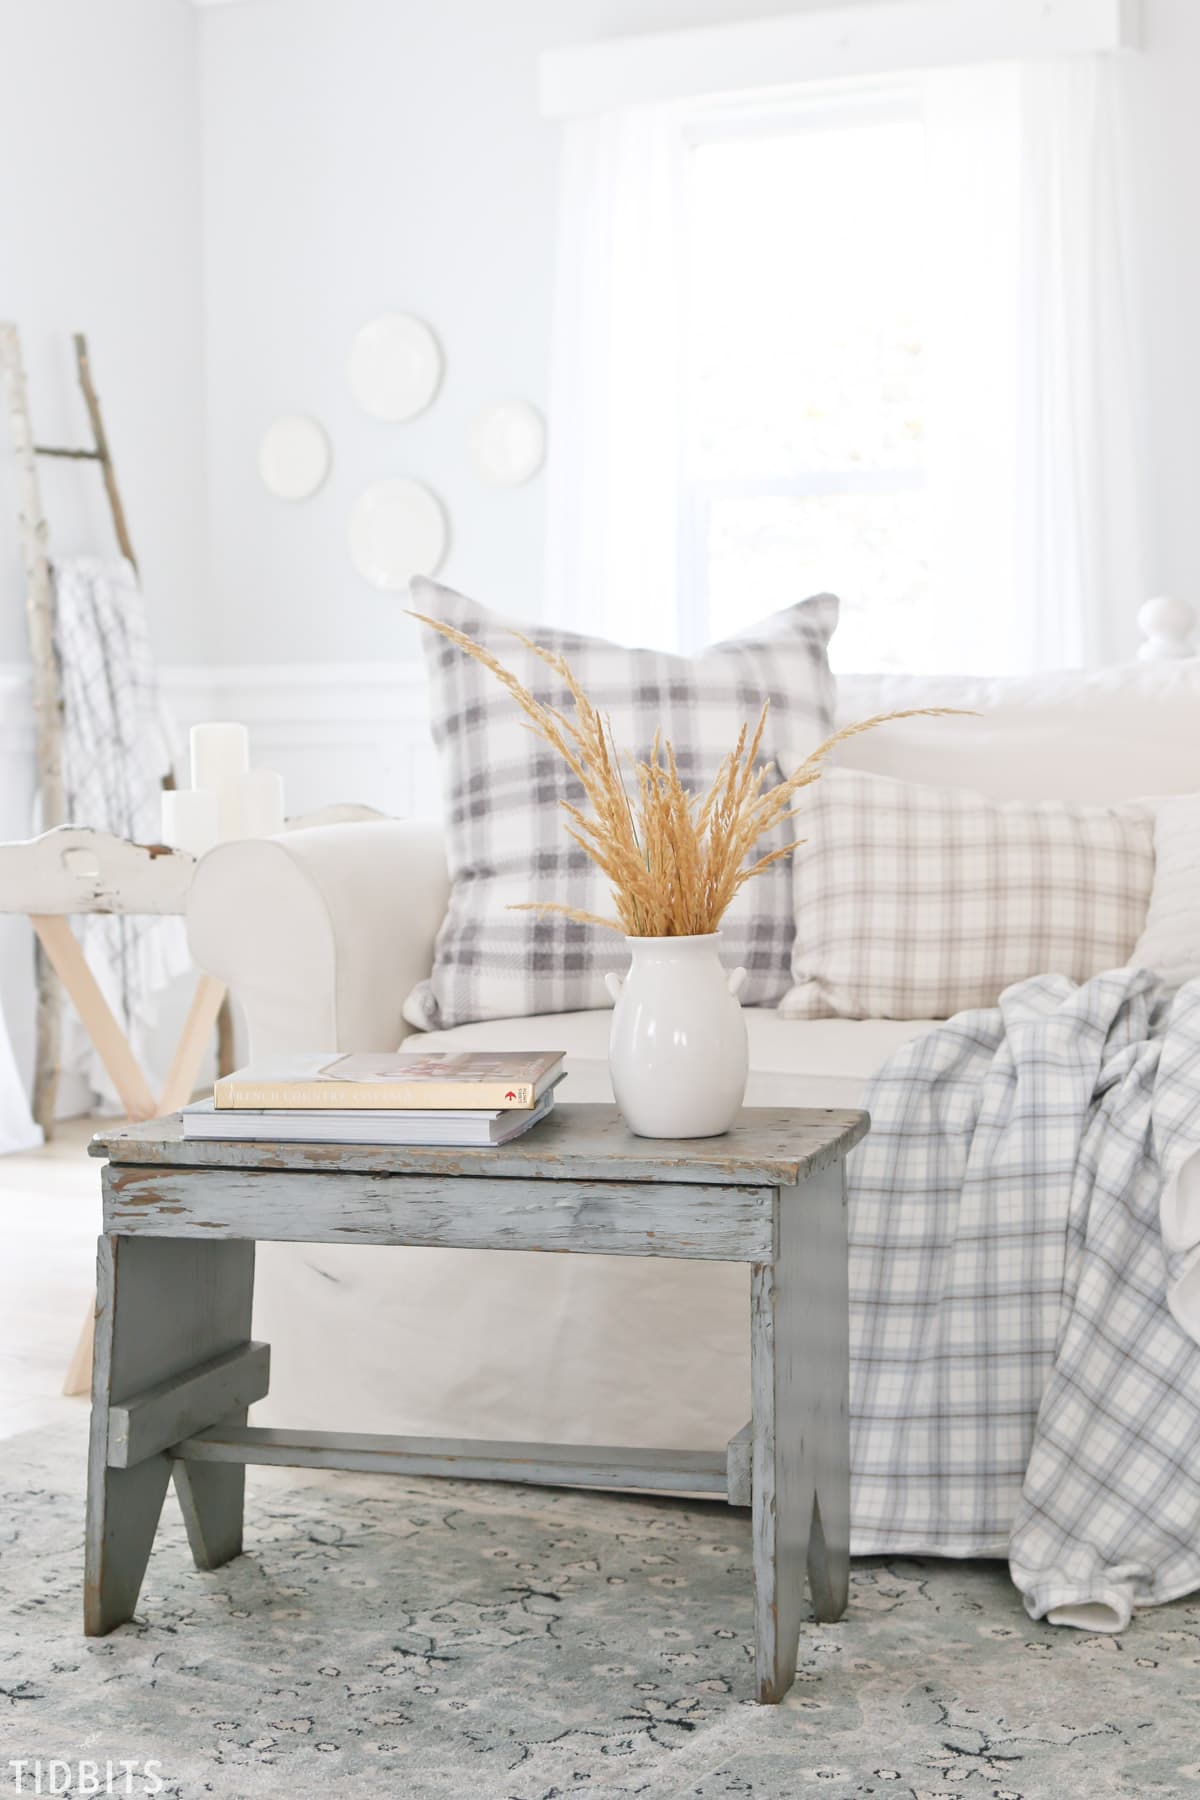
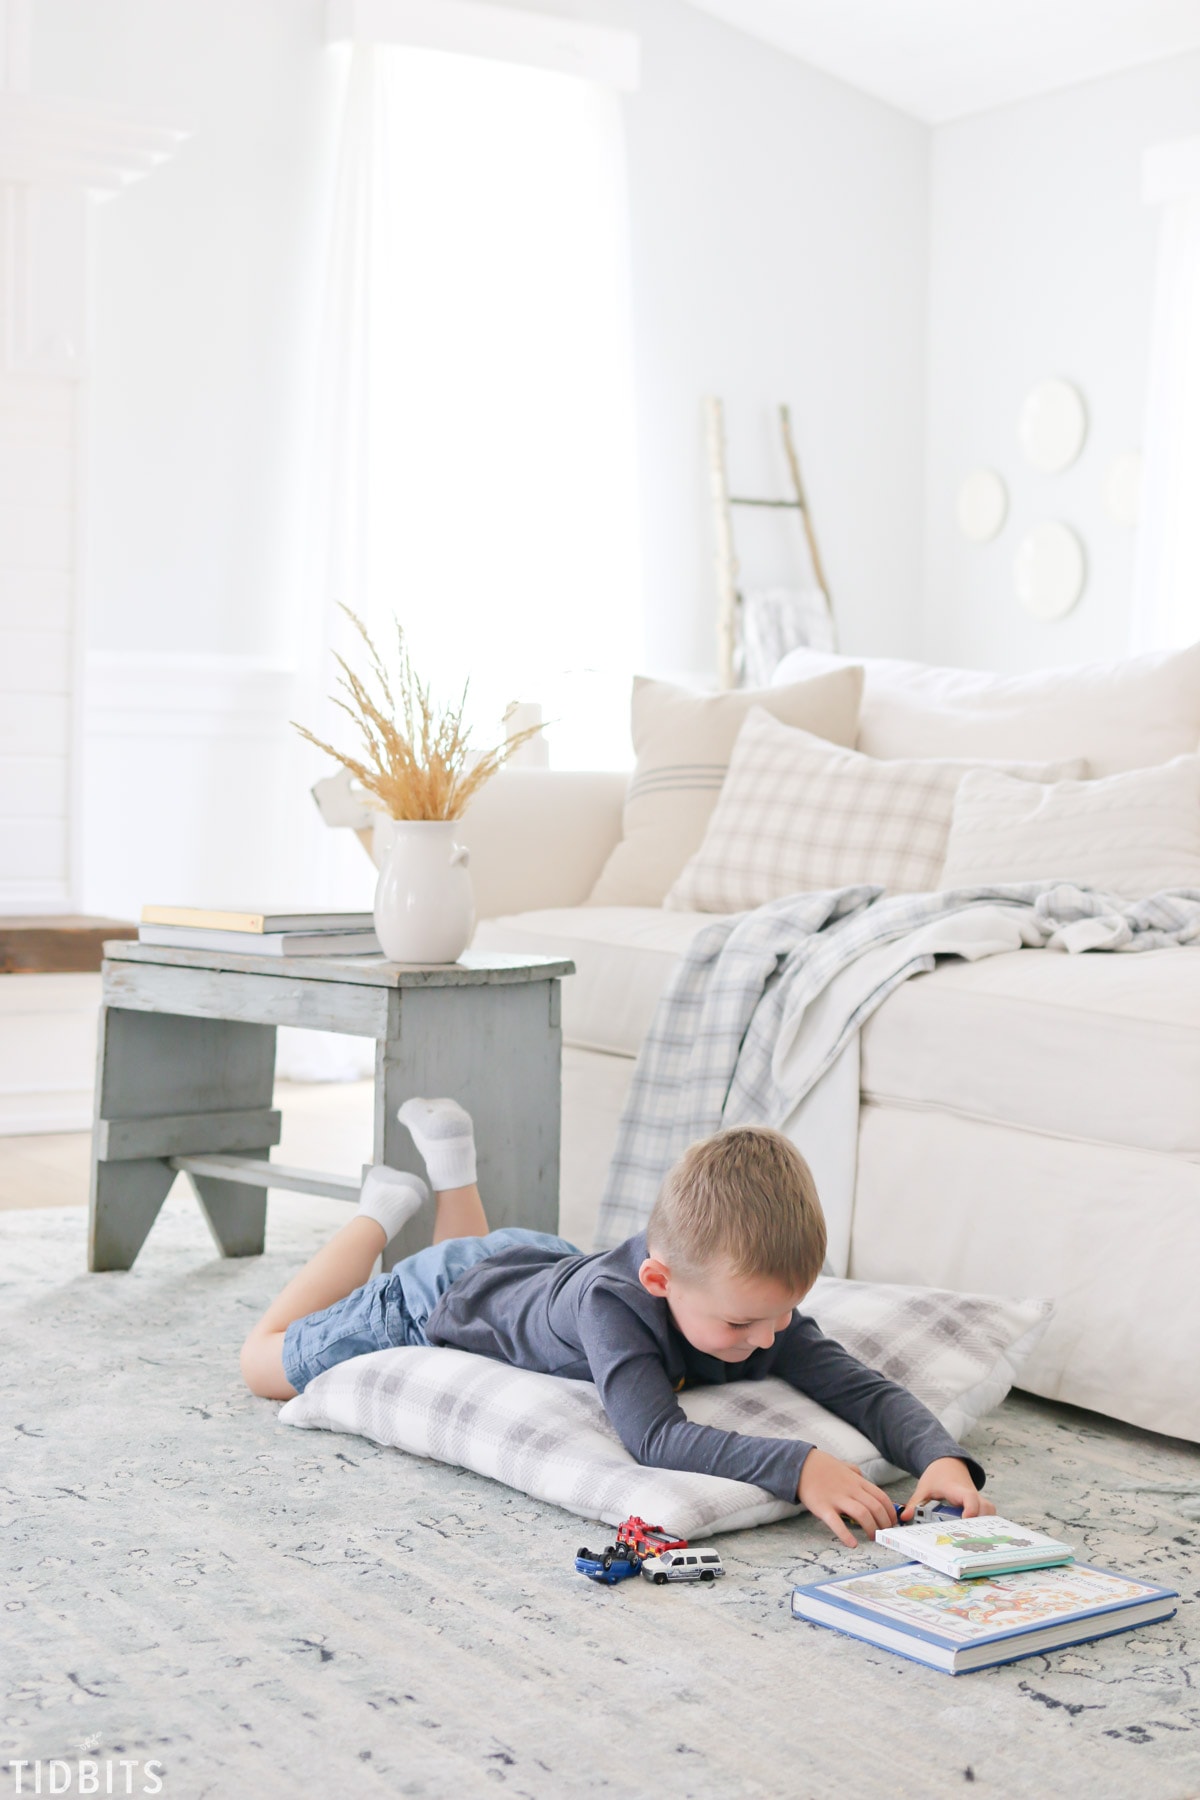
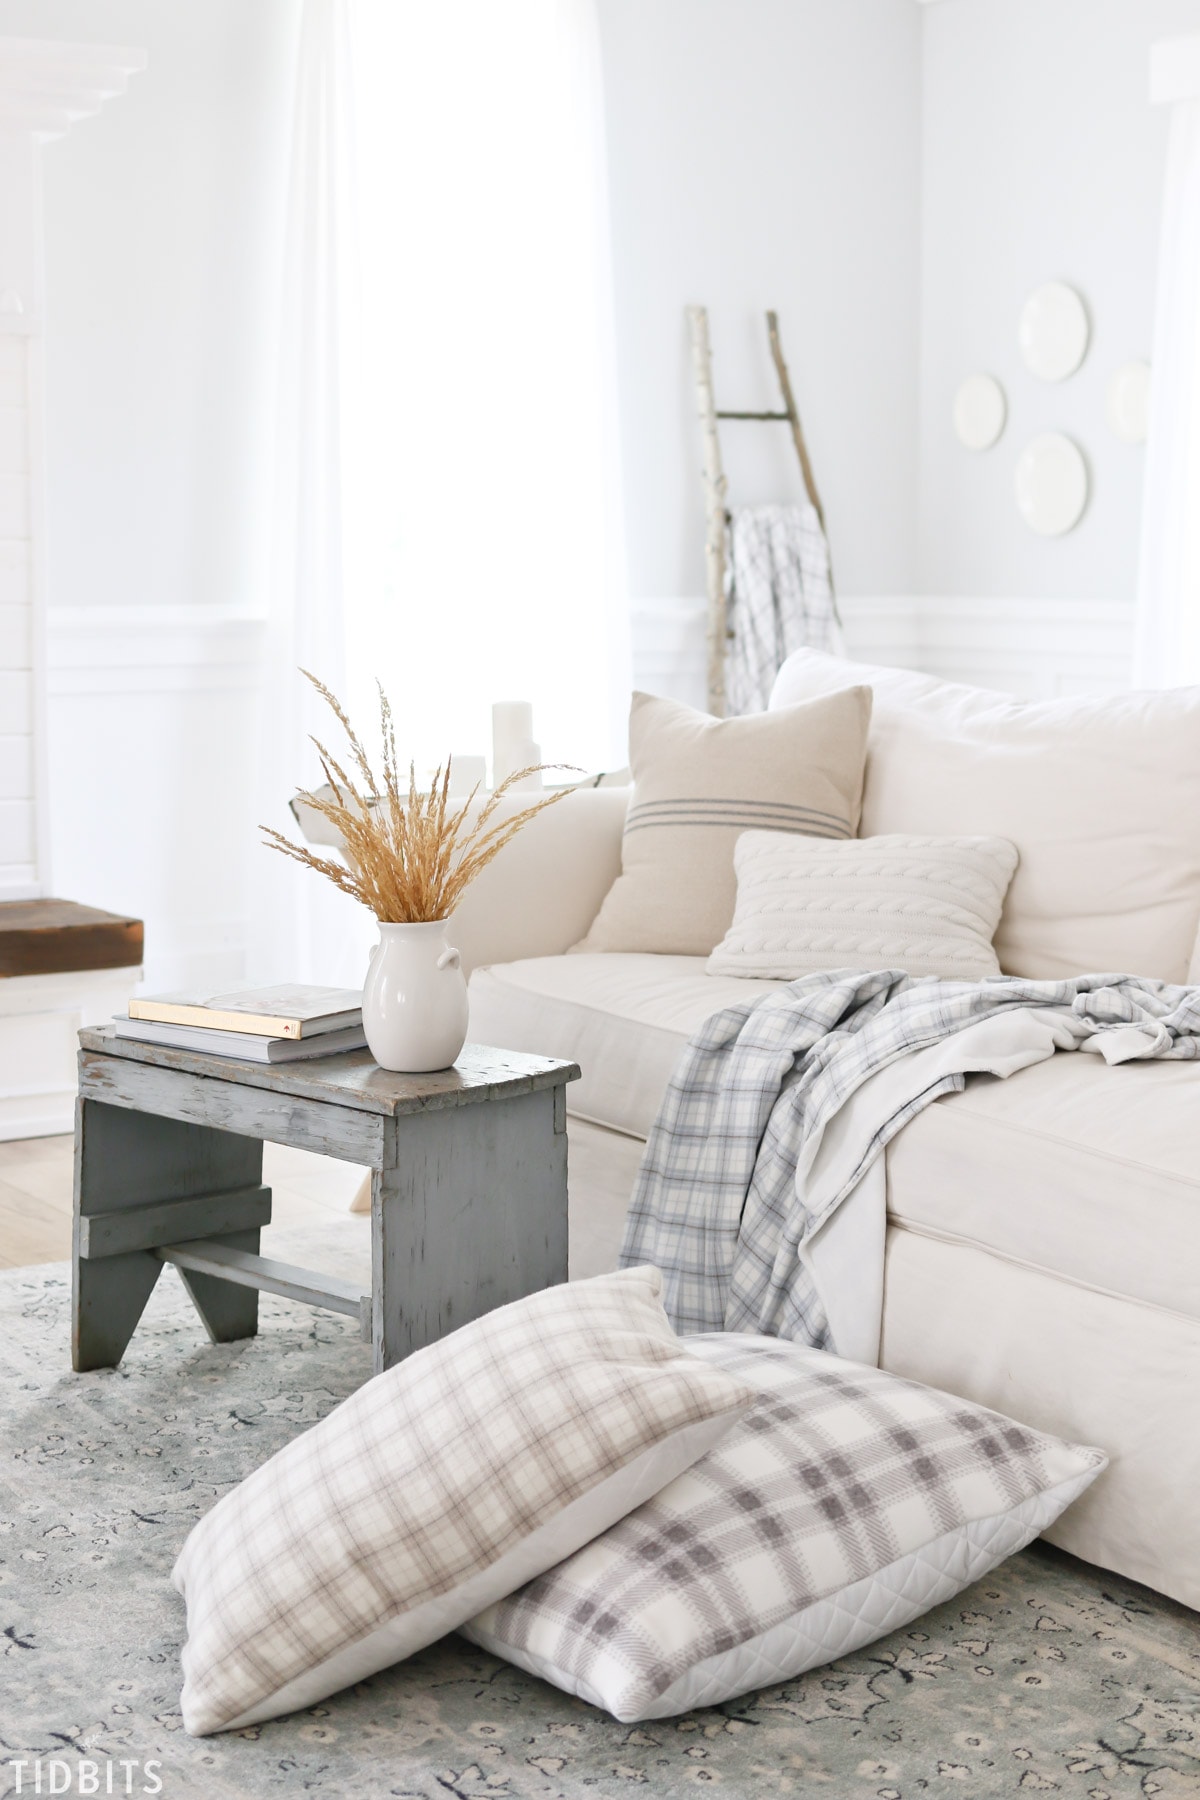
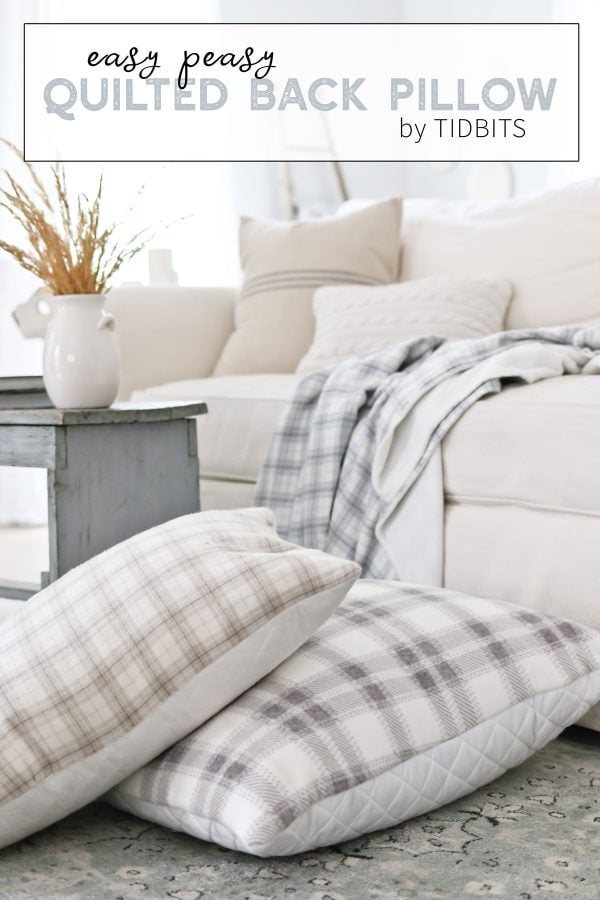
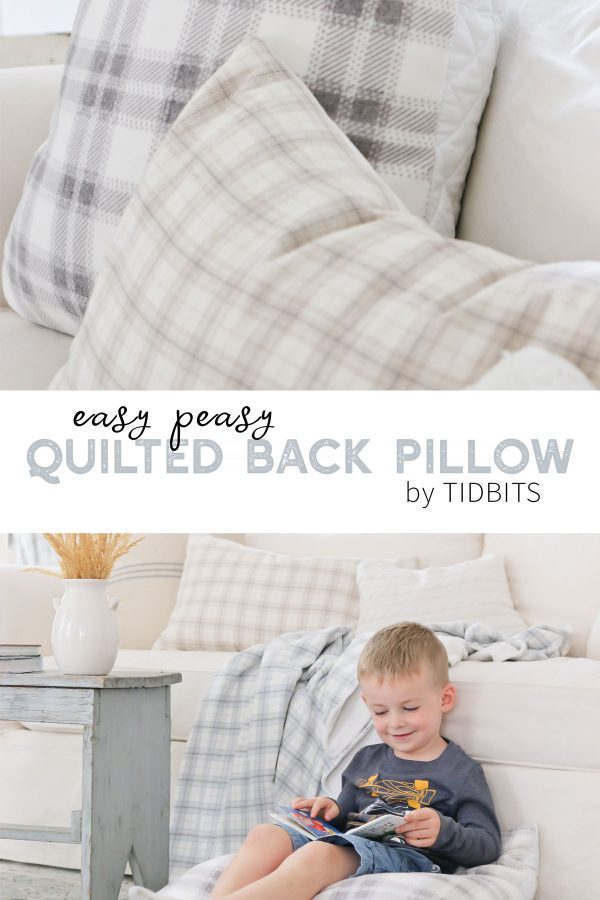
Think you can’t quilt? Think again! Try your hand at sewing this easy peasy quilted pillow (quilted on the back) – any fabric will do, but cozy plaid flannel for Fall is always a good idea.
*This post is sponsored by Therm O Web, whom I LOVE being a Brand Ambassador for. They take my love of fabric and help me turn it into so much more! Be sure to check out other projects I’ve done with them HERE, HERE and HERE.
**Be sure to see more Fall DIY projects from my friends who are also sharing today. All links will be listed down below.
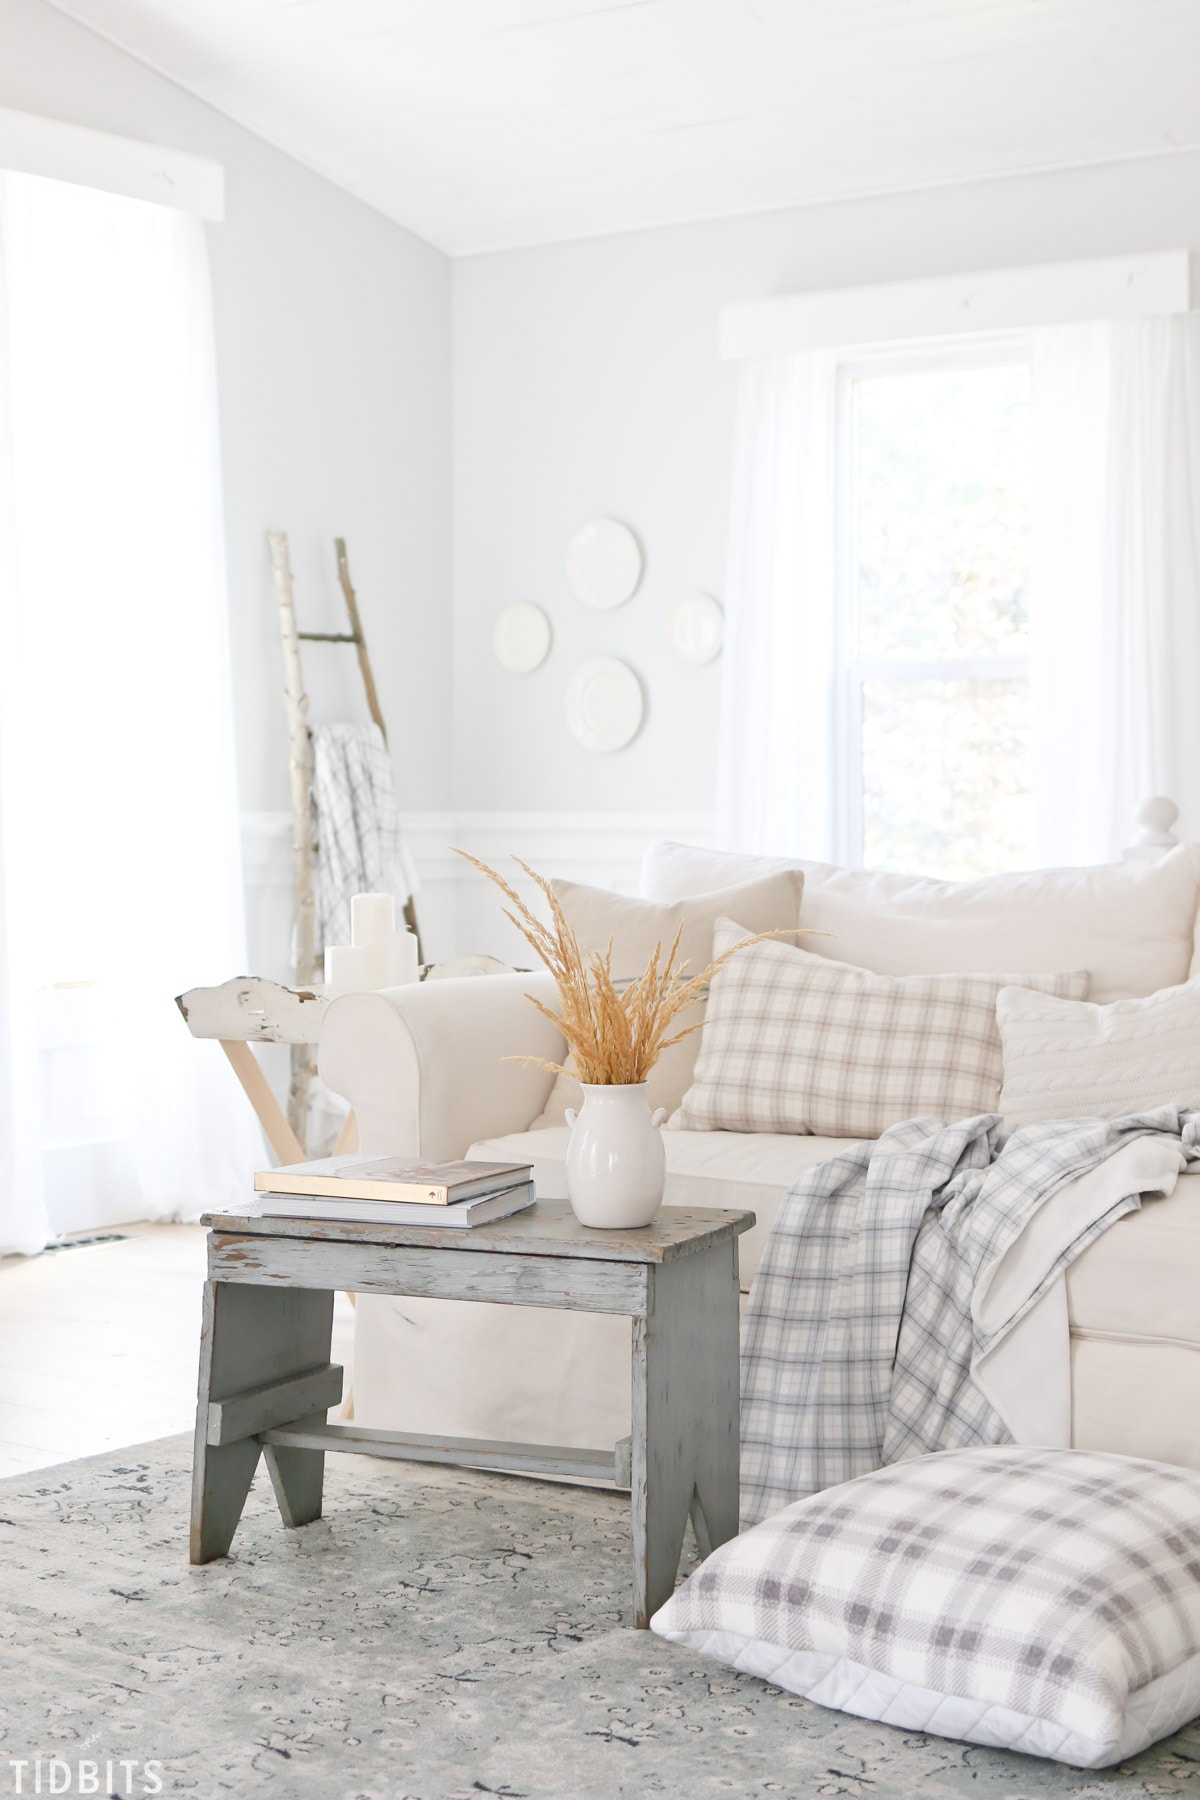
Seeing how this may be the only Fall decorating I am able to share this year (moving and rental home and all) – I decided to go all out with the plaid and flannel fabrics. Why not, right? I snuck into our home that is listed and more than enjoyed myself decorating this space again. Actually, it made me very home sick, but I’m sure this quilted back pillow will be exactly what seals the deal (wink, wink).

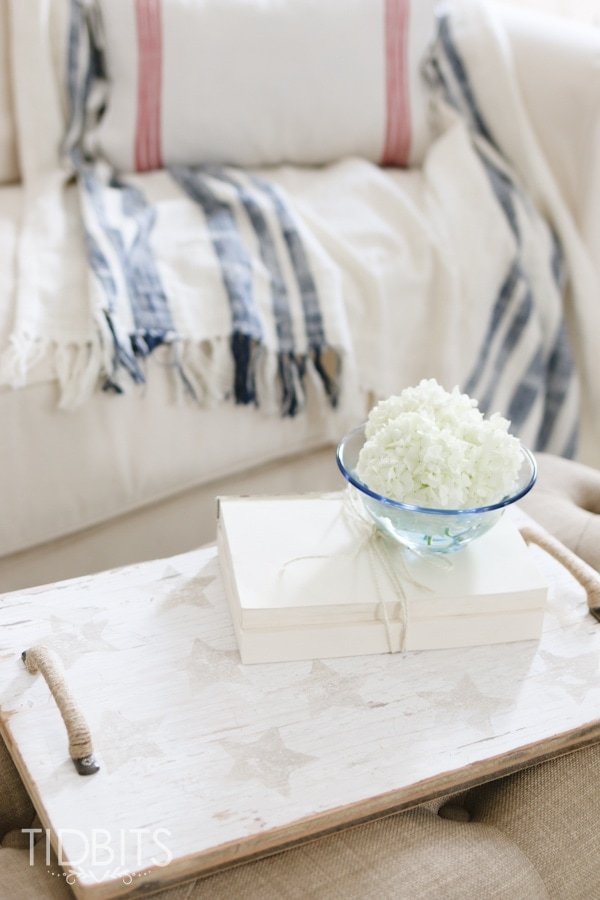
Our Fall home tour was pretty EPIC last year. If you haven’t seen our Fall leaf wonderland tour, it’s worth seeing or reminiscing. I loved the look on my kids faces when they walked into a house that looked more like a Fall forest.
Back to the pillow . . .
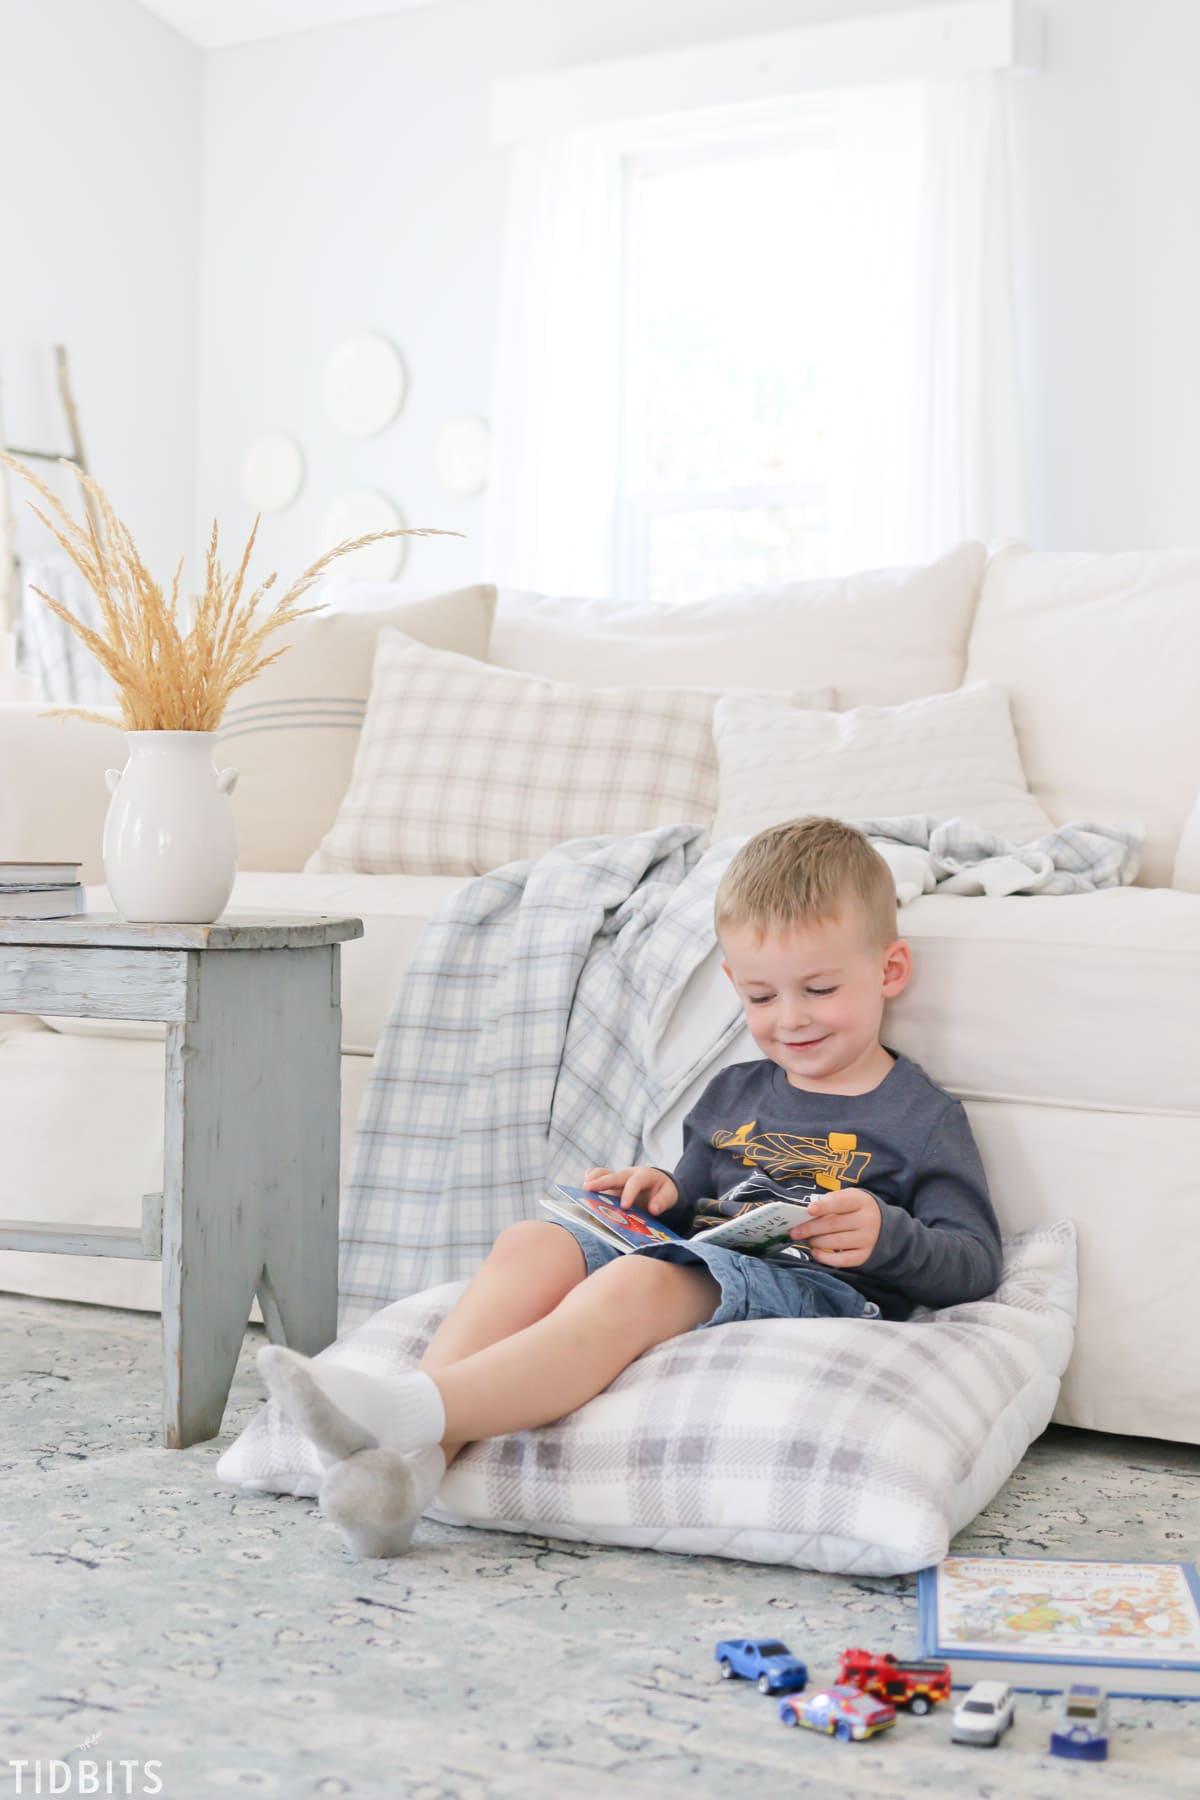
I made this flannel pillow extra sized so it could also double as a floor cushion. Moms all over could agree that pillows end up on the floor more often than not, so why not design one to be used for that very purpose.
Sewing a pillow cover is really nothing too special on the world wide web, but I love the added touch of quilting the back of the pillow. It makes it feel so cozy and inviting.
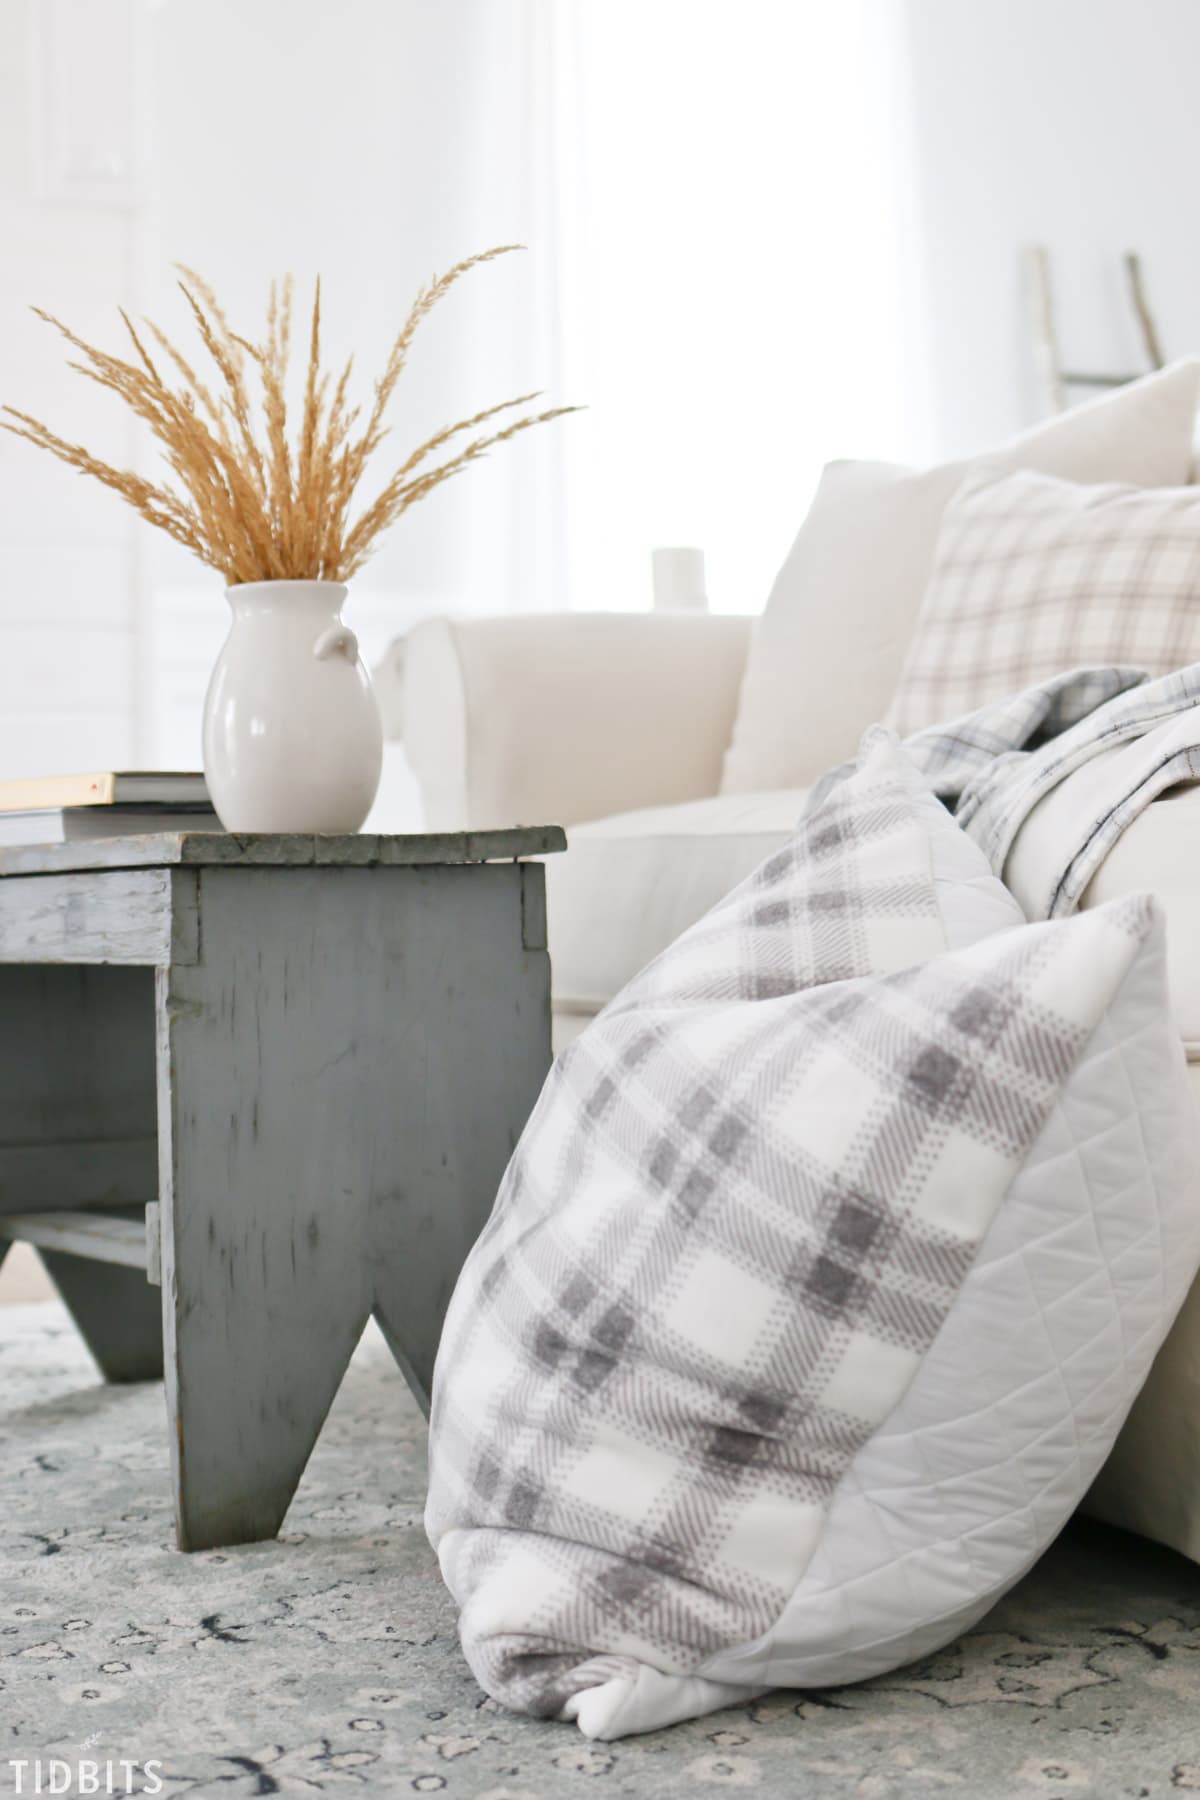
Quilting a large blanket is quite a task and you usually need special quilting machines to even do it. You’ll find it so much easier to do on a smaller piece of fabric and very rewarding to create the quilted look yourself, if even on a smaller scale.
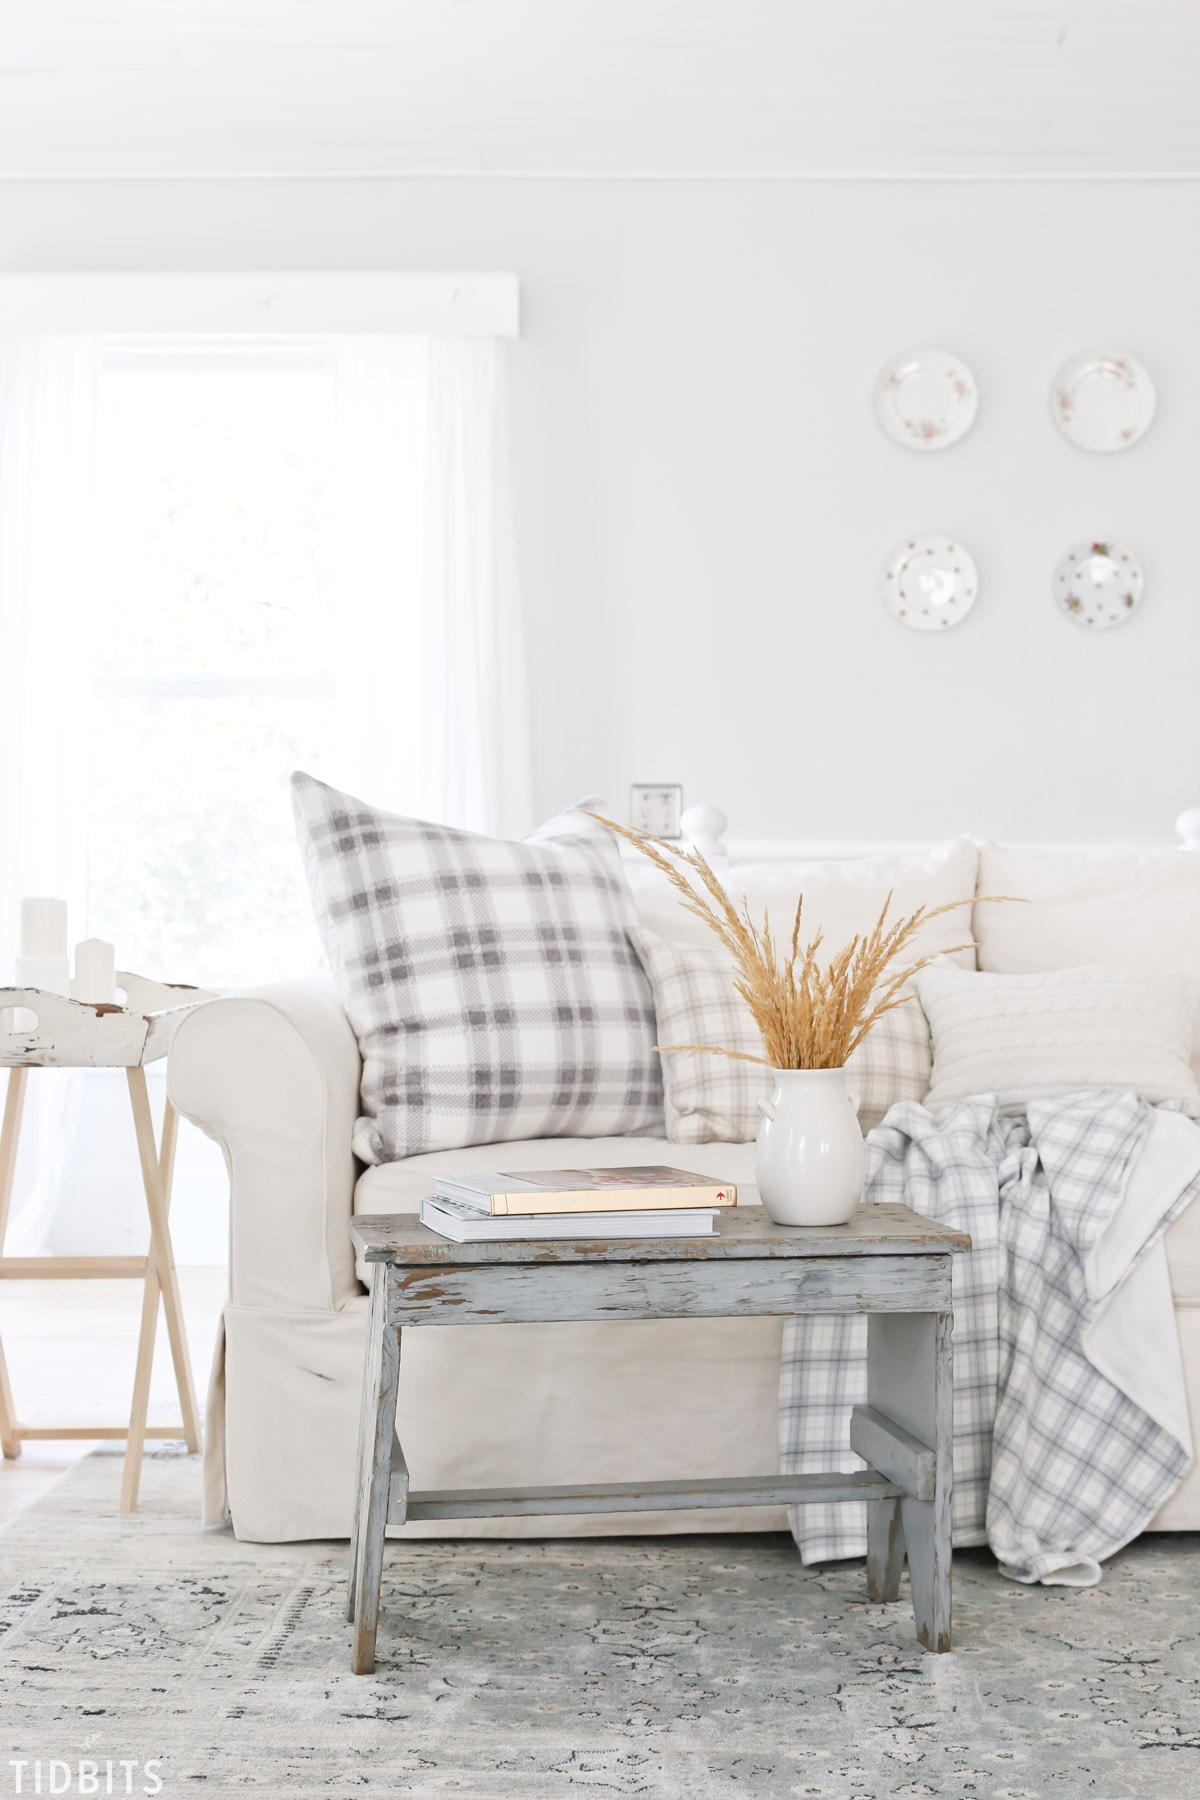
For your reference, all the pillows and the blanket I made using plaid flannel I found at Joann Fabrics. And actually, the gray plaid on the large floor cushion pillow is from their luxury fleece line. I wanted the pillow to be very plush and soft. The sweater pillow I made from a repurposed thrift store sweater. Making my own custom pillow covers and throw blankets is when I find myself most grateful that I took the time to learn how to sew.
Now let me walk you through the process for sewing a quilted back pillow cover. It’s way easier than you might think!
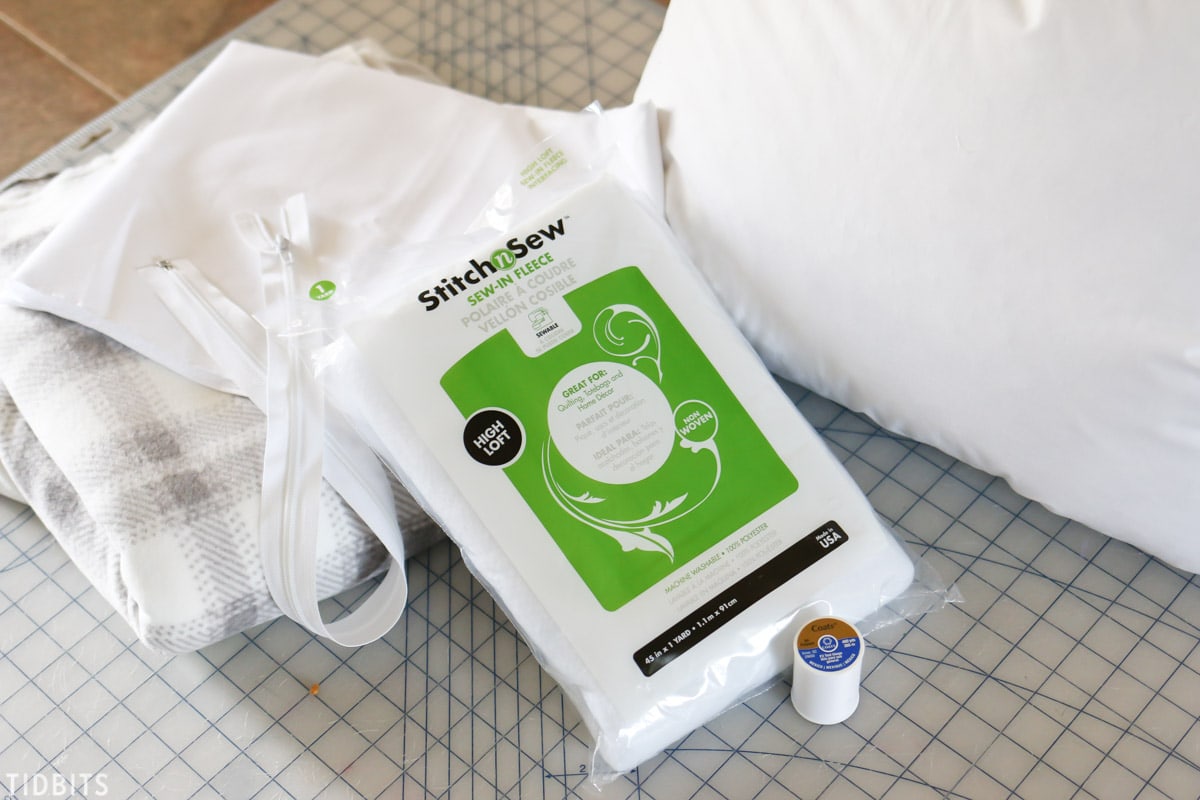
We are simply going to sandwich some Therm O Web StitchnSew sew-in fleece in between two layers of cotton fabric and quilt them together with straight stitches. Then you sew the top fabric to the quilted piece and stuff in your pillow. That’s a quick overview, so now let’s break it down.
SUPPLIES FOR QUILTED PILLOW:
- Front Fabric
- This is the flannel/plaid fabric I choose, but your options are limitless
- Cotton Fabric
- I used just some white cotton broadcloth. Make sure you have enough to make 2 layers.
- Therm O Web StitchnSew sew-in fleece
- Comes in packages or on bolts. I used 2 packages of high loft to double layer my fleece.
- Thread to match
- Zipper closure
- If you opt to do a zipper. In the end I opted to hand stitch the opening closed because I choose such lofty fabrics, it was easier and looks nicer this way. I’ll refer you to great zipper instructions when I get to that step.
- Pillow Form of any size
- I used an extra large 27 x 27 form from Joann’s, made of feather and down so it had that fluffy sink in feeling.
*This post includes my affiliate links. Thank you!
*Measurements for these items will be determined on the size of pillow you are doing. I usually lay the fabric on the bolt over the pillow form and determine how much I think I will need then add about 1/2 yard. I hate being short of fabric!
*Best practice to pre-shrink your fabric before sewing.
HOW TO MAKE A QUILTED PILLOW
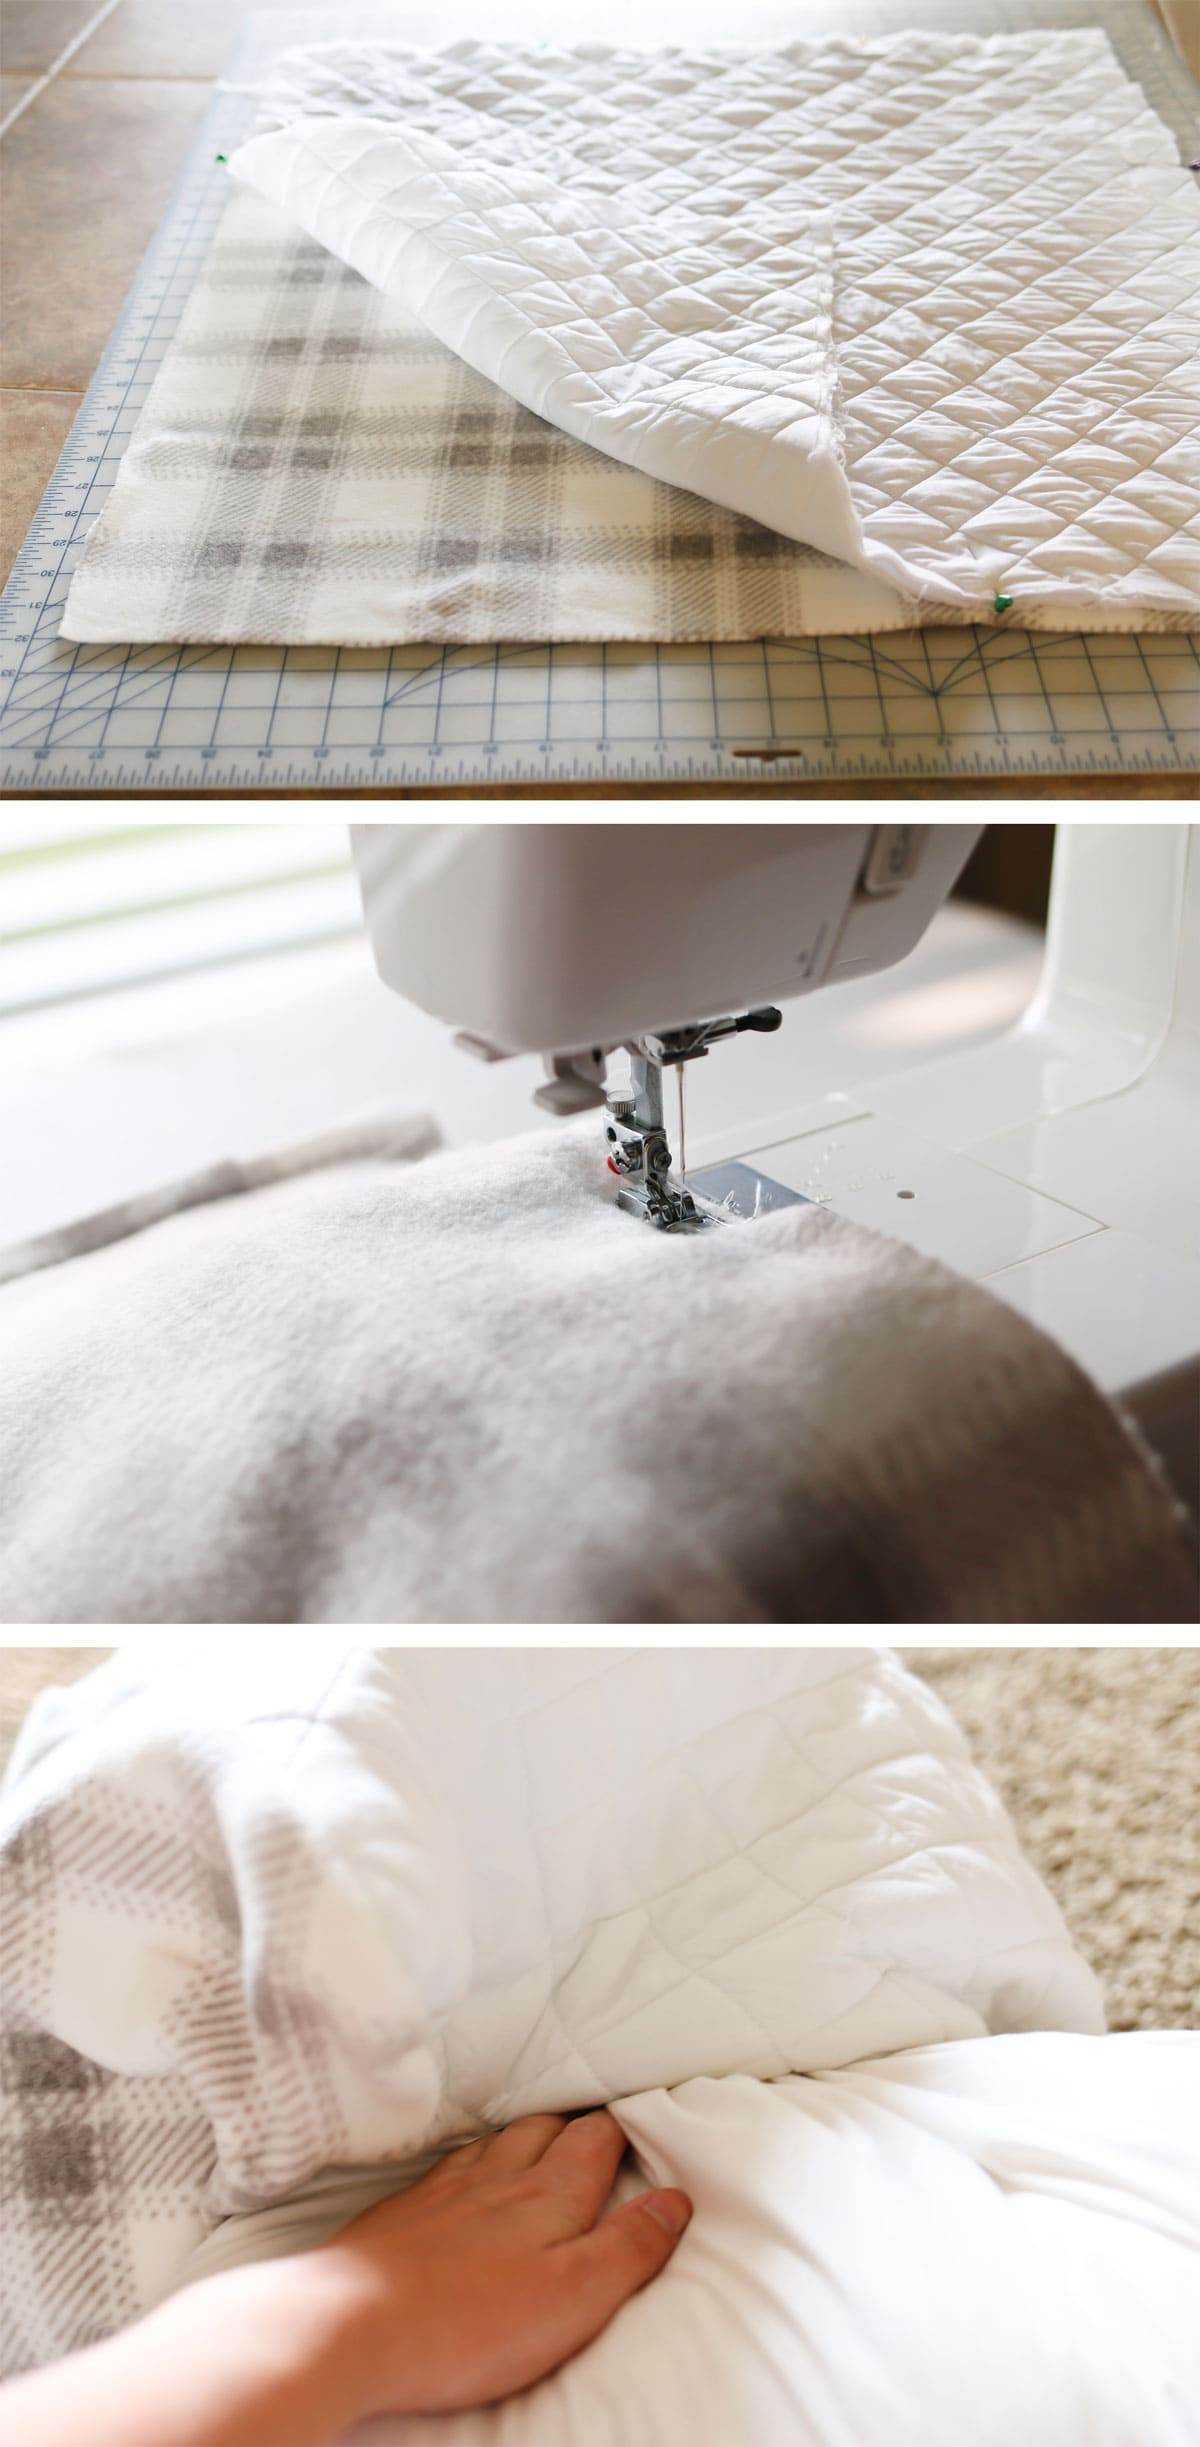
1 – I’ve found for the best fit, I prefer to lay the fabric over the pillow form (rather than measure and then cut) and make a cut after I am sure I will have plenty of seam allowance. Then I remove the pillow and cut a straight line. After you get the first cotton fabric layer cut, you can then cut the other layer (if it was not already folded over) and the sew-in fleece to the same measurements. I opted to use 2 layers of sew-in fleece for extra plushiness – (that’s a word, ya know).
2 – After all 4 pieces are cut to the size of the pillow form plus the seam allowances, layer them nicely with a cotton layer on bottom, then the sew-in fleece, then top with a cotton layer. Cotton layers should be rights sides facing out. (See images below).

3 – Pin all the layers together.
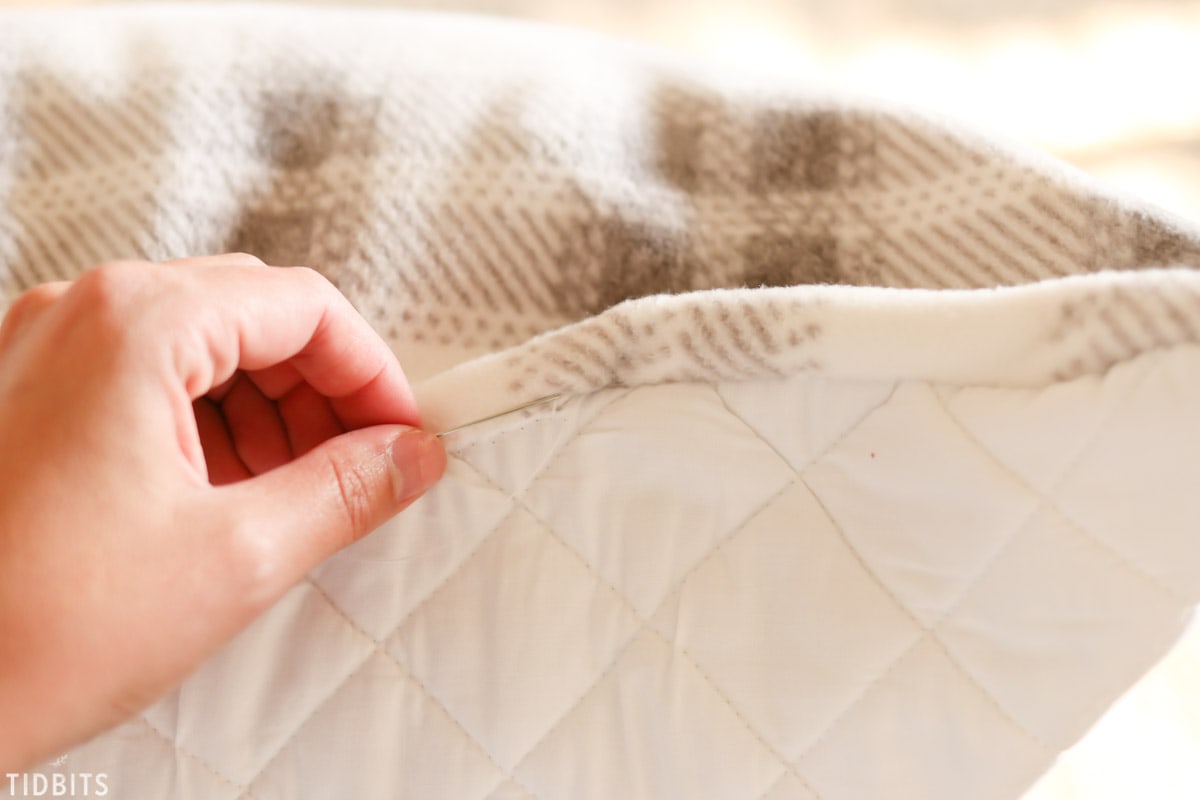
4 – Using a clear ruler or something with a straight edge and a fabric marker, mark your stitch lines directly on the fabric. I did diagonal parallel lines, 1.5 inches apart.
5 – Starting at the very center line, set your stitch length to the highest number and stitch down your mark.
6 – Continue sewing down each line working back and forth from left to right of that centered line. This will help prevent your fabric from shifting and twisting as much.
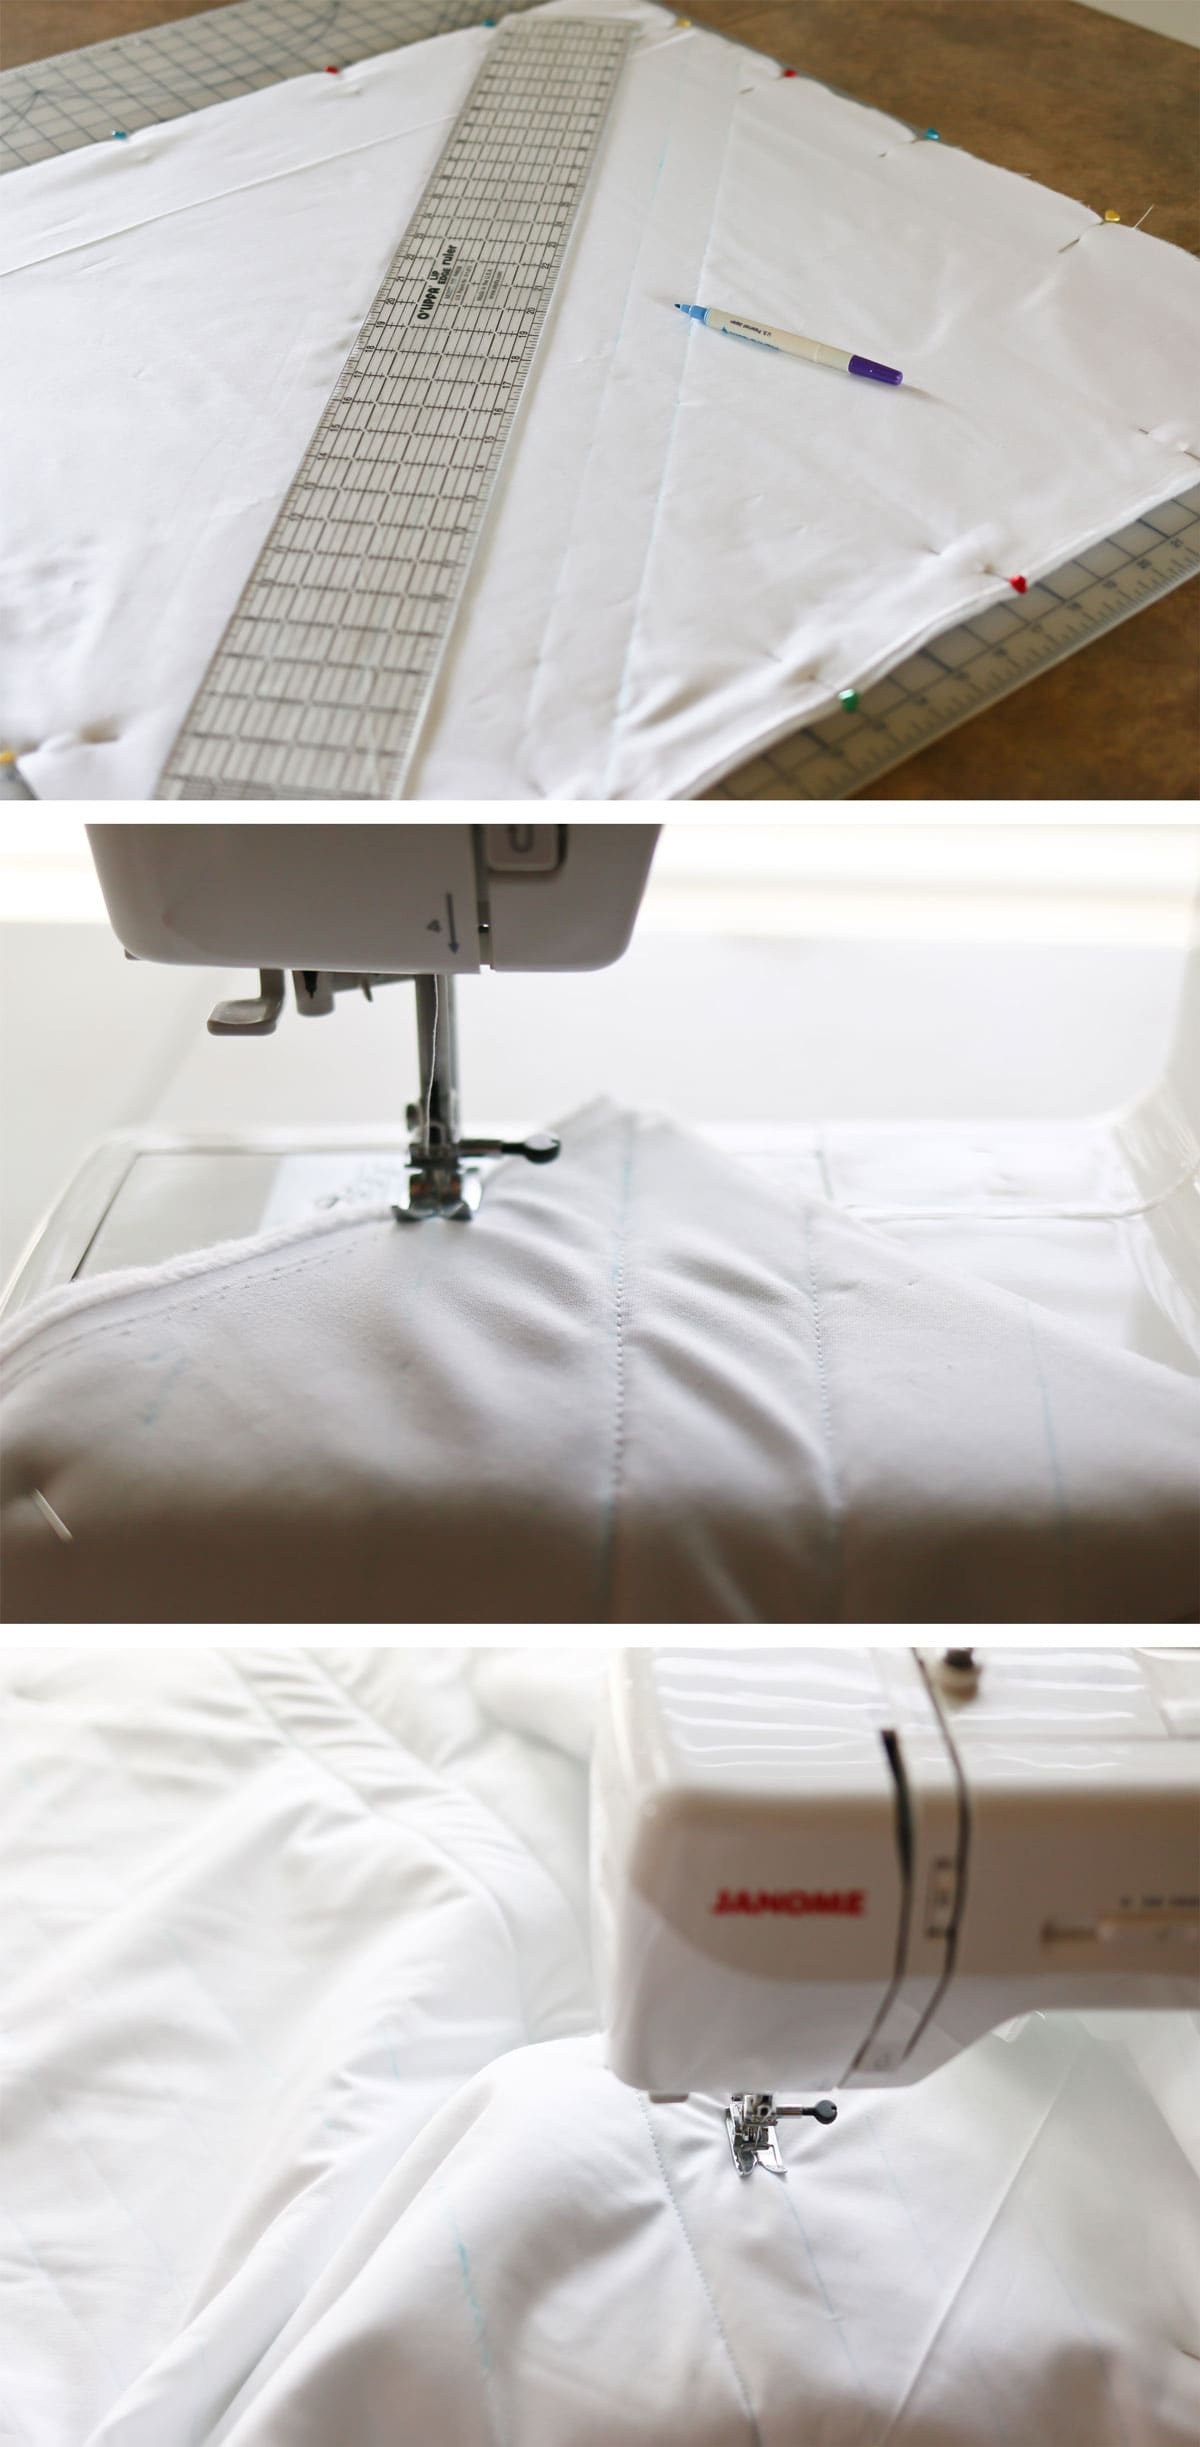
7 – Once you’ve finished all the stitches for that direction, go back and mark lines going the opposite or perpendicular direction from your first stitches.
8 – Stitch down each line just like you did before.
9 – Be sure to press very good at this point to relax any twisting and directional pull from the multiple stitching. I’ve even found washing and drying it again at this point will make the quilted piece look even better.
10 – If you haven’t already cut your front piece, lay the fabric over the pillow form again and measure and cut enough to make it around the pillow form with enough seam allowance.

11 – Pin the quilted piece to the front piece, right sides together.
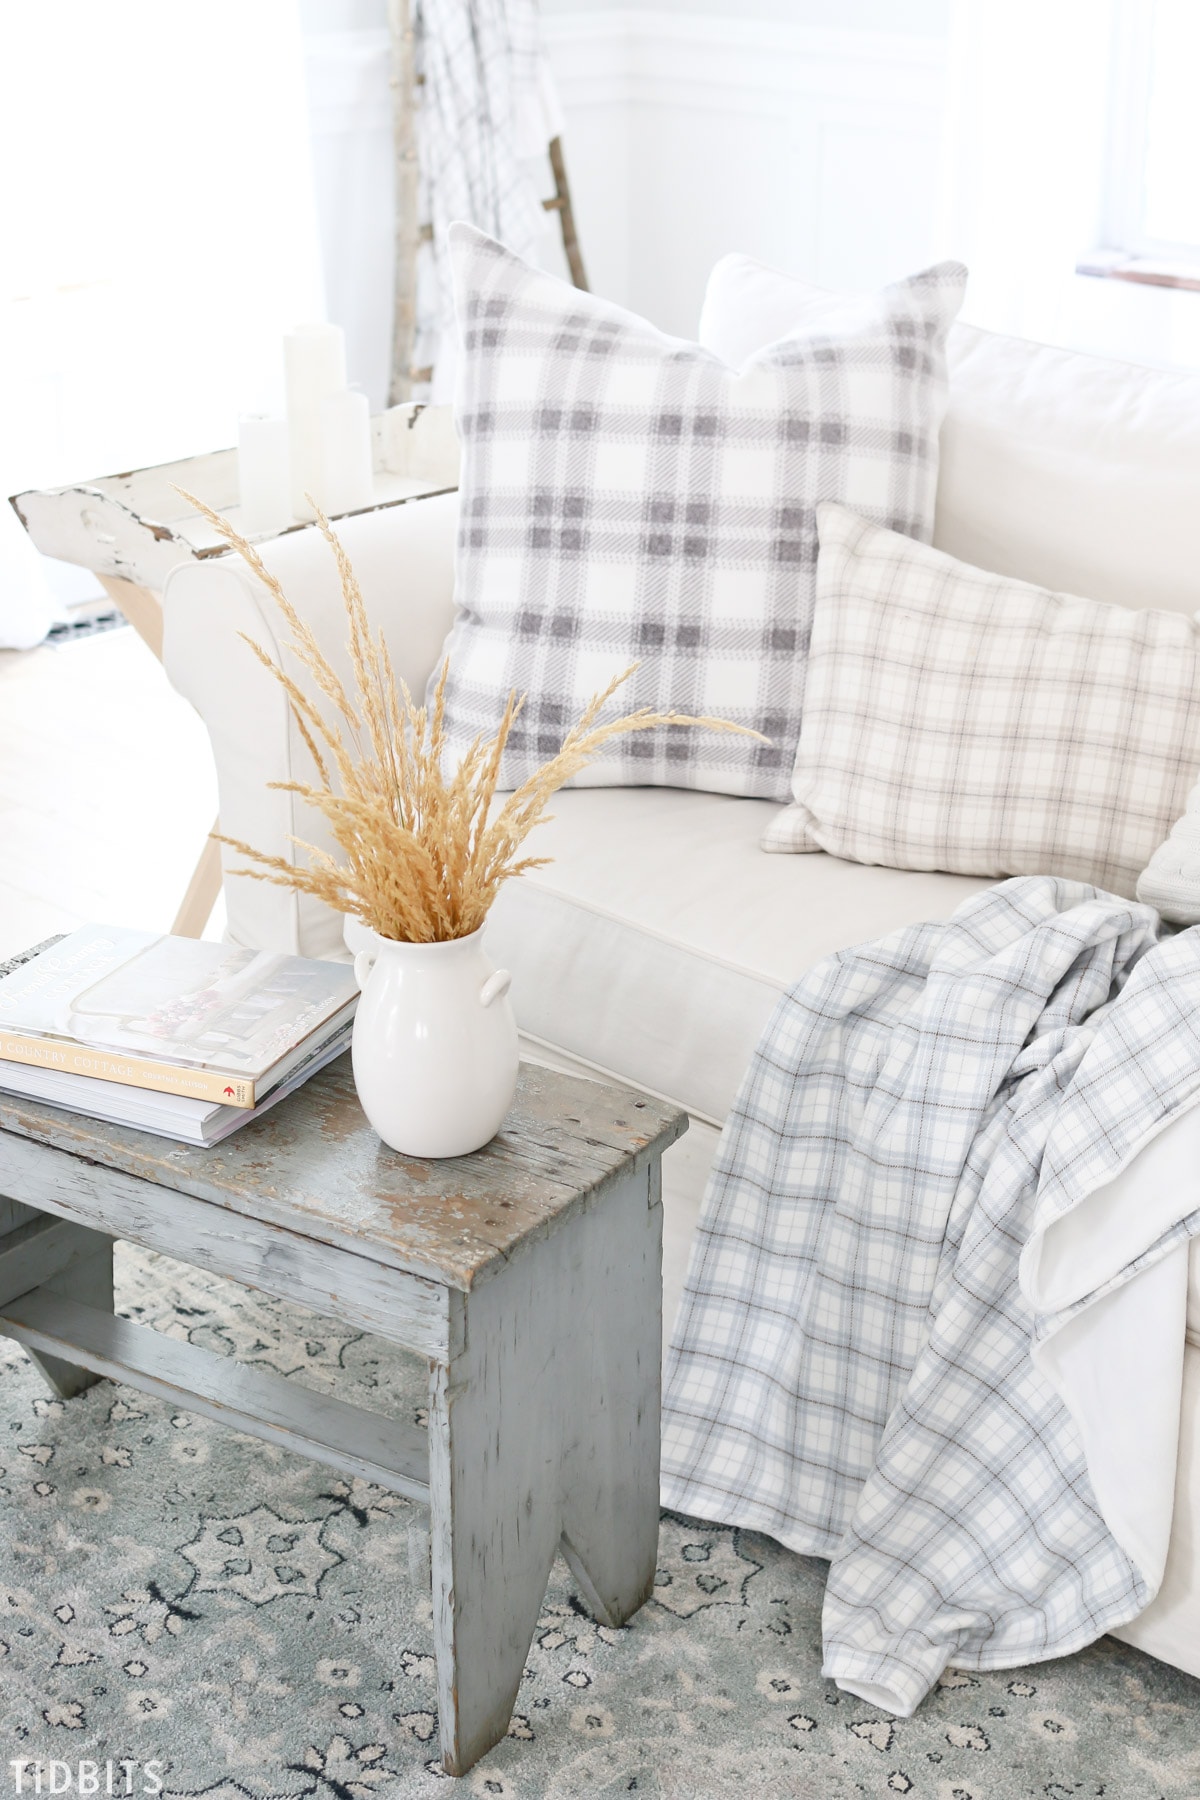
12 – If you are doing a zipper closure, I highly recommend referring to my friend Alicia tutorial on how to make a zippered pillow. It’s really not as scary as you think, but I opted to stitch the opening closed at this point because I had a feeling my choice of thick fleece and extra filling would make the zipper not look as professional. When I wash at the end of the season, I’ll probably just unpick my hand stitches and remove the pillow form. I reuse the forms for other seasons all the time anyway.
13 – Proceed to stitch all around the fabric, leaving a big enough opening to insert the pillow form.
14 – You can then opt to serge or zig zag stitch the edges so they don’t fray inside, and also press your seams and clip your corners for more pro finished results.
15 – Turn your pillow cover right side out and insert the pillow form inside, smoothing the batting out evenly.
16 – If you are hand stitching the opening closed, do that now. Otherwise, zip it up and fluff, fluff, fluff.
I just adore the extra special quilted look of the back of the pillow peeking through, don’t you?

This was a really fun afternoon project, and I adore the results!
Be sure to let me know if you give it a try and please feel free to tag me on social if you share it so I can see it! @camitidbits
You’ll also find some fun ideas on the ThermOWeb Instagram account, so be sure to head over there as well.
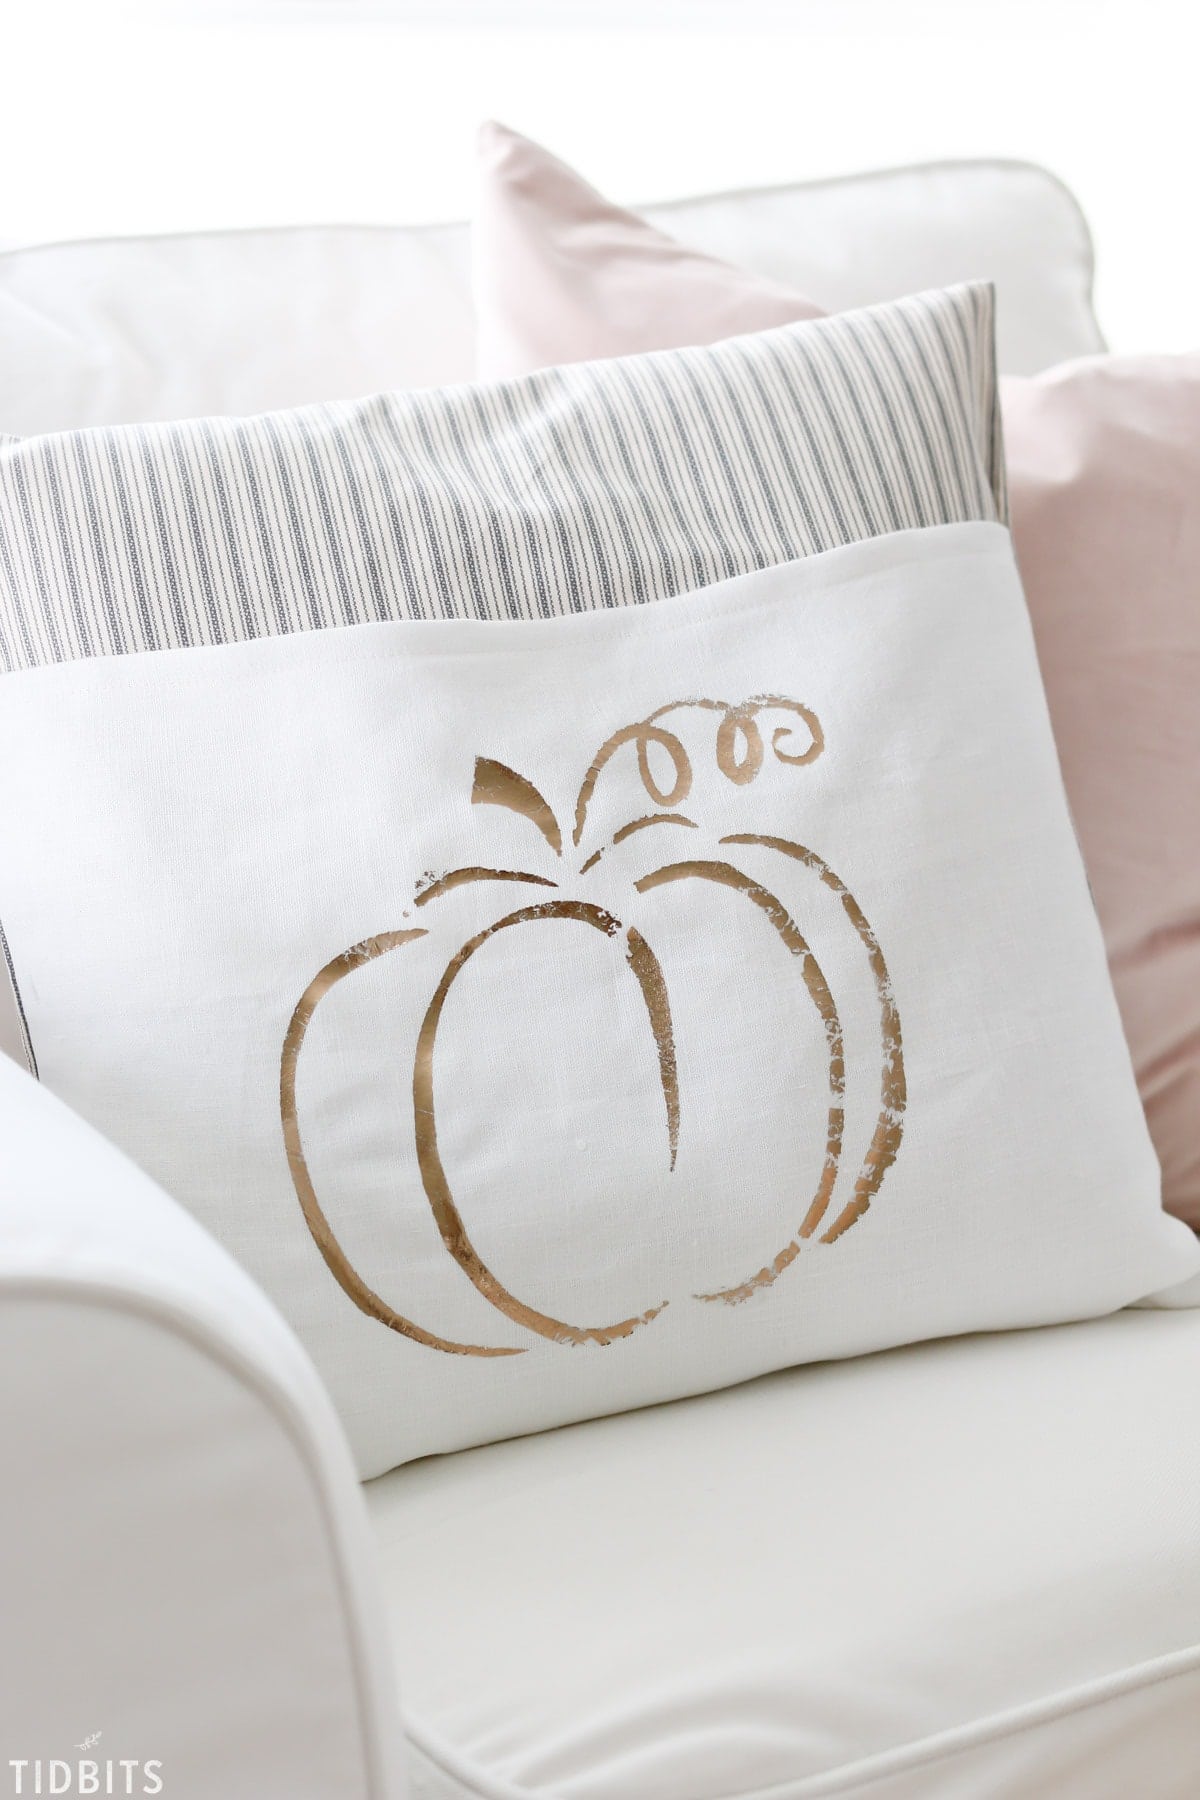
Some other favorite pillow tutorials I’ve done are the Ruffled edge pillow cover, or the DIY Bath Mat Pillow or the Pom Pom Pillows. But if you are looking for another great Fall pillow – this metallic foil pumpkin pillow was a blast!
Thanks for hangin’ with me today! Be sure to subscribe to never miss a TIDBITS update!

Now sit back and relax while you view, pin, and plan for more fun Fall DIY’s to come! Big thanks goes to Kristin from The Happy Housie for arranging another great Seasonal Simplicity tour!

Today I’m excited to be joining a group of 25 other talented bloggers who are also sharing a Fall DIY or Craft project! Hop over to see what my friends are sharing…
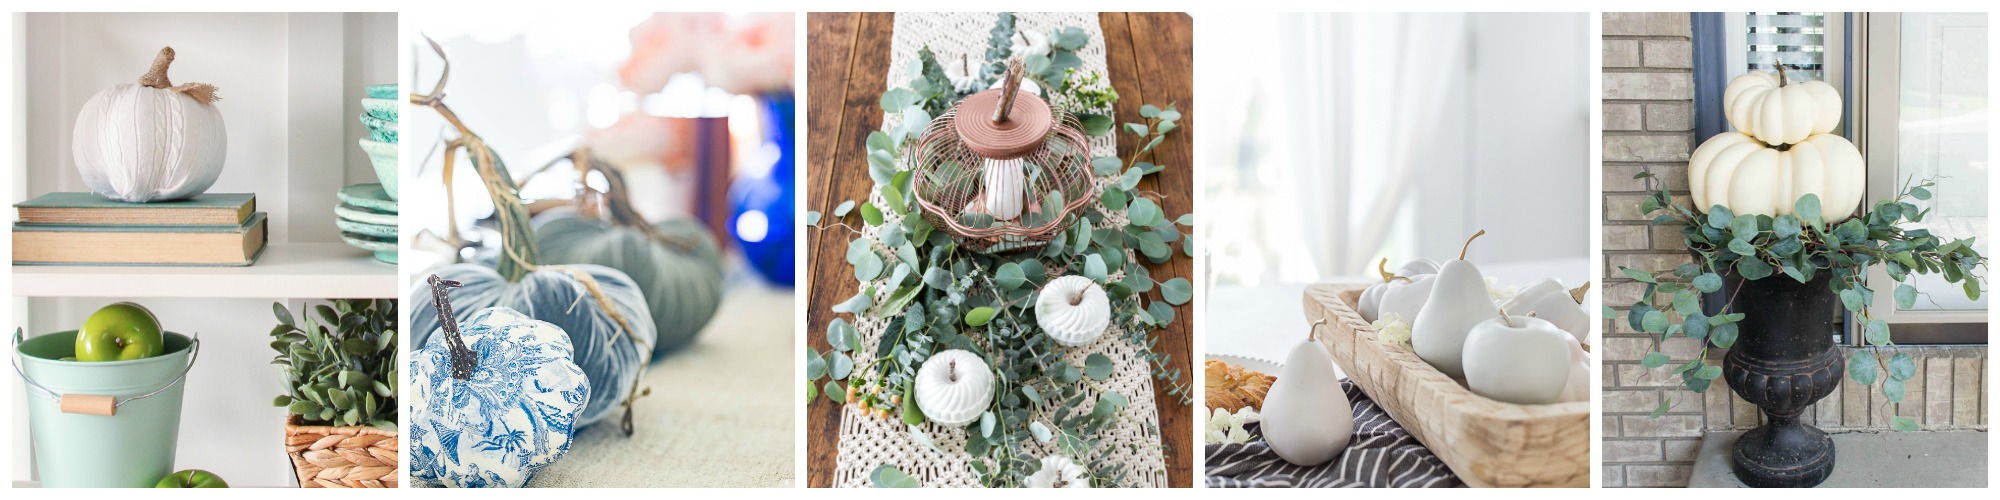
Sweater Pumpkins at The Happy Housie // Chinoiserie Pumpkins at Shabbyfufu // Wire Basket Bundt Pan Pumpkins at Bless’er House // Plastic Fall Fruit Makeover at Craftberry Bush // Pumpkin Topiary at Inspiration for Moms

Forest Pine Candle at Setting for Four // Wooden Trough at Deeply Southern Home // Thrifty Magnolia Wreath at Home Made Lovely // Pumpkin Vase at Amber Tysl // Autumn Watercolour Place Cards at Finding Silver Pennies
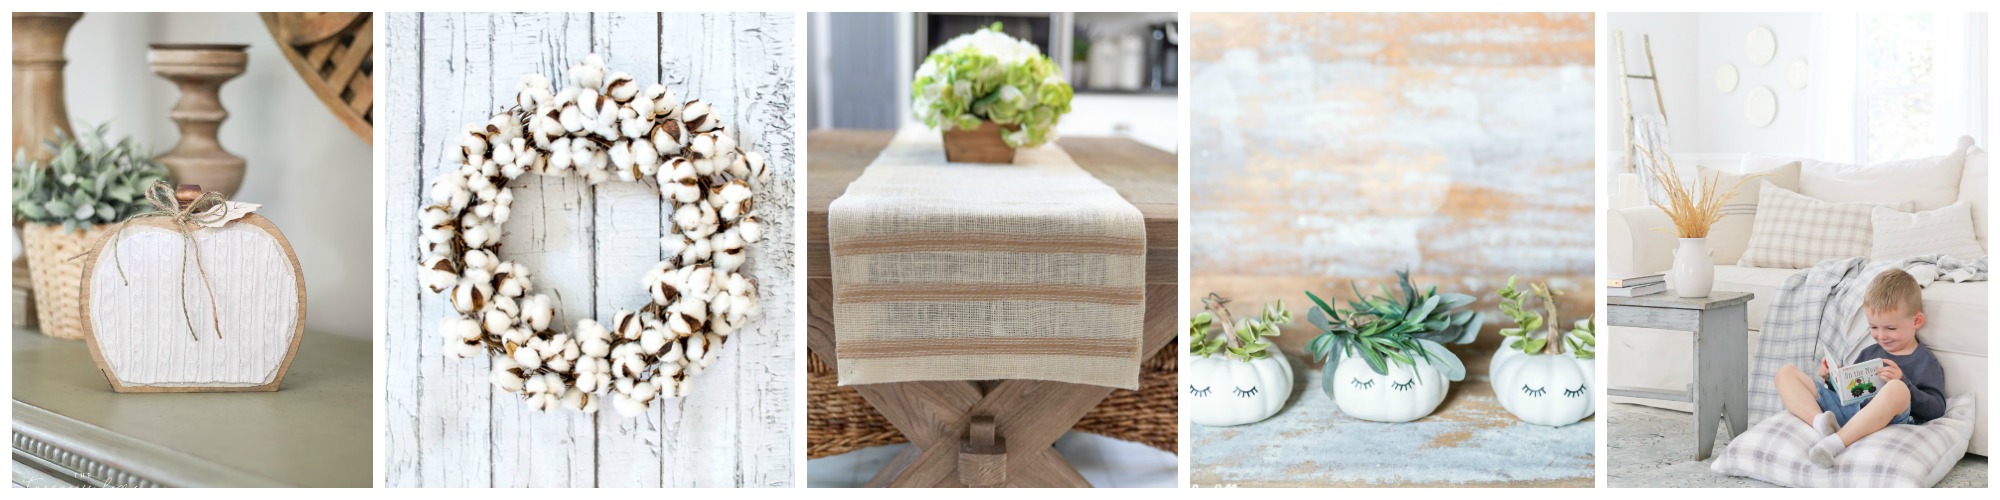
Wooden Pumpkin at The Turquoise Home // Cotton Wreath at My Uncommon Slice of Suburbia // No-Sew Burlap Table Runner at Jenna Kate at Home // Cute Pumpkin Plants at House by Hoff // Fall Flannel Quilted Pillow at TIDBITS
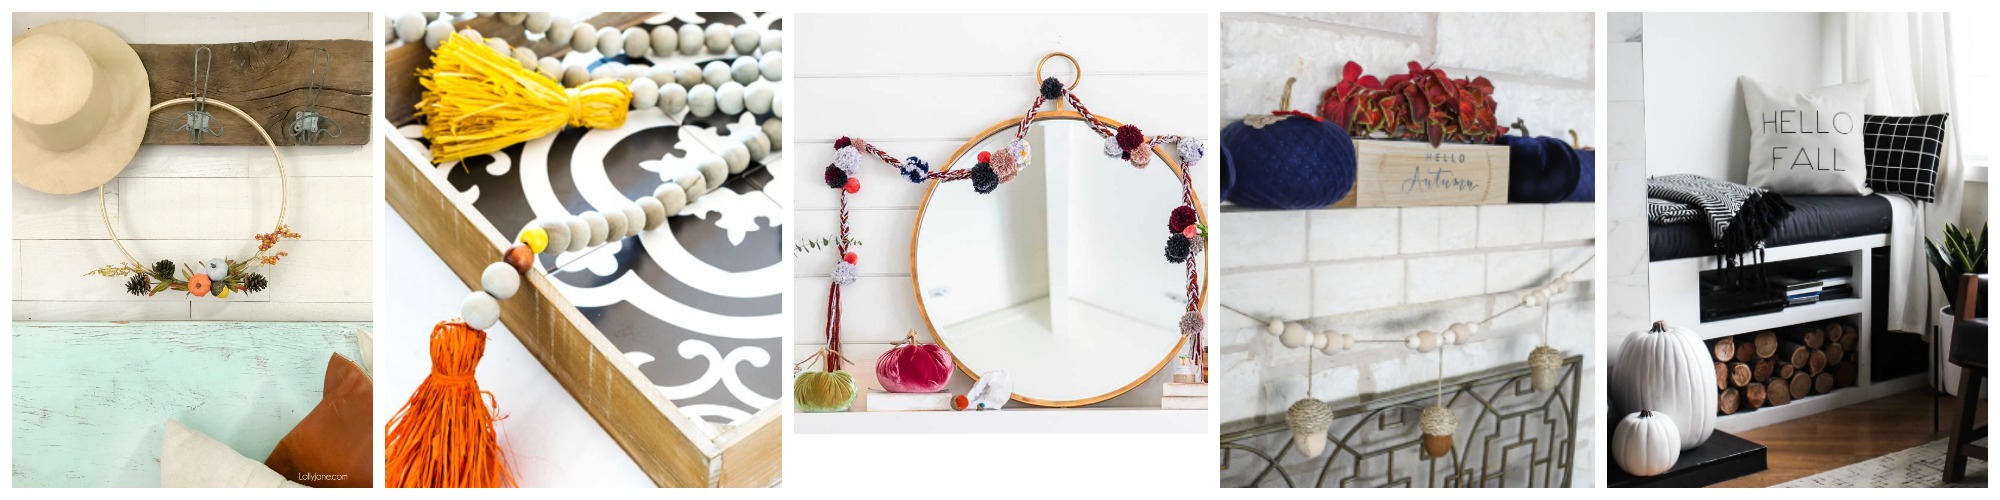
Hoop Wreath at Lolly Jane // Tiled Coffee Table Tray at In My Own Style // Pom Pom Garland at Modern Glam // Acorn Garland at Jen Woodhouse // Hello Fall Pillow at Love Create Celebrate
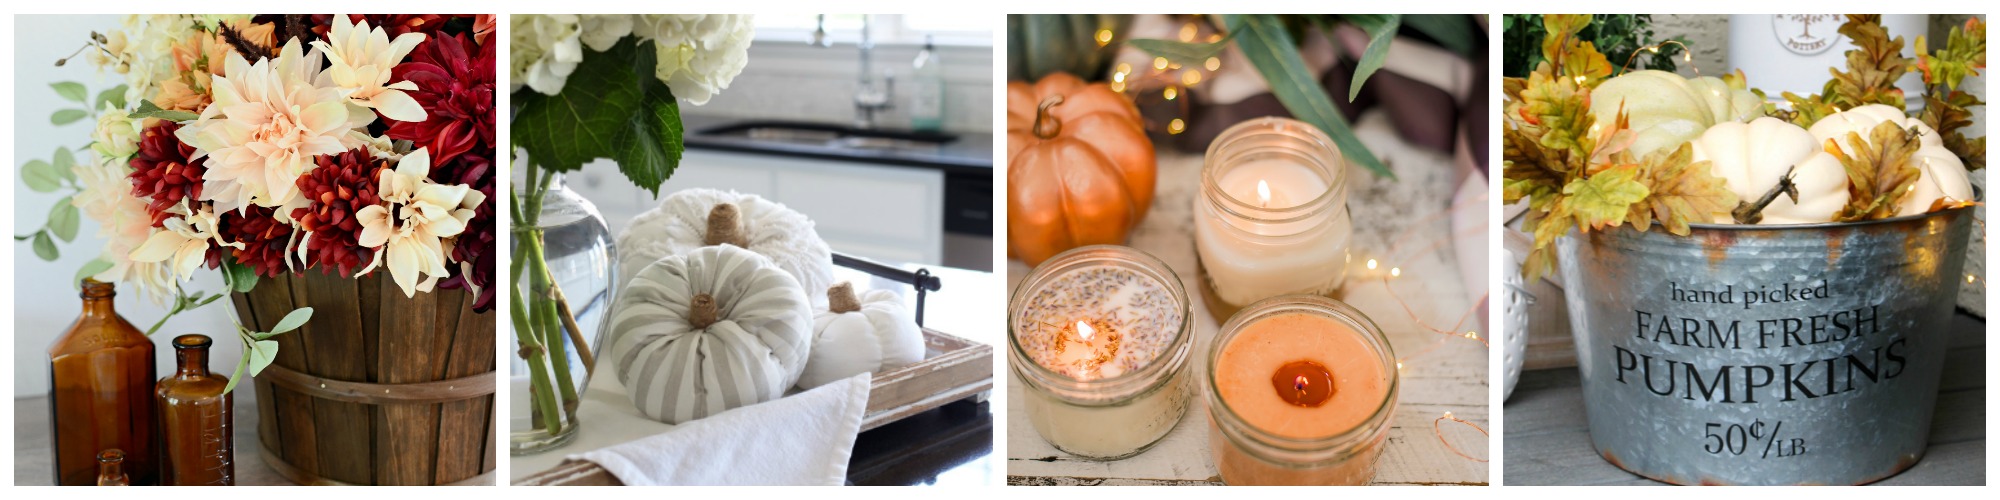
Silk Fall Floral Arrangement at Town and Country Living // Simple Fabric Pumpkins at Confessions of a Serial Do It Yourselfer // Soy Candles at The DIY Mommy // Lighted Pumpkin Bucket at Clean and Scentsible
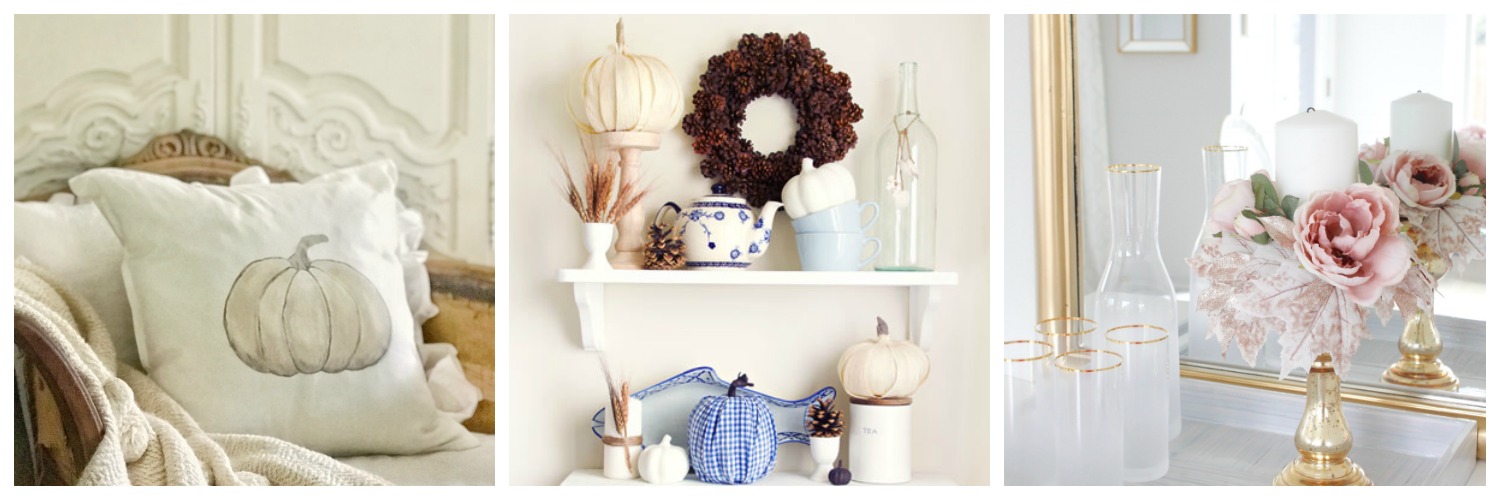
Handprinted Pumpkin Pillow at Hallstrom Home // Corn Husk Pumpkins at Paint Me Pink // Fall Glam Candle Wreaths at Summer Adams


PLEASE PLEASE PLEASE can you PLEASE send the link to the material for the throw blanket. It is absolutely beautiful and I HAVE TO MAKE IT!!!!!! Been looking everywhere for it. Your house is just so pretty!!!!!!!!!
These are so cozy and beautiful! They are perfectly staged with your sweet boy as well! XO
SO relaxed and cozy and cute! ideal for fall nesting. i hope you sense at ease and nested for your transient domestic! glad you can be on this hop.
Aww I’m sure this was so bittersweet for you, Cami, being in your beautiful old home. Praying for you in your next adventure, friend. These pillows are so pretty!
These pillows are beautiful! They would be perfect in our family room, I might just have to buy that same fabric, it’s perfect! Thank you!
This looks so cozy Cami!! Love the color too – perfect to snuggle up to for Fall!
SO cozy and comfy and lovely! Perfect for fall nesting. I hope you feel cozy and nested in your temporary home! Glad you could be on this hop, Cami!
Thanks again for inviting me to the hop Krista! You do such a good job running them!
Oh how darling, Cami! Your little guy looks like he’s loving it too! xoxo
He is totally hogging the pillow. He thinks it was made for him 😉 . I guess I’ll go with it since he is so cute. Ha! Thanks for coming by Summer!
I love, love, love these!! So pretty and cozy!
Thank you Jennifer! I appreciate it!
I love this! It looks perfect for fall and clear into winter! I am definitely making this! Thank you so much!
Yes! I love that I’ll be able to put it away for Christmas decor and then bring it right back in the winter. It’s a no brainer 😉 . Glad you liked it!
Thanks this will be very cozy, perfect for Fall.
Perfect for Fall and even to move into winter. That was my thinking! Glad you liked it!
Cami, these pillows are the coziest looking! I just love the neutral colors too!
Thank you Ashley! Gotta love neutrals!
Yay for cozy! Hugs to you Cecilia!
Such adorable pillows and perfect for fall farmhouse decor!
Thank you sweet Danielle!