This post may contain affiliate links, which means I get a small percentage of the sale at no extra cost to you. I only recommend items I love and have had a positive experience with. Thank you!
*This post was originally seen on Craftberry Bush, where I enjoy contributing.
So many times during a room renovation, I find myself wanting something that cannot be found in the stores.
It’s in my head only.
In these common instances, I do 1 of 2 things.
- Beg and plead for my husband to head out to his wood shop and build it for me, or
- Pull out my trusty old sewing machine, dust off my sewing skills and make it myself.
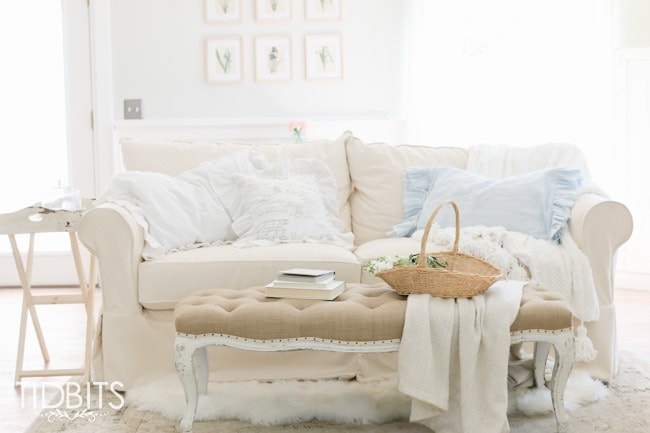
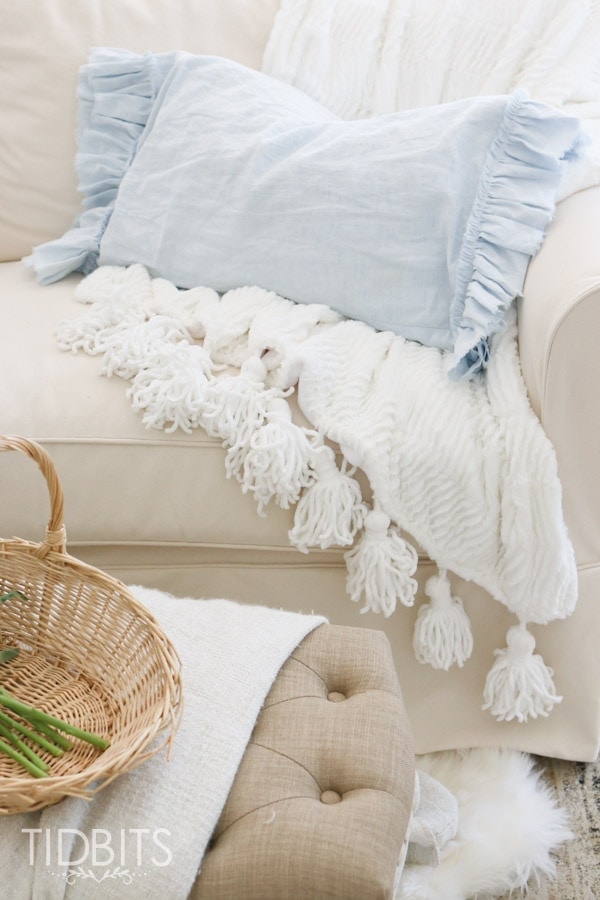
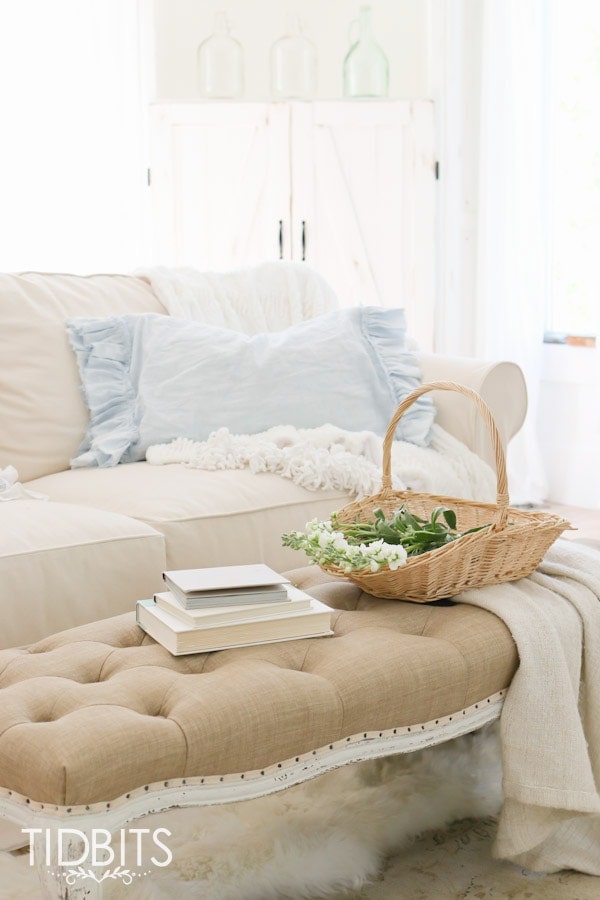
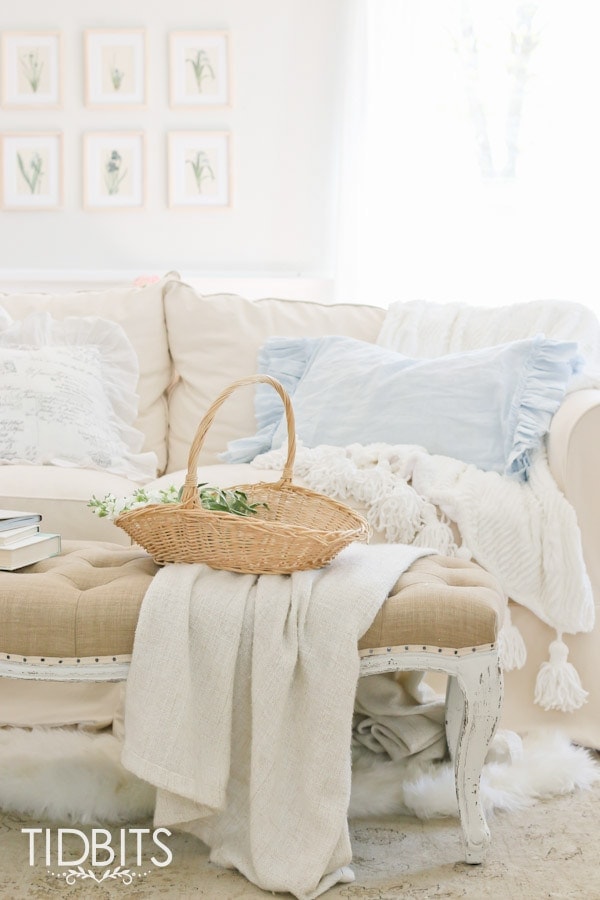
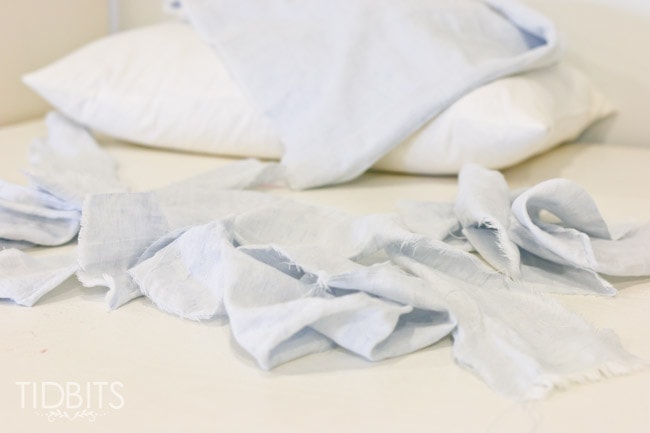
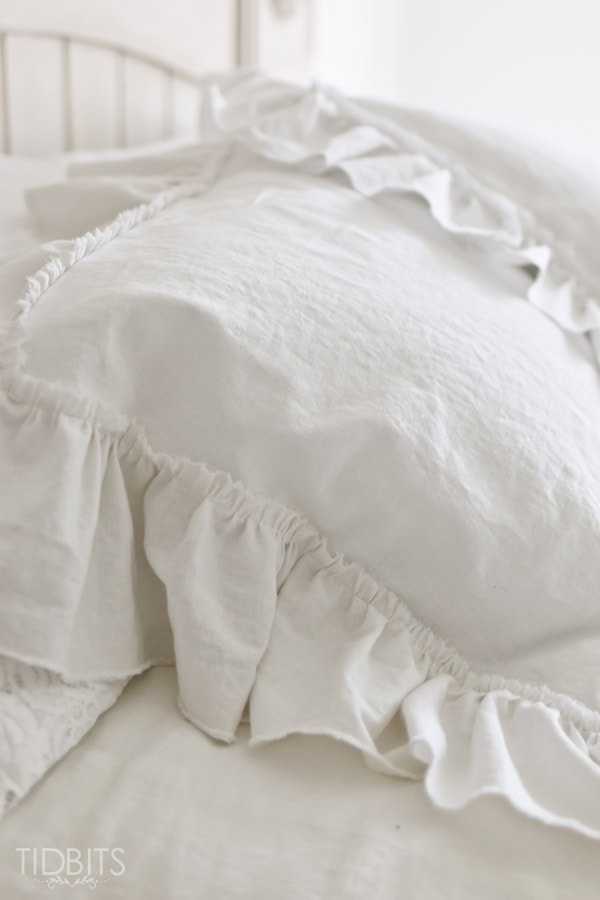
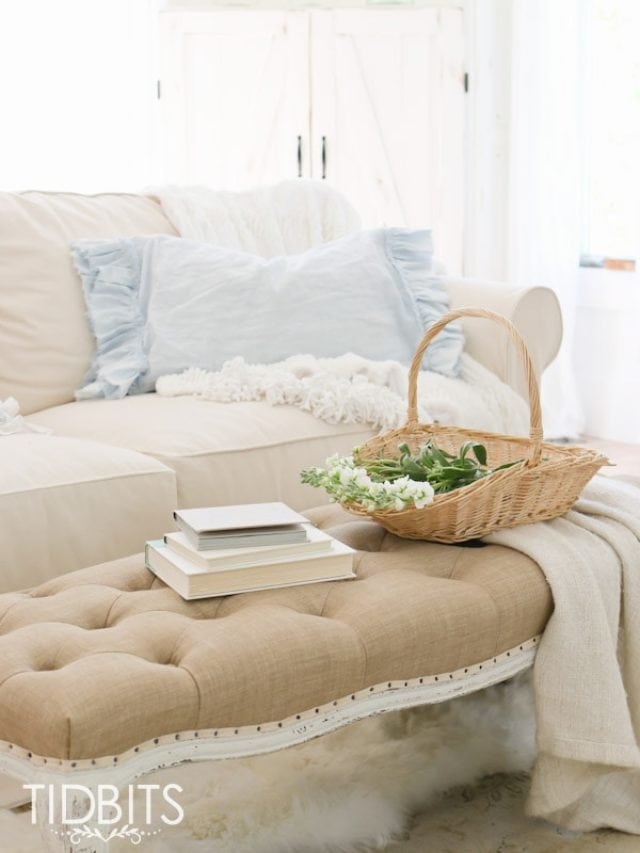
After just recently completing our Living Room Update, I found my new slip-covered Felicity sofa from Joss and Main in need of some fluffy and inviting pillows, and a very subtle touch of color.

I knew some soft blue fabric I’ve been hording for a couple of years was finally going to find it’s purpose. So I found a pillow insert of choice and embraced all things ruffled and frayed for the most inviting and romantic pillowcase for our couch.
With the overhang of the ruffles, it even looks nice hanging out of a basket.

This is really a great beginner sewing project, and I’m going to show you my favorite little ruffle trick to create evenly spaced ruffles in a cinch.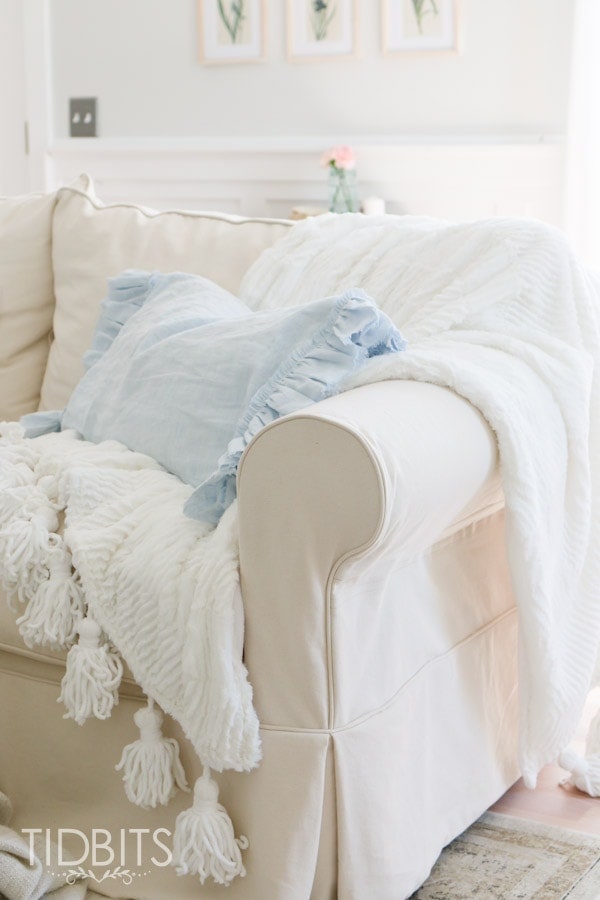
If you would like another sewing project to go with it, I have the tutorial for my favorite Tassel Throw Blanket as well.
This tutorial will guide you through making this double-sided ruffled and frayed pillowcase for any size of pillow insert. You could make it for your pillow on your bed, or a pillow sham, or a decorative couch pillow like shown in my images. This pillowcase will be open on both ends allowing for easy insert and removal.
Let’s get started!
What you will need:
- Pillow insert
- Any size or shape you desire (at least in the square and rectangle variety).
- Woven fabric of choice
- The amount you will need depends entirely on the size of your pillow. You will need enough to cover the front and back of the pillow plus enough for the ruffles on each side. I always double the length of fabric needed when I plan to add a ruffle to something. If I were to make a cover for a standard size pillow, I would purchase 2 yards to be safe.
- All sewing tools such as machine, thread, pins, etc.
First, lay a piece of fabric over the top of your pillow insert and cut it to size leaving a good 1 inch of overhang around all the edges. On the ends where the ruffles go, I may have left 2 inches of overhang for more flounce.
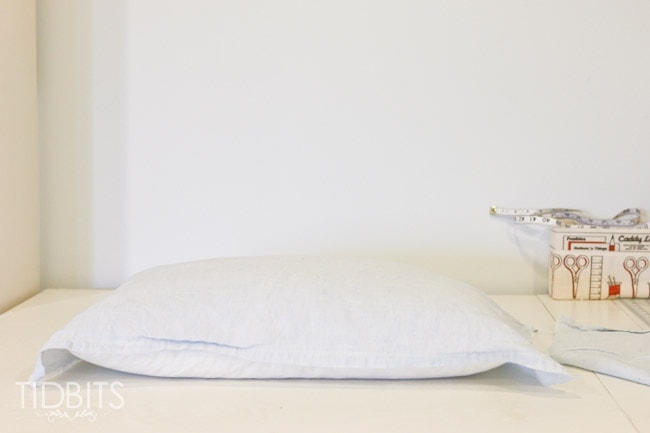
Cut another piece of fabric the same size for the back side. Now you will have the front and back side.
With right sides together, lay those two pieces together evenly and sew 5/8 of an inch away from the edge of the long edges, or the top and bottom of the pillowcase.
So now, the pillowcase should be attached at the top and bottom and open on both ends, creating one big tube.
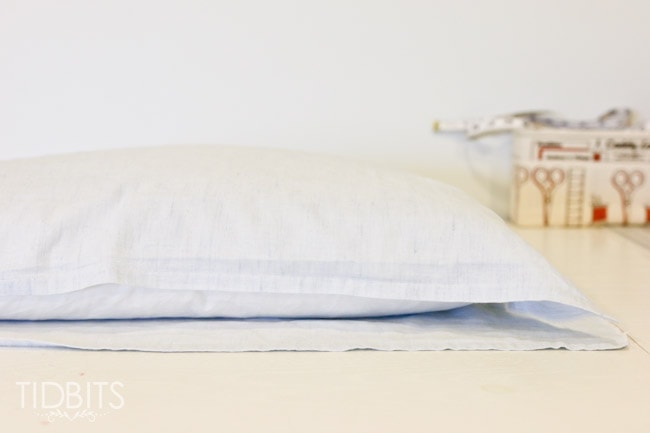
*Before you go any further, please note that if you don’t want your fabric to continue to fray, but still allow for a shabby frayed edge, on both ends simply stitch 1/4 inch away from the edge all around. This will prevent it from fraying too much. Be sure to finish your seams you just made as well (if desired).
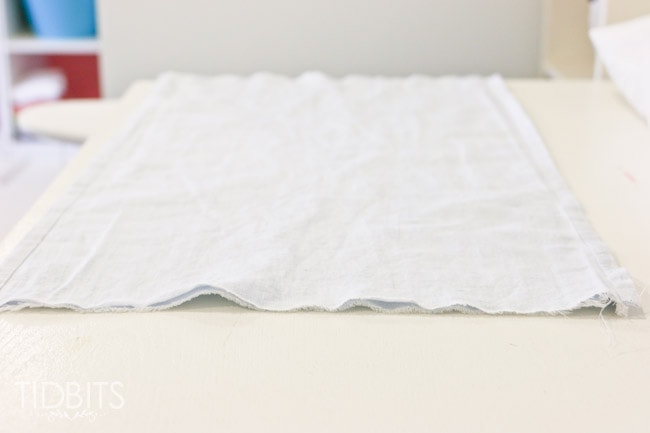
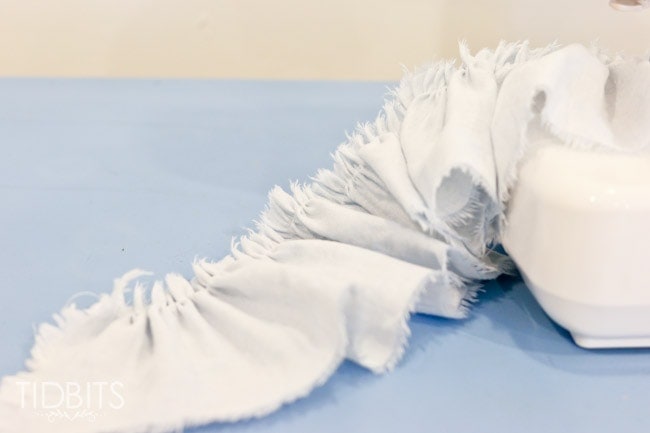
Now you are going to cut the ruffles. You can choose any width you want. Mine are about 5-6 inches wide. To determine the length, measure all around the open edges of your pillowcase and times it by 2, or in other words, double the length. I like to rip these ruffles off from the fabric rather than cut. That creates a very nice frayed edge to work with.
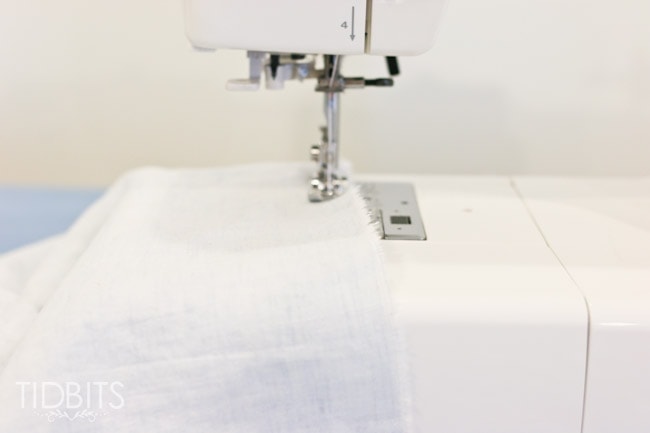
Choose which long side of the ruffle strip to make your ruffles. Place that in your sewing machine about 1/2 inch away from the edge.
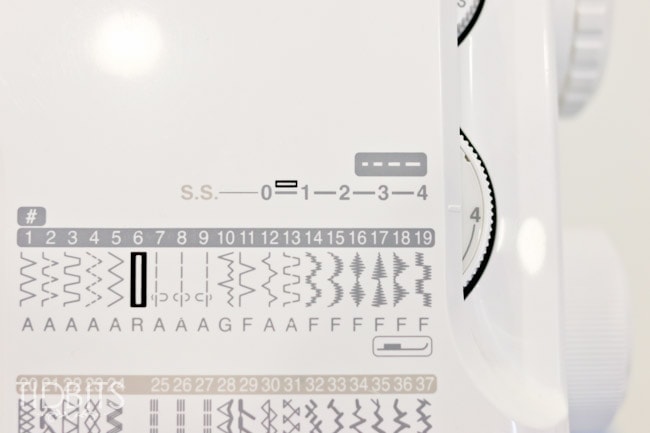
Now here is my fun ruffle trick. It will blow your mind! There is no special ruffle foot needed and you can still adjust your ruffles afterwards if needed.
First, dial your sewing machine tension knob to the highest number it will go.

Then change your stitch length to the highest number it will go.
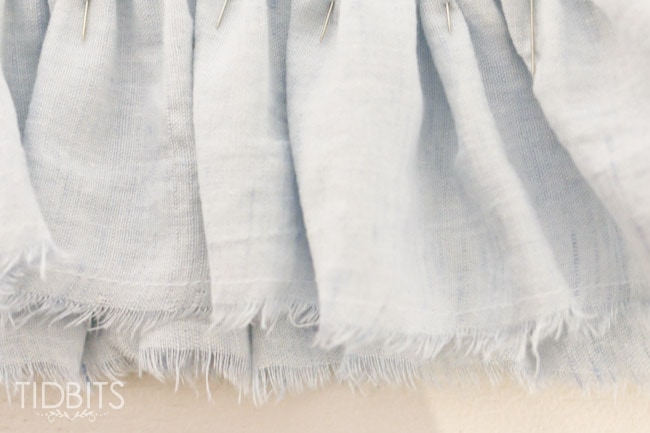
While you are sewing, you will take your right hand and hold the top thread between your 2 fingers creating just a slight amount of resistance. Let it still feed through, but make it work a bit harder for it.
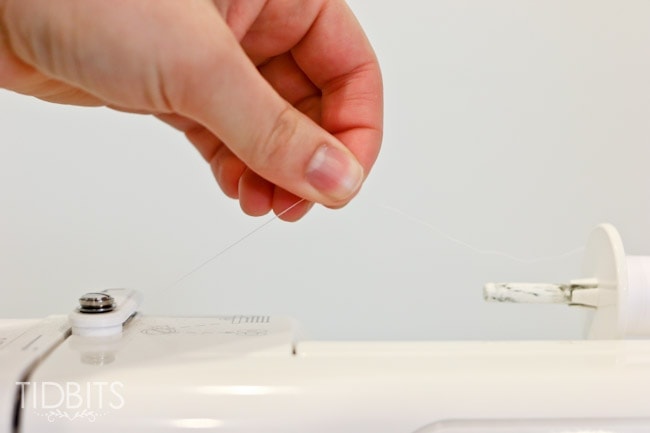
What then happens is you end up with beautiful ruffled fabric coming out of your machine, perfectly spaced. Leave long thread tails just in case you need to adjust a little here and there.
You may now choose to add a 1/4 inch seam at the other end of the ruffle so it doesn’t keep fraying as well.
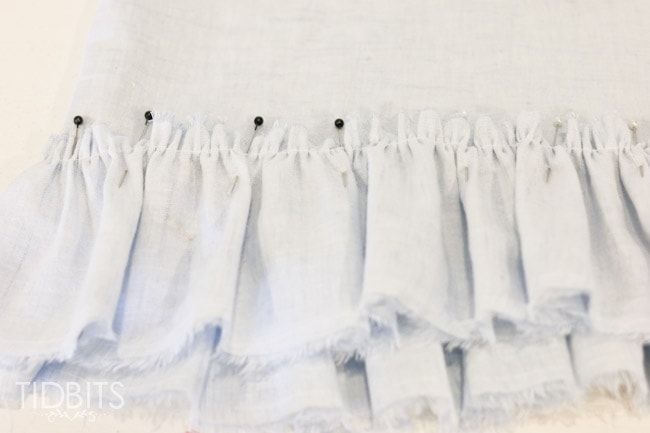
Mark a line an inch and a half away from both ends, to reference where you will pin your ruffle.
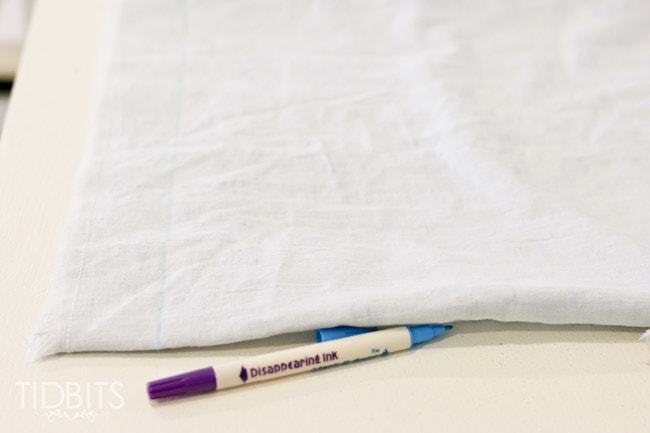
Then you simply lay the ruffled edge of the ruffle piece and pin in down on that line you marked, all the way around both ends of the pillow case.
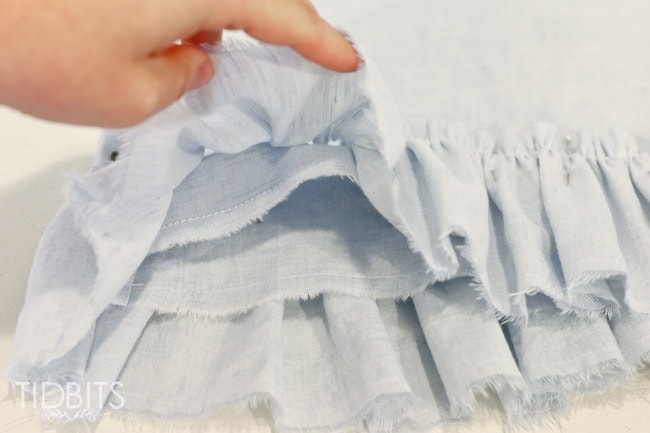
Be sure to pin plenty.
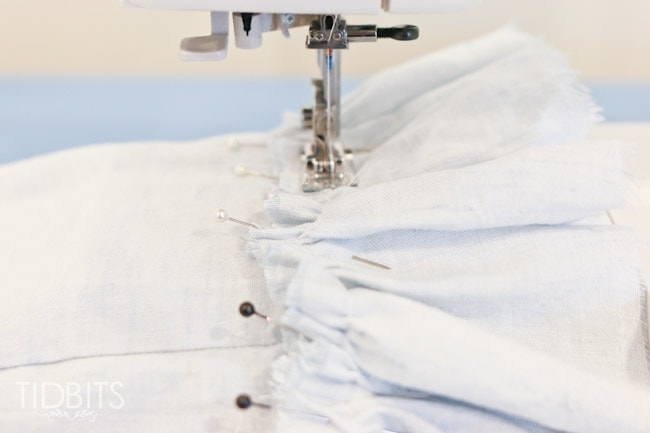
When you are ready, you will then fix your sewing machine settings and sew along the ruffled edge right on top of your previous ruffled stitch. I actually do this twice to reinforce those ruffles down.
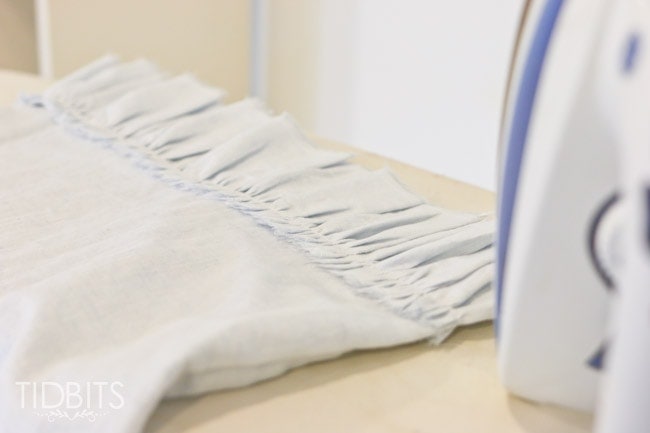
Once your finished sewing the ruffles down, be sure to press the ruffles flat which will yield a much more professional looking pillowcase.
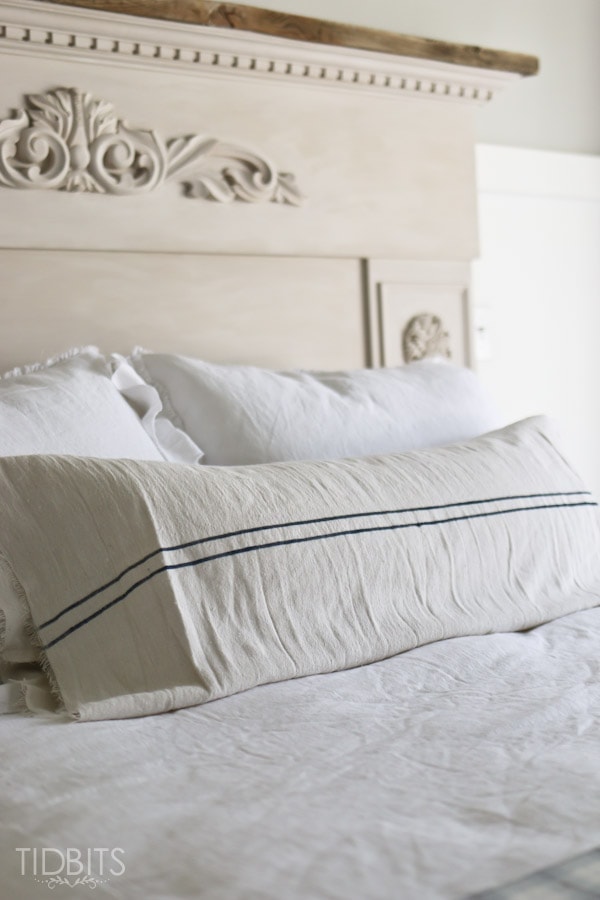
I hope you enjoyed this tutorial! I made a similar pillow sham for our Master Bedroom, which you can find the tutorial for HERE.
And if you love sewing for your home and family, feel free to take a look at my SEWING PROJECT INDEX full of fun and simple projects to make.
Have a wonderful day!


Cushions and pillows are also notorious for capturing and holding in allergens. Using cushion covers is a great way to quickly wash off pollen and other allergens.
https://pillowcase.net/c-17-cotton.aspx
This is so cute! My granddaughter is graduating from a little girls room to a tween room and these pillow covers will go great with her new room theme. The instructions are very clear and doable and will be a great project for us both to work on.
I love all of your tutorials!! I now have a list of more stuff I want to make. I’m currently waiting for my drop cloth to finish in the washing mashine from the tutorial you posted on how to bleach it. Love your ideas and your posts are so helpful and inspiring!!
I am curious what kind of fabric did you use? It looks like linen?
Yes, I would really appreciate knowing the type of blue fabric you used as well. Not every fabric frays the same. That one was perfect! Thank you so much!????????
Thanks for including the tassel throw blanket in the setting – it nicely rounds out the comfy theme!