
This post may contain affiliate links, which means I get a small percentage of the sale at no extra cost to you. I only recommend items I love and have had a positive experience with. Thank you!
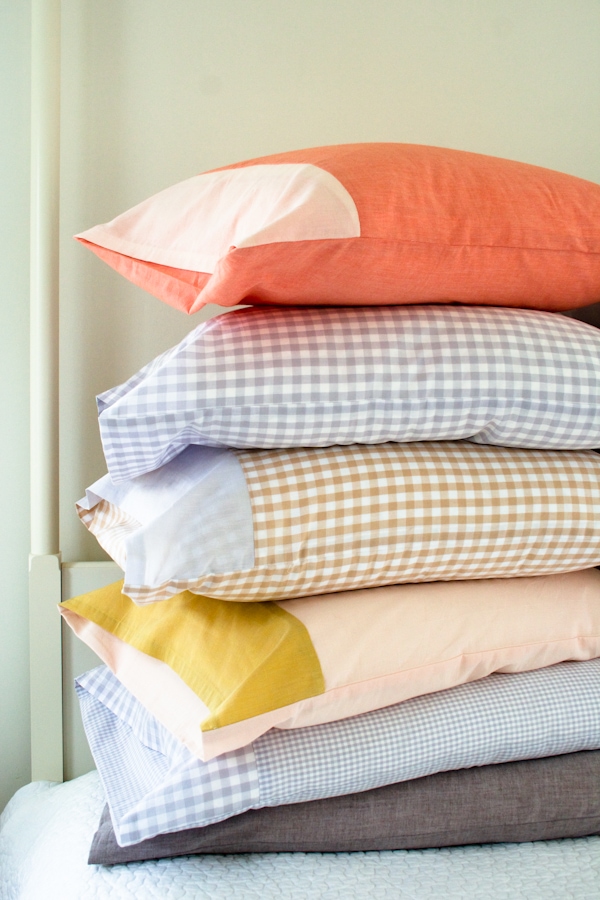
These 20 easy tutorials for how to sew a pillowcase are perfect for the beginner or advanced sewist. It’s a great way to let your creativity shine or a budget-friendly way to match and update your bedroom decor.
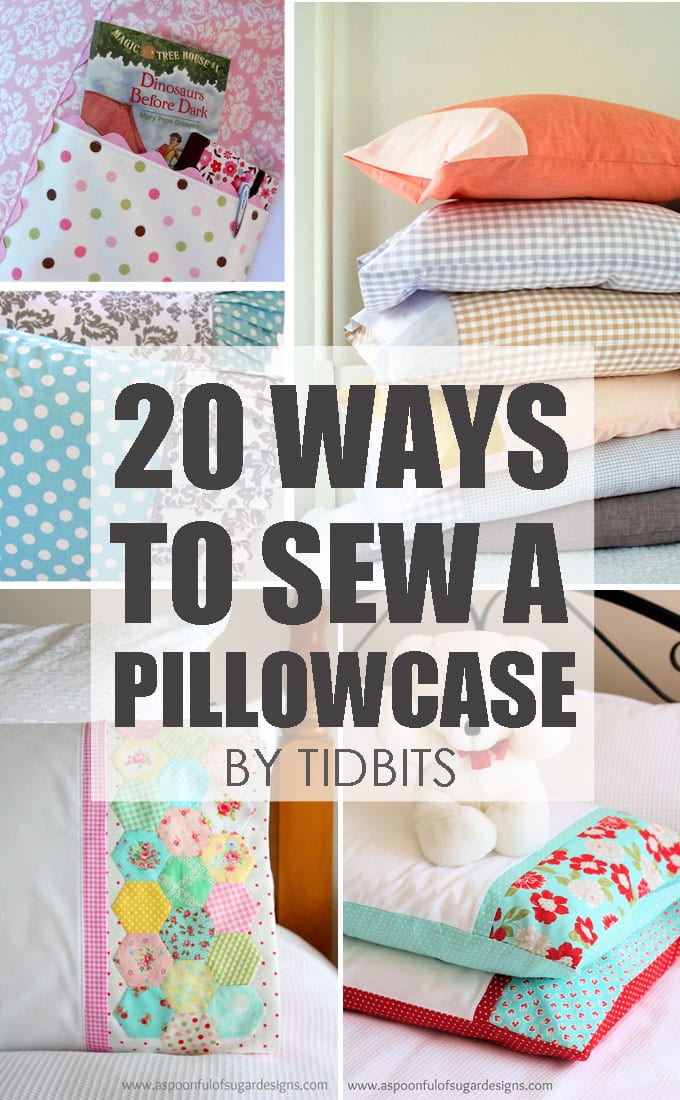
Pillowcases are the perfect project for anyone who loves to sew or wants to try sewing for the first time. They are quick, easy and customizable. In fact, there are so many ways to customize a homemade pillowcase that the only limit will be your imagination.
When you make your own pillowcases, you can choose fabrics, patterns, or colors that match your decor. That makes it a great way to update the look of your rooms on a budget.
Sewing your own pillowcases is also a great way to use some of the fabric scraps you’ve been saving in your stash. If you are feeling adventurous, you can add some ruffles, piping, or more to your creation. You could even try a reversible pillowcase which is one of my personal favorites!
And why stop at making just one style of pillowcase? I’ve gathered a collection of 20 of the best ways to sew a pillowcase. The only question is, which pillowcase do you want to try first?
Table of contents
- 20 Tutorials for How to Sew a Pillowcase
- 1 – Basic Pillowcase by Dana at Made Every Day
- 2 – Envelope Pillowcase from A Spoonful of Sugar
- 3 – Hexie Pillowcase from A Spoonful of Sugar
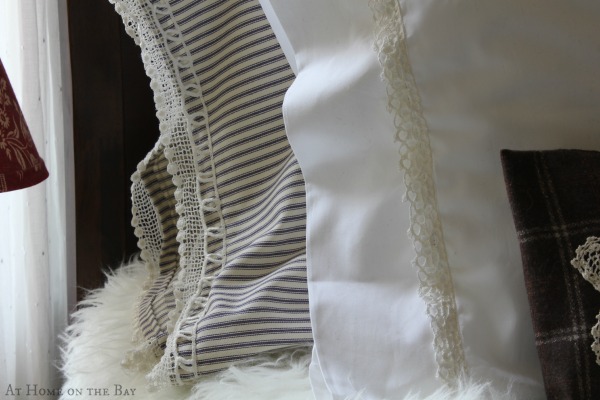
- 4 – Lace Trimmed Standard Pillowcases from At Home on the Bay
- 5 – Reversible Pillowcase from TIDBITS
- 6 – 3-in-1 Pillowcase from Make It and Love It
- 7 – Pillowcases for Every Bed by Purl Bee
- 8 – Pocket Pillowcase from Just Another Hang Up
- 9 – Ruffled and Frayed Pillowcase by TIDBITS
- 10 – “Burrito Method” Pillowcase by The Seasoned Homemaker
- 11 – Road Trip Pillowcases from Amazing Mae
- 12 – Vintage Style Pillowcase by Pleasant View Schoolhouse
- 13 – Fleece Pillowcases from Made Every Day
- 14 – Travel Sized Pillowcase with Minky Edge from Grandma’s Chalkboard
- 15 – Pillow with Decorative Pleated Cuff from Sew 4 Home
- 16 – Lace Trim Pillowcases from At Home on the Bay
- 17 – DIY Lace Pillowcase by TIDBITS
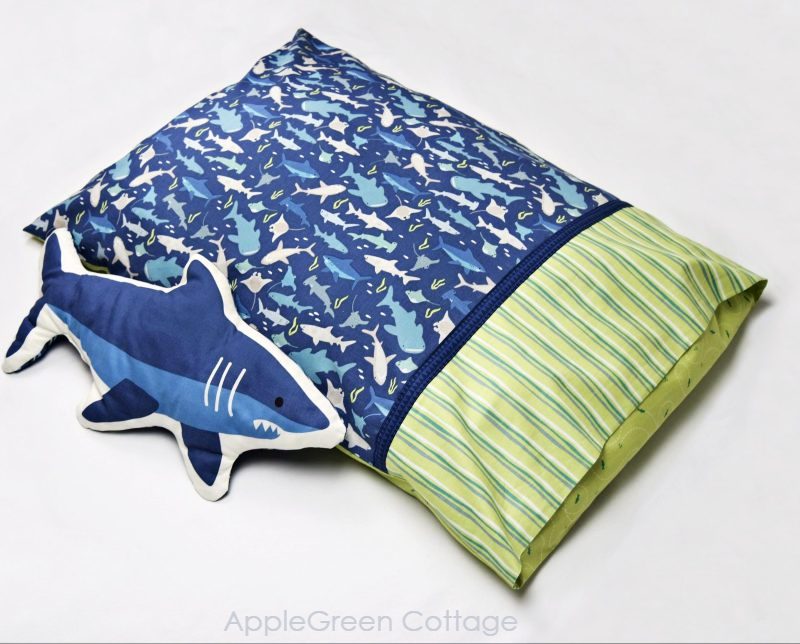
- 18 – How to Make a Pillowcase the Smart Way by Apple Green Cottage
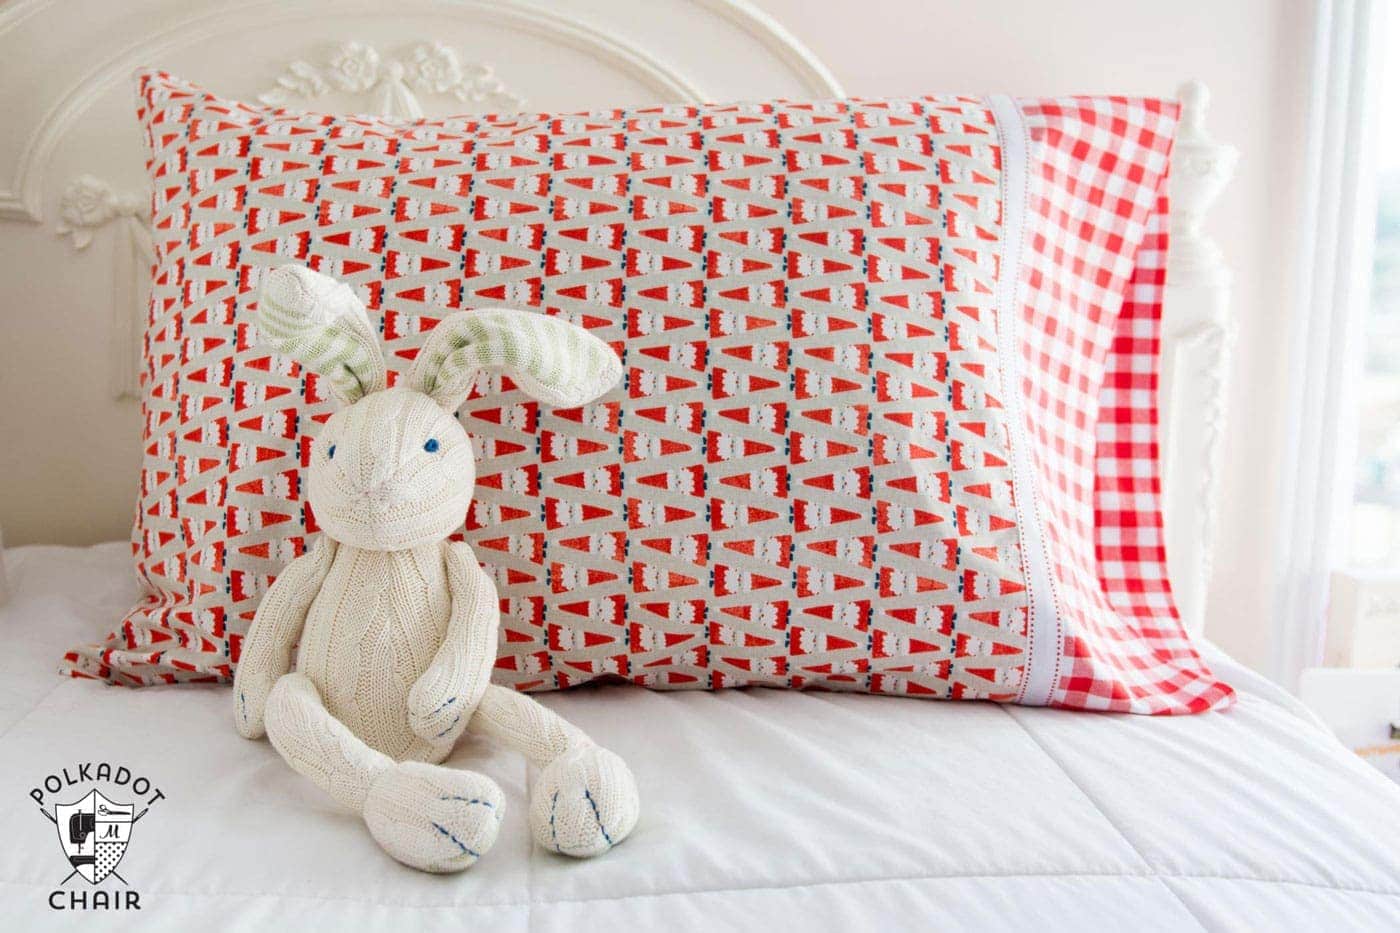
- 19 – Sew a Pillowcase in 3 Steps with Polka Dot Chair
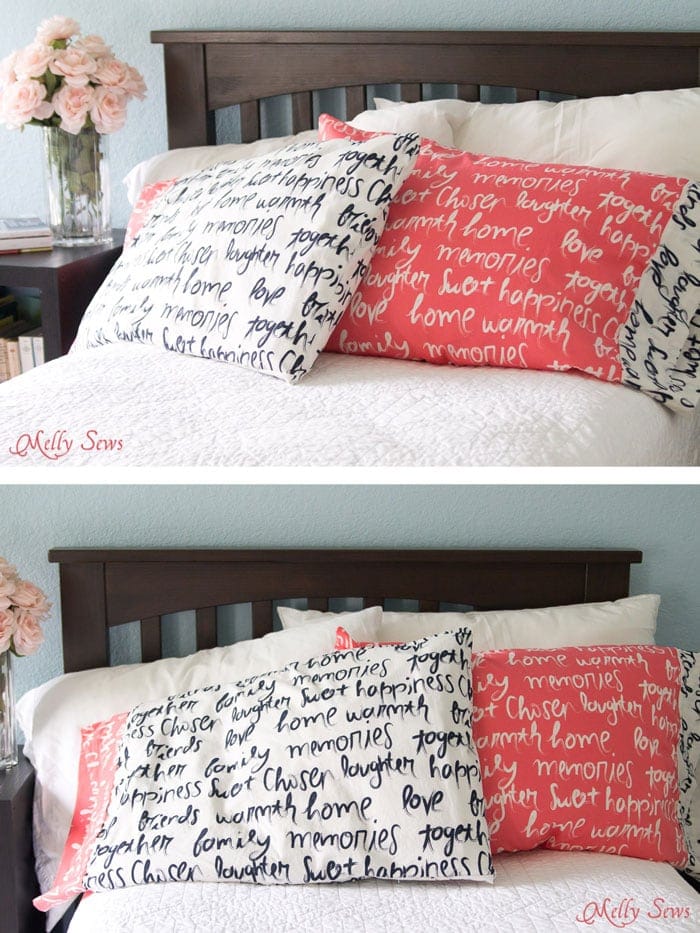
- 20 – How to Sew a Pillowcase with Easy Instructions
- More Sewing Projects to Try
20 Tutorials for How to Sew a Pillowcase
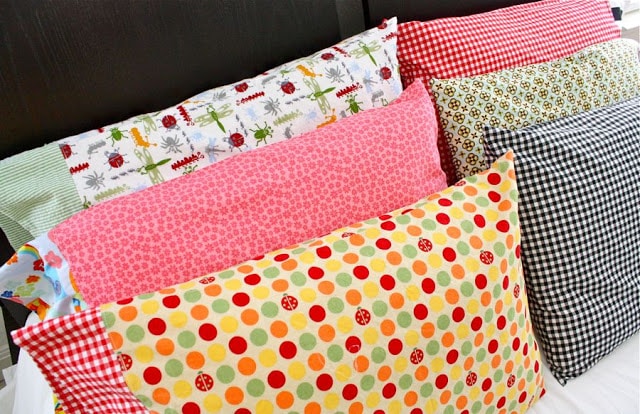
In no particular order here are 20 of the best ways to sew a pillowcase. Make sure to save this list for your next project!
1 – Basic Pillowcase by Dana at Made Every Day
If you’re looking for a basic pillowcase design, clearly spelled out in wonderful detail – then check out this tutorial by Dana, the queen of AMAZING tutorials – MADE.
2 – Envelope Pillowcase from A Spoonful of Sugar
Here is a pillowcase that hides the pillow inside, which I think is fantastic! The fun fabrics really make this project pop. Tutorial from A Spoonful of Sugar.
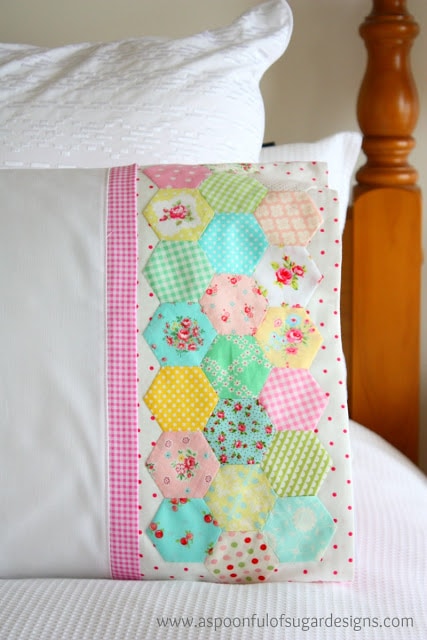
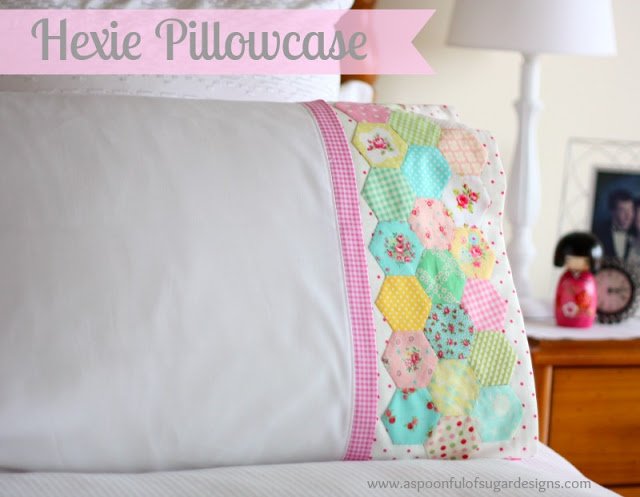
3 – Hexie Pillowcase from A Spoonful of Sugar
Also from A Spoonful of Sugar, this Hexie Pillowcase has beautiful detail! I think this unique pillow case would make a great gift. This sewing tutorial has great instructions if you are wanting something truly special.
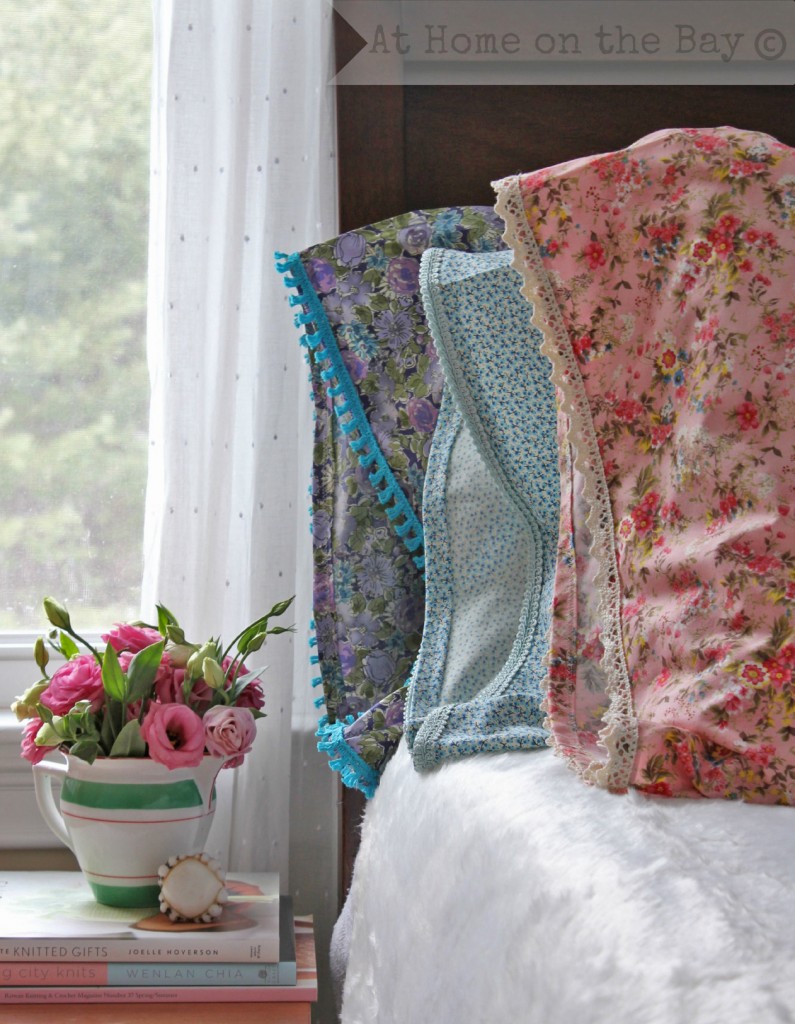
4 – Lace Trimmed Standard Pillowcases from At Home on the Bay
These easy pillowcases look simple enough for any level of sewer, but are so beautiful with the added trim and floral fabrics. The perfect simple sewing project! From At Home on the Bay.
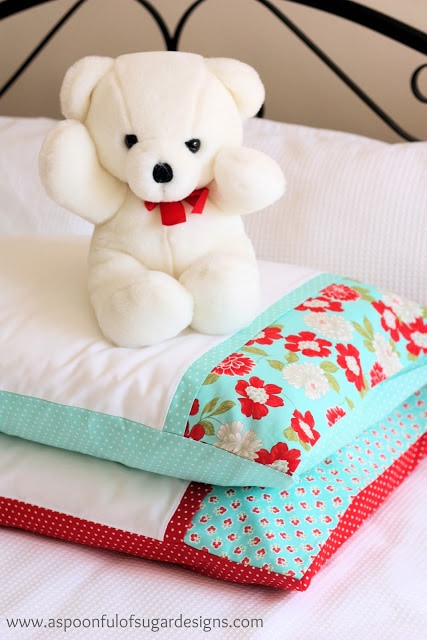
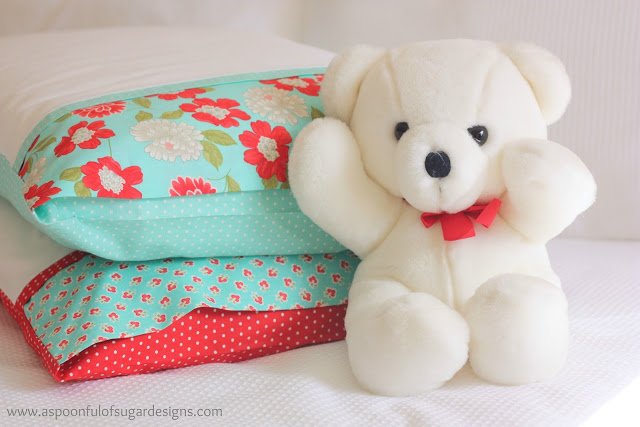
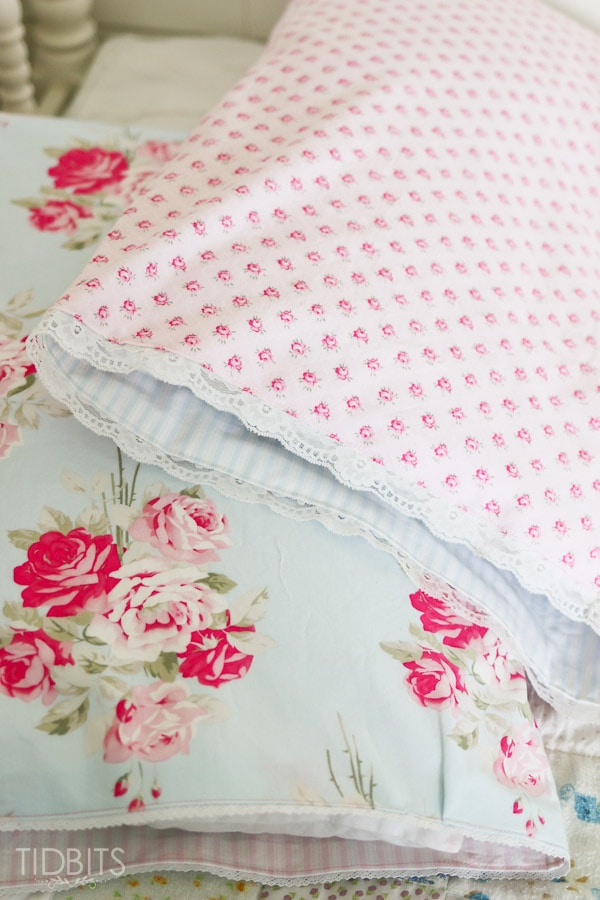
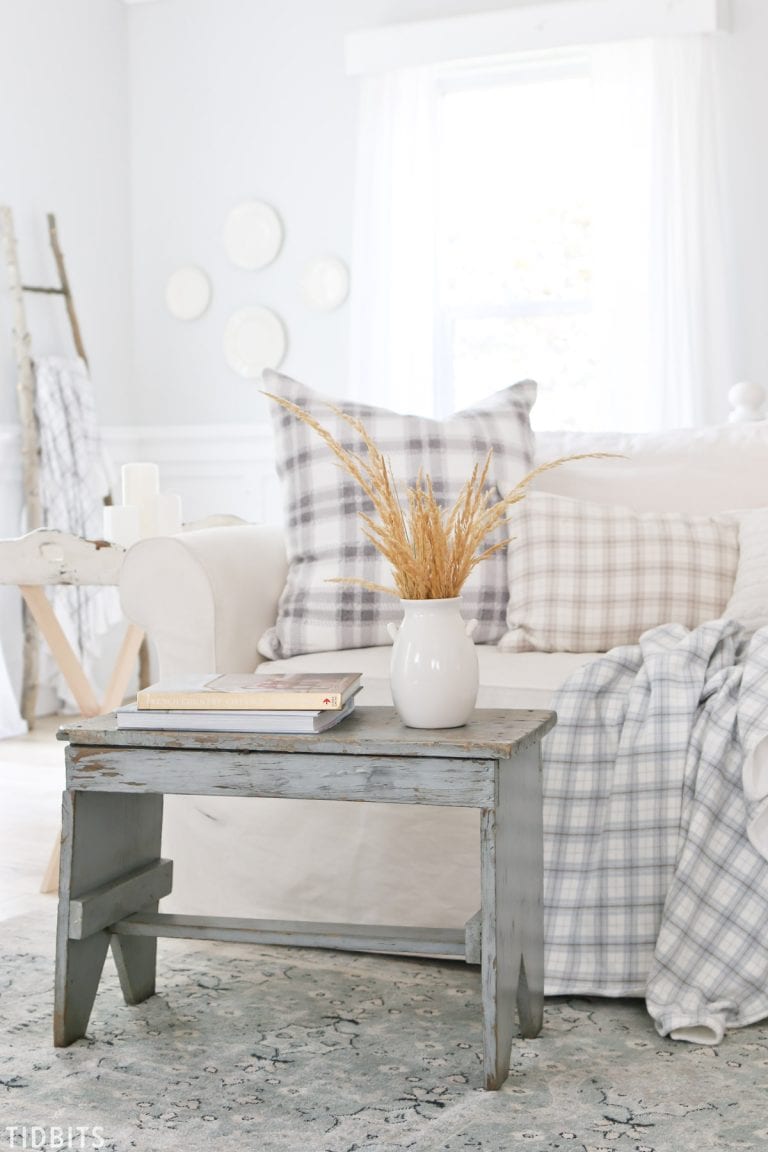
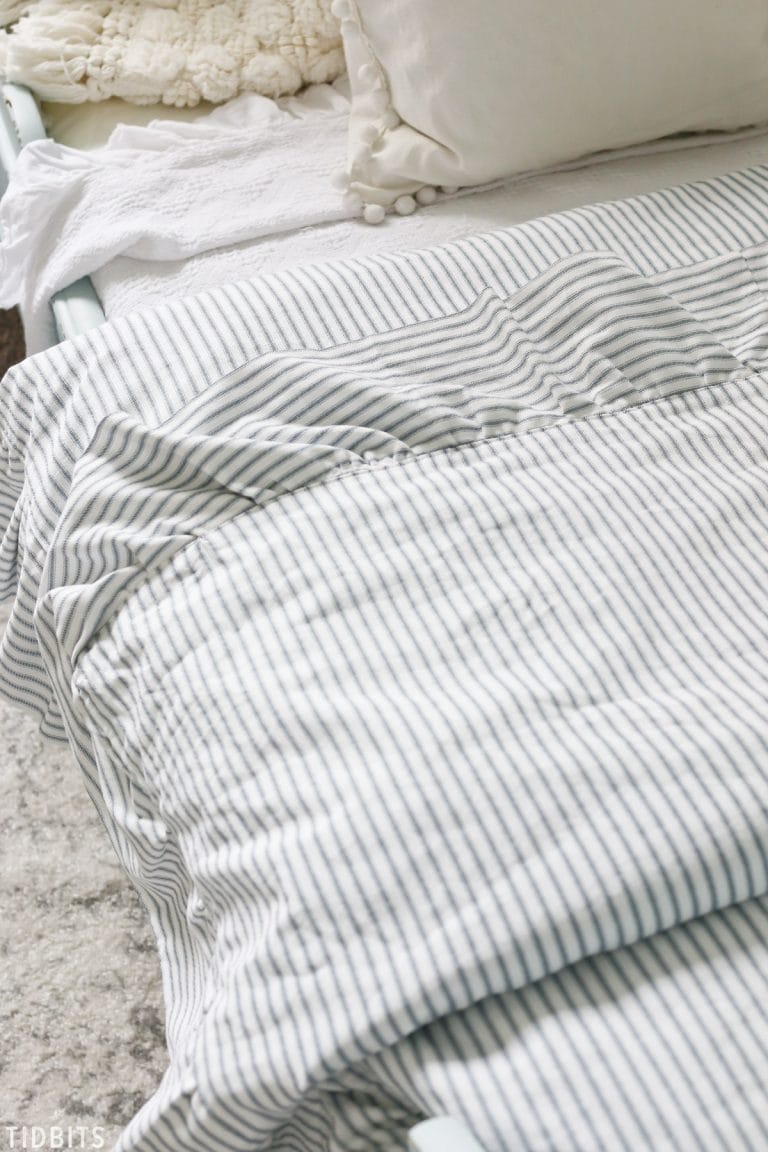
5 – Reversible Pillowcase from TIDBITS
You can fold this reversible pillowcase inside or out and it still looks beautiful! 2 completely different looks in 1 pillowcase. It’s one of my favorite diy pillowcase ideas. Tutorial by yours truly, aka Cami at TIDBITS.
6 – 3-in-1 Pillowcase from Make It and Love It
Here is a 3-in-1 pillowcase tutorial, from Ashley at Make it and Love it. You can choose between basic style, same color cuff, or tri-color contrast cuffs. Which ever way you choose to make it, these simple instructions won’t lead you astray.

7 – Pillowcases for Every Bed by Purl Bee
If you have a whole bunch of lovely fabrics, this is a great idea for mixing and matching pieces of fabric to make a whole coordinated set for your home. Pillowcase sewing tutorial by The Purl Bee.
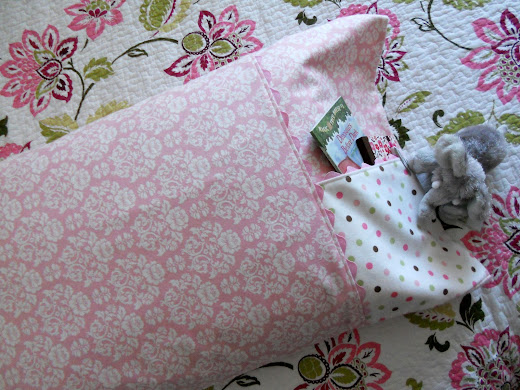
8 – Pocket Pillowcase from Just Another Hang Up
My kids would adore this pillowcase with a pocket. Great for sleepovers and traveling! And I love the main fabric and contrasting pocket fabric idea. Tutorial by Just Another Hang Up.
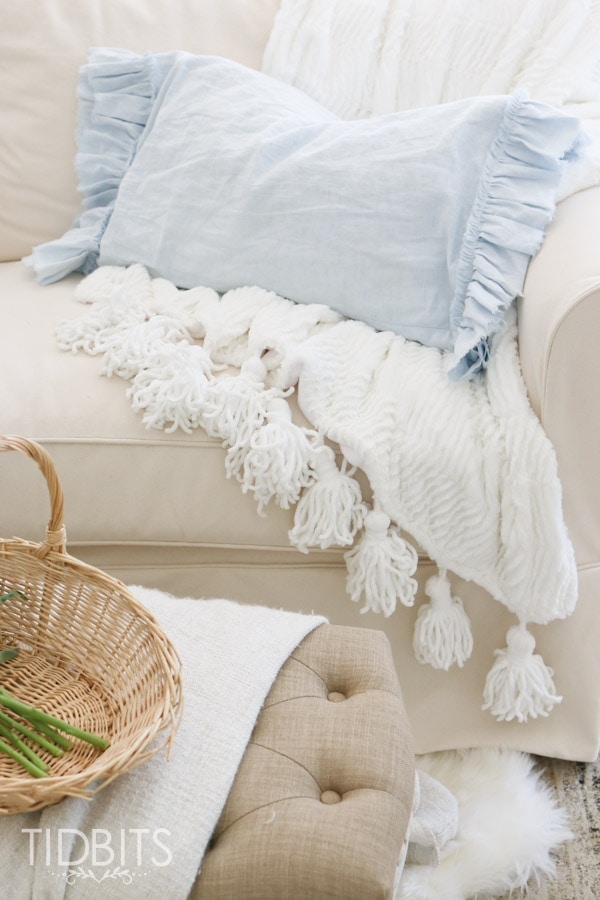
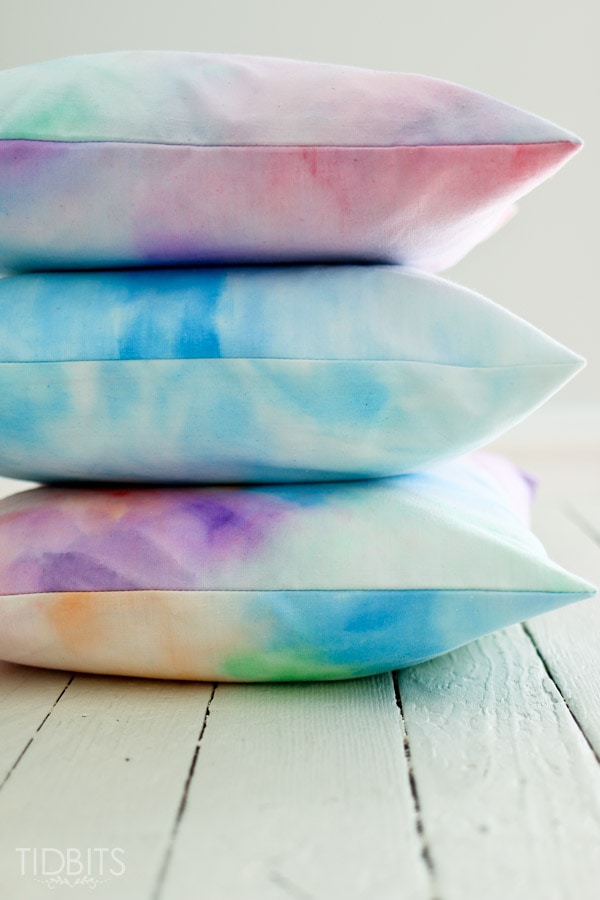
9 – Ruffled and Frayed Pillowcase by TIDBITS
This pretty open-ended pillowcase with ruffled and frayed edging would work great for your bed or as an accent pillow on furniture. Those fraying raw edges are down right dreamy! Another tutorial by myself aka Cami at TIDBITS.
10 – “Burrito Method” Pillowcase by The Seasoned Homemaker
The Seasoned Homemaker shows you how to sew a pillowcase using the “burrito method”. I’ve also heard it be called “hot dog method” or “magic method”. Whatever you call it, this is a beautiful pillowcase with french seams and a very finished look.
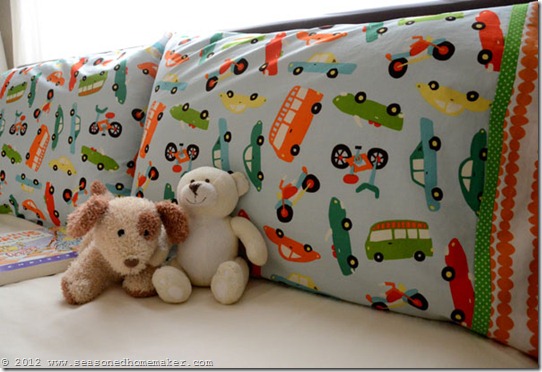
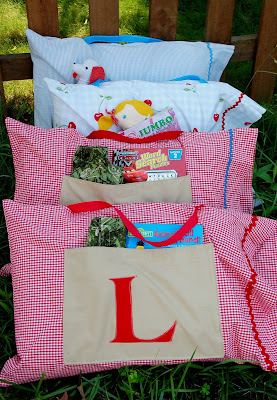
11 – Road Trip Pillowcases from Amazing Mae
I love these road trip pillowcases from Amazing Mae and I know my kids would too. The handle, the dimensions of the pocket – it’s travel pillow perfection!
12 – Vintage Style Pillowcase by Pleasant View Schoolhouse
If you have a thing for vintage, this sweet and simple pillowcase from Pleasant View Schoolhouse should do the trick. I adore the simple trim layer and dainty choices used in this pillowcase!
13 – Fleece Pillowcases from Made Every Day
Want a change from the standard the standard cotton fabric pillowcase? Want something super duper quick? This 2-step pillowcase, also from Dana at MADE, was meant for you!
14 – Travel Sized Pillowcase with Minky Edge from Grandma’s Chalkboard
Need something outside of the standard size pillowcase? Here is an adorable mini-pillowcase with a minky edge from Grandma’s Chalkboard. Another great-for-traveling pillow. Checkout the free tutorial!

15 – Pillow with Decorative Pleated Cuff from Sew 4 Home
I can’t get enough of these pleated pillowcases! This pillowcase from Sew4Home is perfect if you want a pillowcase to make someone feel really special.
16 – Lace Trim Pillowcases from At Home on the Bay
If you are interested in sprucing up a store bought pillowcase, simply stitch some trim on the cuff and feel just as good as you would about making one from scratch. Another great idea from At Home on the Bay.
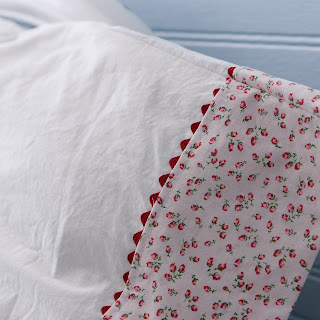
17 – DIY Lace Pillowcase by TIDBITS
Here is another step-by-step guide for adding charm to a store-bought pillowcase with pretty trim. It makes for a high end look without the high price tag. Find my simple tutorial on TIDBITS!

18 – How to Make a Pillowcase the Smart Way by Apple Green Cottage
Here is a great pillowcase sewing tutorial from Apple Green Cottage. This tutorial comes with instructions for making standard, queen or king size pillowcases. Love it!
19 – Sew a Pillowcase in 3 Steps with Polka Dot Chair
Melissa from Polka Dot Chair makes sewing pillowcases easy with her 3 step tutorial. And isn’t her Christmas pillowcase just adorable!?
20 – How to Sew a Pillowcase with Easy Instructions
If you’re looking for an easy to follow tutorial with great visual guides, try How to Sew a Pillowcase by Melly Sews. Melly does a great job taking you step-by-step through the process for making simple and beautiful pillowcases.
More Sewing Projects to Try
I hope you’ve enjoyed this list of 20 ways to sew a pillowcase. There are so many great ideas to choose from. Let me know in the comments if you found a pillowcase that you are dying to make!
If you want more great sewing ideas, checkout the following:
- How To Make Cabinet Curtains: An Easy And Cute Sewing Tutorial
- 10 Easy Quilt Patterns for Beginners | Start Here to Avoid Overwhelm
- DIY Linen Tea Towels | Upcycle Sewing Project
- How to Sew a Chair Cushion Slipcover
- Ruffle Pillow Sham Tutorial
- DIY Gathered Bed skirt | From a Drop Cloth
- DIY Grain Sack Pillow | From a Drop Cloth
- The Lazy Quilters Easy Quilt – No Measuring Required!
- DIY Ruffled Tablecloth | French Vintage Style
- How to Make a Quilted Pillow Cover with Video Tutorial
- How to Sew a Mini Christmas Stocking + FREE Pattern and Tutorial
- DIY Linen Tea Towels | Upcycle Sewing Project
Happy sewing!


Love the variety and different take on style. I’m making my nieces and nephews pillow cases for Christmas, as well as my 95 year old aunt.
How much fabric is needed for a pattern print standard pillow case?
Thx. Such great ideas. Got some fun work to do.
Beautiful ideas! Can’t wait to try a few. They would make great gifts or just to spruce up your current bedding.
Thank you!
That is some beautiful work. I got some great ideas from this article. Thanks and keep sharing.
These are beautiful! I can’t decide on one so I’ll make all of them. I make pillowcases for children with cancer, I know these will put a smile on their faces.
These are beautiful! I can’t decide on one so I’ll make all of them. I make pillowcases for children with cancer, I know these will put a smile on their faces. 🙂
Really great ideas. Now I know what everyone is getting for Christmas
That is awesome.
I like the honesty and oddball details in your review, haha. I’m kinda strange with my pillows – I’ve had my current one about 4 years now because I’ve never found another that matches it’s particular feel.
I highly dislike memory foam pillows because I like a different level of firmness every night. This causes me to bunch my pillow sometimes so all the filling is towards the middle and feels firmer, or fluff it and let the filling spread out with the weight of my head to feel softer. Generally, I don’t mind if the filling feels lumpy as long as they aren’t the hard lumps like you get after washing and drying most pillows a few times (which I haven’t done with this one since I use a zipped dust case plus pillow case)
So, that being said, how would you describe the lumps? Can’t say I’ve ever felt lumpy flour… but I’d assume it’s softer than the traditional cheap and crappy lumpy pillow, right? And does it seem to smooth out at all with the weight of your head or does it remain lumpy? Do you think after using it for a while it might be good for someone who likes forming their pillow a little differently every night?
Thank you for sharing this! These tutorials look awesome.
I have been hunting for birthday material for quite awhile. Still can’t find any.
Birthday fabric – I finally found some at Joanns Fabrics in Boise, Idaho. Hope you are able to grab some before it’s gone.
Thank you so much for the info.
I will be making a trip to the store shortly.
I have five grands for this project.
Again thank you so much.
Blessings
You must be an advanced sewer. I have done several and started out as pillow cases, for Halloween or Boo Bags. Then I did one for my son for every holiday. He was about 10 years old when we did the haunted house bd part. He is 22 right now and he still uses his.
forgot to mention. I start out with the pillow size plus 3.5 inches. I take and sew down the bottom and one side. Then I take and fold over the top 1/4 inch and iron, then down 3 inches and iron and sew it down. That is for a very simple pillow like the ones you get with sheets, except they are done with fun fabric. The hardest to find was bd fabric. However, I did.
Thank you so much for this tip. I’m making pillowcases for a 47″ by 24″ foam dog bed. The dog don’t need any contrasting fabrics, and the burrito method is entirely baffling to me.
Also I needed to sew the large opening 3 inch fold on the right side of the fabric first, then put the wrong sides together and sew the side and bottom last.