
This post may contain affiliate links, which means I get a small percentage of the sale at no extra cost to you. I only recommend items I love and have had a positive experience with. Thank you!
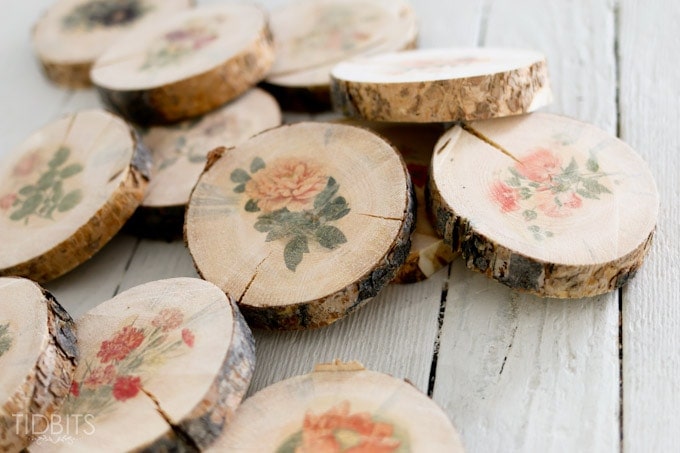
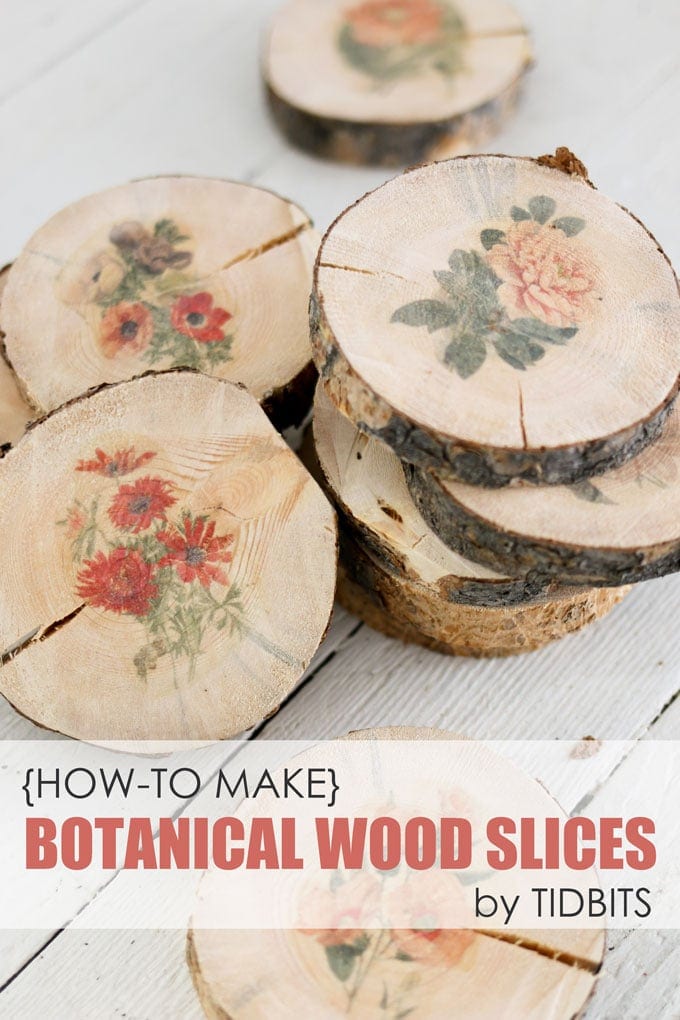
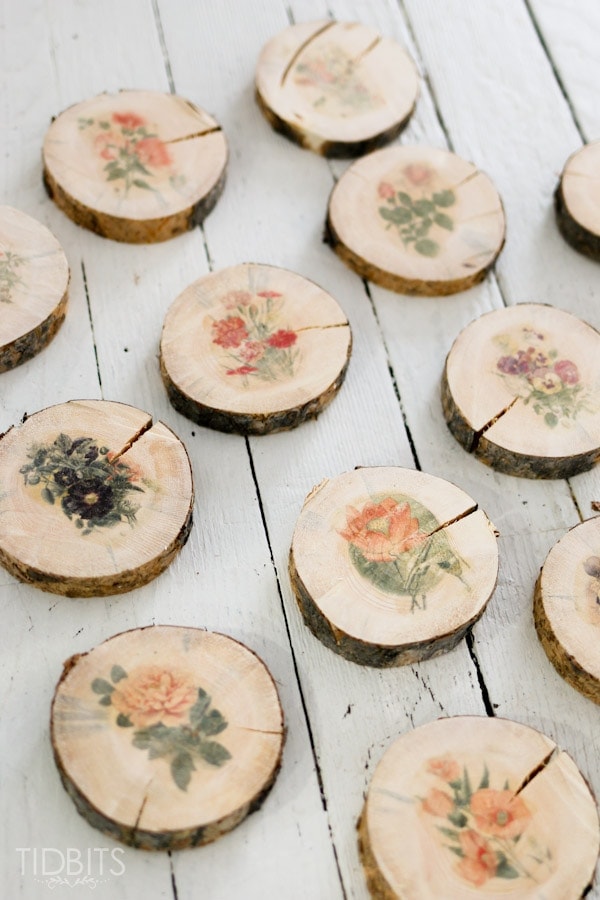
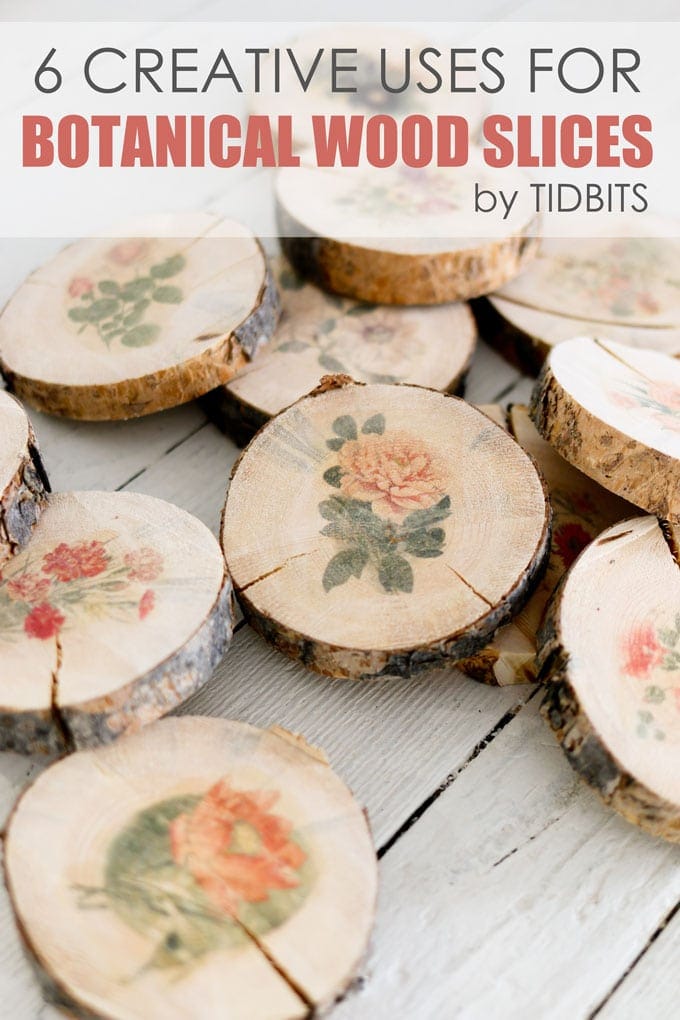
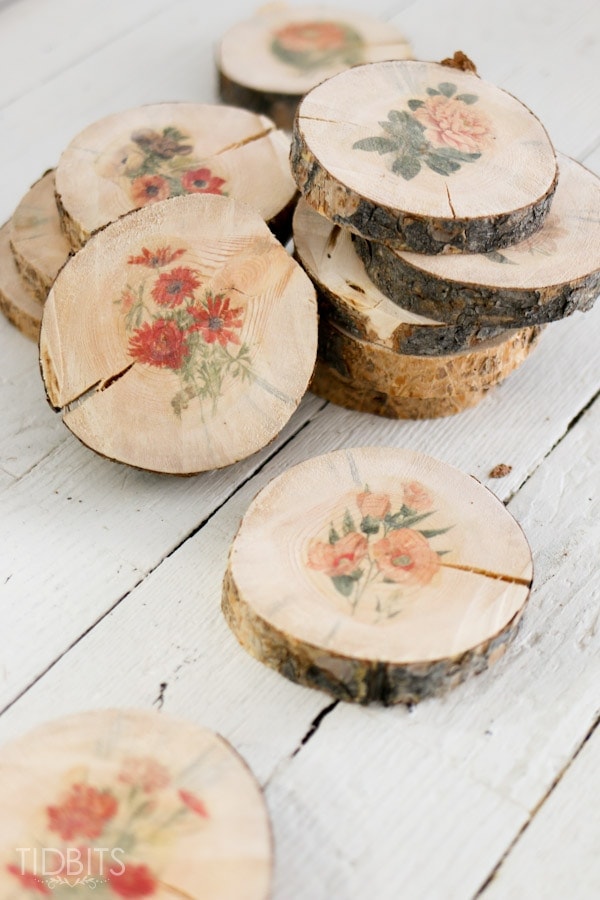
These botanical wood slices are such a fun and easy craft and can be used in so many ways. This tutorial includes the how-to for transferring any image from your inkjet printer onto wood.
I’m bringing home a tutorial I originally shared at Ella Claire, HERE.
In the spirit of spring and summer and flowers blooming, I’m here today to share a quick, easy, and inexpensive way to enjoy nature, without getting your hands dirty.
I came up with the idea of making these botanical wood slices on a day while admiring my neighbors yard with all her flowers blooming and not a weed in sight. I thought to myself, “Self . . . why can’t we keep anything green alive? How is it possible that you are creative inside your home, but severely lacking in vision on the outside?”
Me and myself came to the conclusion that there is a season for all things, and someday I would have the time and energy to perfect my yard and cultivate a knowledge of blooming things.
However, time and energy (or the lack thereof) was not going to stop me from enjoying the beauty of flowers and the smell of trees and the variety of seeds and the miracle of growth.
So I sliced up a tree and found some lovely botanical prints that don’t need to be watered. And with a little help from my ink-jet printer and some wax paper – I have my very own low maintenance garden, right inside my house.
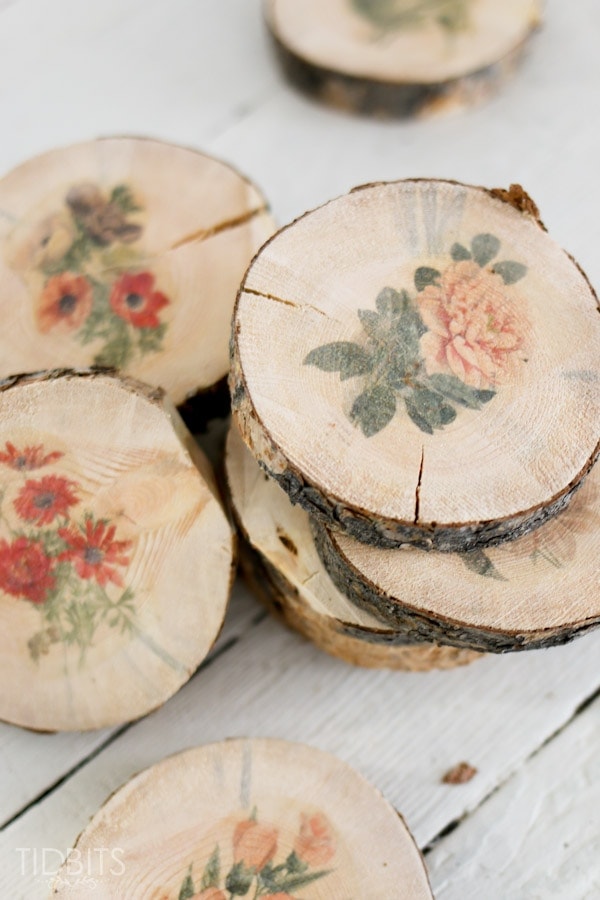
If this is a craft you are dying to do as well, I am going to show you how easy it is to transfer some botanical prints onto wood slices in minutes! No fancy tools or chemicals needed – just your ink jet printer, wax paper and a few household items.
And in case you are wondering what to do with your botanical wood slices once you made them, I have plenty of ideas for you. One super cute idea would be to plop them down on coffee tables or outdoor cookouts for a one-of-a-kind drink coaster.

And if that is not adorable enough, head over to TIDBITS, where I am sharing 6 creative uses for your botanical wood slices – or better stated – 6 reasons why you need to make lots and lots of these right now!
So here is what you need to make your botanical wood slices:
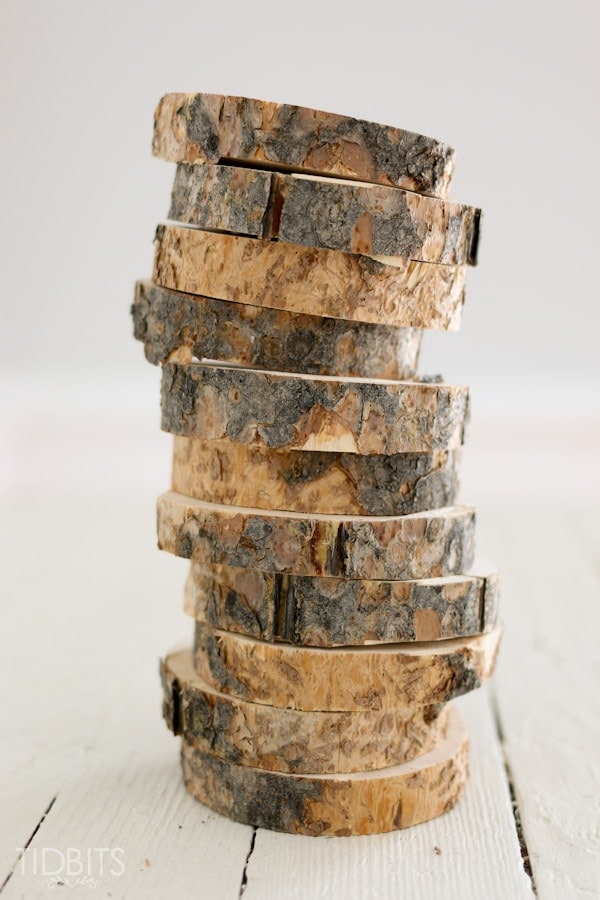
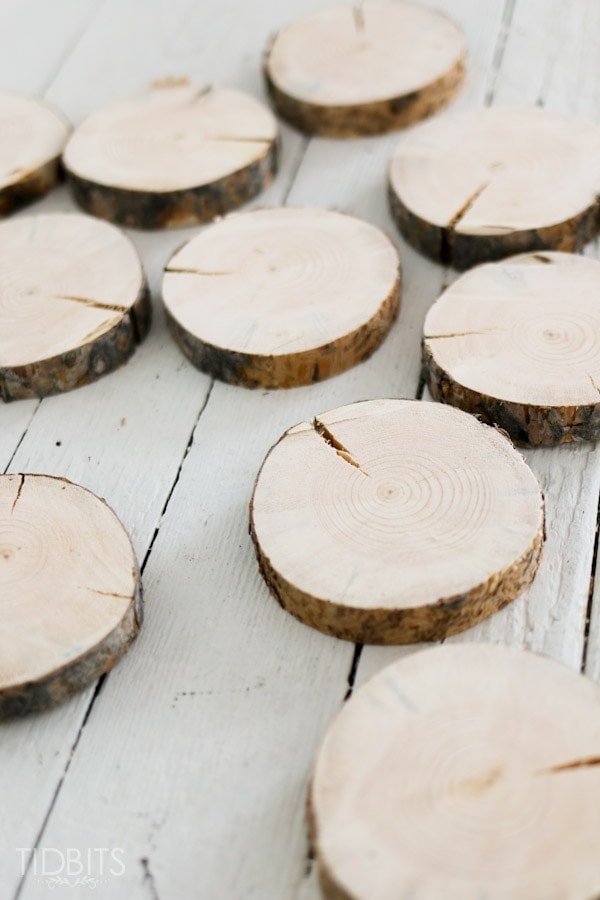
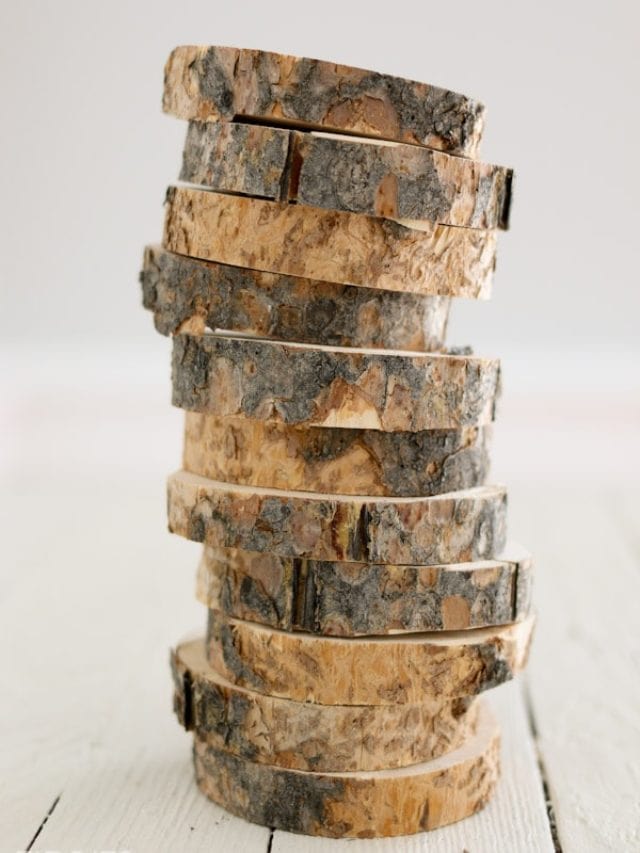
Wood Slices
- My husband happens to hoard anything wood – so he took a lodge pole pine tree log that was sitting in our garage (because you never know when you might need one), and quickly cut them into slices for me. I have seen these available at craft stores, so you might want to check there if you don’t have access to logs.
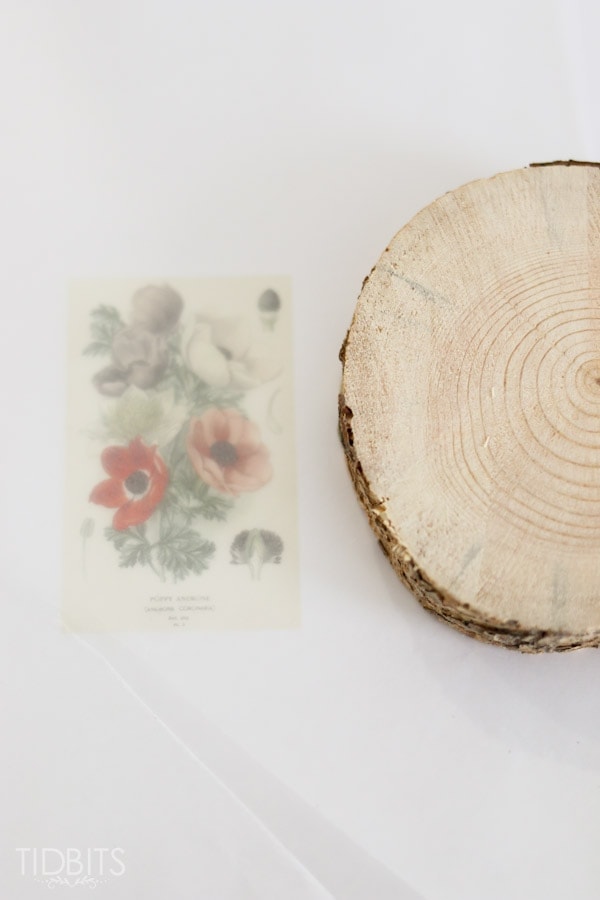
- My wood slices measure about 4 inches across, but the size is completely up to you with what you have available. Just be sure the image you are going to print is going to match the size of the wood.
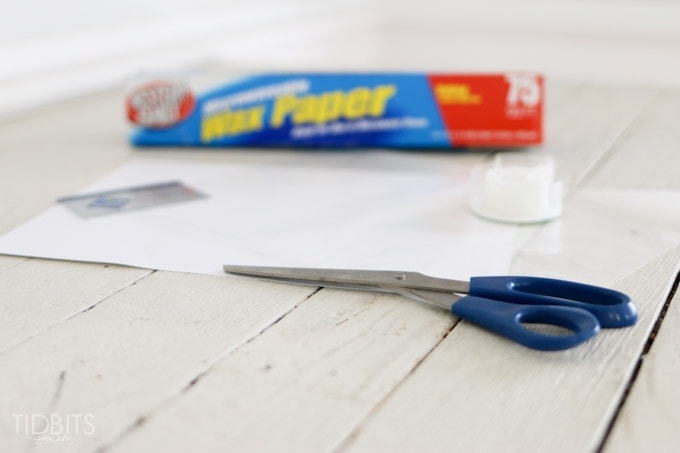
You’ll also need:
- Wax paper (I’ve heard freezer paper works too)
- Tape
- Scissors
- Credit Card
- Standard printer paper
Botanical Prints:
- You can technically print any image and adhere them to any type of wood with this method I will show you. If you want to do the botanical prints seen in my images, go HERE to download this free (for personal use) book full of lovely botanical prints, from Botanicus.org. I was thrilled to find this resource online. Though, I will mention – I couldn’t seem to re-size the print in any way after I downloaded the images. Perhaps you can figure that out (and let us know if you do), but the small size of the print worked perfectly for my wood slices.
Instructions:
I want to be sure to reference the tutorial I found online which taught me this method of ink jet transfer onto wood. The blogger at “A Piece of Rainbow” used this method for some adorable projects which you will have to check out. She offers several tips and tricks which I used and found very helpful. She also shows how you can make a all natural sealer for your wood slices, if desired.
First of all, cut a piece of wax paper the same size as your standard printer paper. Overlap the wax paper about an inch over the top of the printer paper. Fold the extra edge over to the back side of the printer paper and tape it securely down. You only need to tape on the top edge that will be feeding into the printer. To give you perspective, you are only printing on the wax paper, but it is best to tape it to printer paper otherwise the wax paper gets jammed very easily.
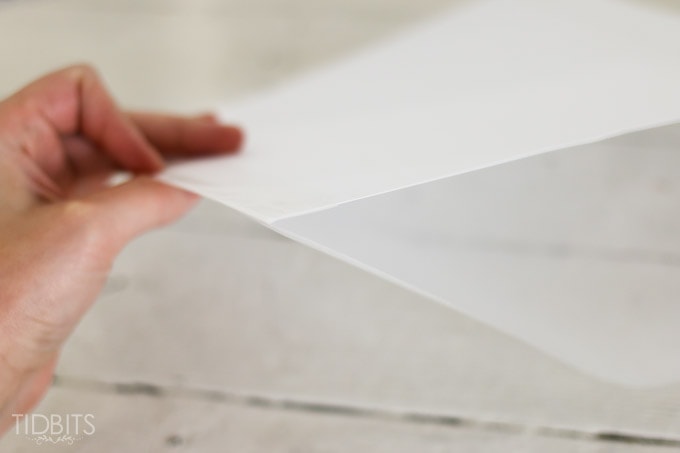
Place this paper into your printer paper feed so that the wax side will be the one printed on. This is different for all printers so experiment if you need to figure out your specific printer.
Print your botanical image and carefully remove the print from the printer. You really have to be so careful to not let that image smudge on anything. It is wet ink just sitting on top of the wax and if you all but breath on it wrong, it could smear.
It’s best to handle this image as little as possible, but I found it easier to cut my image out carefully before the transfer. Keep in mind, you cannot touch that ink at all.
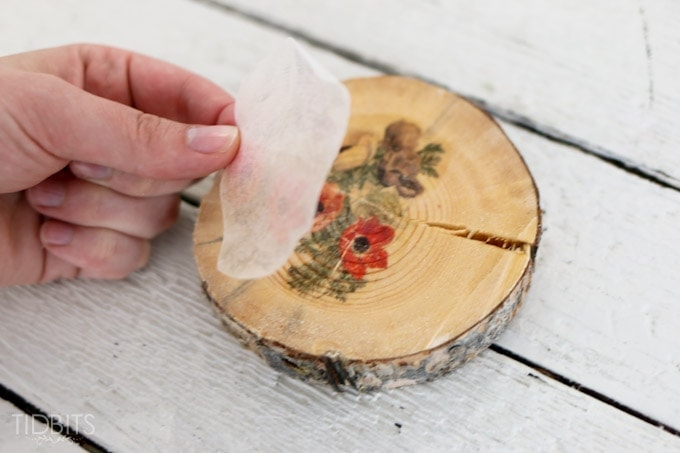
One great tip that was mentioned in this post, was to dampen your wood surface just barely before putting the image on. I did find this to be helpful.
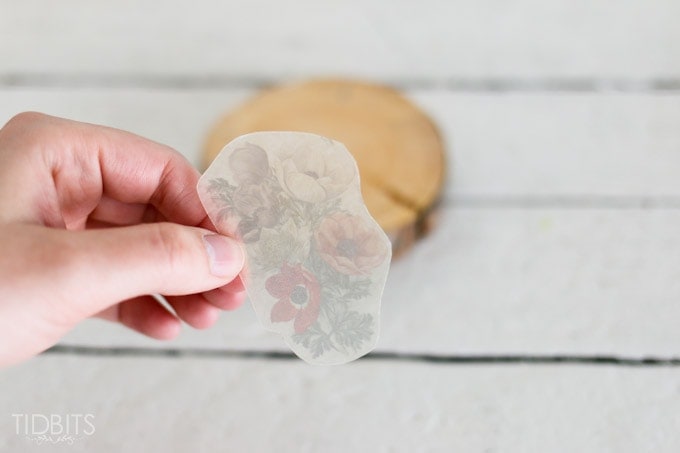
Figure exactly where you want the image and set it down without moving it around. I found it easier to set it in place and use my pointer finger in the center to keep it from shifting.

Use any type of card or flat surface to gently rub the ink onto the wood. It only takes a little bit of pressure and once the wax paper lifts up, I don’t recommend trying to place it again as it will look smudged.

Lift your wax paper all the way up and off, and your image is left on the wood. Yay!
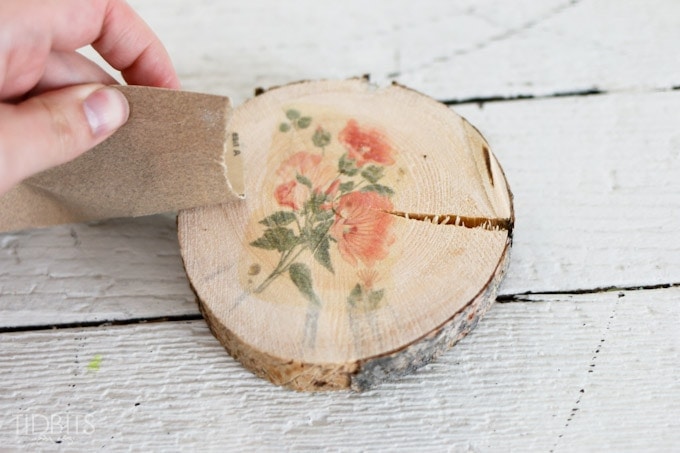
The background of these botanical prints are slightly colored and I didn’t want that very noticeable. You can take some sandpaper and sand and smooth some of that background off, but be sure to not sand off the image.
It really is that easy! This was such a fun and rewarding craft and I hope you get a chance to try it out.
I would love to hear if you do!
Here are some other crafts you can find over at my site, TIDBITS.
Make a sweet little candle in a jar – tutorial HERE.

Go HERE, to find out how to whip up the fastest wreath in the history of EVER!

Or if you are in the mood for a very basic sewing project, these reversible pillowcases are one of my all time favorites.

Thanks for reading!


I had a tree that I cut into slices as well. After sanding for a good bit my surface was NOT this smooth. Do you have any tips or tricks to make it really smooth? It still had the grooves of the rings and when I tried to transfer even given that, it did not transfer well and rubbed out more easily.
Absolutely love the idea! I got all the supplies but I was wondering if it works with laser printers. I tried it but it seemed the print dried already. =( Help
What kind of wood have you used for the botanical wood slice,did you seal the wood with product? What kind of product?
Thank you
Brilliant! Glad that worked for you!
A trick I’ve discovered is to copy and paste images into a Word document, then you double click on image to adjust the size. Also, you can change the placement to “over text” then you can click and drag image around. This way you can get several images on one sheet.
First, thank you for posting this. They are so cute!
1. Since it would be good to print the pictures ahead of time on the waxed paper for a few people to do the project, must the image be rubbed onto the wood BEFORE it dries, or will it still work AFTER the ink dries on the waxed paper?
2. Did the waxed paper hurt your printer?
3. Must it be sealed with something afterward? Would mod podge work for a sealer, or must it be something like polyurethane?
Please respond as soon as you can, we just discovered this great project and would love to use it soon at a make and take gathering. Thank you so much
Patty
So fun! Thanks for sharing the link with me! You are adorable!
Hi there,
I love these coasters but can’t get the images to come up through the link you provide. How can I go about getting these images?
Thank you,
Penni
When I click on the link it does not bring up any images. Is it me or are they no longer available?
Hmm. I can see them on my end. Is it for the botanical wood slices post that you can’t see the images? Is is all or some images that are not loading? If you have a moment and could tell me if you can see other posts but just not this one that would be helpful. Thank you for bringing this to my attention.
Sorry, no, I can see all your images on your posts. When I click on the link to get the botanical images you used for your wood slices, I cannot get any images to show up.
Brilliant idea. Well done. I have also made coasters from tree slices. If you want to prevent them from cracking as they dry out, first soak them in a product called Pentcryl. Apparently this prevents the wood cells from shrinking. It has worked well for me.
Fat finger error! Should read as Pentacryl.
Do you think that the front of seed packets would be a good source for floral images?
Do you need to seal these with some sort of clear coat? I would think the ink would run if it got wet from a cold drink.
Cami, these are just beautiful! Thank you for linking up to Creative Spark. I’m featuring these wood slices tomorrow. Hope you’ll link up with us again – the party starts at 6am EST!
Thank you so very much! Can’t wait to see it. You have a great link party!