• Skip to primary navigation
  • Skip to main content
  • Skip to primary sidebar
  • Skip to footer

Tidbits

Inspiration for the Keeper of the Home

  • Home
  • About
    • About Me
    • Work with me
    • Media Kit
    • FAQ
    • Disclosure and Policy
  • Project Index
    • All
    • Decorating
    • DIY
    • Homesteading
    • Printables
    • Sewing
    • Crafts
    • Holidays
    • Recipes
    • Woodworking
    • Photography
    • Crafting with Kids
    • Other
  • Home Tours
  • Seasonal
    • Winter
    • Spring
    • Summer
    • Fall
  • Shop
  • Contact
You are at Home and DIY
Home and DIY
Food and recipes

You are here: Home / Crafts / DIY Thrifted Glitter Putz House

DIY Thrifted Glitter Putz House

December 11, 2017 • Crafts, DIY, Holidays, Seasonal, Winter

530 shares
  • 4

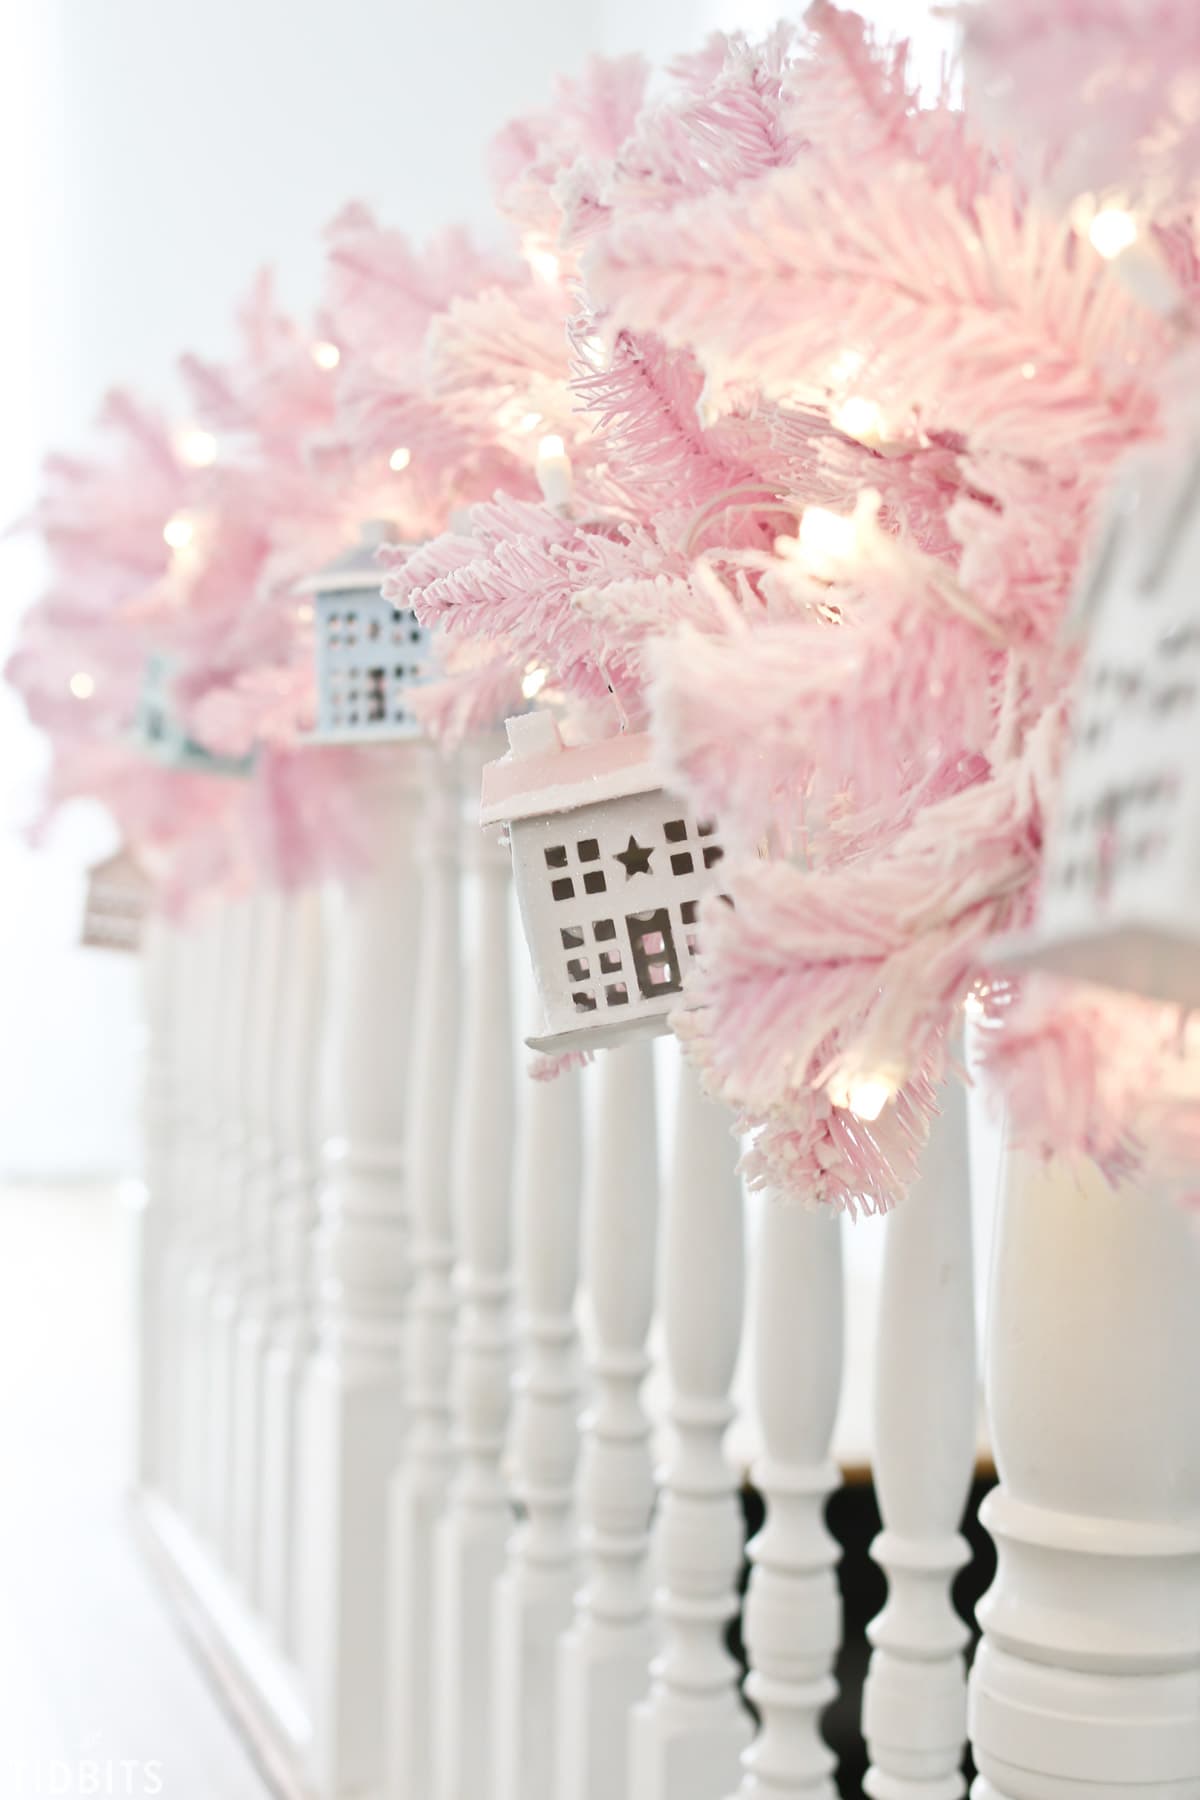
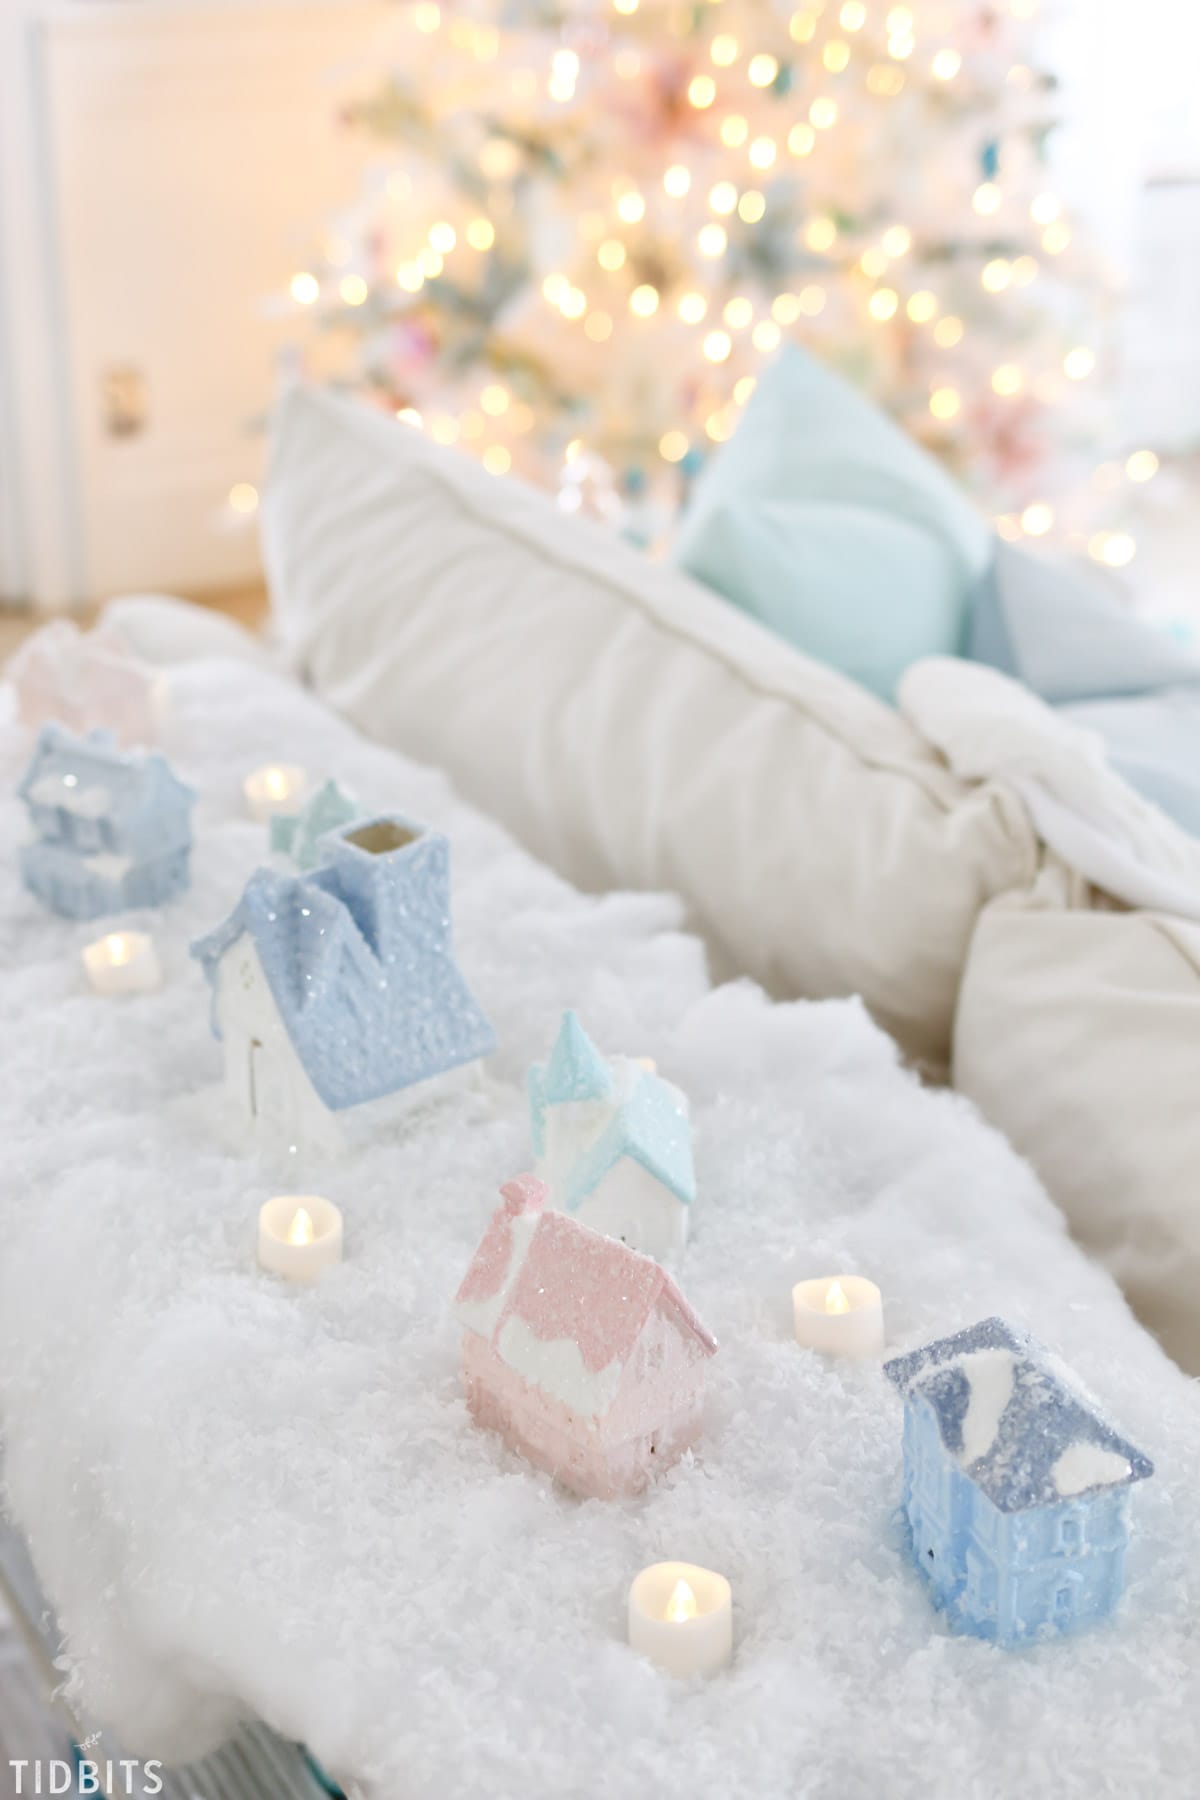
Take any yikes, scary or icky Christmas Village house from the thrift store and give it a whole new look – a glitter putz house look, to be exact.  Simple, affordable, and so stinkin’ cute!

DIY Thrifted and Upcycled Glitter Putz Houses, by TIDBITS

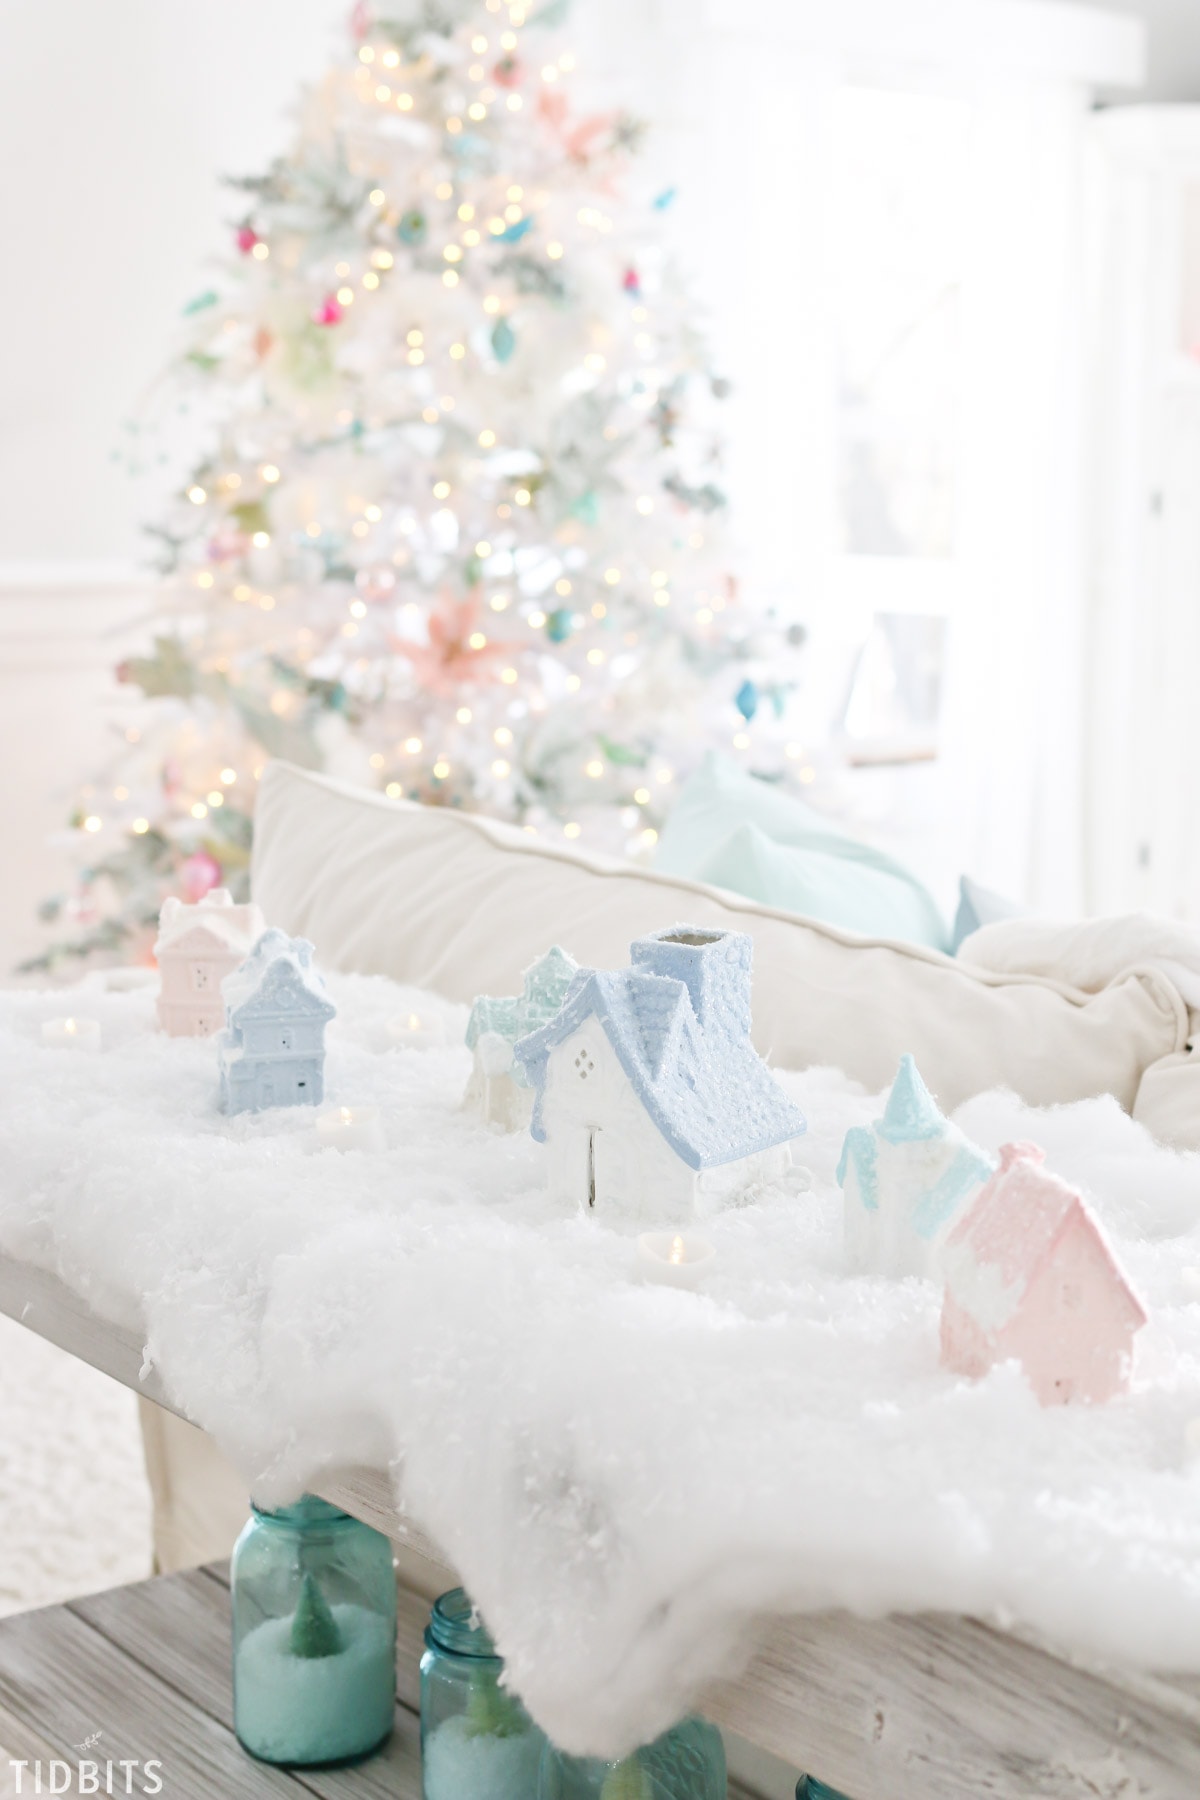
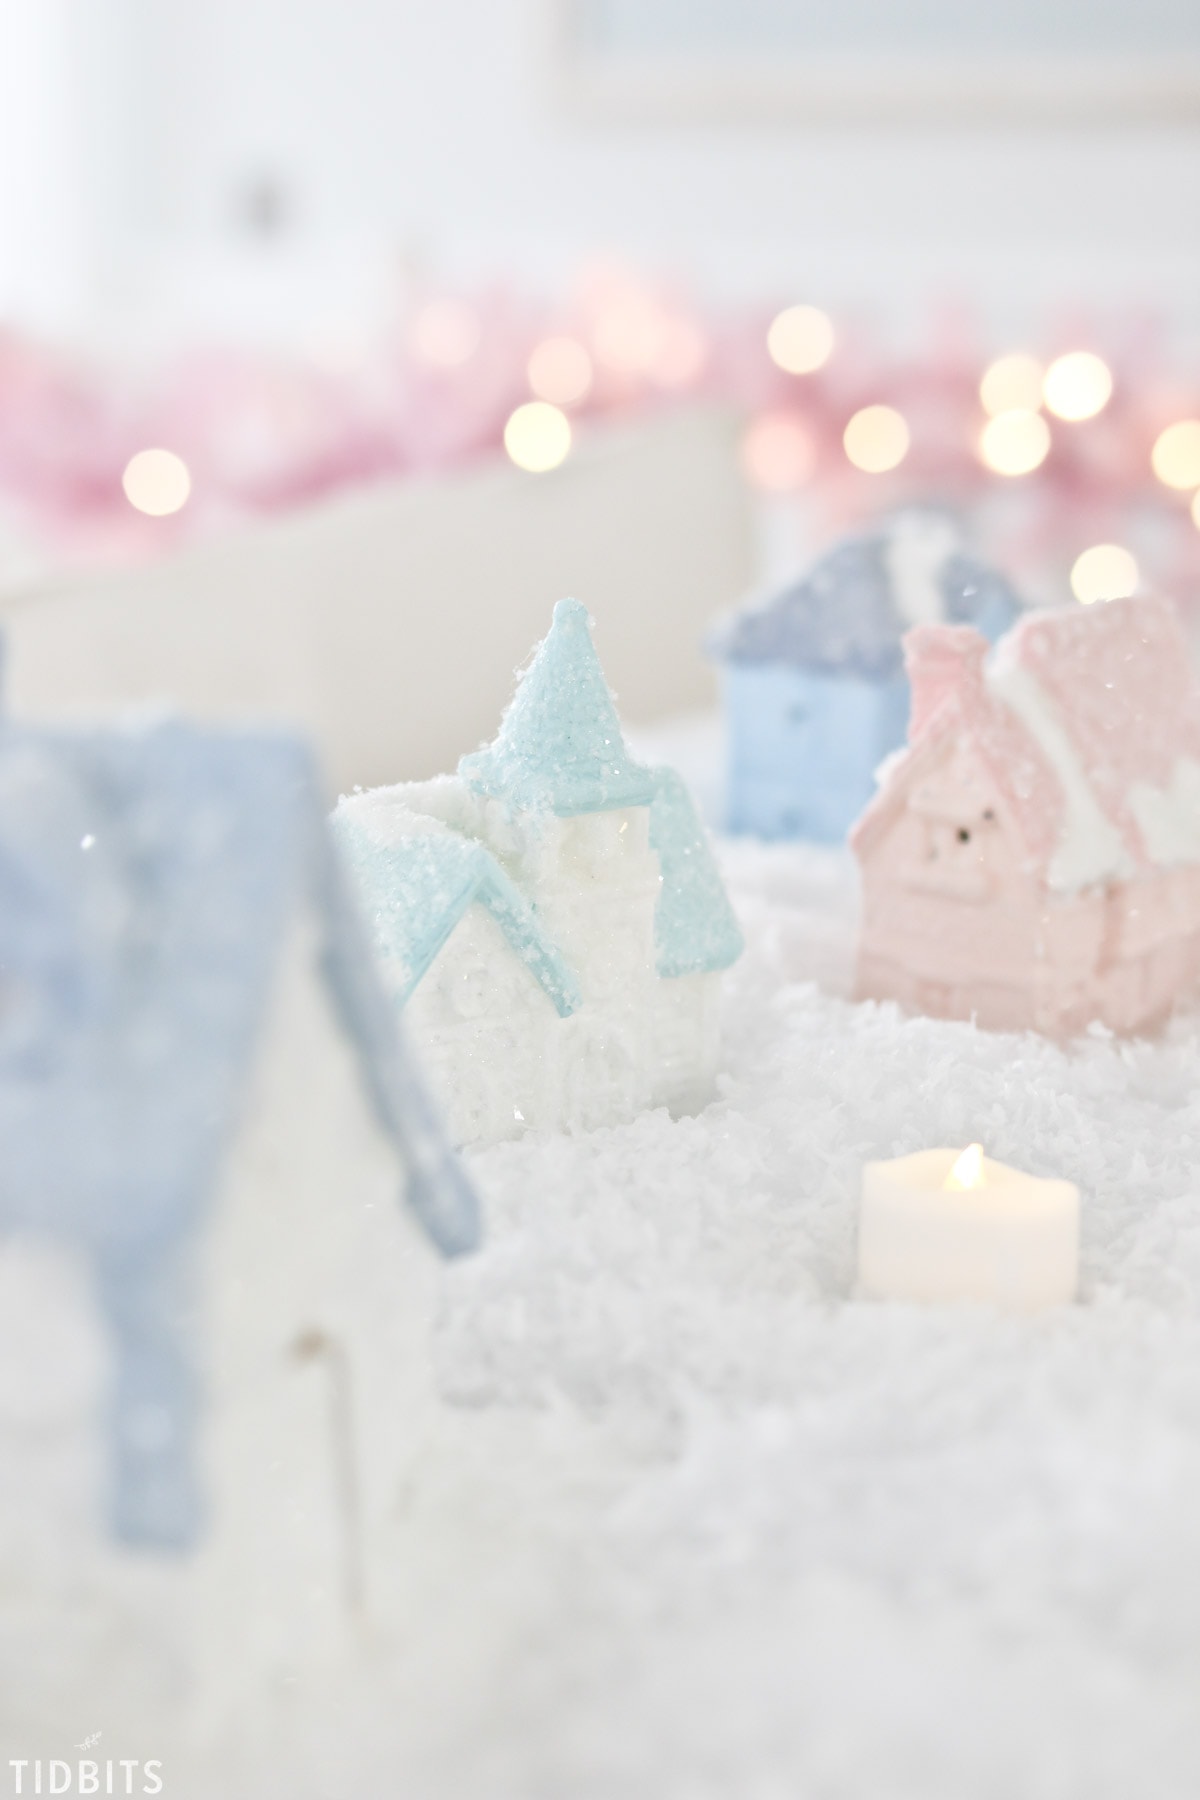
I shared my glitter putz house village set in my Christmas home tour, but what I didn’t show you was how they all started.  That’s the real kicker.

DIY Thrifted and Upcycled Glitter Putz Houses, by TIDBITS

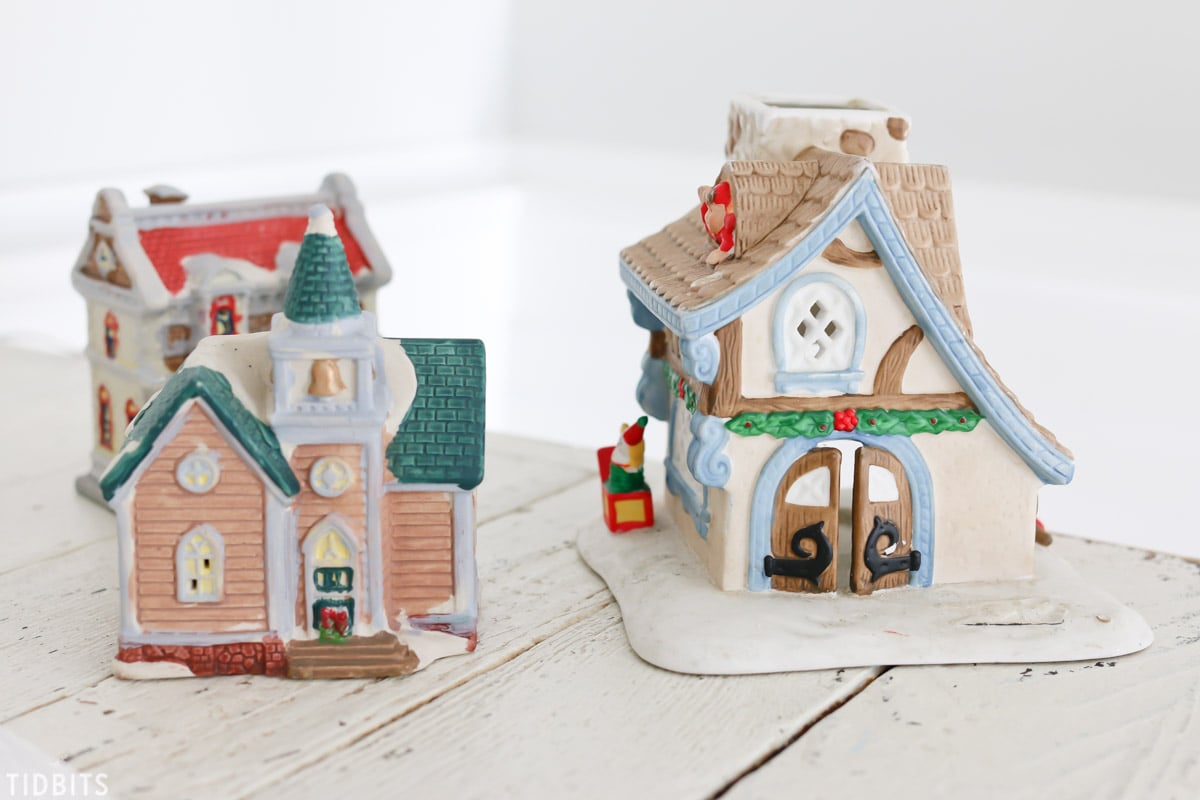
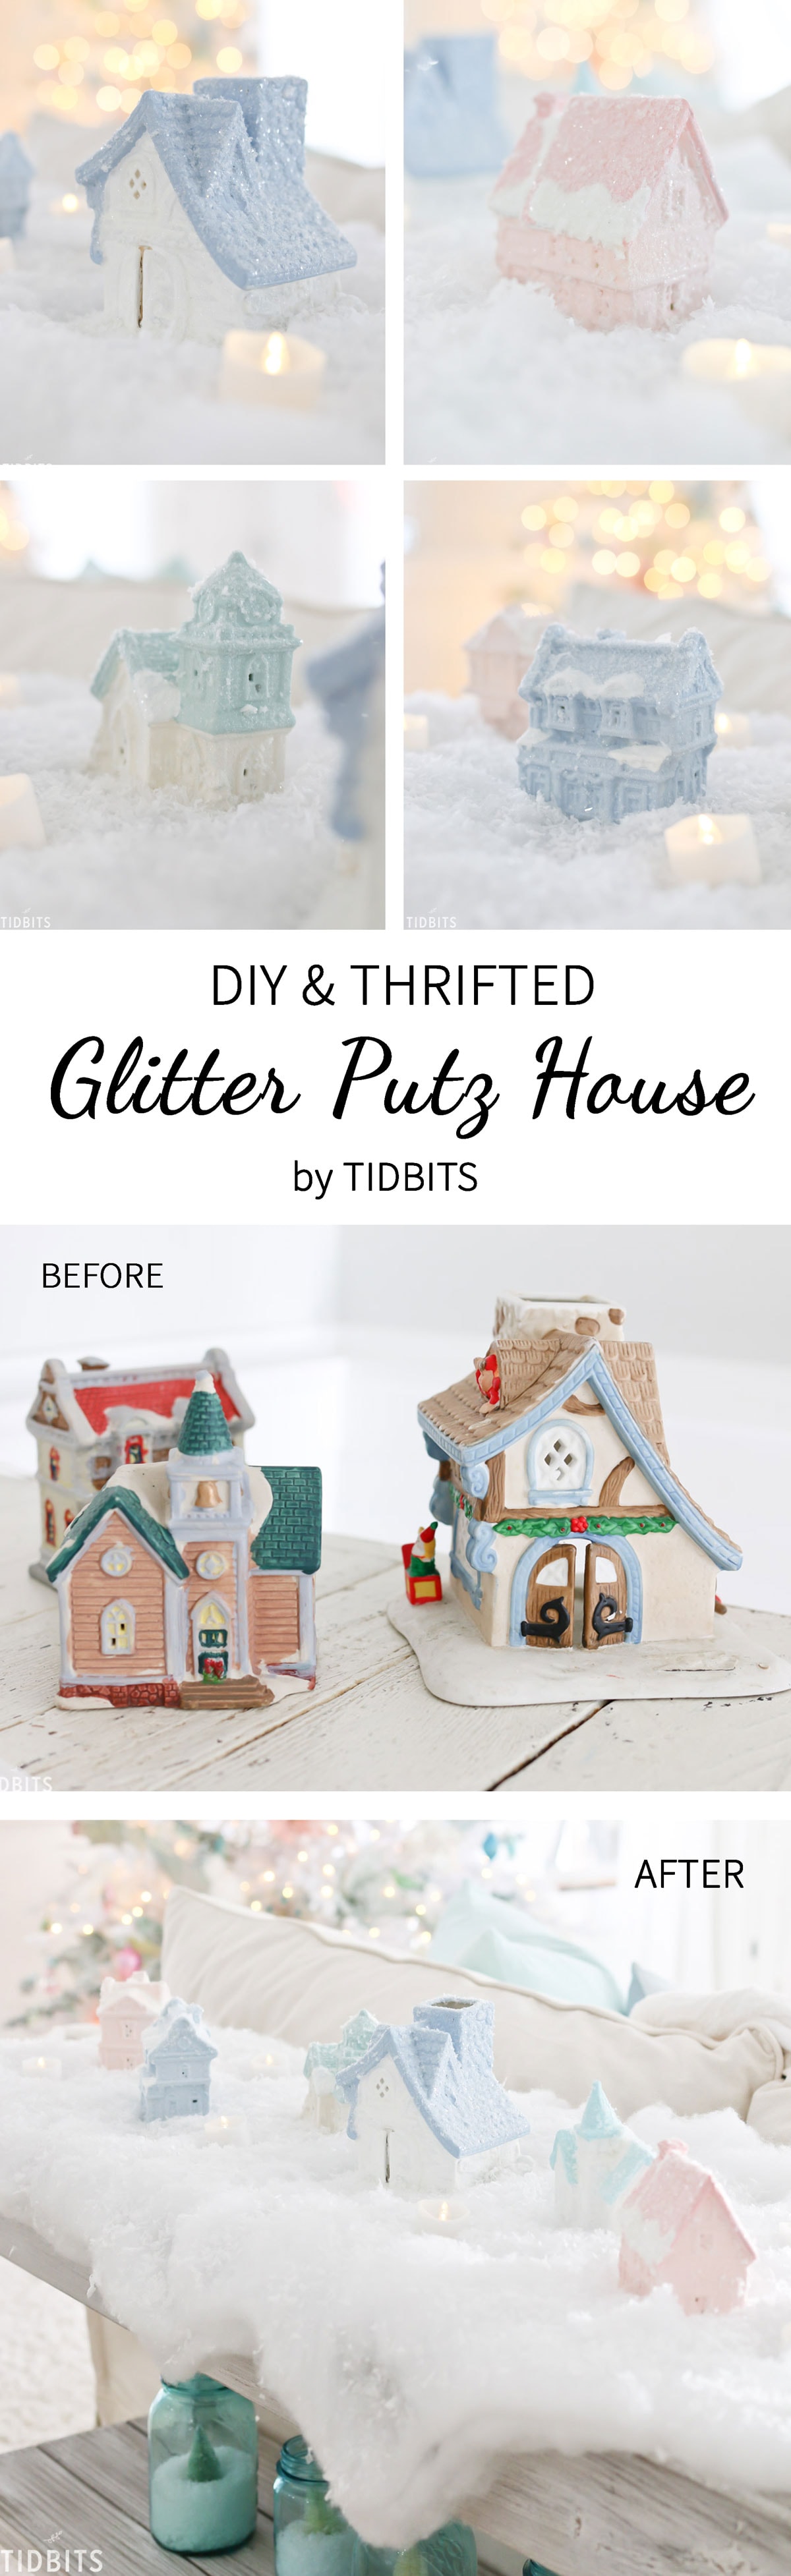
So here they are.  Small and adorable in their own right, but not exactly for me and this years colorful pastel Christmas.

DIY Thrifted and Upcycled Glitter Putz Houses, by TIDBITS

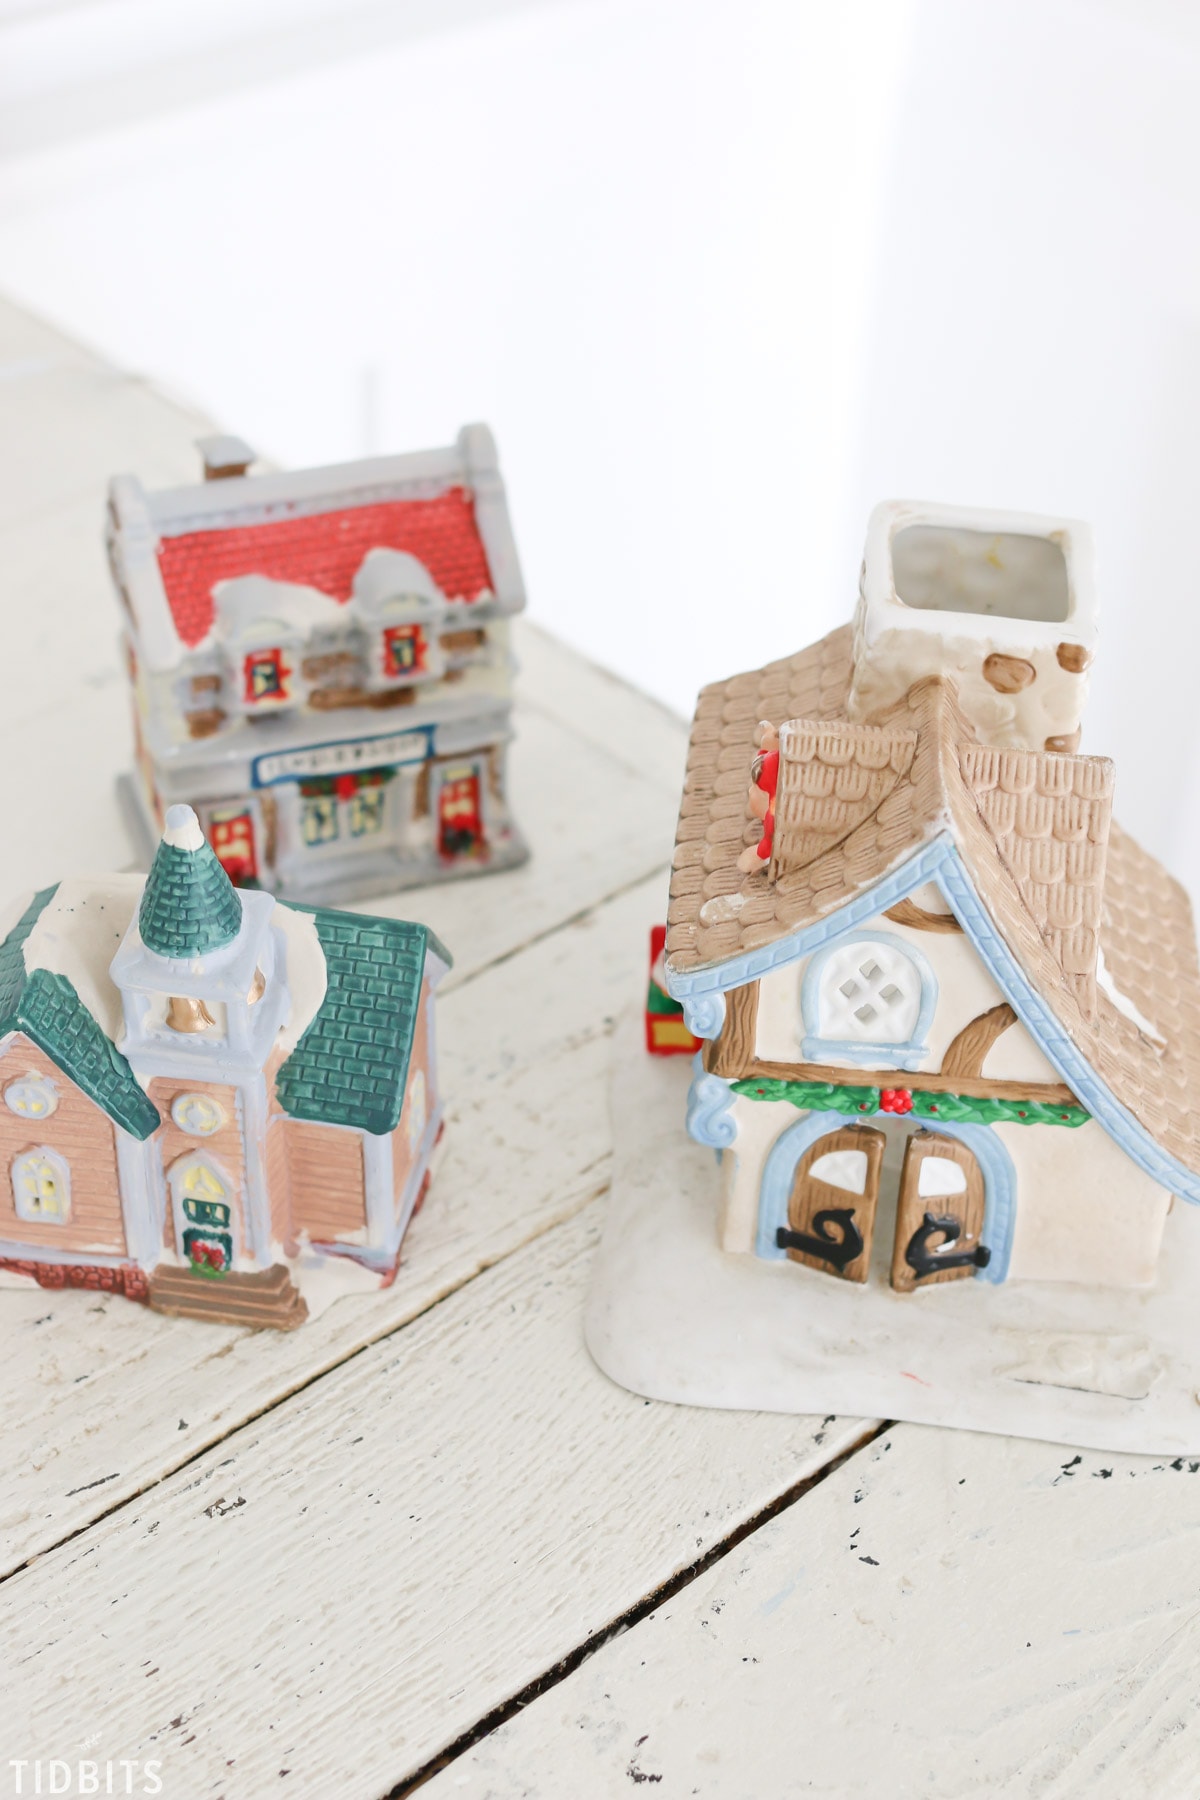
You’ve probably seen them for a dime a dozen at thrift stores, and that is exactly where I picked mine up for 50 cents to $1.00 each.  But after discovering German Glitter Putz houses online, I knew exactly what I wanted to do with the village set once I got them home.

DIY Thrifted and Upcycled Glitter Putz Houses, by TIDBITS

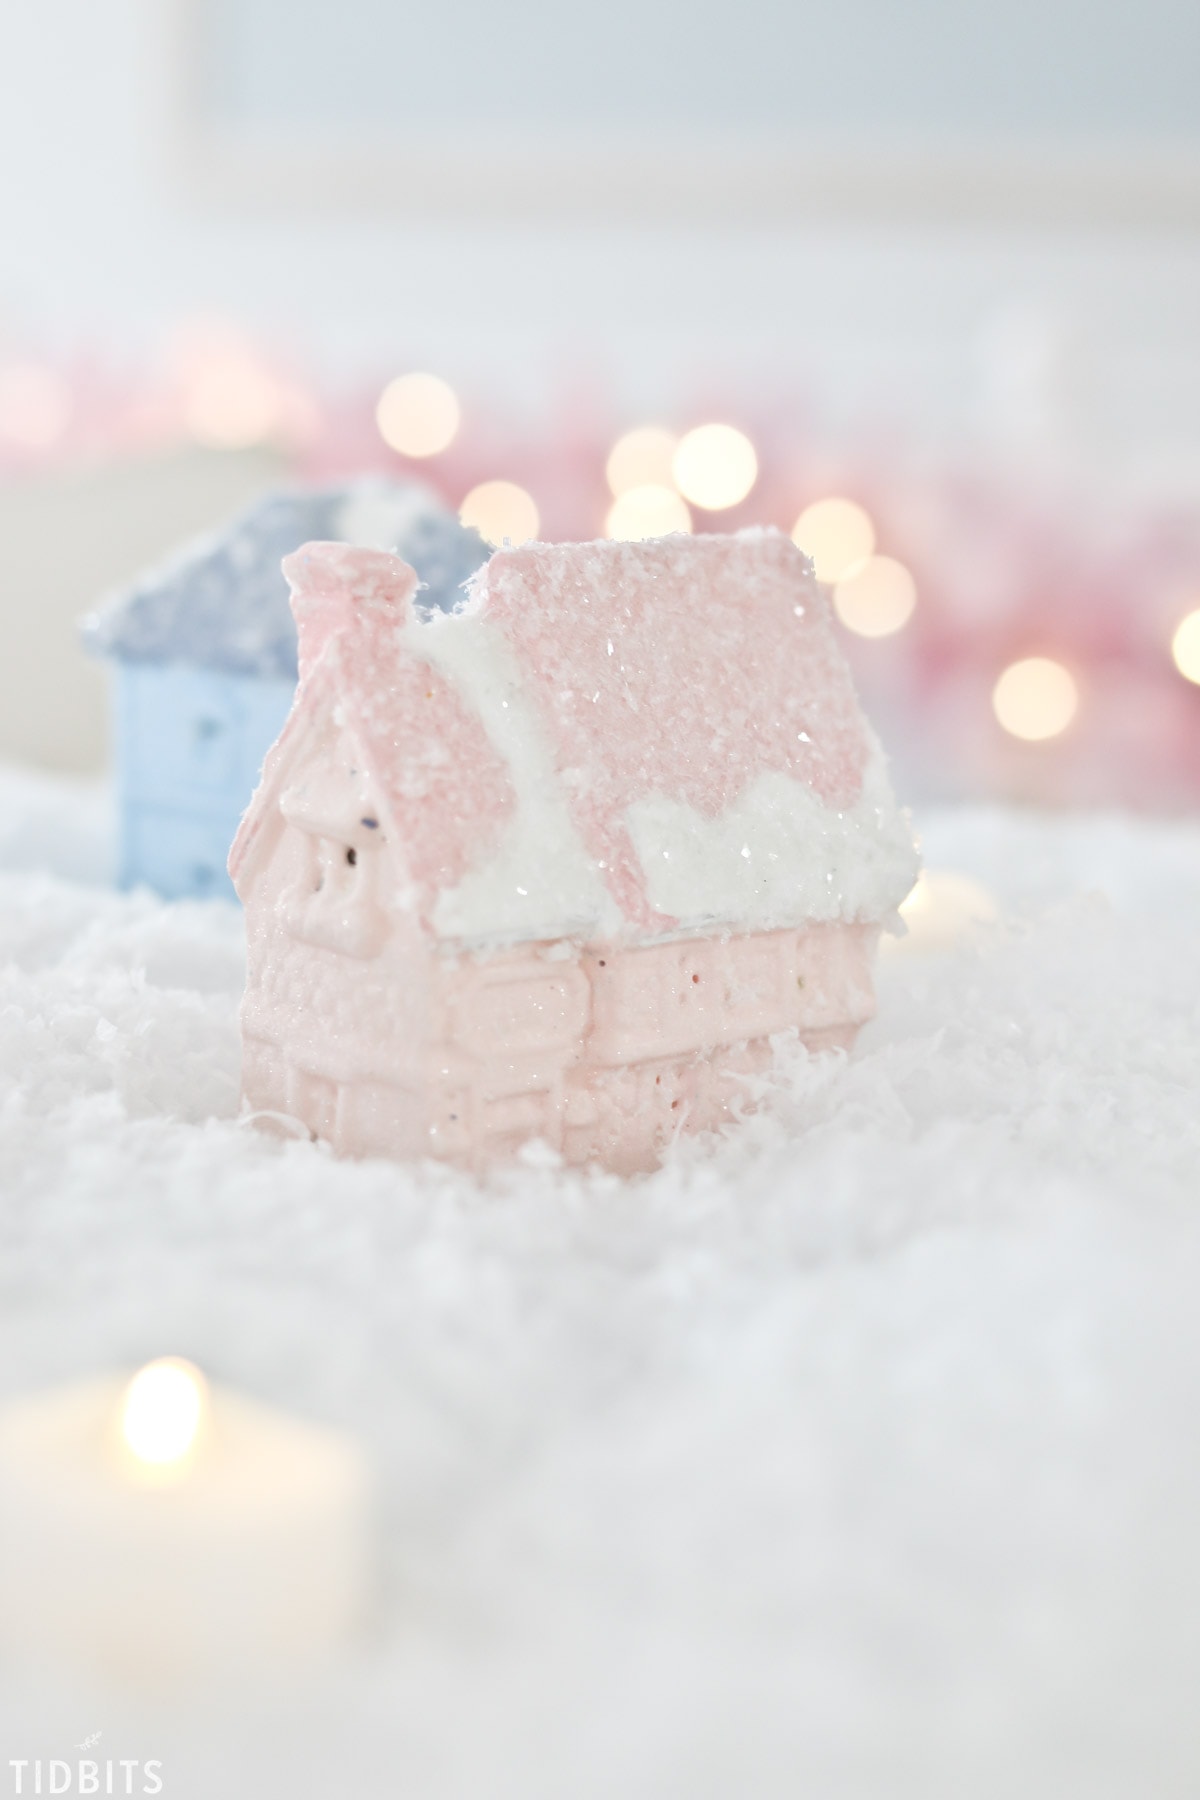
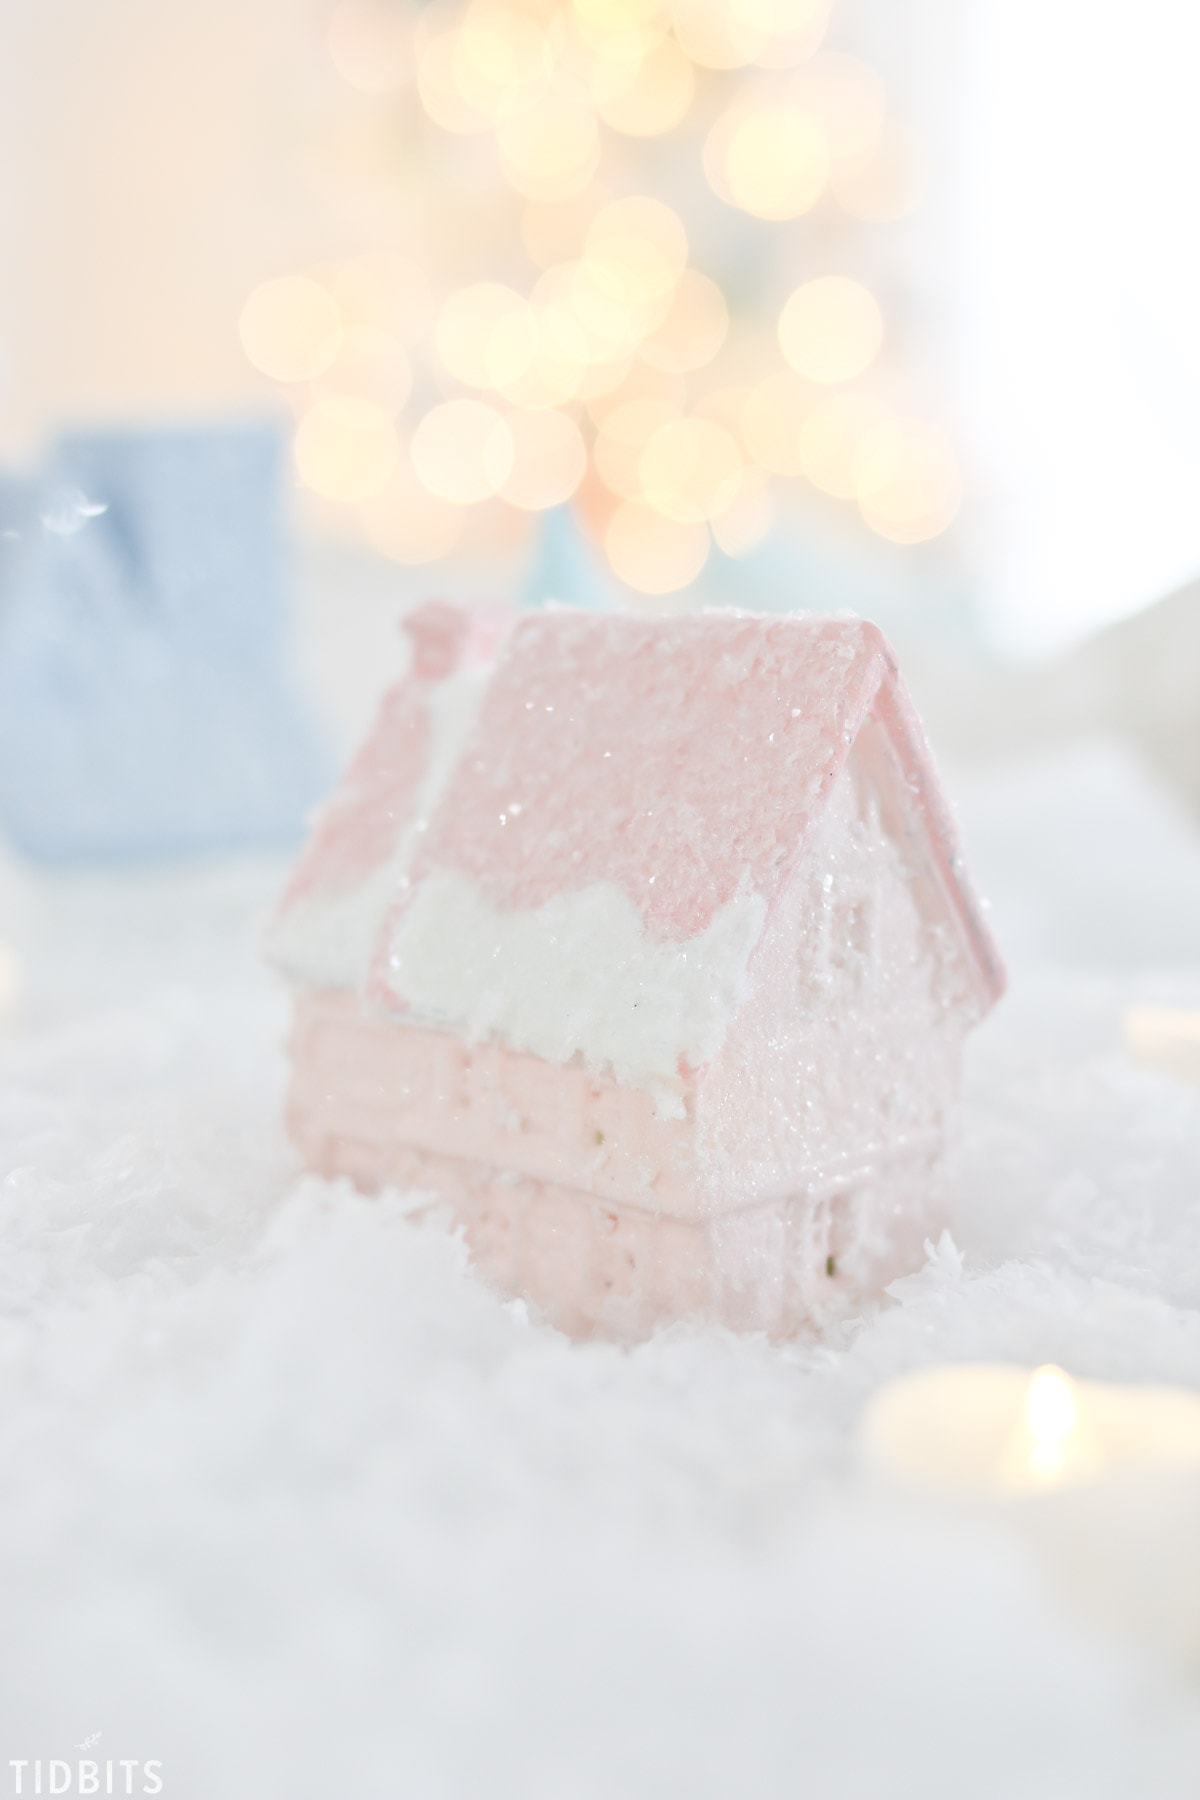
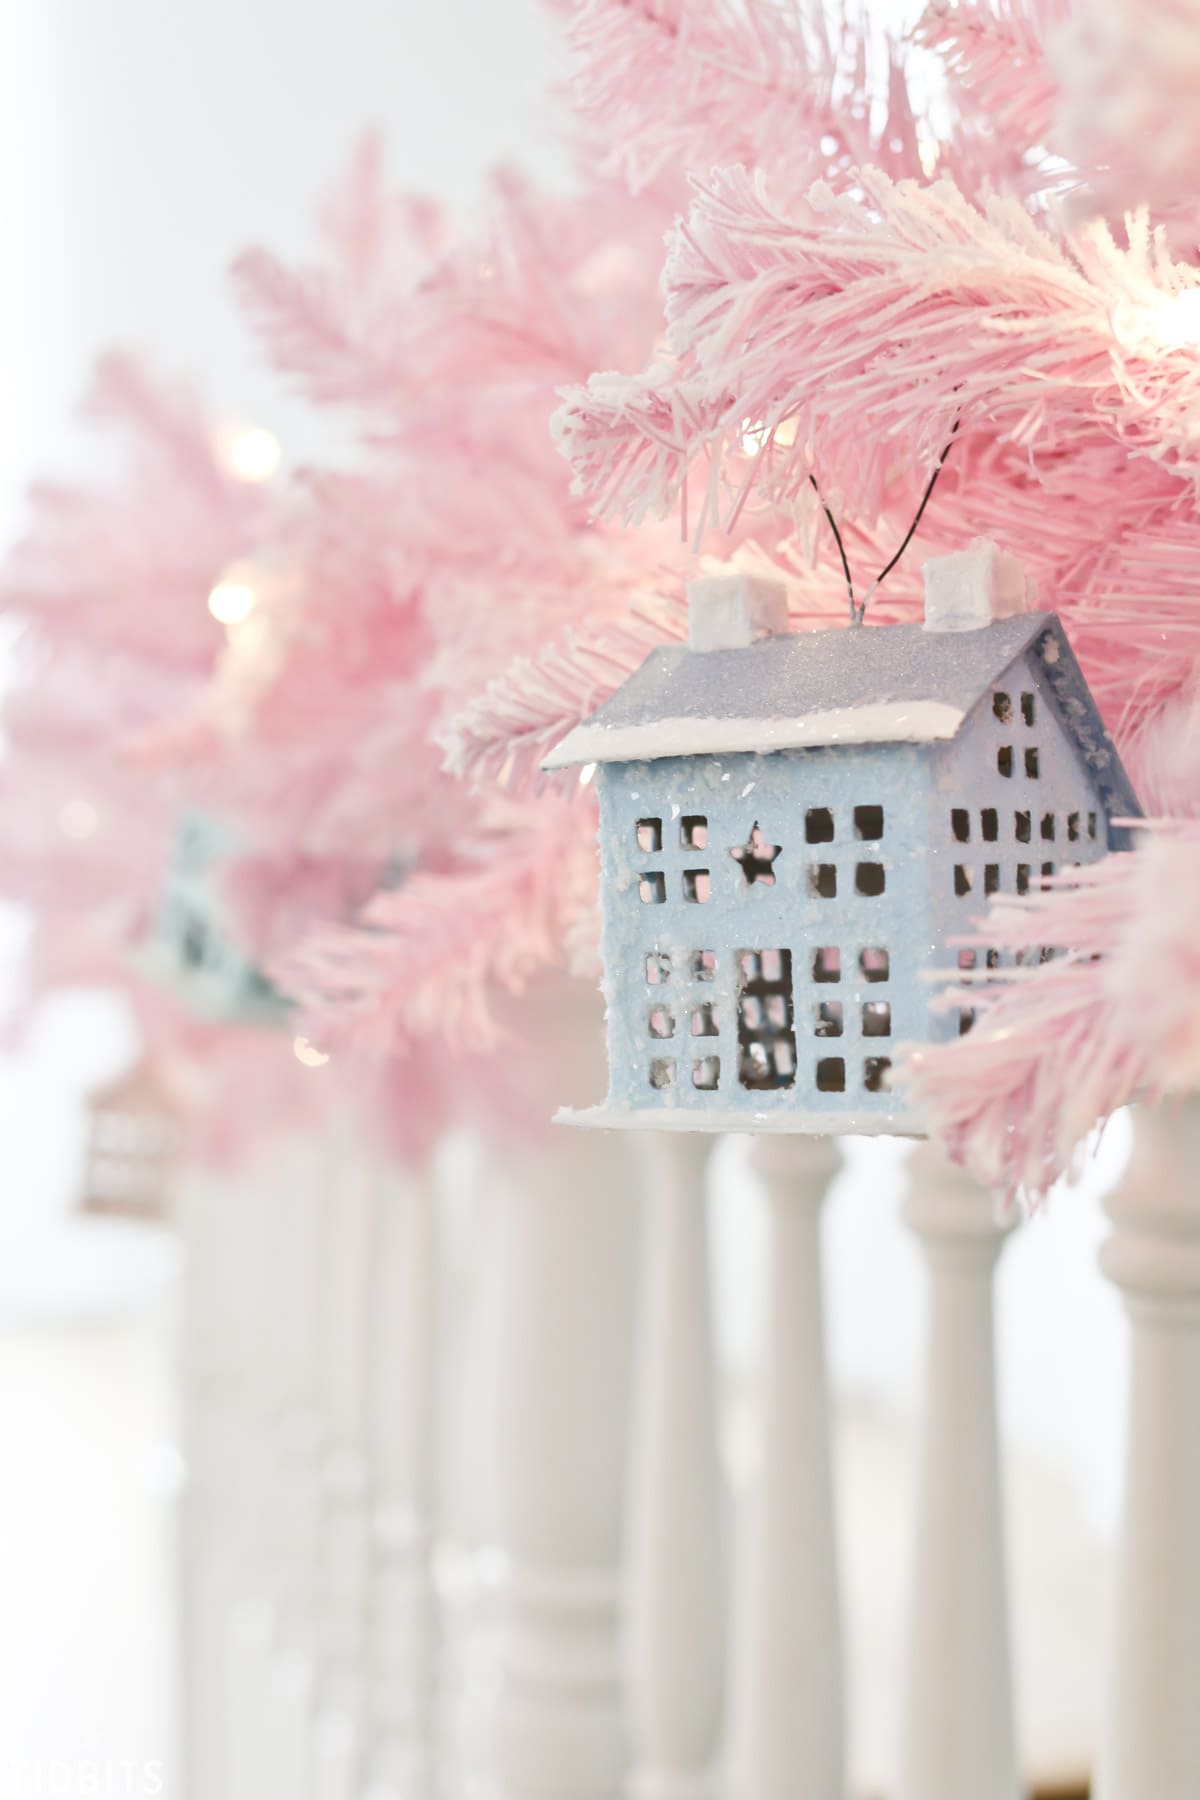
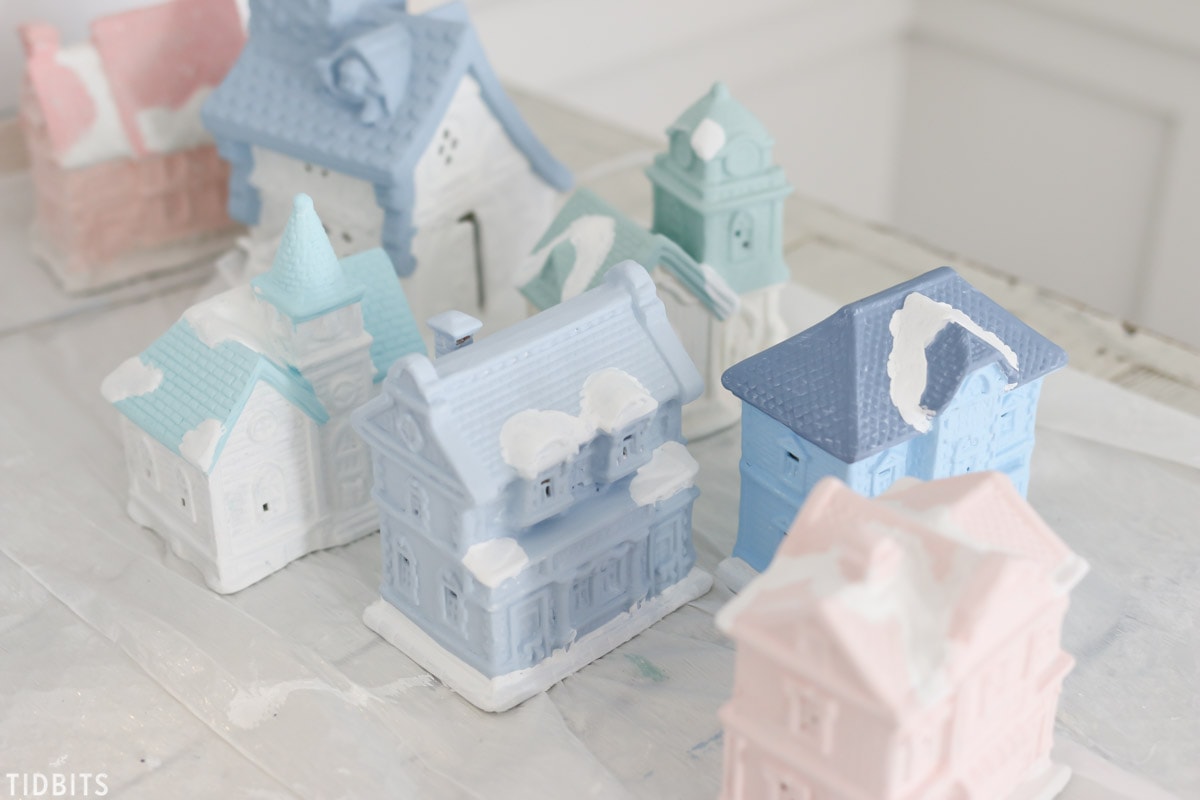
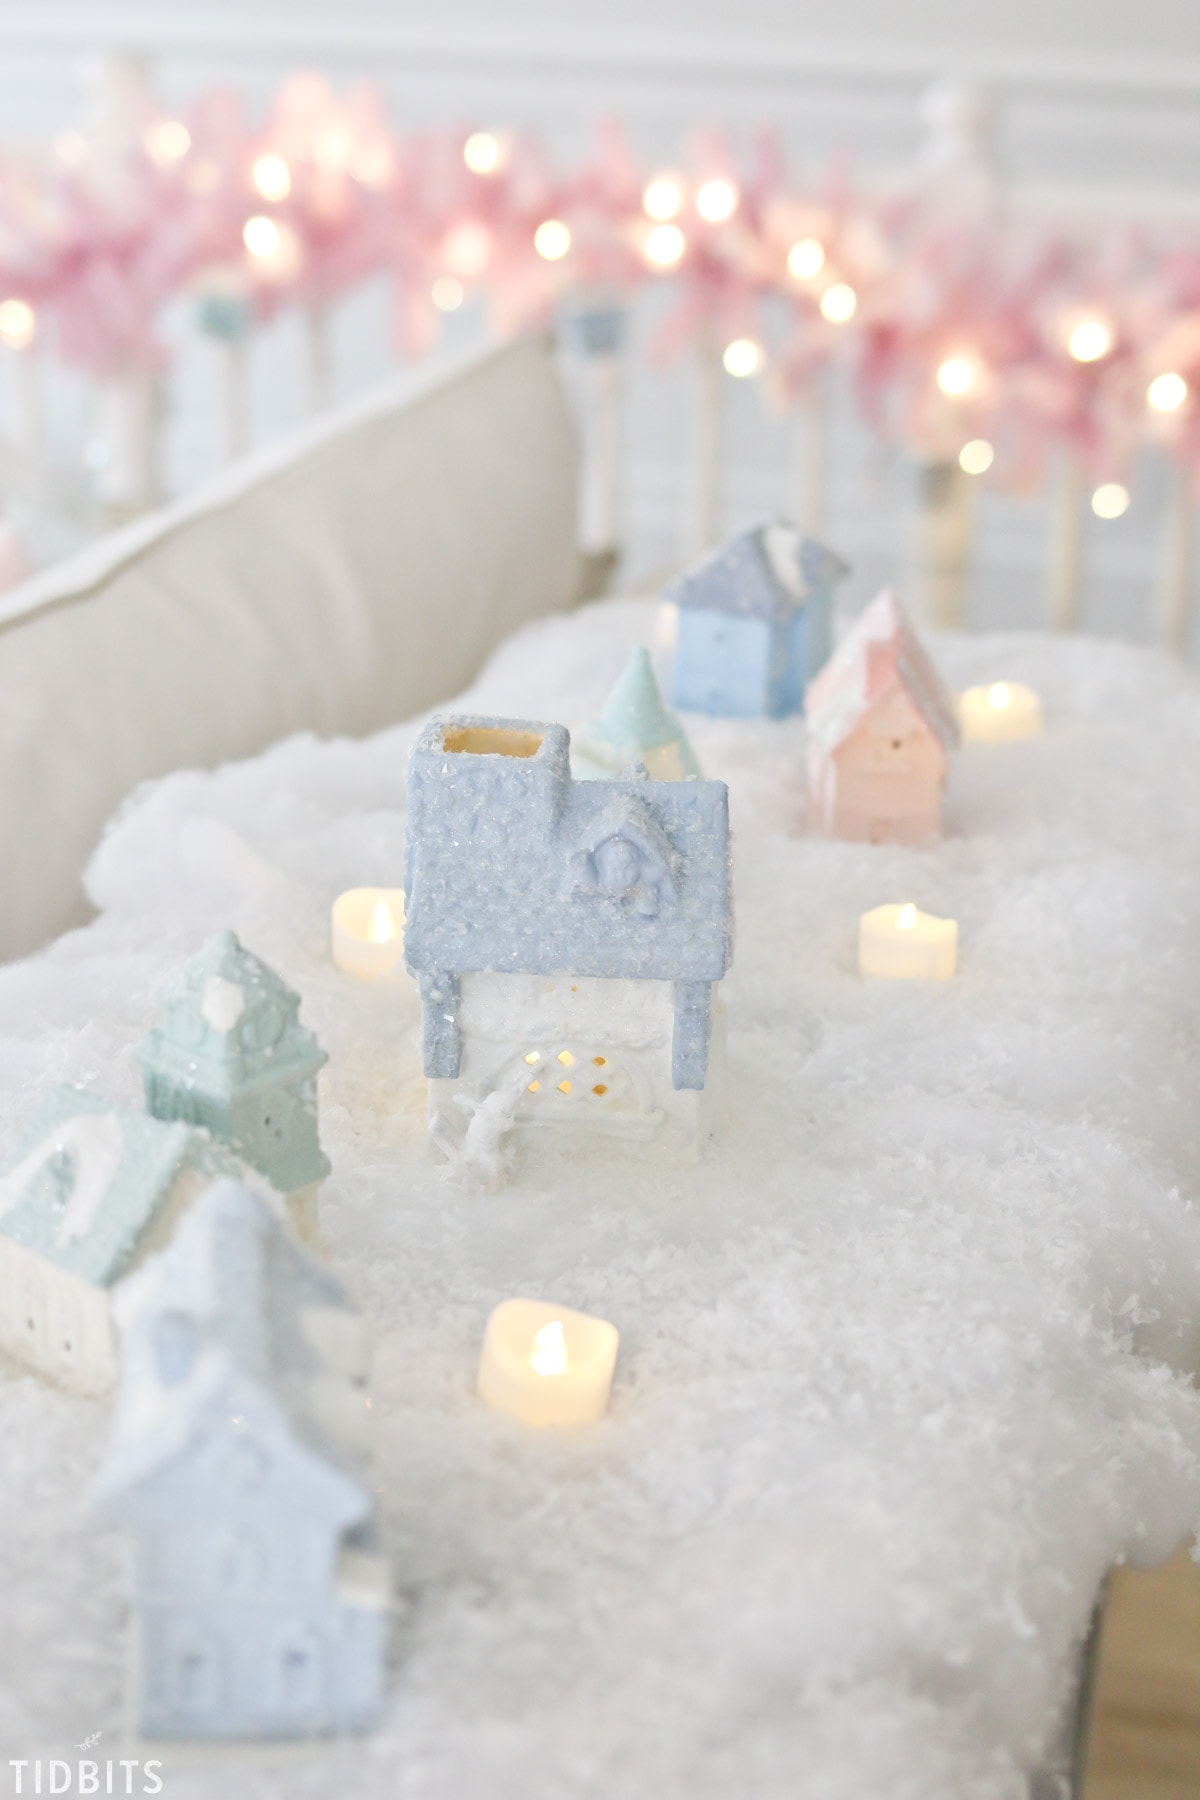
I first had it in my mind to paint them all white, and then glitter them.  But once my Colorful Christmas started piecing together, I thought some pastel colors would suit the village well.

DIY Thrifted and Upcycled Glitter Putz Houses, by TIDBITS

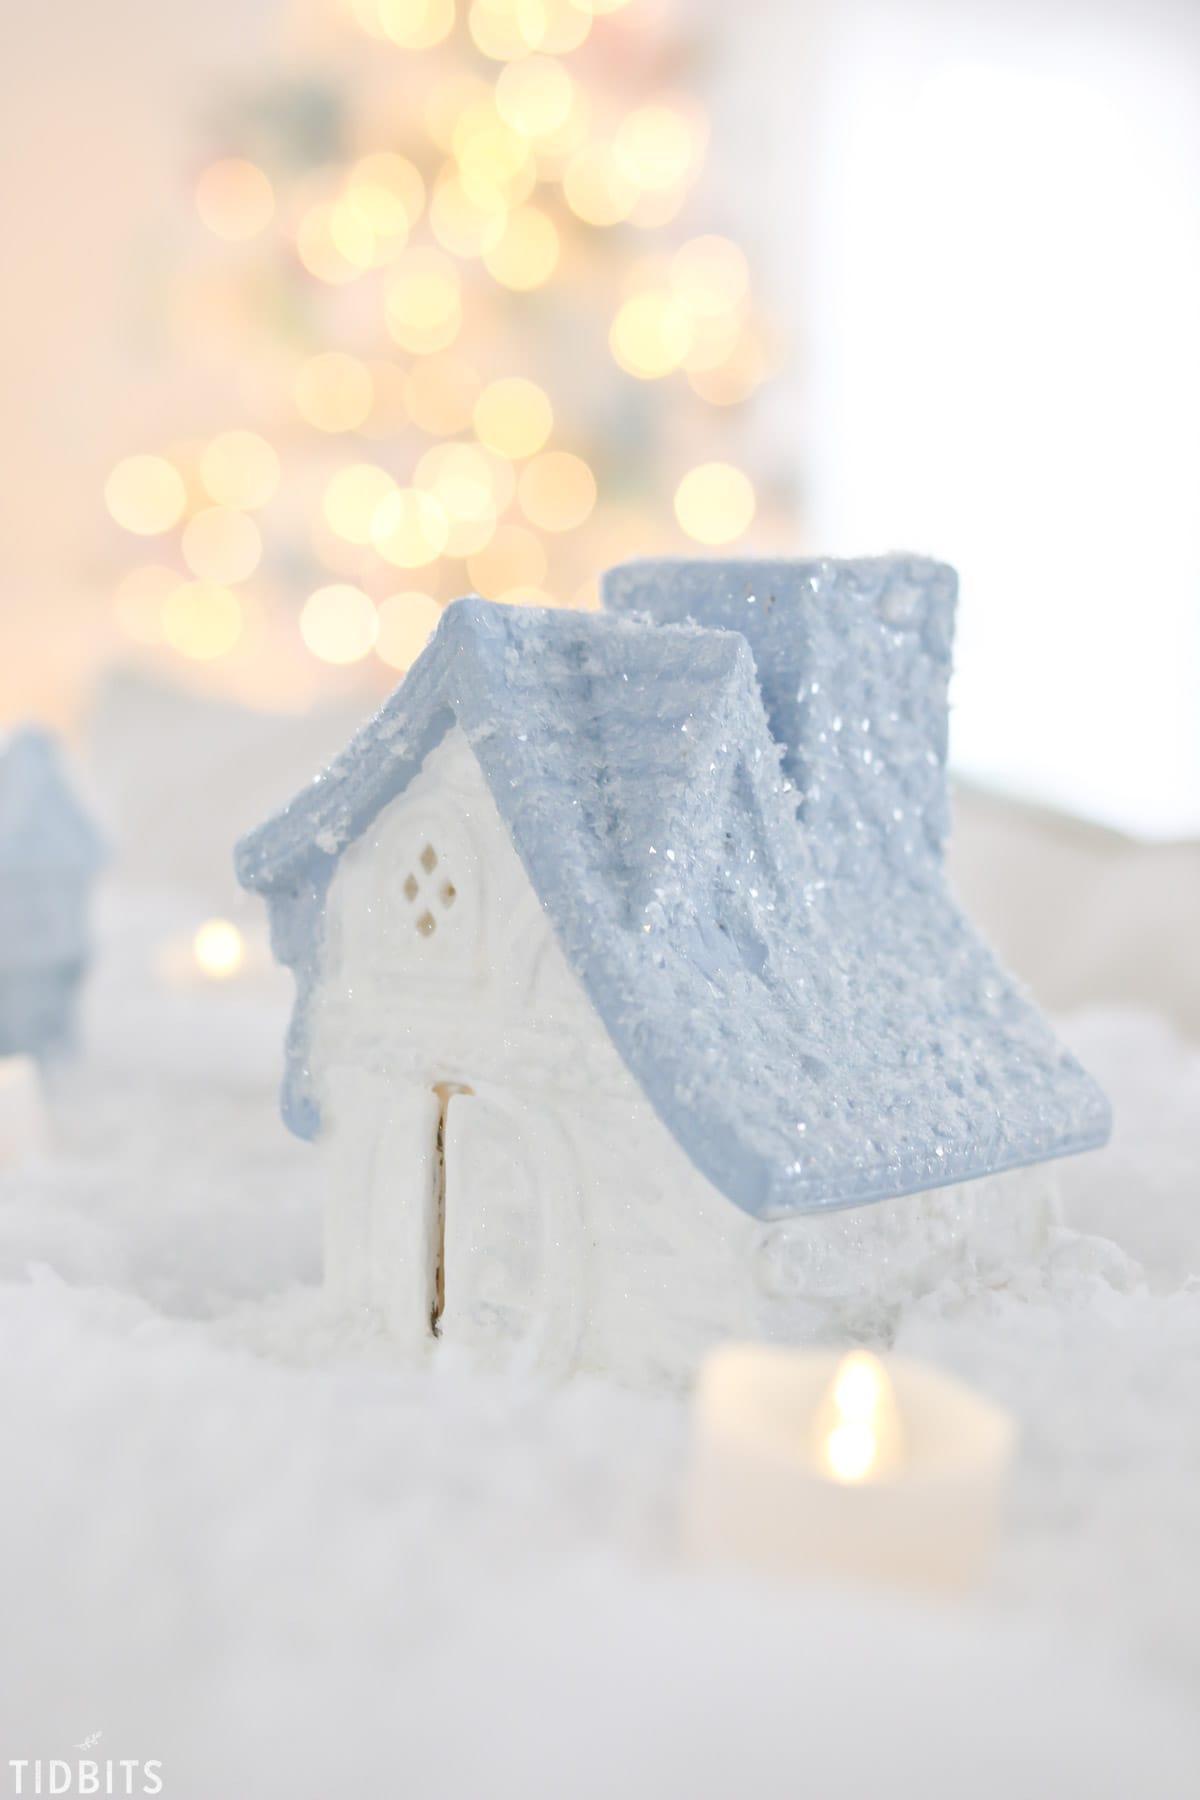
Let me give you a quick close up of each putz house and then show you the materials you need and the simple process it takes to create a putz village for yourself out of ceramic houses.

DIY Thrifted and Upcycled Glitter Putz Houses, by TIDBITS

What’s so great about this method is that you don’t have to be an expert painter, and you don’t need to fuss over details and perfect paint jobs.

DIY Thrifted and Upcycled Glitter Putz Houses, by TIDBITS

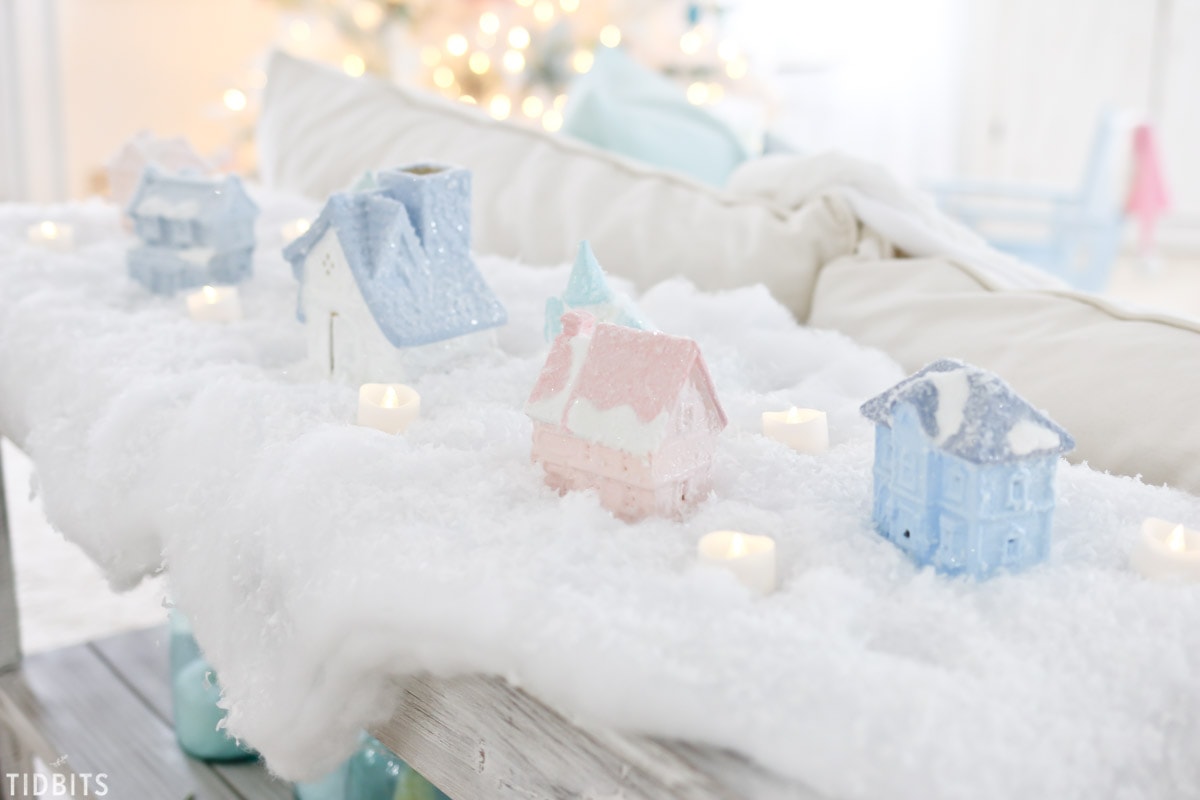
Once they are covered in paint, glitter and snow they will look absolutely flawless.  Even my kids enjoyed helping me put them together.

DIY Thrifted and Upcycled Glitter Putz Houses, by TIDBITS

You can combine colors or simply paint the house one single color and let the details of the ceramic house shine.

DIY Thrifted and Upcycled Glitter Putz Houses, by TIDBITS

DIY Thrifted and Upcycled Glitter Putz Houses, by TIDBITS

DIY Thrifted and Upcycled Glitter Putz Houses, by TIDBITS

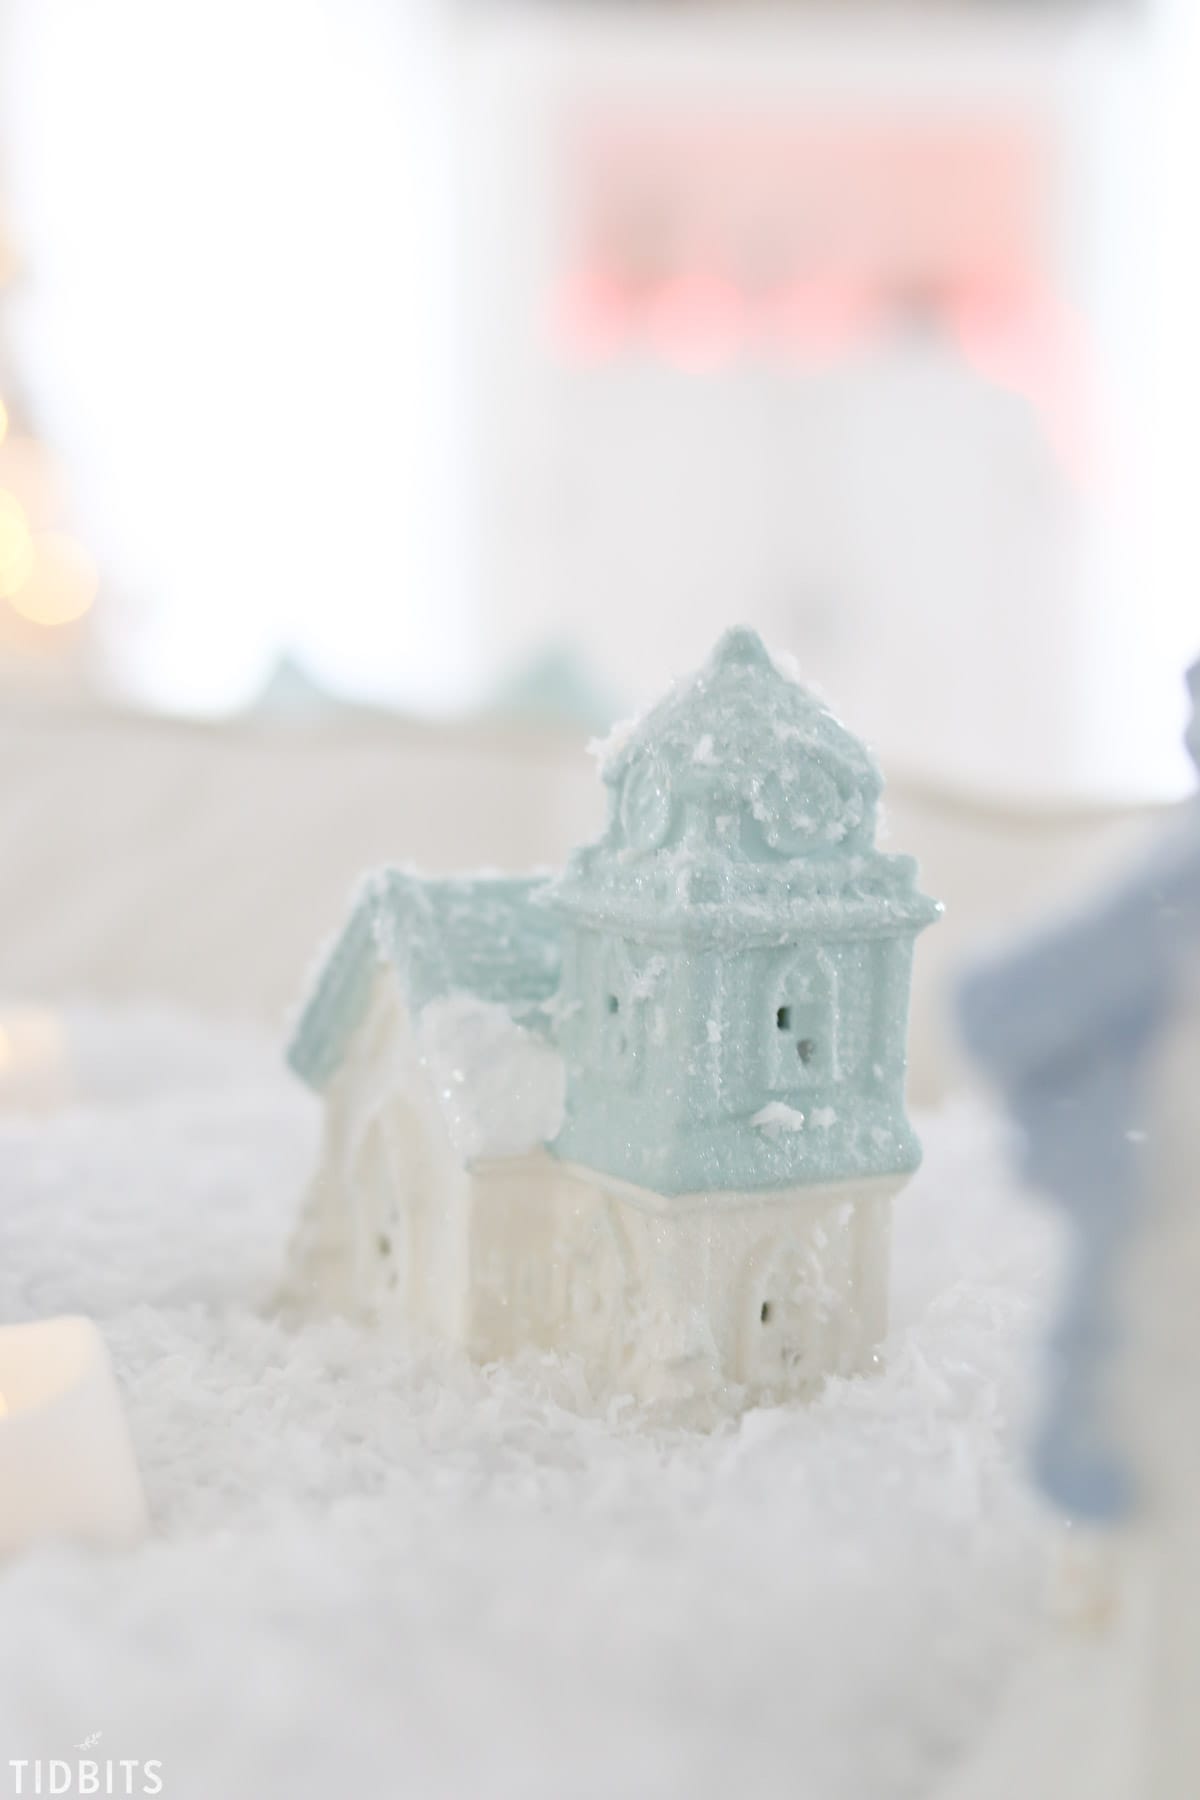
I used the same products and method to do some glitter putz houses from paper mache products, so keep in mind that option when looking for your village.

DIY Thrifted and Upcycled Glitter Putz Houses, by TIDBITS

DIY Thrifted and Upcycled Glitter Putz Houses, by TIDBITS

Let me show you how it’s done!

*Affiliate links are included in this post.

SUPPLIES:

  • Glitter
    • After trying a few different snow and glitter products, I narrowed down my favorite to these
      • Extra Fine White Glitter
        • Found mine at Michaels
      • Diamond Dust
      • Bagged snow from any craft store
  • Mod Podge
    • I like the matte finish for this project
  • Paint of choice
    • Craft acrylics work great
  • Brushes

DIY Thrifted and Upcycled Glitter Putz Houses, by TIDBITS

SHOP THIS POST


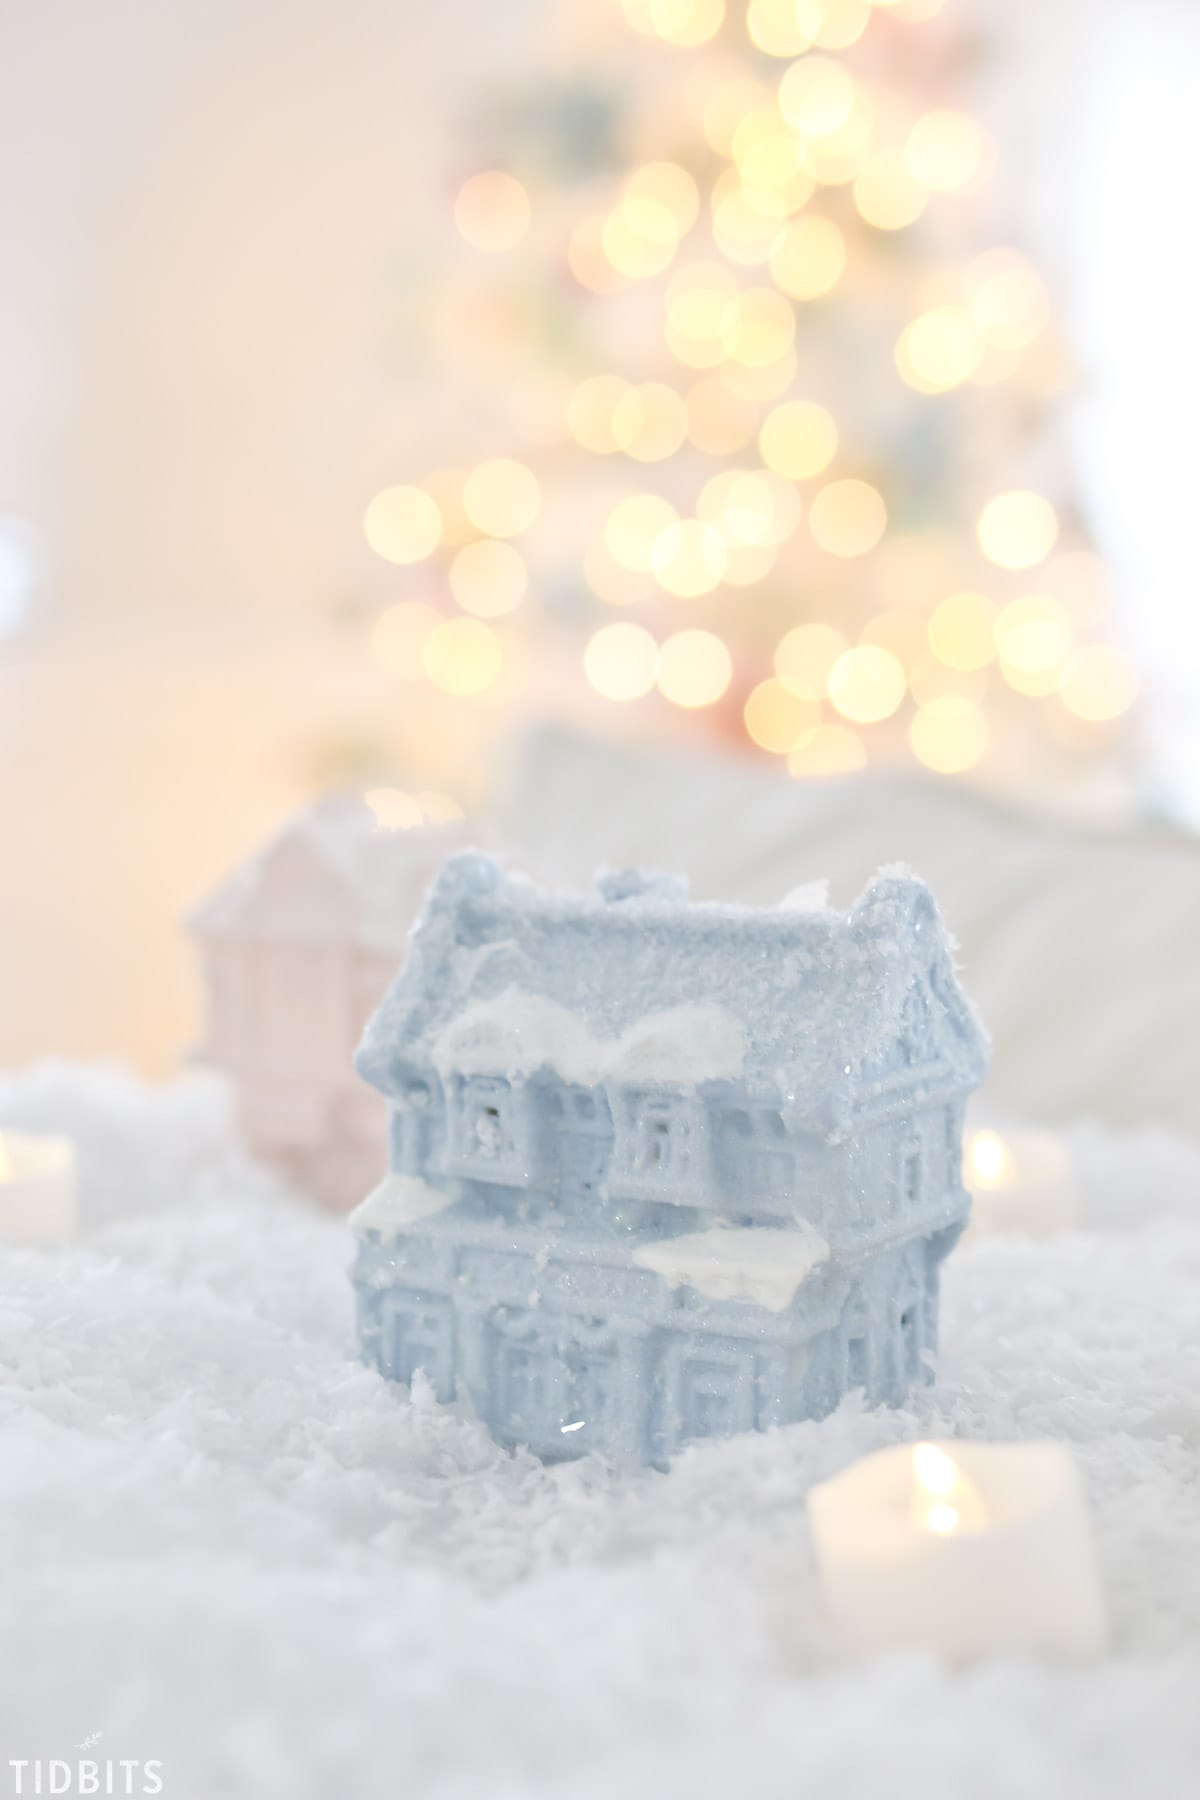
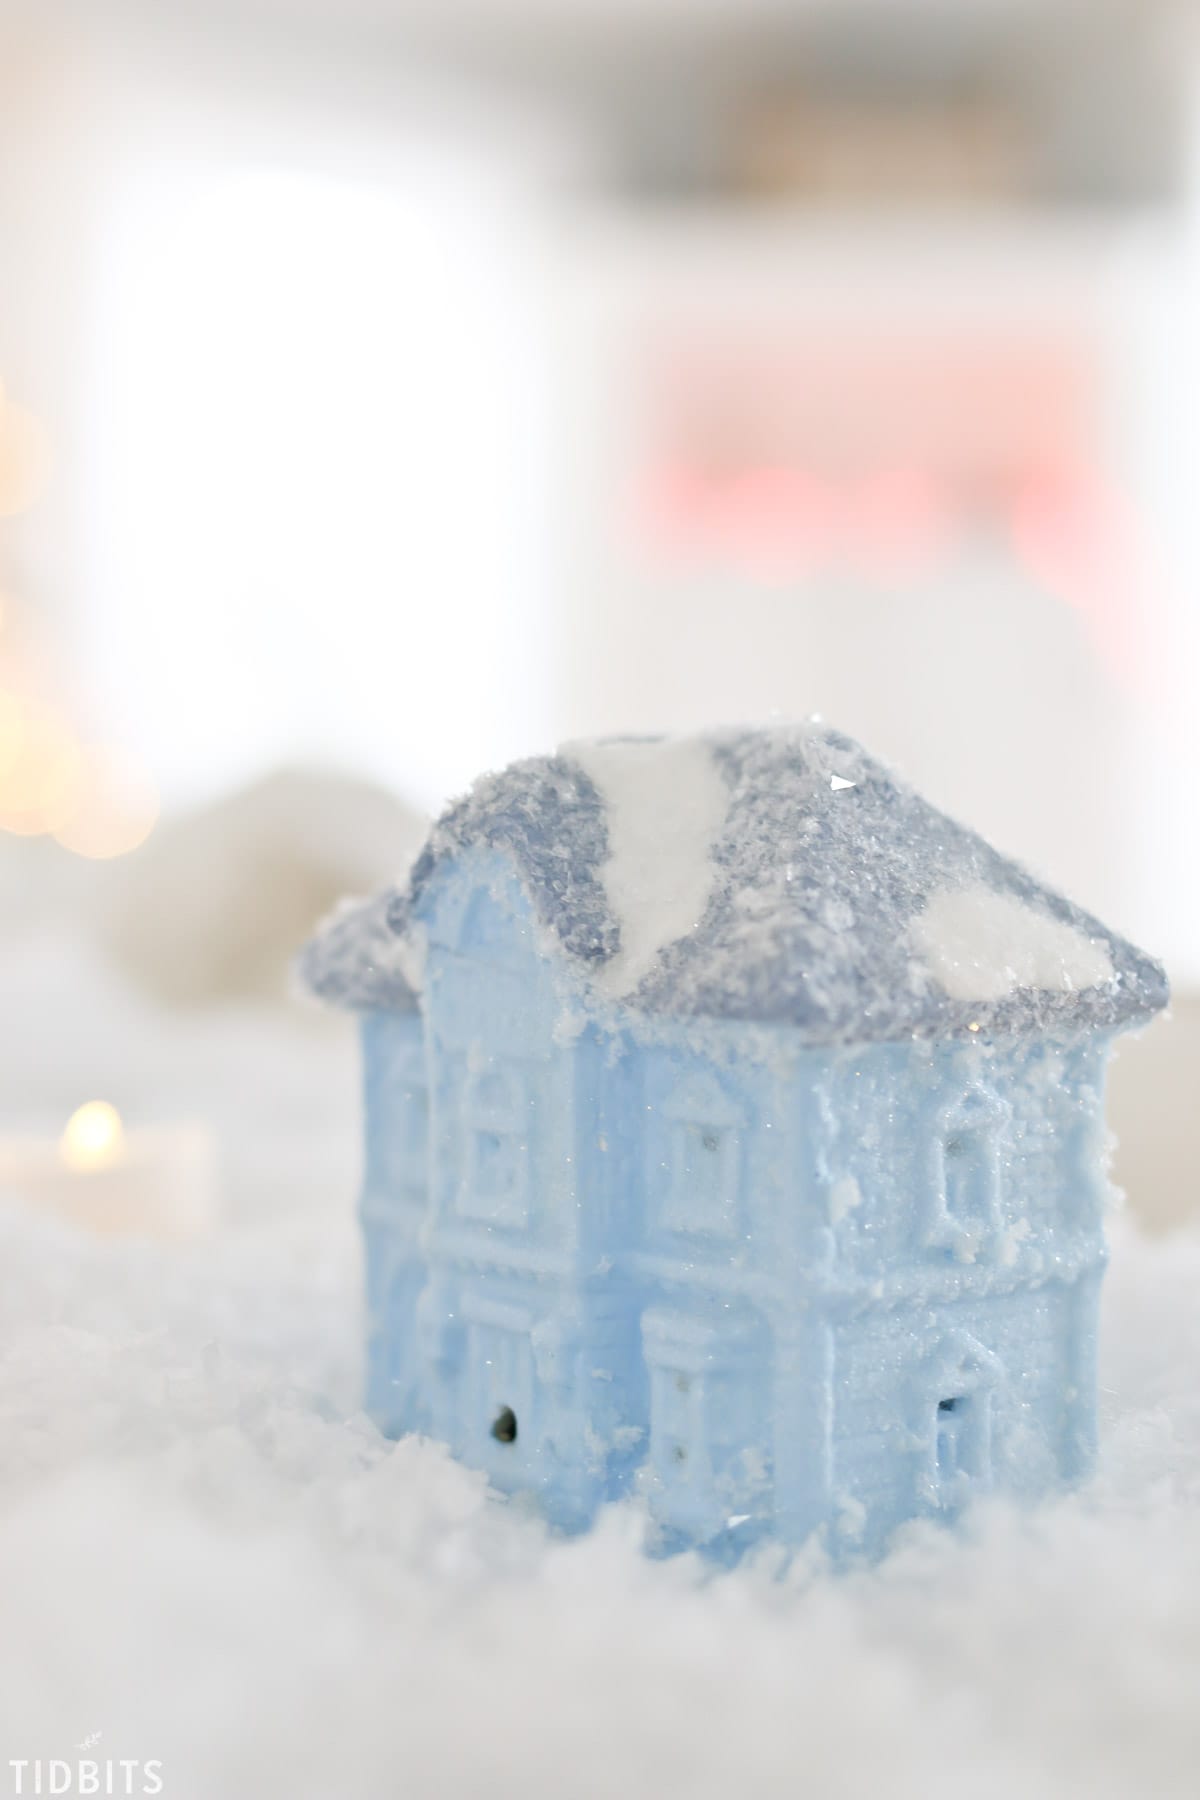
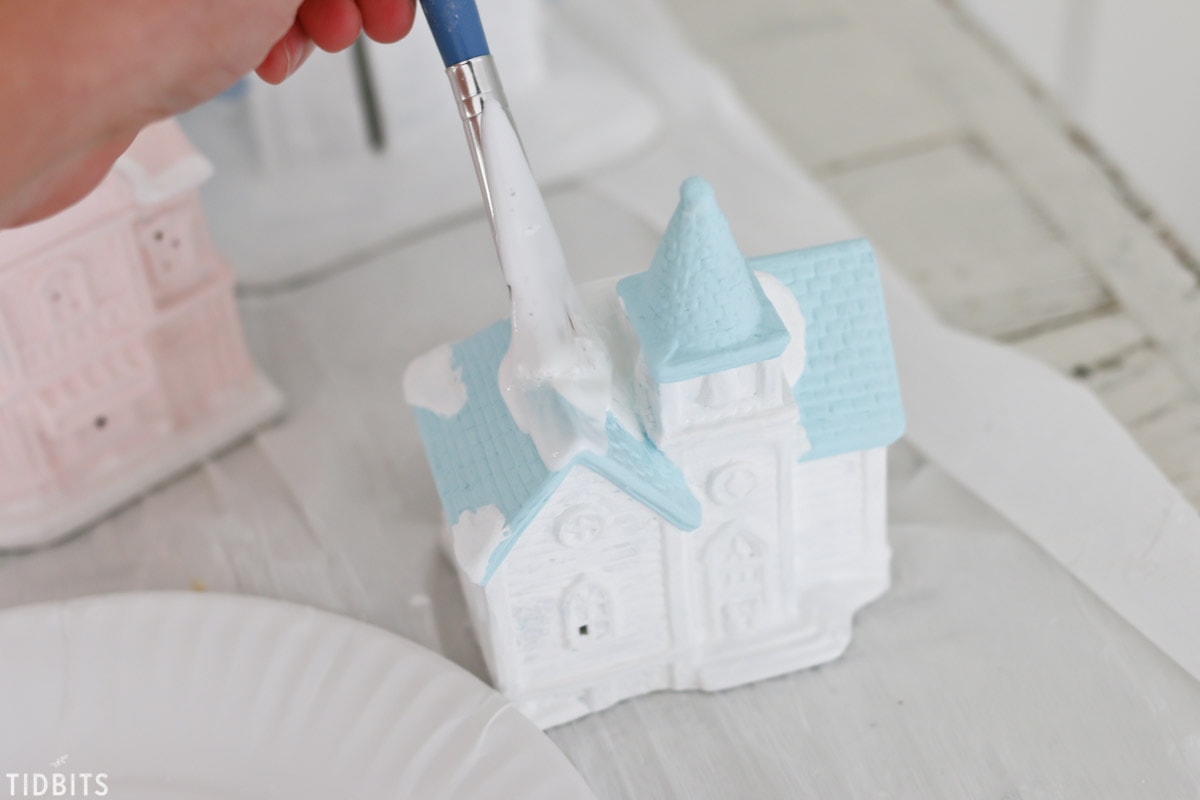
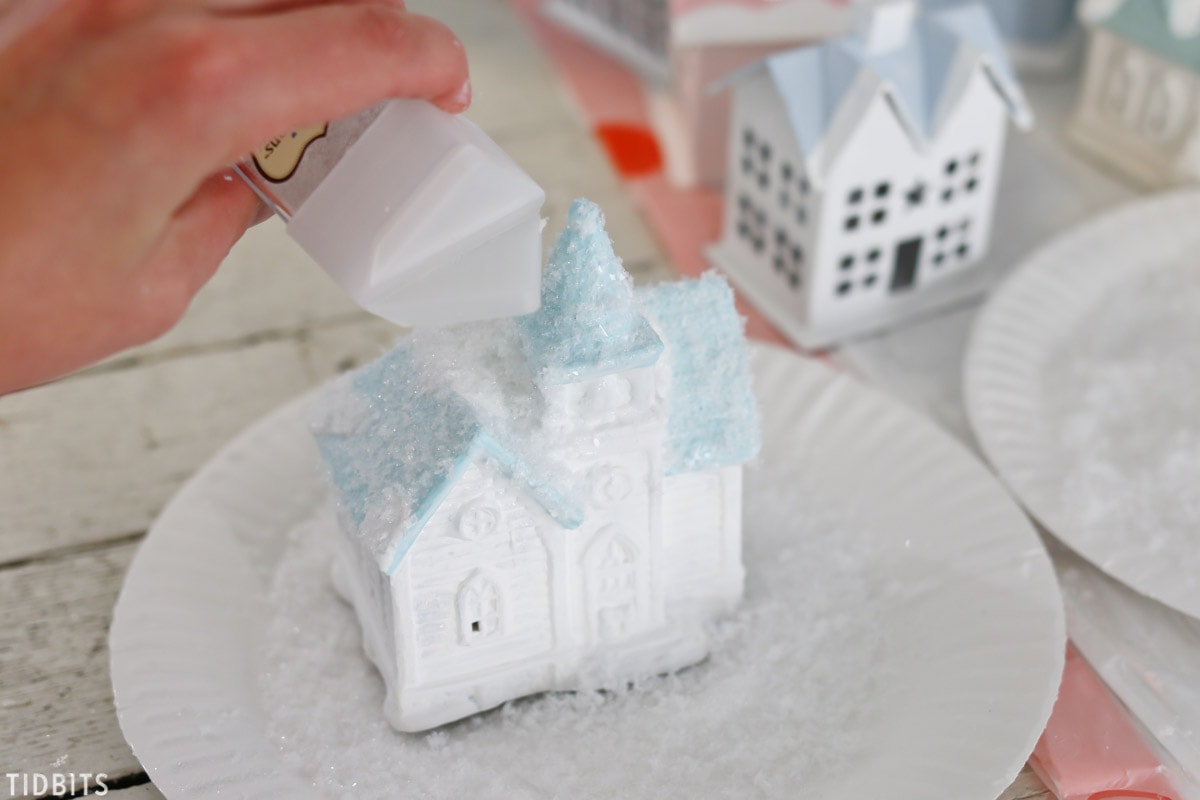
First, paint your houses in the desired colors – 2 or 3 coats of paint may be necessary.  Add snow drifts or embellishments as desired. My particular villages came with snow imprints on them already, and I painted them white.  As you can see below, my paint job is less than perfect.  Once the glitter and snow gets placed on top, no one will know the wiser.

DIY Thrifted and Upcycled Glitter Putz Houses, by TIDBITS

Once completely dry, brush on the mod podge a section at a time.

DIY Thrifted and Upcycled Glitter Putz Houses, by TIDBITS

Work fast to add the glitter and snow on top of the mod podge until you get the desired effect.  Shake off any extra glitter and snow.

DIY Thrifted and Upcycled Glitter Putz Houses, by TIDBITS

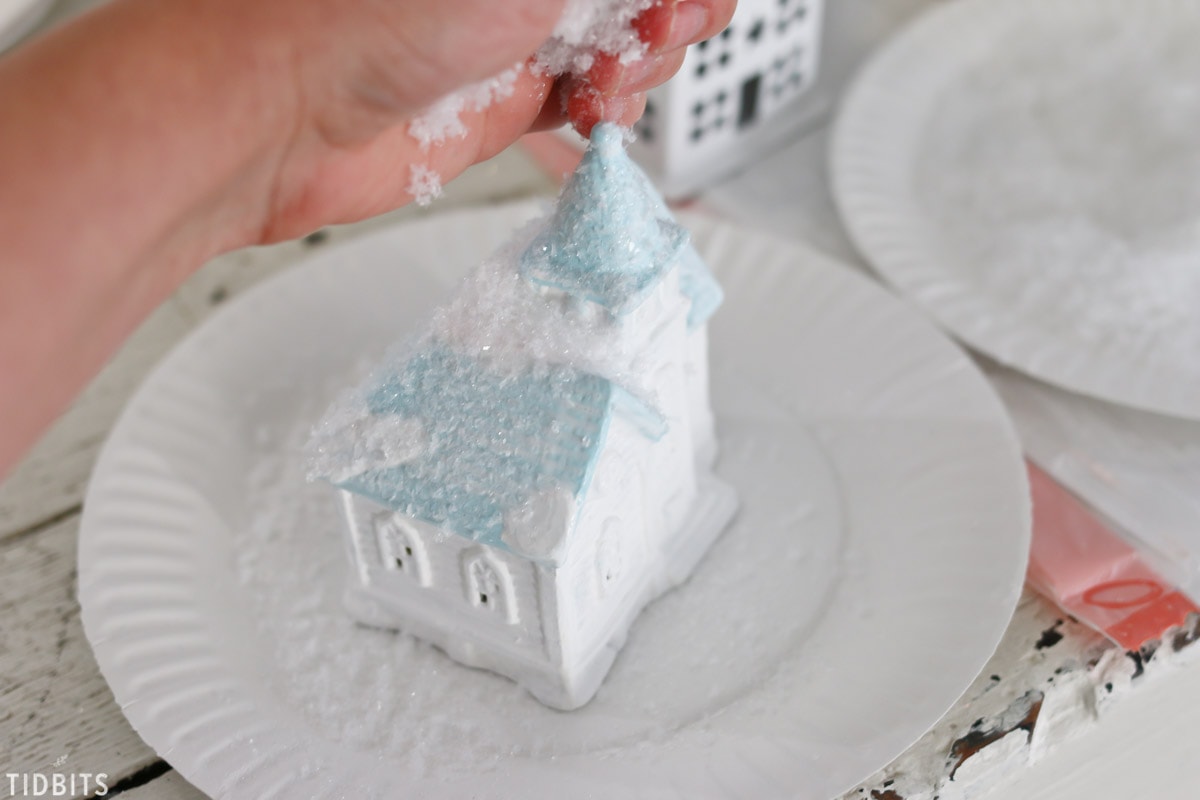
I used the diamond dust mostly on the roofs and tops of houses, the fake snow to clump on the snow drifts, and the fine glitter around the rest of the house.

DIY Thrifted and Upcycled Glitter Putz Houses, by TIDBITS

There is no exact science to this process, so feel free to go with your gut and see where creativity takes you.

DIY Thrifted and Upcycled Glitter Putz Houses, by TIDBITS

Let me know if you give it a try!  It’s a fun project for girls night, family night, or just for yourself.

DIY Thrifted and Upcycled Glitter Putz Houses, by TIDBITS

Thanks for reading, and pin this post for later reference.

DIY Thrifted and Upcycled Glitter Putz Houses, by TIDBITS

I’m Cami! Welcome to my blog TIDBITS. Follow me along for beautiful home decor ideas and inspiration for do-it-yourself living
Thank you for Subscribing to TIDBITS! Talk to you soon.

There was an error submitting your subscription. Please try again.

530 shares
  • 4

Tags: christmas, colorful, german, glitter, house, houses, pastel, putz, village
Leave a Comment

You might also like

  • DIY Paper Mache Glitter Putz HouseDIY Paper Mache Glitter Putz House
  • DIY Velvet Stockings From Pillow CoversDIY Velvet Stockings From Pillow Covers
  • A Colorful Christmas Home TourA Colorful Christmas Home Tour
  • A Colorful Christmas Tree with Balsam HillA Colorful Christmas Tree with Balsam Hill

Reader Interactions

Comments

  1. Andrea says

    December 14, 2017

    Very pretty with the snow. I actually painted my flower shop village house last winter to display for Valentine’s day. I painted with more pastels like you did. Now I might go buy a few more after seeing this for a large Valentine’s day display. I love the look of houses during the cold winter months.

    Reply
    • camitidbits says

      December 18, 2017

      Oh my! I could totally use these through Valentines! What a great idea! How fun that you’ve already done that and thank you for sharing!

      Reply
  2. Kim says

    December 12, 2017

    I love this idea! Thanks for sharing. Did you know that you can buy German glass glitter?

    Reply
    • camitidbits says

      December 18, 2017

      What! No! Thanks for sharing!

      Reply
  3. Cecilia says

    December 12, 2017

    Haha, funny how little girls love glitter so much. The houses look so much better glittered up! And so easy to get the look! Love it!

    Reply
  4. Sue says

    December 12, 2017

    Those turned out really cute! Your photos are enchantinng!

    Reply
  5. Ramona Puckett says

    December 12, 2017

    I love this! Now, off to the thrift stores! Thank you so much for sharing this!

    Reply
    • camitidbits says

      December 18, 2017

      I hope you are able to find some! It’s such a fun project!

      Reply
  6. Norma Rolader says

    December 12, 2017

    Beautiful and what a great idea … thank you for sharing

    Reply

Leave a Comment Cancel reply

Your email address will not be published. Required fields are marked *

CommentLuv badgeShow more posts

This site uses Akismet to reduce spam. Learn how your comment data is processed.

Primary Sidebar

Hi! I am Cami. My passion is to help you, as the keeper of your home, to feel inspired to create a home you love and to learn the homemaking skills to help you do so.


About Cami

My product lines

TIDBITS Planners
TIDBITS Linen

Our books

Front cover of 'Master The Electric Pressure Cooker' cookbook

Hot off the press
tidbits.
Right to your inbox.

Sign up to get post updates, monthly subscriber only content, and inspiration for do-it-yourself living
Thank you for Subscribing to TIDBITS! Talk to you soon.

There was an error submitting your subscription. Please try again.

Archives

Follow on Facebook

Footer

Welcome to my blog, TIDBITS! I am a homeschool Mom to 4 and a fanatical DIY'er. I absolutely love home - and I love to inspire others as the keeper of their homes!

Subscribe

Thank you for Subscribing to TIDBITS! Talk to you soon.

There was an error submitting your subscription. Please try again.

Privacy

Copyright

I love sharing my ideas and tutorials! I ask that you respect my work and follow these guidelines. 1. All images are property of Tidbits blog. 2. Feel free to use 1 or 2 images on your own webpages, provided a link back to my blog is clearly available. 3. Do not remove any watermark or crop/edit my images in any way, unless given written consent by myself. 4. All tutorials/ideas/designs are for personal use only and are not to be copied and distributed in any way. 5. Sharing and pinning through social media is always welcome!

An elite Cafemedia Home/DIY Publisher
Branding + Website By Coded Creative

530 shares