This post may contain affiliate links, which means I get a small percentage of the sale at no extra cost to you. I only recommend items I love and have had a positive experience with. Thank you!
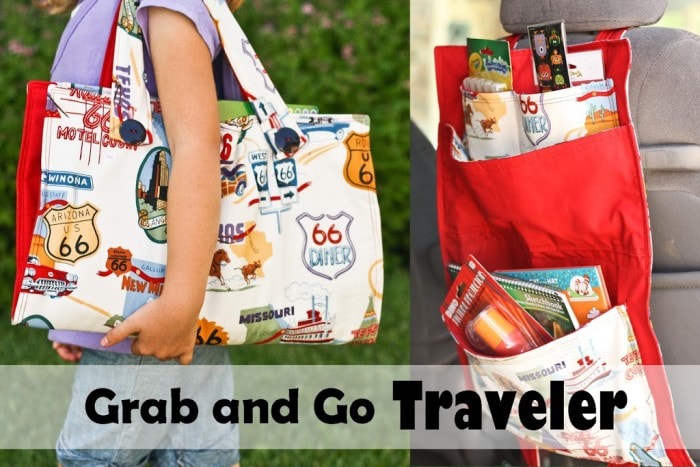
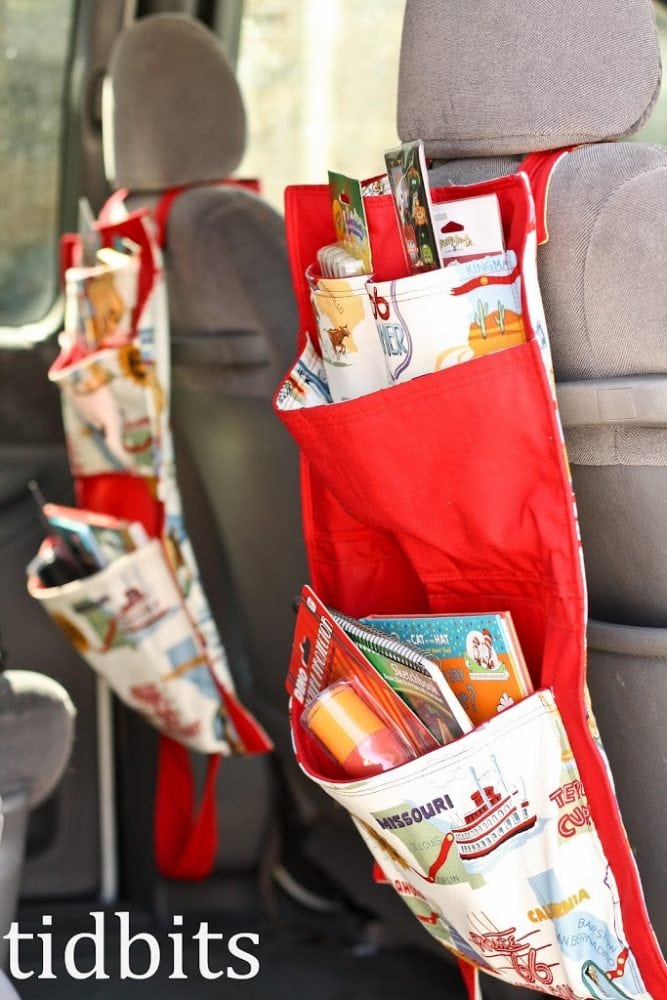
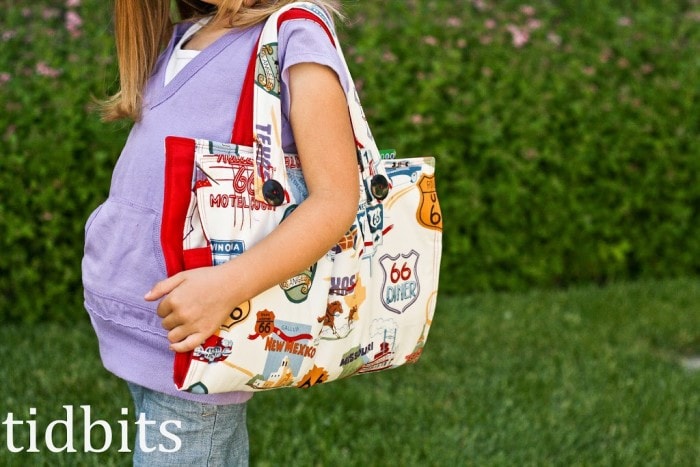
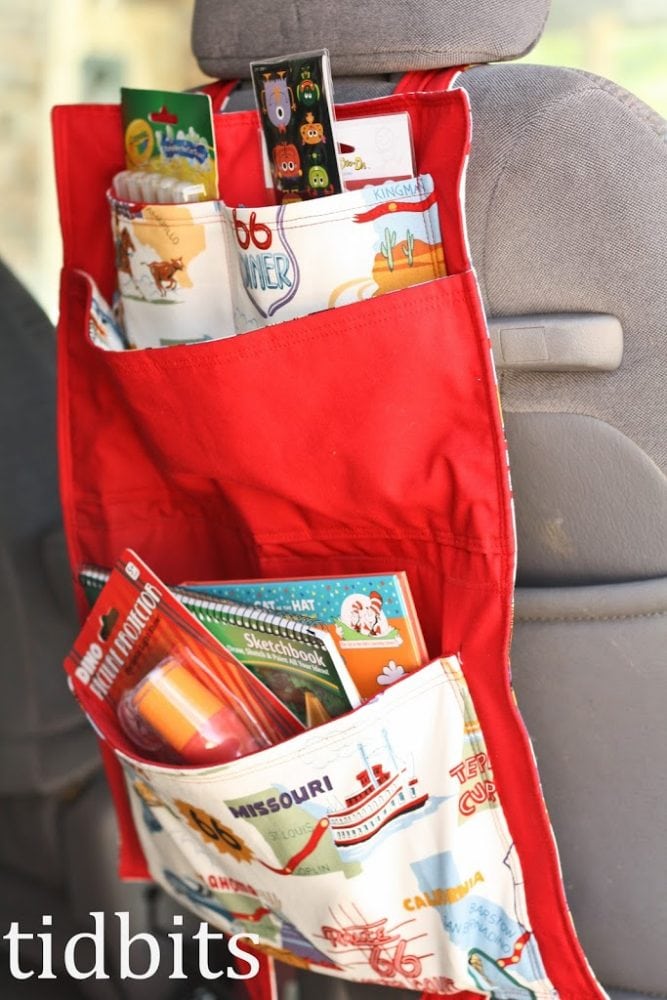
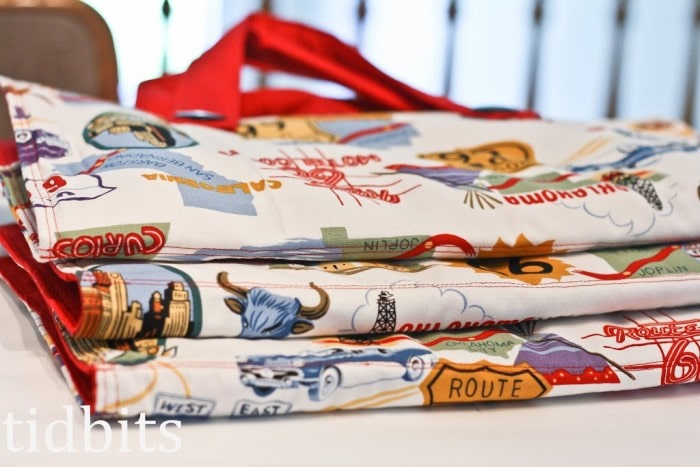
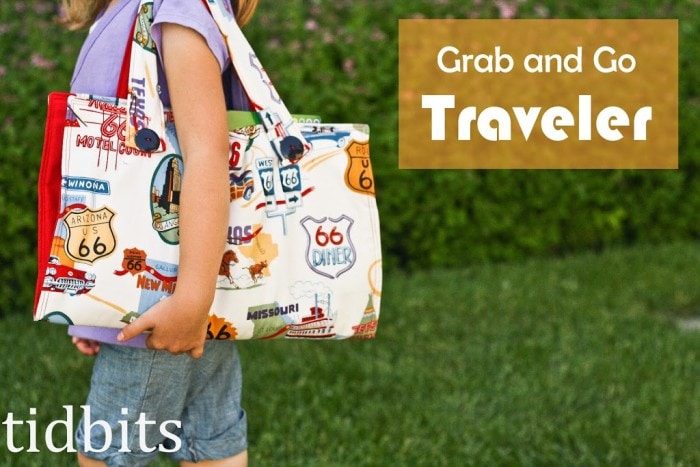
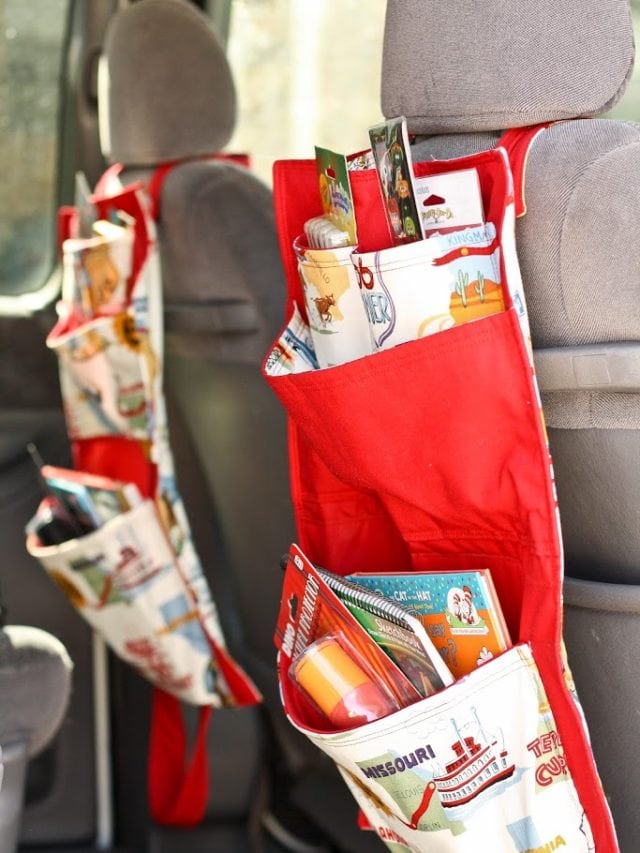
This little travel organizer folds up easily for carrying and can also hang anywhere you need a little organization or entertainment, be that in the car, a hotel or even just at home.
Want to make one, or maybe 3?
I’ll show you how I did it. It’s super easy to make and oh so fun to customize for your lifestyle and specific items. Let’s go!
Table of contents
DIY Travel Bag Organizer Supply List
Along with your sewing machine, you’ll need the following to make this grab and go travel bag organizer:
- 2 1/2 yards of fabric (get 1 1/4 yards each of 2 coordinating fabrics)
- 1 1/2 yards of pellon (I used the soft fleece like kind and non-fusible)
- 4 Buttons
- Coordinating thread

Measurements and Cuts
Cut the following measurements out of each coordinating fabric and the pellon (making 3 pieces of each cut). All measurements are in inches.
- Main Part Inside and Outside: 21 x 17
- Bottom Pocket: 9 1/2 x 17
- Top Inside Pocket: 8 1/2 x 14
- Top Front Pocket: 7 x 17
- Straps: You need only 1 piece in the desired fabric for one strap, and 1 piece of pellon. So, for the needed 2 straps you will need to cut 2 pieces of fabric at 4 x 19 inches, and 2 pieces of pellon, 4 x 19 inches.
How to Sew Your Travel Bag Organizer
Follow these steps to make your travel bag organizer.
Travel Bag Pockets
To prepare all your pocket pieces, sew them as instructed in steps 1-5.

- Line your pocket pieces together with the stiffener on the bottom and fabrics on top with right sides together.
- Sew along the top, 5/8ths of an inch.
- Press your seams open.
- Fold your top fabric down, sandwiching the stiffener. Press the edge so it looks nice and flat.
- Top stitch along the edge. Add a double top-stitch for a little more design.
Travel Bag Organizer Main Body

- On the right side of your inside fabric, starting at the bottom mark lines at 2 inches from the edge. Do this about 1/4 of the way up from the bottom.
- Mark these lines on both left and right sides of this fabric piece.
- Take your BOTTOM POCKET piece and trim the non-sewn edges to even them up good.
- Press the edges of the short sides to the back about 1/4 of an inch.
- Pin these edges to the inside fabric piece where you previously marked.

- Topstitch and double topstitch those edges down, removing the pins as you go. This topstitching should encase your raw edges inside so there is no fraying.
- There will be a large gap in this pocket after all that is done.
- Make a small pleat at the bottom of the pocket piece on both sides, as evenly as possible. Pin it down.
- Baste the bottom of this pocket to hold the pleats in place. Press your pleats so they look crisp.

Attach the Travel Bag Pockets
- Prepare your other pockets following steps 1-5 if you haven’t done so already.
- Take your TOP INSIDE POCKET and press in the edges about 1/4 of an inch.
- Find the center of the pocket and the center of the outside main piece and pin in place where you would like your pocket to be.
- Topstitch the edges down and the bottom of the pocket. Mark a center line on this pocket and stitch it down to form 2 pockets. You could do as many pocket dividers as you would like at this point.
- Clean up the edges of your TOP FRONT POCKET.
- Press the long bottom edge only to the inside of the pocket, 1/4 of an inch.

- Lay that folded and pressed edge right along the bottom of the INSIDE pocket, hiding the raw edges. Pin in place.
- Stitch and double stitch along the bottom, checking to make sure you are encasing those raw edges.
- Now you are ready to sew it all together. Lay the MAIN PART stiffener evenly with the back of the INSIDE piece, with all the pockets sewn on. Take the MAIN PART OUTSIDE piece and lay it on top, right sides together.
- Stitch all around these 3 pieces, leaving a gap for turning. Clip your corners and trim the edges.

- Turn it inside out and press all the edges making it look nice. Topstitch and double topstitch along the whole rectangle, closing the opening as you go. Find the center of the traveler (folded hamburger way) and mark a line. Stitch and double stitch along this line. This will help the organizer fold easier.
Travel Bag Straps

- To make your STRAPS place the stiffener on top of the fabric’s wrong side, evenly.
- Fold it in half (hot dog way) and stitch along the long edge catching the stiffener as well.
- Turn this fabric tube inside out. Fold in your top and bottom ends and stitch them down, while topstitching along the edges. Press.
- Create buttonholes in each end according to the size of your buttons.
- Hand stitch your buttons onto the traveler, measuring evenly and placing them where you would like them best. Button your strap in place. (This picture’s handle was sewn slightly differently because I was running out of fabric for the last traveler I was making. The handle has both fabrics in it, which you could also do).
This completes your grab and go travel bag organizer!
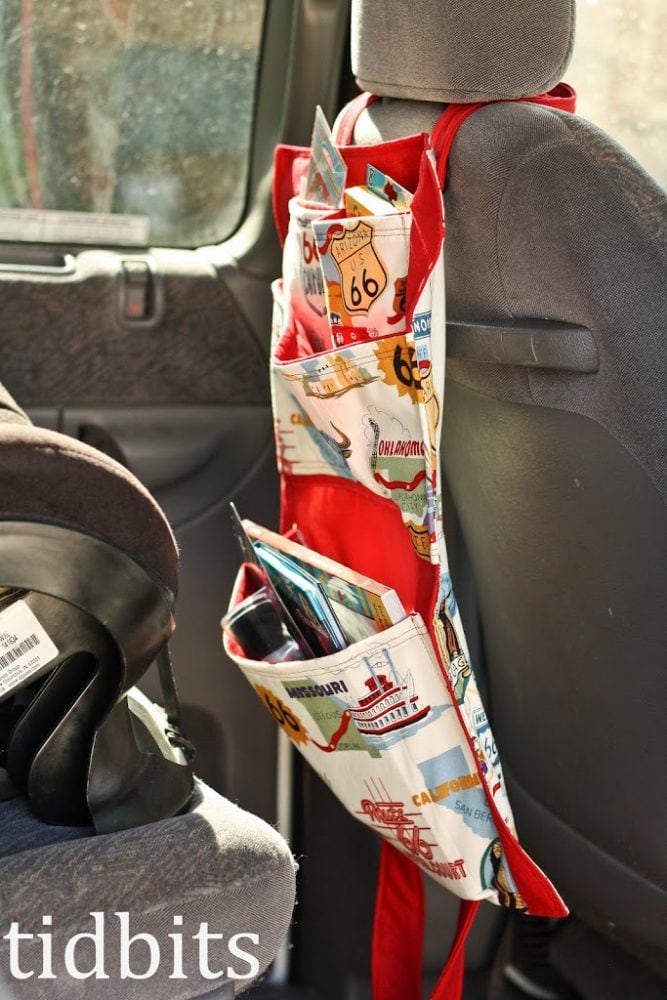
Easy to Use Straps
A note about the straps – I designed the straps to have the buttons so you can hang it on things that might be too big to just slip it on. This will also help if your car seats head rests are not removable. Just another way this organizer bag makes travel a breeze!
More Fun Projects to Try
Clean up the mess and keep those travel essentials organized with this handy grab and go travel bag organizer. You are going to love taking it along on your next trip!

If you’re looking for more great project ideas, give one of these a try:
- How to Make a Fishing Toy | Fabric Fish and Wooden Reel
- 5 Minute Wreath
- Horse Silhouette Art – Tutorial
- Bath Salt Soak in a Tea Bag | Party Favor for Guests
- How to Make a Candle in Jar {A Lovely Gift!}
- How To Make Botanical Wood Slices
- Easy No Sew Applique T-Shirts


Hi Cami. I love this! Can it be made and sold online in small quantities?
I do not currently have any contracts to make and sell. But, if you adapted the design to make it your own, you could do that.
These are awesome. Thanks so much for sharing. I just made 2 of them for my kids. I can't wait to use them next week on our trip to California! Thank you so much for sharing the tutorial. I love how they turned out.
I love this!!! Wonderful idea! I will definatly be making one of these for my 2 nephews! Thank you for tutorial.
omg i have to travel 30 min every time i need to do shopping and this is amazing and i am also thinking that this would work as a great barbie tote they can hang it and then fold it up to take with them!
Super idea!! We are taking a trip west the week of Thanksgiving, so these will be perfect for my girls in the car. Thank you!!!
Cami, I had so much fun making three of these, your tutorial was so easy to follow….I posted them on my blog and gave you the credit. I am so new at this I'm super worried how to do it right. I would love to post a picture of mine too on your site if you want me to or what is the etiquette for doing that. Please forgive me if I've not done this right.
WOW! I love these! Will for sure be trying to make for my kiddos!!! THANKS for the amazing instructions!!!
The kids loved them! Thanks! It definitely helped with "traveling car mess" syndrome! Miss you guys!
I'm always so amazed at your impeccable stitching lines. 🙂 VERY awesome!
I am totally going to whip a couple up! Thanks for the tutorial!!!
I am visiting from the Crafty Cupboard….this is one of the most original and useful ideas I have seen in a long time. Thank you so much for sharing
This is so awesome – and the Route 66 fabric almost made me die from the cuteness. Definitely going on the "must make" list!
I love this. I have 6 kids and they are always fighting for space in the car.
I am visiting from The crafty cupboard. Thanks for sharing over there. I love this. I will be making a couple for my boys before our next big car trip.
LOVE, LOVE, LOVE THIS IDEA!!! Wish I had these when my boys were growing up and we were shuffling them between LA and MT every summer for their yearly visit with us. I always made up something to entertain them on the trip back and forth but NOTHING like this!! WOW something like this would have made things a whole lot easier to say the least. Will be making them NOW for the grandkids! LOL!!!