• Skip to primary navigation
  • Skip to main content
  • Skip to primary sidebar
  • Skip to footer

Tidbits

Inspiration for Do-It-Yourself Living

  • Home
  • About
    • About Me
    • Work with me
    • Media Kit
    • FAQ
    • Disclosure and Policy
    • Link Parties
  • Project Index
    • All
    • Decorating
    • DIY
    • Printables
    • Sewing
    • Crafts
    • Holidays
    • Recipes
    • Woodworking
    • Photography
    • Crafting with Kids
    • Other
  • Home Tours
  • Seasonal
    • Winter
    • Spring
    • Summer
    • Fall
  • Shop
  • Contact
You are at Home and DIY
Home and DIY
Food and recipes

You are here: Home / Decorating / Horse Silhouette Art – Tutorial

Horse Silhouette Art – Tutorial

October 22, 2012 • Decorating, Woodworking

307 shares
There have been some requests for instructions on how I made my horse silhouettes, so I thought I would get this tutorial up first.
(For the full living room tour, click here.)
They came together pretty easy.  I first saw a picture of this art here.  I believe it is originally Pottery Barn.  I debated doing other shapes for my silhouette but then decided since my husband and I met on a dude ranch, the horses would actually be quite fitting.
First thing first.  I measured the wall sections where I wanted the horses to go.  Then I sent the hubs out to the garage to plank some wood for me to the size I wanted.

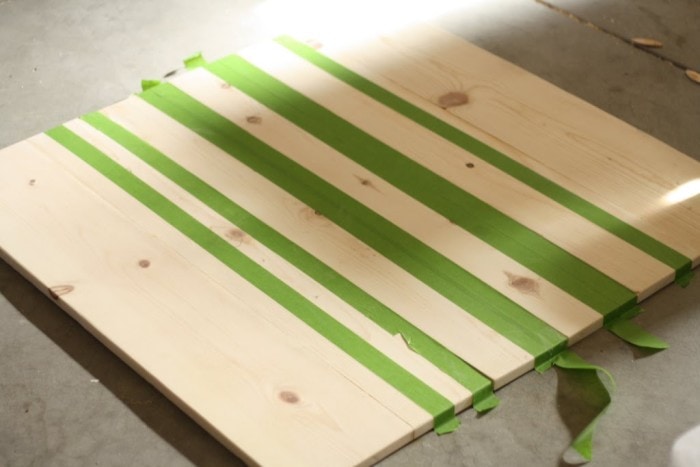
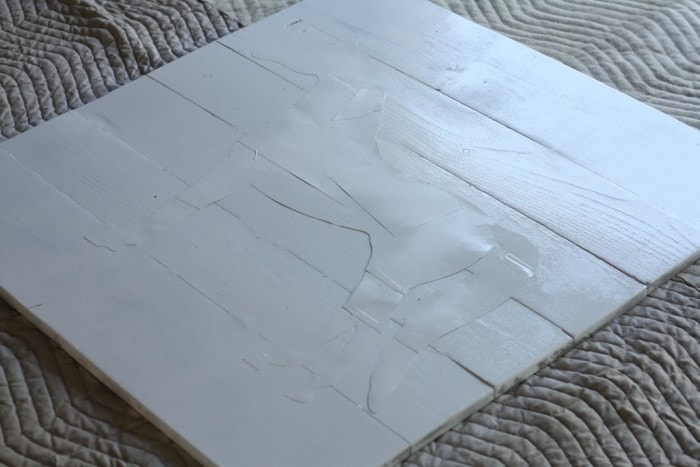
I wanted the wood to look like it was varying shades and different pieces of wood so I taped up sections of all different widths.

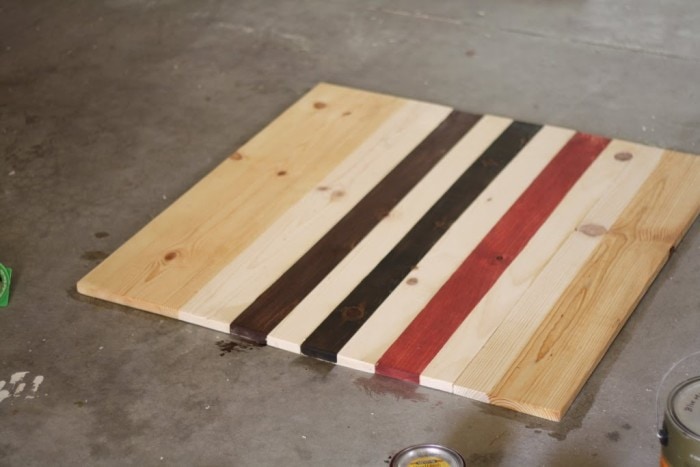
Then I scrounged through my husbands stain drawer, and started wiping on stain.  Once the strips of varying stains were dry, I ran some walnut stain over the whole thing.

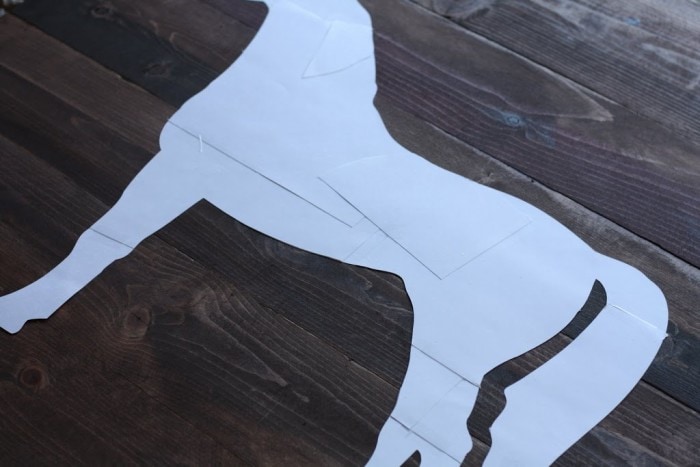
While all that dried, I pulled out my electronic cutter – the Silhouette SD.  This was a bit tricky because my cutter would certainly not cut the horse the size I needed it.  So I cut it out in bits and pieces and taped it all together.  I used cardstock for my paper.

Then, I soaked the back of my horse with spay adhesive.  It is important to get every square inch really good.  You don’t want the paint to sneak under your paper.

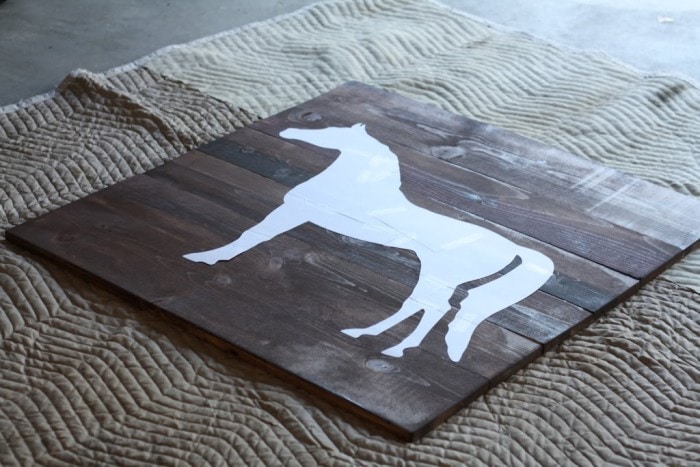
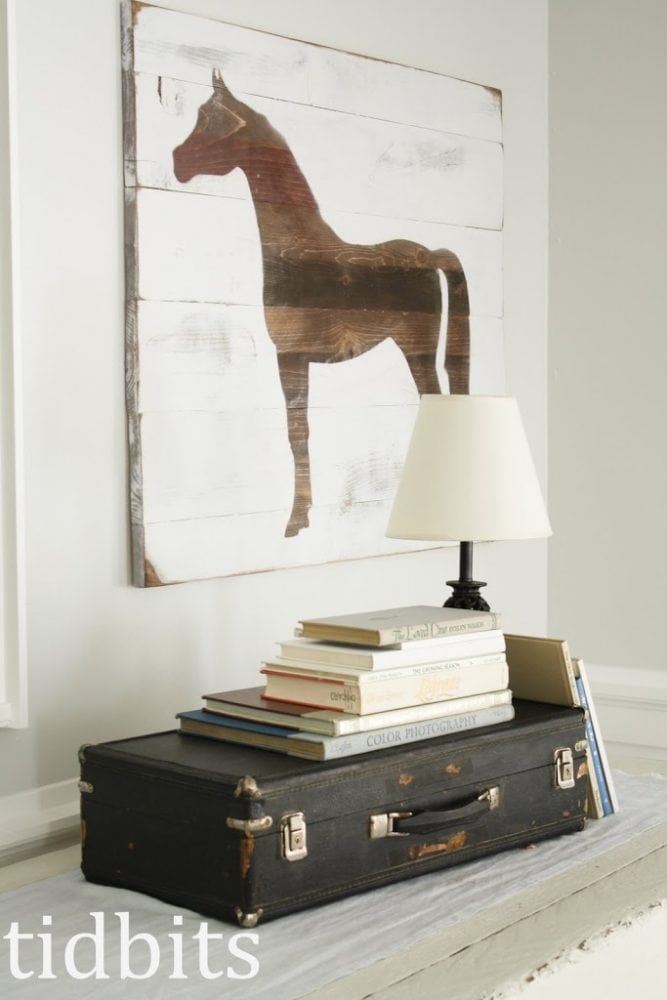
After I made sure the horse was stuck to the wood good enough, I took a can of white glossy spray paint and painted the whole thing.I was too impatient to wait for it to dry – so I peeled the horse right off.
Once it was dry, I took a sander to the whole thing, scuffing to my pleasure.

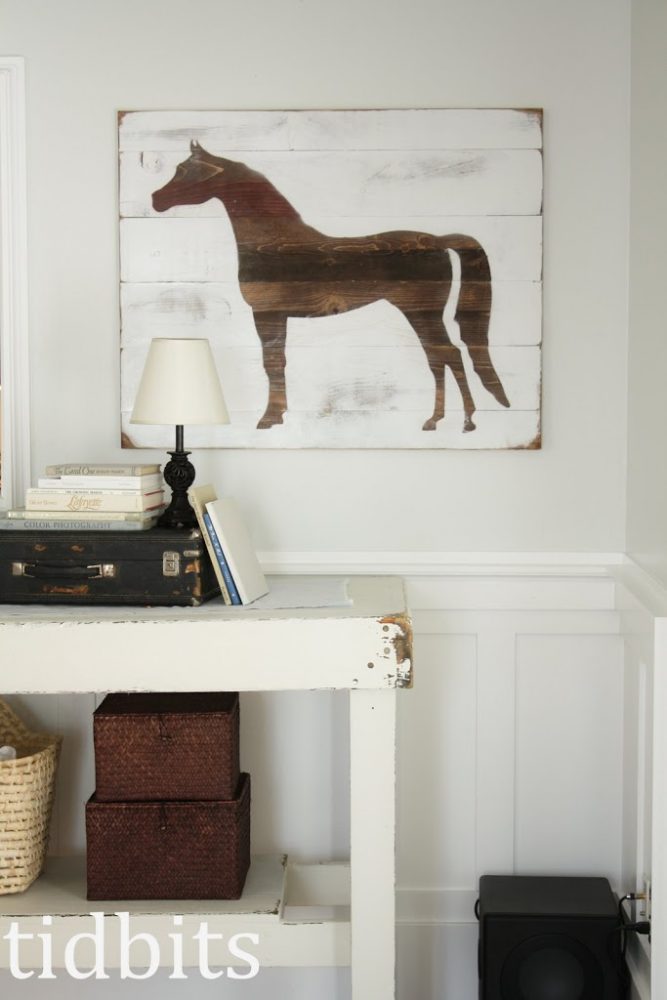
It really turned out better than I had hoped.

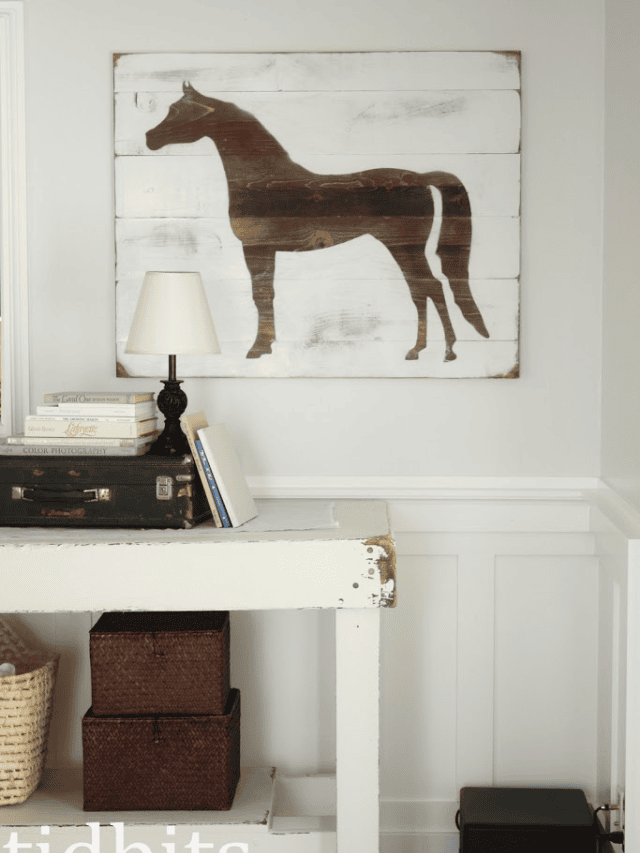
So while I went to do the second horse, I had always intended to do the same method, so my silhouette was already cut out.  However, when I stuck the paper horse on I realized how much I would like it if the staining and painting was reversed for the second piece.

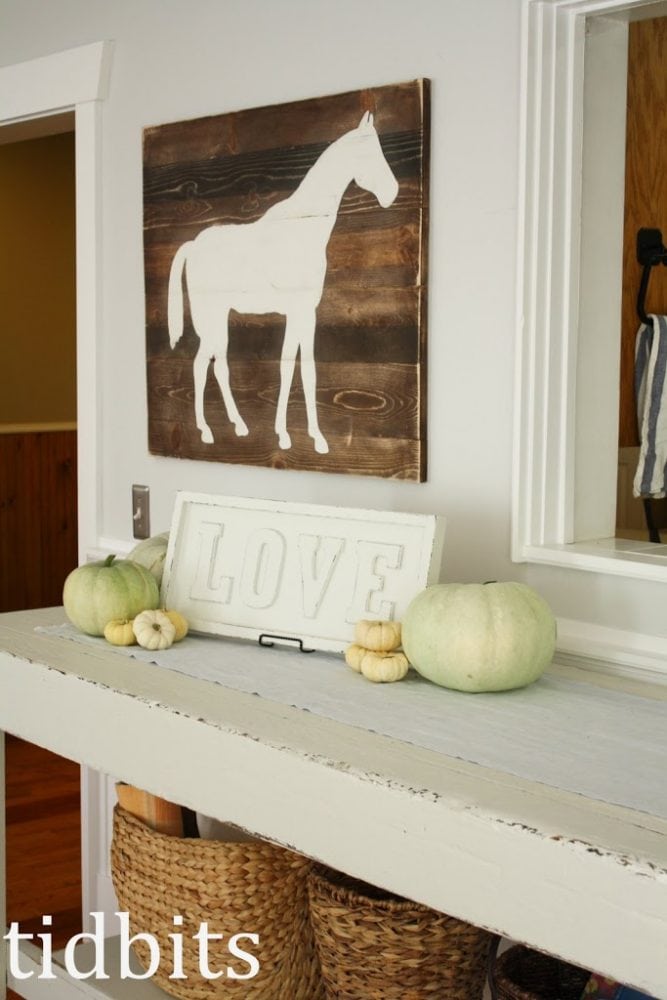
So at that point, I took a pencil and traced the horse shape onto the stained wood.  Then I carefully hand painted the horse on in white, and sanded after so more wood grain would show through the stain.  This method definitely took longer.

Had I known I was doing this beforehand, I imagine I would have kept the outer part of the silhouette that I cut out, and then spray painted like I did the first one.

Does this make any sense?


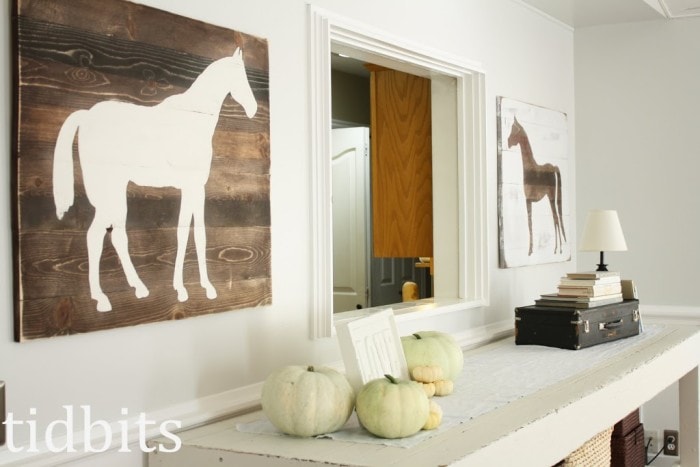
But now that it is all done, I am quite pleased with my horses.

I really do love making my own affordable art.

Let me know if you have any further questions.

Posted by Picasa

I’m Cami! Welcome to my blog TIDBITS. Follow me along for beautiful home decor ideas and inspiration for do-it-yourself living
Thank you for Subscribing to TIDBITS! Talk to you soon.

There was an error submitting your subscription. Please try again.

307 shares

Leave a Comment

You might also like

  • 6 Reasons Why You Need a Pastry Cloth and How to Make One6 Reasons Why You Need a Pastry Cloth and How to Make One
  • Fabric Basket FaceliftFabric Basket Facelift
  • Fall Flannel Table RunnerFall Flannel Table Runner
  • Unleashing the Potential of the Electric Pressure CookerUnleashing the Potential of the Electric Pressure Cooker

Reader Interactions

Comments

  1. Anne says

    March 21, 2020

    Beautiful! What size is the finished product? Thank you!

    Reply
  2. Mary says

    September 18, 2019

    You done good! Thanks for the breakdown which makes it a doable project 🙂

    Reply
  3. daily ford hcm says

    December 1, 2017

    khuyen mai xe oto Ford 2017 moi tai dai ly xe Ford Ho Chi Minh

    Reply
  4. Mua Chevrolet Tra Gop says

    November 25, 2017

    So creative with your post – measured the wall sections where I wanted the horses to go. Then I sent the hubs out to the garage to plank some wood for me to the size I wanted.

    Reply
  5. Gary says

    June 13, 2016

    How exactly did you attach the planks together?

    Reply
  6. Heather says

    May 21, 2015

    I absolutely love these – awesome! I wish you had these for sale, I would definitely purchase! Very cool!

    Reply
  7. lauren @ West Furniture Revival says

    November 28, 2013

    I ABSOLUTLY LOVE THE ART! beautiful, i want to make one of these, would love to feature them, if that would be ok please let me know<br />lauren

    Reply
  8. William Relvas says

    September 3, 2013

    Nice post. Here you provide some valuable points about company it&#39;s really nice. I like your post. Thank you for sharing…………….<br /><a href="http://www.gaiti.com/34034/the-paintings/&quot; rel="nofollow"><b>Horse art paintings</b></a>

    Reply
  9. Heidi @ Decor & More says

    June 9, 2013

    Marvelous! Thanks for sharing! Popping over from The Cottage Market. :)<br />~ Heidi

    Reply
  10. Karin Marie says

    April 9, 2013

    This is amazing! I love this! Thank you sooo much for the tutorial! I&#39;m going to do one for my daughters birthday party! I&#39;m excited! I have a cricut but I think I&#39;m going to turn my iphone into a projector with the horse image and trace it on a paper and cut it out. Somedays I wish I could trade my Cricut for a Silhouette but I did manage to get Sur Cut A lot I just need a windows

    Reply
  11. Anonymous says

    April 6, 2013

    Thank you for saying that you used your Silhouette to make this!! I&#39;d been looking for a horse shape online for awhile to also try to replicate this piece, and couldn&#39;t find anything I liked. When I saw your site, I fell in love with the horse shape you used and was able to find it on Silhouette&#39;s site still! Thank you!

    Reply
  12. Deborah Wilson says

    February 3, 2013

    Hi I love these! Would you sell two like this to me? Do you take custom order?<br />Thanks<br />[email protected]<br />

    Reply
  13. J and M Manire says

    November 20, 2012

    I love this. My husband and I are from Kentucky so the horse is a reminder of home. Plus my grandparents used to have some huge horse print in their living room over their couch and this would be a great tribute. Thanks for the tutorial. Now I know what to do with the old pallets I wouldn&#39;t let him throw away.

    Reply
  14. mar says

    October 23, 2012

    I love Arabians and own 4 real live Arabian horses. So I want to make the horse art on the right. But I have a long way to go since I barely know what<br />Silhouette Art is. ha ha

    Reply

Leave a Comment Cancel reply

Your email address will not be published. Required fields are marked *

CommentLuv badgeShow more posts

This site uses Akismet to reduce spam. Learn how your comment data is processed.

Primary Sidebar

We are sisters, working independently under the same Brand, while sharing our individual passions. Follow Cami for all things HOME, and join Marci for all things FOOD. Enjoy!


About Cami
About Marci

My product lines

TIDBITS Planners
TIDBITS Linen

Our books

Front cover of 'Master The Electric Pressure Cooker' cookbook

Hot off the press
tidbits.
Right to your inbox.

Sign up to get post updates, monthly subscriber only content, and inspiration for do-it-yourself living
Thank you for Subscribing to TIDBITS! Talk to you soon.

There was an error submitting your subscription. Please try again.

Archives

Follow on Facebook

Footer

Welcome to my blog, TIDBITS! I am a sleep deprived Mom to 4 and a fanatical DIY'er. I absolutely love to create - but I love to inspire others to create even more!

Subscribe

Thank you for Subscribing to TIDBITS! Talk to you soon.

There was an error submitting your subscription. Please try again.

Privacy

Copyright

I love sharing my ideas and tutorials! I ask that you respect my work and follow these guidelines. 1. All images are property of Tidbits blog. 2. Feel free to use 1 or 2 images on your own webpages, provided a link back to my blog is clearly available. 3. Do not remove any watermark or crop/edit my images in any way, unless given written consent by myself. 4. All tutorials/ideas/designs are for personal use only and are not to be copied and distributed in any way. 5. Sharing and pinning through social media is always welcome!

An elite Cafemedia Home/DIY Publisher
Branding + Website By Coded Creative

307 shares