This post may contain affiliate links, which means I get a small percentage of the sale at no extra cost to you. I only recommend items I love and have had a positive experience with. Thank you!
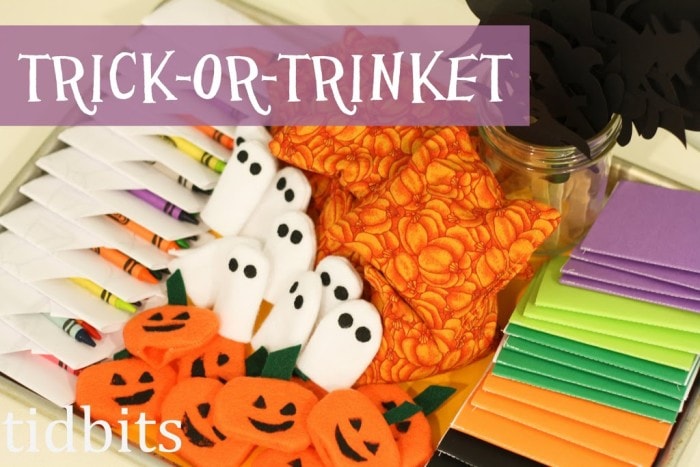
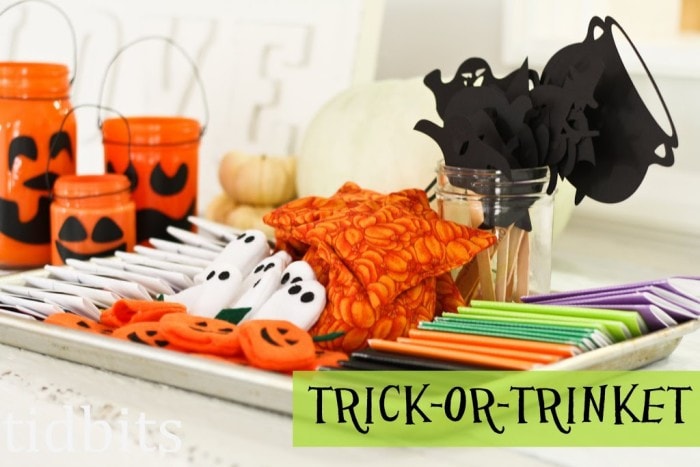
Make it a memorable Halloween with healthy trick or treat ideas that the kids will love. Try these easy, fun to make, better-than-candy Halloween trinkets!
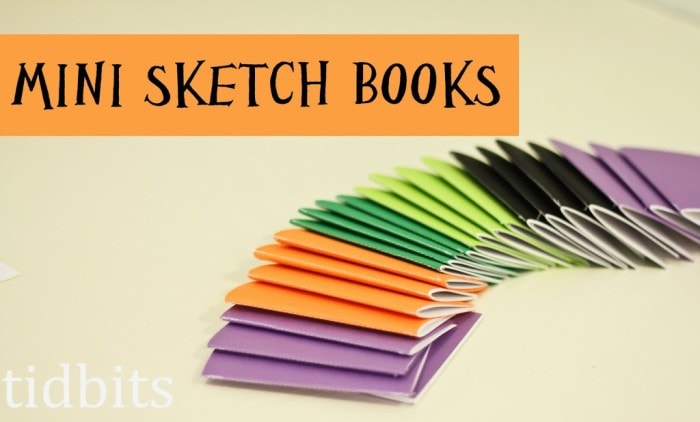


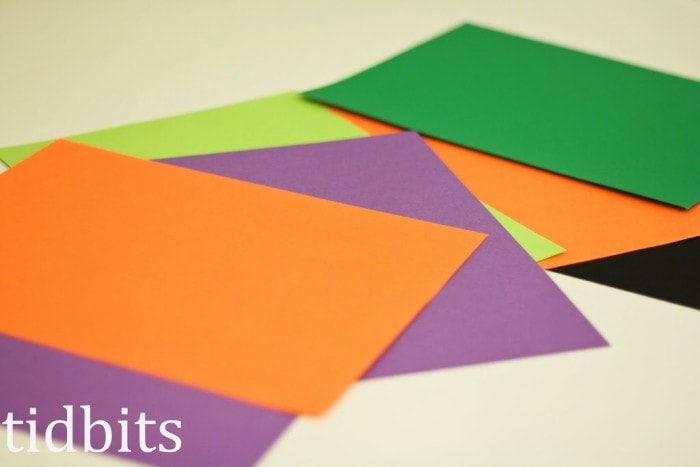
Mini Trick-or-Treat Sketch Books

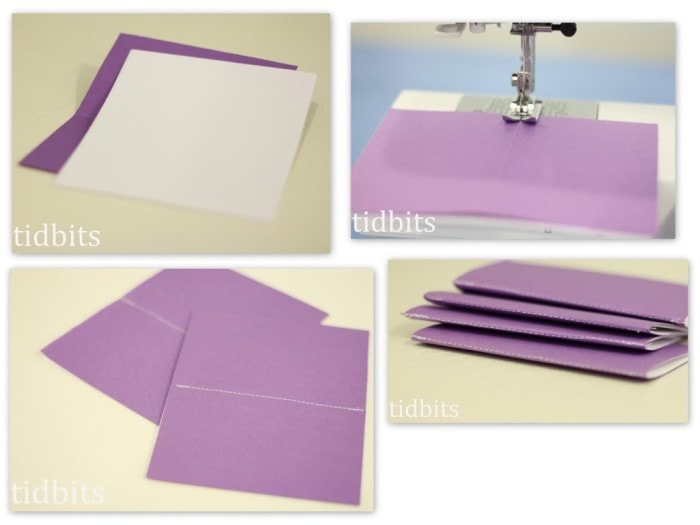
2. With your printer paper evened up, stitch right on that fold. Keep those papers secure in your fingers while you sew so they don’t shift.
3. Be sure to back stitch at the beginning and end.
4. Crease all the papers along the previous fold and where your stitch line is.
That’s it! You will need a new sewing machine needle now, but you can save that needle for any future paper sewing projects.
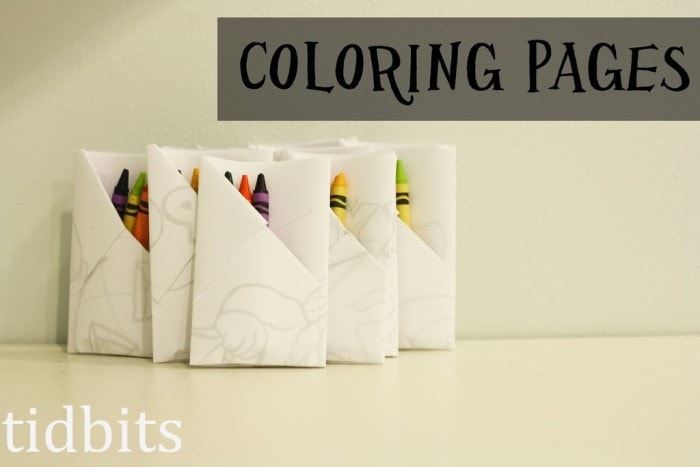
Halloween Coloring Pages and Crayons
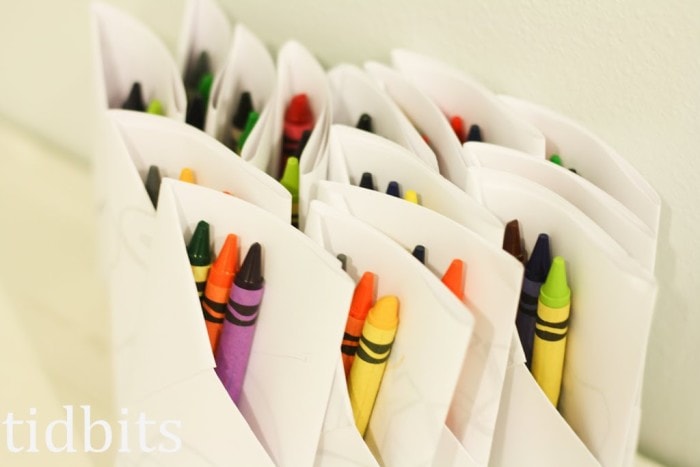
For the coloring pages, get online and print all the free Halloween pictures you want.
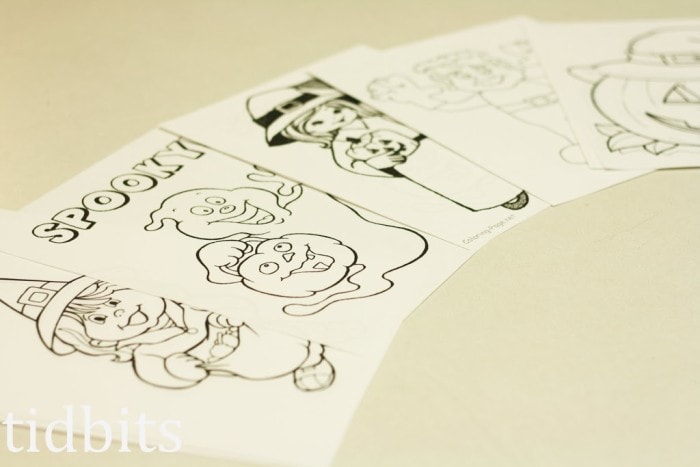
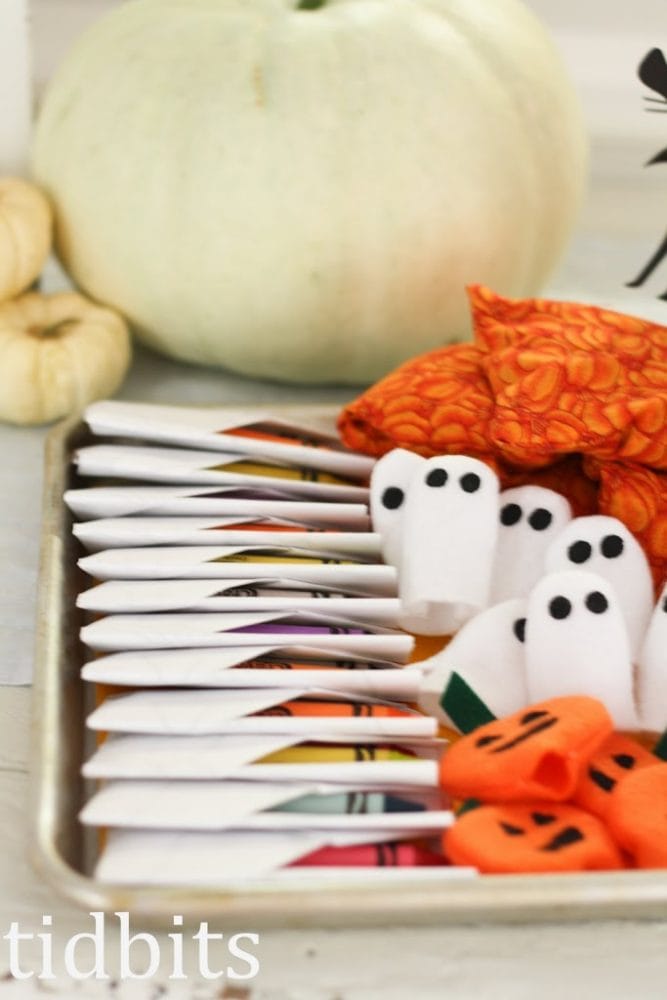
Stick in a few crayons. It doesn’t get easier than that!
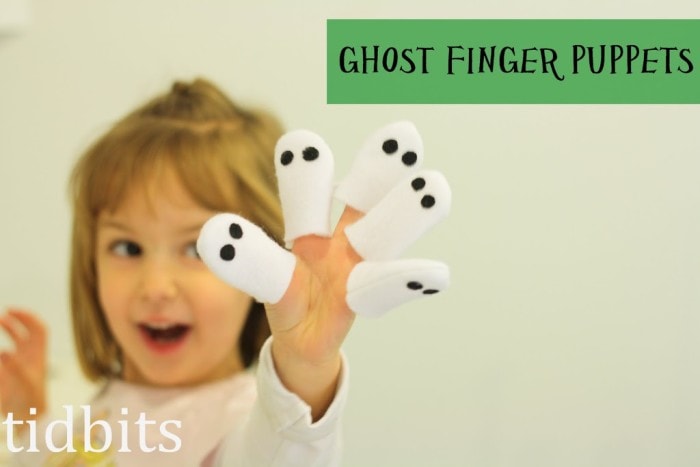
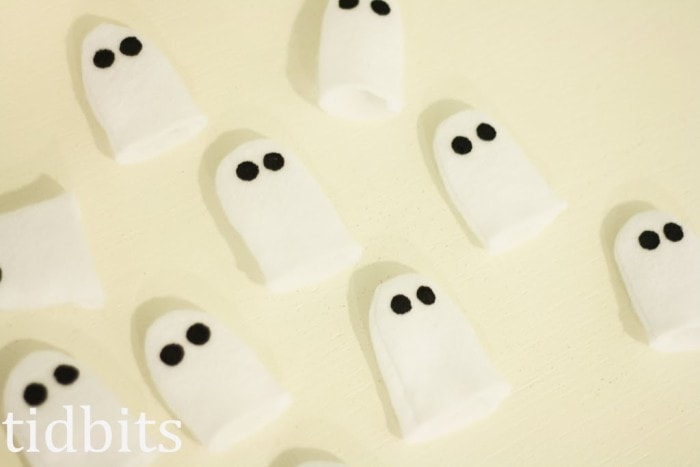
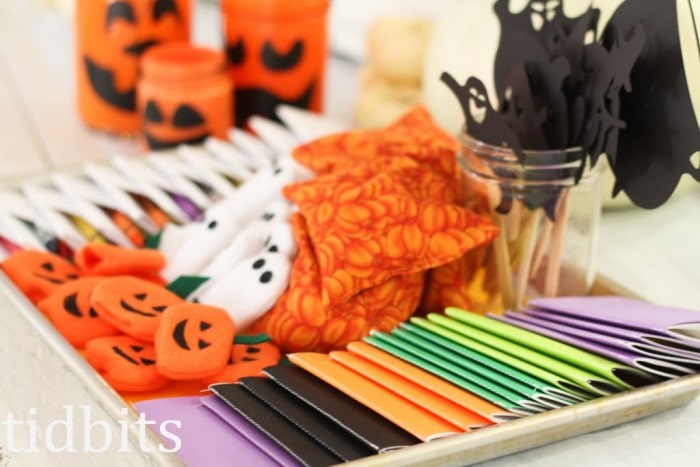
Ghost Finger Puppets
For the ghosts you only need a small sheet of white felt and some black paint.
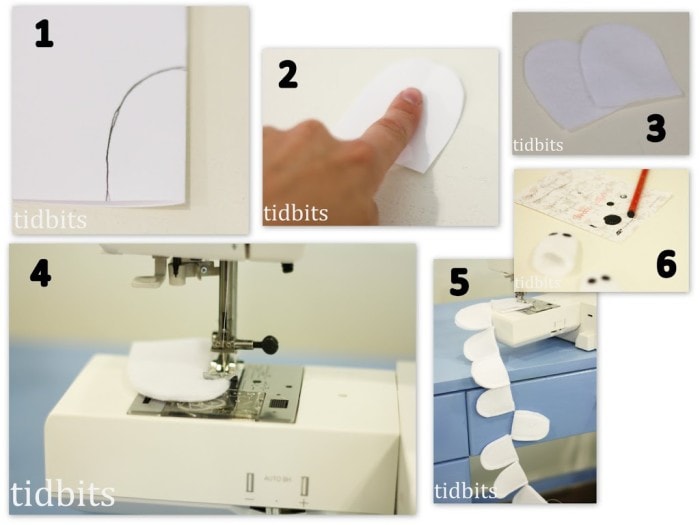
1. Make a pattern on the fold of a paper.
2. Give it about an inch around your finger.
3. Using your pattern, cut the shape on 2 pieces of felt.
4. Stitch around the ghost leaving the bottom open. Be sure to backstitch.
5. These are super easy to mass produce. Sew them back-to-back so you don’t have so many threads to clip.
6. Using the back end of a colored pencil, dab it in some black paint and make two dots for your eyes. The pumpkins are just about the same as the ghost.
Just a few more steps.
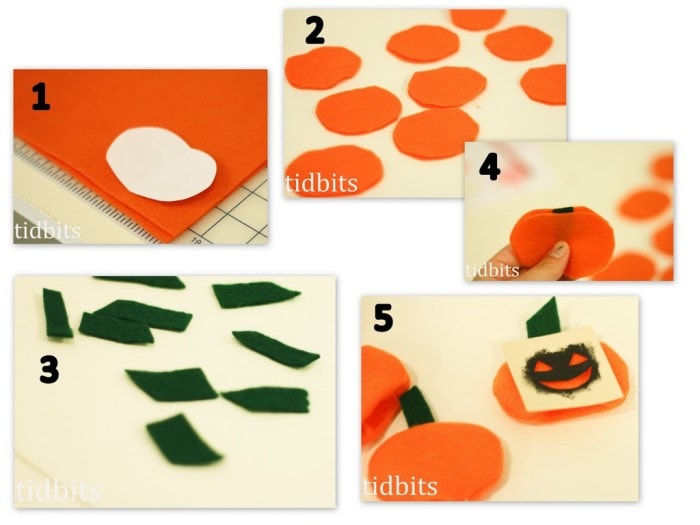
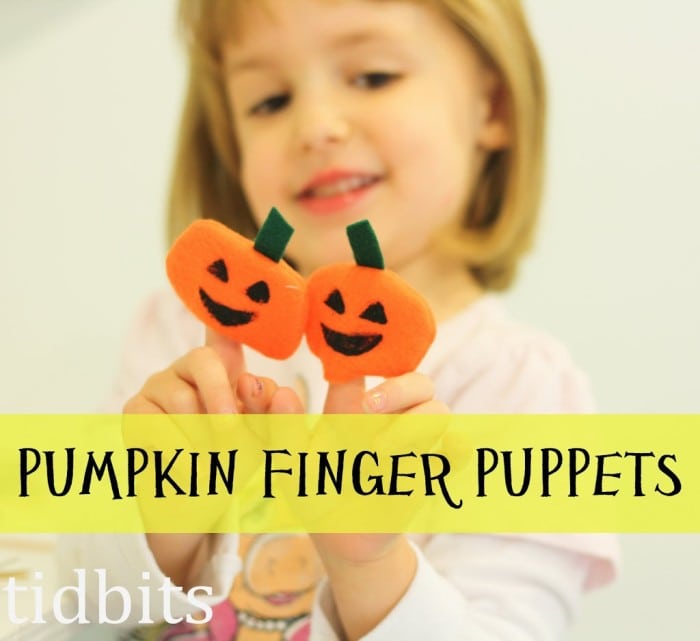
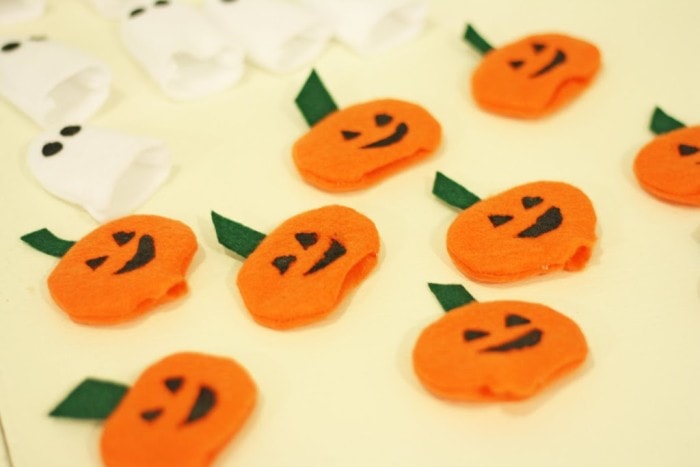
Pumpkin Finger Puppets
2. Cut out your pattern in felt, 2 pieces for each pumpkin.
3. Cut a strip of green felt for a stem.
4. Insert the stem inside the pumpkin on the top middle section. Sew around the edges leaving a small gap for turning and for the finger at the bottom of the pumpkin.
5. Using paper and a knife, cut out a simple pumpkin face and use it as a stencil for painting. Viola!
Halloween Shadow Puppets

If you have an electronic cutter (I own the Silhouette SD) these shadow puppets are so quick and easy. Just cut your shape out of cardstock, and hot glue it to a stick. You can make plenty in no time at all!
Of course, you can make simpler shapes with scissors or an Exacto knife.
Trick-or-Treat Bean Bags
Finally, you can make fun bean bag or rice bag toys. I prefer using rice, as I find it to be a little bit lighter.

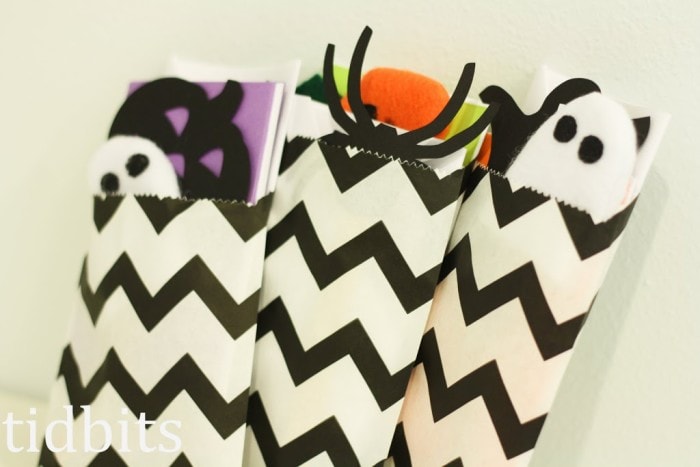
Other Ways to Use Your Healthy Halloween Trick or Treat Ideas
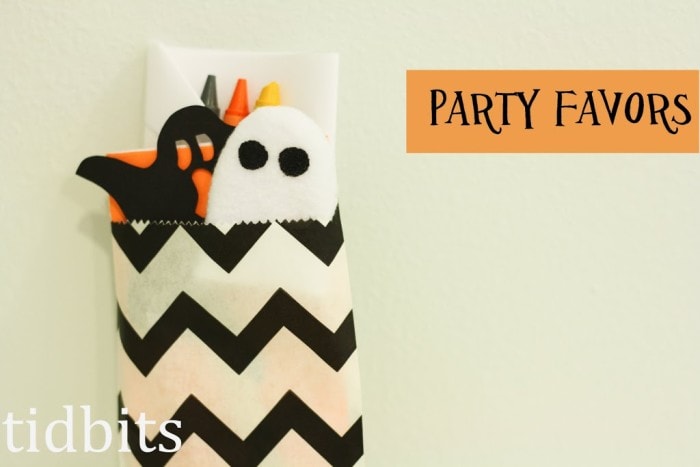
Group them in a cute package and hand them out at a class Halloween party, give to your grandchildren, your kids’ neighborhood friends, or hand them out as regular party favors.
And you will have had a lot of fun making them!
More Great Halloween Ideas
- Easy Halloween Candle Making for Kids (and Moms!) with the Doodle Crate
- Red Riding Hood Costume – The Medieval Version
- Pirate Costume for a Girl
- 5 Tips for Fall Front Porch Decorating
- Character Door Hanger | Home Depot DIH Workshop
- Decorating for Fall Outdoors: Porch Tour
- Halloween Round-Up (Tidbits Style)
- Mystical Mermaid Costume


Discover more TIDBITS
Love this article? Make sure to connect with me on your favorite social platform below, and leave a comment so we can chat!