This post may contain affiliate links, which means I get a small percentage of the sale at no extra cost to you. I only recommend items I love and have had a positive experience with. Thank you!
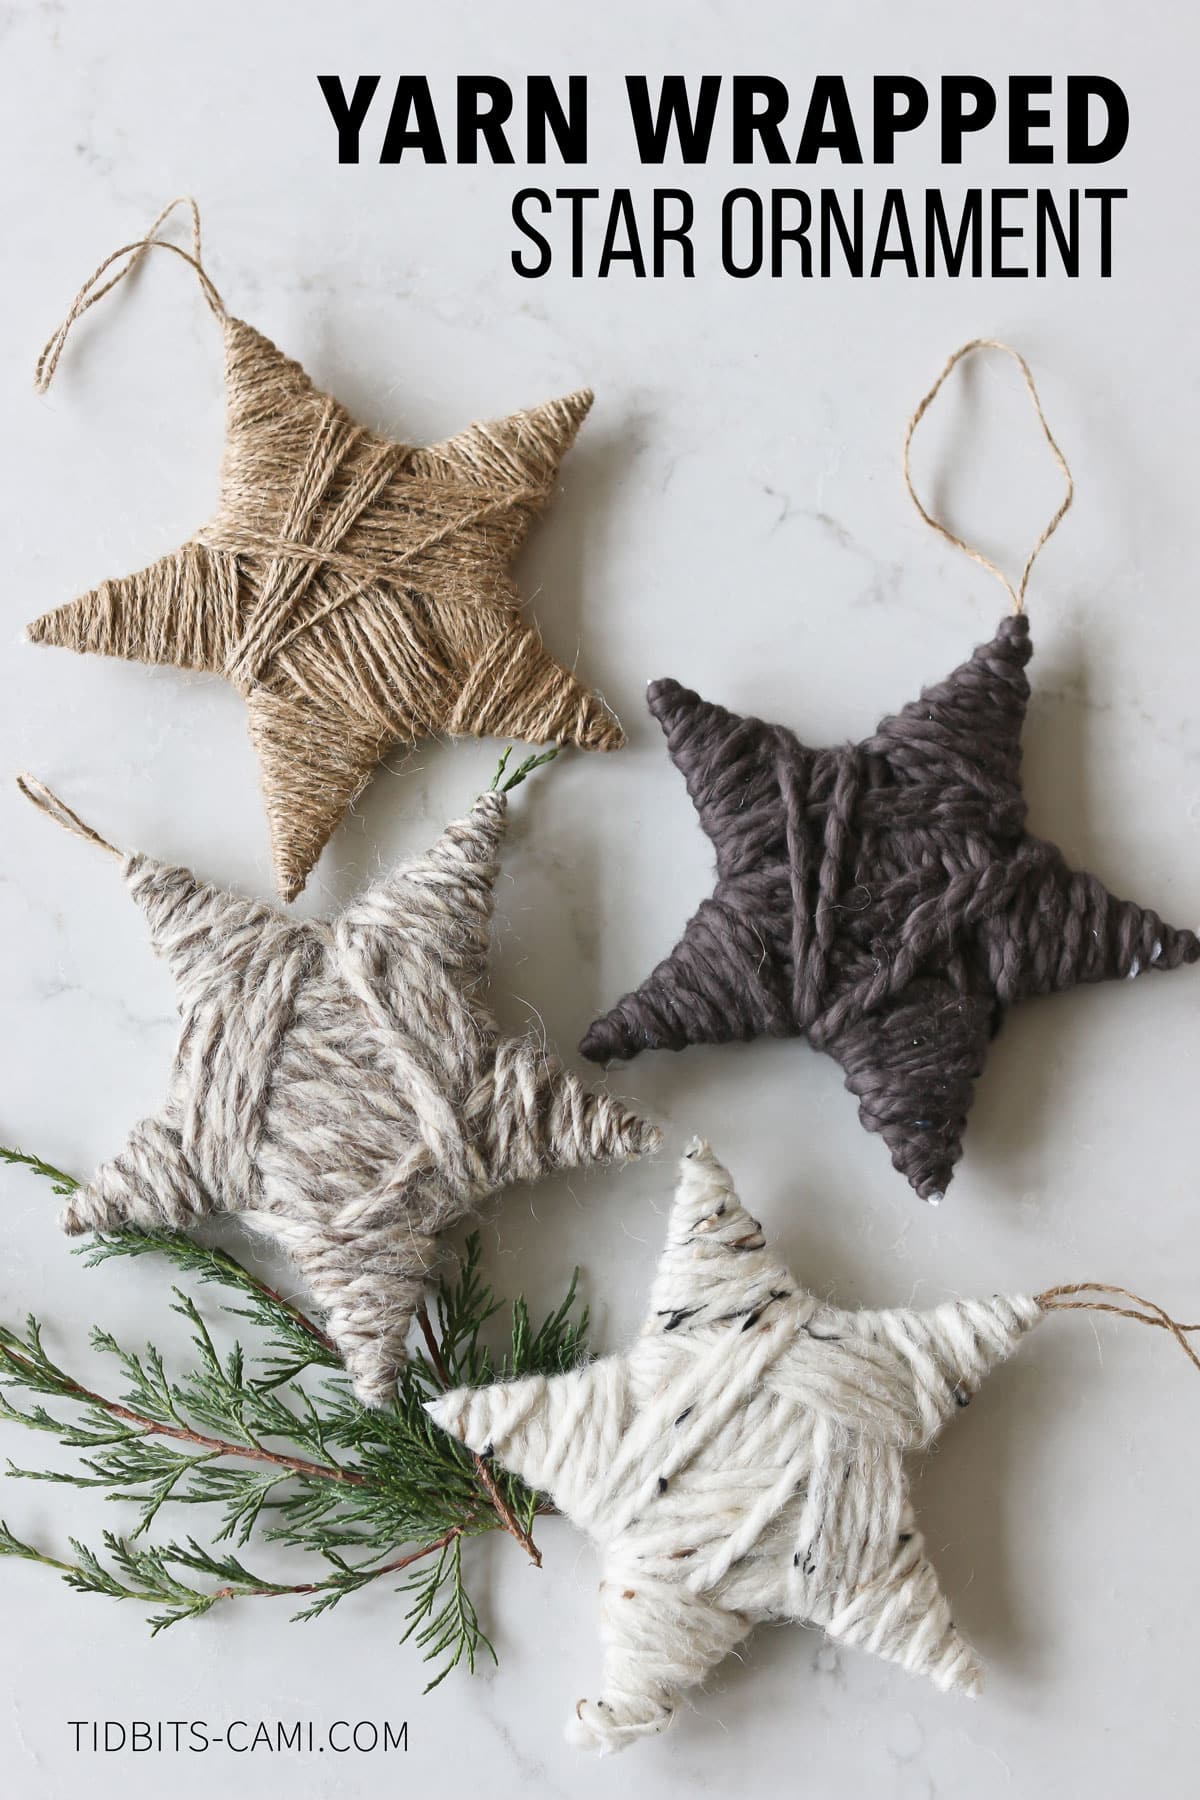
Join me for this fun and super easy craft tutorial! I’ll show you how to DIY these yarn wrapped star ornaments that are great to hang on the Christmas tree or for other Christmas decorations.
Admittedly, I do not crochet or knit and therefore don’t have very many excuses to buy yarn. But that doesn’t stop my heart from going “pitter-patter” when I walk down the yarn isles of the craft stores.

I then find myself coming up with any and all sorts of yarn craft ideas I can make with all that beautiful yarn – that don’t require learning a whole new DIY skill. #aintgottimeforthat
I did something similar for yarn hearts on Valentines day on my blog.
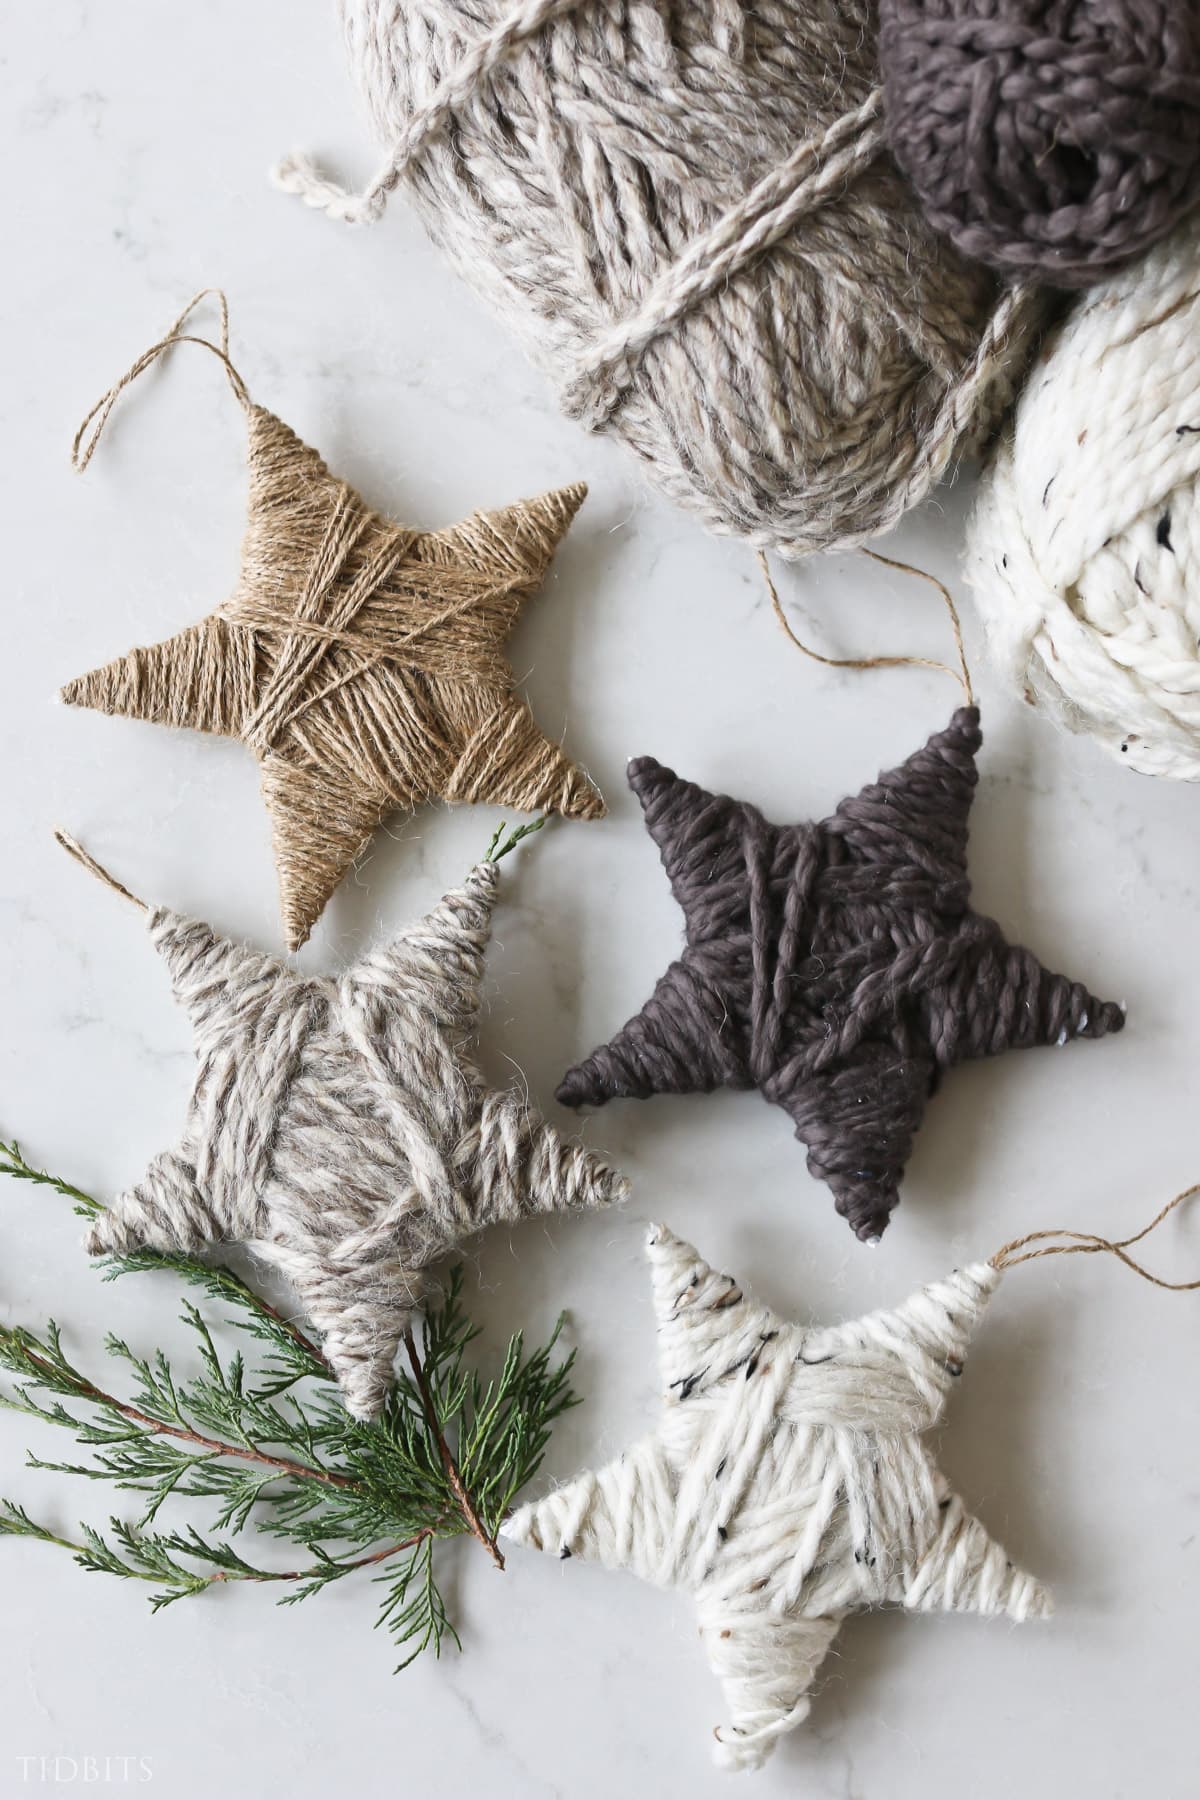
That’s how these beautiful yarn wrapped stars were born. I simply couldn’t resist all the earthy, organic-looking skeins of yarn and they had to make their way into our Handmade Christmas Home – one way or another.

Making them is so fun and easy (and great for kids too!), so let me answer some questions on how to make yarn wrapped star ornaments, and then check out the quick video or picture tutorial to see how!
SUPPLIES NEEDED FOR YARN STARS
- Yarn or String
- Skies the limit! Pick whatever yarn speaks to your heart. There are no hard and fast rules here, but I adored these neutral colors that I found at Hobby Lobby. It uses very little yarn per star, so if you buy a whole skein you’ll be able to do a lot of them!
- Star Template
- Cardboard or Foam Core
- I’ve seen other inspiration where people use craft sticks. That is an options too!
- You could even use a thick cardstock if that is all you have.
- String for hanging
- I just used a bit of hemp twine
- Hot Glue gun with glue (just need a little glue!)
- Scissors
HOW TO FIND A STAR TEMPLATE
You can of course hand draw a star shape for your template, or do a quick google search to find the right shape for you. Just print it and cut it out and use it as a guide to draw the star onto your cardboard or foam core.

YARN WRAPPED STAR VIDEO TUTORIAL
Watch this quick video to get the general idea of how they come together.
PICTURE TUTORIAL ON HOW TO MAKE YARN WRAPPED STARS
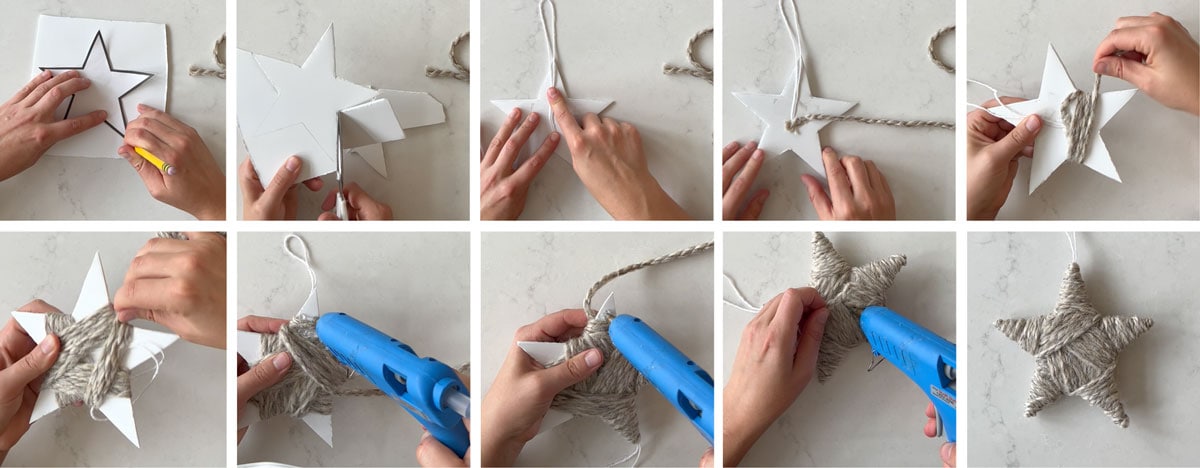
Step 1: Trace your star template on your board
Step 2: Cut out the cardboard or foam core star
Step 3: Tape down your hanger
Step 4: Tape down the end of your yarn
Step 5: Wrap the yarn around the star in any creative manner leaving the star points for last
Step 6: Hot glue the yarn down as you wrap it around the points of the stars
Step 7: Hot glue the final end of the yarn with a small amount of glue and weave it inside the other wrapped yarn and tie a knot
Step 8: Enjoy your finished wrapped star!

HOW COULD YOU USE YOUR YARN STAR ORNAMENTS?
Here are more ideas for how you could use these stars.
- Gifts and gift toppers
- Make a garland
- Loop on cupboard or drawer handles
- Christmas crafts for parties (for mom and kids of all ages!)
- Yarn star decorations all around the house and mantel
- Christmas tree ornaments
Would you like more Christmas Star ideas?
- Paper Origami Star
- Ceramic Star Ornaments (customizable!)
- Large Stick Star
- Hanging Clay Stars
- Dried Orange Peel Star Garland
- Beautiful Blue and White Christmas Tree
Please be sure to pin this idea to your Pinterest boards! Thank you! Sign up for my newsletters if you are not already!


About how big was the star you used for your star template? Thank you so much!