
This post may contain affiliate links, which means I get a small percentage of the sale at no extra cost to you. I only recommend items I love and have had a positive experience with. Thank you!
Learn how to install cabinet hardware, the easy peasy way!

*This post is sponsored by Liberty Hardware, but all opinions, text, and images are my own.
Furniture hardware.
The DIY gals “bling bling” of choice . . . am I right?
Don’t bother with diamonds, ruby’s, or emeralds . . . just make my furniture shine!!
(P.S. If you are Mr. TIDBITS, you can totally bother with diamonds, ruby’s, or emeralds any time you want. . . AND make my furniture shine. Just clarifying).
Whether you are updating an old piece of furniture/cabinetry or building from scratch, that final piece of hardware can make or break your project.
Be sure you get just the right ones, by shopping Liberty Hardware’s HUGE-A-MUNGOUS selection online. Or find a retailer like Home Depot who carries Liberty Hardware products.
But I warn you, shopping for diamonds never left me with a “me-wanty” list like shopping for hardware for our office DIY furniture.
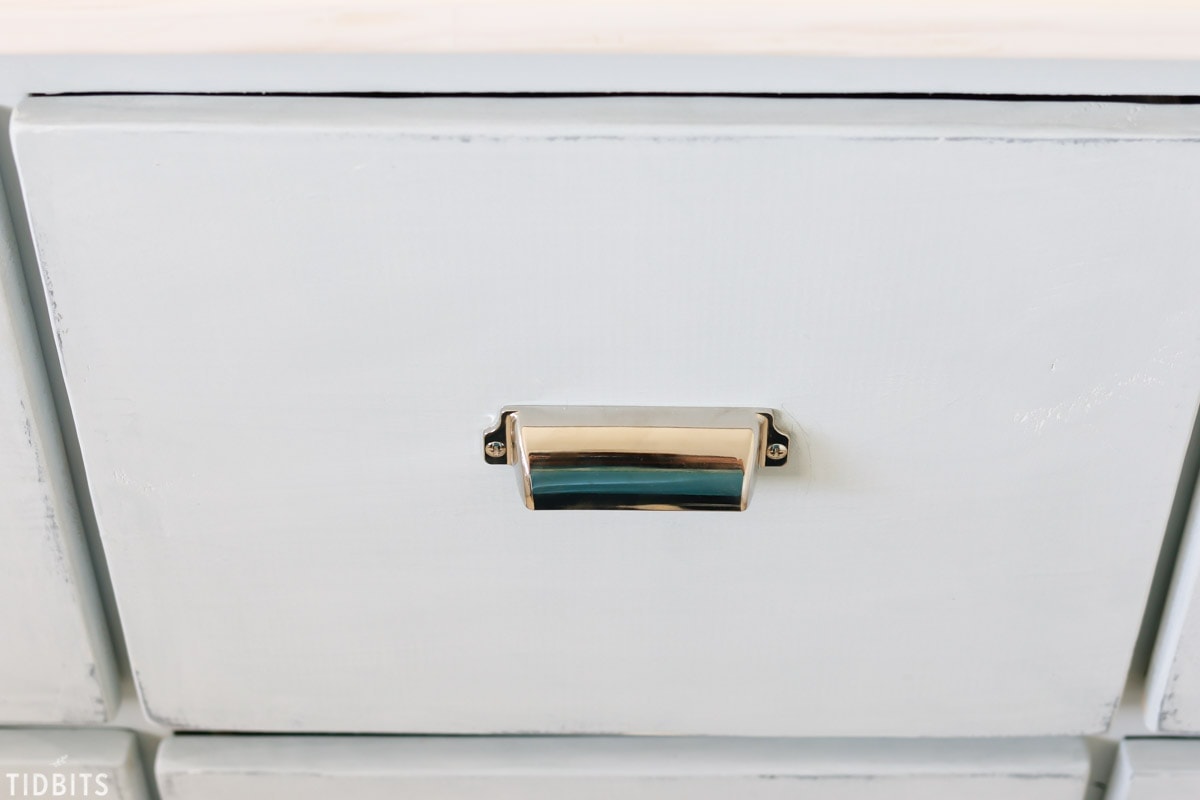
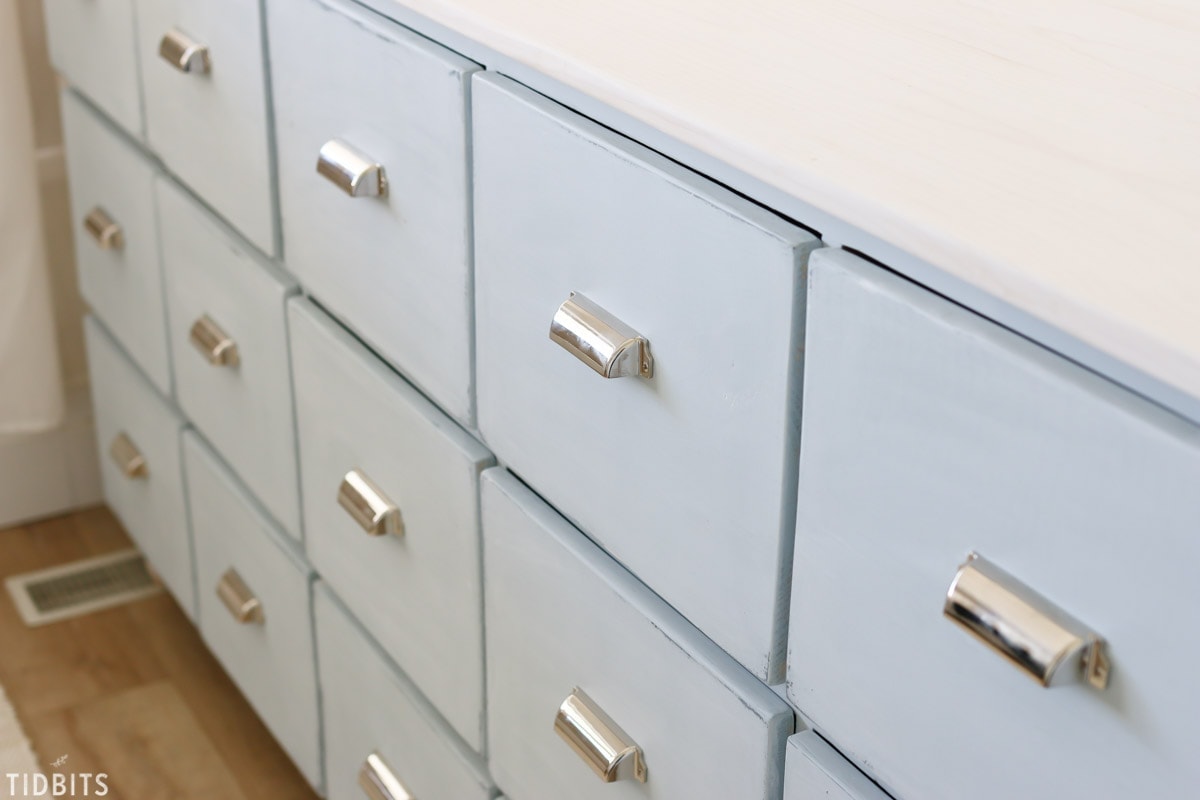
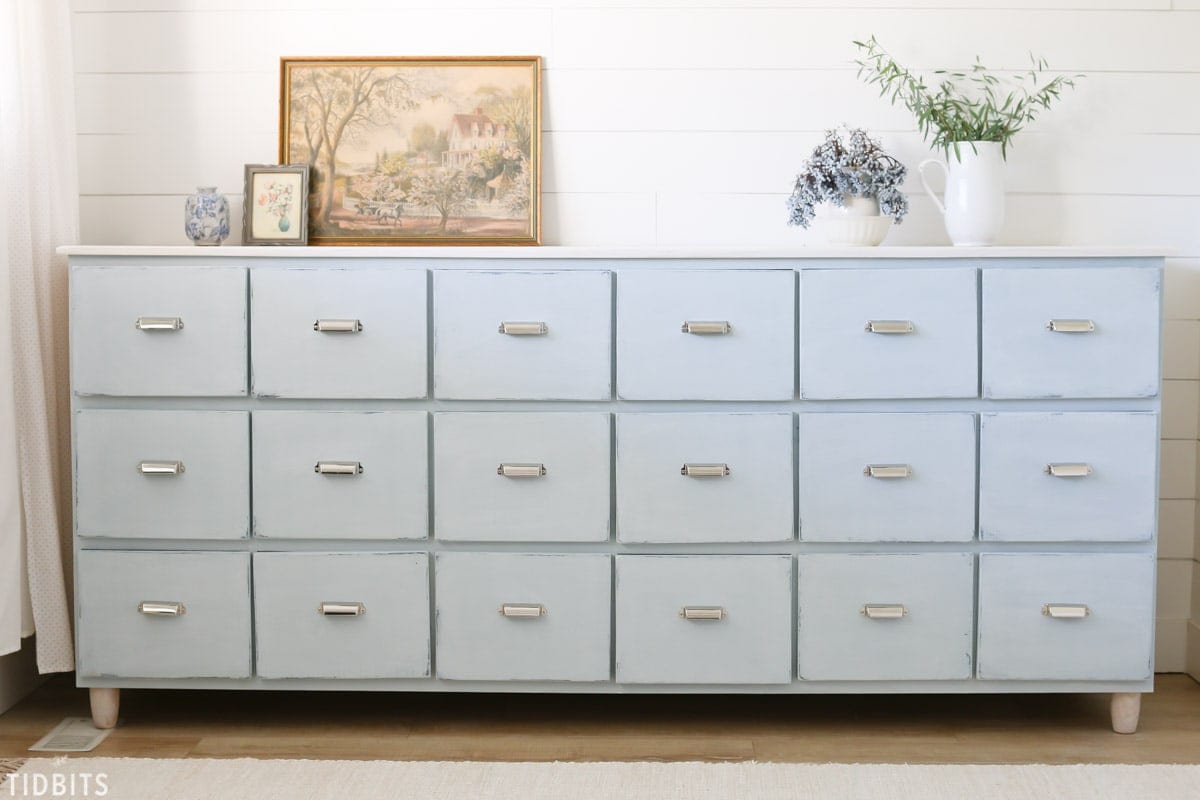
I narrowed it down to THIS vintage inspired cup pull hardware for our 18 drawer apothecary cabinet. I wanted a classic vintage style in the end, and the shiny silver mixed with the shape of the pull really helped me pull this off.
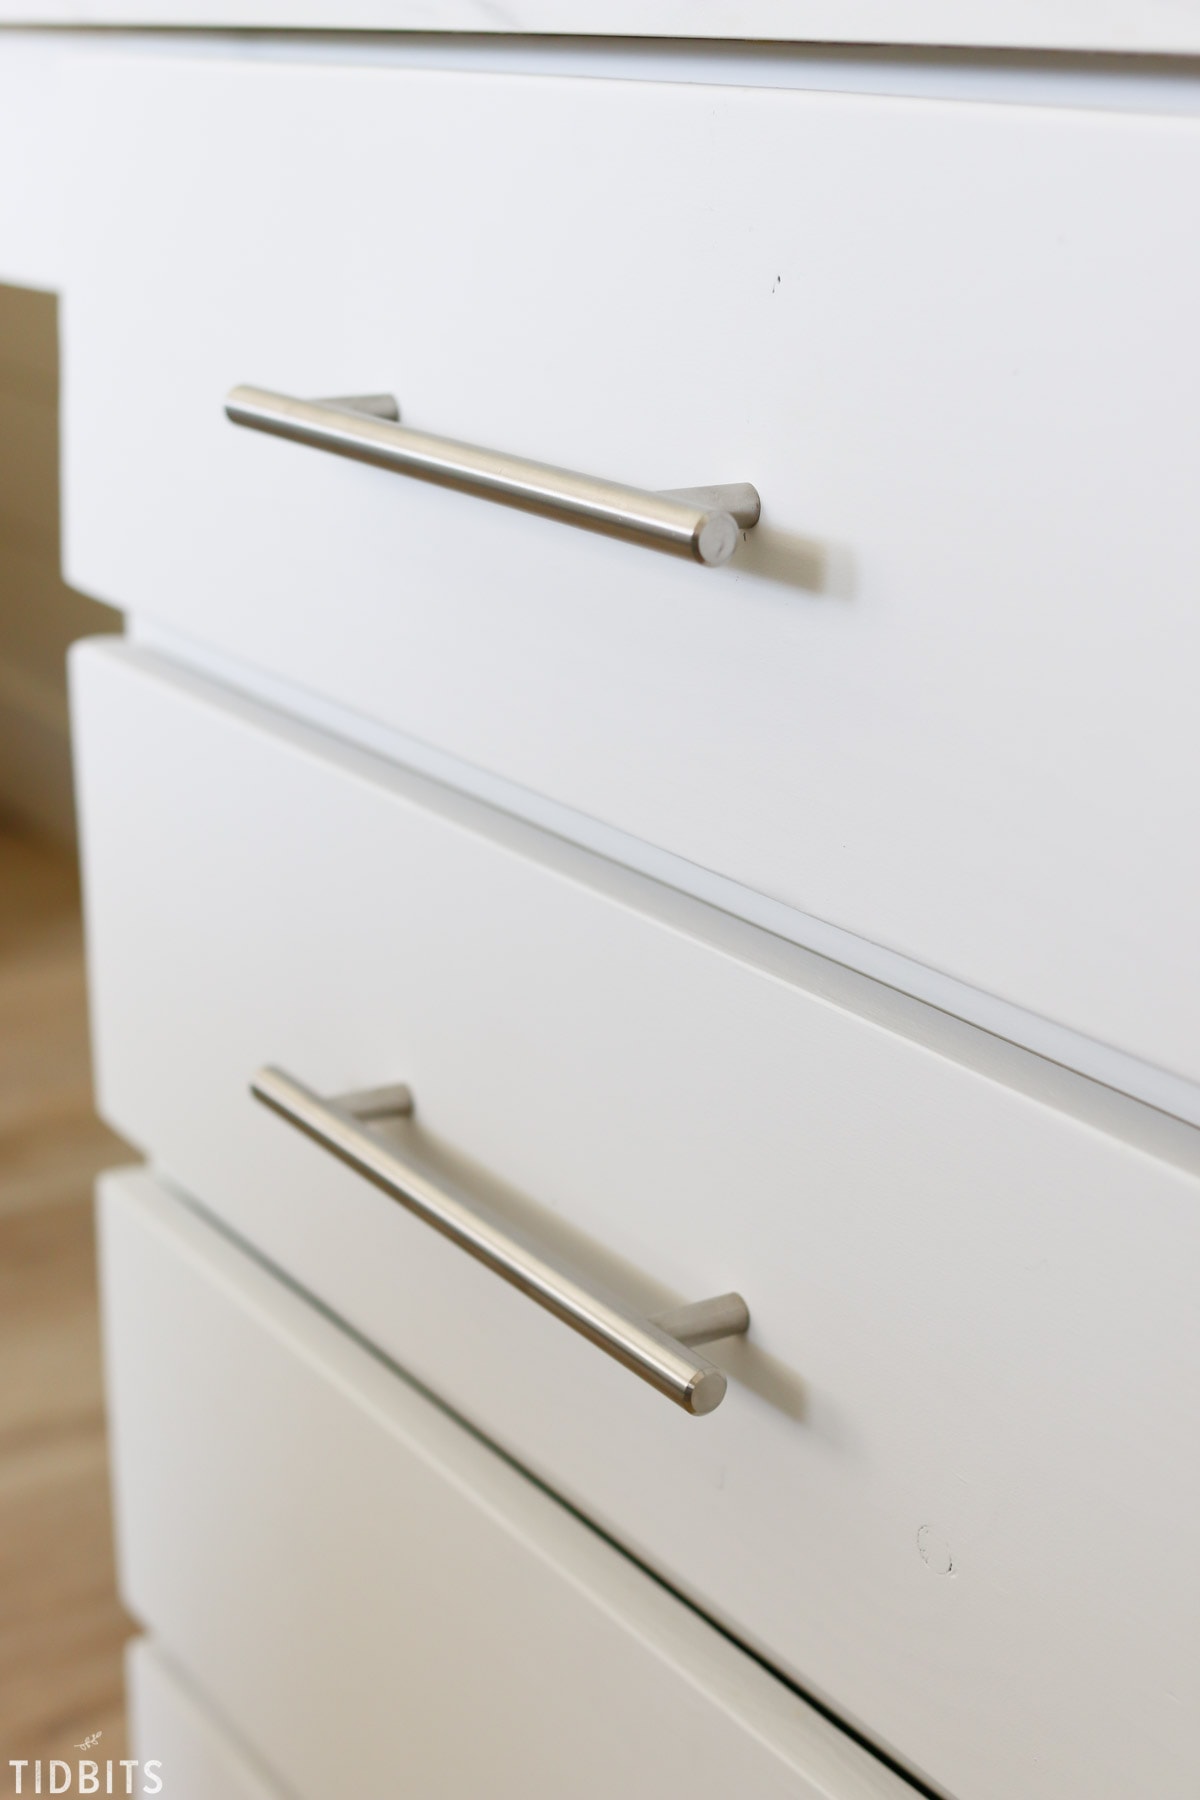
We also installed THIS silver bar pull hardware on our office desk (to be shared soon!).
There were some tools that really made installing over 20 pieces of hardware a breeze.
I’m bringing Mr. TIDBITS back to explain how he made quick and easy work at installing our 2 different types of cabinet hardware. I hope this tutorial can help you at some point in your DIY adventures! Let us know if you have any questions.
*This post contains affiliate links.
Mr. TIDBITS . . .
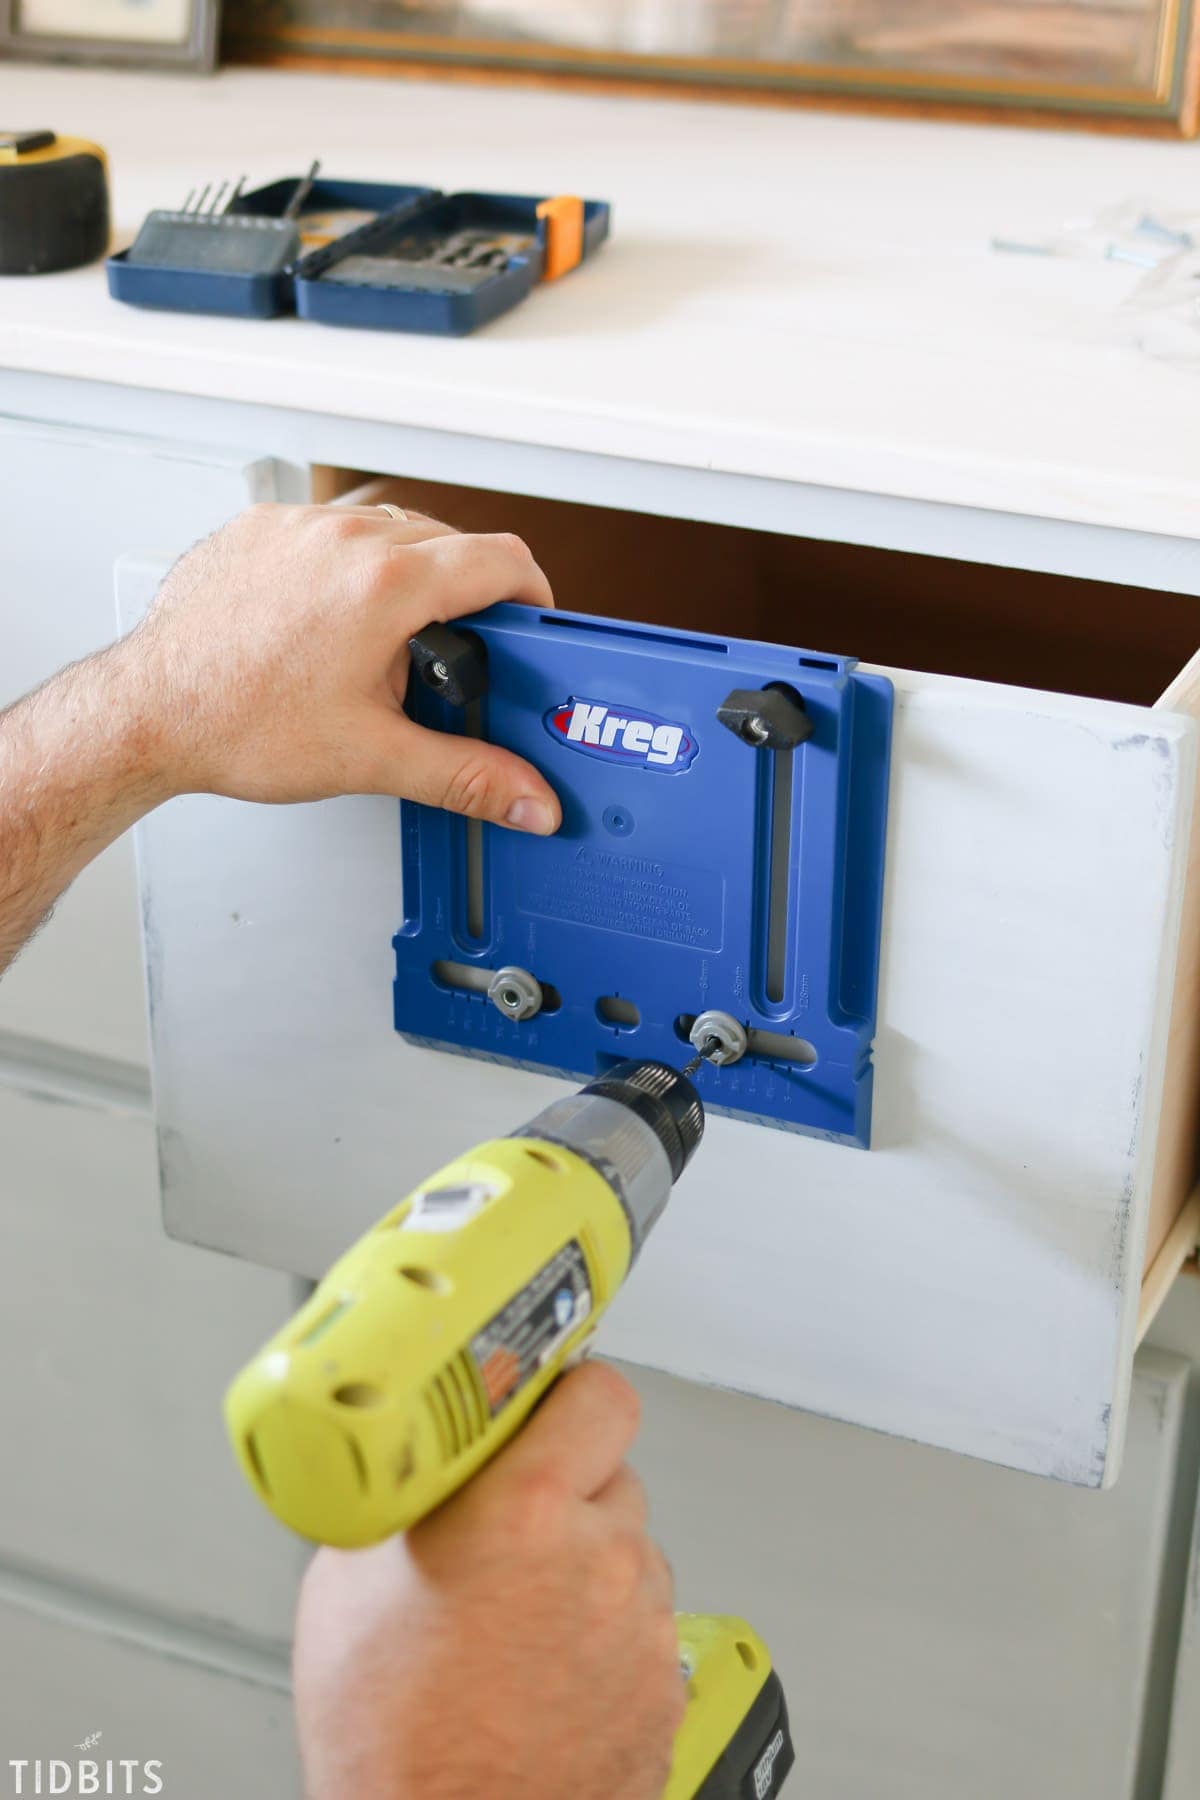
First things first, always find the center of the drawer. Unfortunately we didn’t get a picture of it on this first handle but rest assured that I did it. For these narrower handles I was able to use my Kreg Cabinet Hardware Jig to drill the holes. This made it nice since I only needed to set it up once and then go crazy with the drill. I find the center and then set the width of the guide holes on the jig to the same width as the ones on the handle. Then I set the vertical stop screw where I wanted the holes to go. By vertical I mean the up and down measurement.
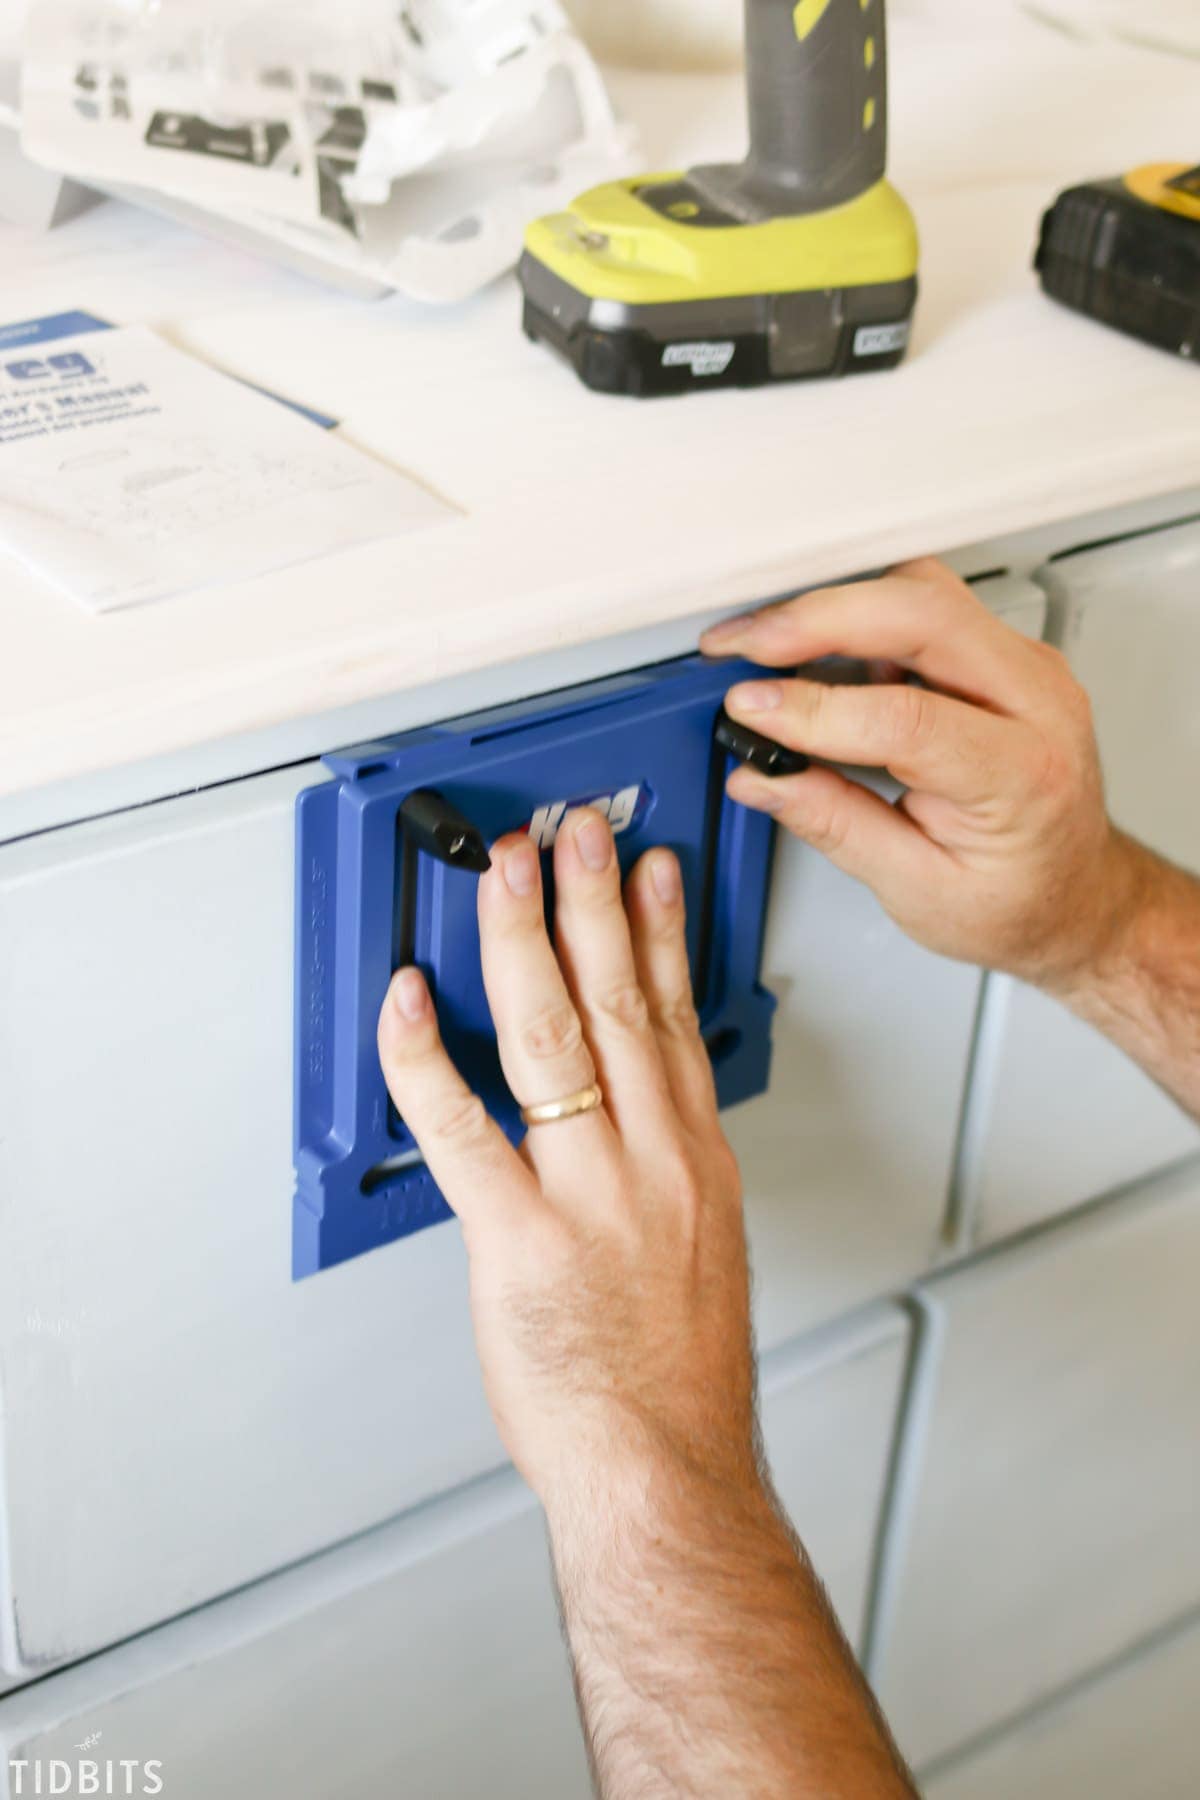
Once all the screws are tightened up on the jig, I had my daughter go ahead of me and mark the centers and then let the drill do all the work.
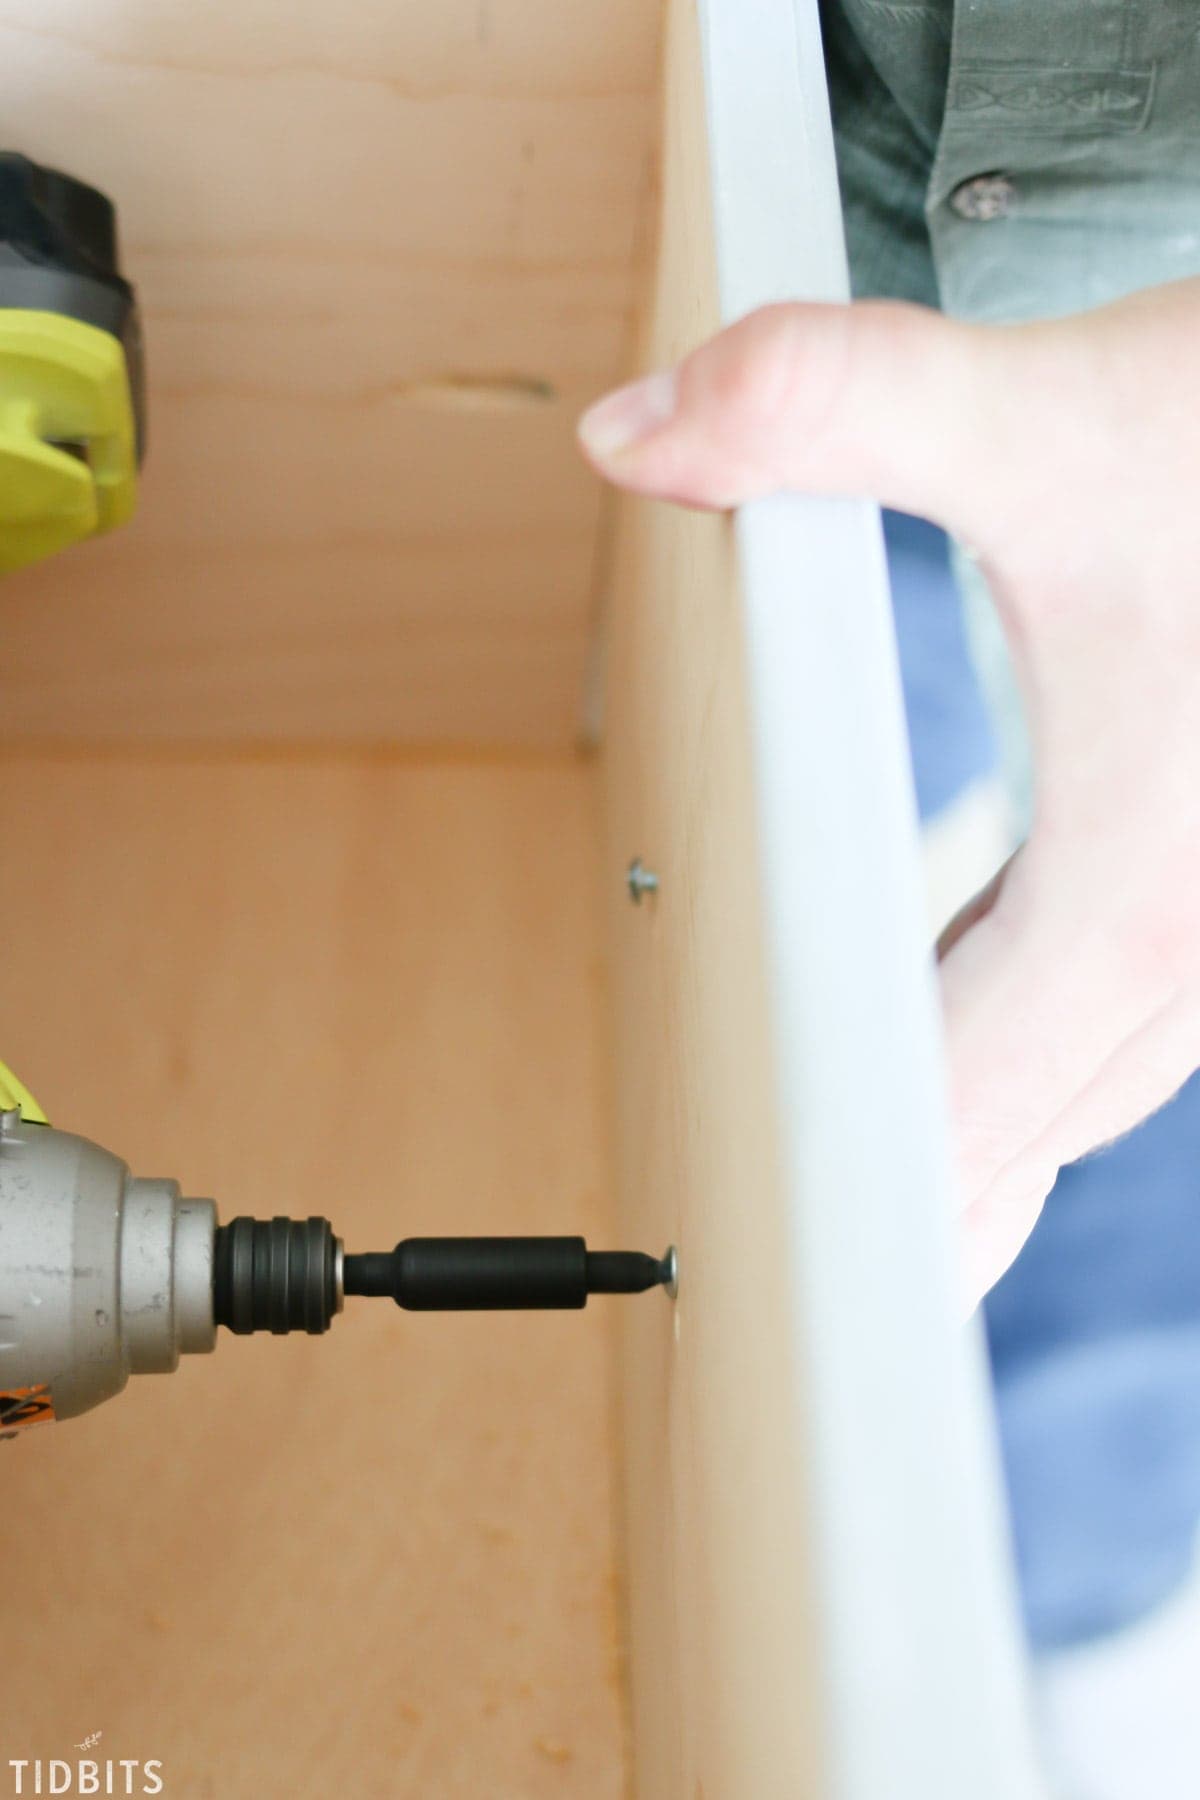
Once the holes are drilled, I hand threaded them into the handles and then tightened them up with a drill. If you don’t have a lot of experience with a drill I would recommend using a screw driver as the screw heads can be easily stripped out if not careful.
This Ryobi drill is the one I use.
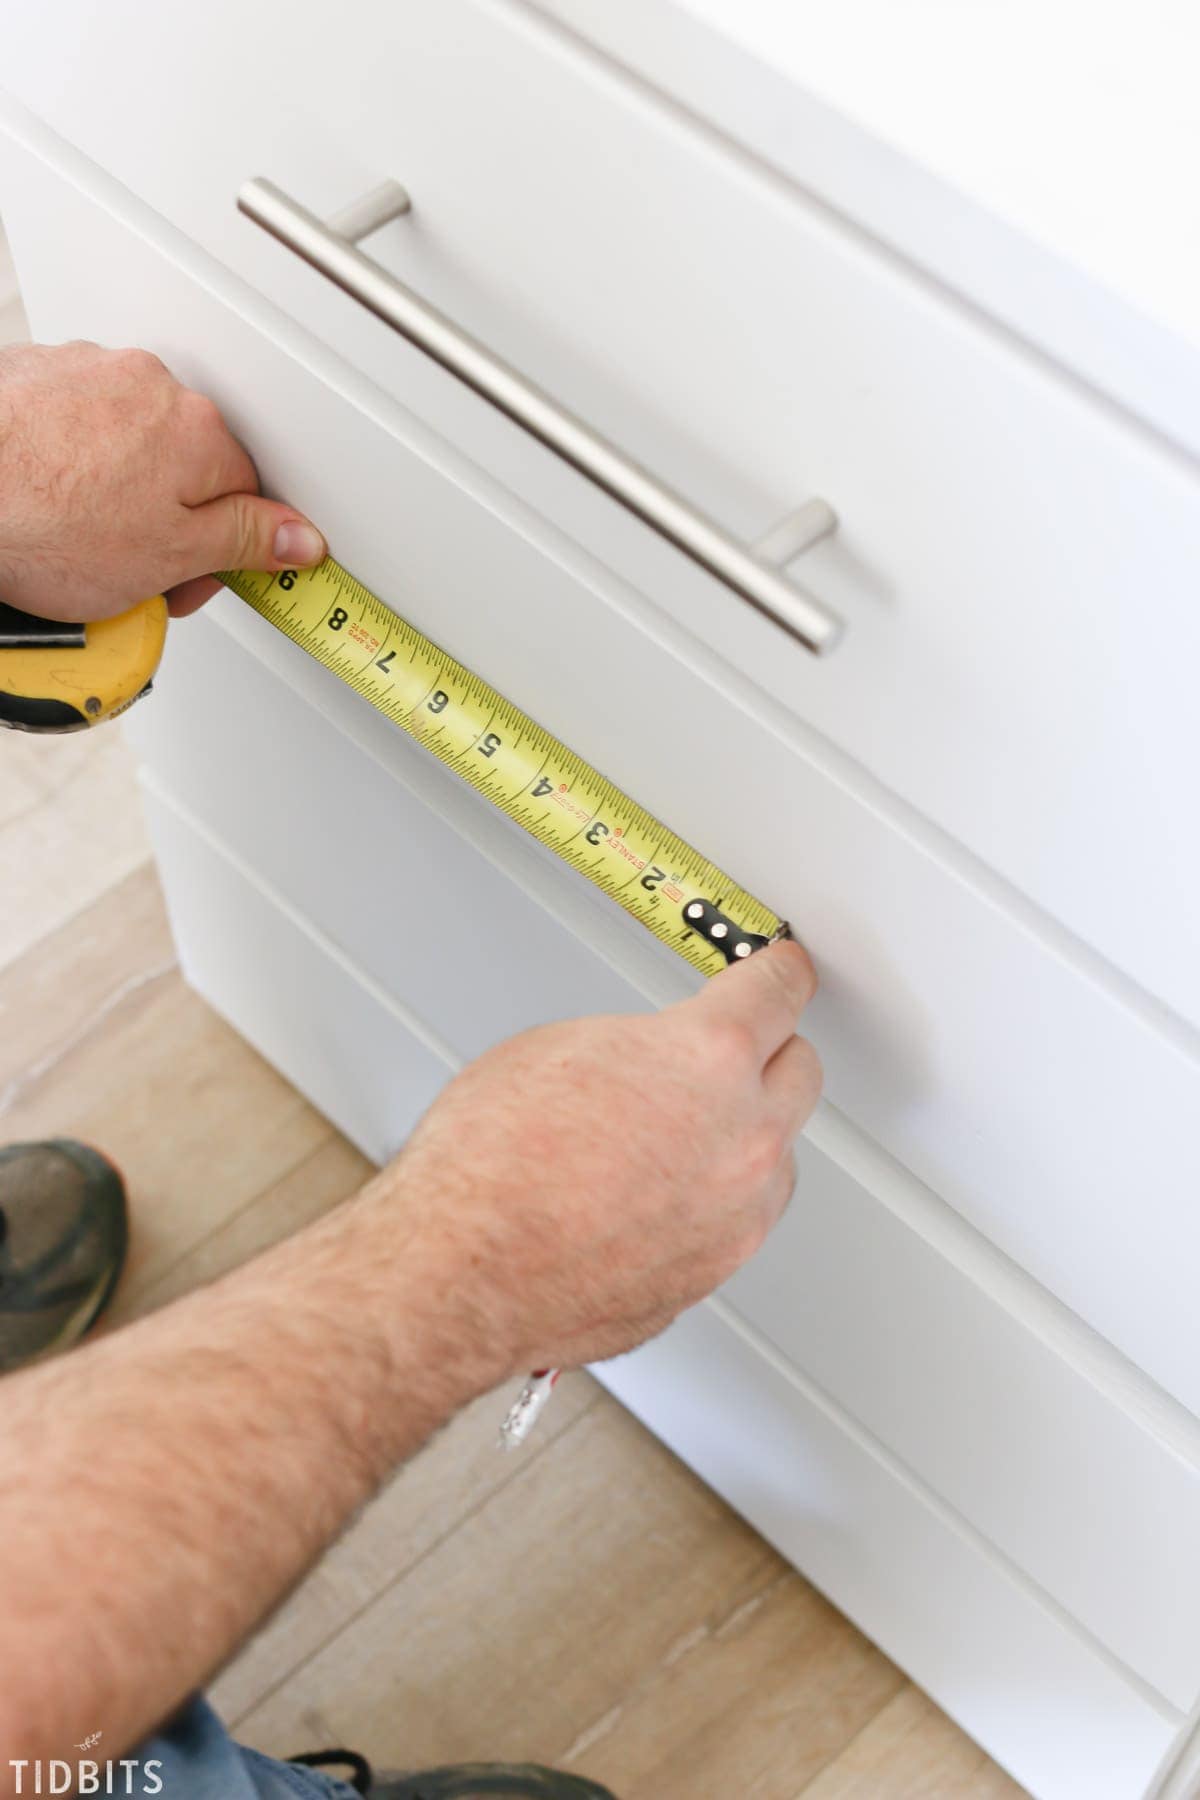
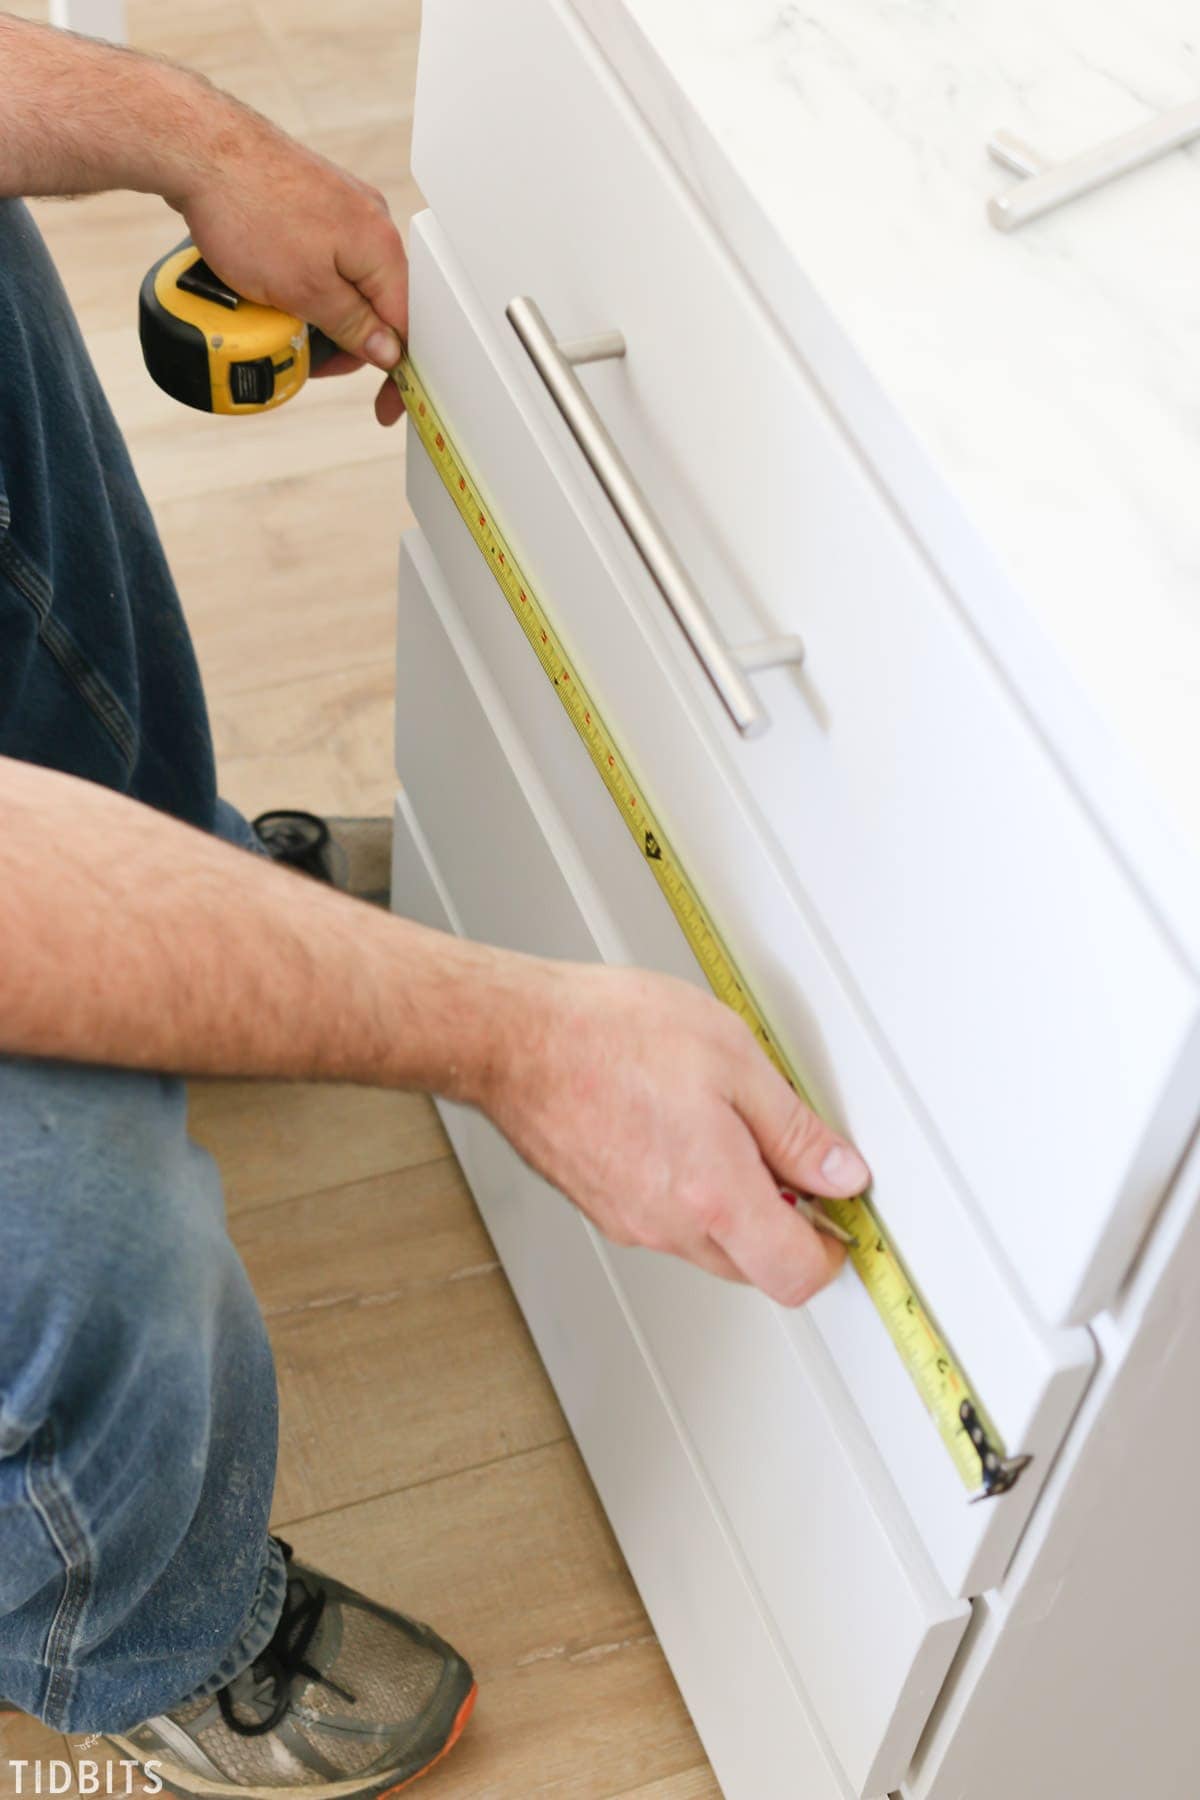
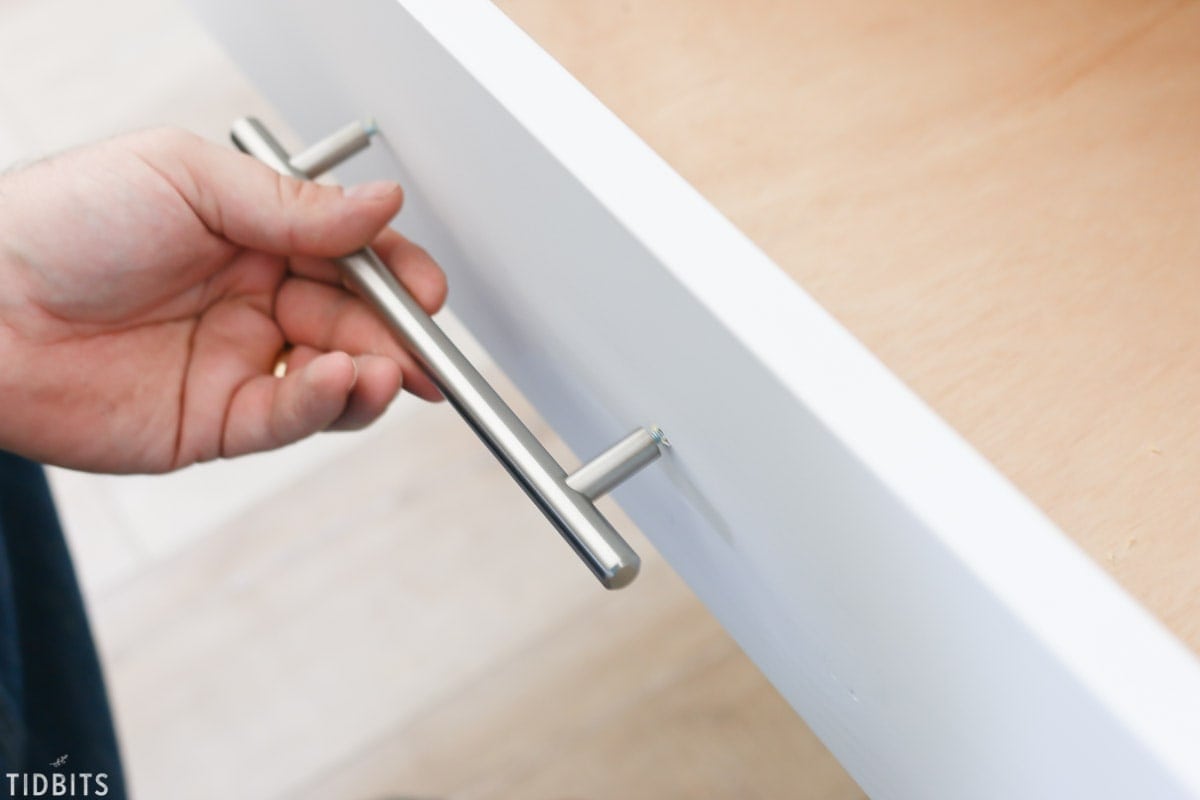
Unfortunately my handy dandy Kreg jig wasn’t wide enough for the longer bar handles so I had to do it the old fashioned way, which you can also do if you are without a Kreg Jig. First step, as always, find the center as seen in the picture below (see I got it this time).
Second step is figure out how wide apart the holes need to be. Luckily for me these handles from Liberty Hardware had the distance on the packaging so no need to attempt it with my measuring tape as pictured below.
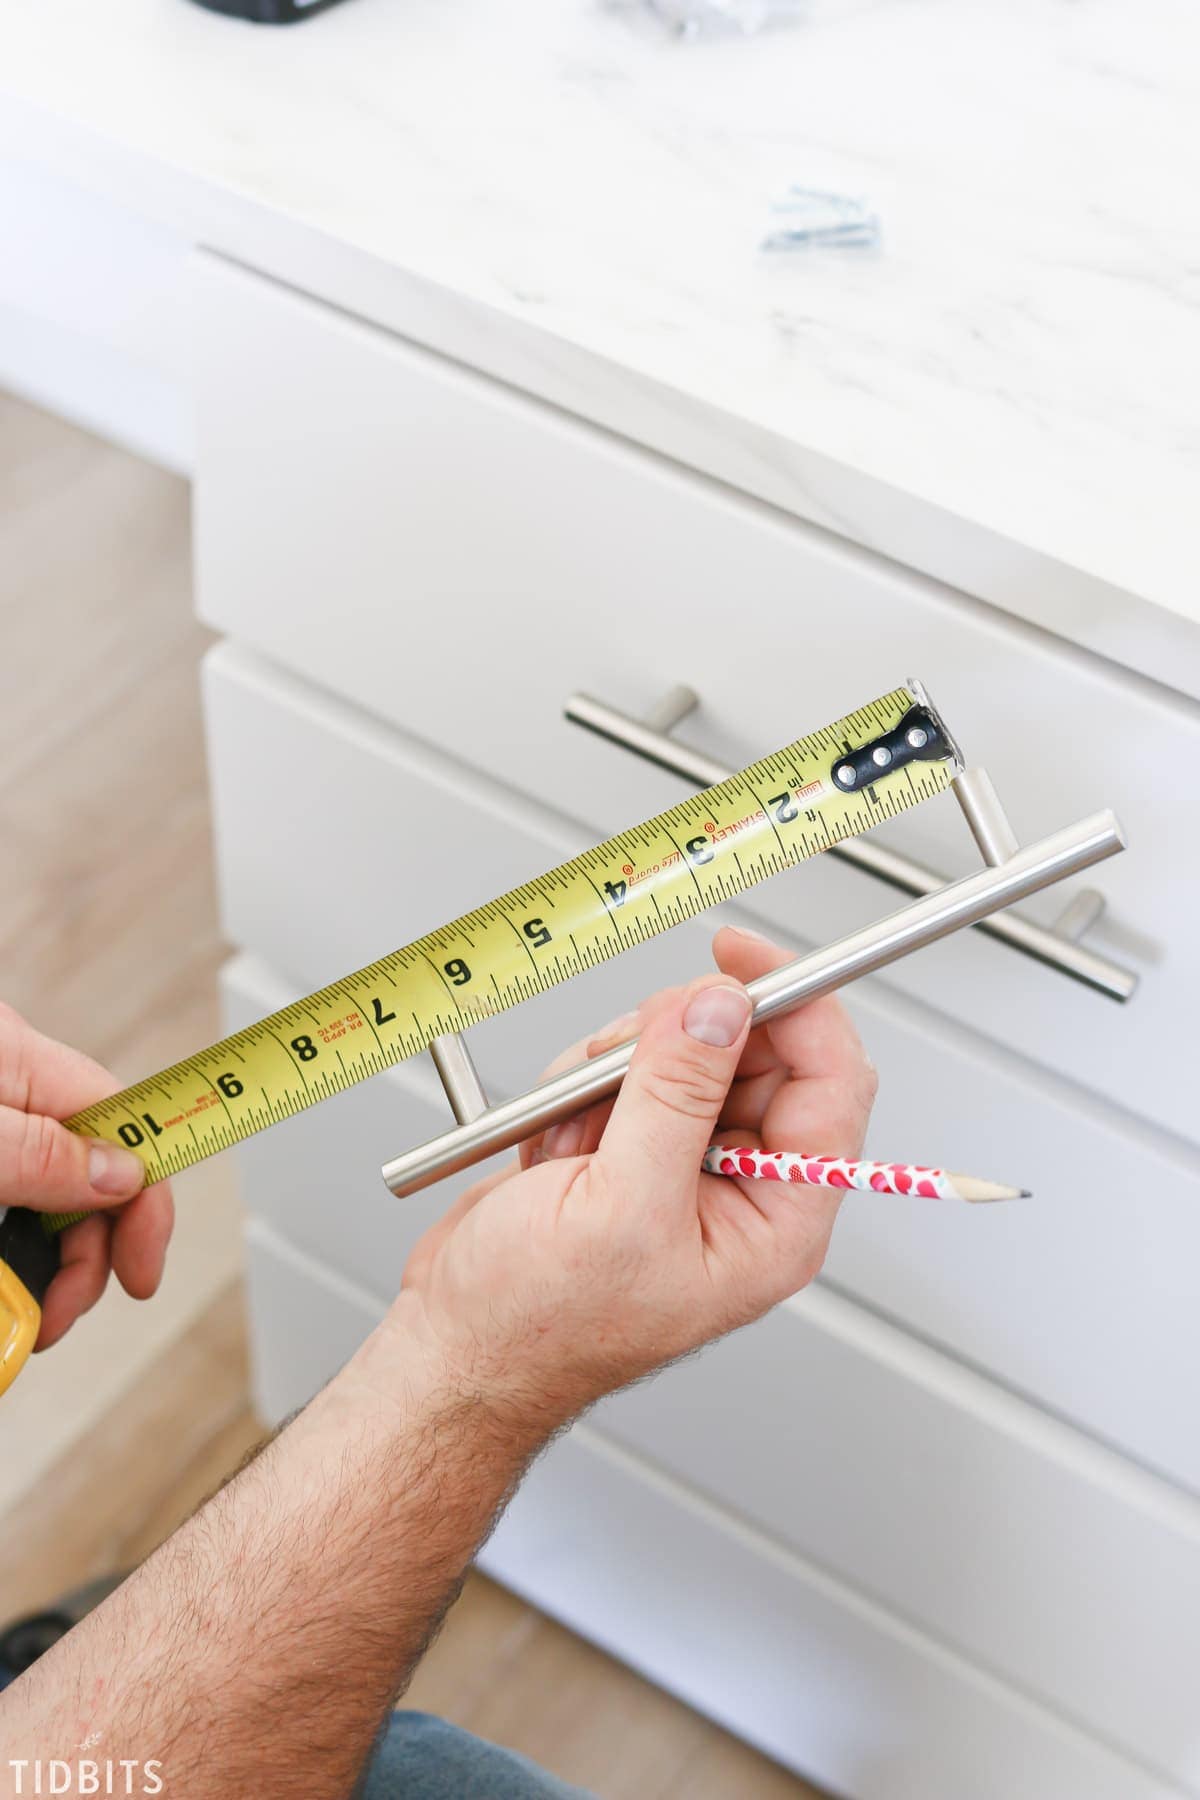
Third step is to take the width of the holes and divide it in half. With that measurement go that far to each side of the center mark. For example, 6 1/4″ wide holes equals 3 1/8″ to either side of the center mark. I try to make this mark at about where I think the center of the drawer is up and down wise so that I don’t have to move the mark very far in the next step.
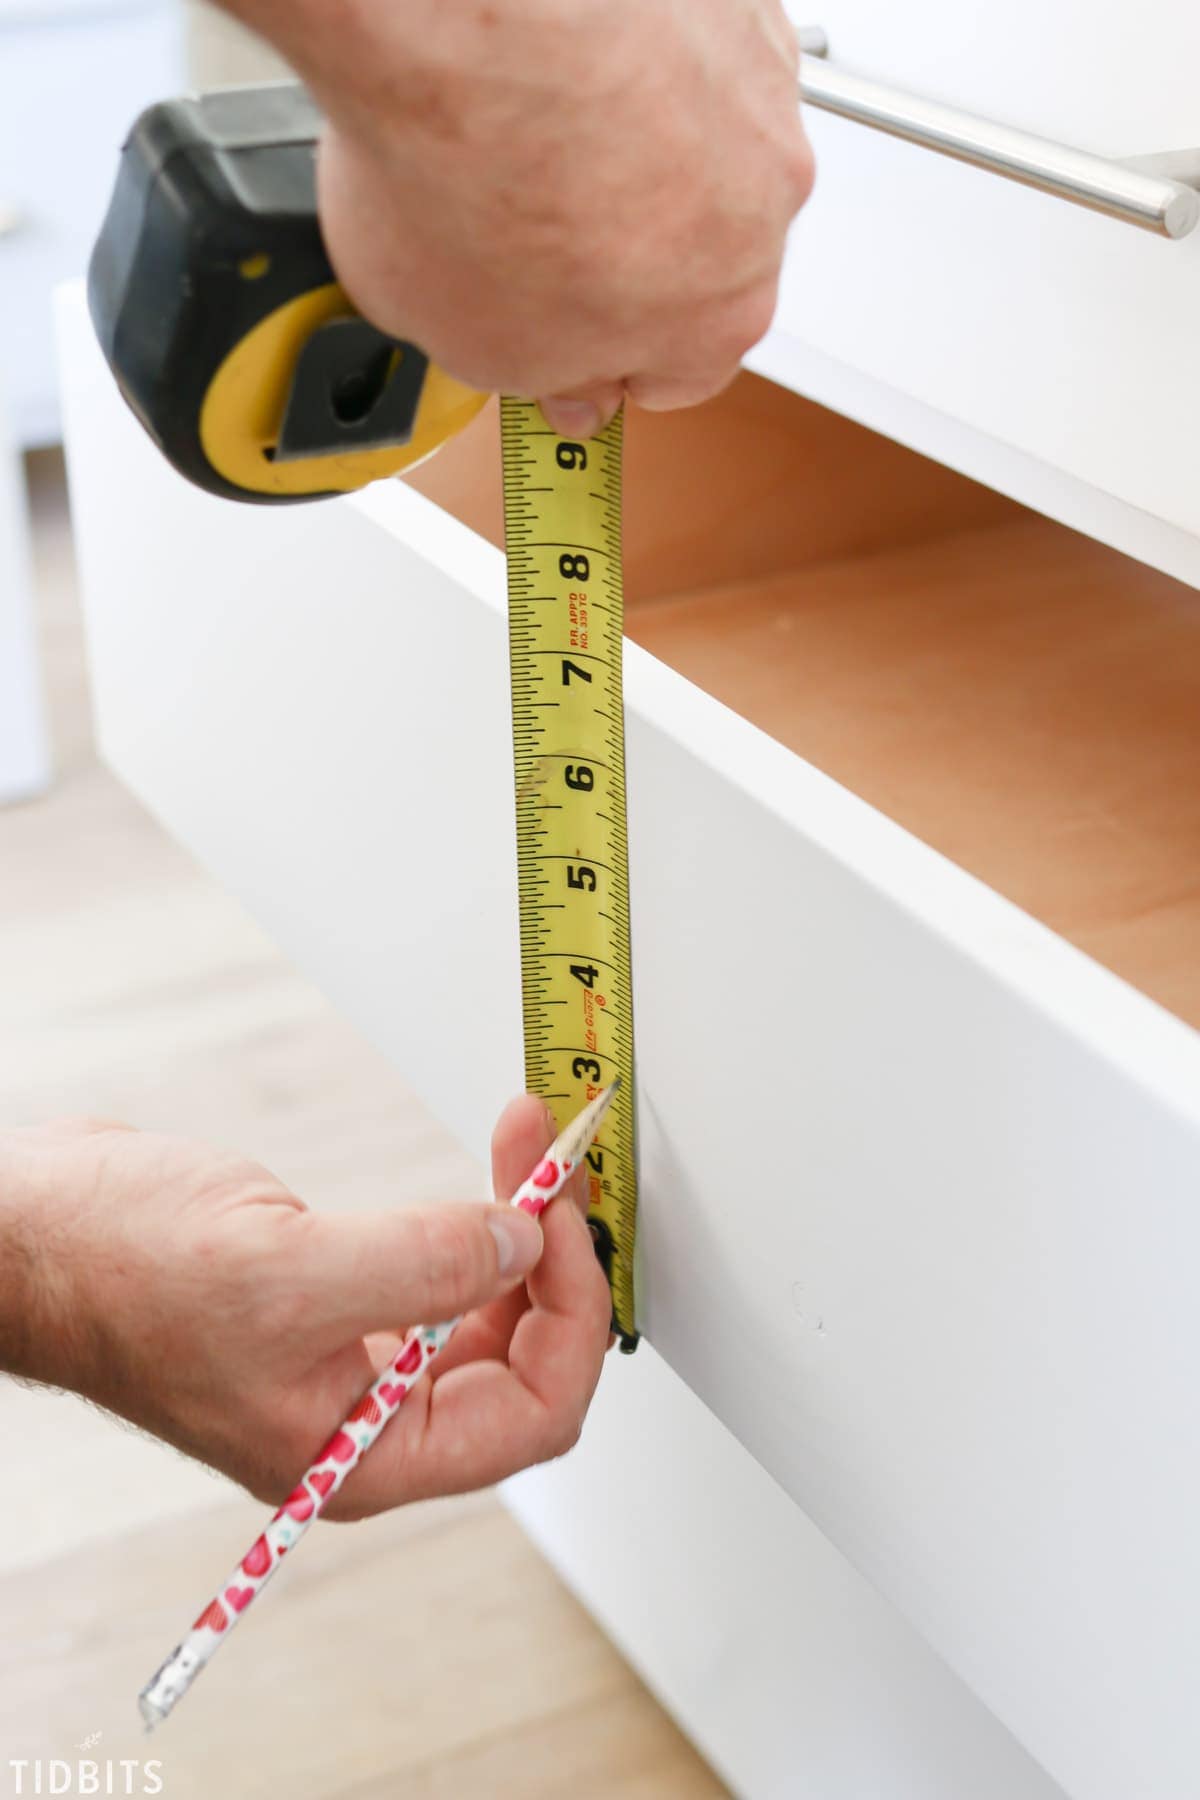
The next step is where you need to find the vertical center, which is what I meant by up and down wise. At each of the two marks you just made, measure to the center up and down wise and make that mark in line with the other. That is where you will drill the hole.
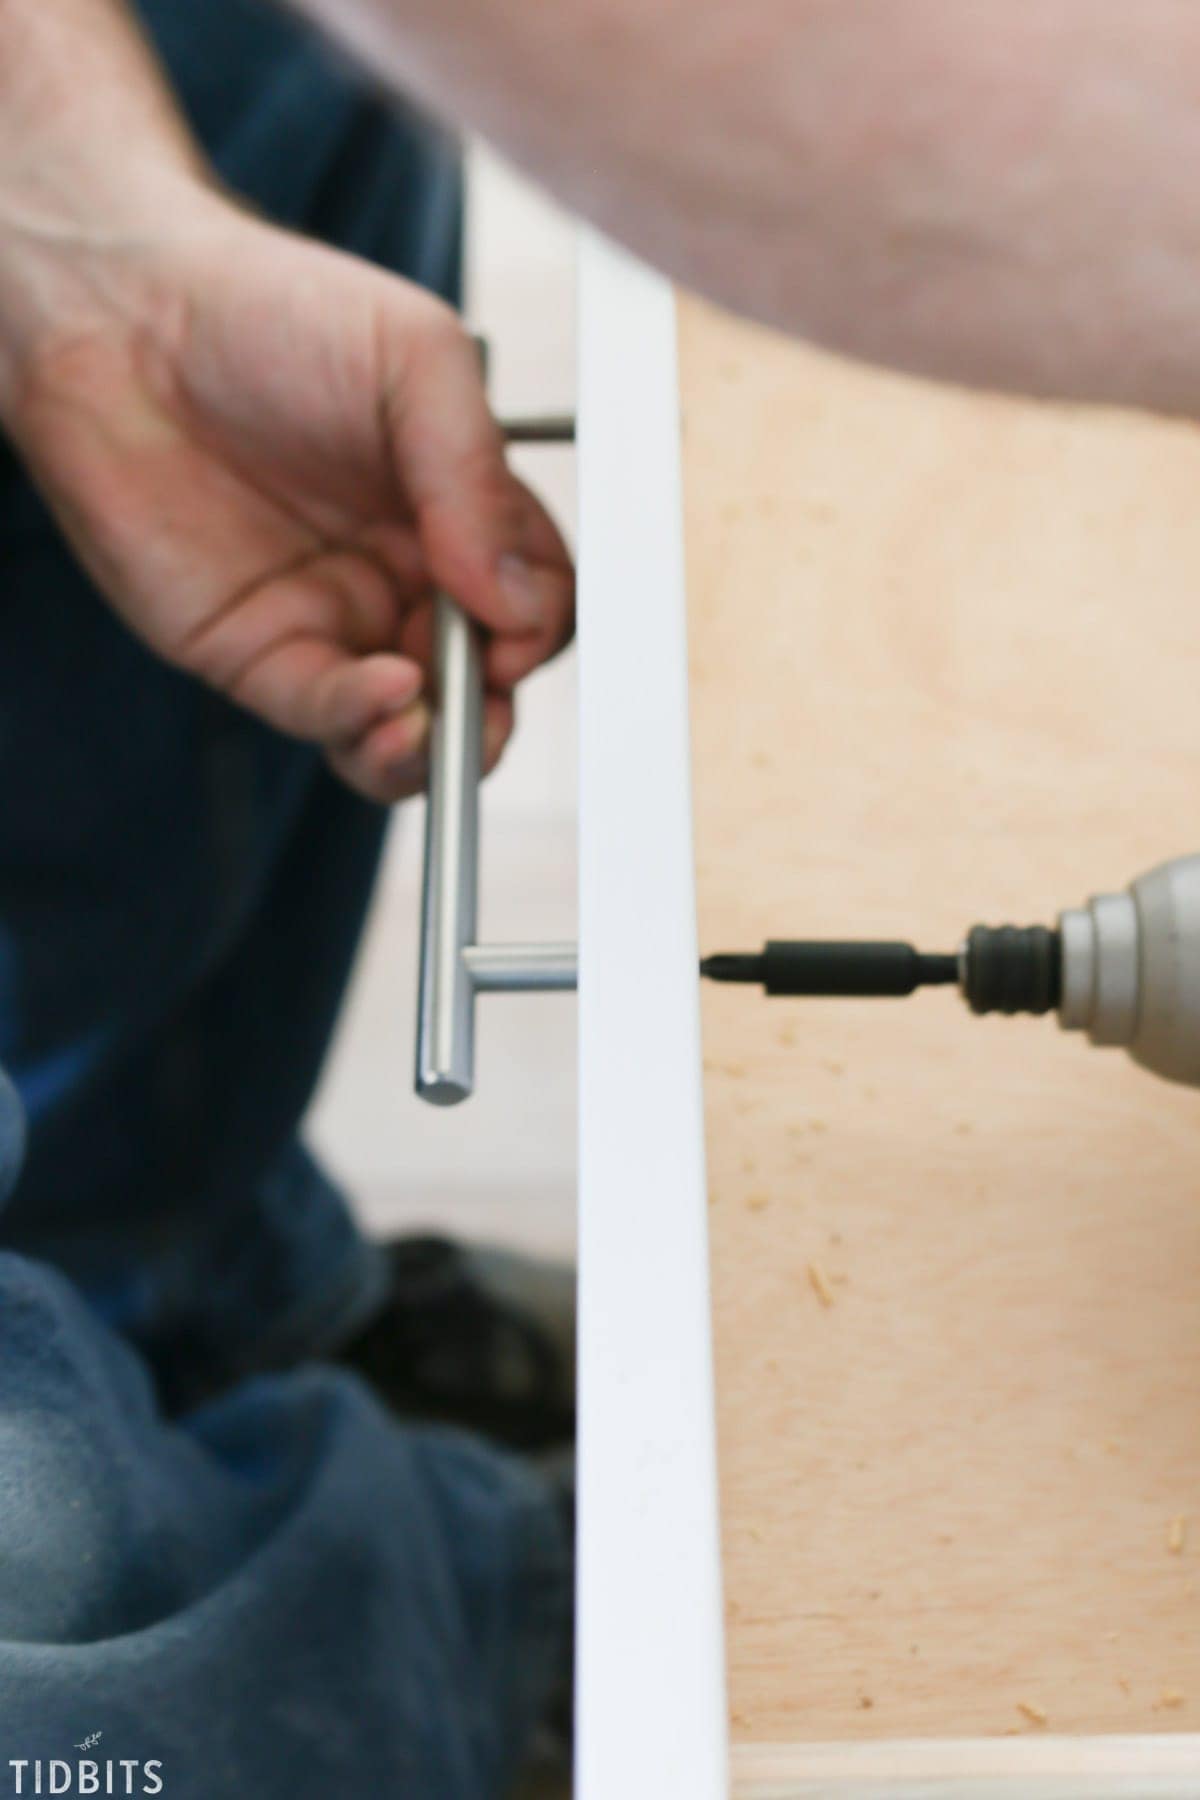
Next step . . . drill the hole.
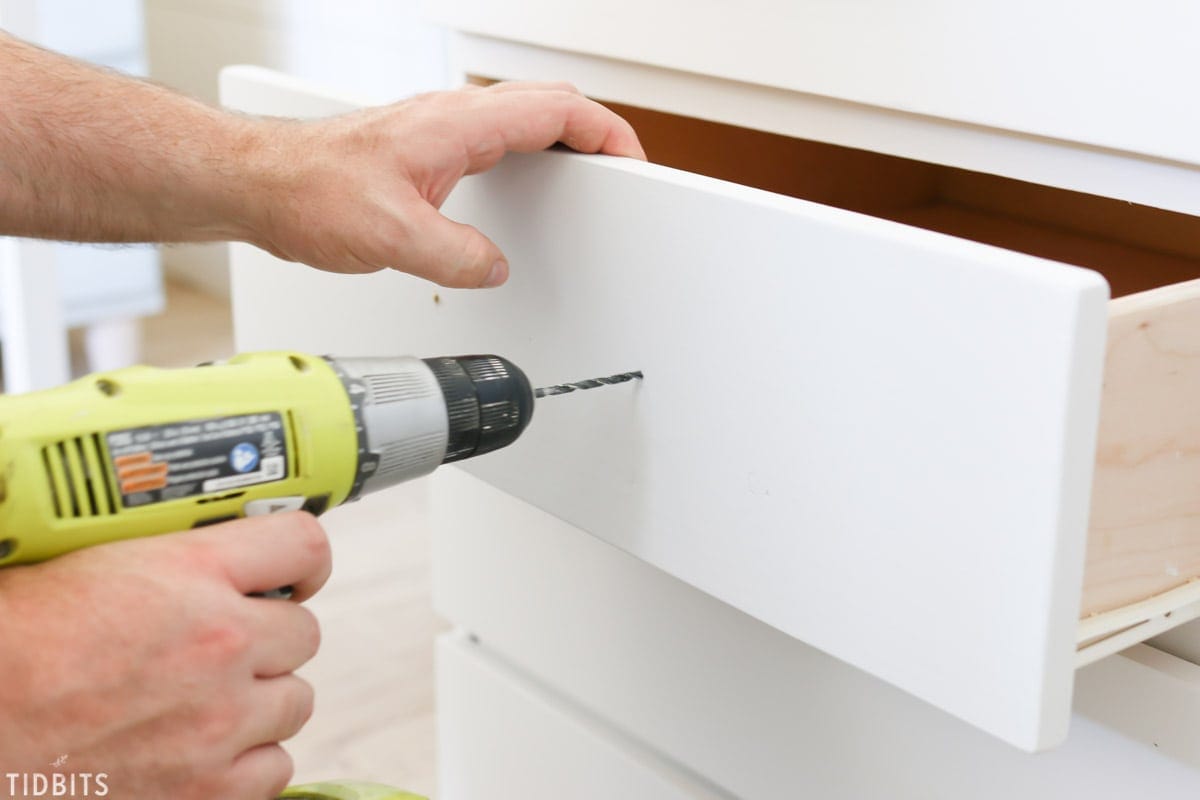
Hand thread the screws through the hole and into the handle.
Tighten the screws, again with the same warning as above.
Now finish by opening and closing it several times just to admire your handiwork, because everyone knows that helps.
Be sure you check out the plans for our 18 drawer apothecary cabinet, and Cami’s tutorial on how to give new wood a vintage painted finish.


Great DIY project. The cabinet looks so cute and simple and i love it! Thank you for putting effort in attaching pictures of the step by step process. It makes it easy to follow.
I love the shiny cabinet handle. It looks simple but elegant. I am actually planning to install additional kitchen cabinets, and I would definitely take heed of your advice on how to install the handles of a drawer. Thanks.