
This post may contain affiliate links, which means I get a small percentage of the sale at no extra cost to you. I only recommend items I love and have had a positive experience with. Thank you!
Pushing up my sleeves, and getting my paint game on! Sharing the difference a coat of fresh paint can make on this antique cabinet makeover.
Today felt like a good day to finally makeover this antique bead-board cabinet I picked up for our living room. I’d like to tell you a little bit about this piece, share all about the paint I am using and take you along to see it transform.
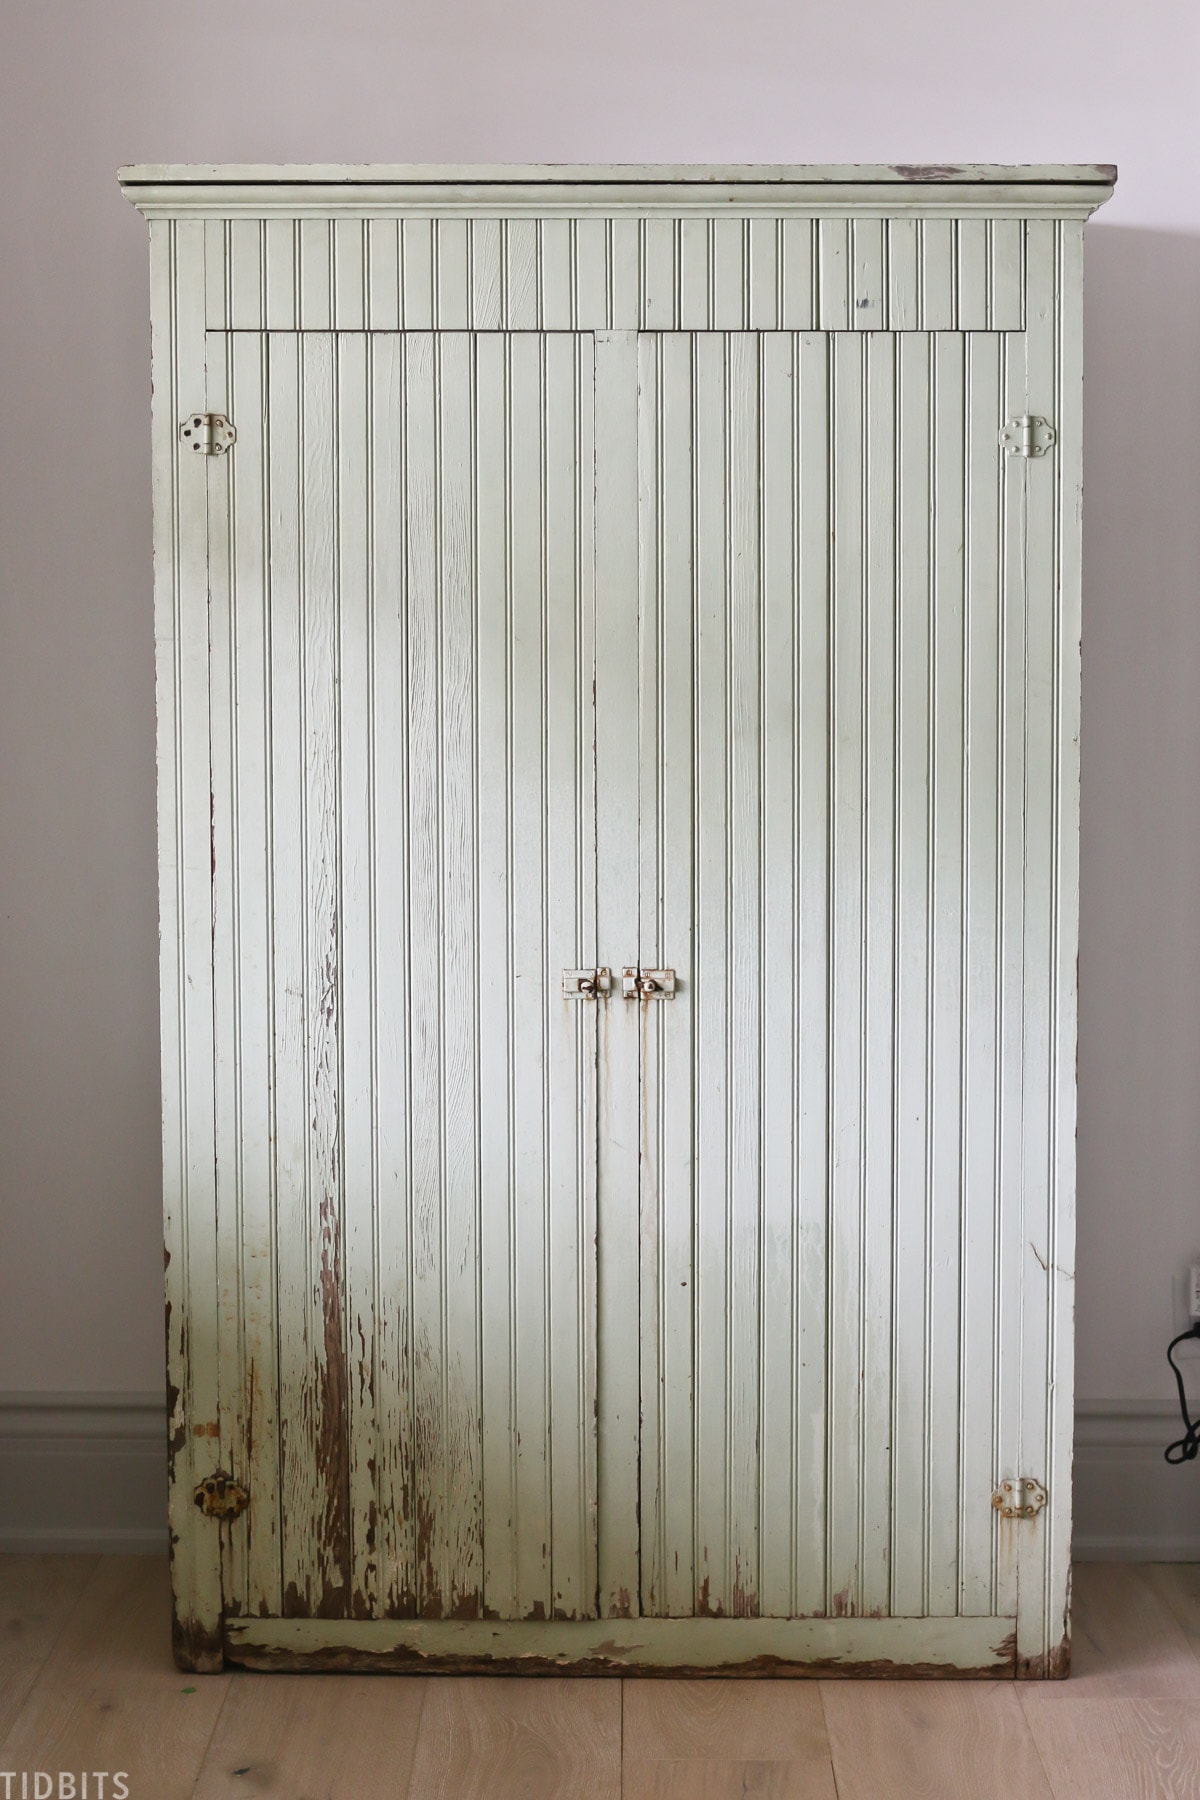
I picked up this storage cabinet, cupboard, hutch – whatever you want to call it – at an antique store quite awhile ago. I immediately fell in love with it.
WATCH THIS POST
Prefer to see the painting in action? I’ve got a video for this post!
I loved the shape, the size, the simplicity, and I even loved the chippy paint and wear that was obvious from this old piece.
I also loved the price, coming at just over $100. I’d seen similar cupboards priced over $1000.
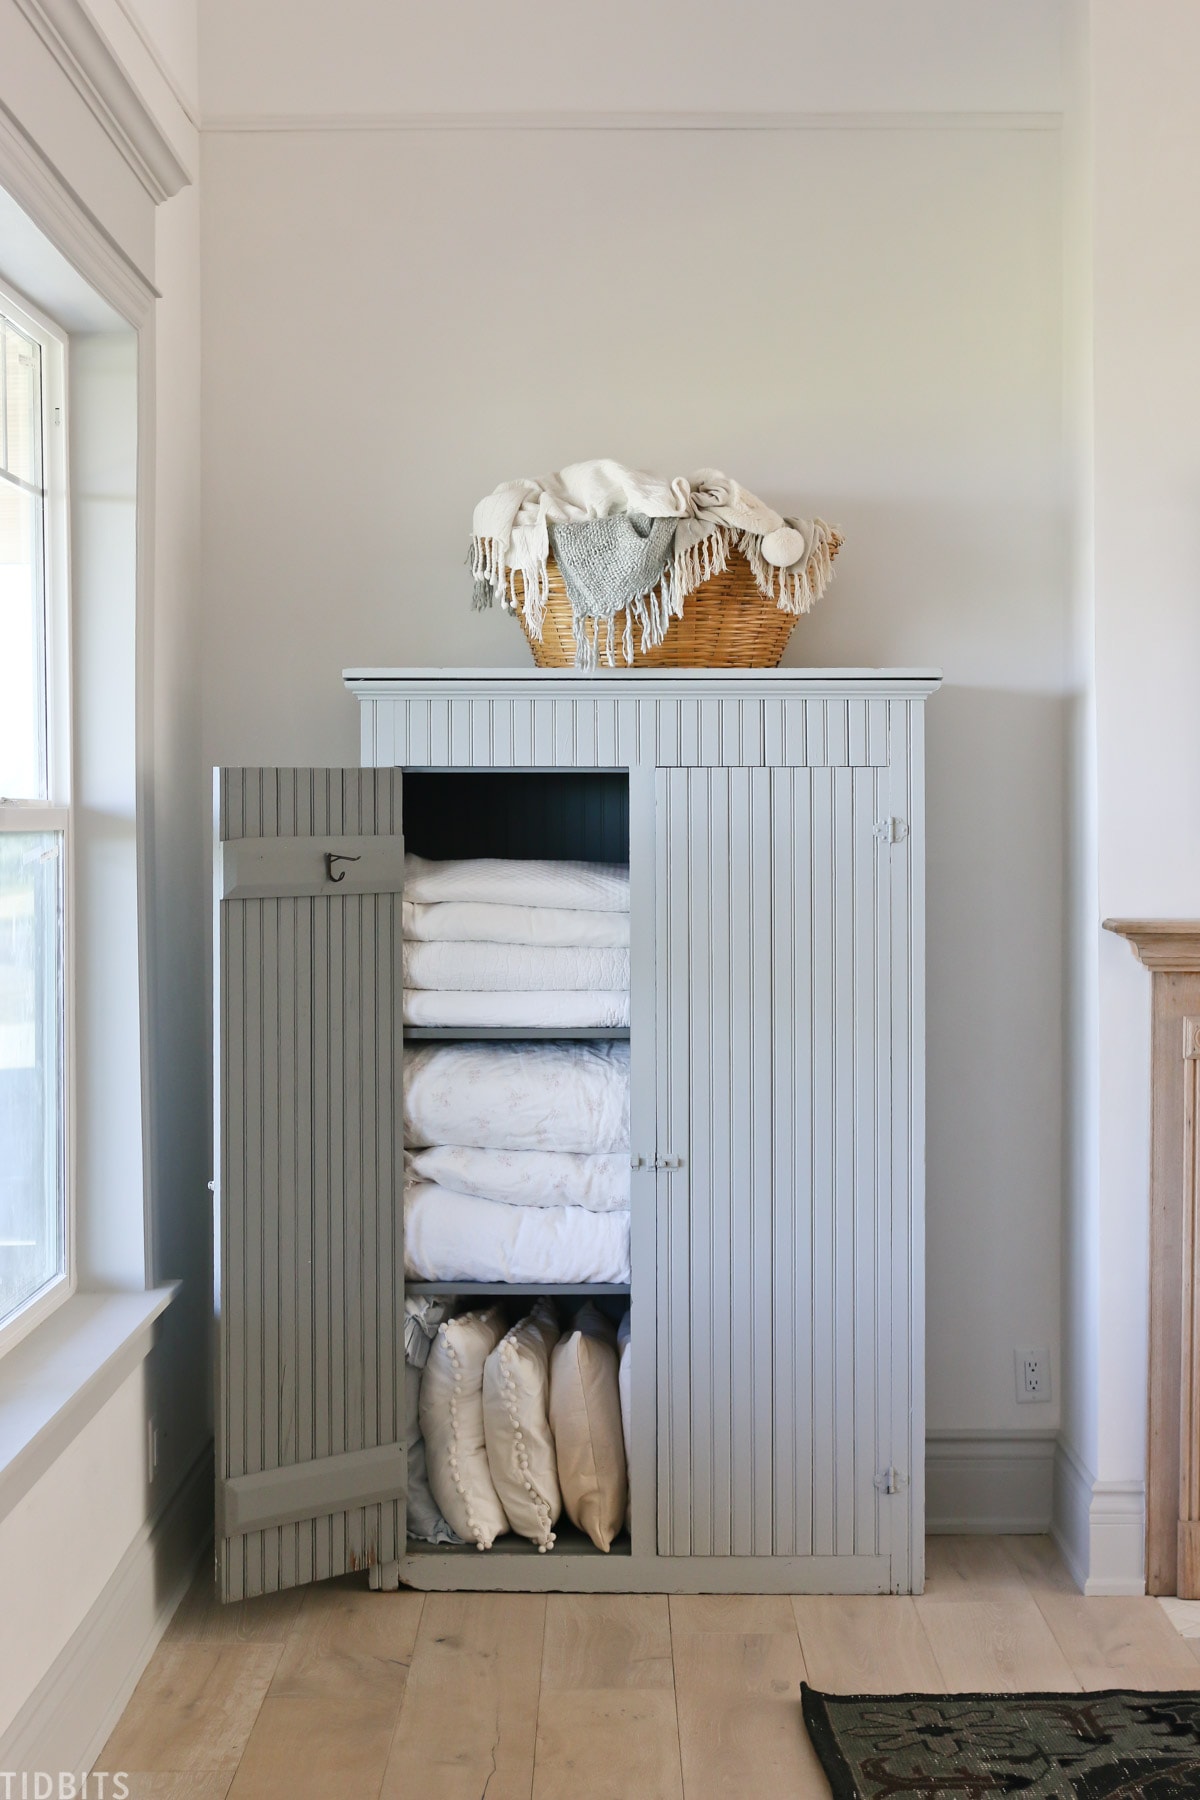
What I didn’t love, was the color. I’ve just never been a fan of candy apple green, but I bought it thinking I could like it in a kids bedroom. Well, when we got it home, I found it to be the perfect size for this spot beside our TV and mantel, and I knew it would be the perfect storage for our extra blankets, linens and pillows.
I had known all along I didn’t want built-in shelving here, but rather some really cool furniture pieces to create more of a curated home look. But the candy apple green did not fit in with my earthy color tone palette for this new space. That’s when I knew it needed to be painted.
PAINTING AN ANTIQUE CABINET WITH CHALK PAINT
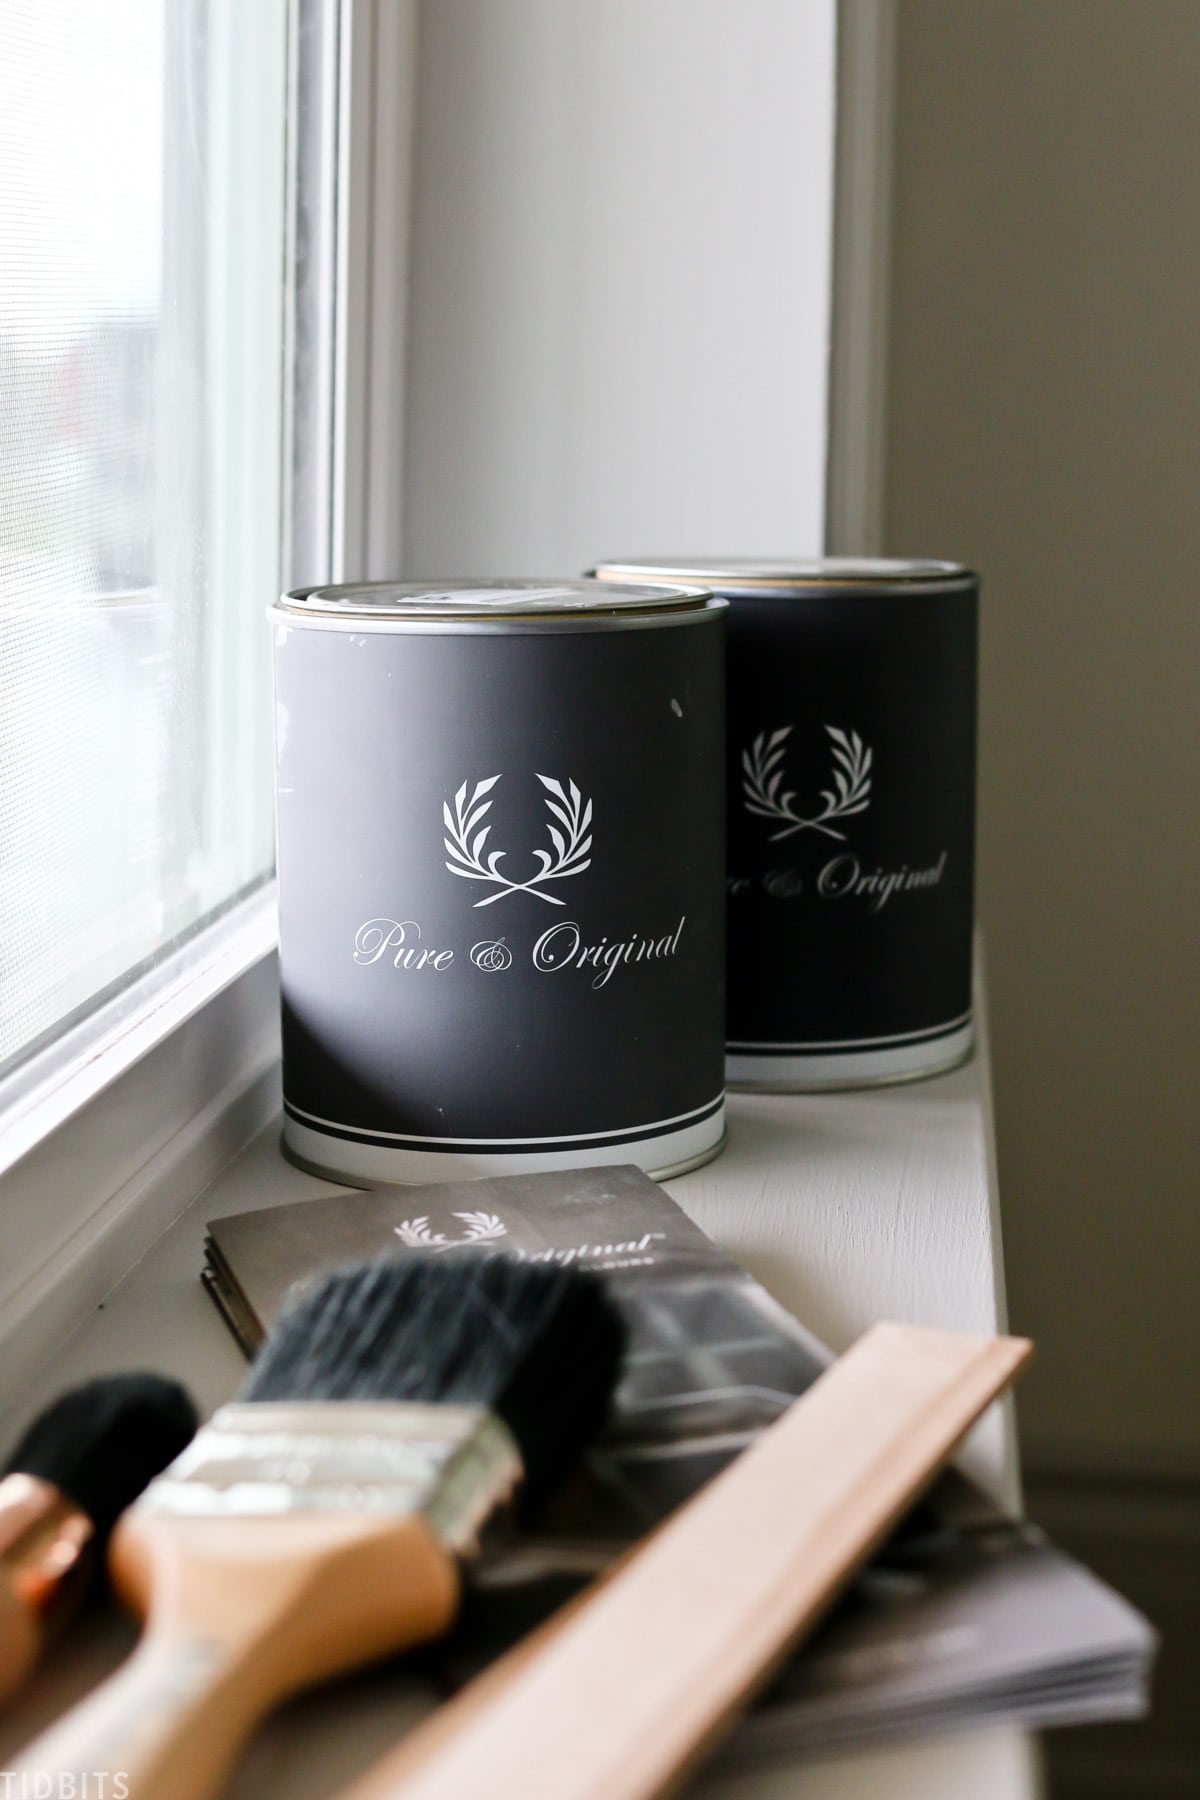
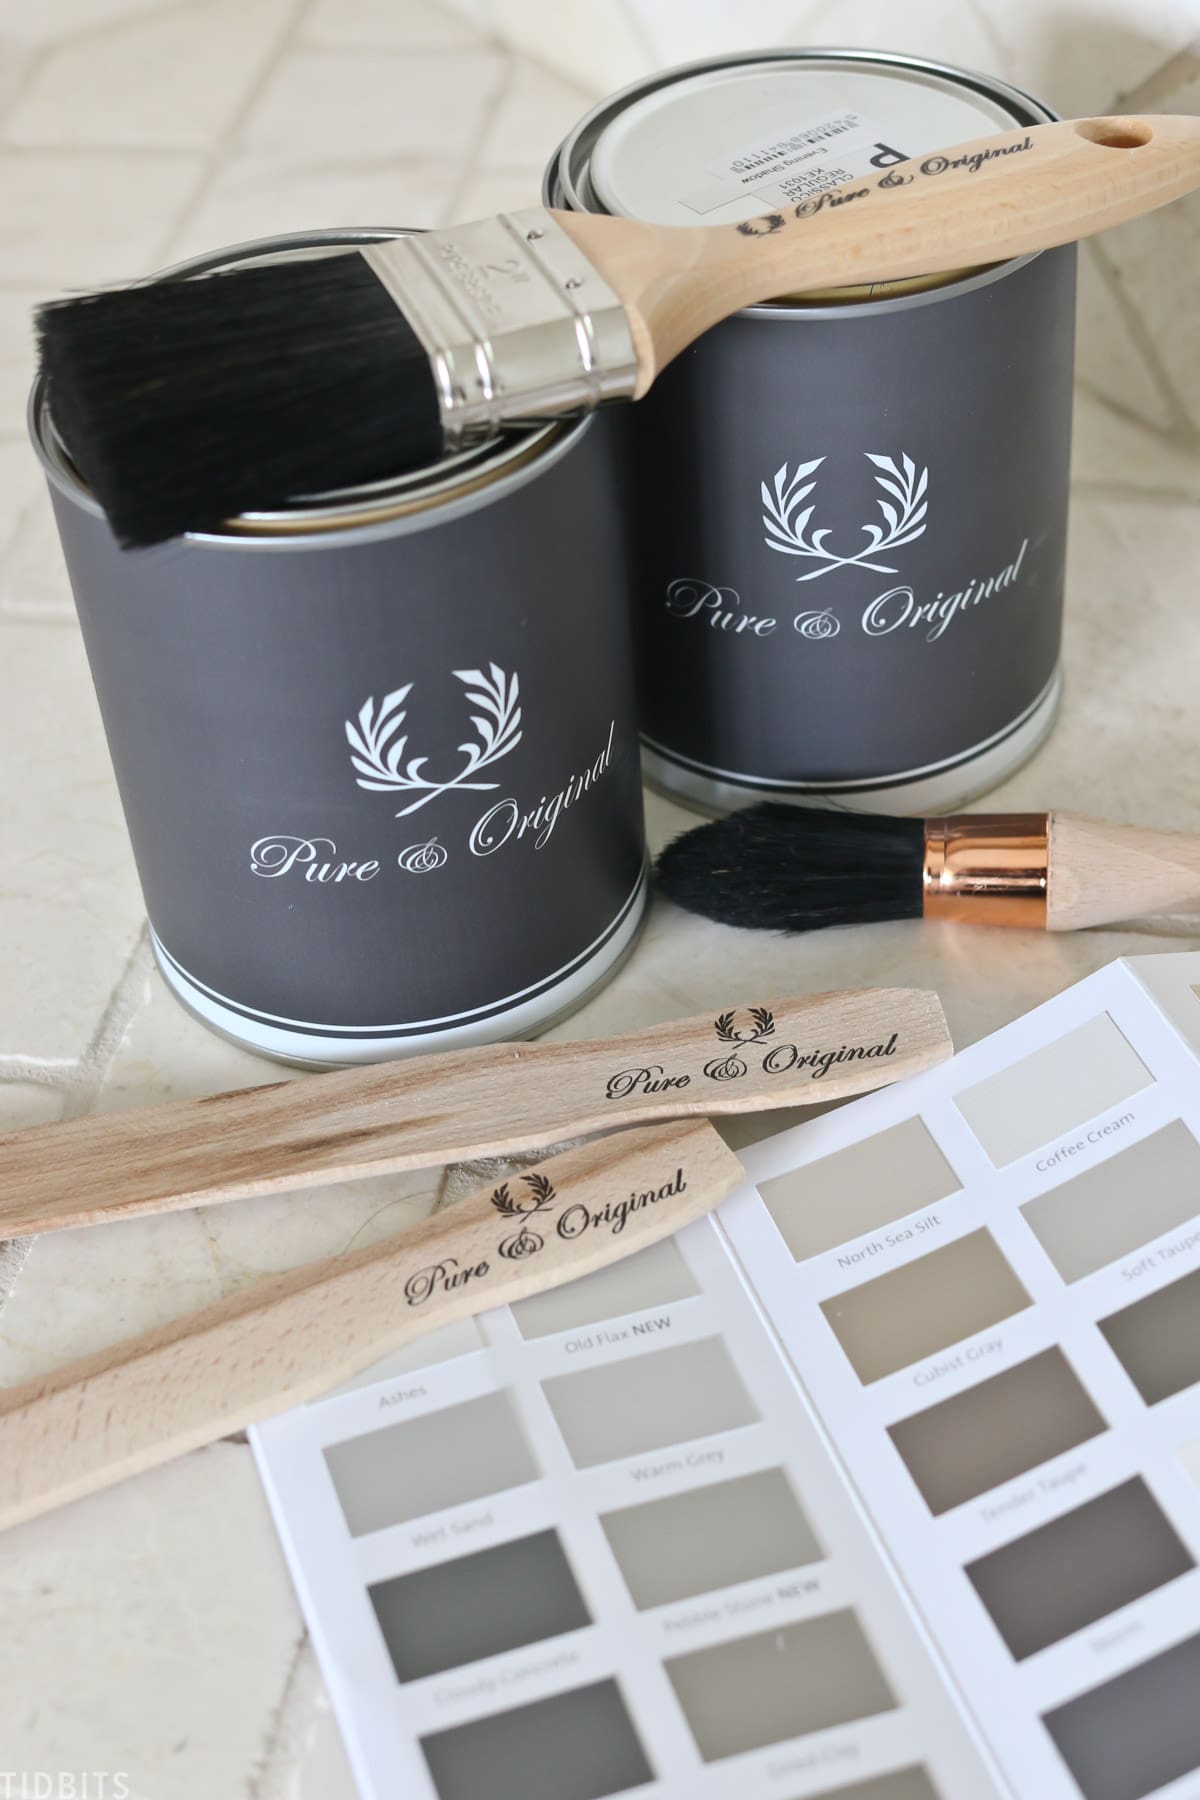
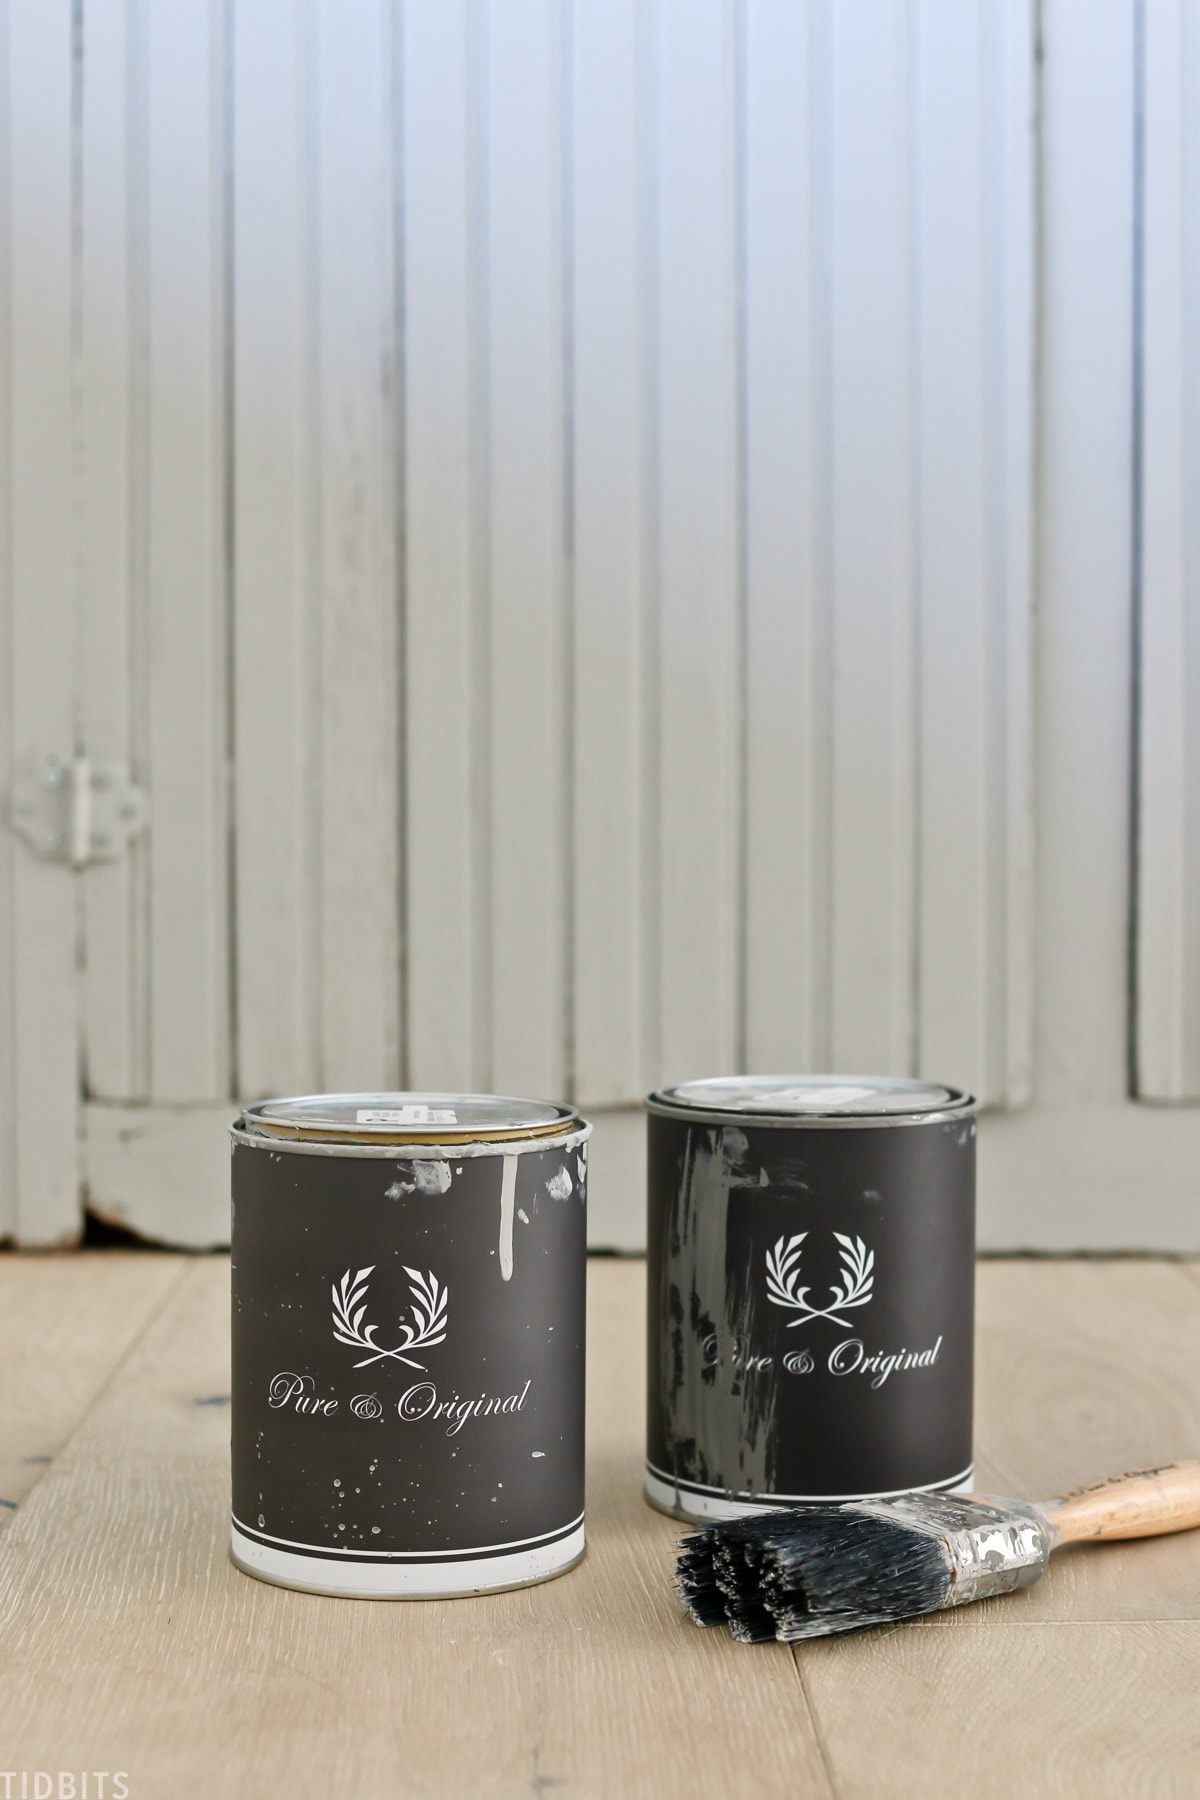
Let me tell you about the paint I used. I’m excited to be trying out some new-to-me paint, from a company I have partnered with before on my blog and YouTube channel. Pure and Original sent me some of their Classico Chalk based paint, which I was told was perfect for furniture makeovers.
I used their Marrakech paint on our walls to achieve a concrete like or Venetian plaster like appearance. And I used their durable Licetto paint for our trim and doors, which you can see in my kitchen painting post.
If you want to take a look at their images from their website, you’ll see the Classico chalk paint is also great for achieving a beautiful matte chalk appearance on walls, with a smooth consistent velvety finish. It’s really very lovely!
And I love that their paints are naturally pigmented making all sorts of dreamy earthy color tones. Another great perk, Classico is durable enough that you don’t even need a finishing wax.
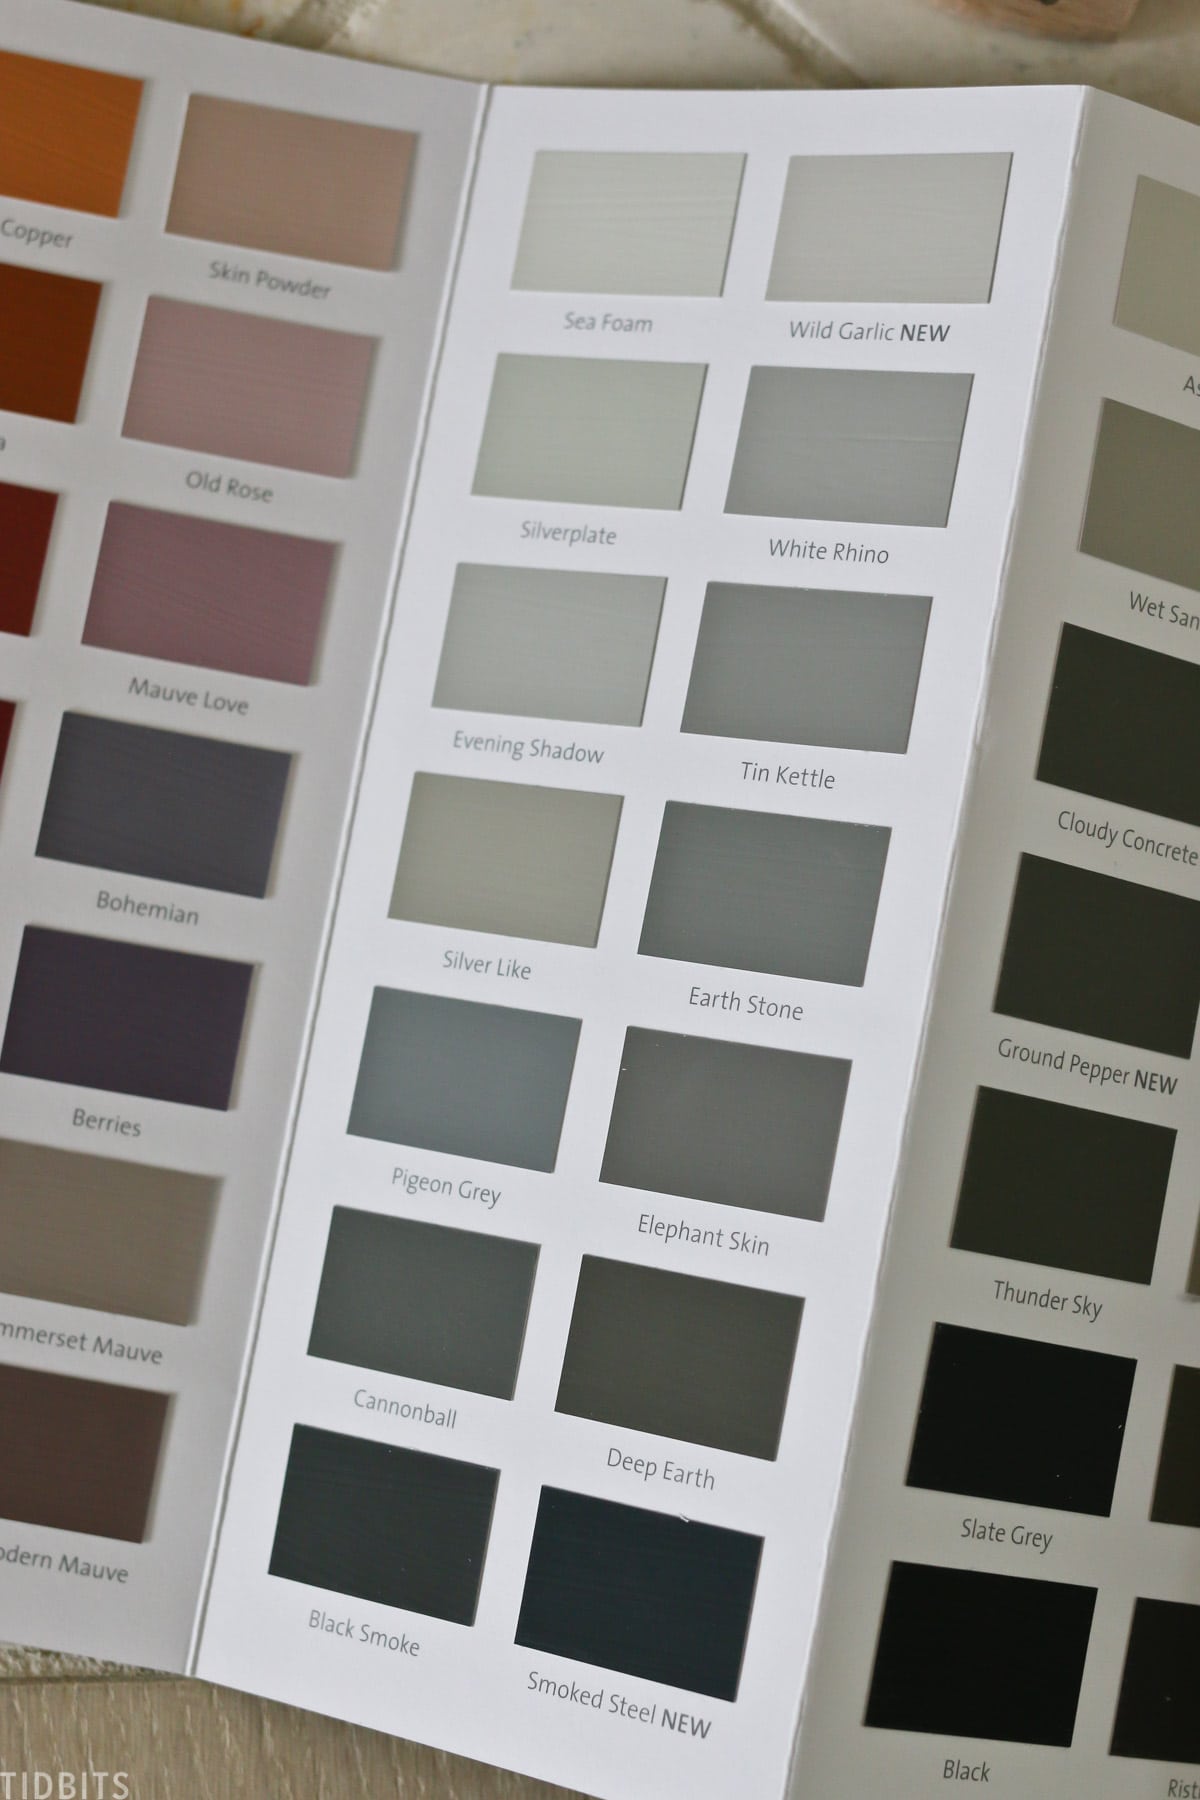
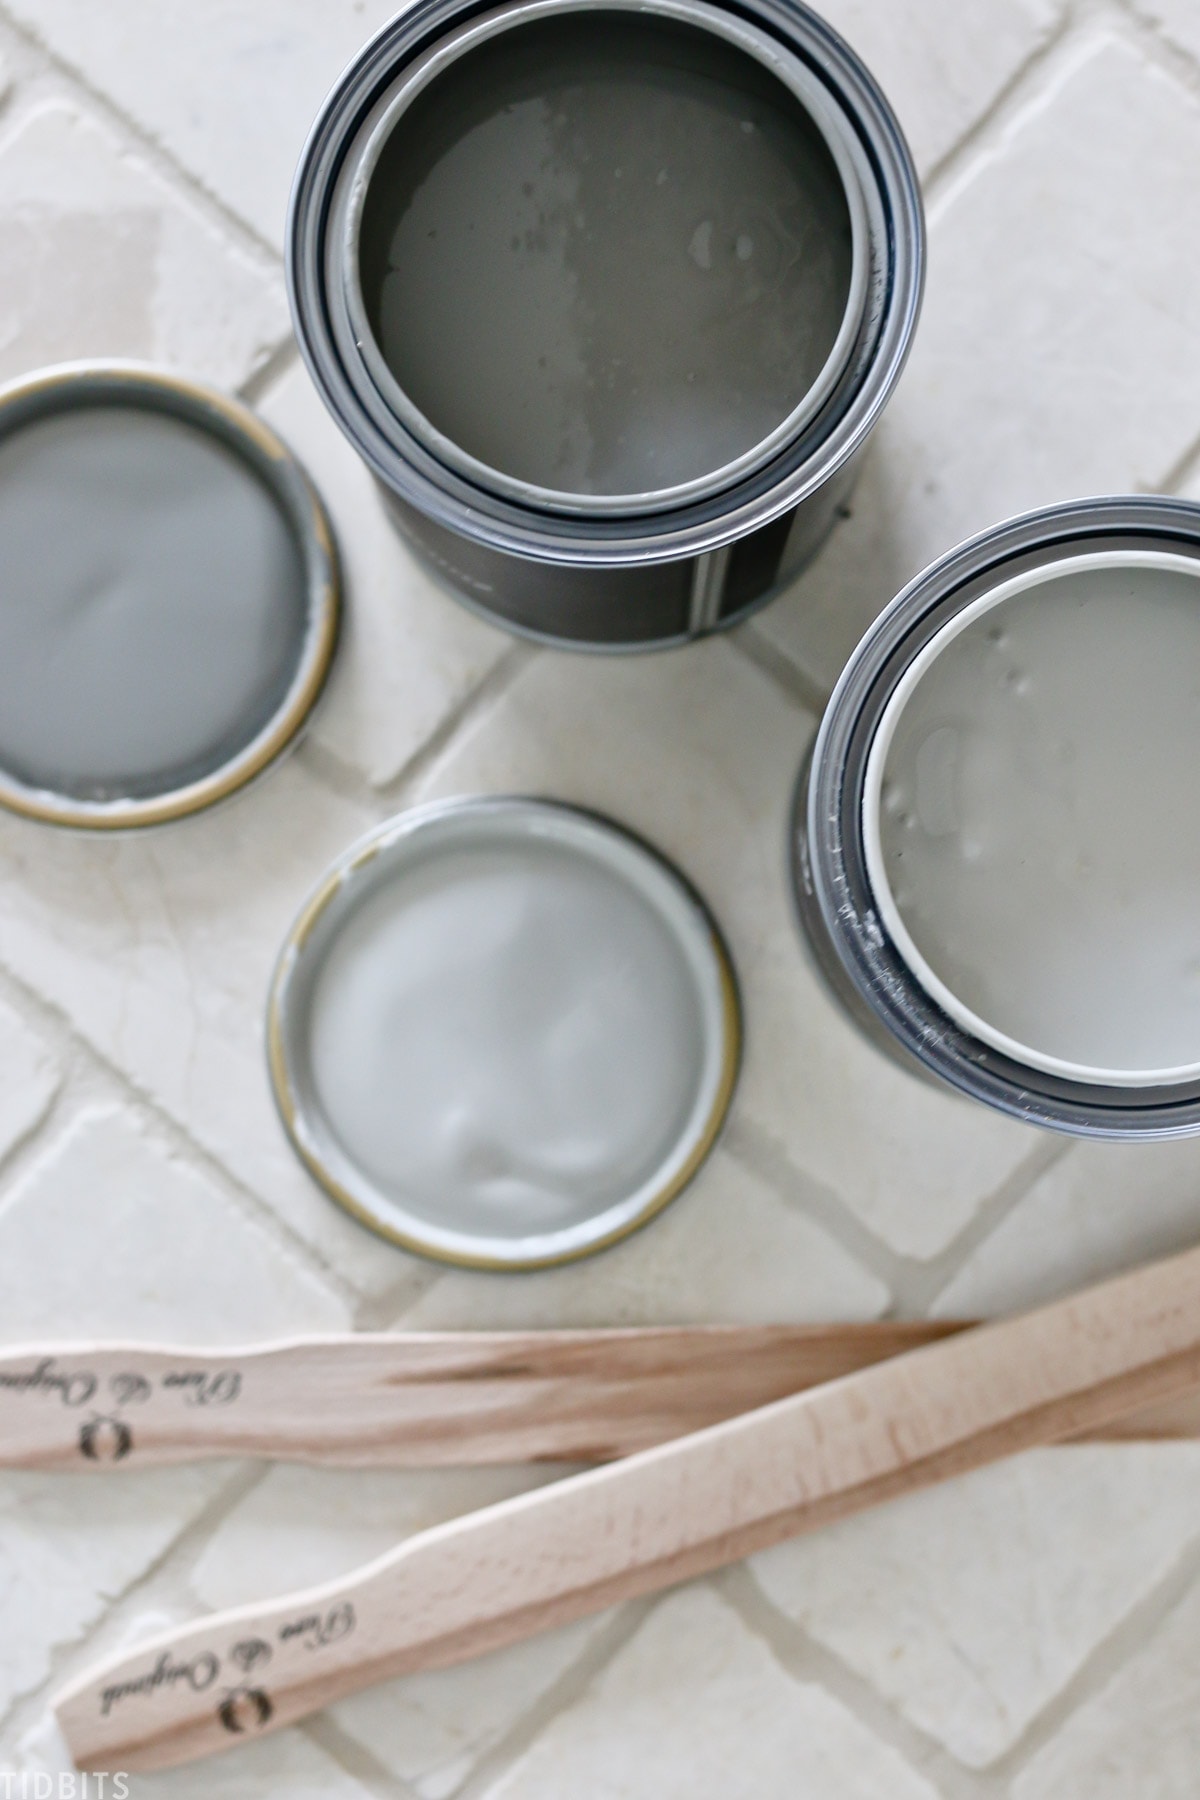
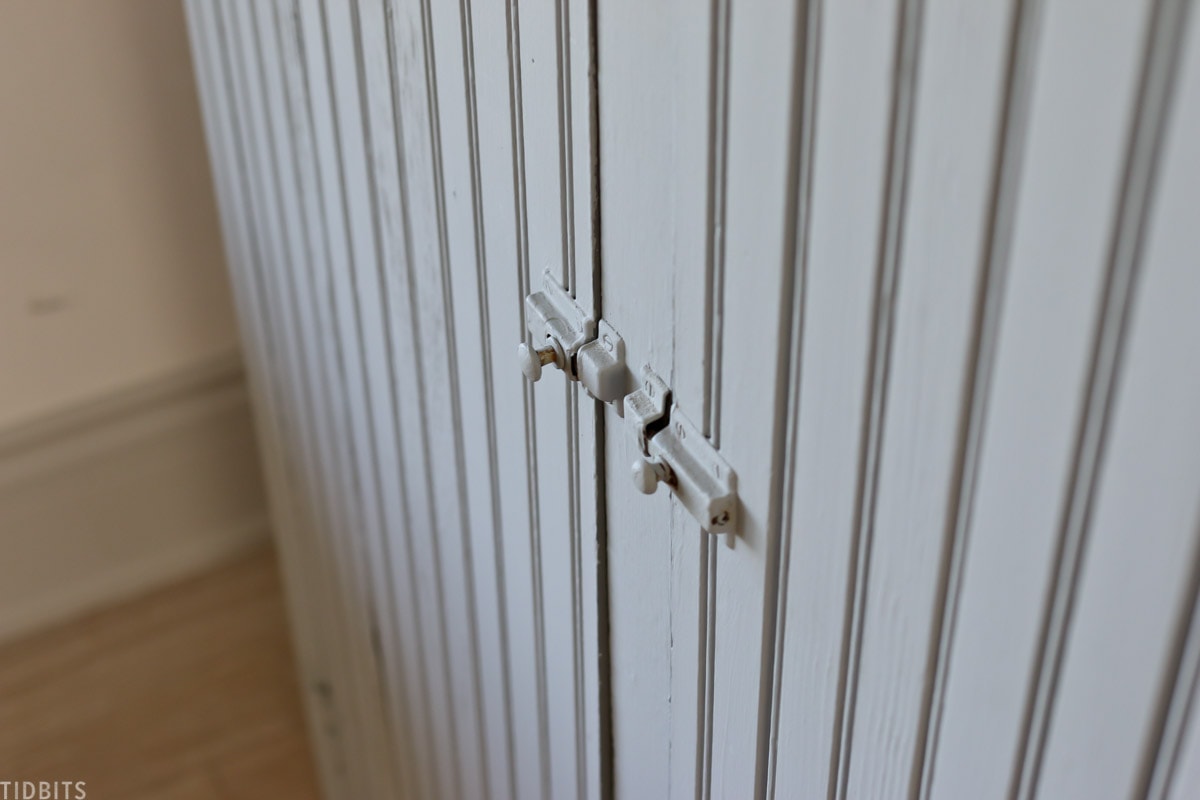
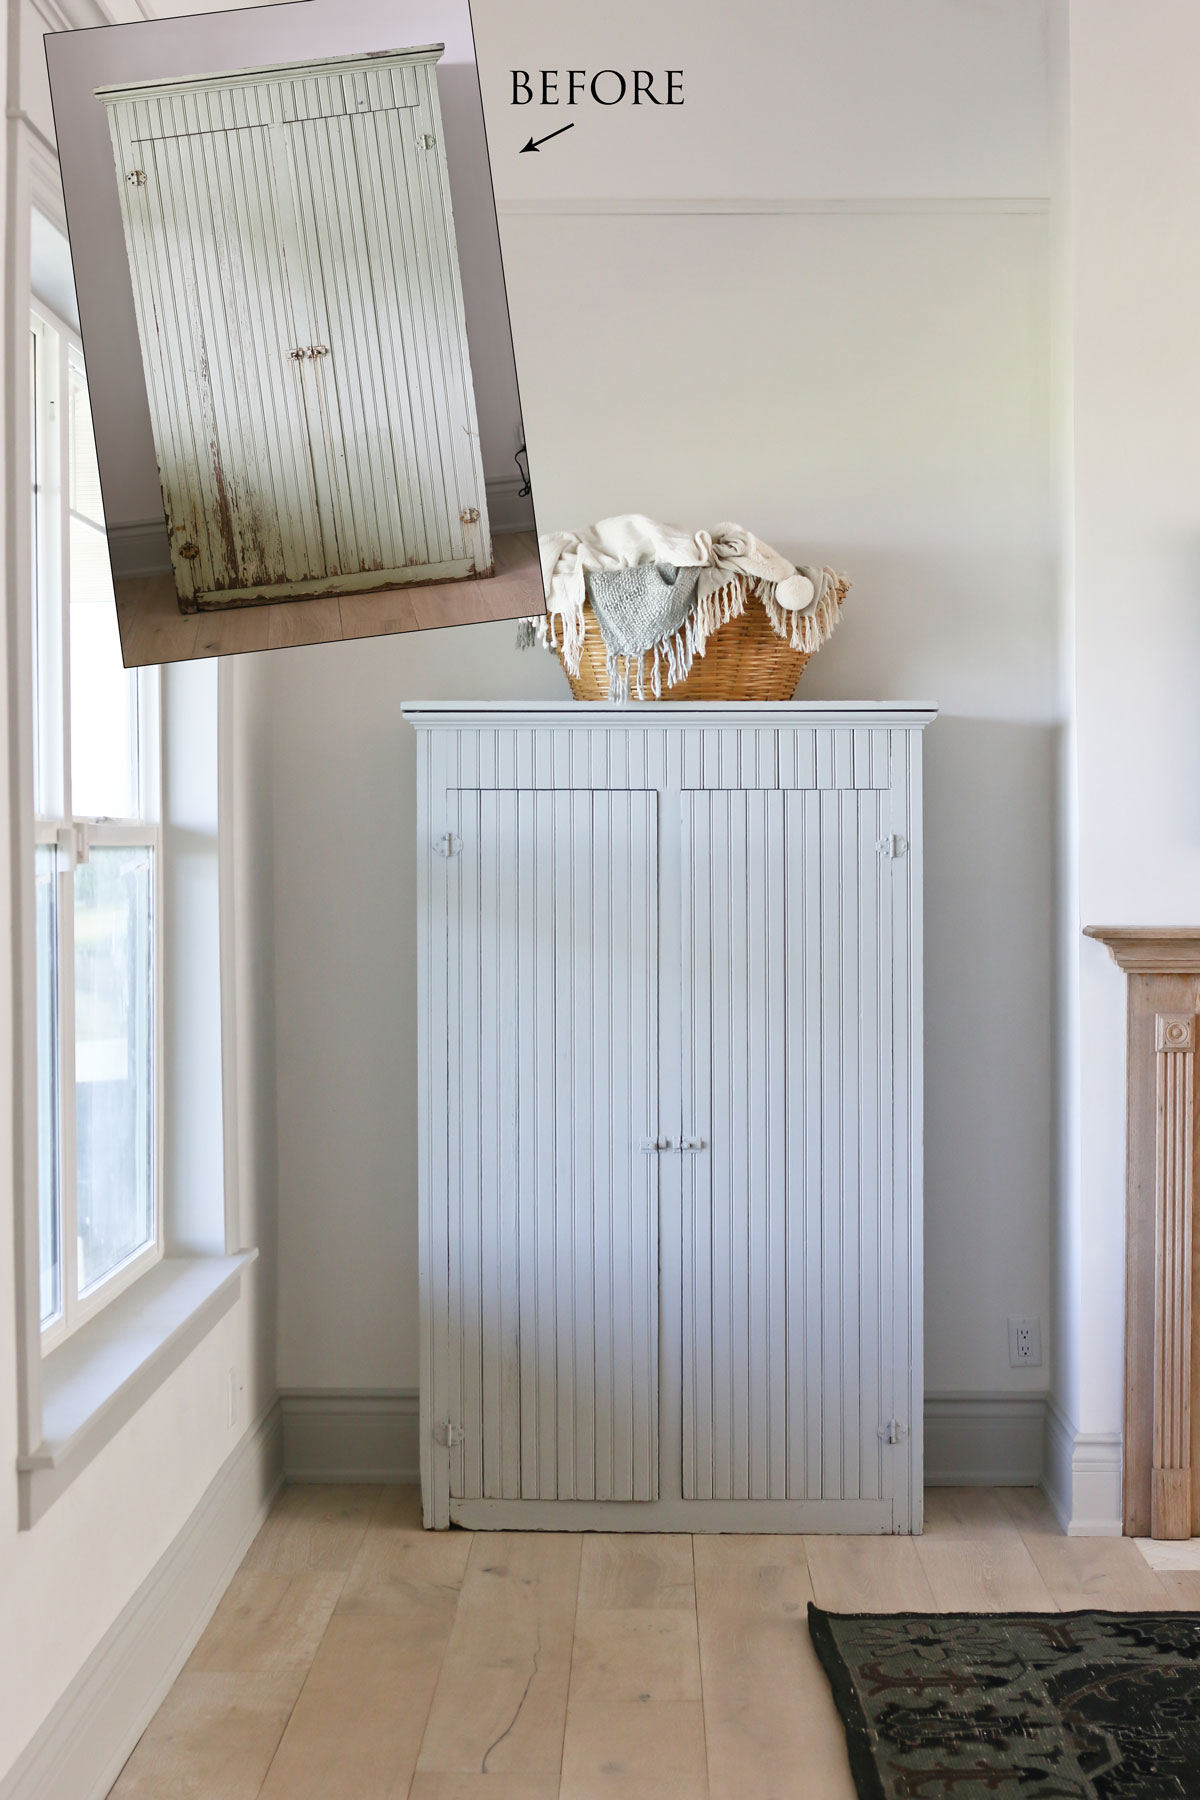
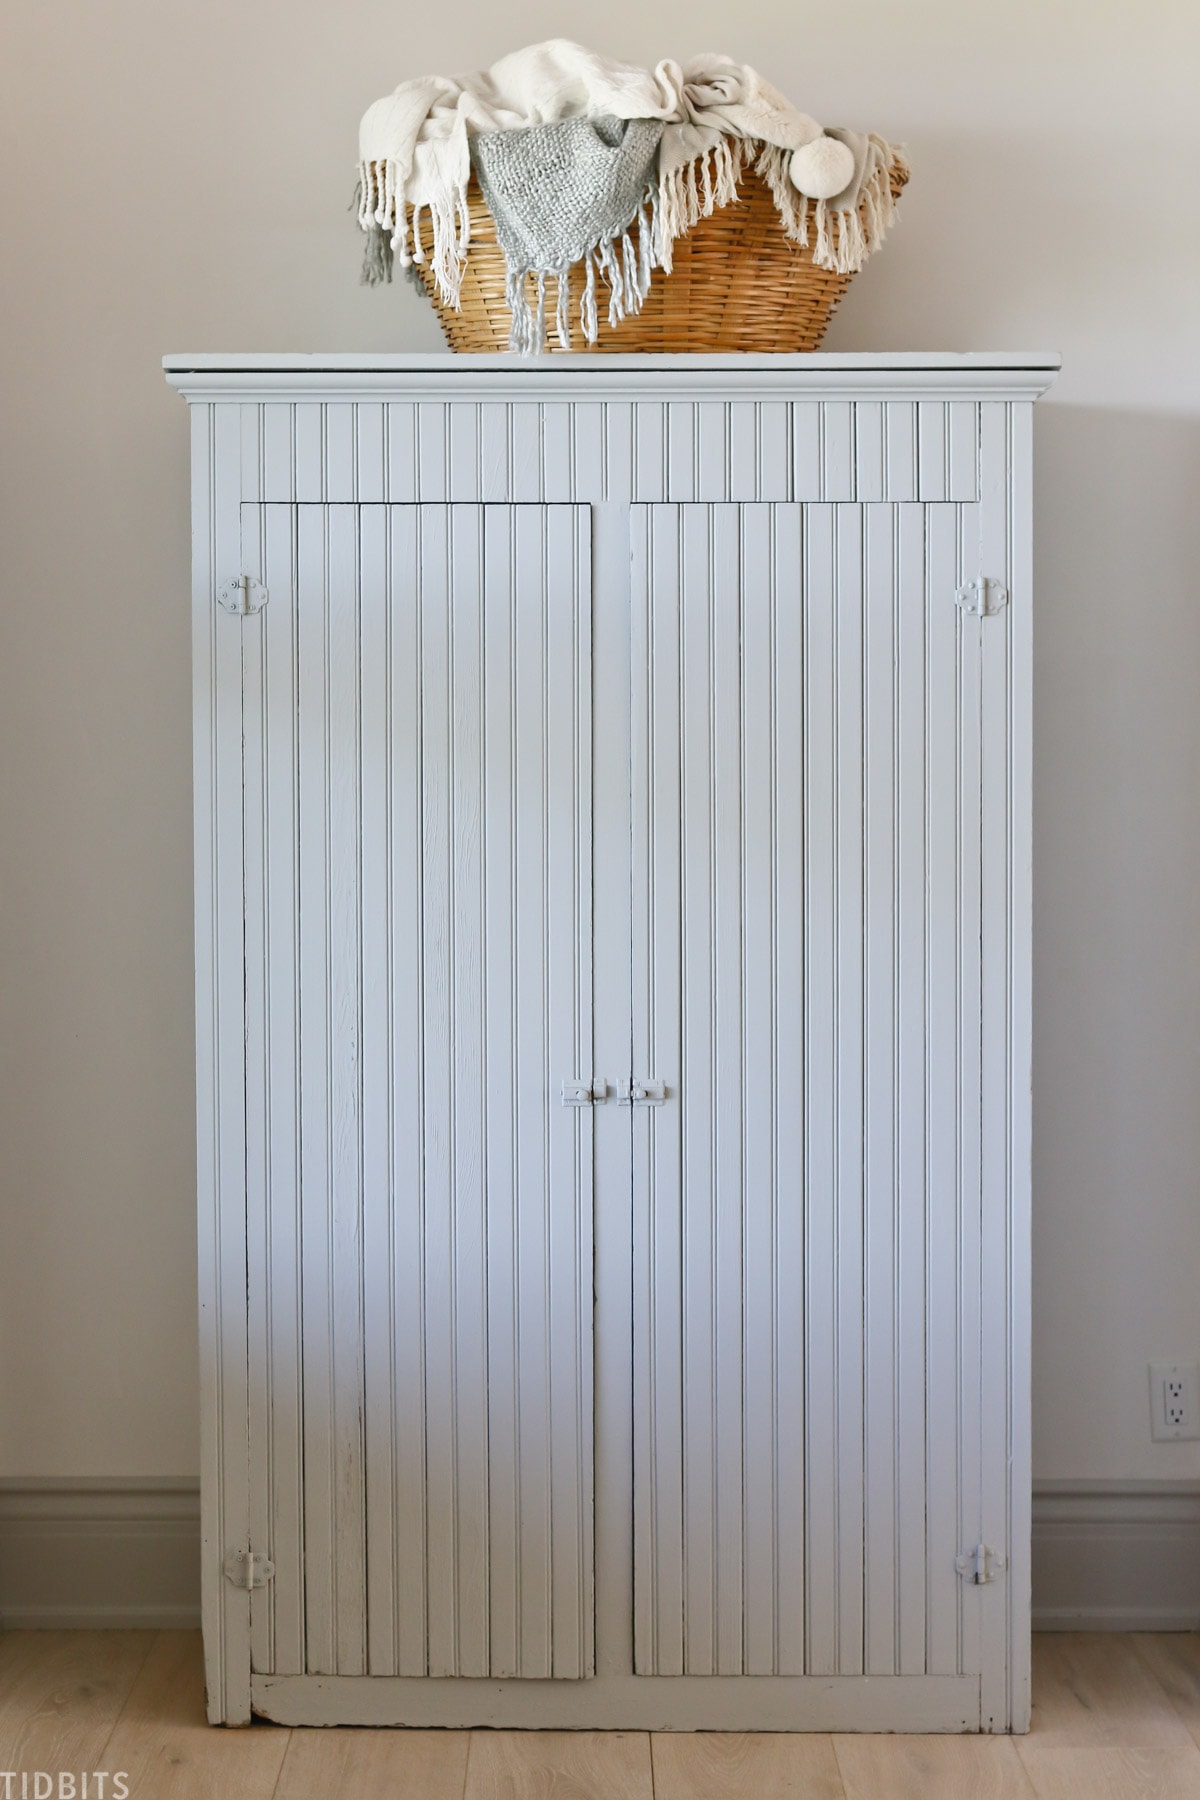
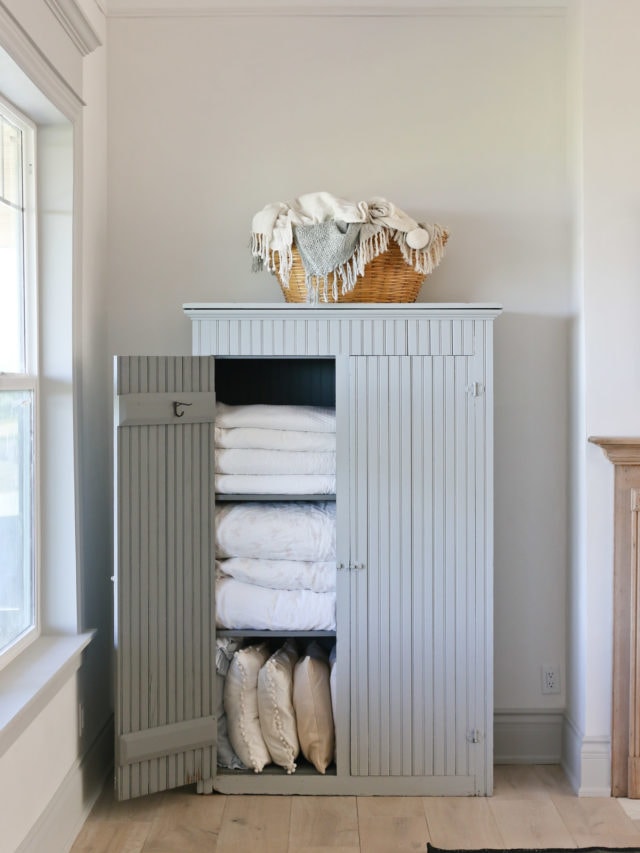
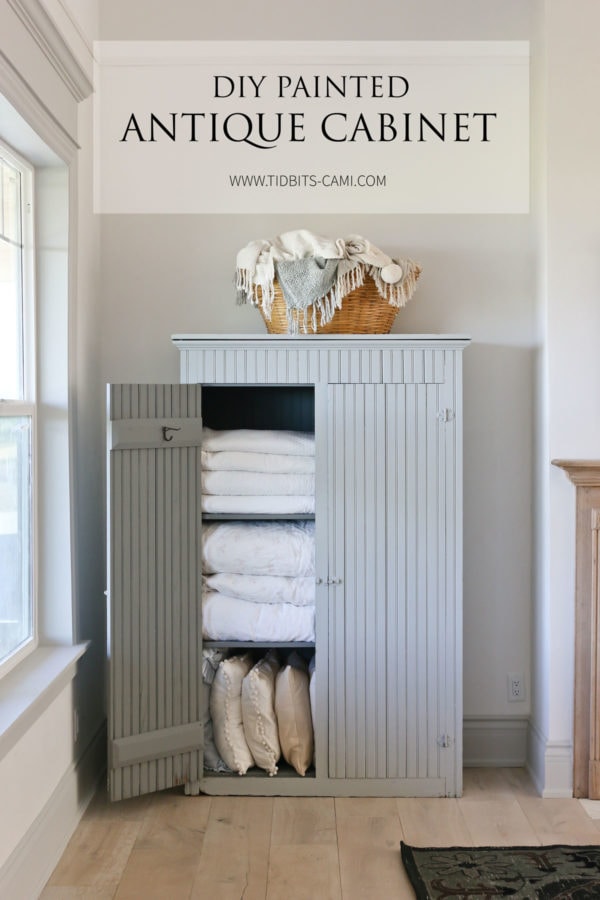
I selected this color called “Evening Shadow” for the outside of this cabinet, because I felt it went really well with the color “Ashes” on our contrasting trim. For the inside of the cabinet, I selected a slightly darker color called “Earth Stone”. Both colors seem to have a bit of blues and grays. You can order your own hand panted color card HERE.
ANTIQUE CABINET PREP WORK
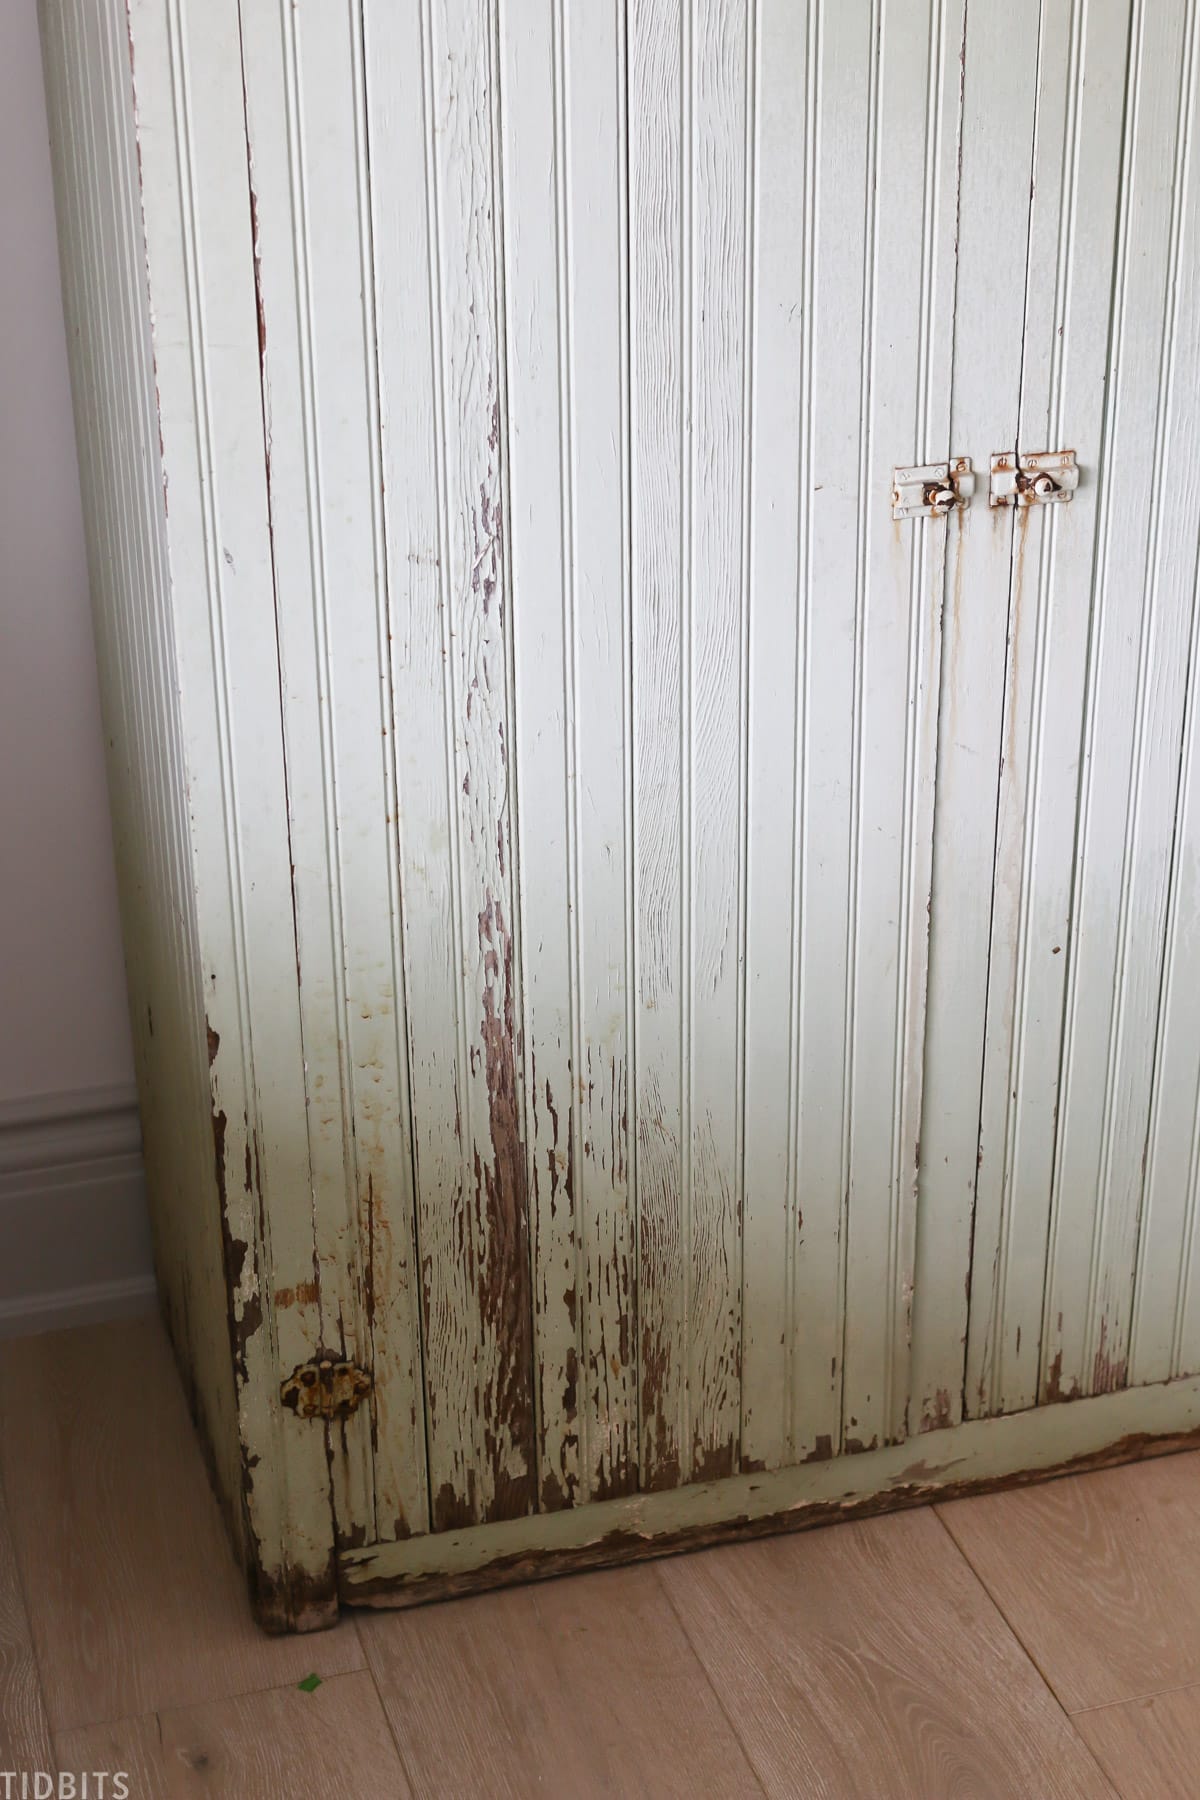
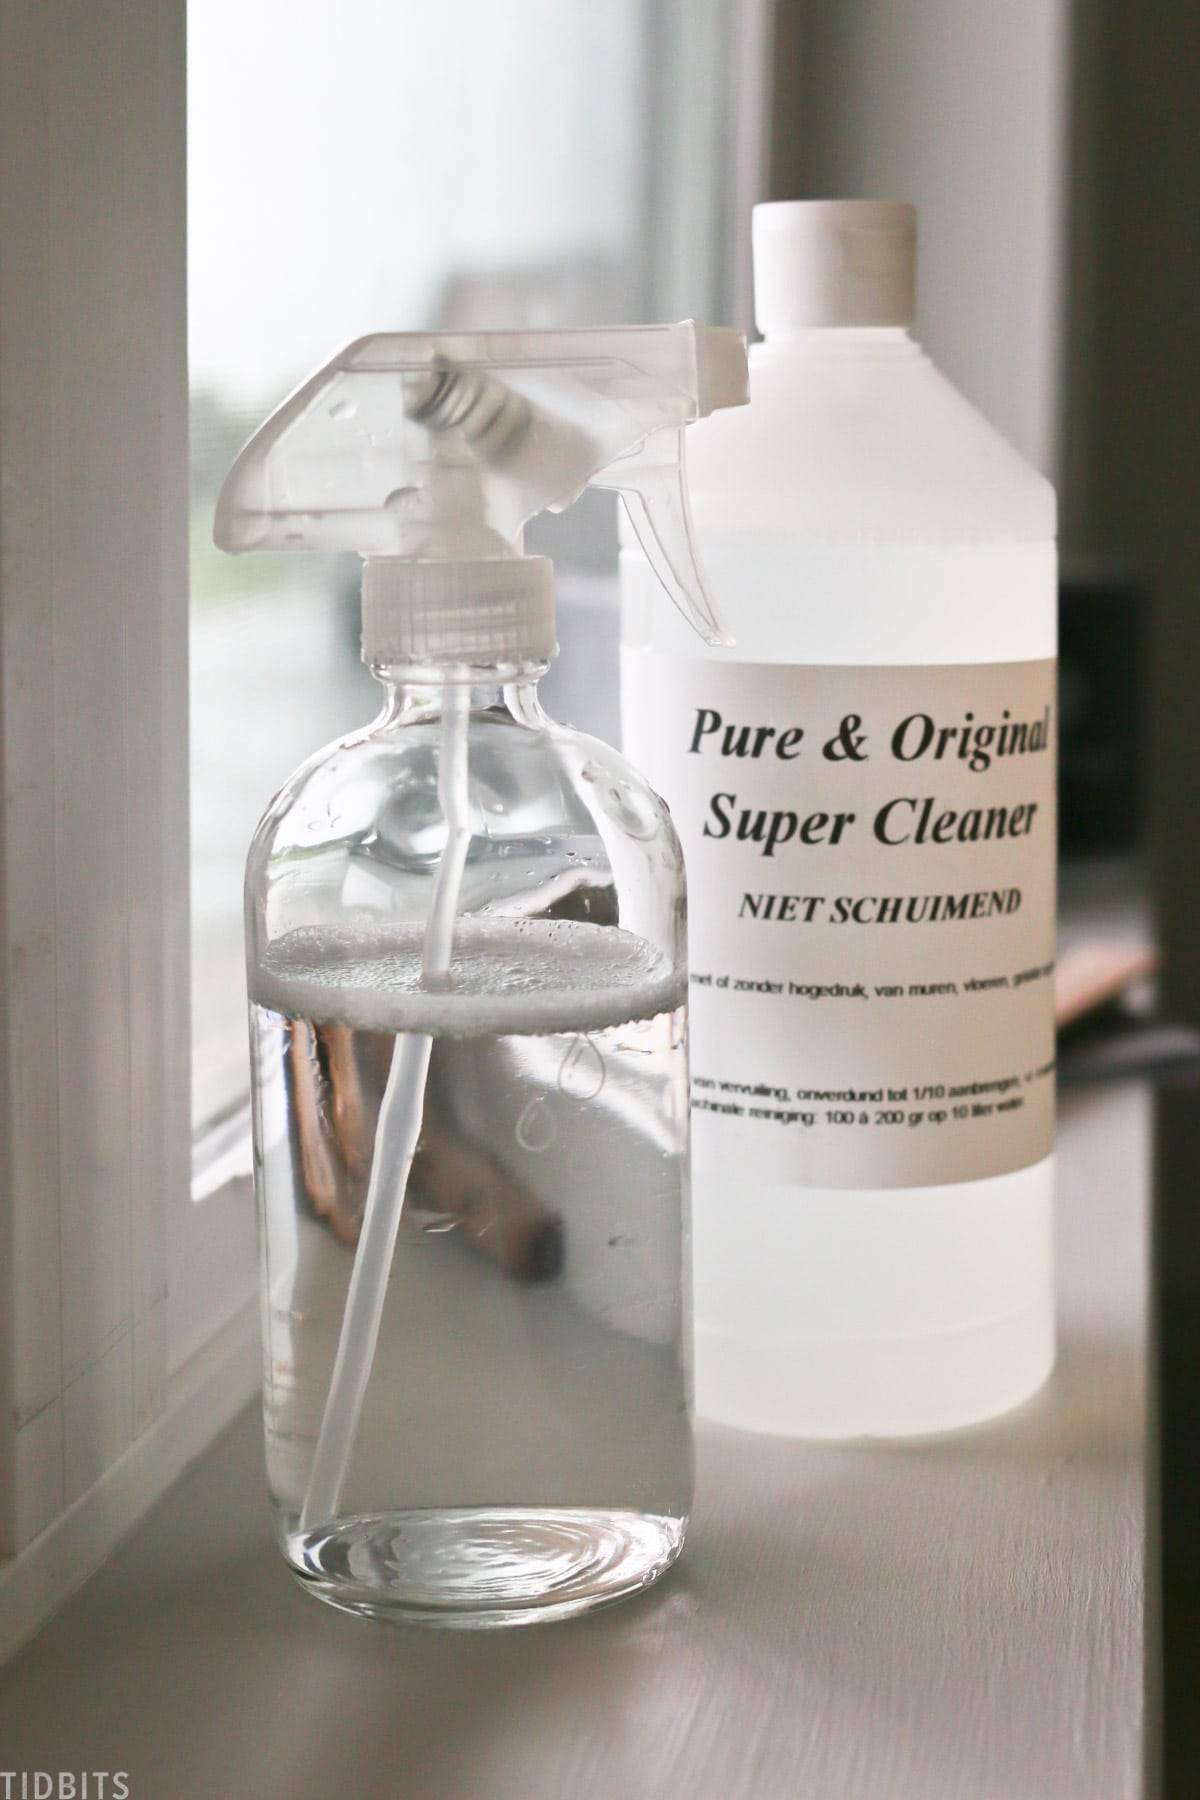
When it came to the prep work for this piece, I did not do a whole lot except for scrub it down really good. This piece was pretty dirty and grimy. Pure and Original sent me some of their non-toxic, all purpose Super Cleaner, which I diluted and used to help scrub off a lot of the dirt and grease.
CABINET PAINTING BRUSHES
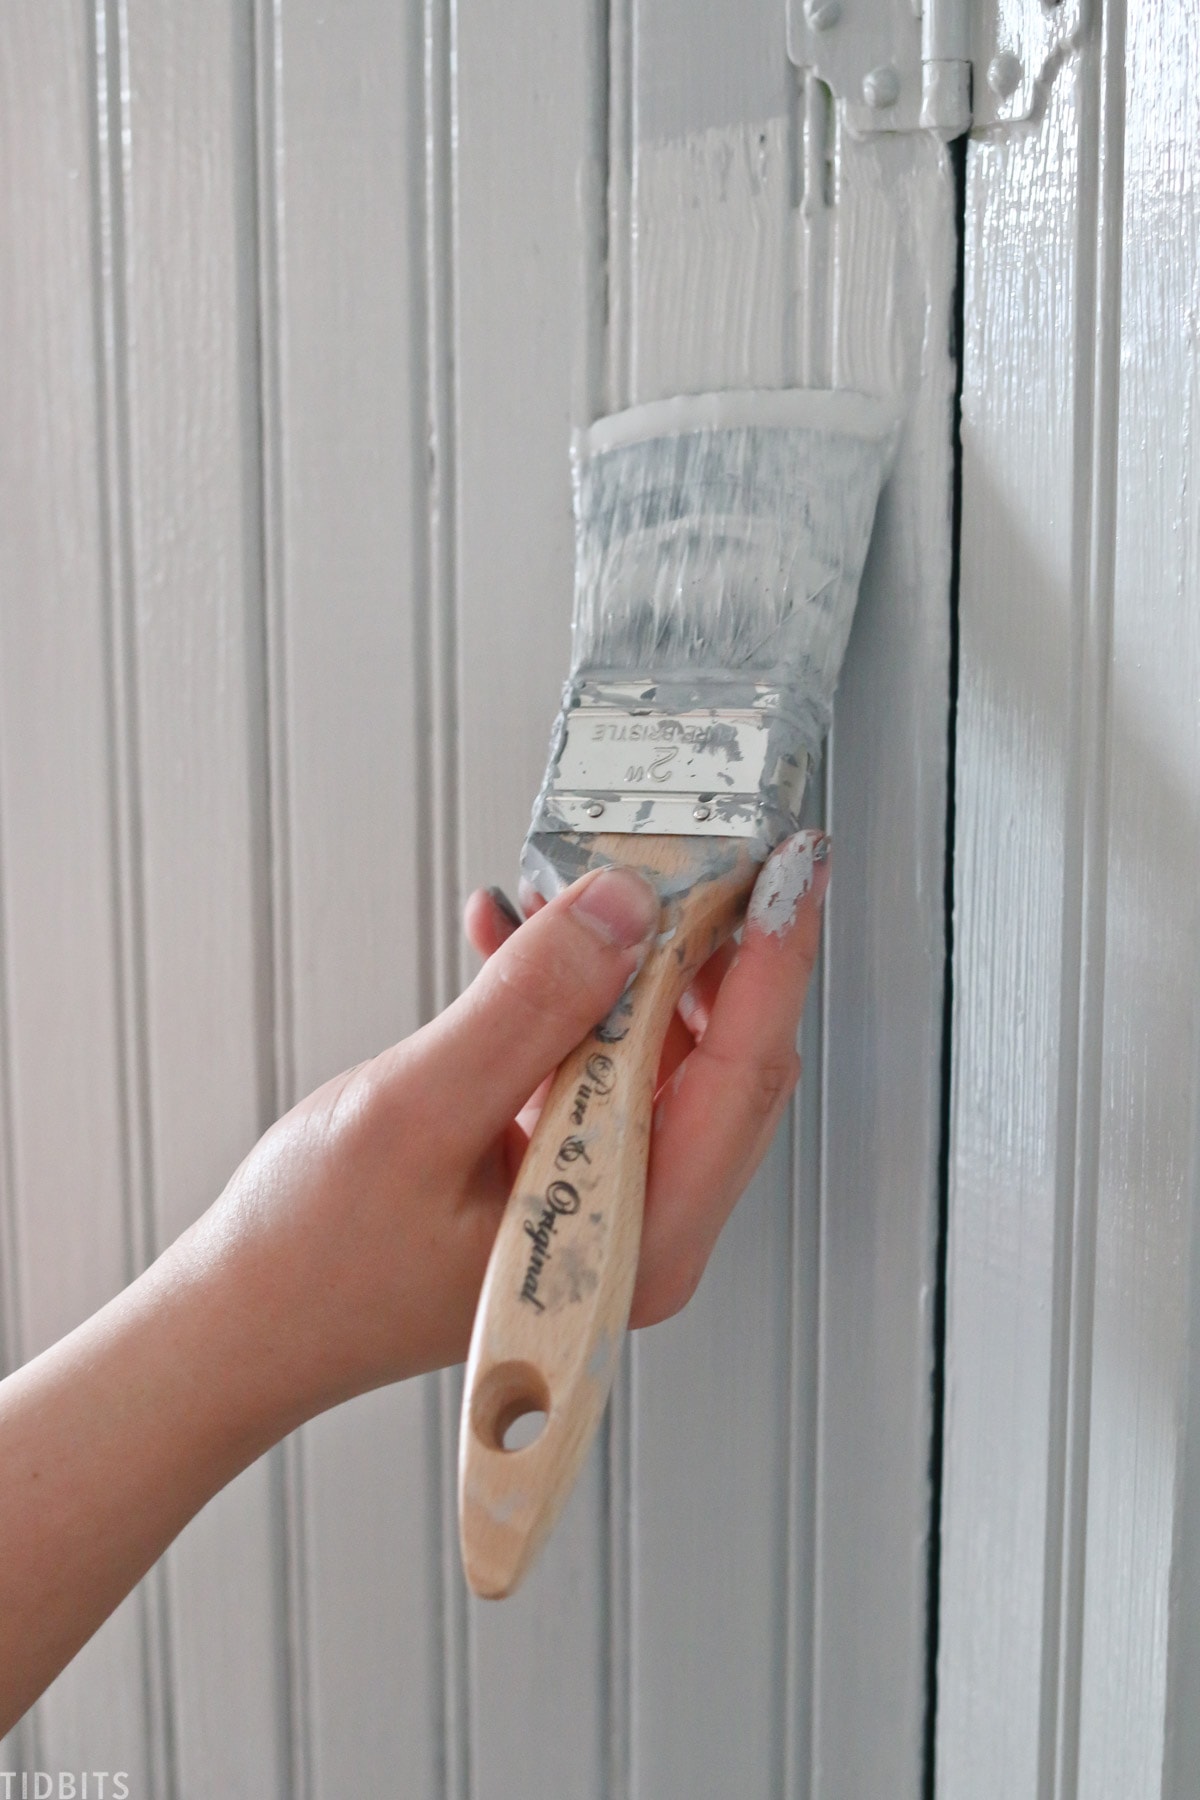
I used a couple of Pure and Original brushes to apply my paint. I felt a brush would help me paint in the crevices of this bead-board better than a roller would. I used a nice thick fat 2 inch pure bristle brush, and a pointed one for the corners and edges.
PAINTING PROCESS
You can see more of the process in my YouTube video, but painting a cabinet is pretty straightforward. I taped off areas I didn’t want paint on. I worked from the inside out.
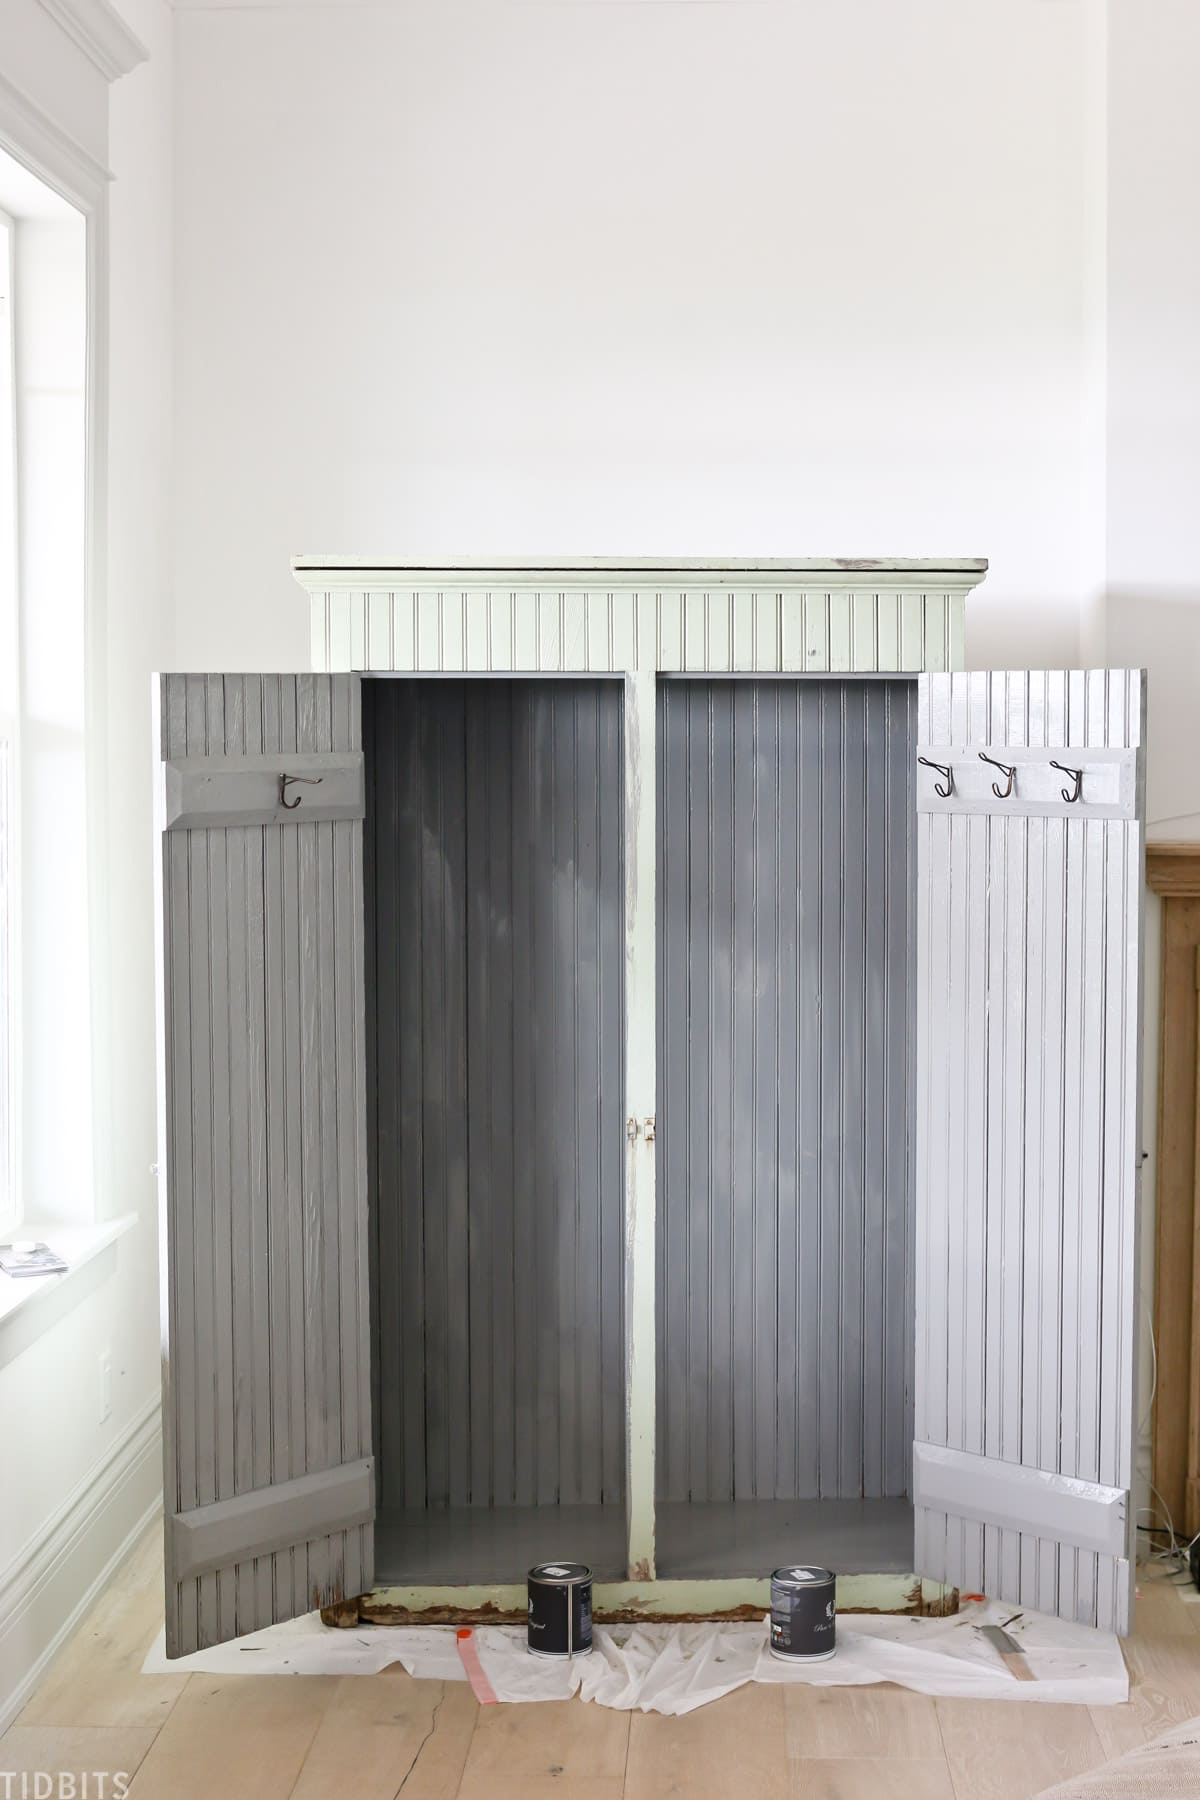
I ended up needing 2 coats of the Classico Chalk Paint. I felt like it had really great coverage, and the 2 pints of paint were just enough.
ANTIQUE CABINET REVEAL
Ready to see how it all turned out?! I’d love to hear if you like it or if you would have left it alone.
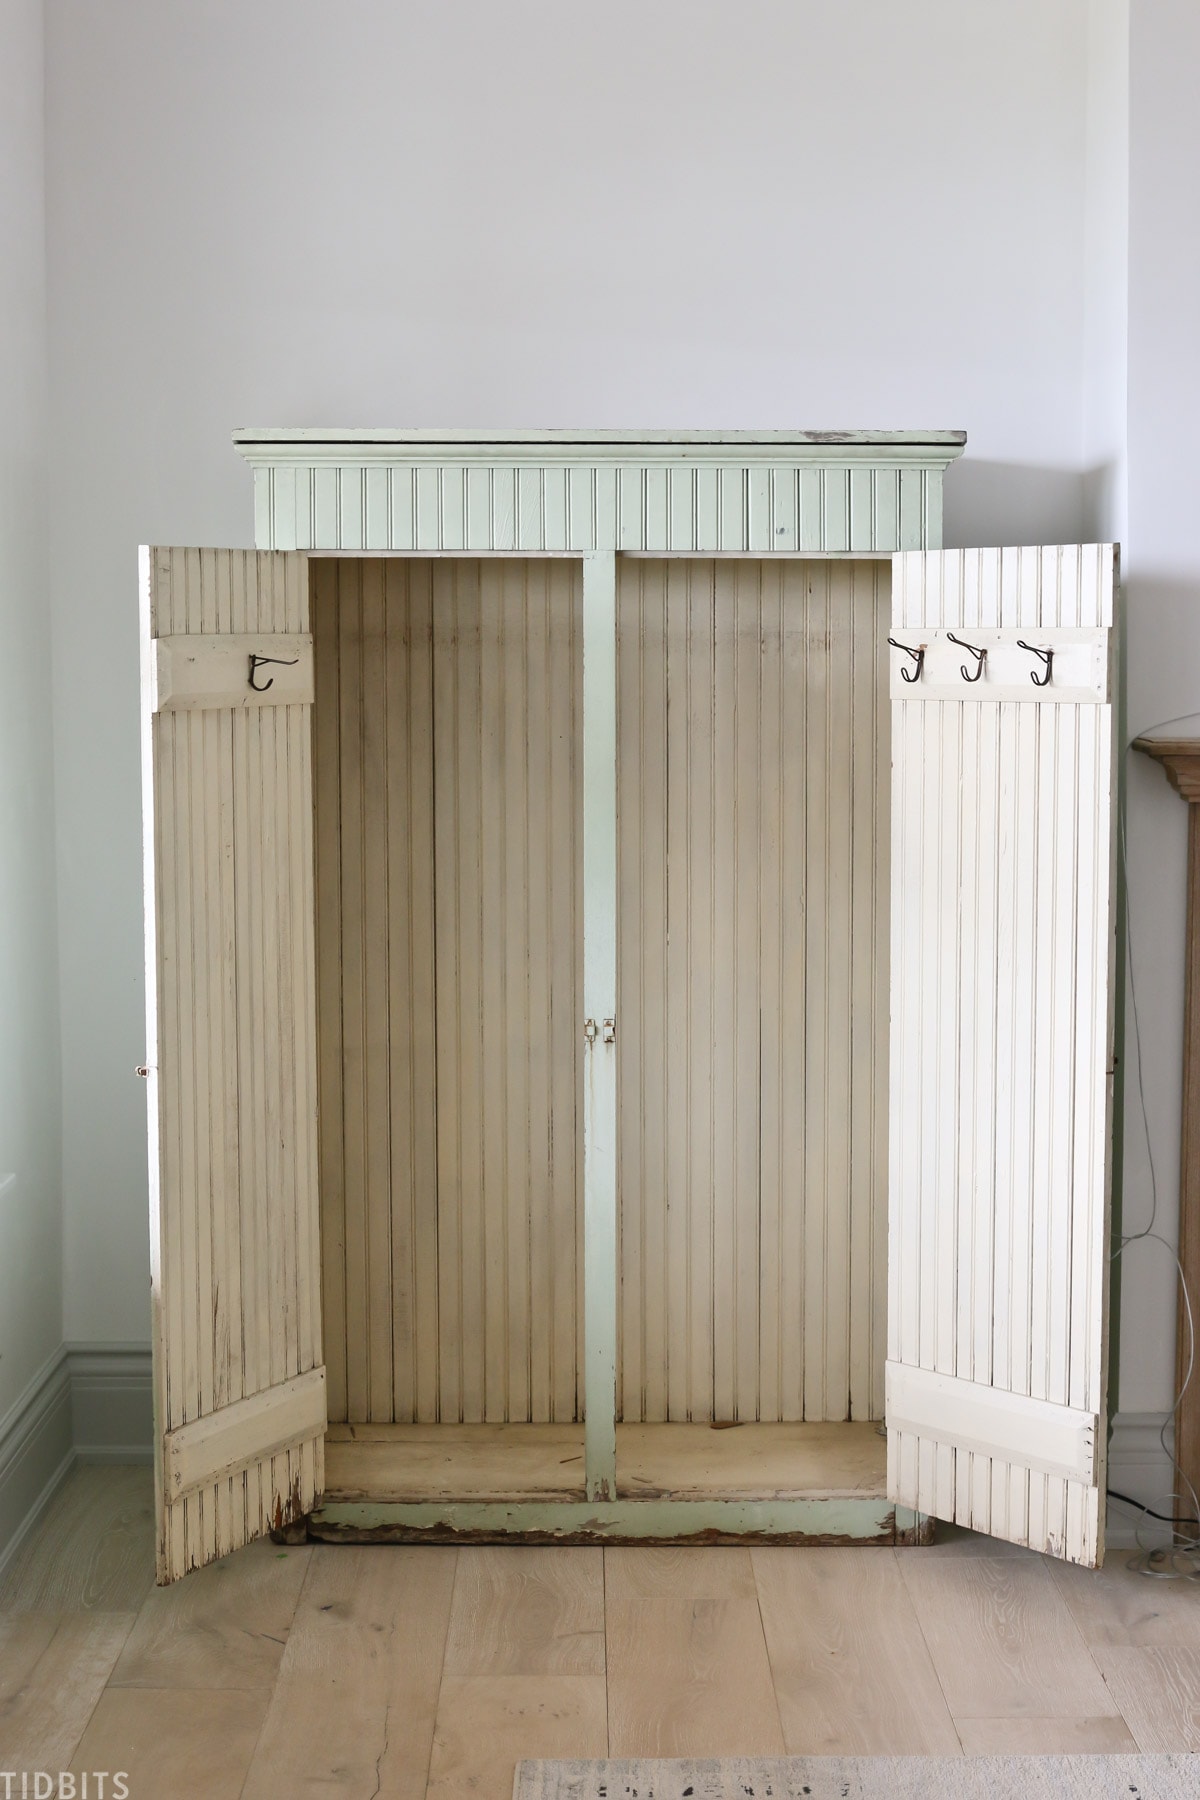
Once the piece was all painted, dried, I played around filling it up with all our extra linens. Let’s open it up and check out the inside.
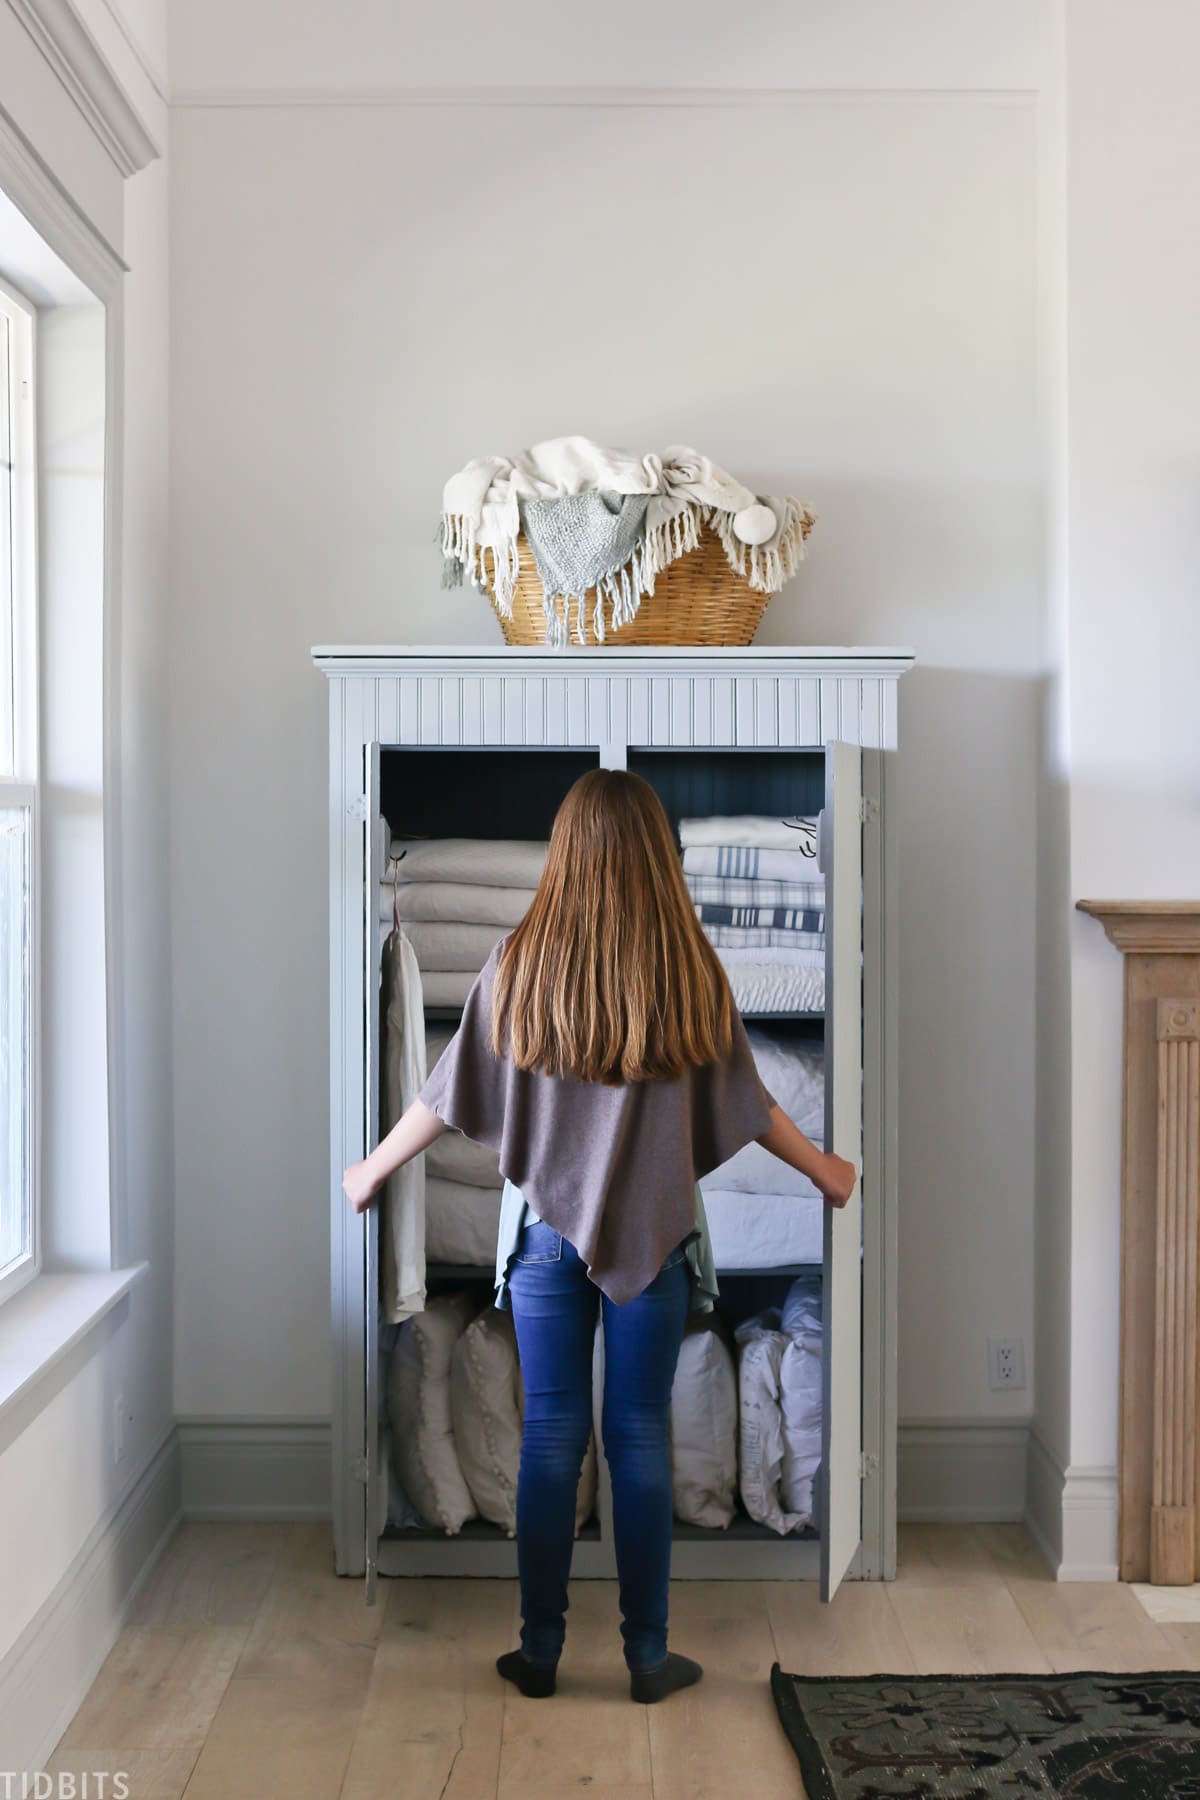
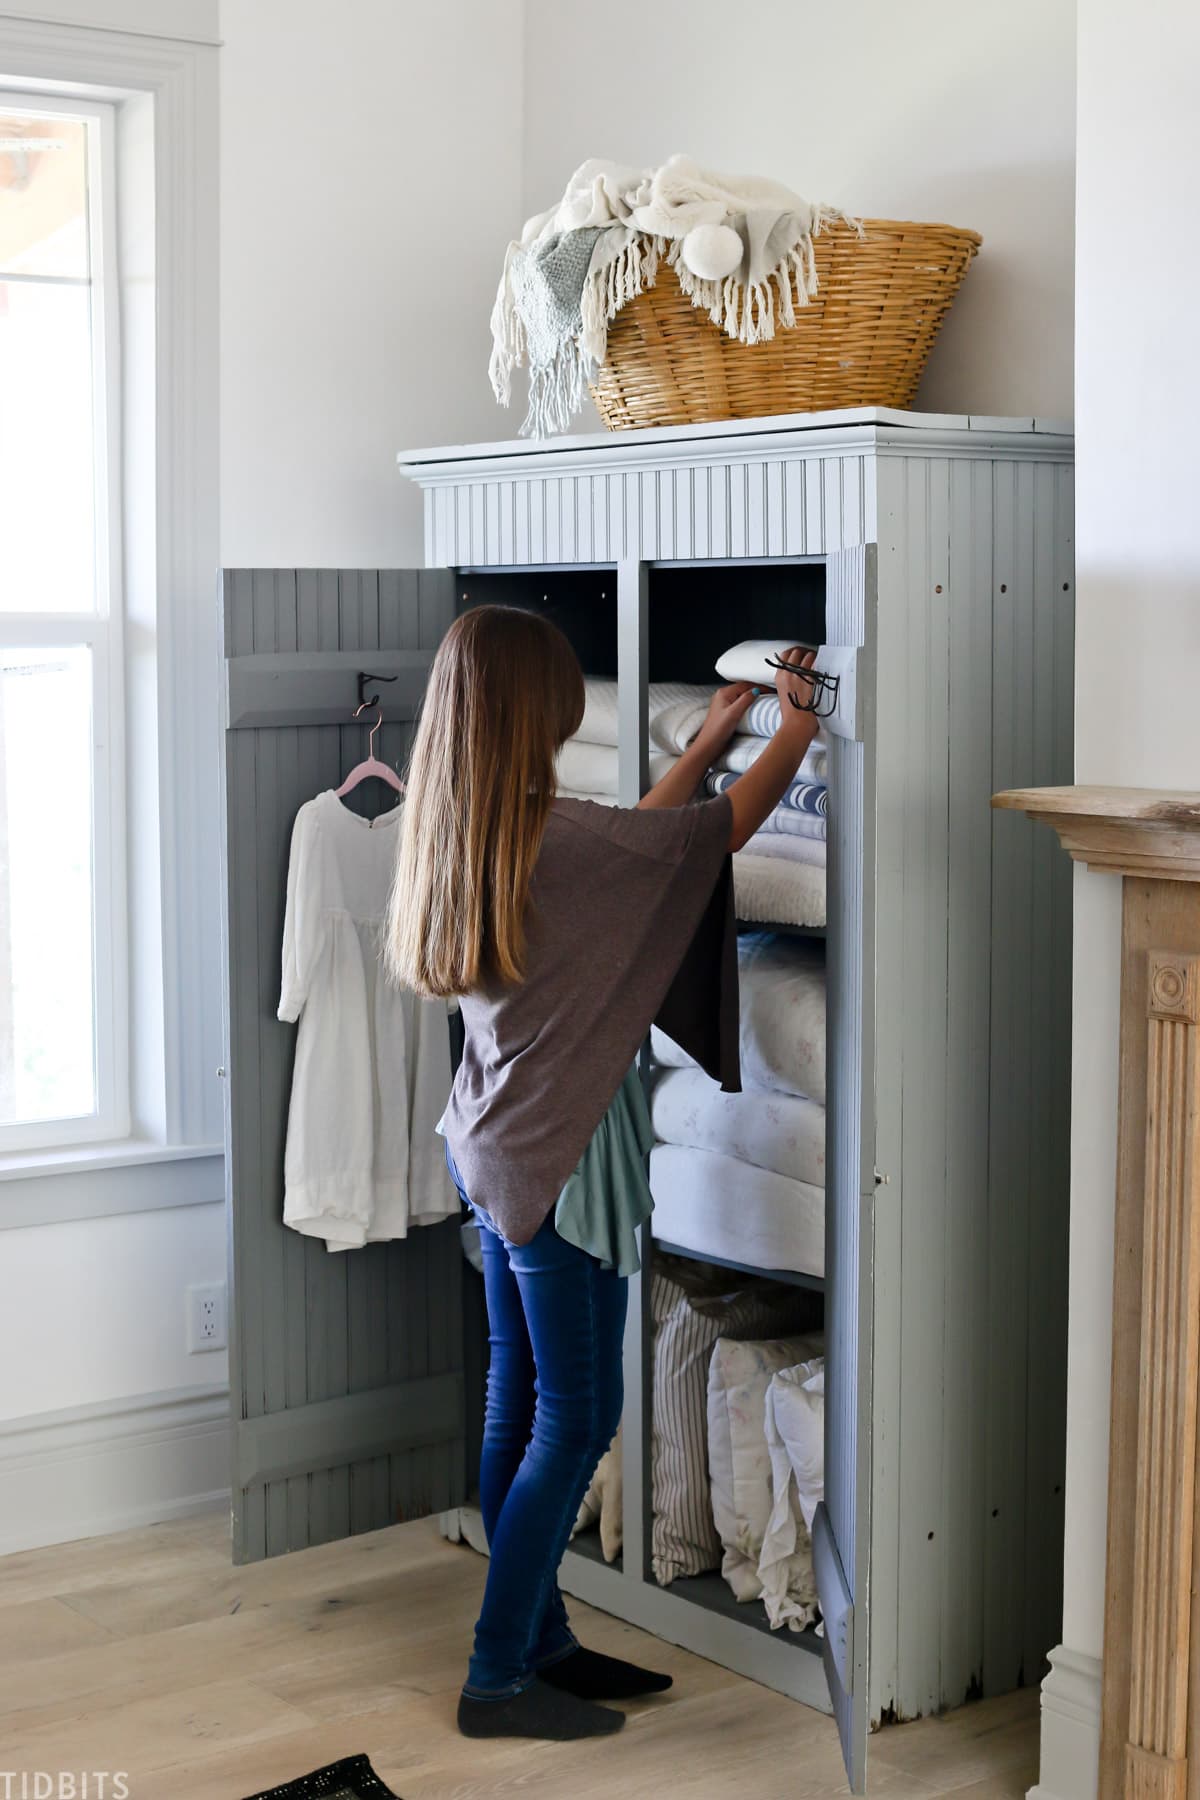
My husband built me a couple of shelves inside for some much needed storage.
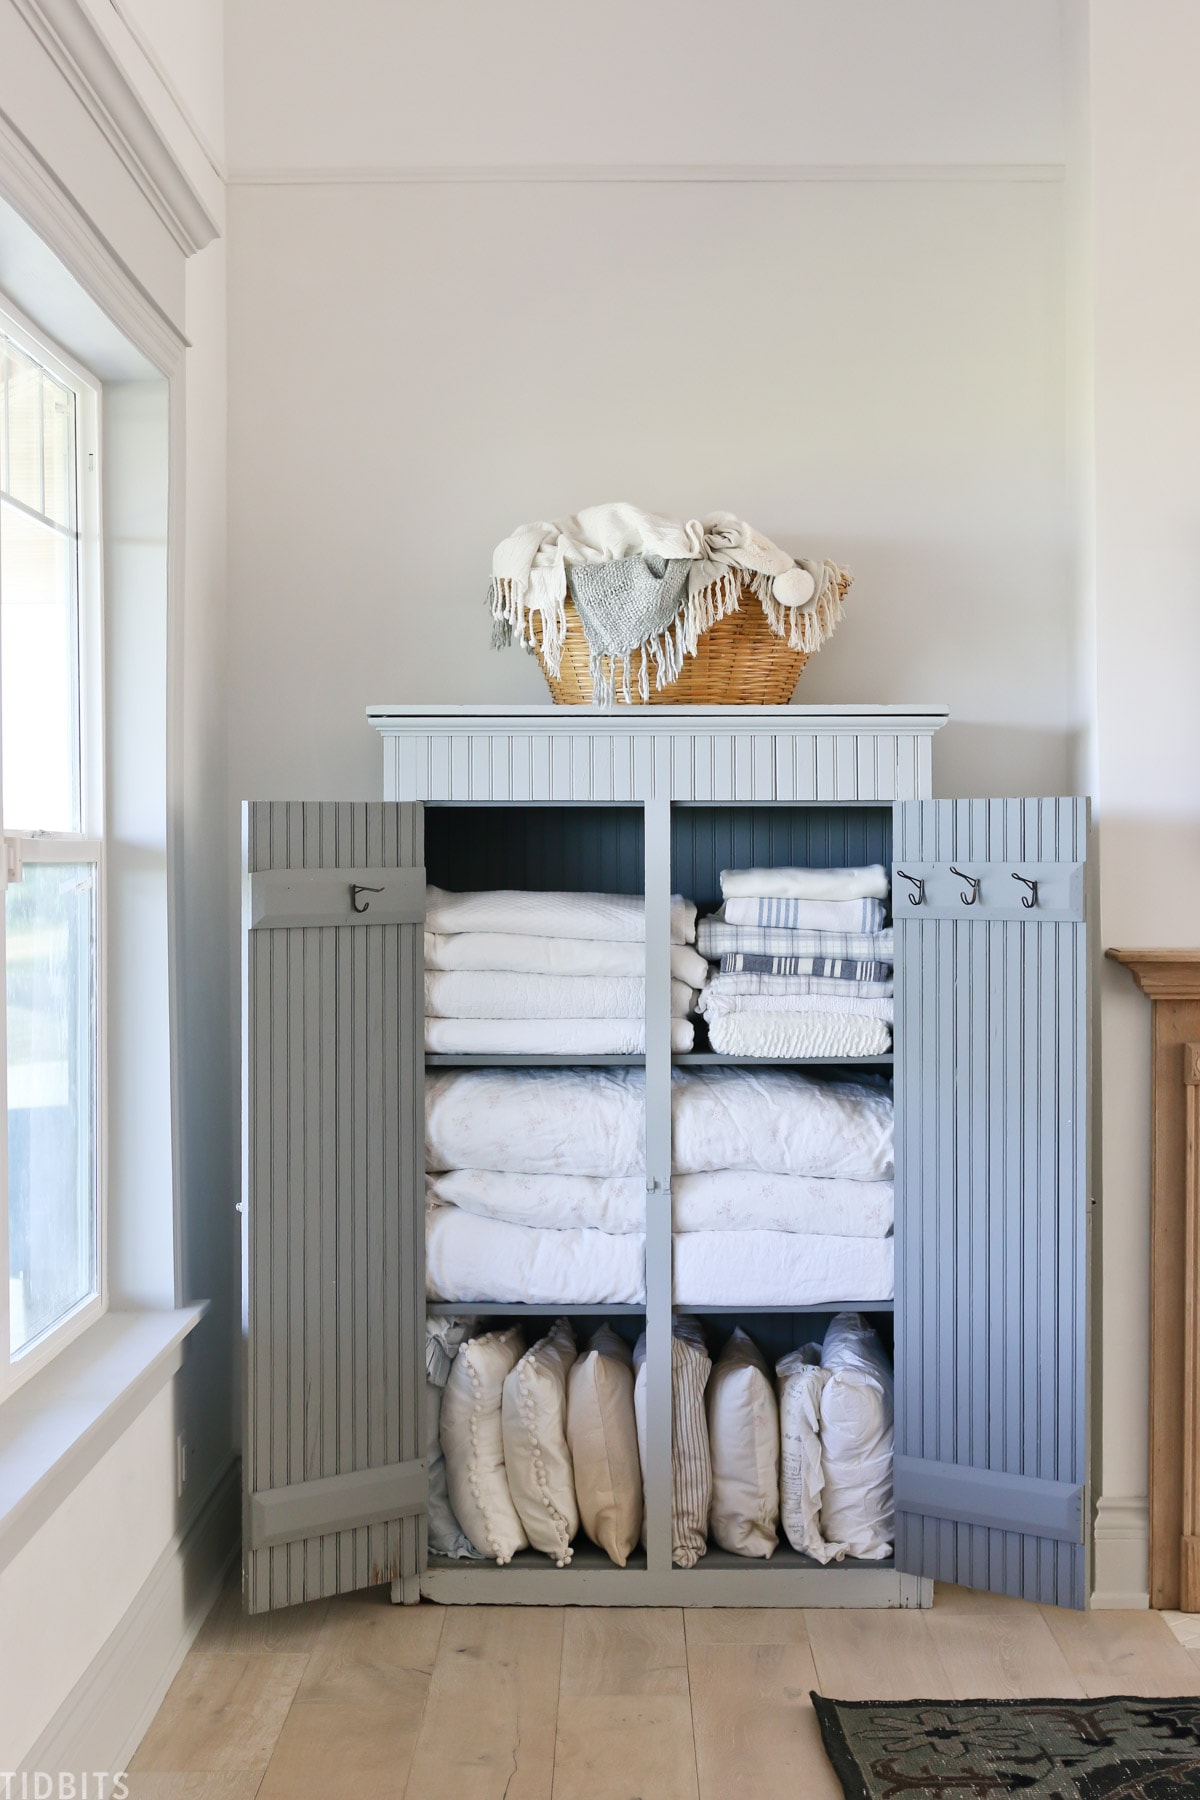
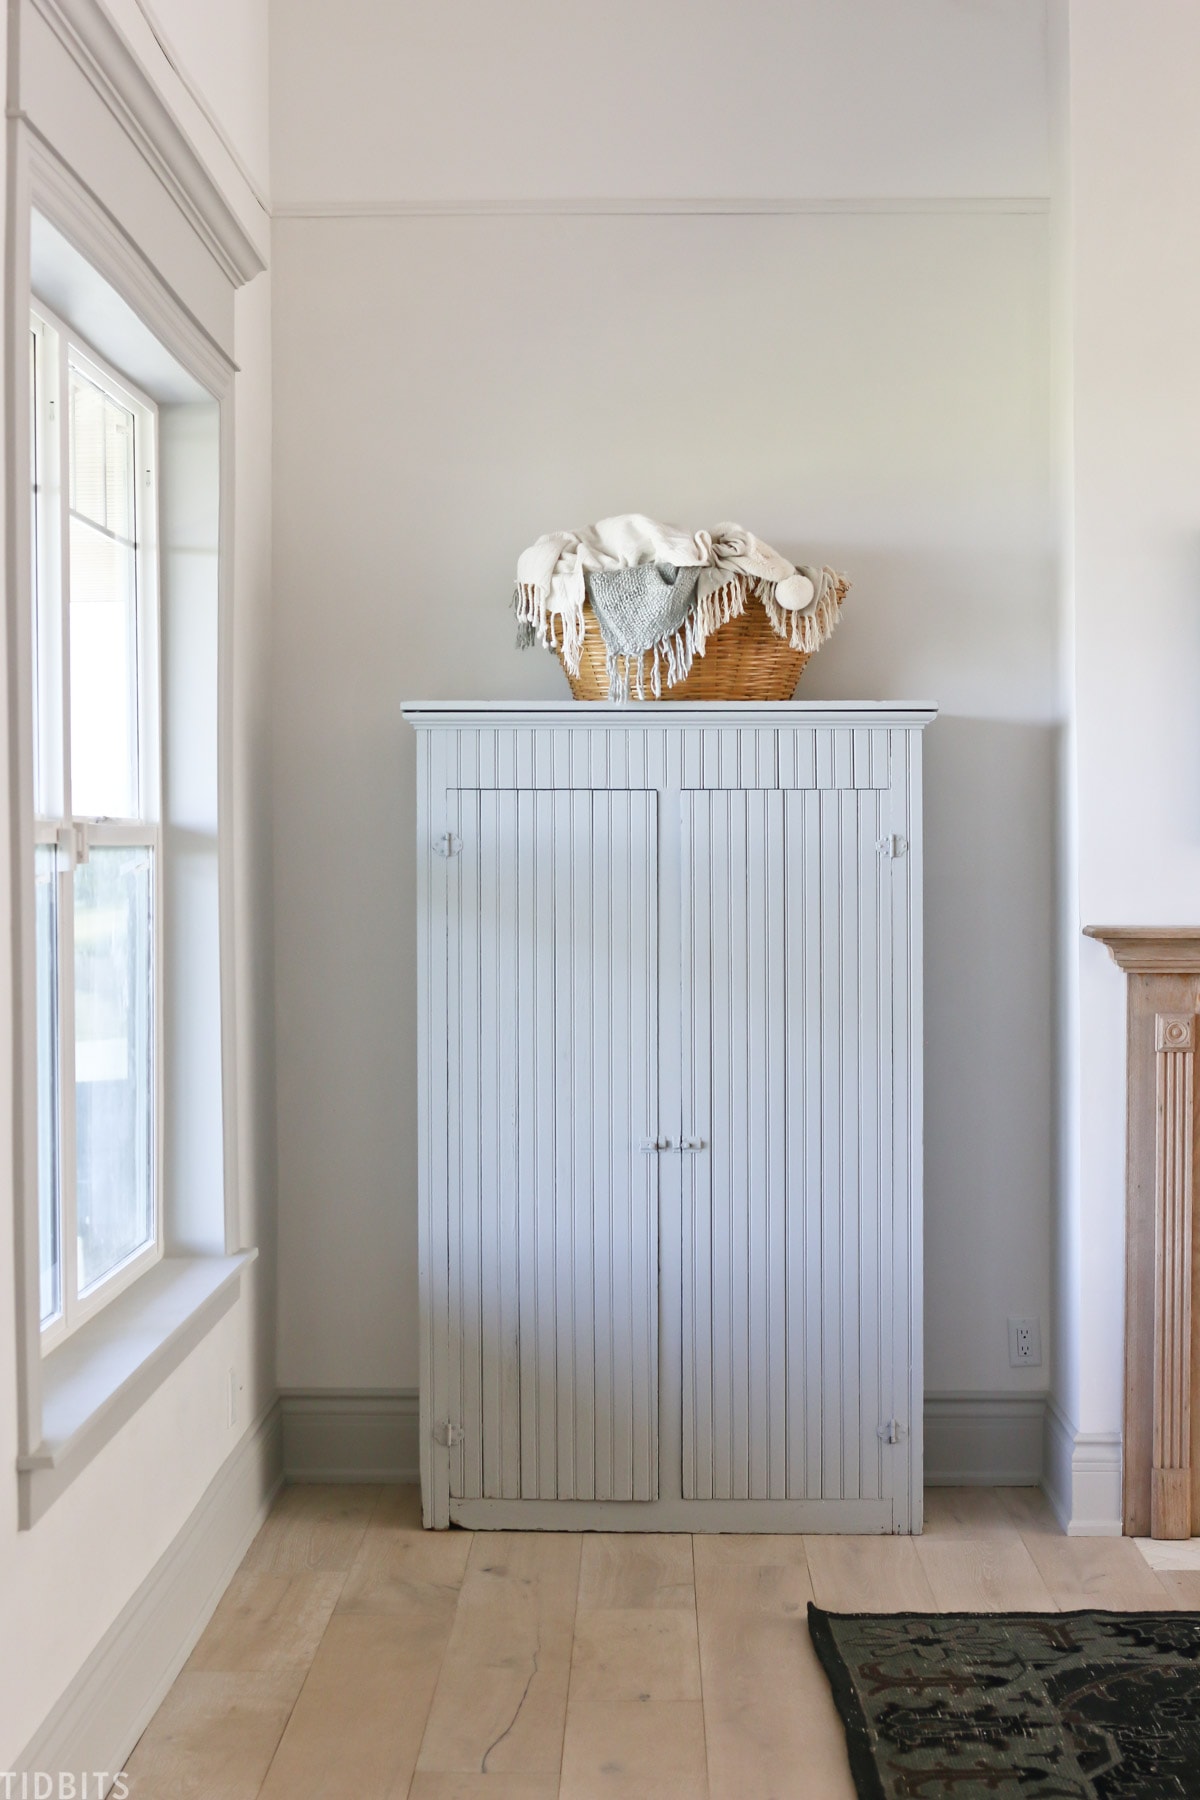
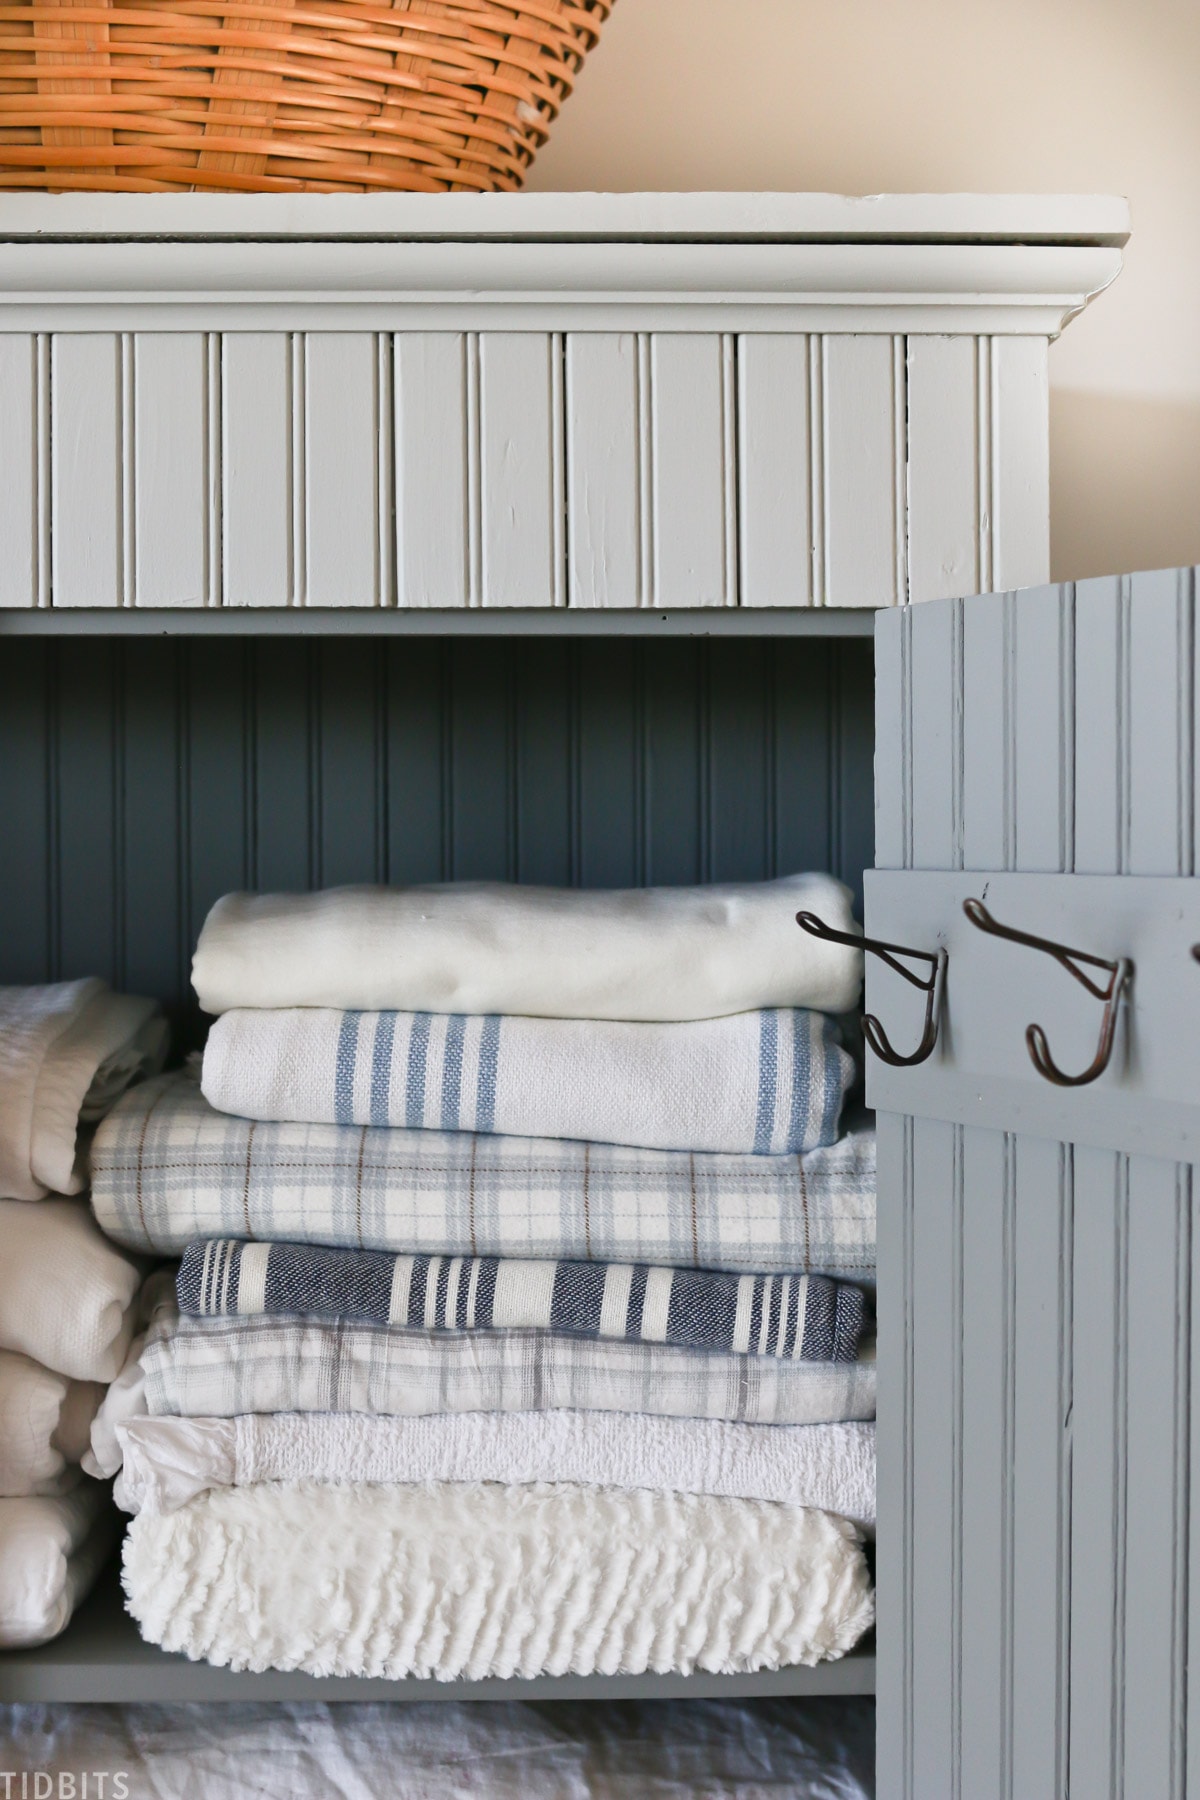
The outside color, “Evening Shadow” turned out to look like a very lovely shade of earthy blue/gray. It seems just a hair darker than our trim color, which is exactly what I was hoping for!

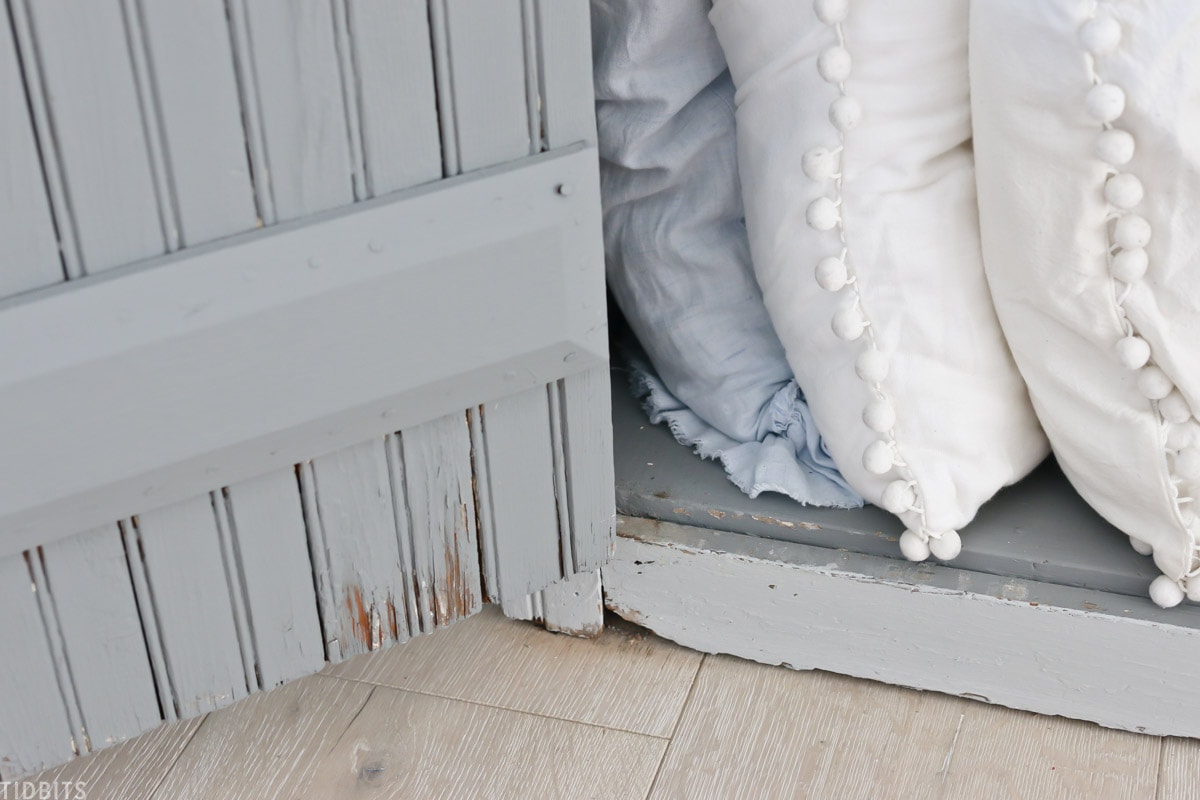
After getting it painted, I liked how clean it looked, and decided not to distress it too much. Just a bit on the bottom here and there, which looks more natural to me.
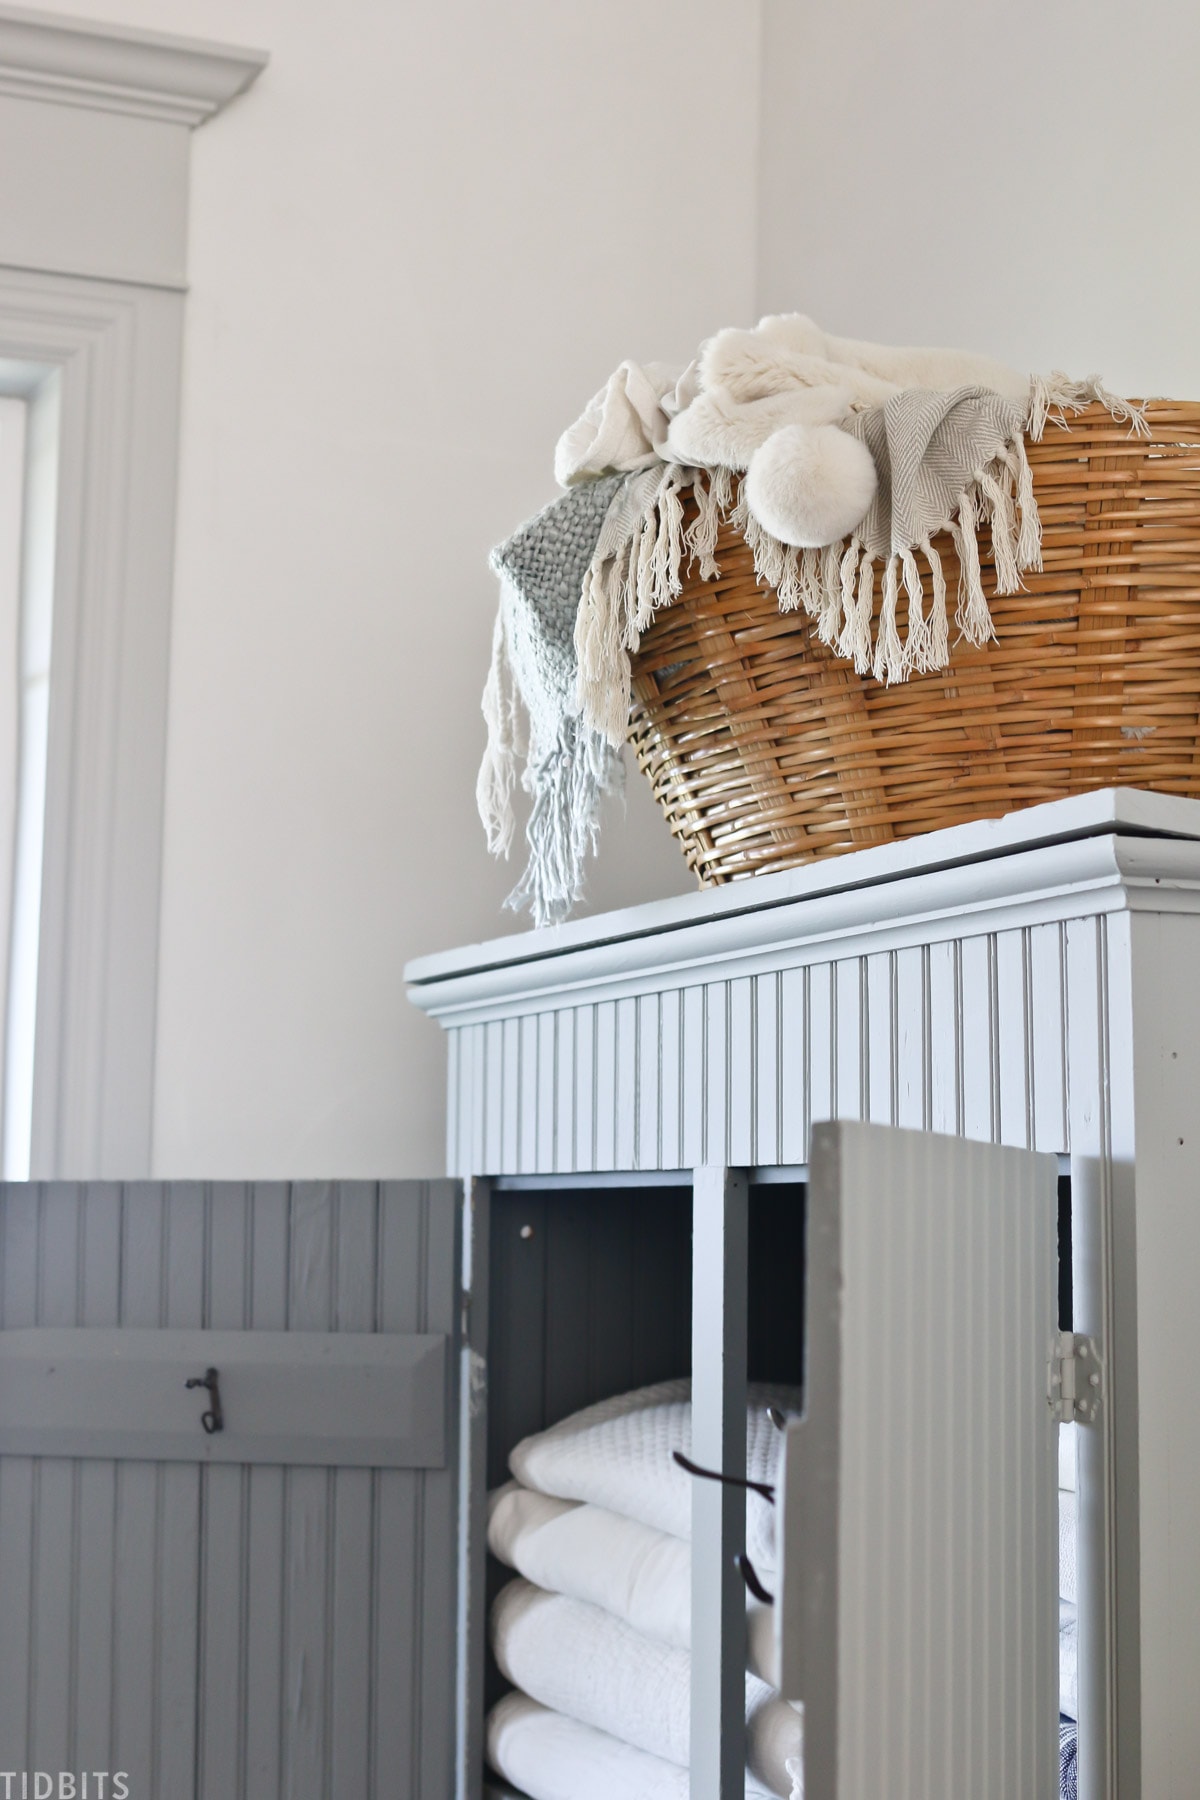
I really really like the inside color “Earth Stone” and kind of wish I would have done it on the outside! It’s a lovely earthy blue/black tone and really helps all my white linens pop against the darker color.
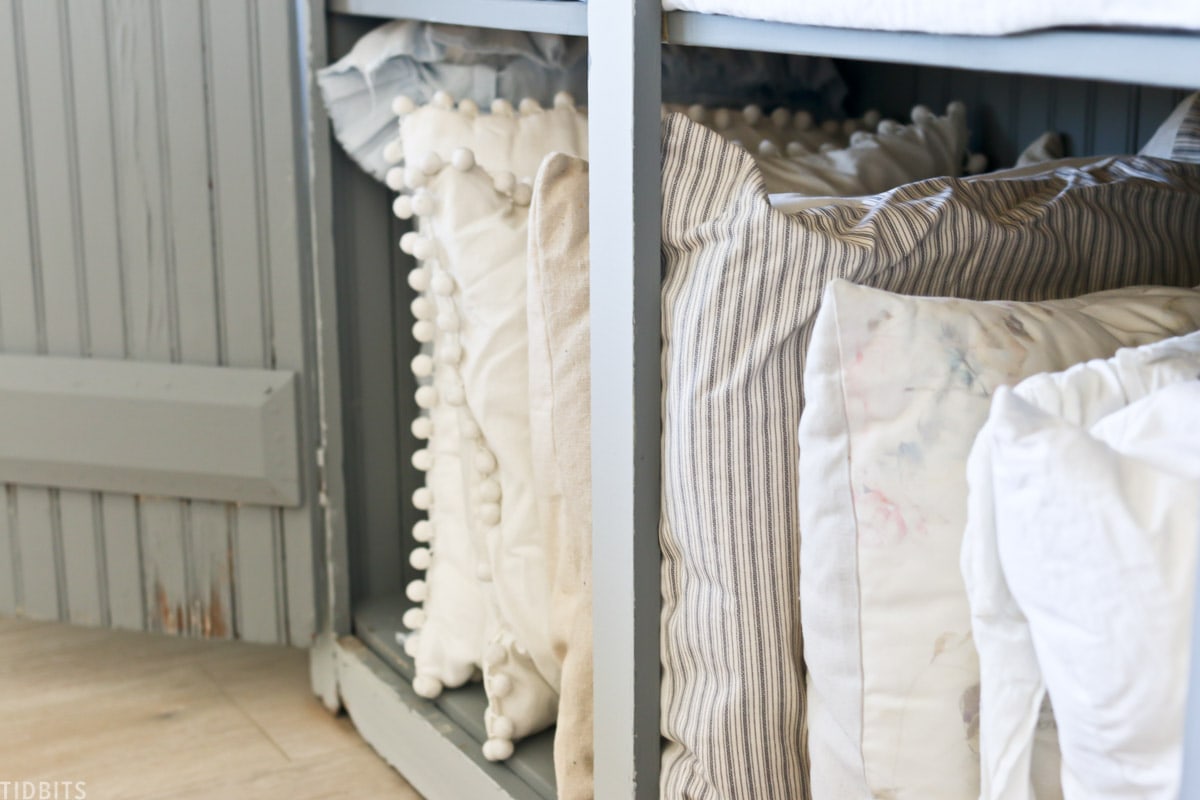
On the bottom shelf, I’ve filled it up with our extra pillows and pillow forms. I think it will be handy to have them there for when we want to swap out pillows or build blanket forts!
This middle shelf holds our big heavy duvet’s and duvet covers. When summer comes, we don’t like to have such heavy bedding, and this was the perfect spot to store those for the season.
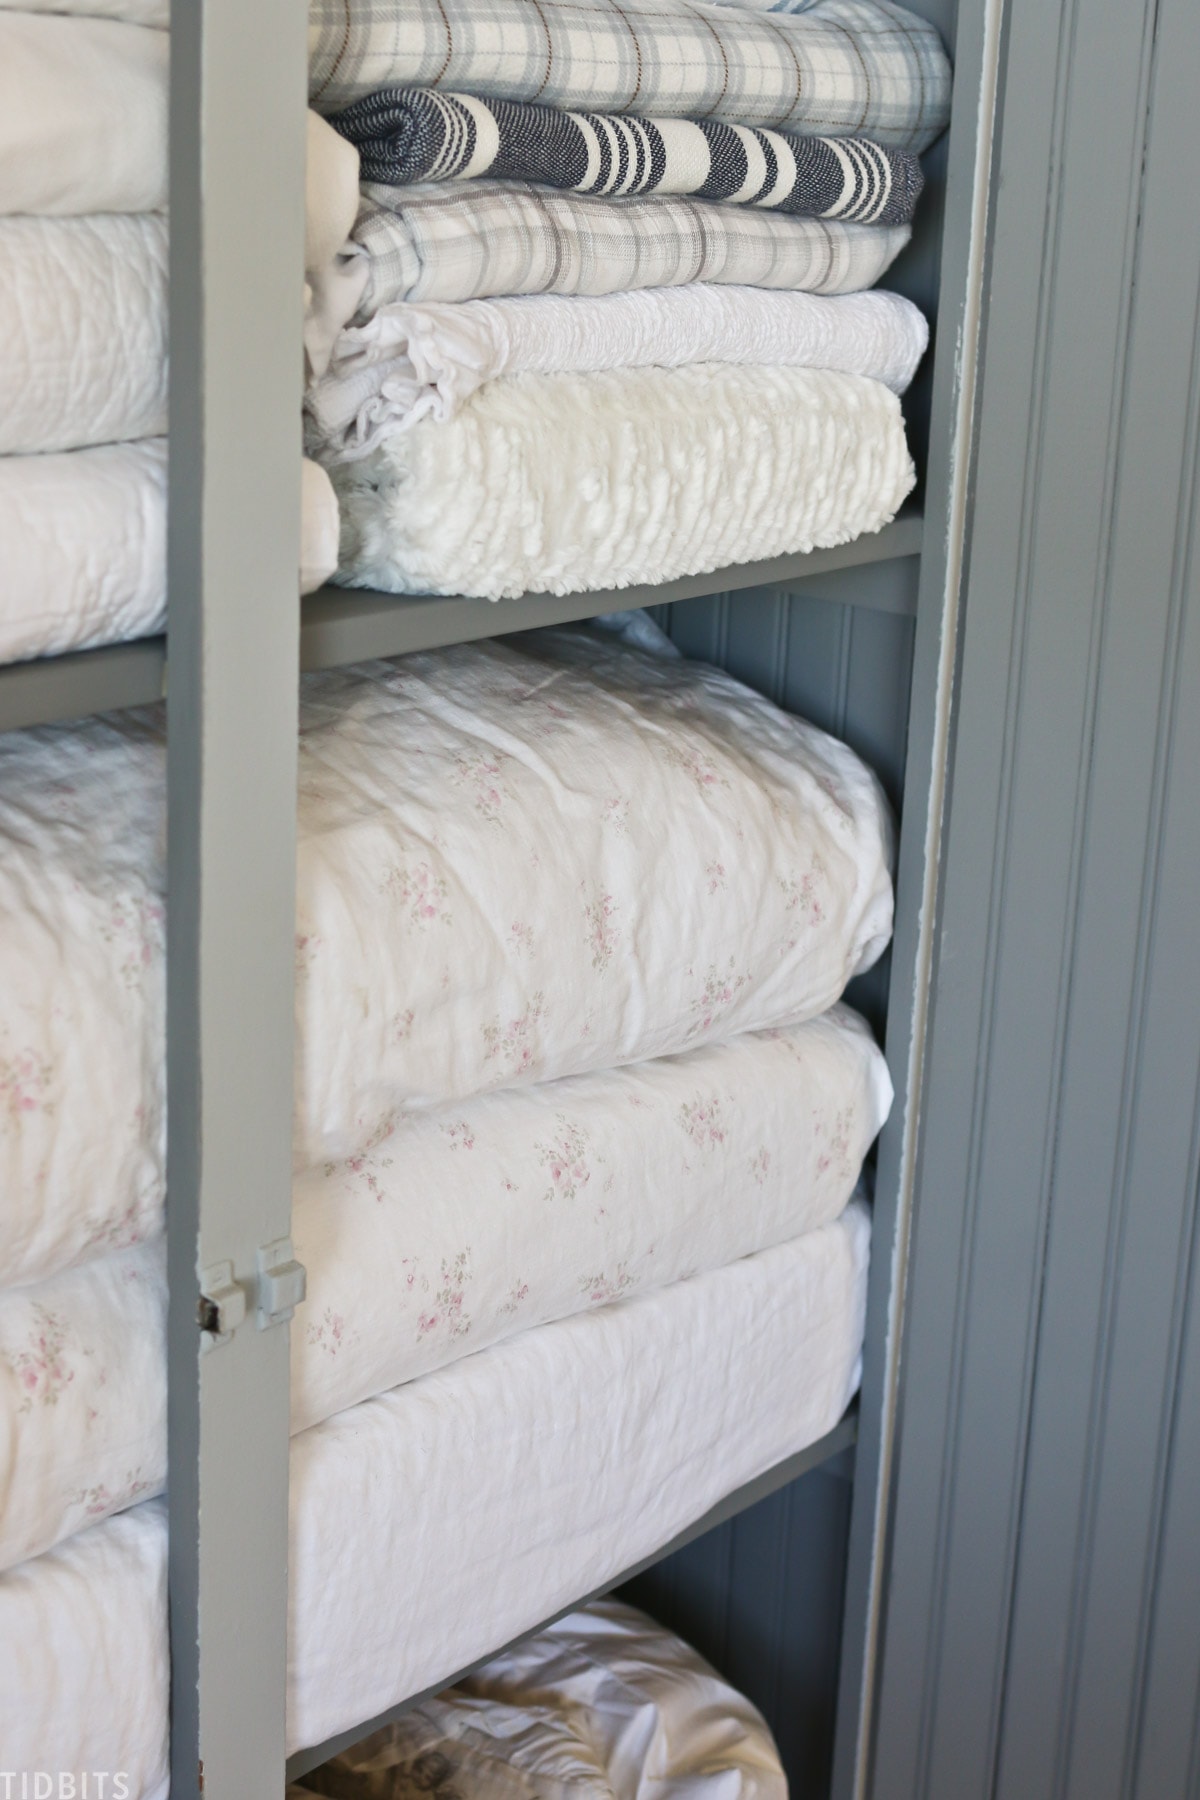
The top shelf has a mixture of extra bedding and throw blankets. I didn’t realize I had collected so many white blankets, but now I am glad I did. It feels very pretty and cohesive in here.
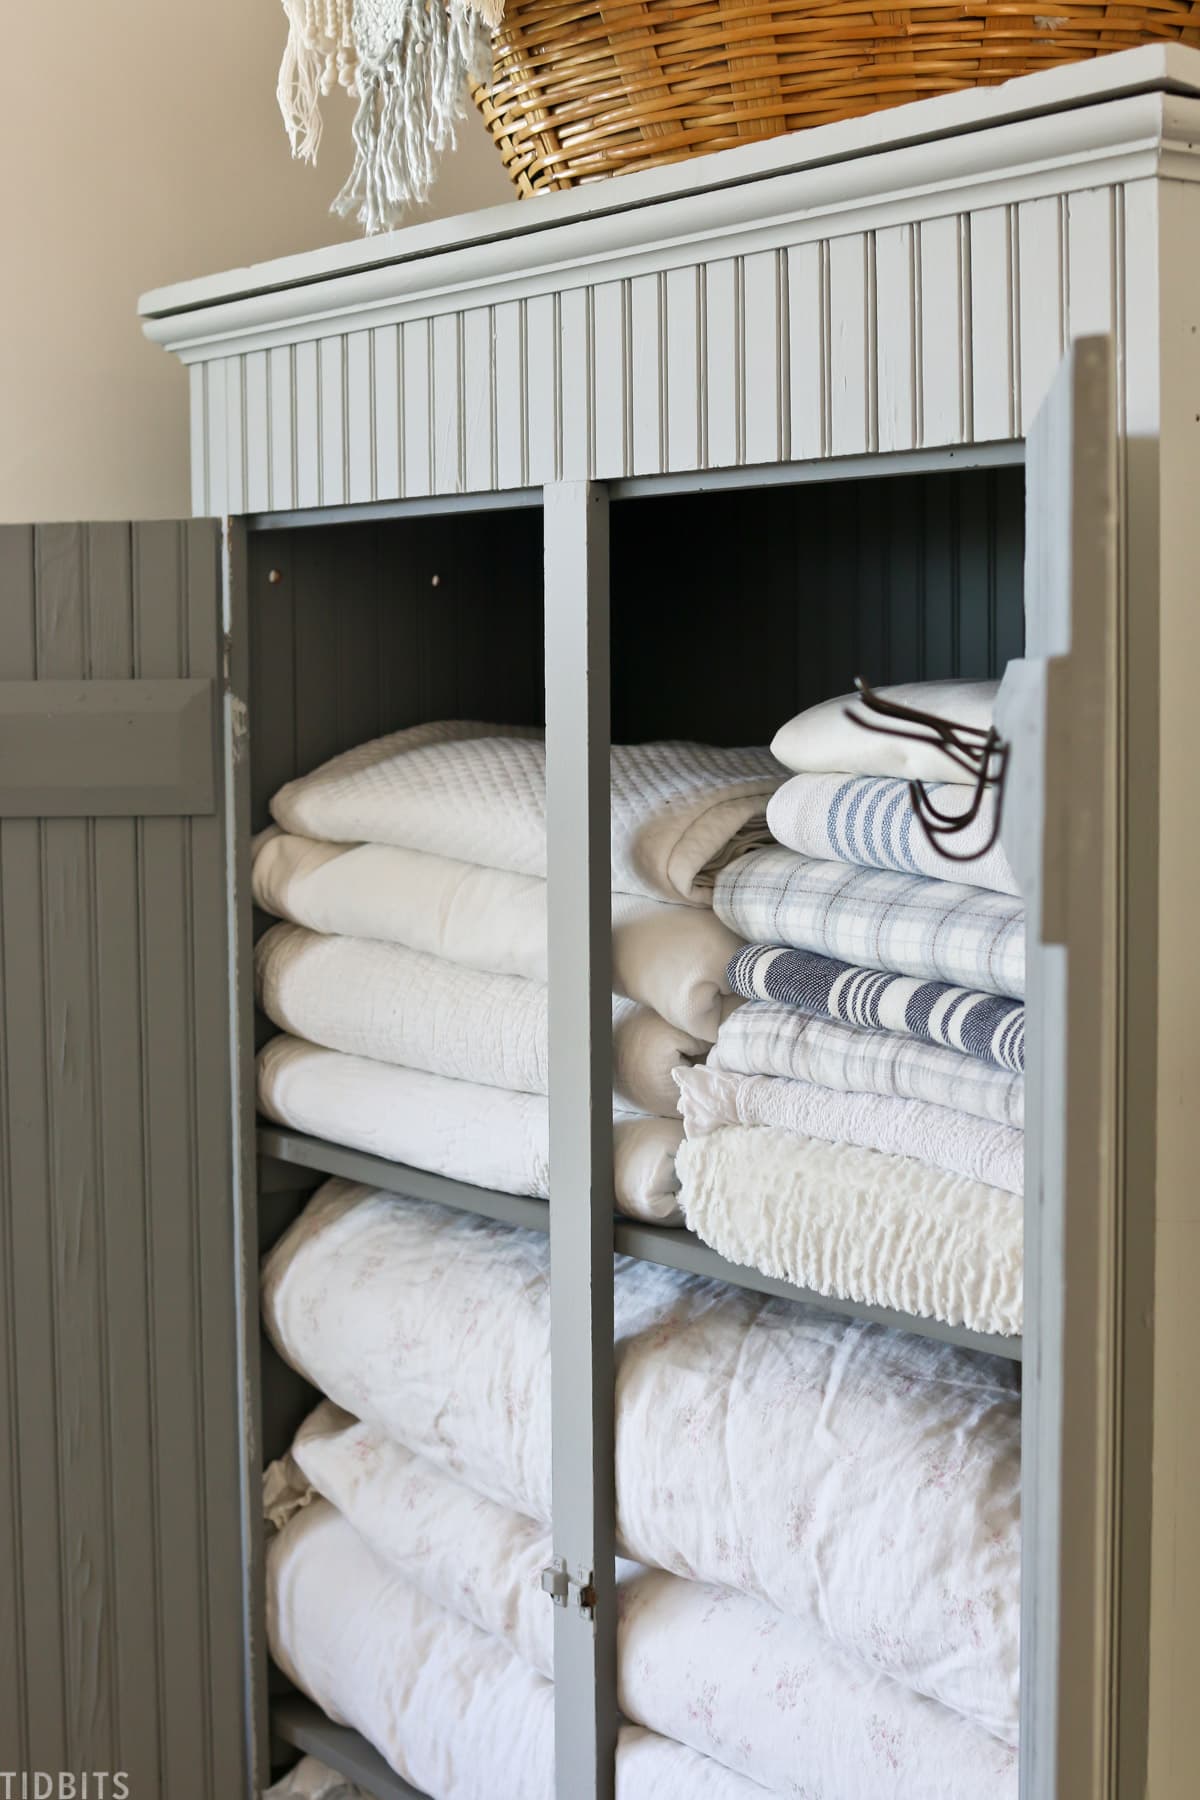
On the top of the cabinet, I just added a vintage basket for our favorite cozy throw blankets that are easy to grab and put away for movie nights.
We haven’t had our pillows and blankets since we moved from our last house, because they were all sitting in boxes in storage. It was so wonderful to pull them out and have them available. It’s funny the things you miss. I did end up getting rid of a bunch of extra ones I just didn’t want to hold on to, and I wanted to make sure they would all fit comfortably in the new linen storage cabinet we now have available.
I hope you’ve enjoyed seeing this transformation!
This thrifted hutch I shared on my blog not too long ago is another favorite furniture transformation. I also enjoyed making over this Antique German Sleigh Bed.
There are a lot of great paint products you can use to makeover furniture, but I really enjoyed trying the Classico this time around. I’d love to hear what has been a favorite paint for you!
I hope you get to check out all the lovely products and home pictures found on the Pure and Original website. I’m dying to try their Fresco lime paint next!
I do have some more painting projects to do for our living room space, and our furniture is SO CLOSE to being delivered. If you missed it, the design plans for our living room are also on my blog. I can’t wait to pull this space together and do another reveal post for you.
If you love getting paint on your hands, you might also like a FREE copy of my Complete Guide to Painting a Room. Just fill out the form below.
P.S. I’d love your help getting this post circulating on Pinterest! CLICK HERE TO PIN THIS POST! Thank you so much!


I totally would have painted it too and GREAT JOB Cami! I love love love how it turned out!! And your white Val let’s look so good inside there … I think you should leave it open all the time!!🤣
Much love,
Cammi
It’s beautiful and I know you needed it to match but I sure did love the before.
Love it- you are multi -talented girl!!
Hi Cami! I have been hearing a lot about Classico paint and i would love to try it. The hutch looks so awesome now but i agree with you, i love the inside color more. I love to get my hands dirt with paint. I am recently using Dixie Belle for my furniture and DIY Paint from Debi’s Design Diary for my smalls. It is a clay based paint and i love the texture you can get with it. I do have some Annie Sloan and County Chic that i still need to try. Have you tried any of these brands and what did you think? Thank you for sharing this. I love a good furniture transformation. I love love that hutch.
Wow, I would have fallen for this lovely antique cupboard, also! Great find! And it looks just amazing with the new color & new purpose. =) (I’m gonna have to go check out that paint line you used….)
Love this piece! I love old/antiques…it would have been interesting to see this piece sanded and stained, to show the natural wood. Your pillows, blankets, etc. look lovely inside. Great job! Thanks for sharing.
Hi Linda! I love antiques too! I did debate sanding it, but I was afraid of lead paint possibilities. Painting it sounded easier and safer. But I bet it would have looked fantastic!
Hi! I love this cabinet before you painted it and the AFTER VERY MUCH!!! Just beautiful and i LOVE how you filled it too!!! My question is….did just that little bit of cleaning AND the painting, get rid of ANY oder that would have been in it, being that it is THAT old?! Especially with putting bedding inside. THANKS!!!
Great question Peggy! Oh yes, it had odor. Smelled very old, another reason why I knew it needed to be painted. The scrubbing and painting did a wonderful job at masking that smell. I’m hoping it will stay that way, but only time will tell. Thanks for stopping by!
You outside cabinet color is perfect for the room. You have made such a cozy little corner in your living room. Nice job, high five!
Thank you so much! It turned out such a lovely color.
Cami, the cupboard is beautiful! Love the color choices you made, and the basket with more often used throws on top it like the cherry on top.
Thank you Annette! We are just patiently waiting for the couches to cozy up on with those blankets! Hugs!