This post may contain affiliate links, which means I get a small percentage of the sale at no extra cost to you. I only recommend items I love and have had a positive experience with. Thank you!
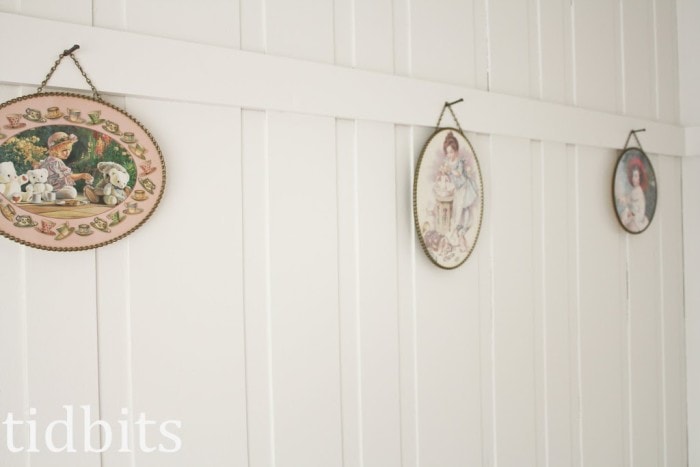
And just to be clear, this is a light and bright wall paneling treatment. None of that old, dark basement paneling around here! We’re going for fresh and clean!
Full Room Tour
DIY Wood Wall Paneling
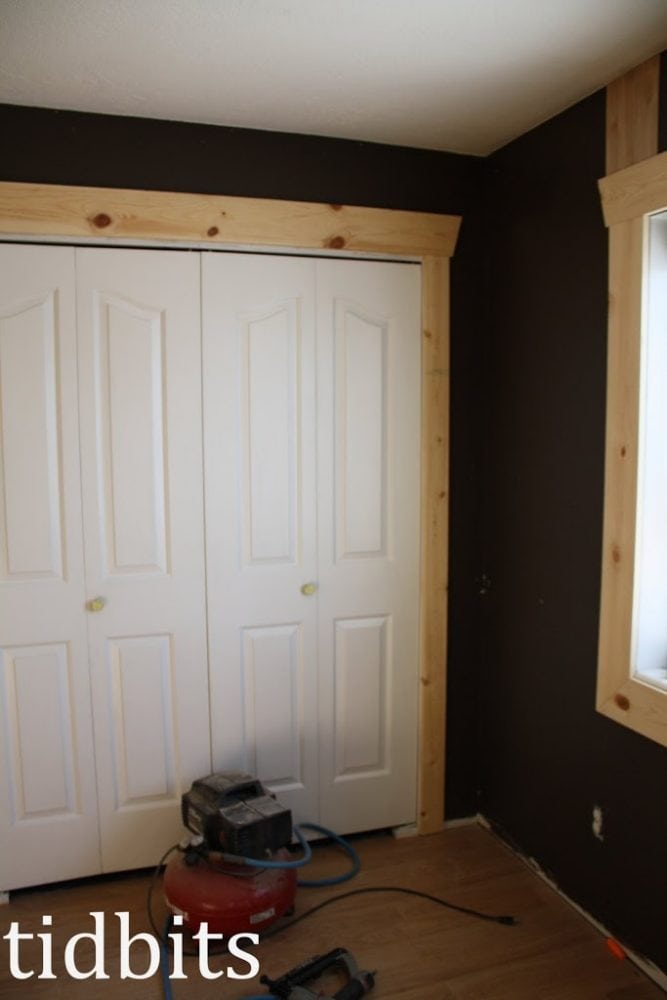 But I didn’t like the dark color – so here is the step-by-step process we did to add some dimension and light to the 10 x 12 room.
Wood Slat Wall Paneling Tutorial
First, we went to Home Depot and bought 8, 1/4-inch plywood sheets. They were about 12 dollars a sheet. I think we even had some leftover. So, this totaled about 100 bucks.
Then at Home Depot they cut the sheets down into wood slats. We had them cut them into 4-inch, 6-inch, and 8-inch strips.
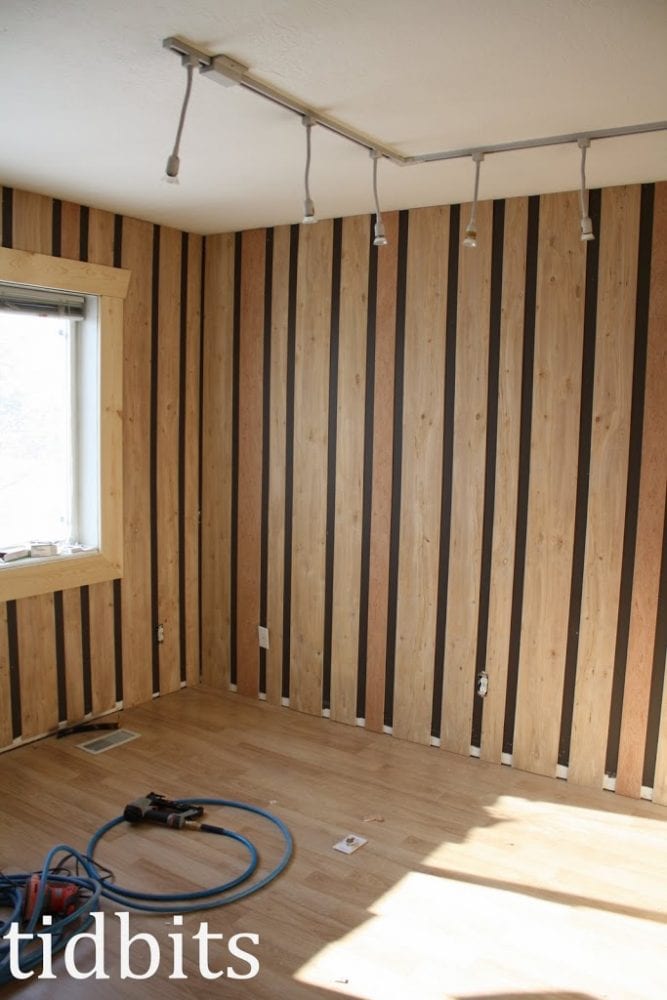 Then my husband nailed the vertical boards onto the walls with 2-inch gaps between. He made it easy by cutting a small chunk of wood that was 2 inches, and he slid it in the gaps as he nailed up the next piece. This made installation quick and easy (so much better than pulling out a tape measure every time!).
Next, he added some trim around the windows and a horizontal panel about 2/3rds of the way up the wall. Sort of like a chair rail but higher. You could do it without that extra trim piece, but I thought it added some extra visual interest.

We came up with these wall paneling ideas to save time and money. It was pretty quick to put up the wood strips and about 50 dollars cheaper than the shiplap that we did in this room.
Crown Moulding Alternative
We had spent enough on the wood, so we used some inexpensive rope for the molding along the ceiling. This idea came from a room we saw at a themed hotel on our anniversary – it was a pirate ship. Can’t believe I just told you that!
We first sprayed the room with a paint sprayer, but it became obvious that in order to get the seams in between the planks good enough, I needed to caulk and brush. So, I did.
That took a while, but the payoff of seeing a plain wall come to life with beautiful wood paneling was worth it!
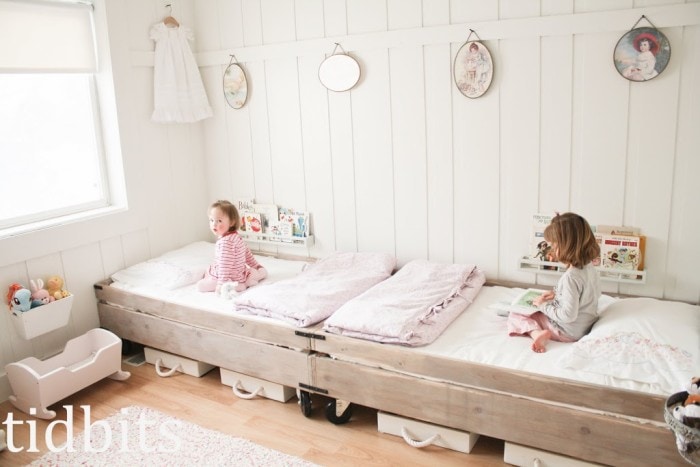
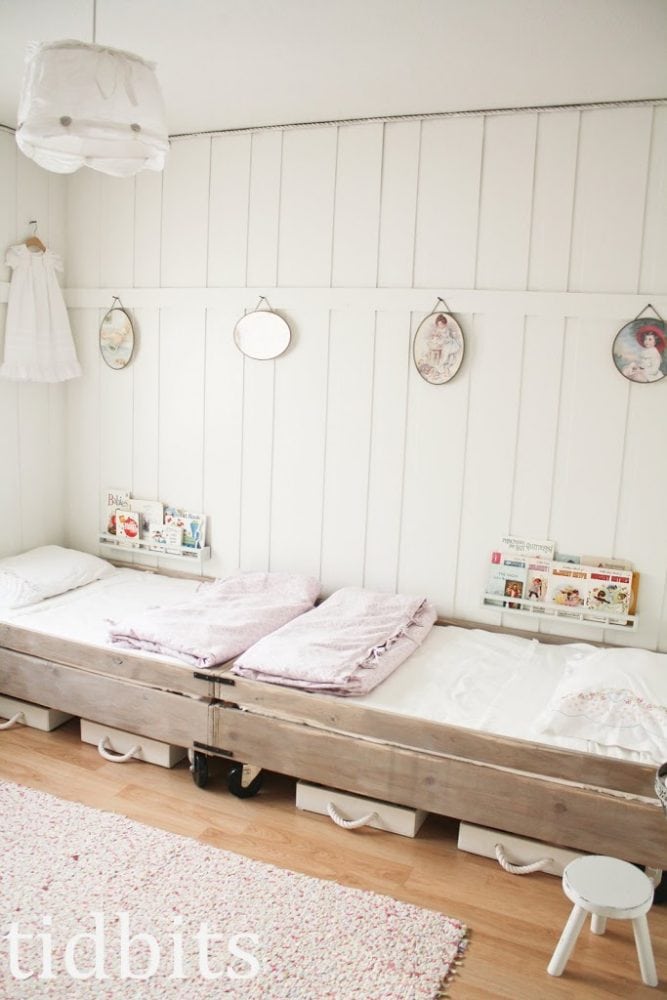
Custom Bed Designs
Now for a few details on the beds, which were another diy project.

My husband was kind enough to custom make these beds per my requests. He thought I was a bit crazy when I said I wanted beds that looked like crates – but he loves them now and they look fabulous with the new feature walls.

There is a lift up storage compartment under the mattress, which is so nice for blankets and out of season clothes.
I couldn’t talk him into pictures during the process or even to make up some plans. So sorry.
He likes to work at his own whims . . . . . . . and I wasn’t about to interrupt when I had him on a roll.
But I will tell you about the stain I used.
Bed Paint and Stain
The pictures you see above were from a vinegar and steel wool method. I filled a quart jar with vinegar and 3 bunches of steel wool. I let that sit for 2 days.
Then I brewed up some green tea. We did a single coat of the tea on the wood. The wood doesn’t do anything at this point. But when you wipe on the vinegar mixture it turns an old wood brownish gray. So pretty.
But I still thought they needed a little something, so I watered down some white paint and whitewashed the wood, scrubbing it in as good as I could without leaving any streaks. The wood tone of the bed works will with the white of the diy wood wall paneling.
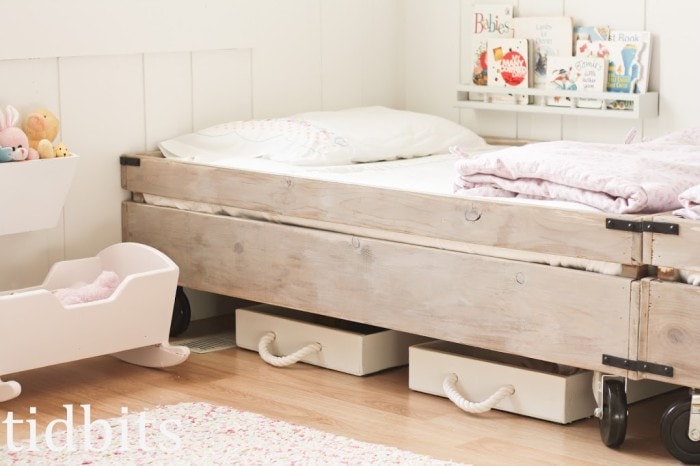
The whitewash made the wood even grayer, which was exactly what I had in mind. Then we added some wheels and hardware.
Customizable Mattresses
Now a little on the mattresses.
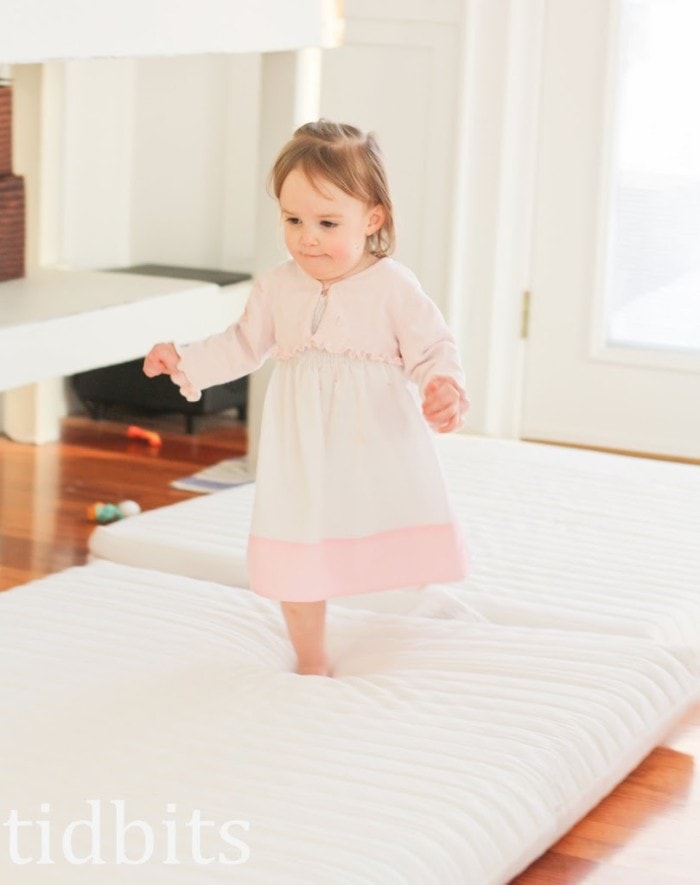
These mattresses are a unique size, or at least they can be. I needed this to fit the beds in this room along the wall.
I got them from Ikea – they have thought of everything.
They are simple covered foam mattresses but they come in separate pieces so you can customize the size. They go from the length of a twin (73 inches) to smaller (63 inches) or even smaller (53 inches). We used one insert making the beds 63 inches, perfect for our wall. The beds fit in snug enough that they can’t roll around. Perfect!

The foam isn’t that thick, but I think it is soft enough for a kid. I don’t think I could sleep on them.

But I don’t hear any complaining from the little ones.

I hope this answered some of your questions. We are really enjoying the new room with its diy wood wall paneling. Try it out in your next bedroom, living room or dining room makeover. You won’t regret it!
Let me know if you have any further questions!
More Wall Treatment Ideas
If you’re looking for more ways to spruce up your walls, checkout some of these great ideas:
- DIY Interior Stone Accent Wall
- How to Apply a Mural Wallpaper + Tips for Success
- How to: Gorgeous Textured Walls with Pure & Original Marrakech Lime Plaster Paint
- Choosing and Installing our Custom Moulding and Trim
- Country Cottage Bedroom Ideas
- Red and Black Bedroom Ideas with Vintage Furnitur
- 10 Charming Cottagecore Design Ideas


Really admire what you did with your walls
i am completely in love with this room!! i love those beds. i want to try to recreate the beds for my two toddlers. any suggestions on how a single momma could start? i’ve never done any home improvement projects and this would be my first! gasp!
Hey Cami,
You really had a beautiful home with the happy little girls. Looks that you had a great time! I admire what you did on your walls. Just loved it! Would try that soon. Thanks!
Cheers,
Oliver
I loved your comment Oliver! Thank you for stopping by!
Cami, I discovered you thru a yogurt recipe search for my instant pot. Now, I can’t stop reading about your DIY everything. Your girls room is adorable and I LOVE your beds. I want it for our twins! You should find a way to market your beds so the rest of us mortals could buy it 🙂 Awesome posts. Please keep it up. I can use some more instant pot recipes being a busy mom of twin toddlers. Thank you!
Really beautiful, thanks for sharing. I love the custom size! Would you share where the sheets are from?
This is a very wonderful kid's room makeover. Absolutely loved the atmosphere and the storage space. The room looks more spacious because of the light-coloured walls—it makes natural light bounce all over the room. Plus, the kids' beds are multi-functional. This is indeed an inspiration DIY to all parents out there. There's still something we could do to maximise the room regardless
I love the beds your husband made and have now commissioned my sweet husband to make me one that is similar for our little guy. Wondering though, the black hardware on the corners and joining your two beds…where is it from? Thanks for the help and inspiration.
Beautiful! We're afraid of too much white in my girls shared room but I am rethinking that. Maybe just lots of extra paint for touch-ups
Great article, Its really a very informative posting indeed. Resources like the one you mentioned here will be very useful to me! I expect more and more article like this from you in the future as well.
Hi Cami! First of all, congratulations to your lovelly family. I like very much what you did to the house this far and can't wait to see the rest of it.<br />Thanks a lot for the idea with the rope molding. I think it looks great.<br />Have a nice day,<br />Szillili
Your girls are sooooo precious! I totally love these beds! I so wish I could corral my husband long enough to get him to do something like this for our boys. They would be perfect! How ya been, girlfriend? 🙂