
This post may contain affiliate links, which means I get a small percentage of the sale at no extra cost to you. I only recommend items I love and have had a positive experience with. Thank you!
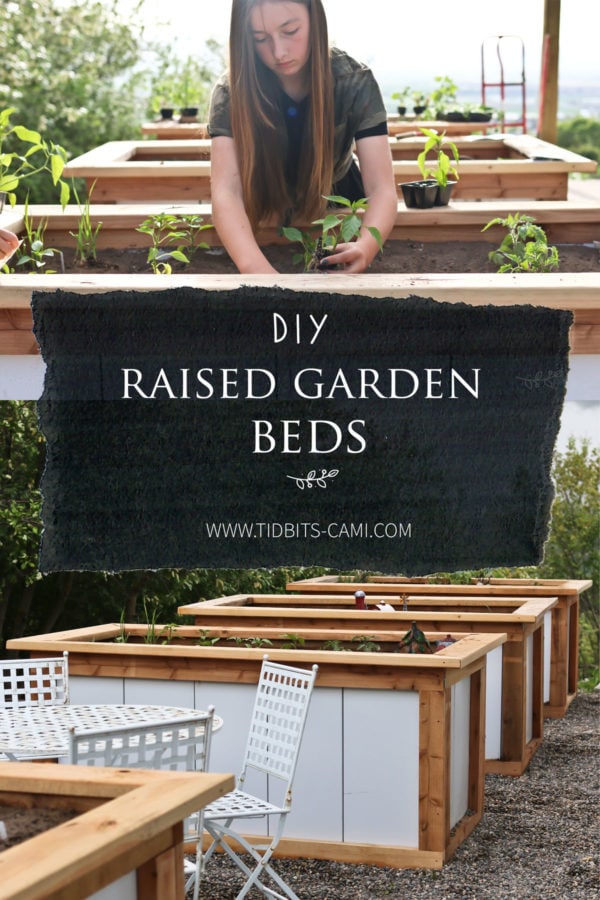
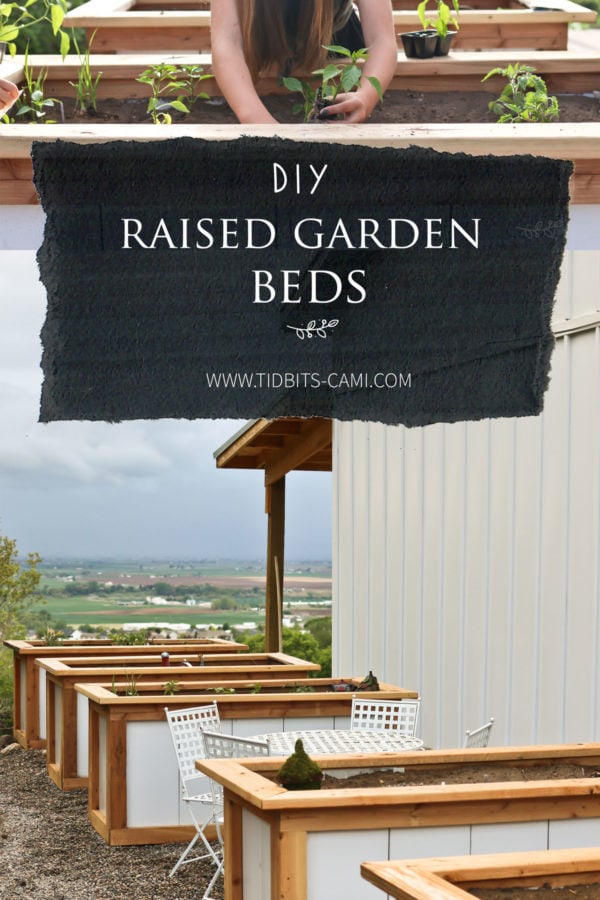
Mr. TIDBITS is here to share his tutorial on easy-to-build beautiful DIY raised garden beds. Here we’ll walk you through our process for building these cedar-raised garden beds. They come together pretty easily!
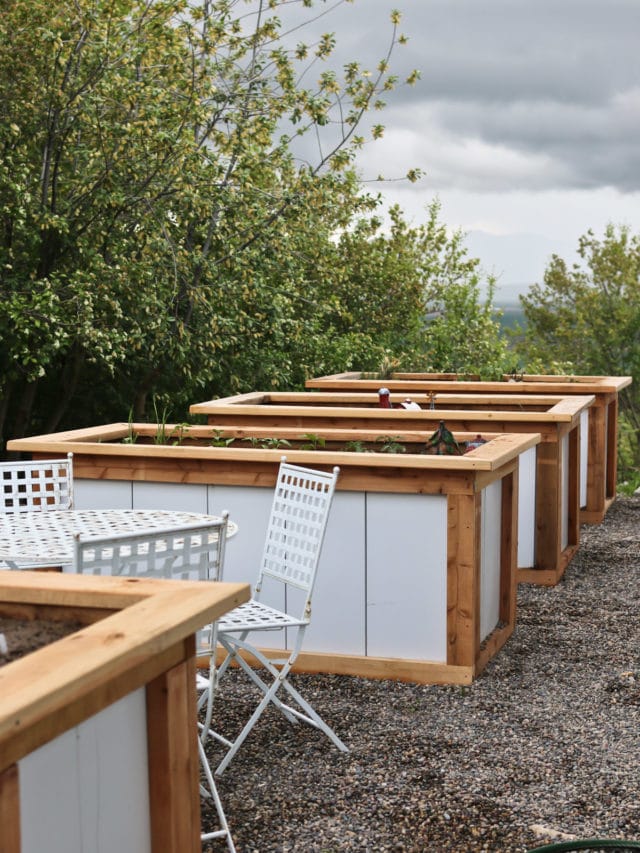
We’re so excited to share with you this DIY raised garden bed on a budget, which is a twist on the traditional gardens and planter box that you see.
They also give your backyard a little personality and a place to grow plants and veggies in time for the growing season.
Watch This Post
With the warmer weather upon us, hubby gets really excited about working outside. Being in a brand new home on 25 acres, we still have almost no landscaping, since our priority has just been getting the inside more comfortable.
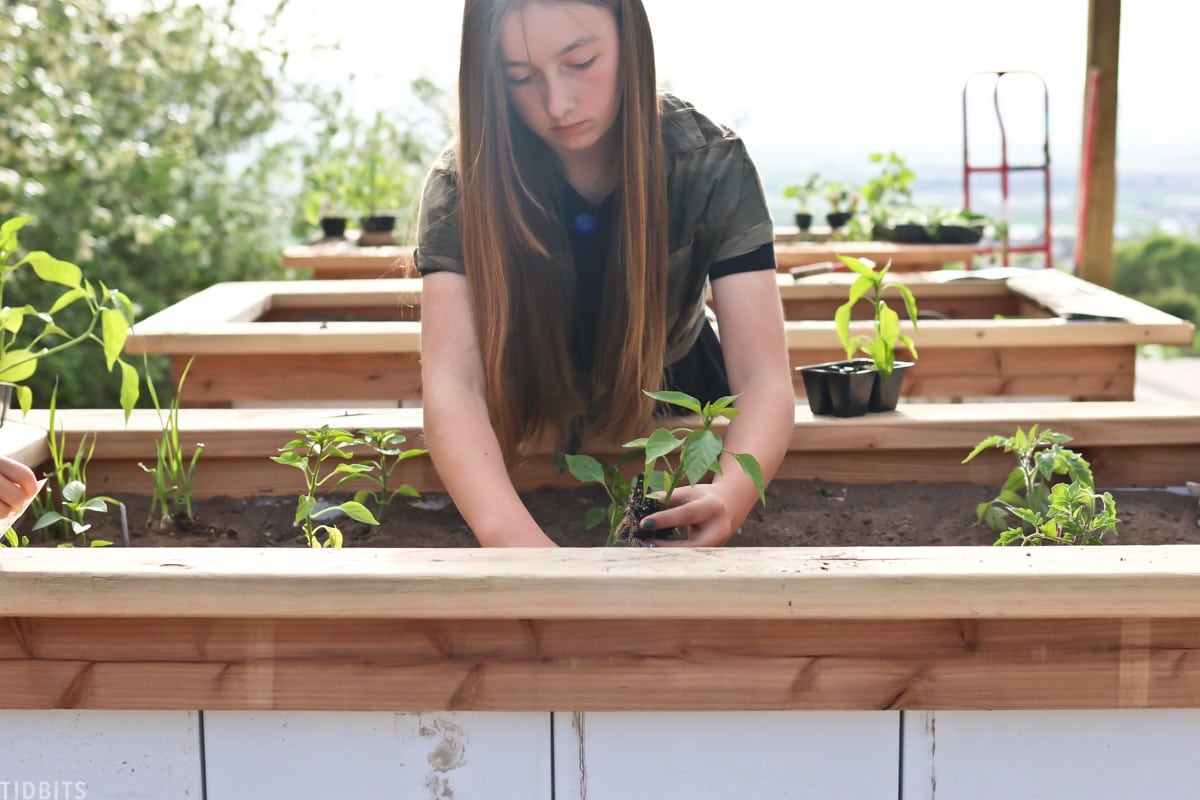
But we both wanted to get a little garden spot going for fresh food, but also mostly to get our kids involved and learn something new.
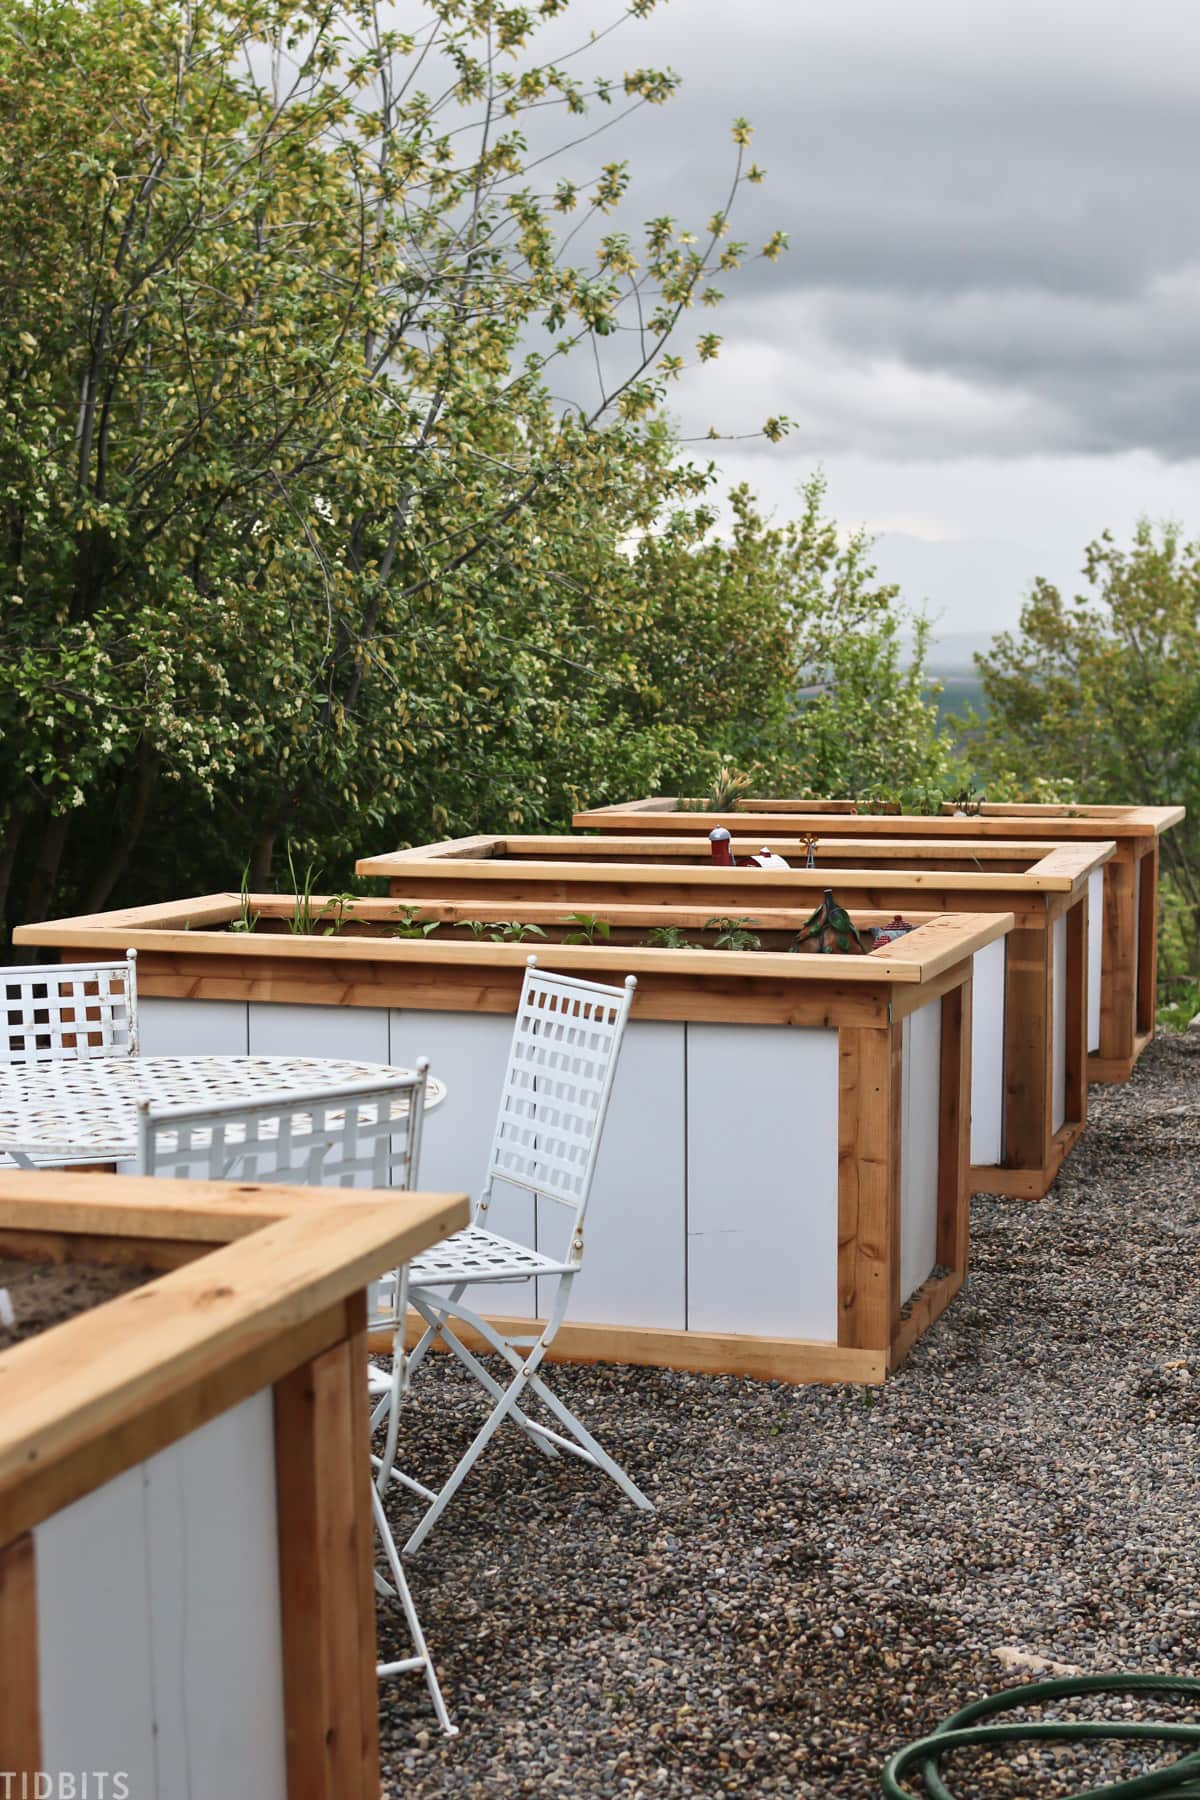
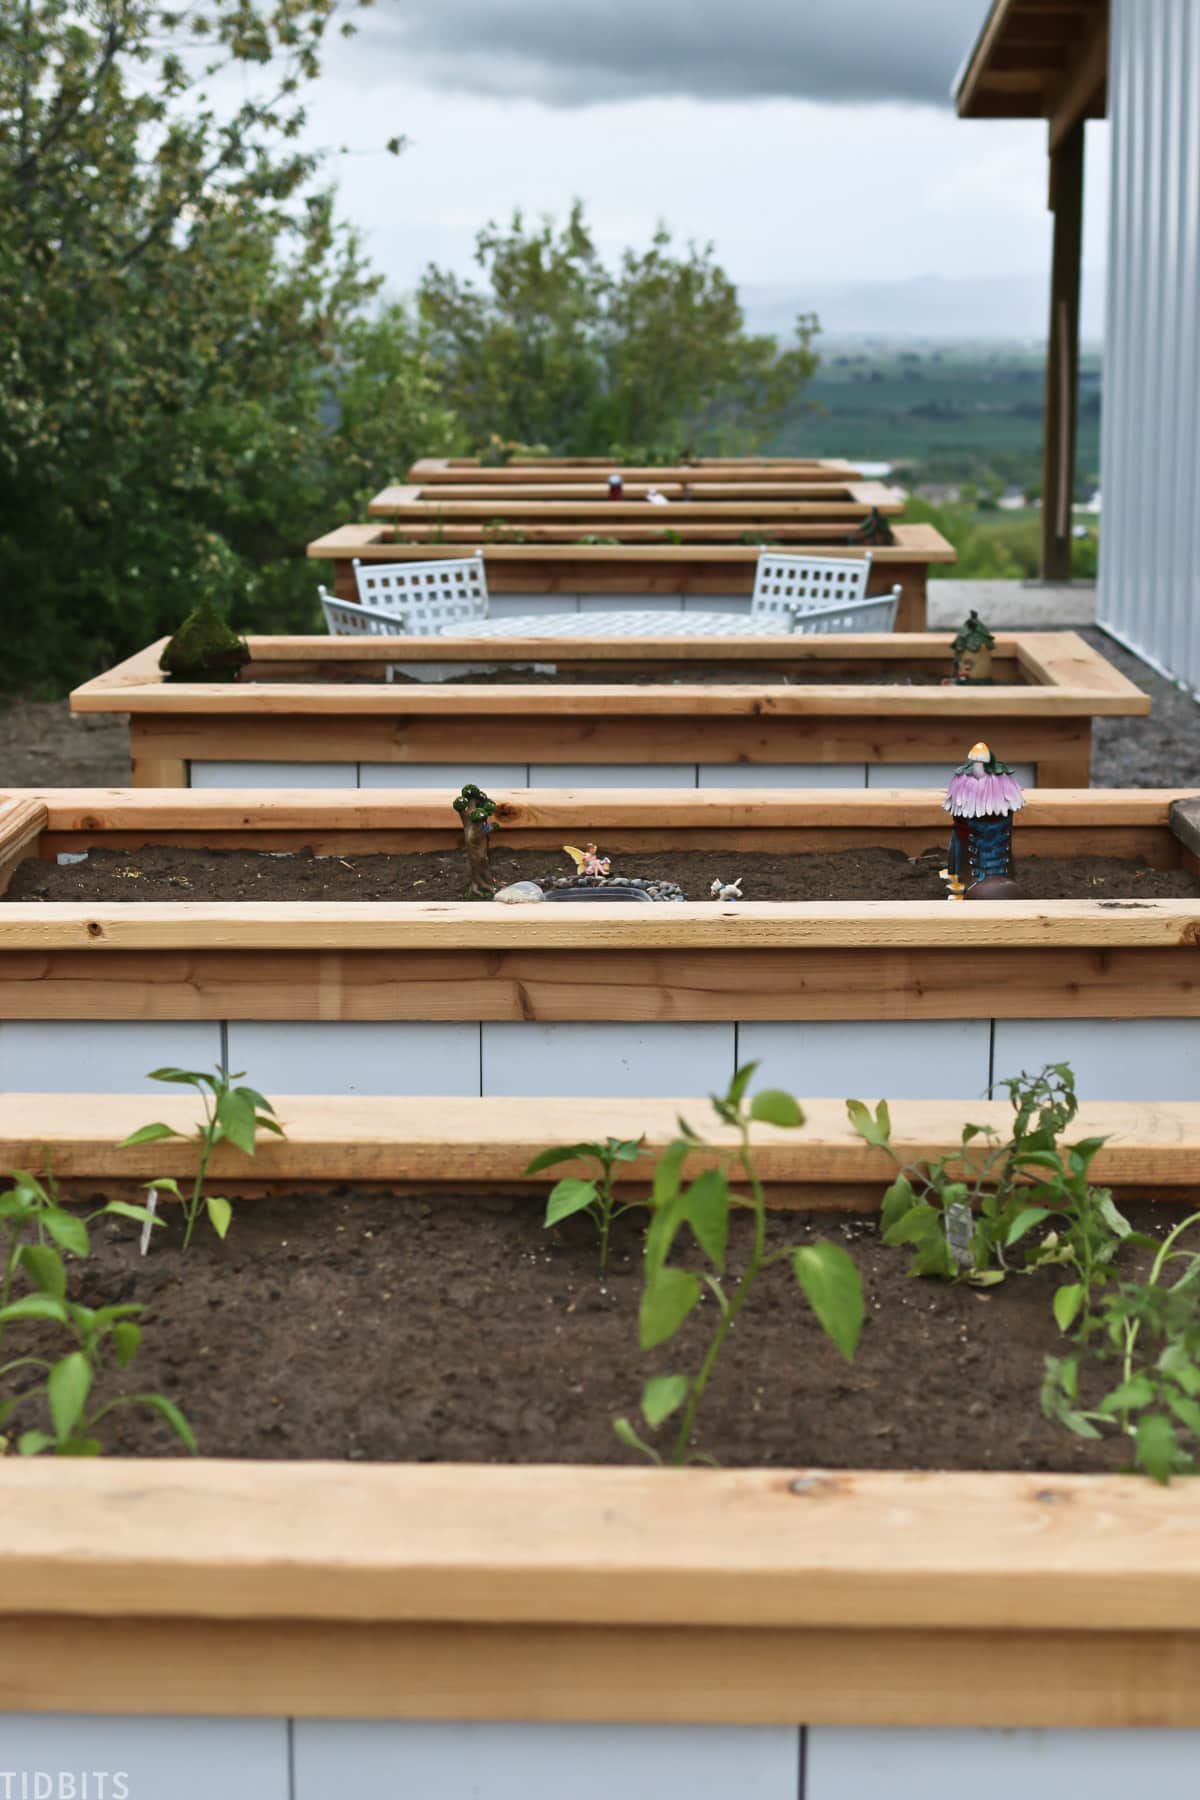
We thought this spot on the side of the house would be perfect to build a raised garden bed that we can use whenever we want.
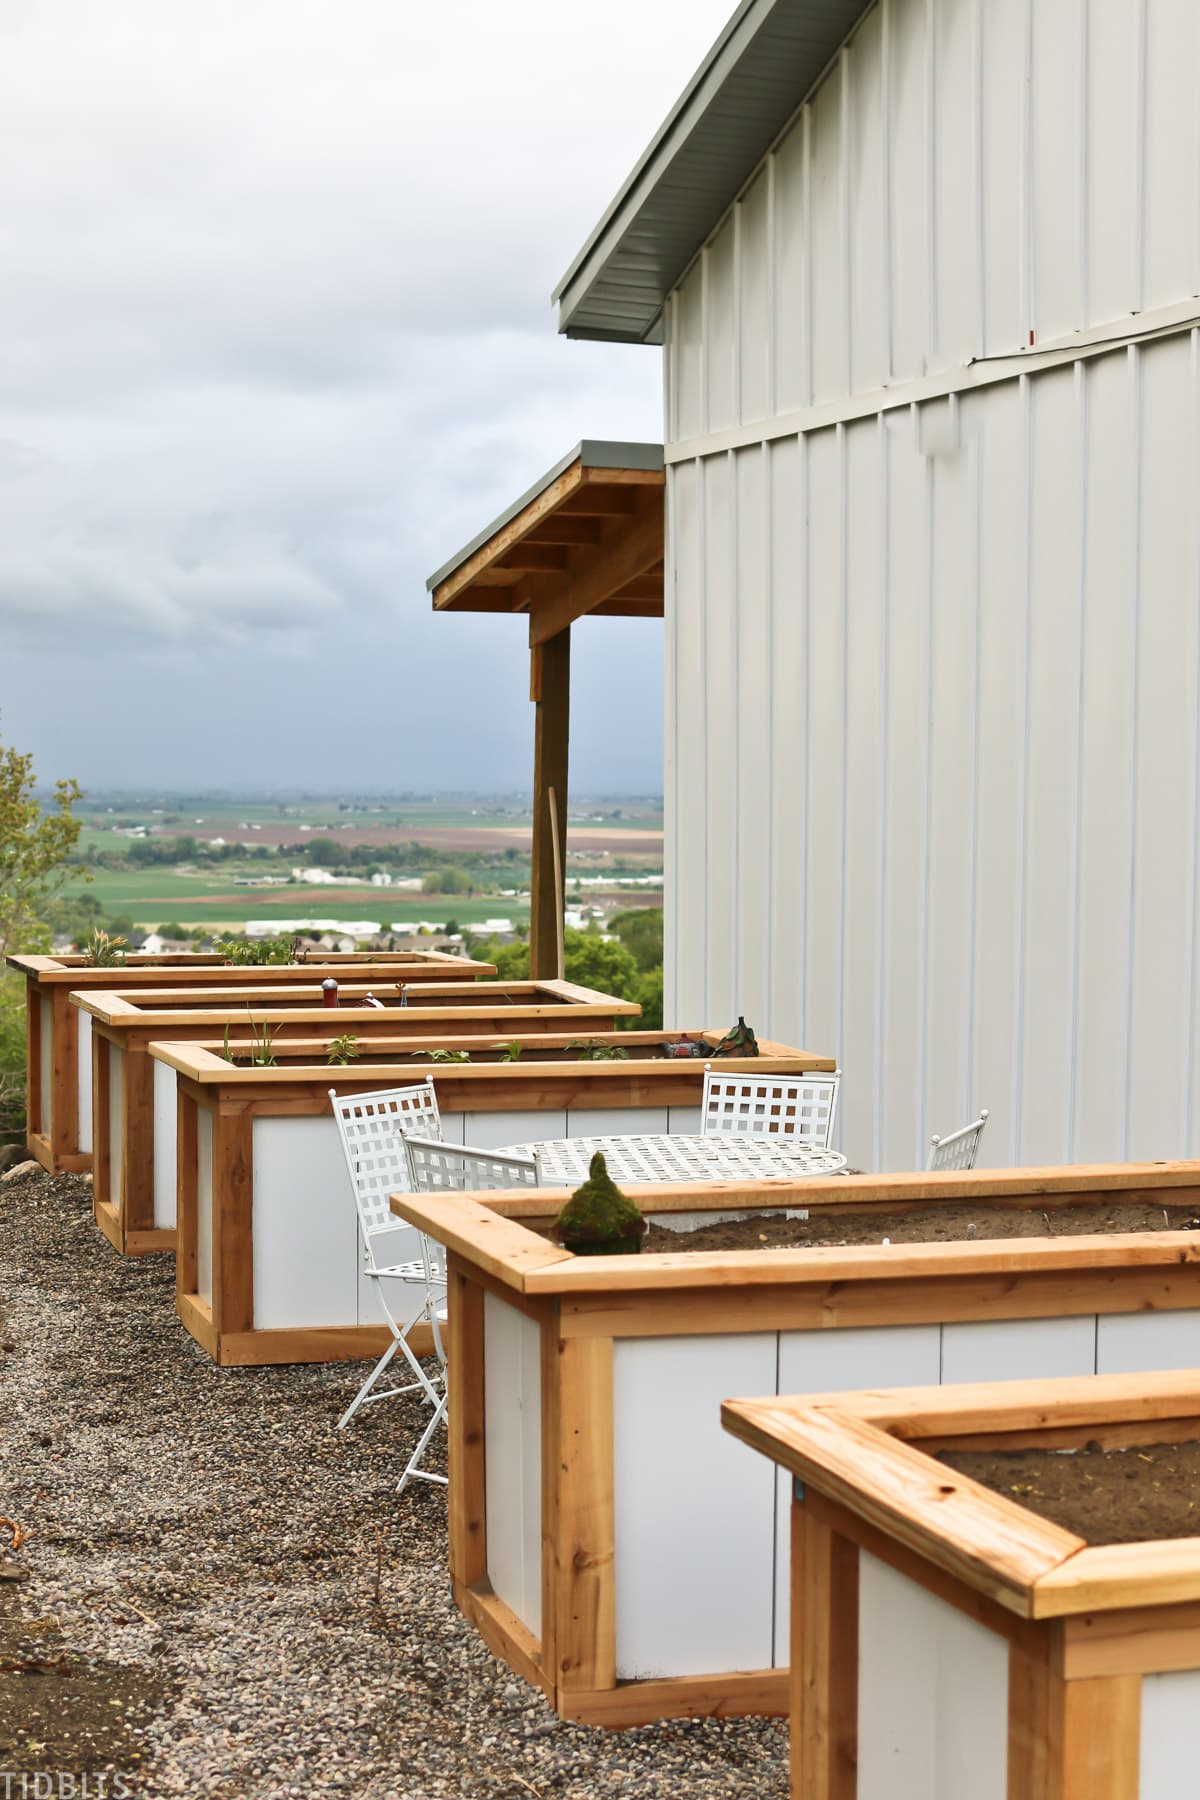
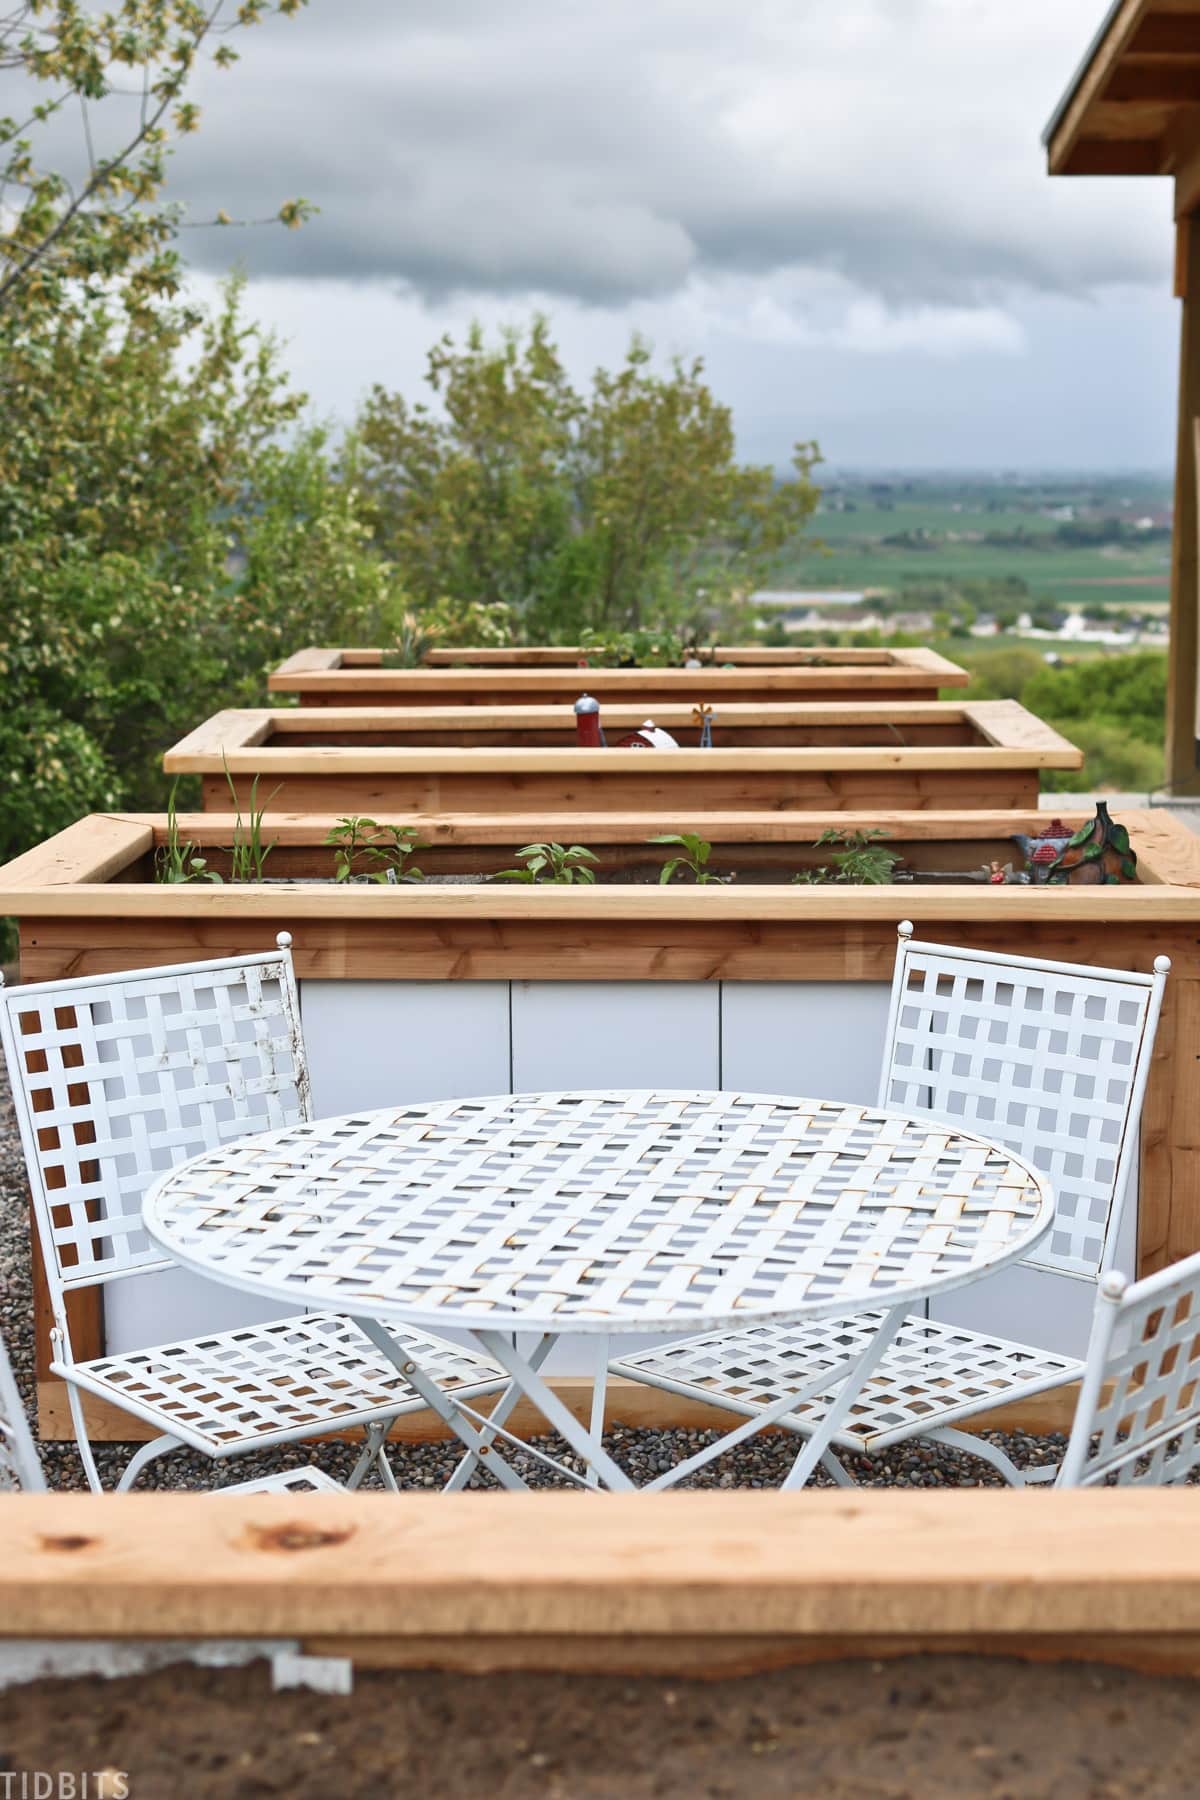
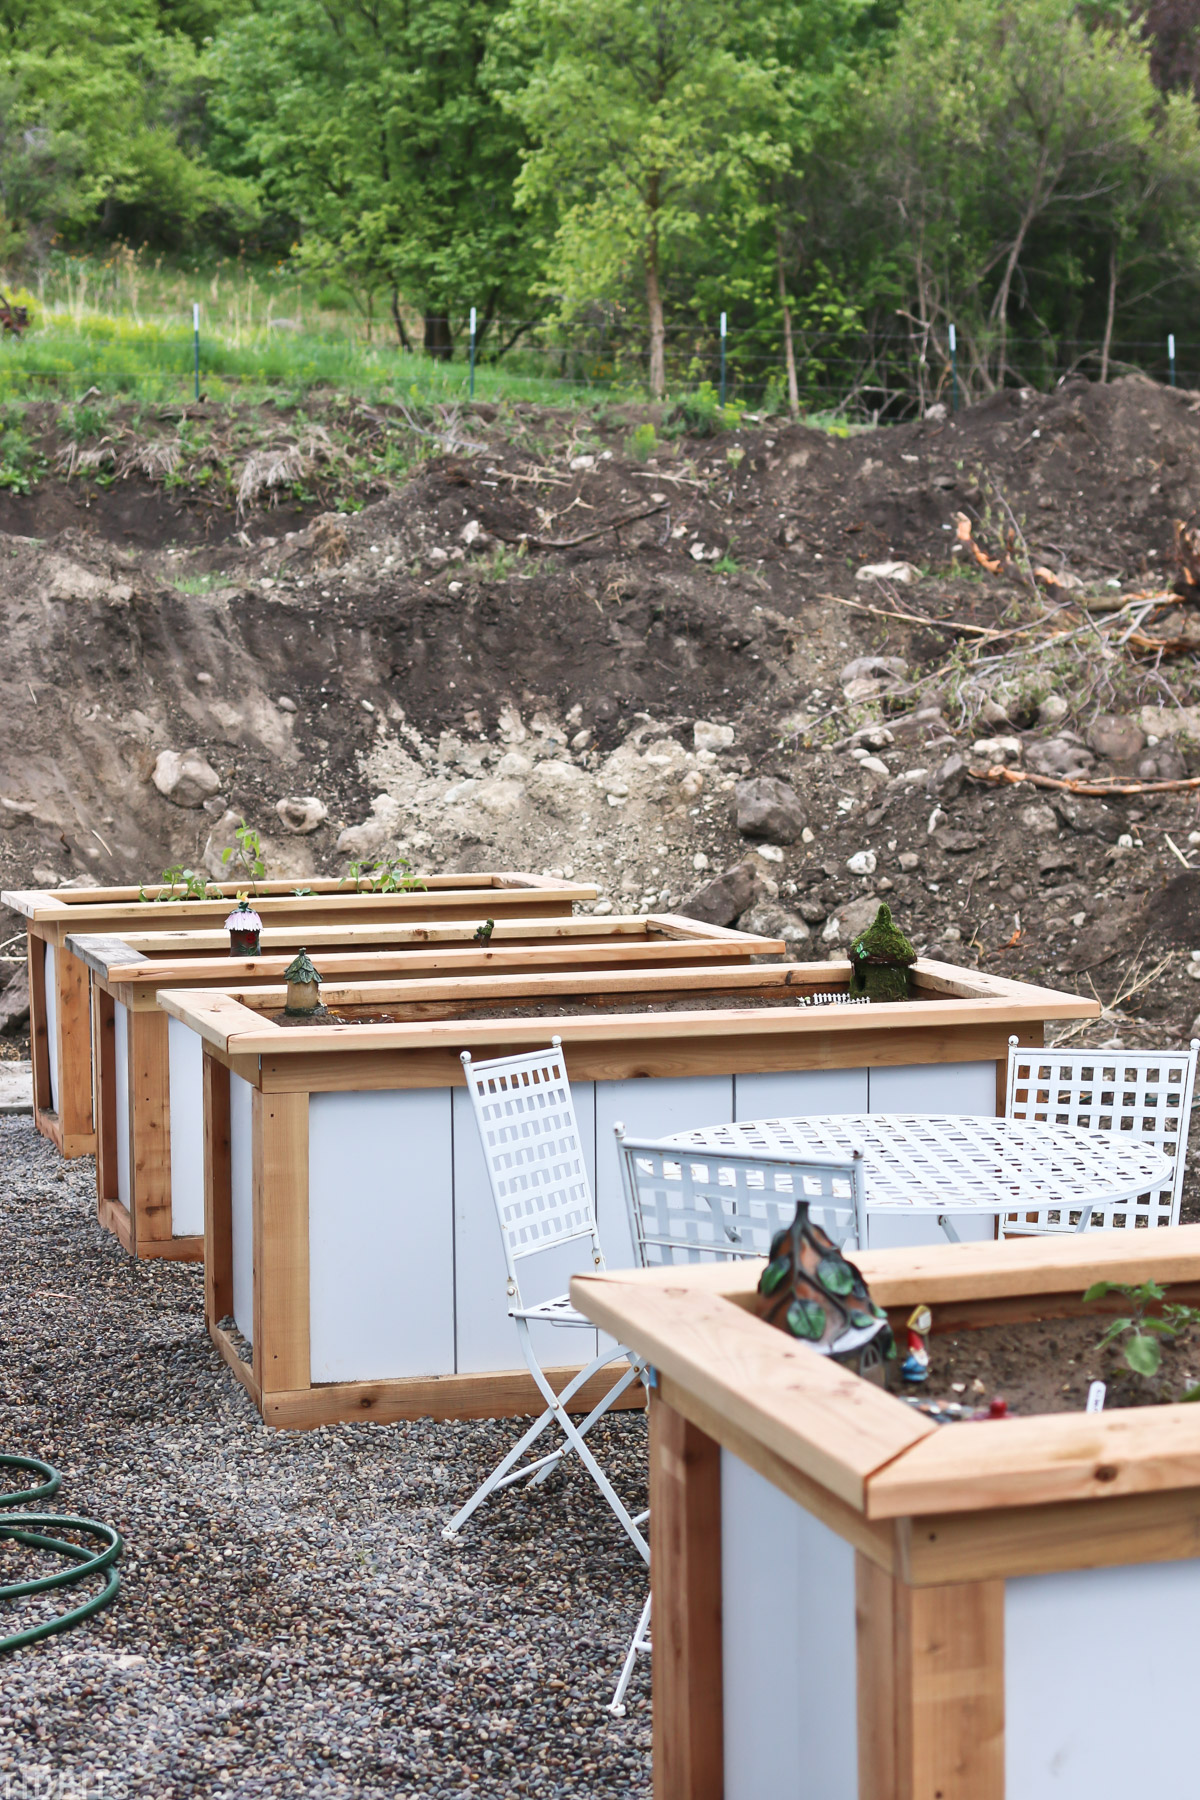
Kevin made six of them for each member of the family to enjoy and care for themselves.
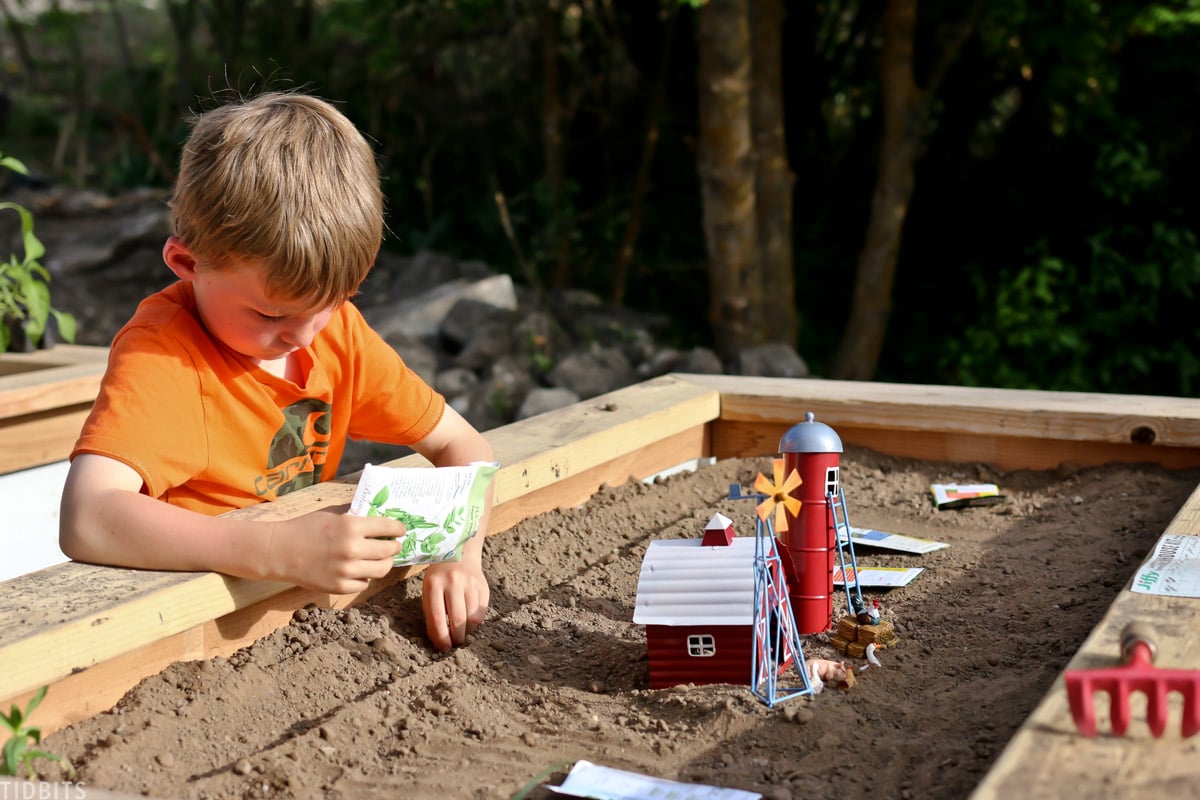
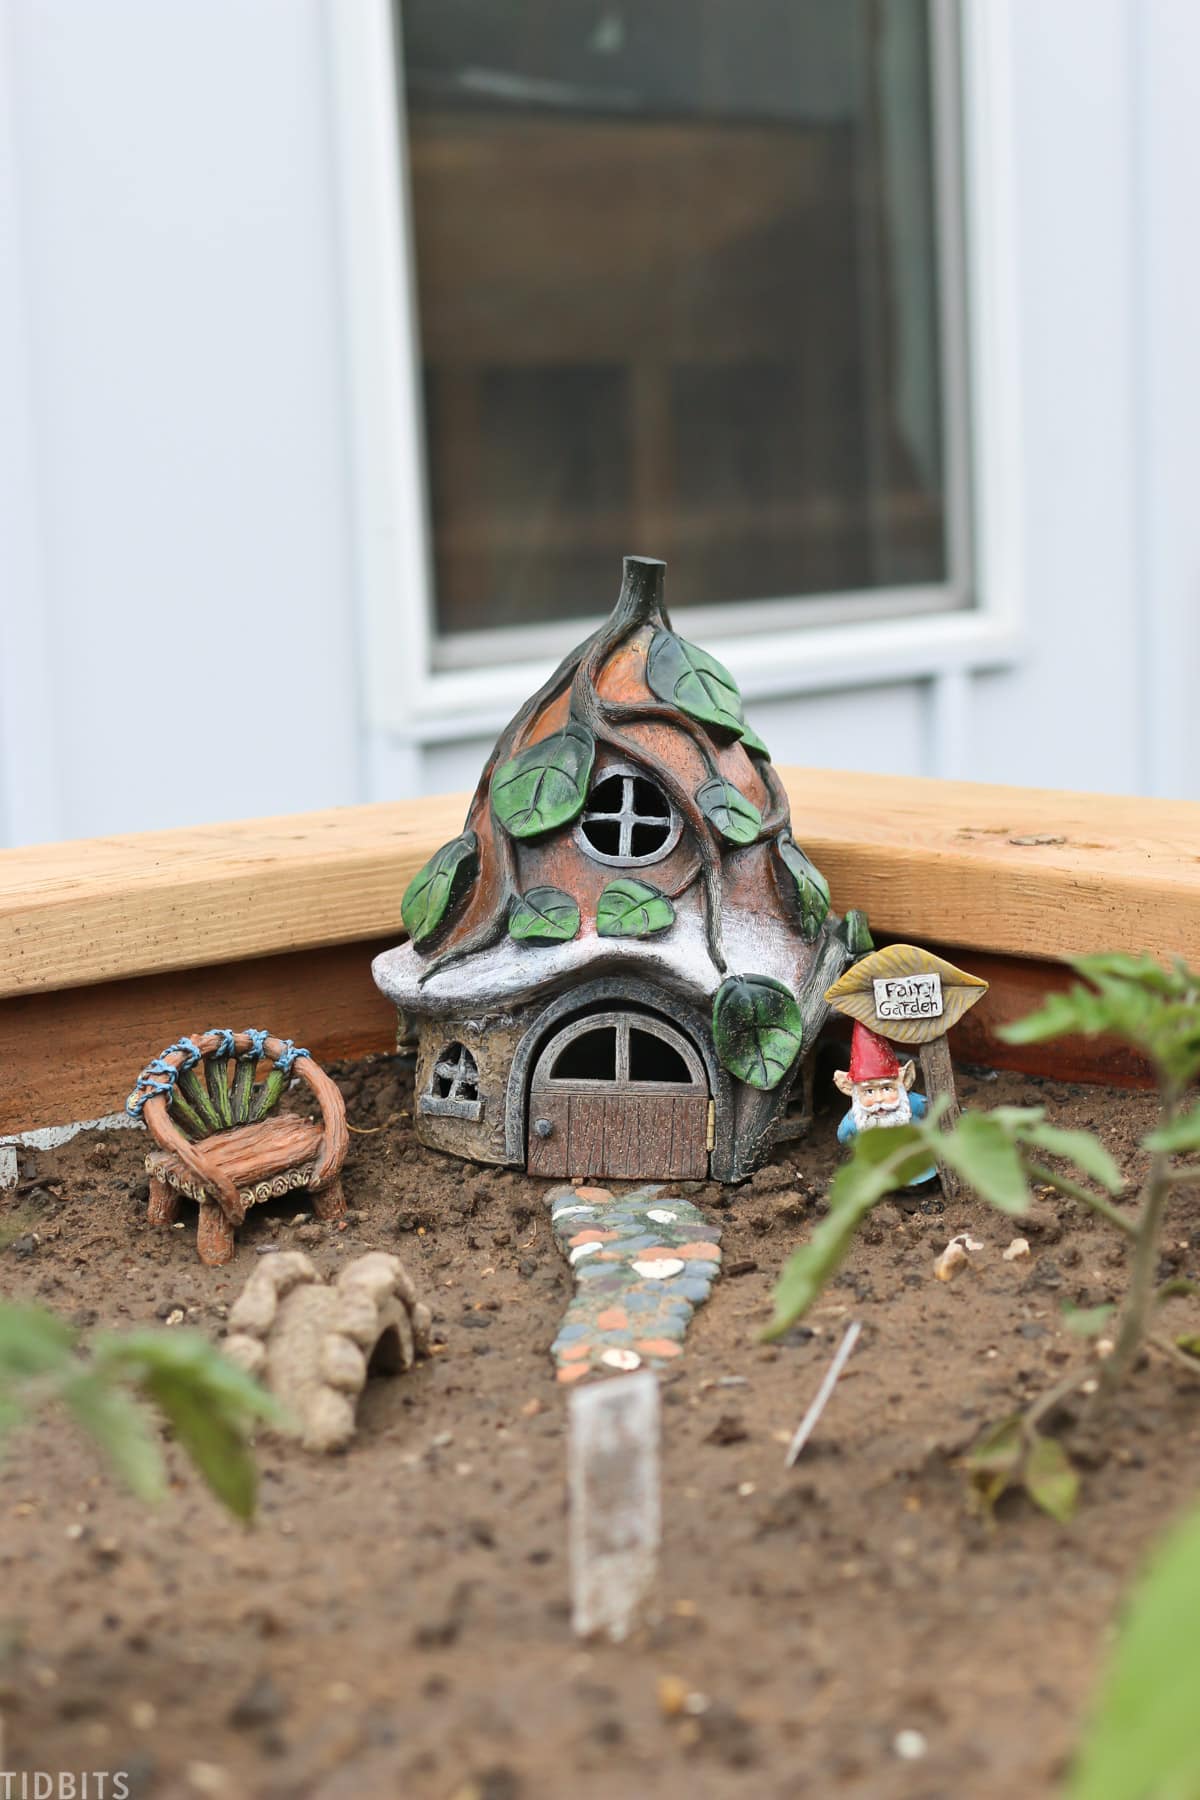
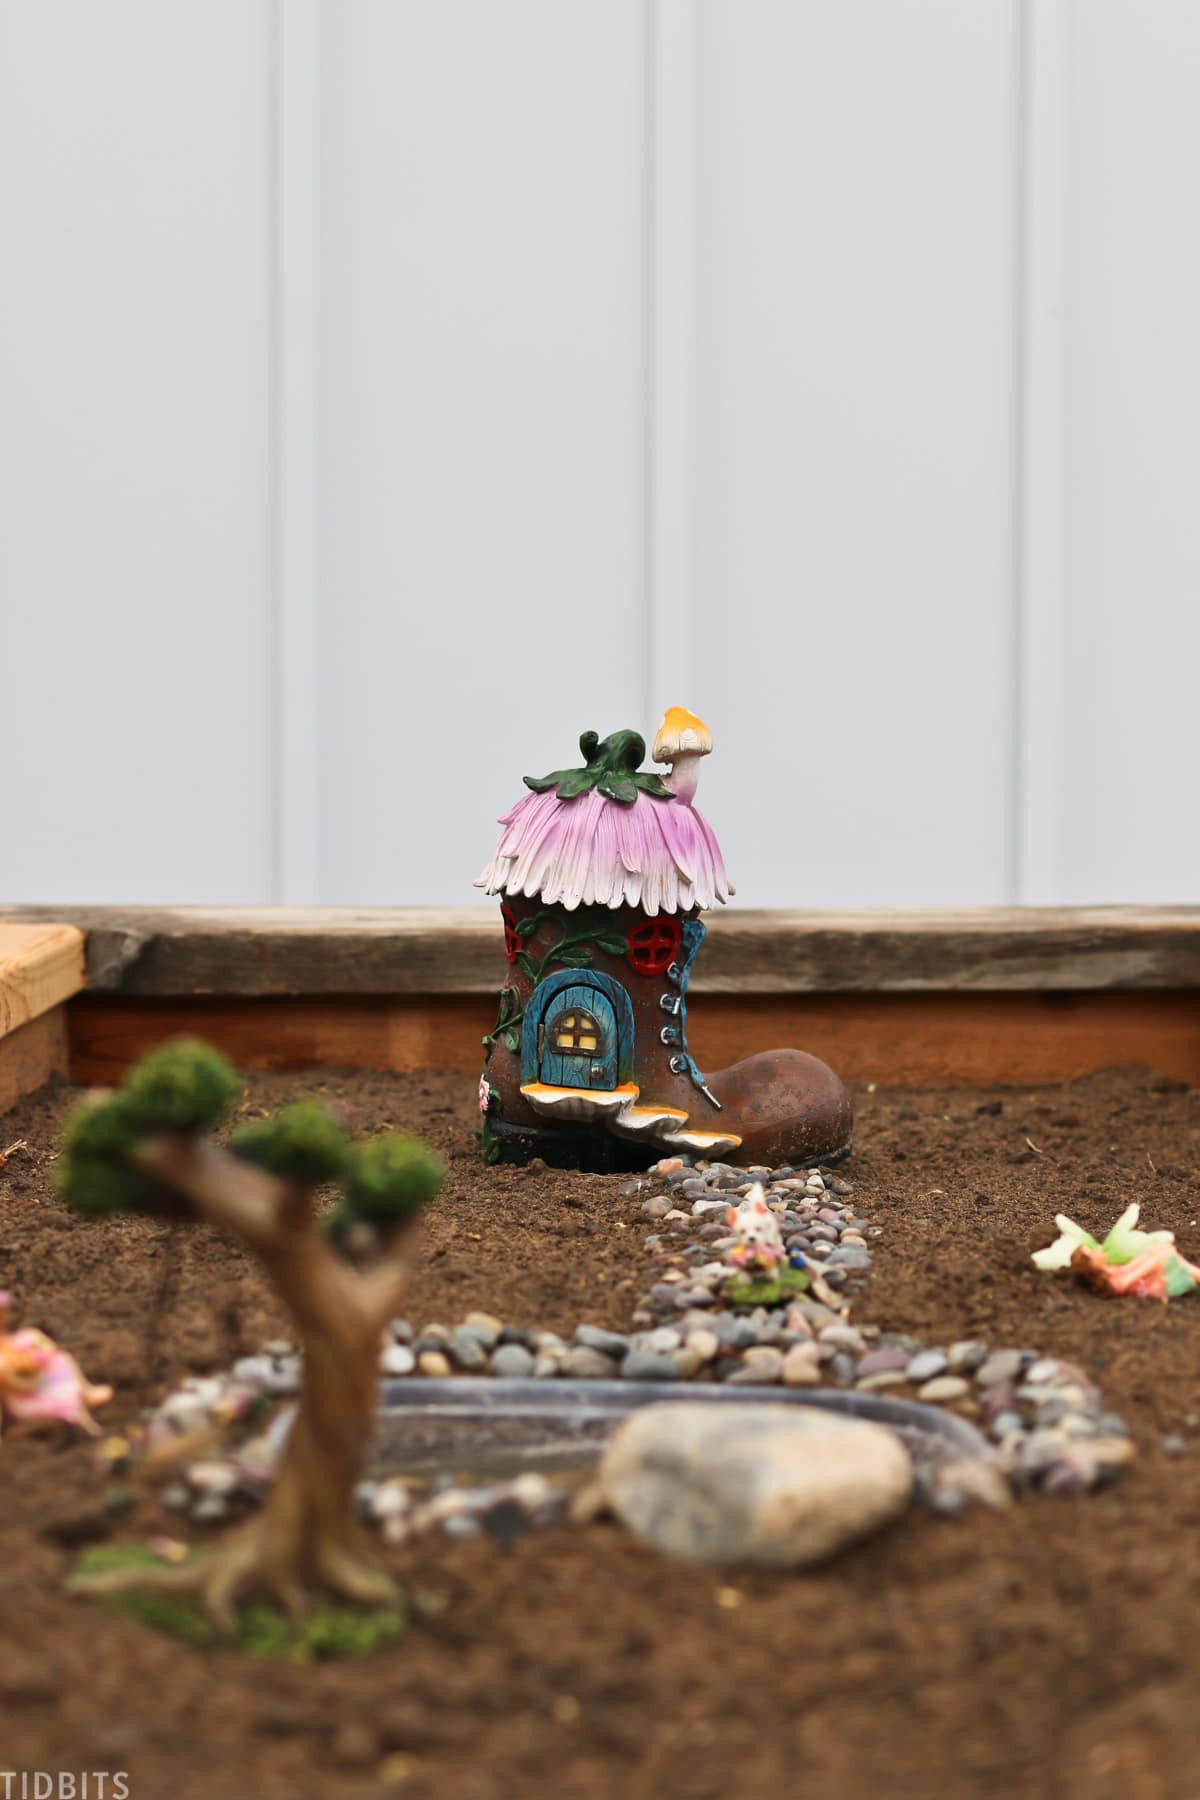
It has been so much fun to get the kids involved! We let them pick what seeds and plants they wanted. We got them little fairy garden sets and barnyard sets to make it even more fun. That’s another garden idea activity you can plan with your kids for the summer too!
It’s been an absolute pleasure to see them enjoy this process and get excited about soil and plants and gardening in general.
We wanted to make the waist-high DIY raised beds so planting, weeding, and harvesting would be much better on our backs.
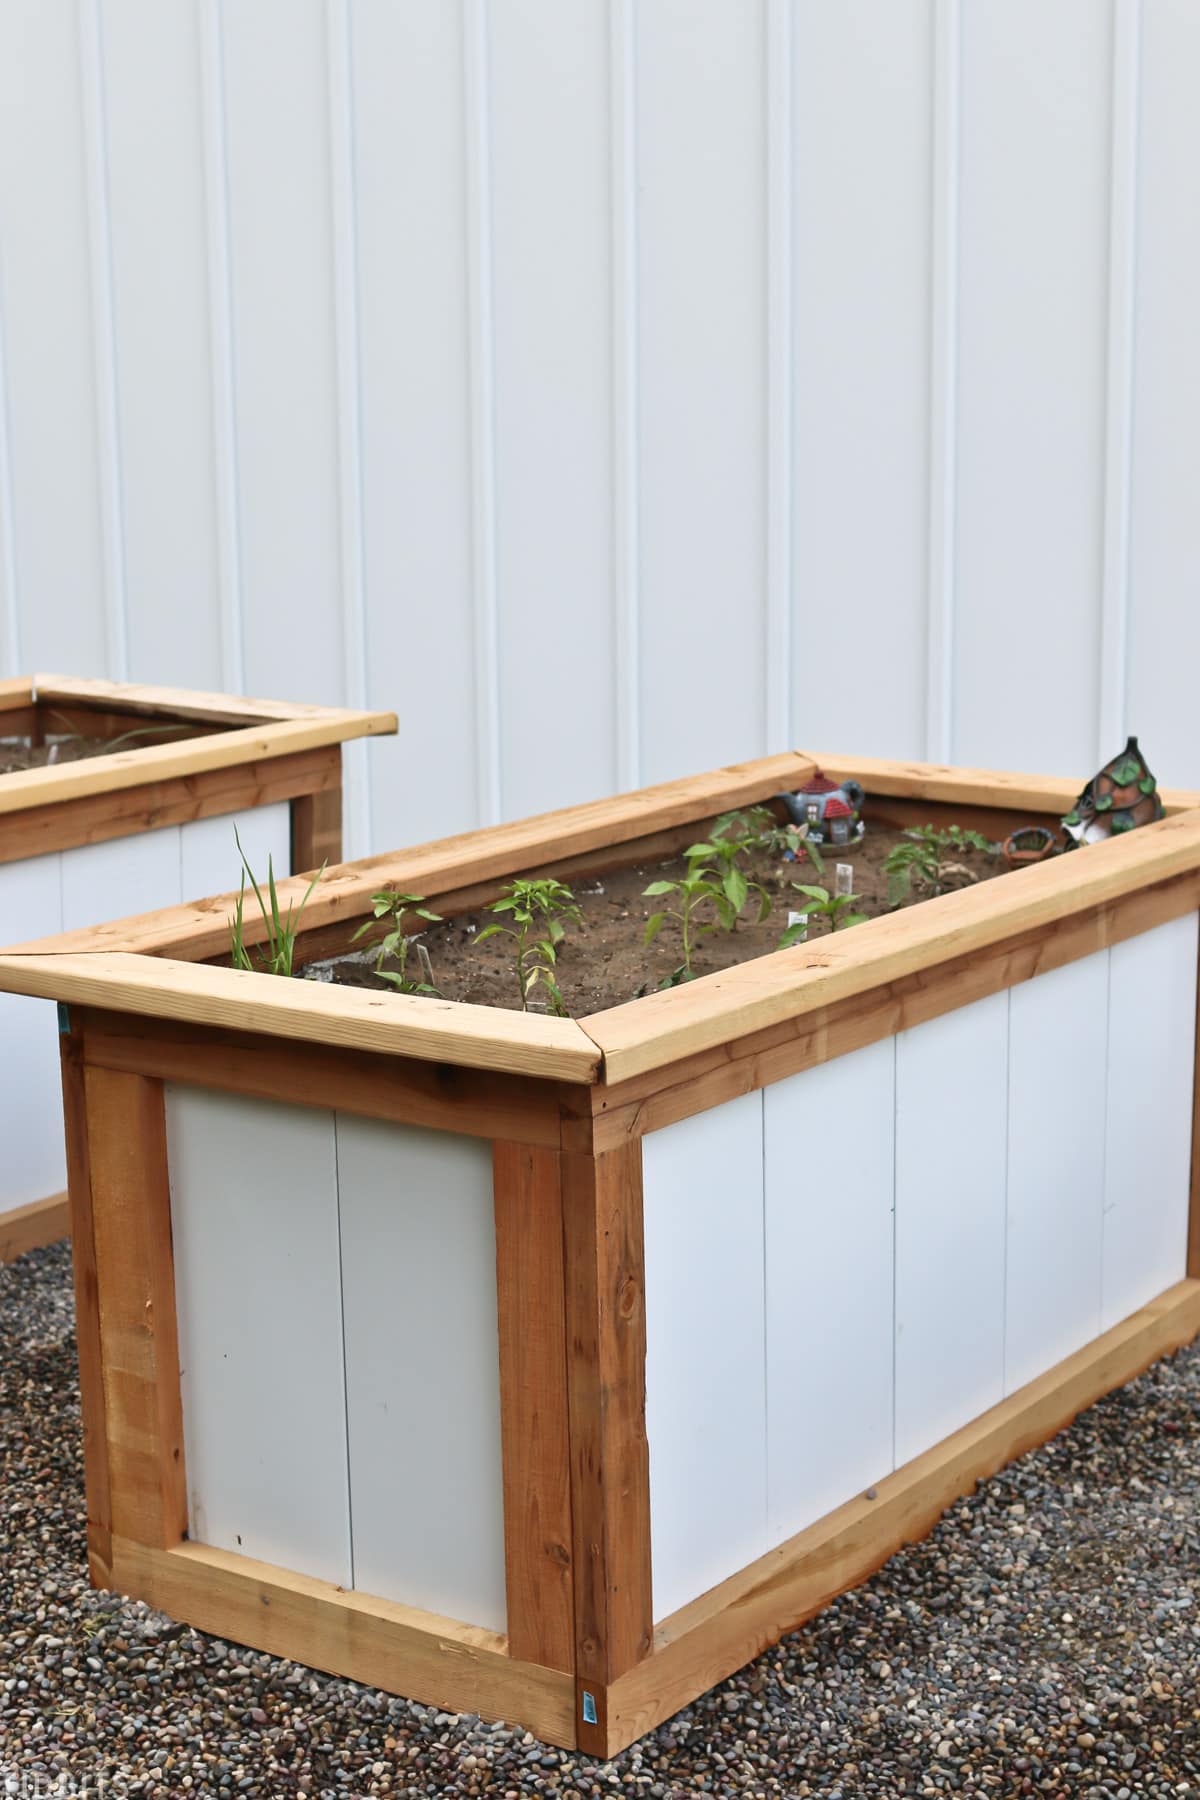
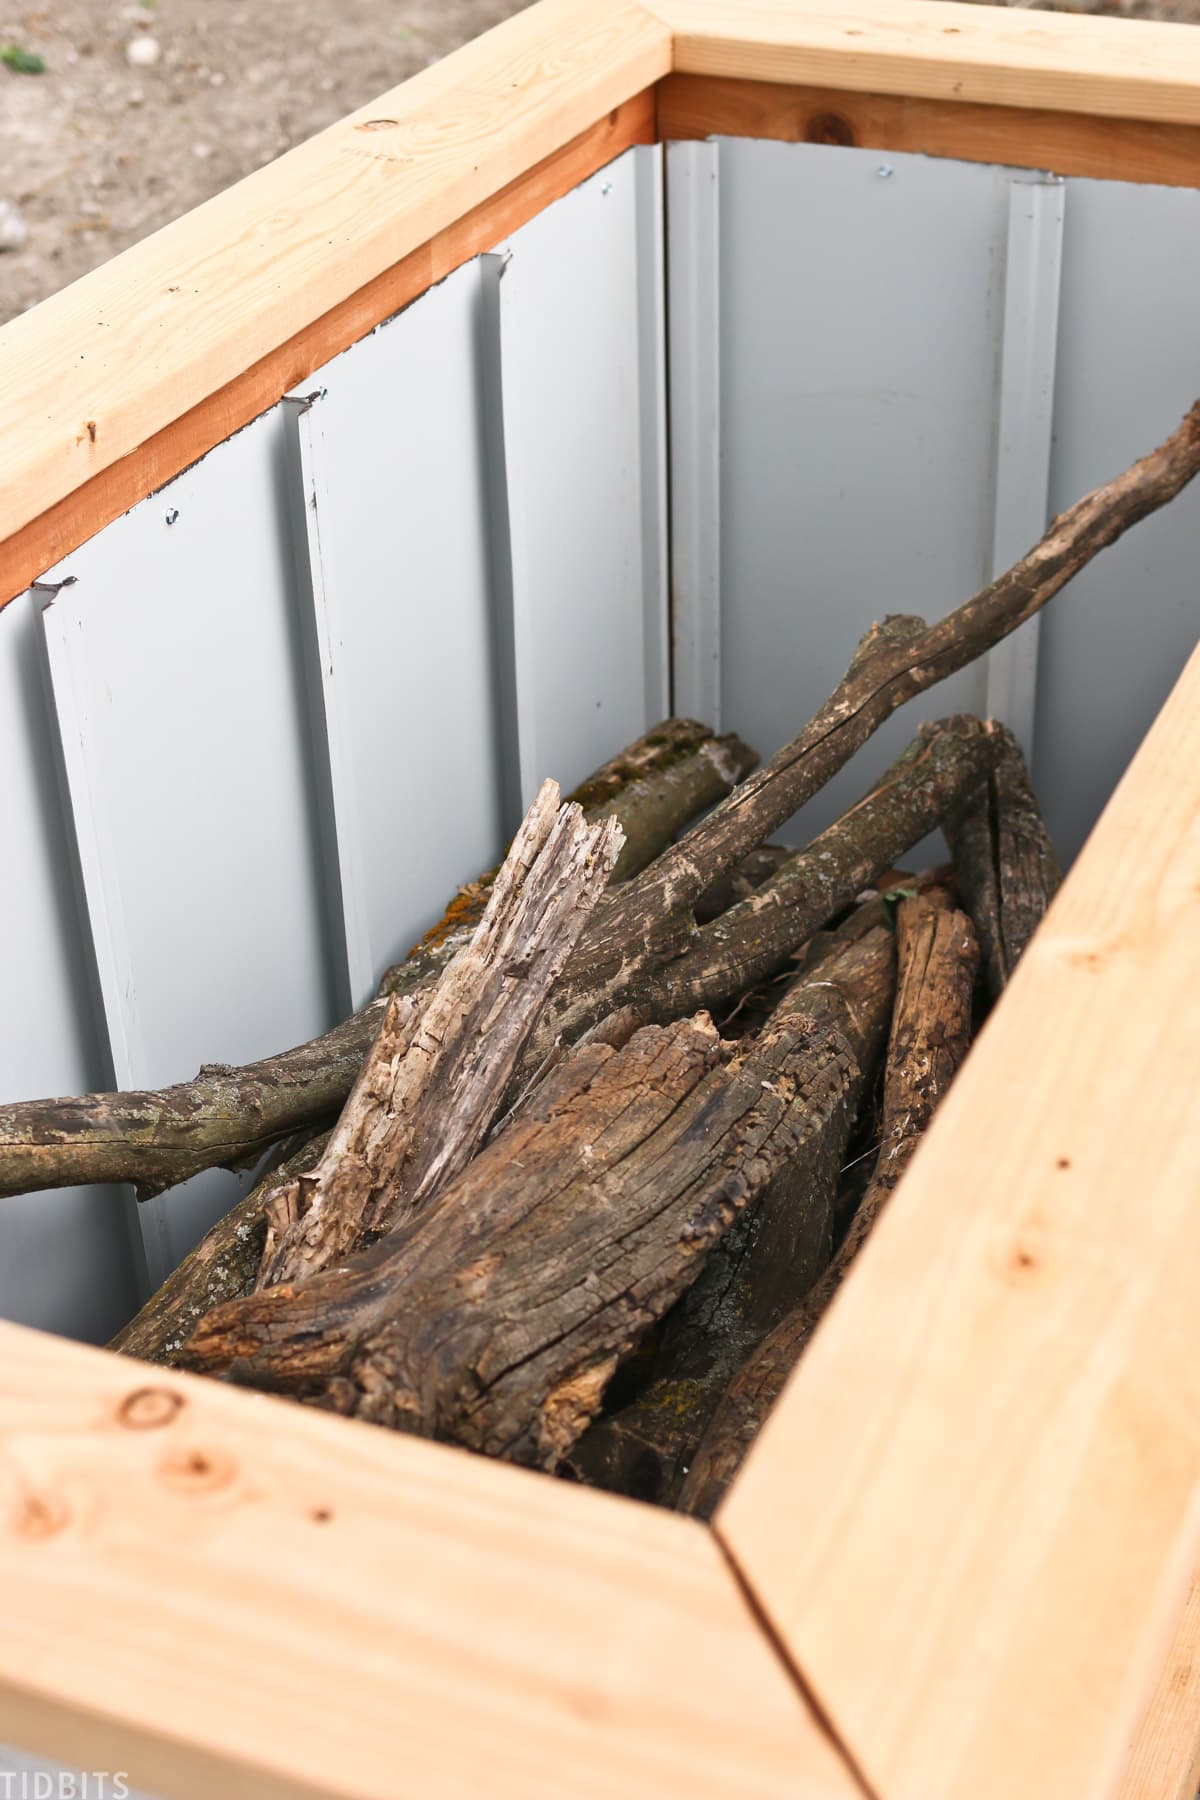
Of course, that means you would need a lot of good soil, so we filled the beds first with as much natural and organic material as we could find around our property, which is great for nutrients and drainage as well.
I’m excited to show you how we made this raised garden bed idea so you can make your own!
SUPPLIES FOR RAISED GARDEN BEDS
Wood
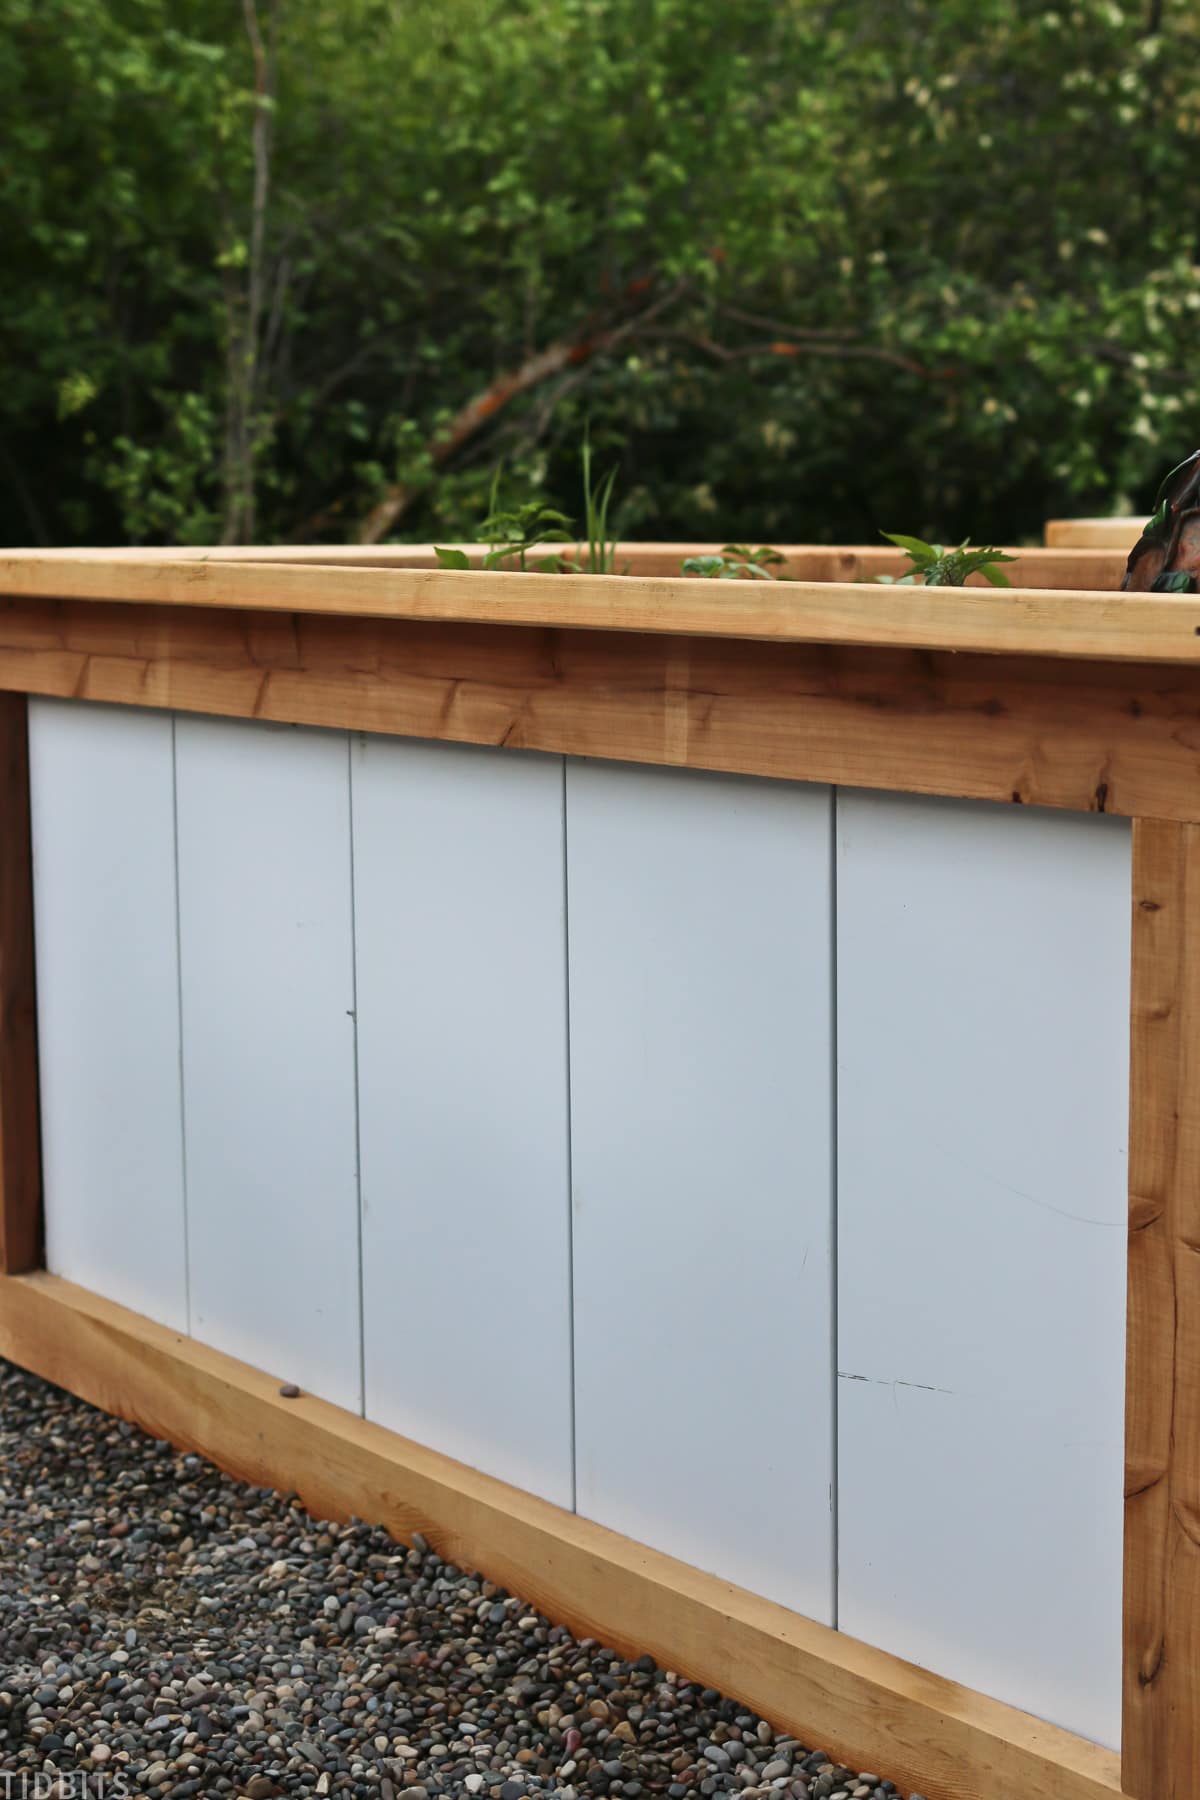
We used rough-cut cedar wood to build the structure and leftover tin from building our pole barn home – which saved us a lot of money!
WHY SHOULD YOU USE CEDAR WOOD ON GARDEN BEDS?
Cedar has the benefits of being bacterial and fungal resistant. It is also coefficient, which means even on hot days it stays cool, which is better for plants. And because of the natural oils in cedar, the wood stays preserved a lot longer than other woods.
You can buy treated wood, but we were worried about those chemicals seeping into the soil and the food, so we didn’t go that route.
COST OF A TALL GARDEN BED
The cost of just the wood for each garden bed came to around $95 each, which is much higher than it should be because of the current inflation on wood costs. It surprised us to see that cedar was the cheaper route to go than pine – highly unusual.
The tin was free for us, as you’ll learn below.
TIN
This tin was just leftover for us from building the house. It is a tin that is made to snap together and looks like a shiplap or planks. We bought it locally, but I found this online store that has an example of this type of tin siding.
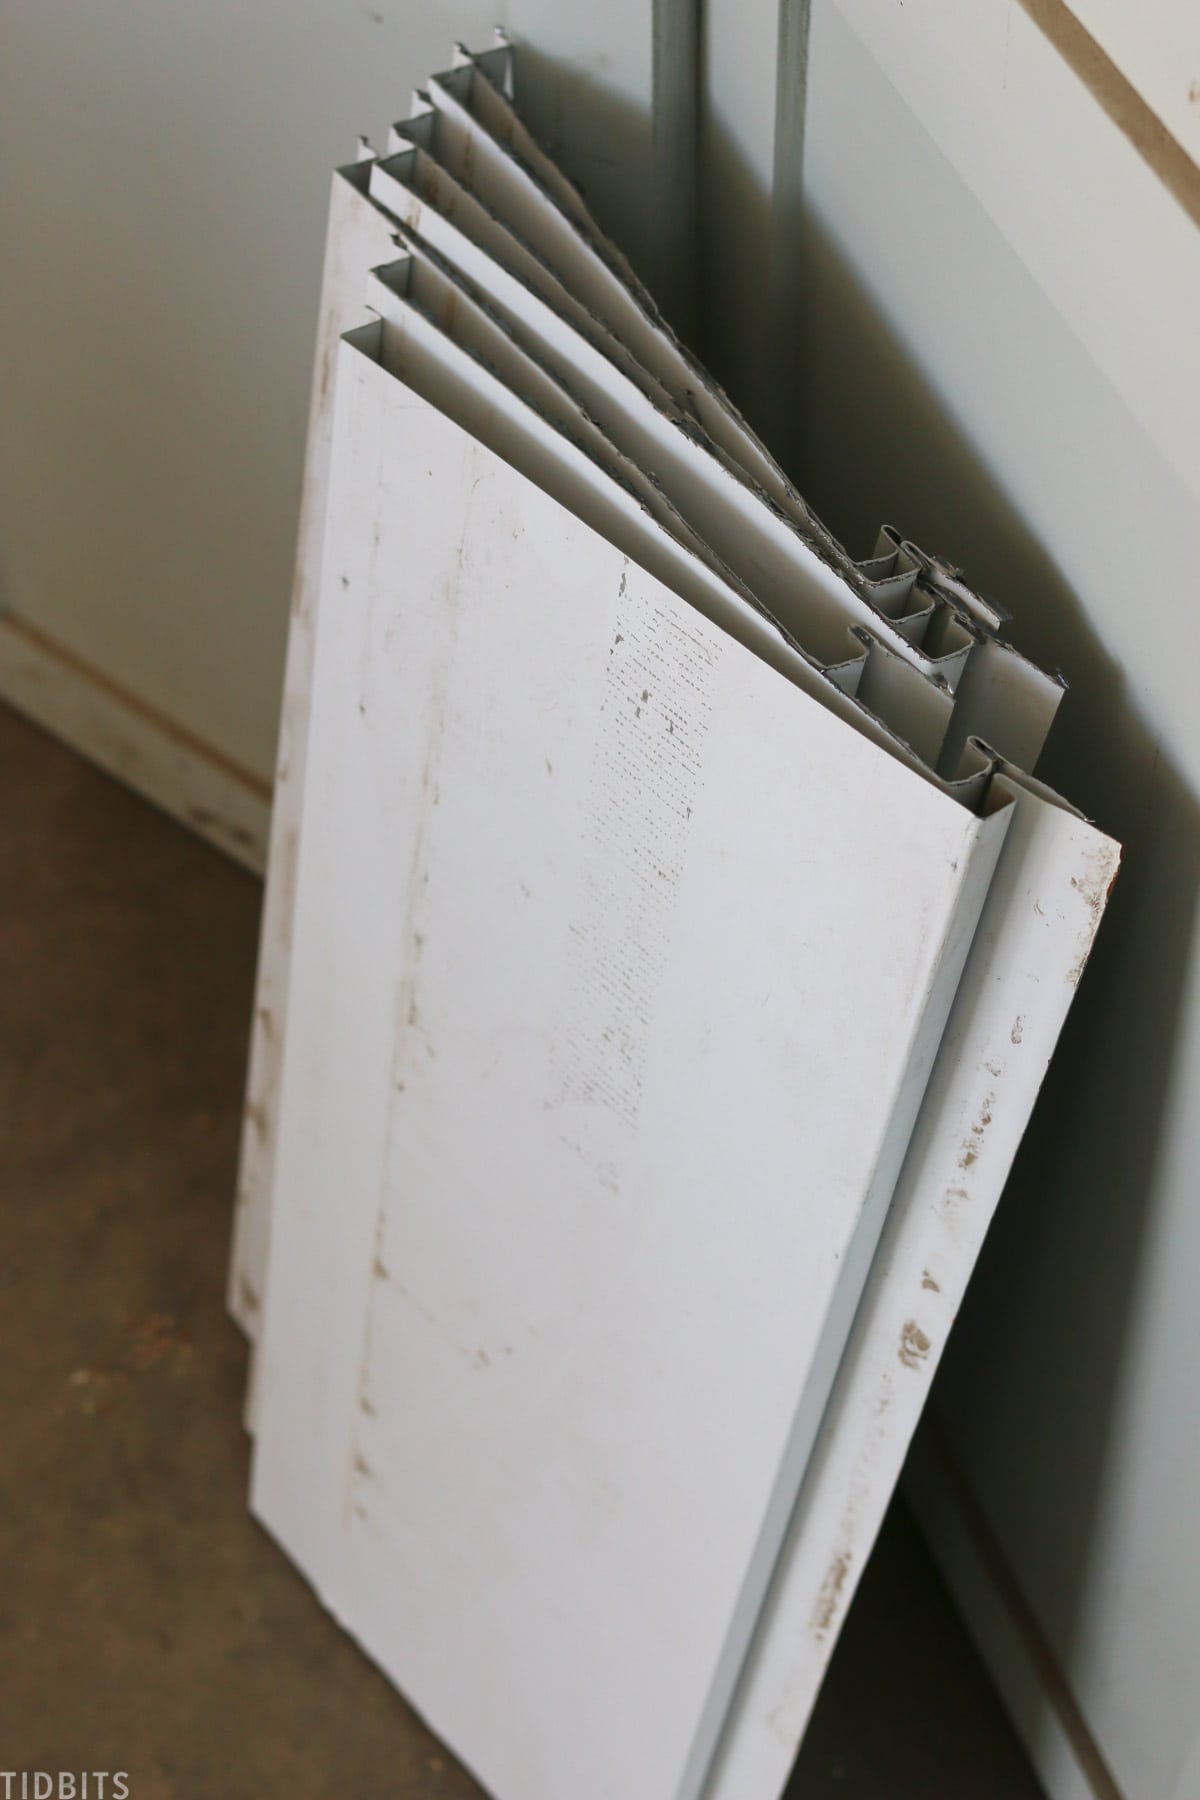
So if you can’t find this exact tin, you could use any type of tin siding and many of the places that supply the tin can cut it to size. I think it would still be cheaper than using just wood.
HOW TO MAKE HIGH-WAISTED RAISED GARDEN BEDS
For 1 garden box, you will need to purchase:
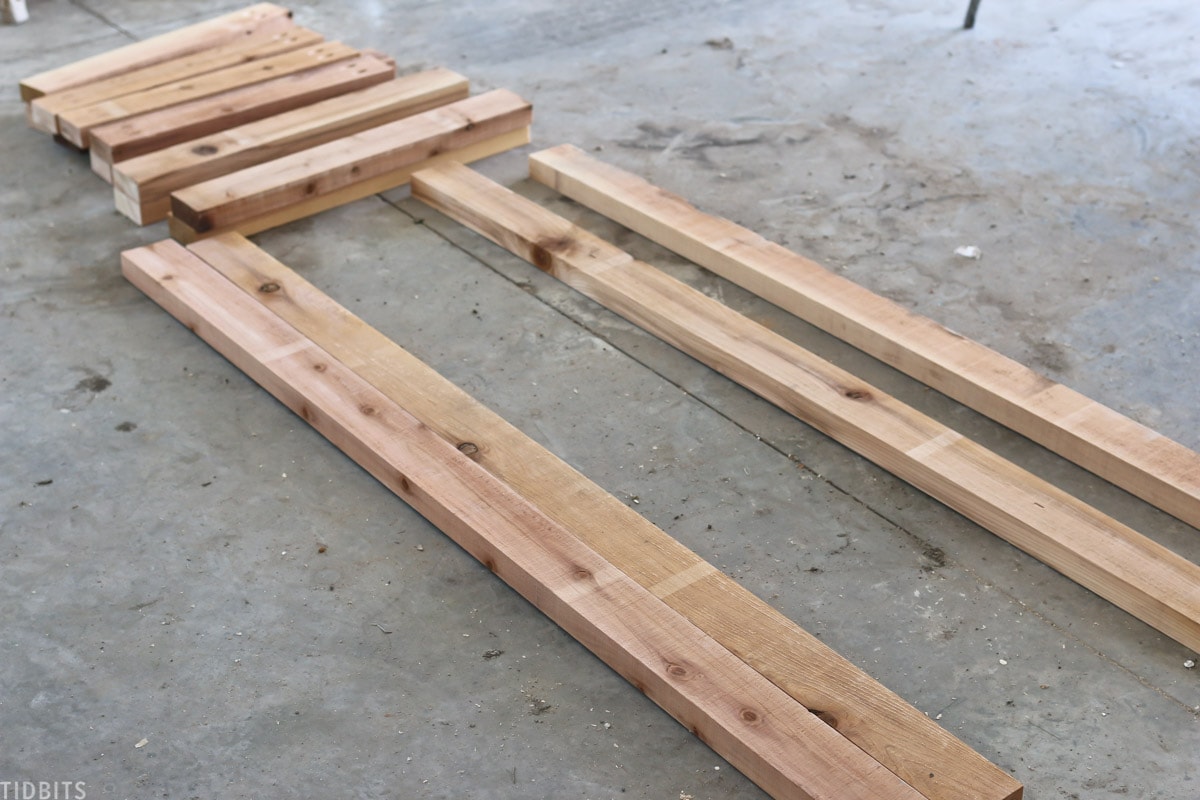
- Six 8-foot long 2 x 4 rough cut cedar boards
- Three 8-foot-long 2×6 pine boards
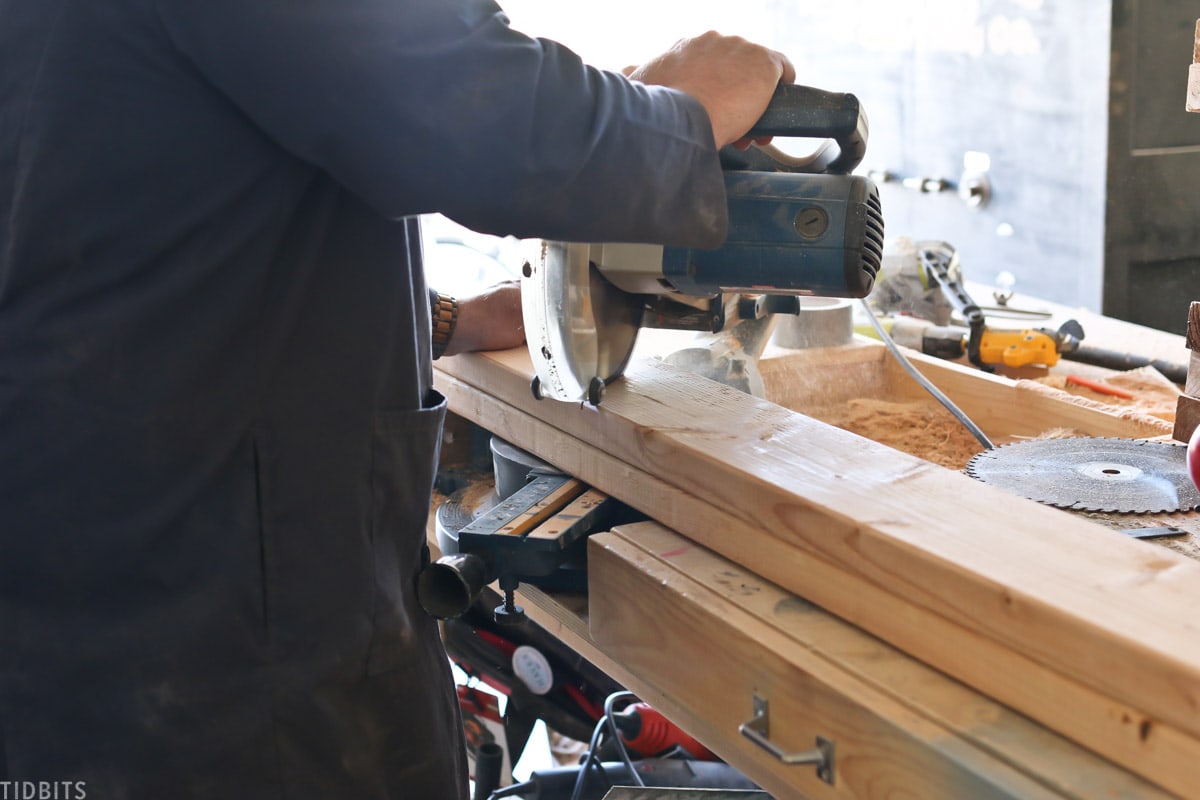
FRAME WOODCUTS
- Cut 4 cedar boards at 68 inches long, which will give you 28 inches left over.
- Using two 8-foot cedar boards, cut them into eight 24-inch boards.
Or, if you have different size boards, make sure you have these last cuts:
- Four 68-inch cedar boards
- Four 28-inch cedar boards
- Eight 24-inch cedar boards
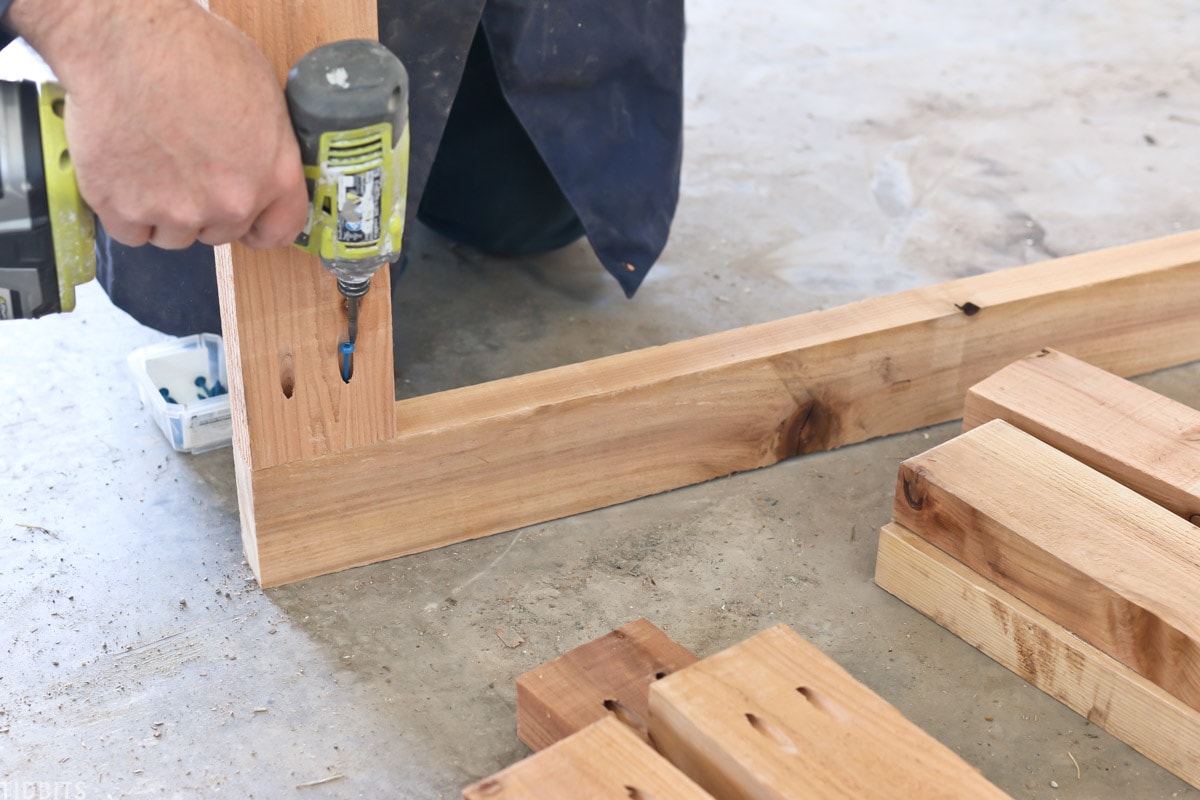
Wood Preparation
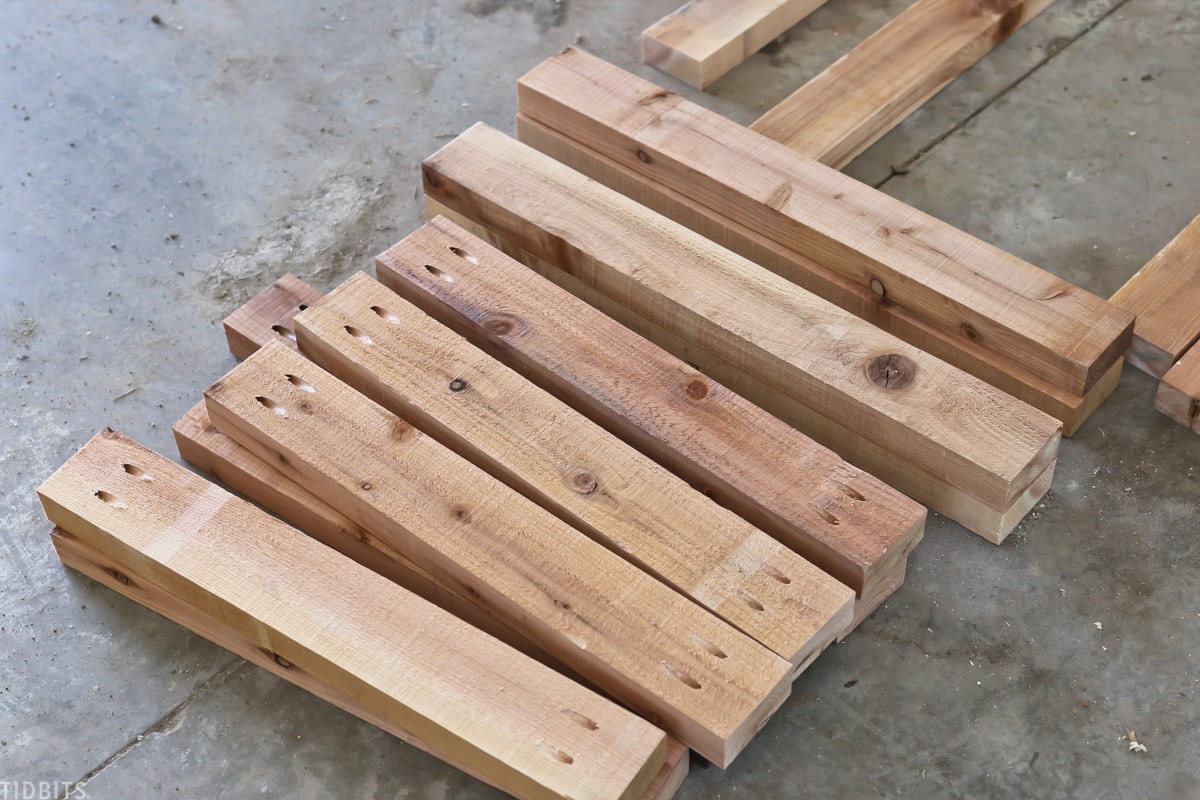
Then we used a Kreg Pocket Hole Jig to make two holes on each end of the 24” pieces.
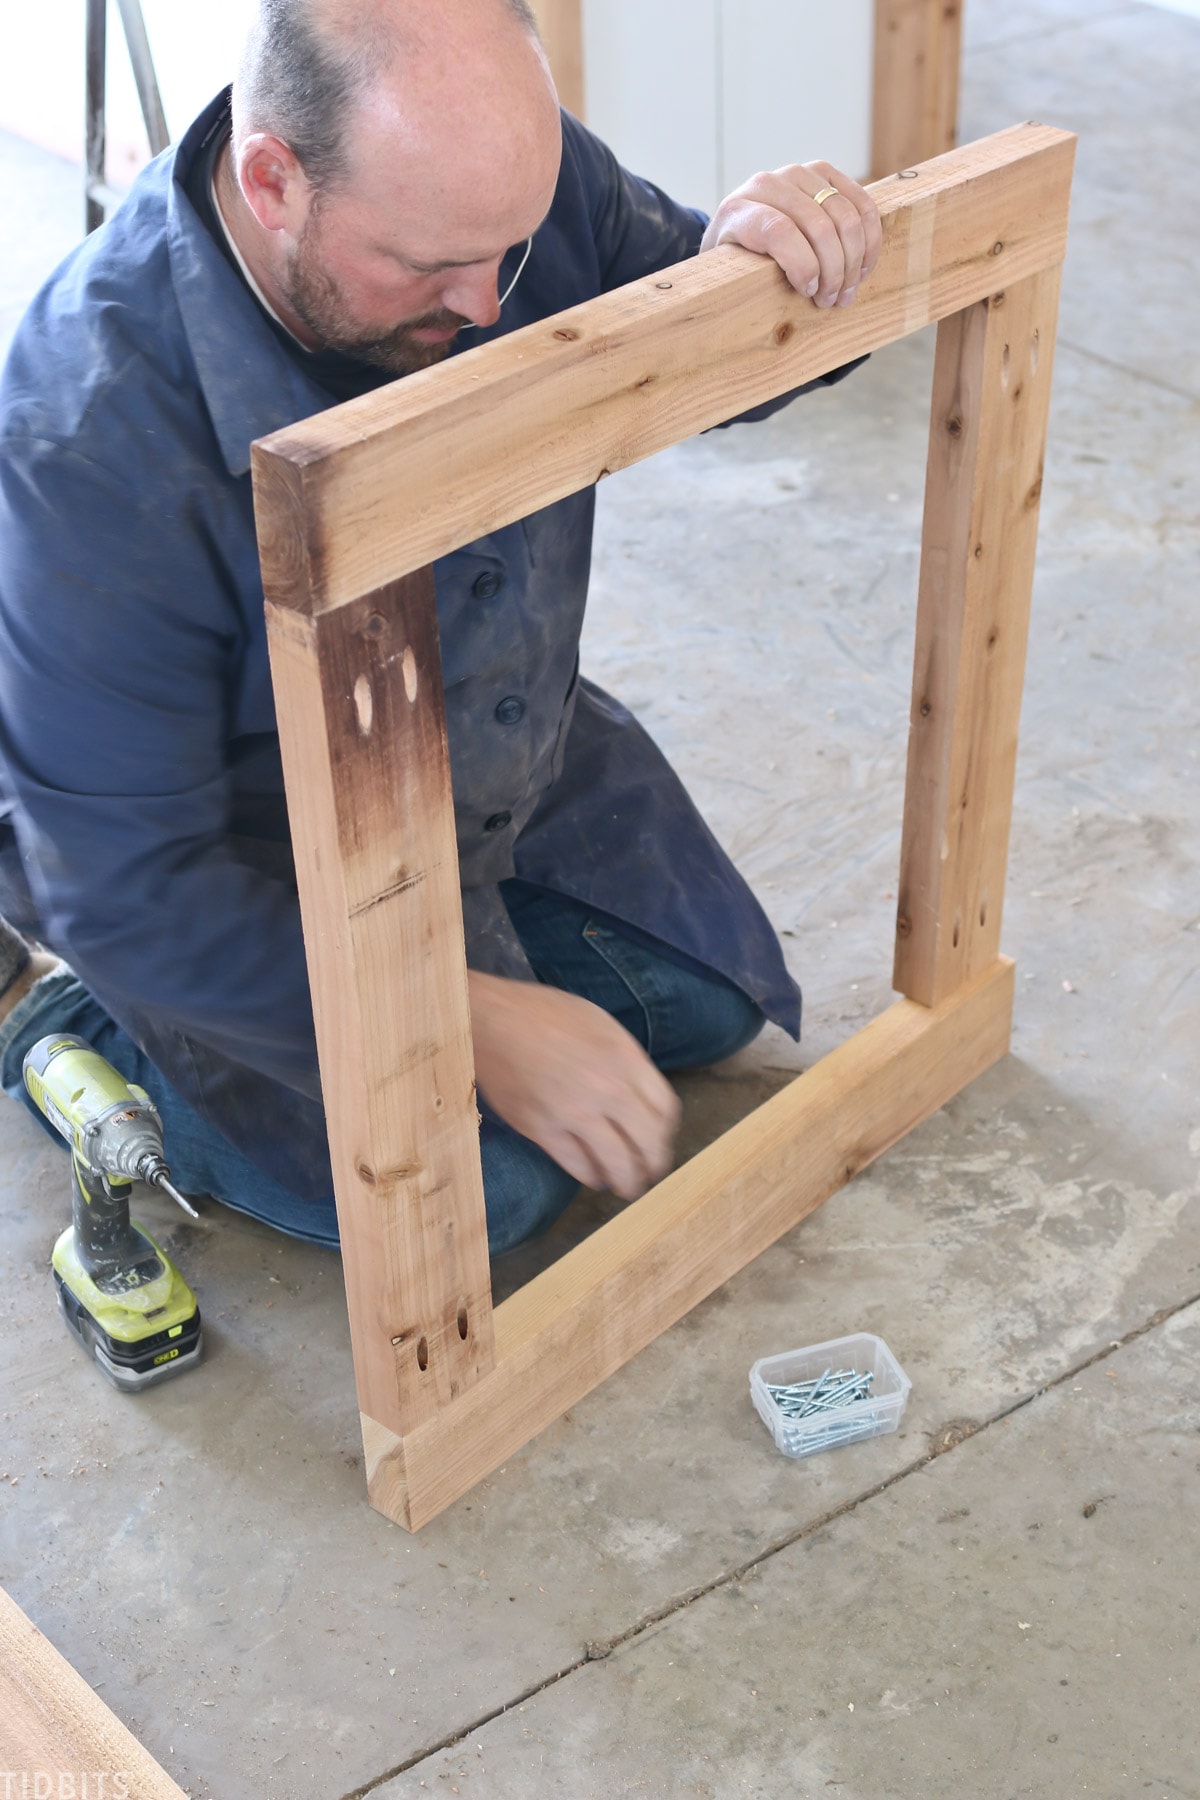
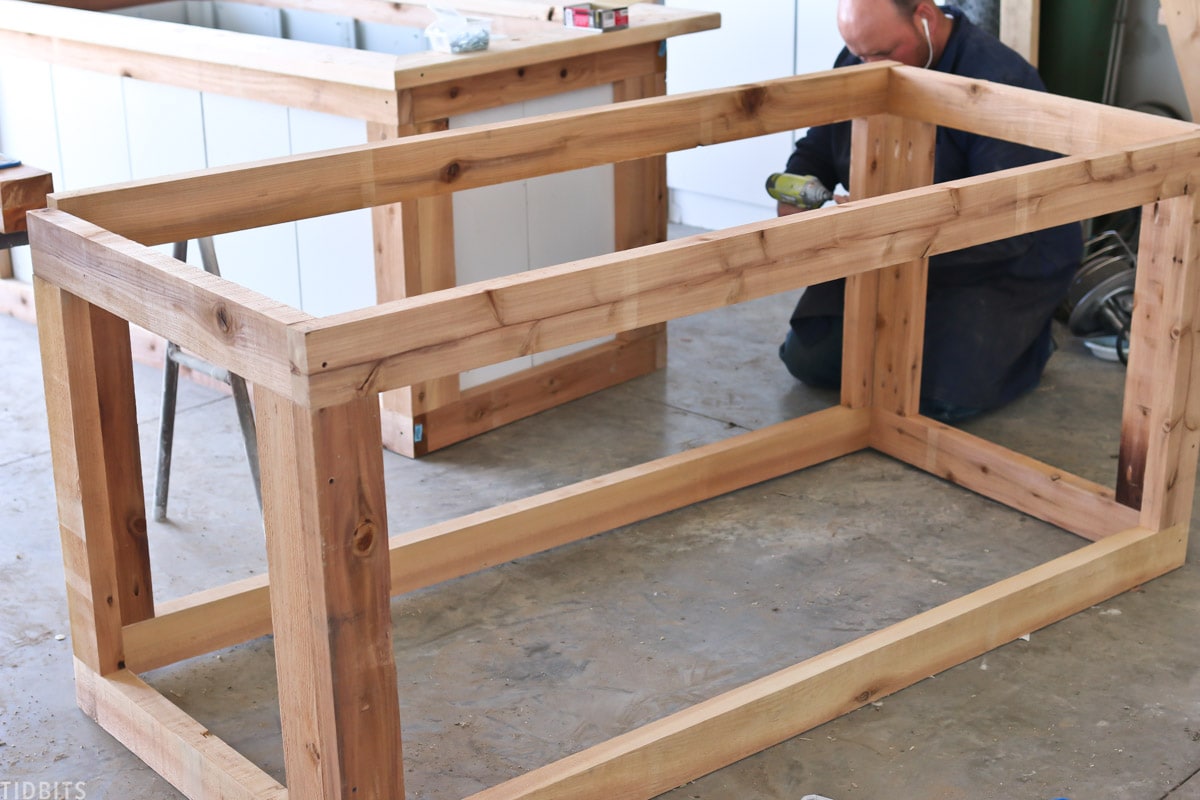
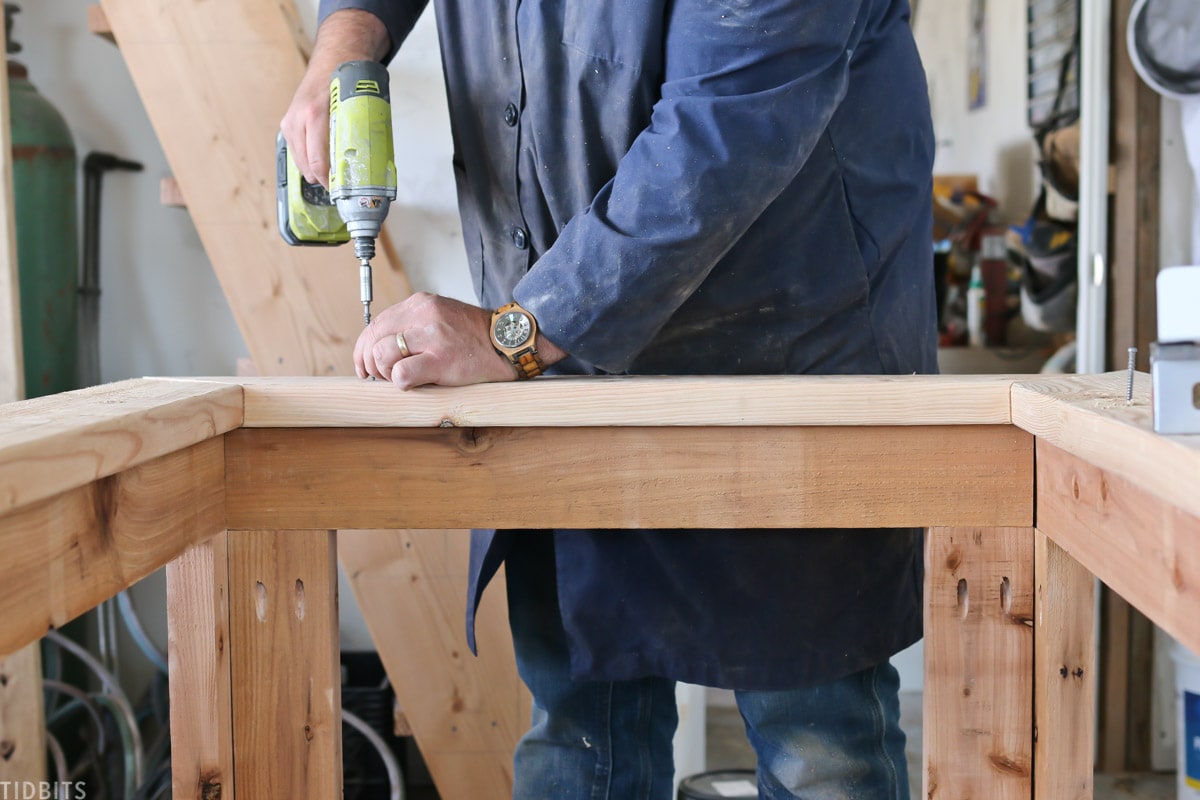
Make the Garden Bed Wood Frame
You will build 2 frames with two 68″ long boards for the top and bottom and two 24″ boards for the sides.
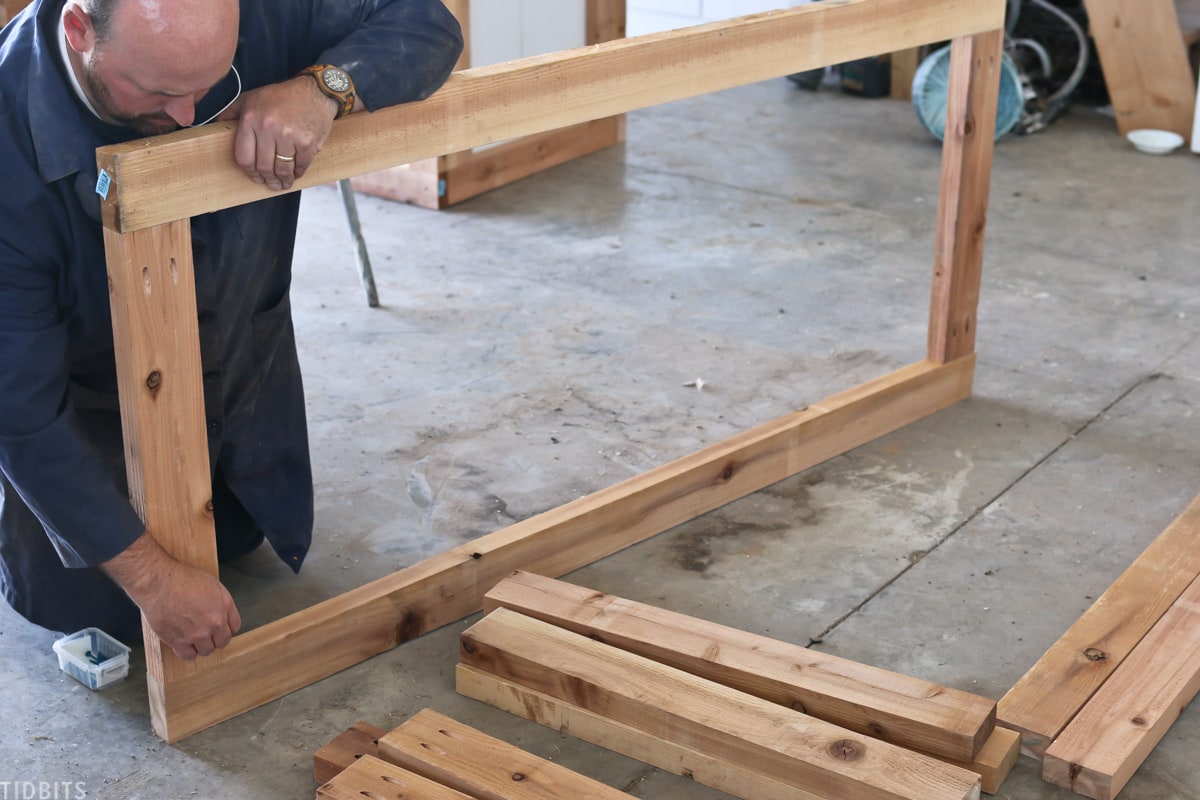
We used 2-inch Kreg weather-resistant screws.
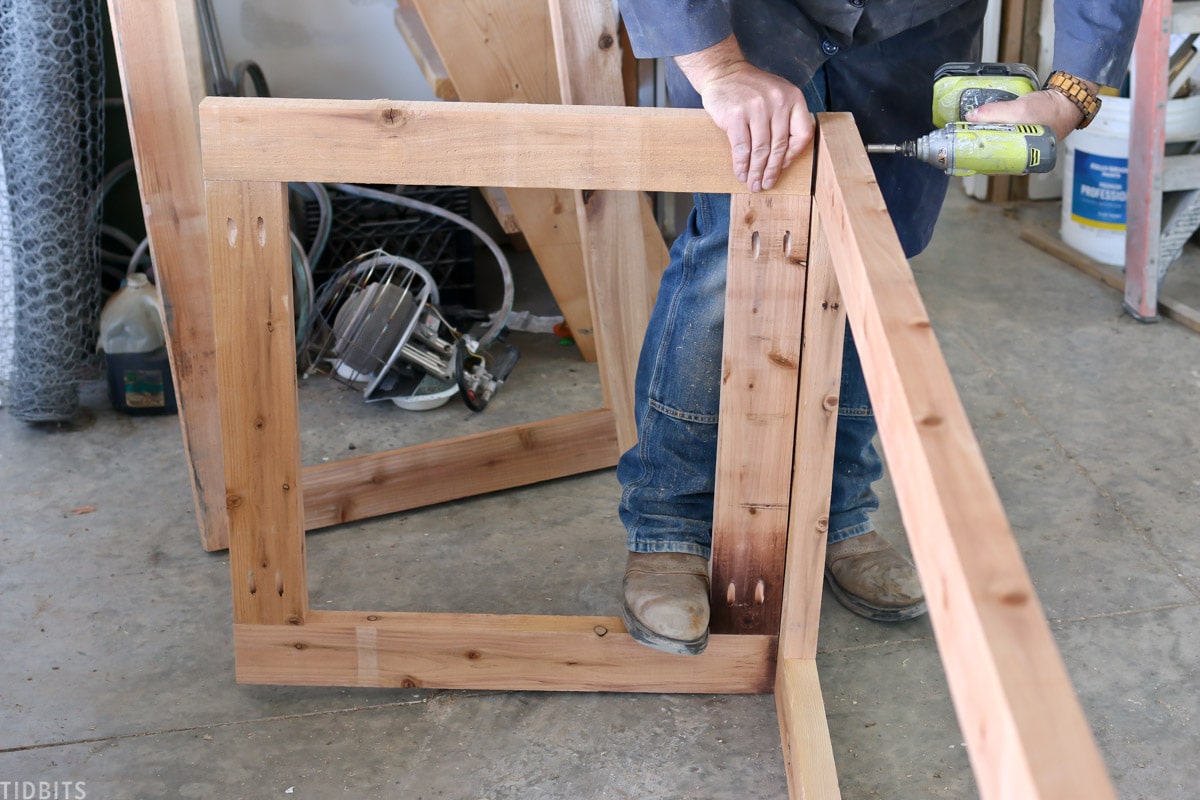
Build 2 more side frames with the 28″ boards and 24″ boards.
Then you will attach them by screwing the 4 frames together with the 68-inch longboards outside of the two 32-inch wide frames. I used 3-inch deck screws to connect everything.
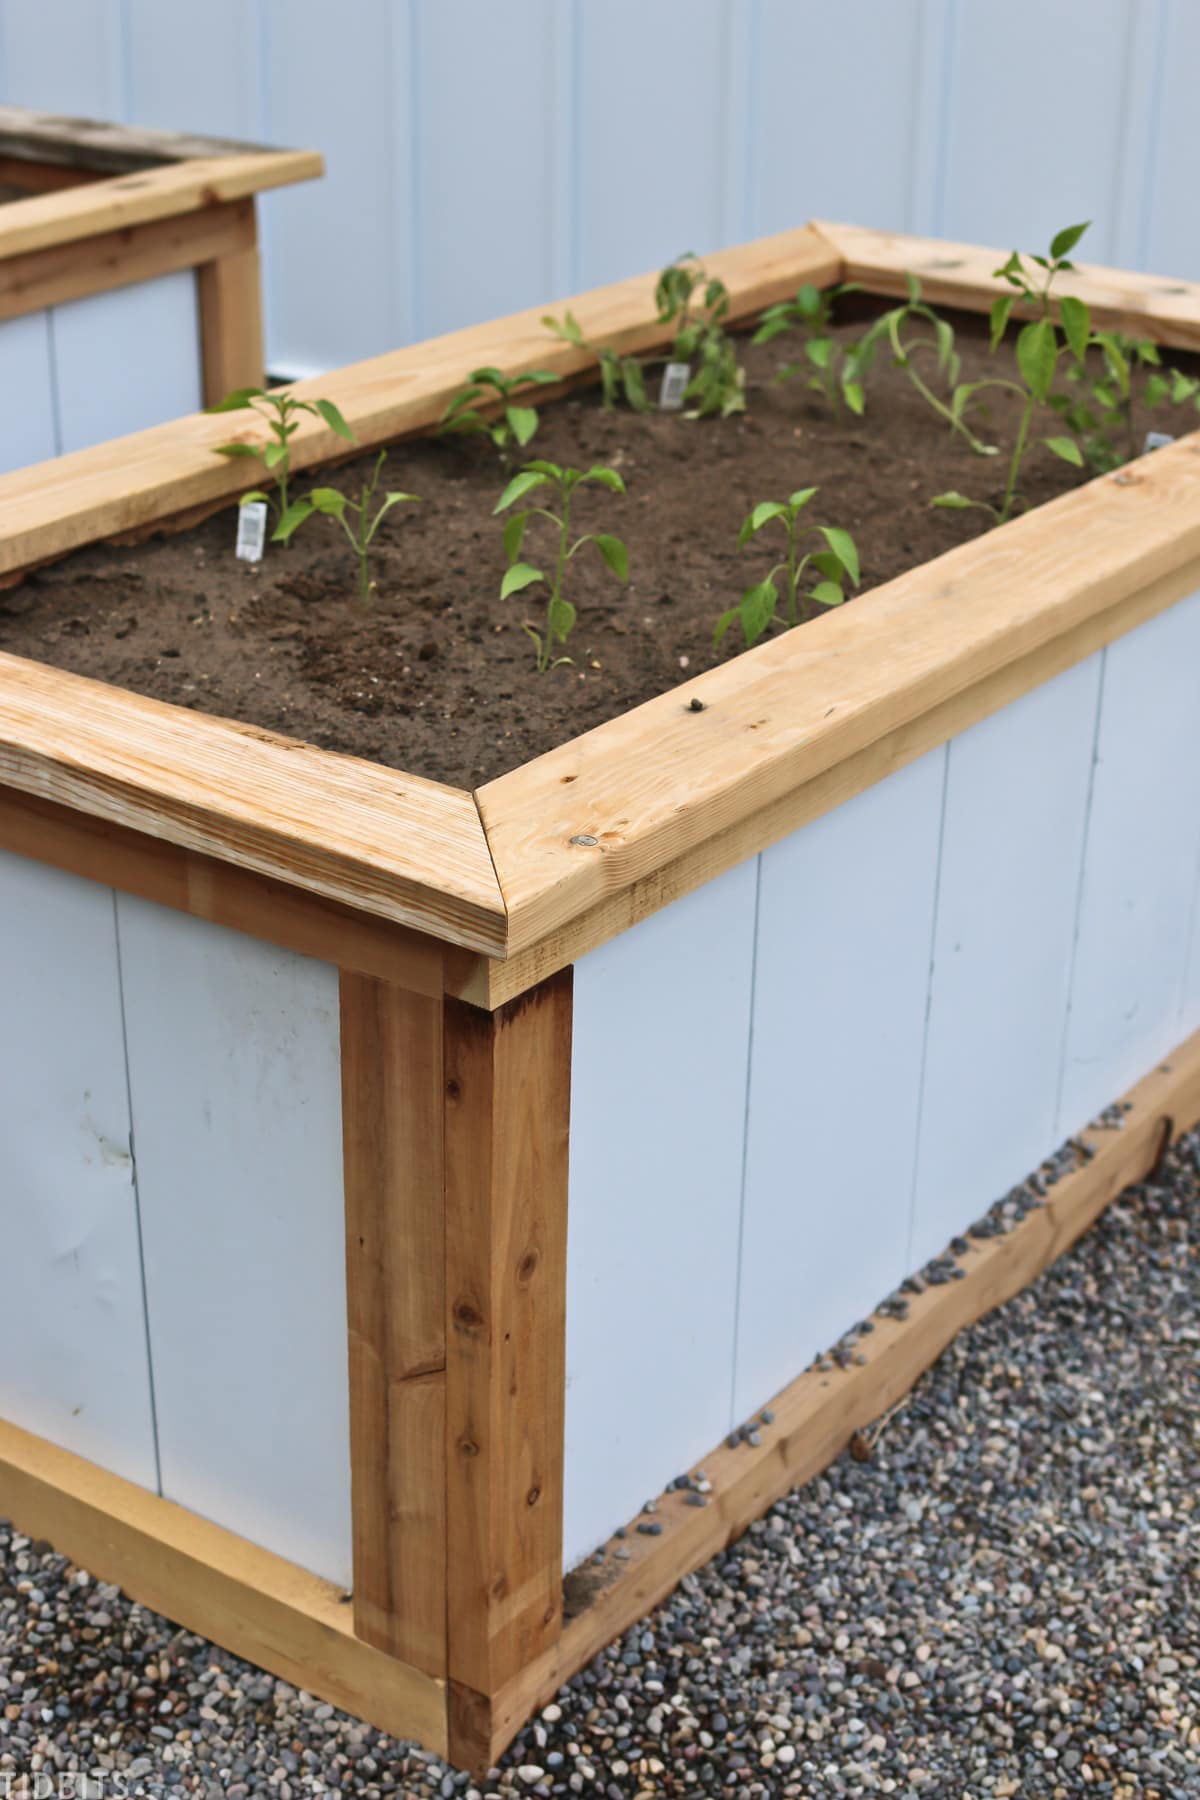
MAKE THE TOP LEDGE
Finally, the top ledge for the wood part, which we both thought would look and function nicely if it was wider.
For the top, we cut two 2×6 boards to 64 inches long on the shorter edge with a 45° angle on each end. We used a third 2×6 board to cut the two end pieces at 27 inches long on the shorter edge, again with a 45° angle on each end.
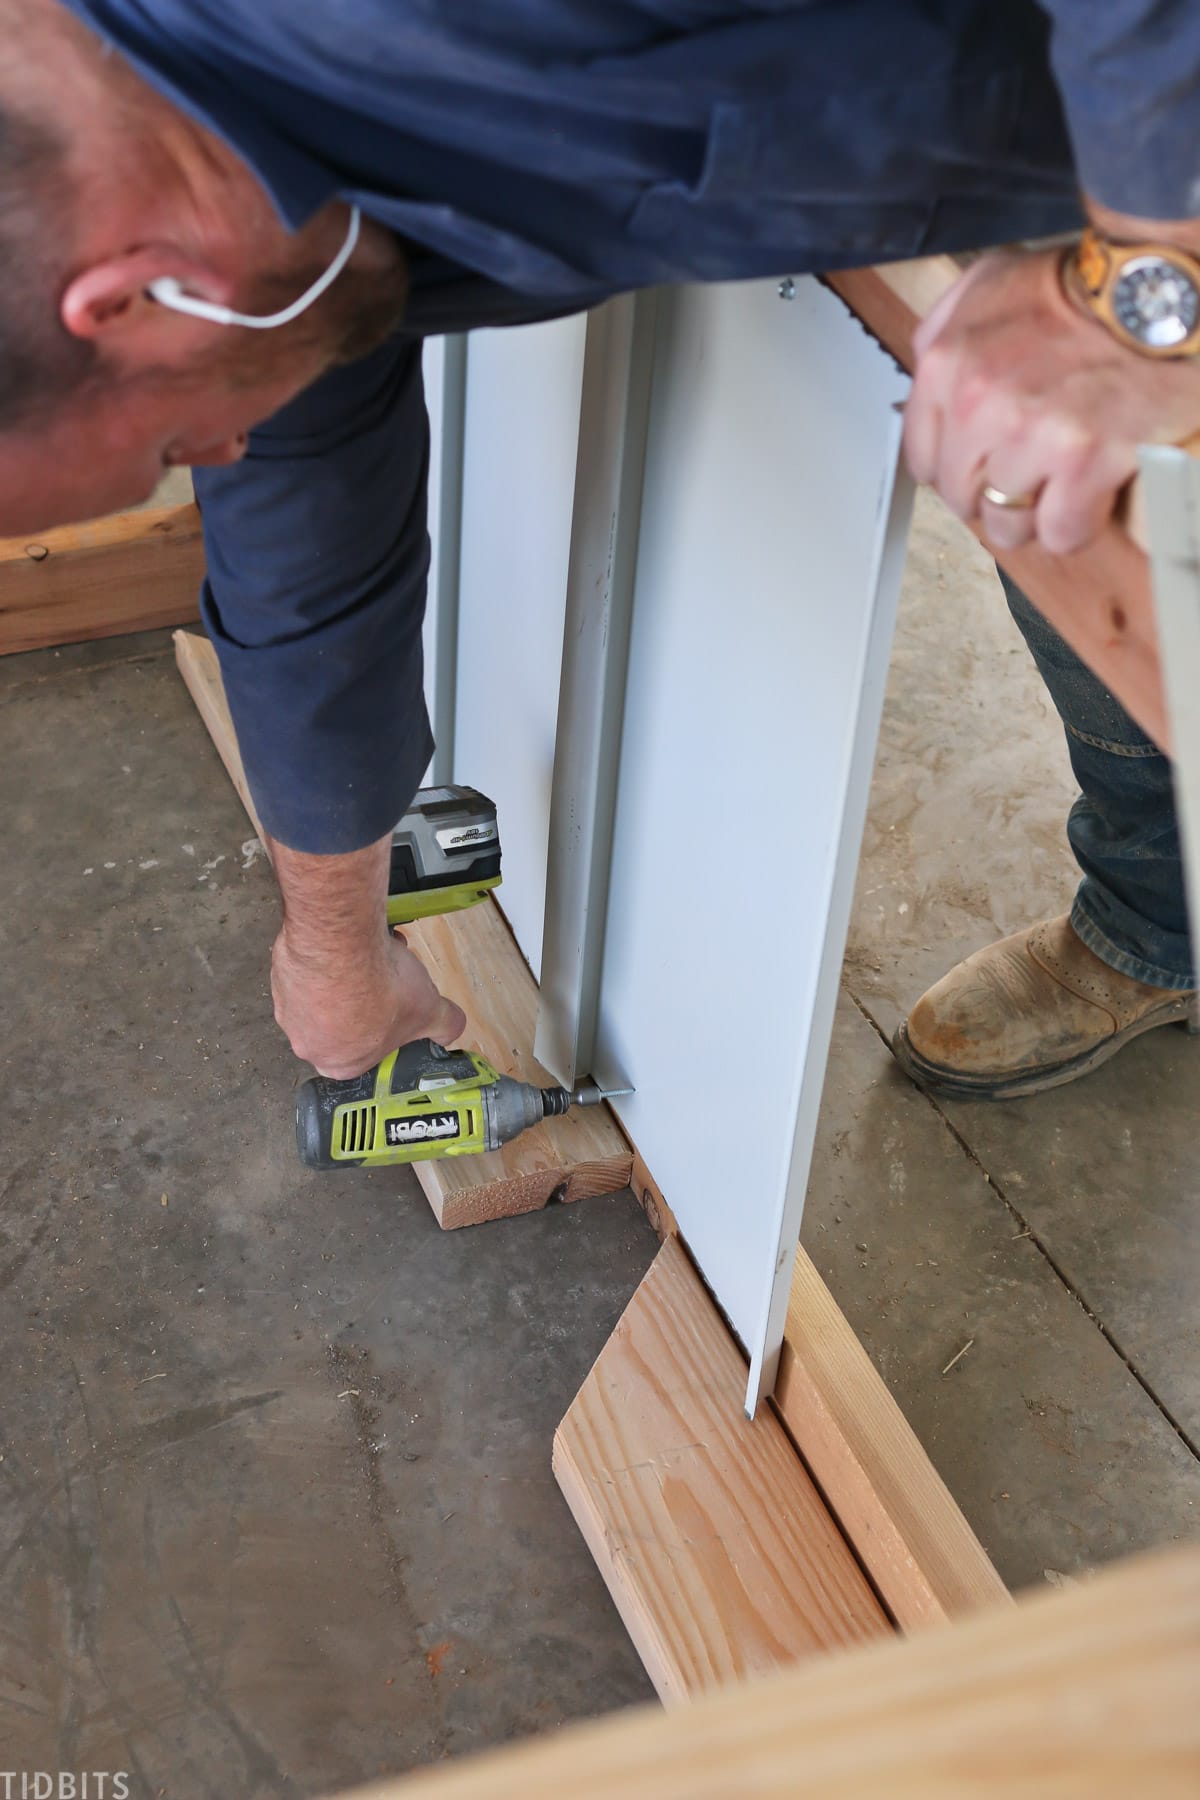
ATTACH THE TIN
We used a metal blade on my miter saw to cut the tin to 28 inches long. Then we used 1” self-tapping screws to attach the pieces to the inside of the box. I used leftover 2×6 boards to lift the tin to the proper position before attaching them to the frames. We ran our tin vertically for design purposes.
If you decide to go horizontal, then you will need to cut an 8 ft piece of tin at 64 inches long for the side panels and then you will have enough left over to cut the 28-inch piece on the ends. You would then only need 2 8-foot sheets of tin for this project.
No matter what time of year it is, I think getting some garden beds built will always be useful and beautiful for your home.
DIY RAISED GARDEN BEDS FAQS
A very comfortable height for a waist-high raised garden bed is 3 feet tall. We designed these raised garden beds to be waist-high, so planting, weeding, vegetable gardening, and harvesting would be easier on our backs.
What do you put on the bottom of an elevated garden bed?
Your garden bed can sit directly on top of your ground, and you do not need to build a base. A speck of dirt or grassy ground is just fine to sit your garden bed on top of.
What do you fill tall raised beds with?
Stock your garden bed with organic waste, rocks, or other bulky filler so you don’t have to use as much topsoil and the garden soil has plenty of drainages. We filled the soil along with rocks and fallen tree branches.
Which wood is best for raised garden beds?
Cedar has the benefits of being bacterial and fungal resistant. It is also coefficient, which means even on hot days it stays cool, which is better for plants. And because of the natural oils in cedar, the wood is rot-resistant and stays preserved a lot longer than other woods.
If you want to see more of our gardening posts on TIDBITS.
- Must know tips for container gardening
- How to make natural wood plant markers
- The best flower gardening books
- Summer dreams planning pack
Be sure to come on back as we celebrate the art of homemaking, and inspire you with more inspiration for do-it-yourself living!


How has the tin held up? Has it rusted any?
The tin has held up amazing. No rust at all on the garden beds or our house. I would say they have begun to bow a little bit, but it is hardly noticeable. I think just with the moisture and soil compaction. I think if they were shorter they wouldn’t have done this, but I do love having them so tall.
This is a beautiful build and an extremely long post to arrive at zero material list or instructions. 🙁
However, the build looks nice.
I hope you caught our video on it, if you need more! Thanks for reading!
Hello, how much tin per box? I can’t seem to find that? These are beautiful and I look forward to making them this year.
I’ve been thinking about doing a steel roofing raised bed for some time. I think that lining it with untreated plywood and covering with black plastic would protect both the roofing and the human as I believe zinc is used in the galvanizing process…which isn’t that good for our nervous systems…especially the developing ones. So a little extra protection.
Do you ever have a problem with squirrels getting into the boxes or raccoons?
No, I’ve never had that problem! Our chickens however, love to nestle in. I had to put a net over them this year.
My raised beds are very similar, but I used (6) cedar 2x10x8′ so the beds are 4’x8′. I used cedar 2×8 flatwise for the top rail, but only on the long sides. And 4×4 at the corners and midway on the long sides to tie it all together (I had a few cedar posts left over from deck and fence).
This takes more soil to fill – and more lumber. The 2×8 top is at bench height by using 2×10 sides.
You have a very nice discussion about garden beds. Your ways are instructive. I hope it will benefit all of us. Thank you!
Thanks for sharing this Cami. These garden beds are great! I’ve always wanted to build garden beds but I hadn’t considered waist high… excellent idea. Thank you and Mr. Tidbits for the detailed instructions.
Those are actually pretty, very useful, thank you Mr. Tidbits.
Thank you Marlene! Isn’t he wonderful?!
You guys are so cute!! Good work, the garden boxes are awesome!
Thanks Kelli! Sure miss ya!