This post may contain affiliate links, which means I get a small percentage of the sale at no extra cost to you. I only recommend items I love and have had a positive experience with. Thank you!
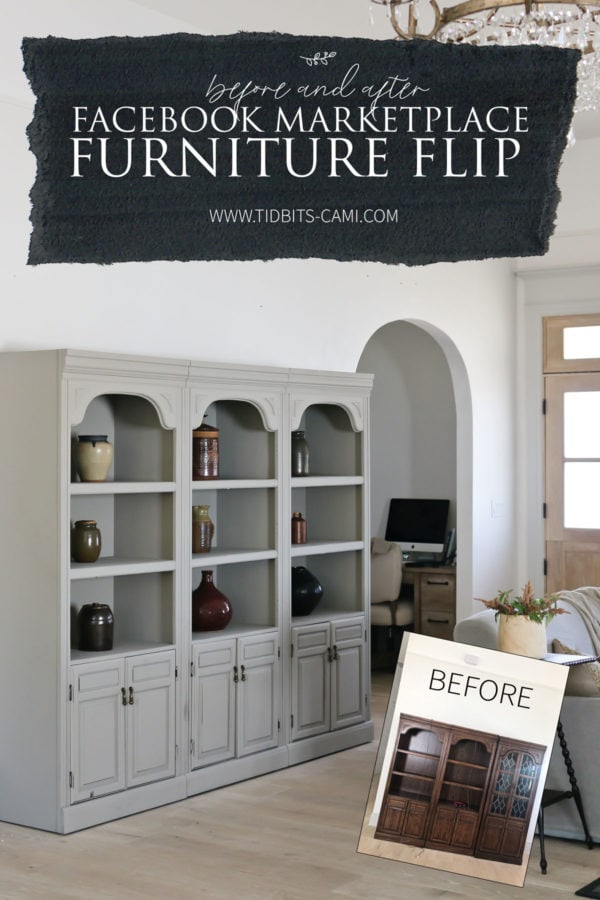
Check out the before and after results of my Facebook Marketplace bookshelf makeover project. A little bit of chalk paint goes a long way!
The only rooms we have mostly finished in our new home is the kitchen, laundry room, and master bathroom. The last room on our list is the living room, which we livened up with this beautiful bookshelf makeover.
WATCH THIS POST
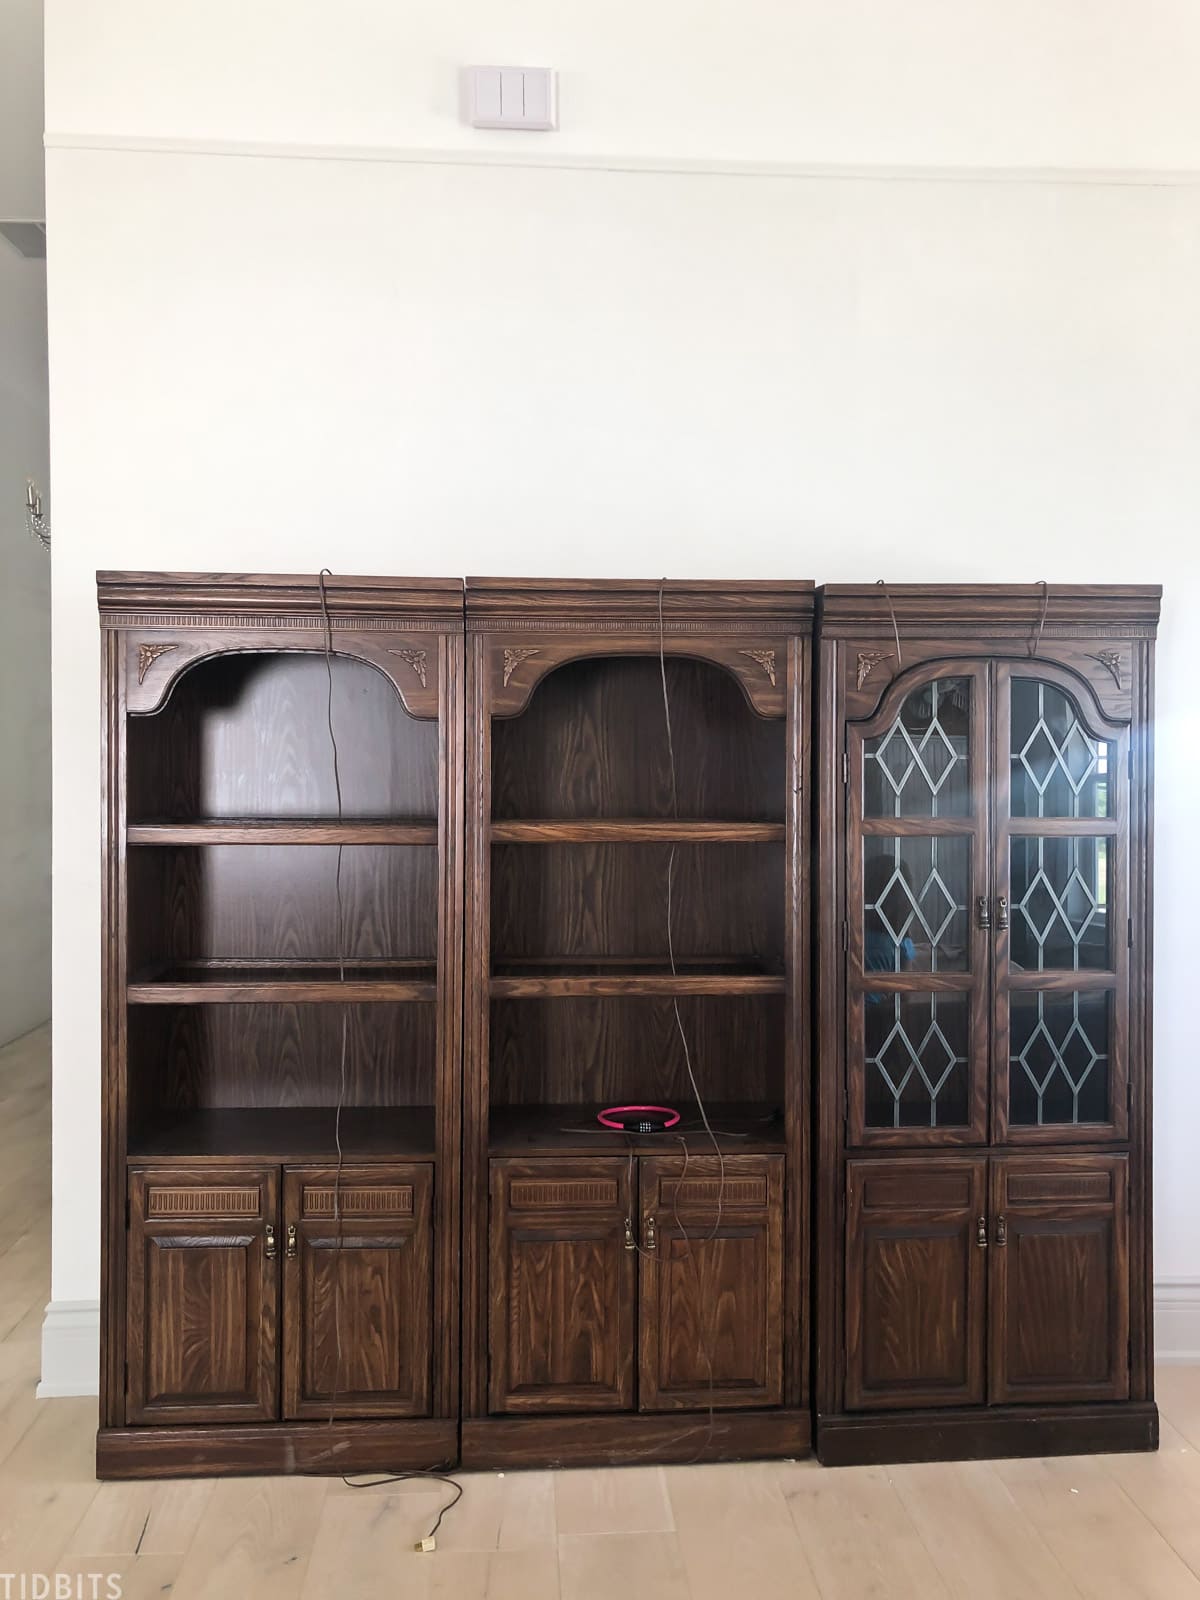
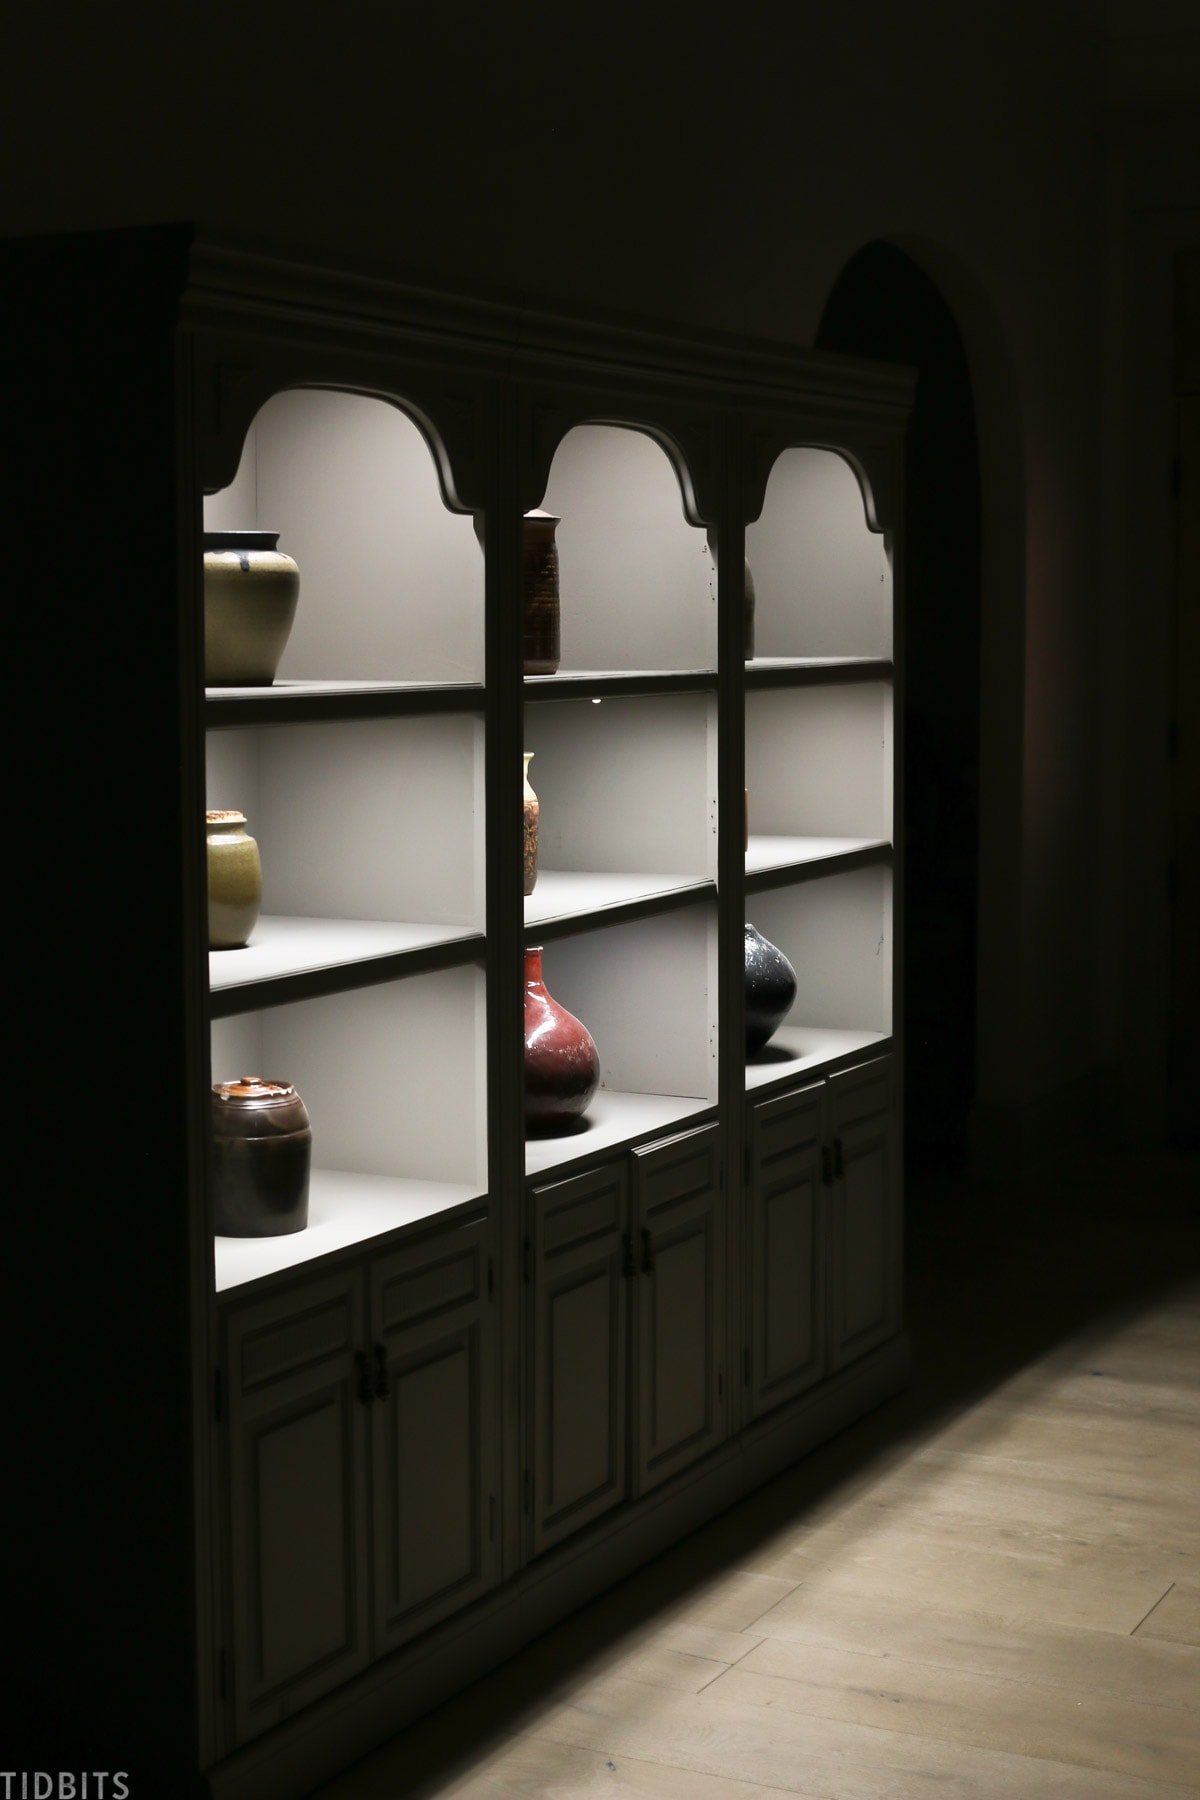
It’s amazing what a coat of paint did to these 3 old bookshelves we snagged for a steal from a seller on Facebook Marketplace.
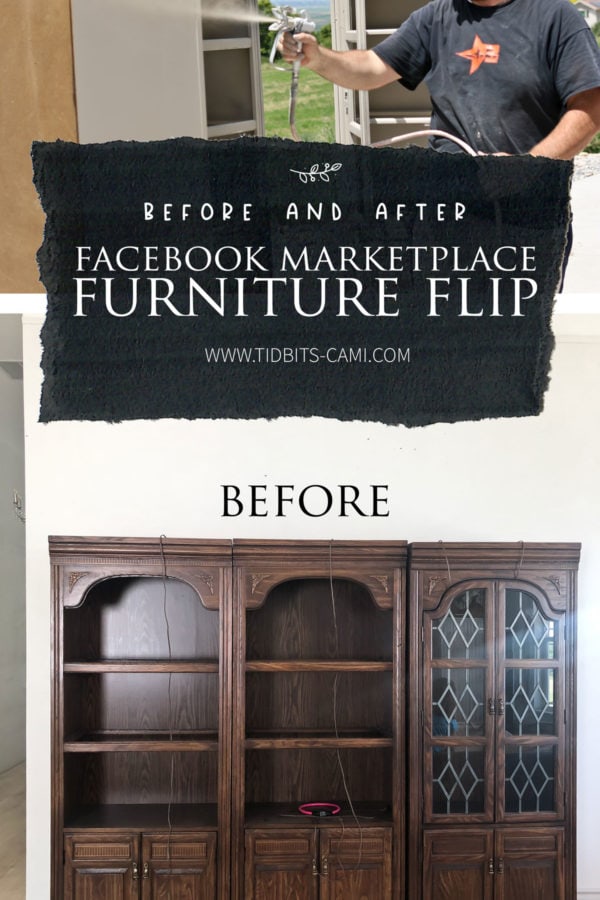
Here is what this modular unit looked like before we got our hands on them.
I actually had the hardest time finding a shelving piece for this empty wall spot in our living room.
I really wanted something with curves since this room tends to feel a little too boxy.
I knew it wasn’t the ideal super cool antique piece I hoped to find, but I’m pleasantly surprised by how much better it looked when I painted it.
I actually love it, and if anything, it will allow me as much time as I need to keep searching for something that really speaks to my soul and will be worth the investment.
How do you revamp an old bookshelf?
This piece was old, but not that old. It was made with cheap 70’s laminate fake wood, so I knew there was no way I could make it a pretty natural wood piece. The best option was to paint it.
At this point, I reached out to one of my favorite paint companies—Pure & Original.
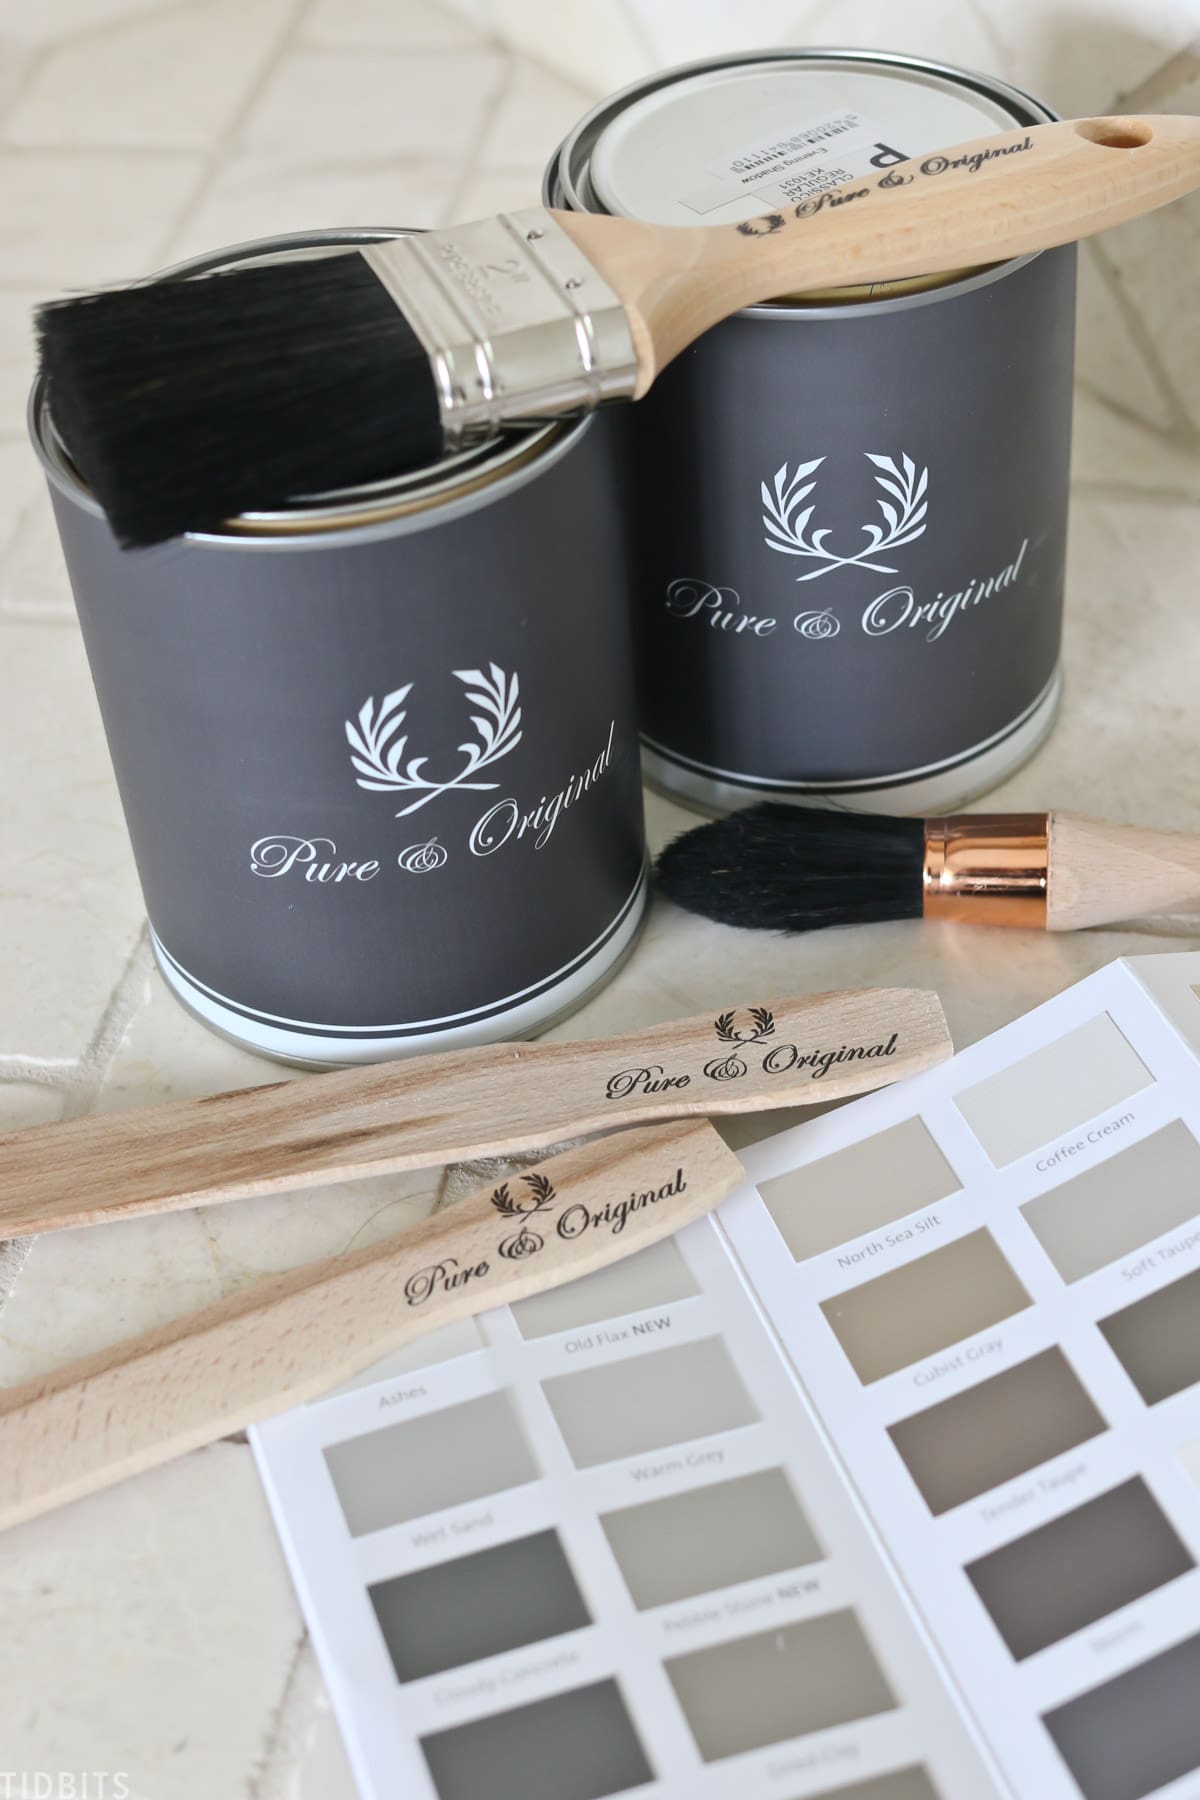
If you’ve been with me awhile, I used Pure & Original’s Marrakech Paint on our walls to create a subtle textured concrete look with the color Milk White.
I also used their Classico Chalk Paint on this really cool vintage hutch with the inside the color Earth Stone and the outside the color Evening Shadow. Lastly, I’ve used their Licetto Paint for our trim in the color Ashes.
HOW TO CREATE A BOOKSHELF MAKEOVER WITH PAINT
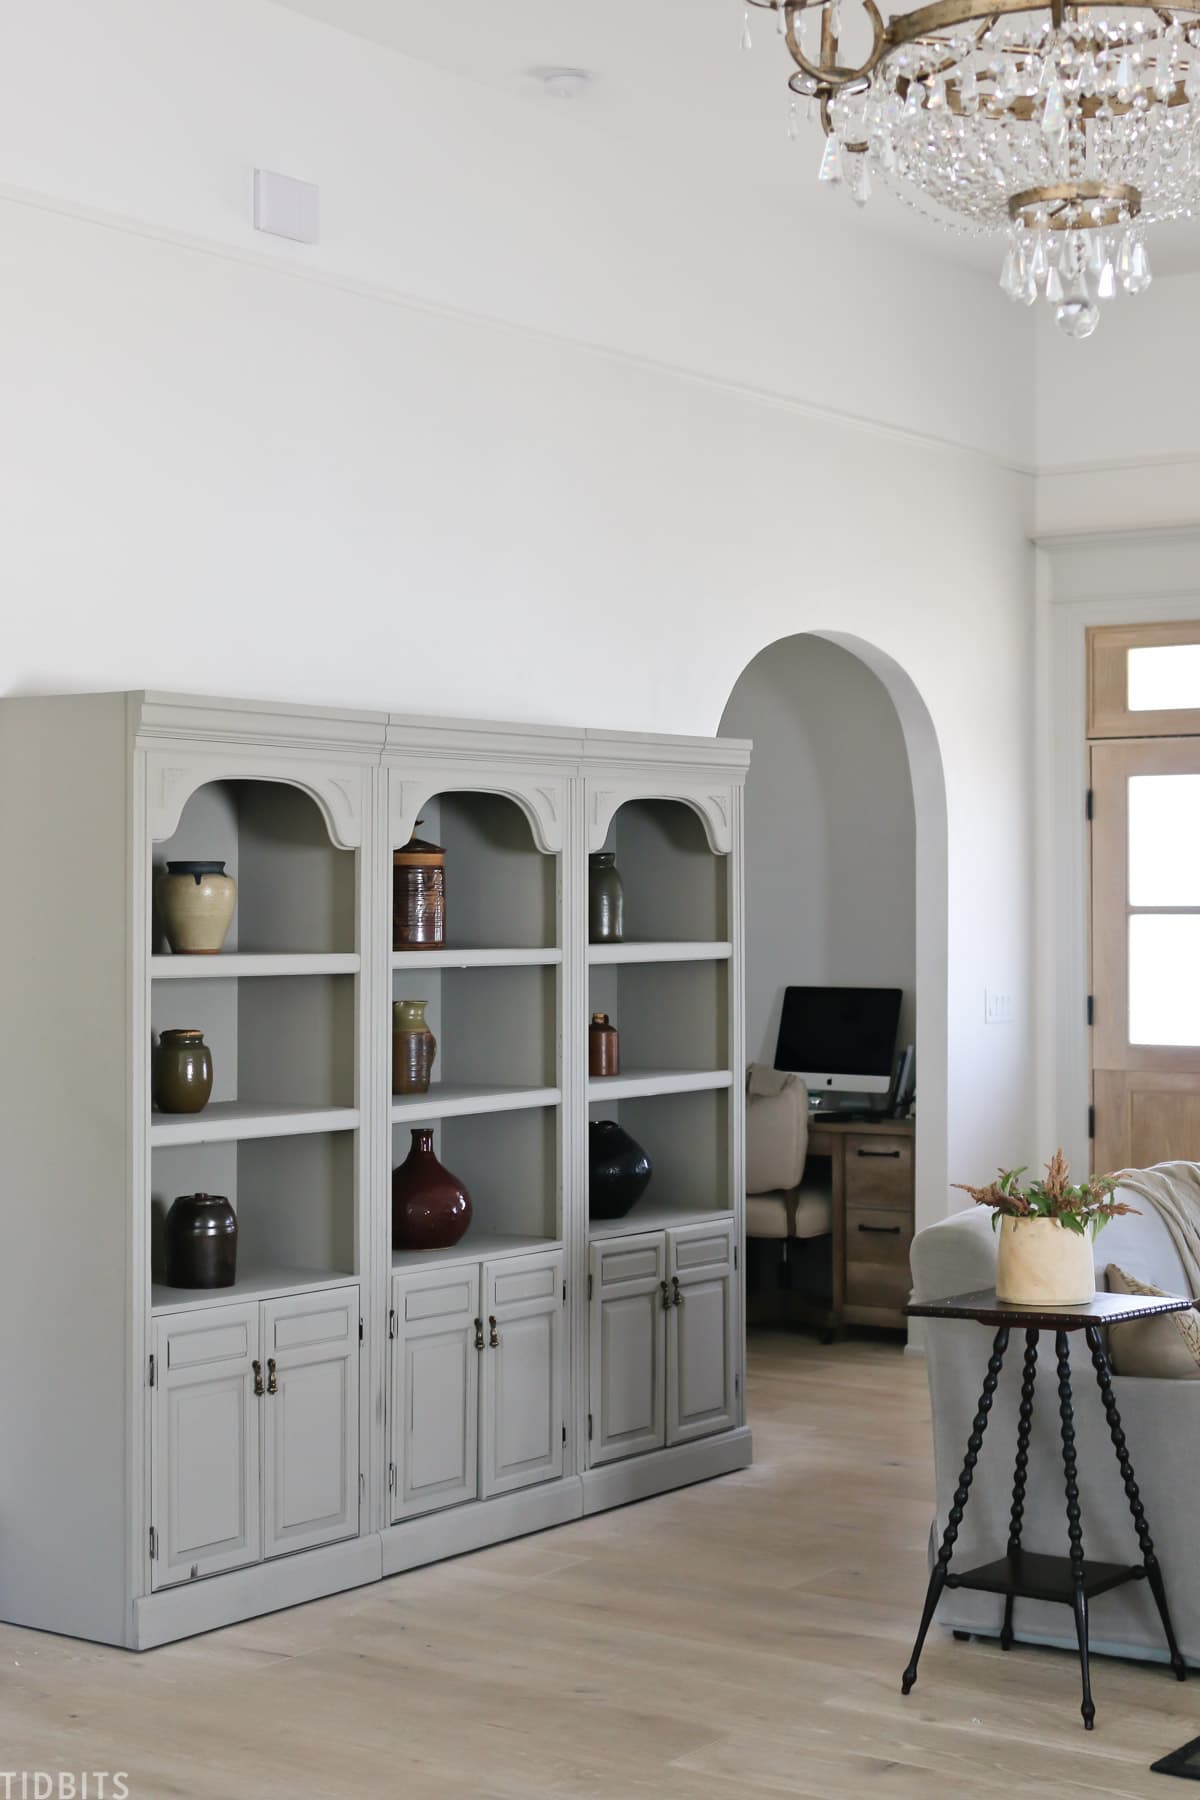
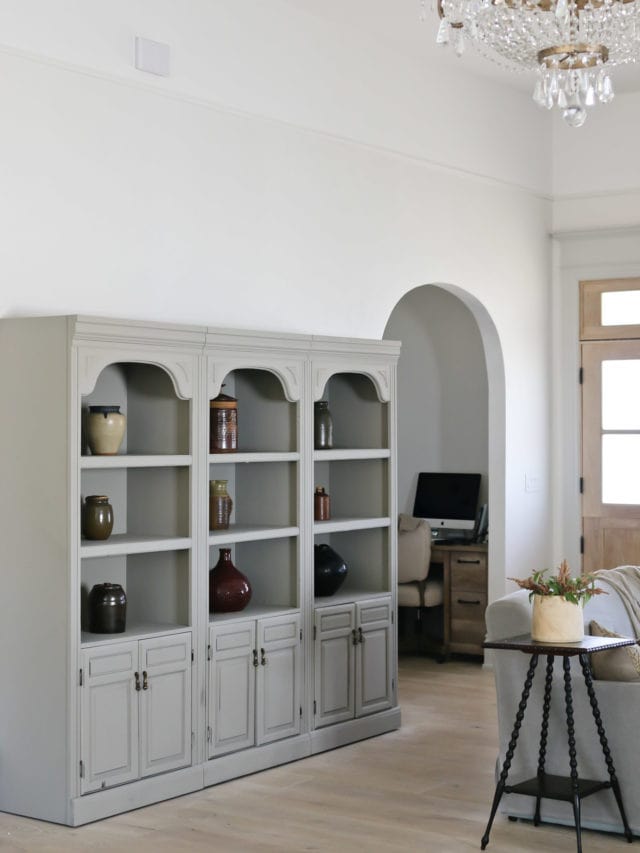
For this piece, I wanted to compliment the grays in the room, but not add to it, so I picked this perfectly balanced greige color called “Pebble Stone”.

It came out better than I anticipated. If you are looking for a medium-toned brown/gray, I think you’ll love this one!
It might look a little too muddy in a room without a lot of natural light, but I think it is a gorgeous color in our light-filled room.
I wanted to make this bookeshelf makeover as easy as possible, so spraying it was ideal and sanding it down wasn’t really an option due to the laminate covering.

Pure & Original recommended I use their Classico chalk paint again, since it adheres so well and has a nice smooth matte finish with no sealer or top coat needed.
I didn’t actually get a ton of images of the process, but it was so simple and straightforward.
We gave it a good scrub down, removed doors and hardware, and sprayed 2 coats. That’s it!
THE RESULTS OF OF OUR FACEBOOK MARKETPLACE BOOKSHELF MAKEOVER

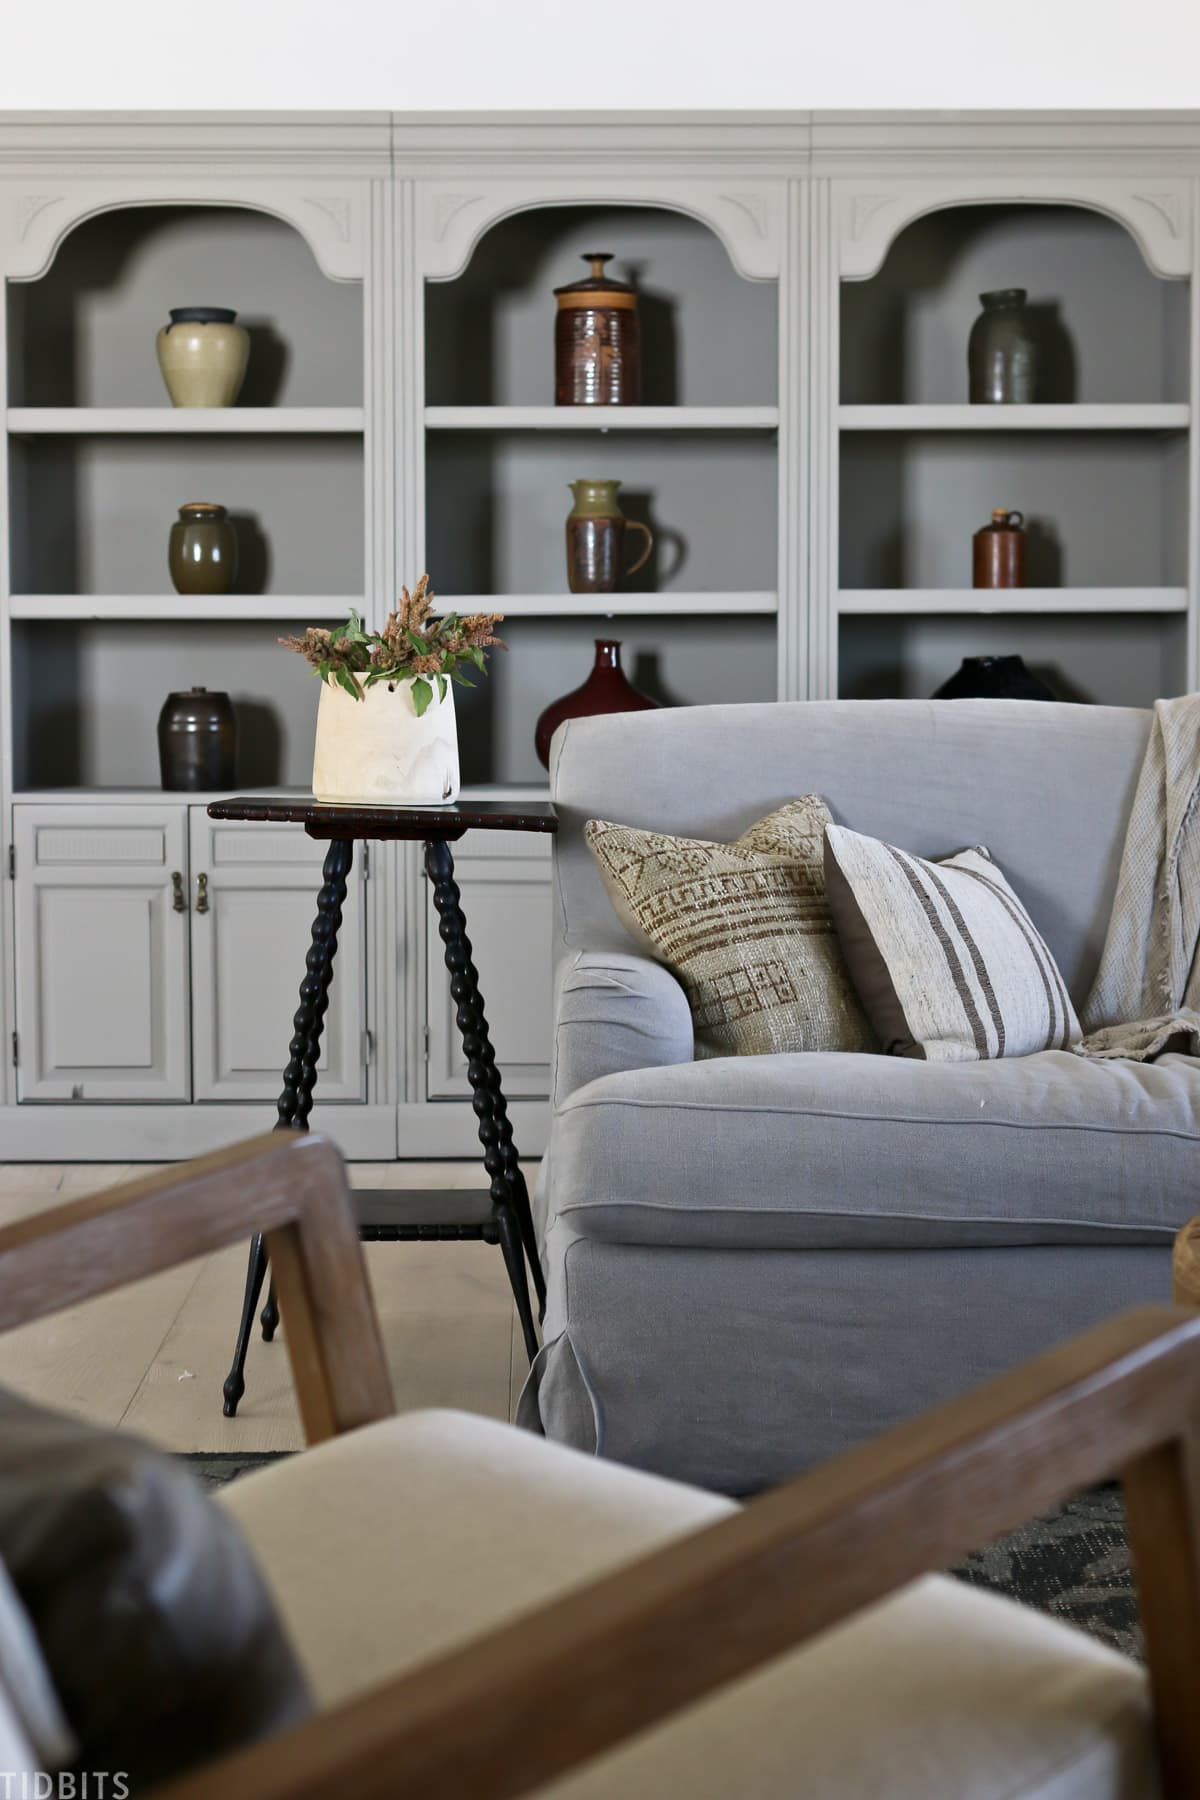
And here she is, painted and styled. After removing the doors, I decided I liked all 3 without the doors.
The lower cabinets are perfect for storing our sewing supplies and other random things we don’t want to look at.
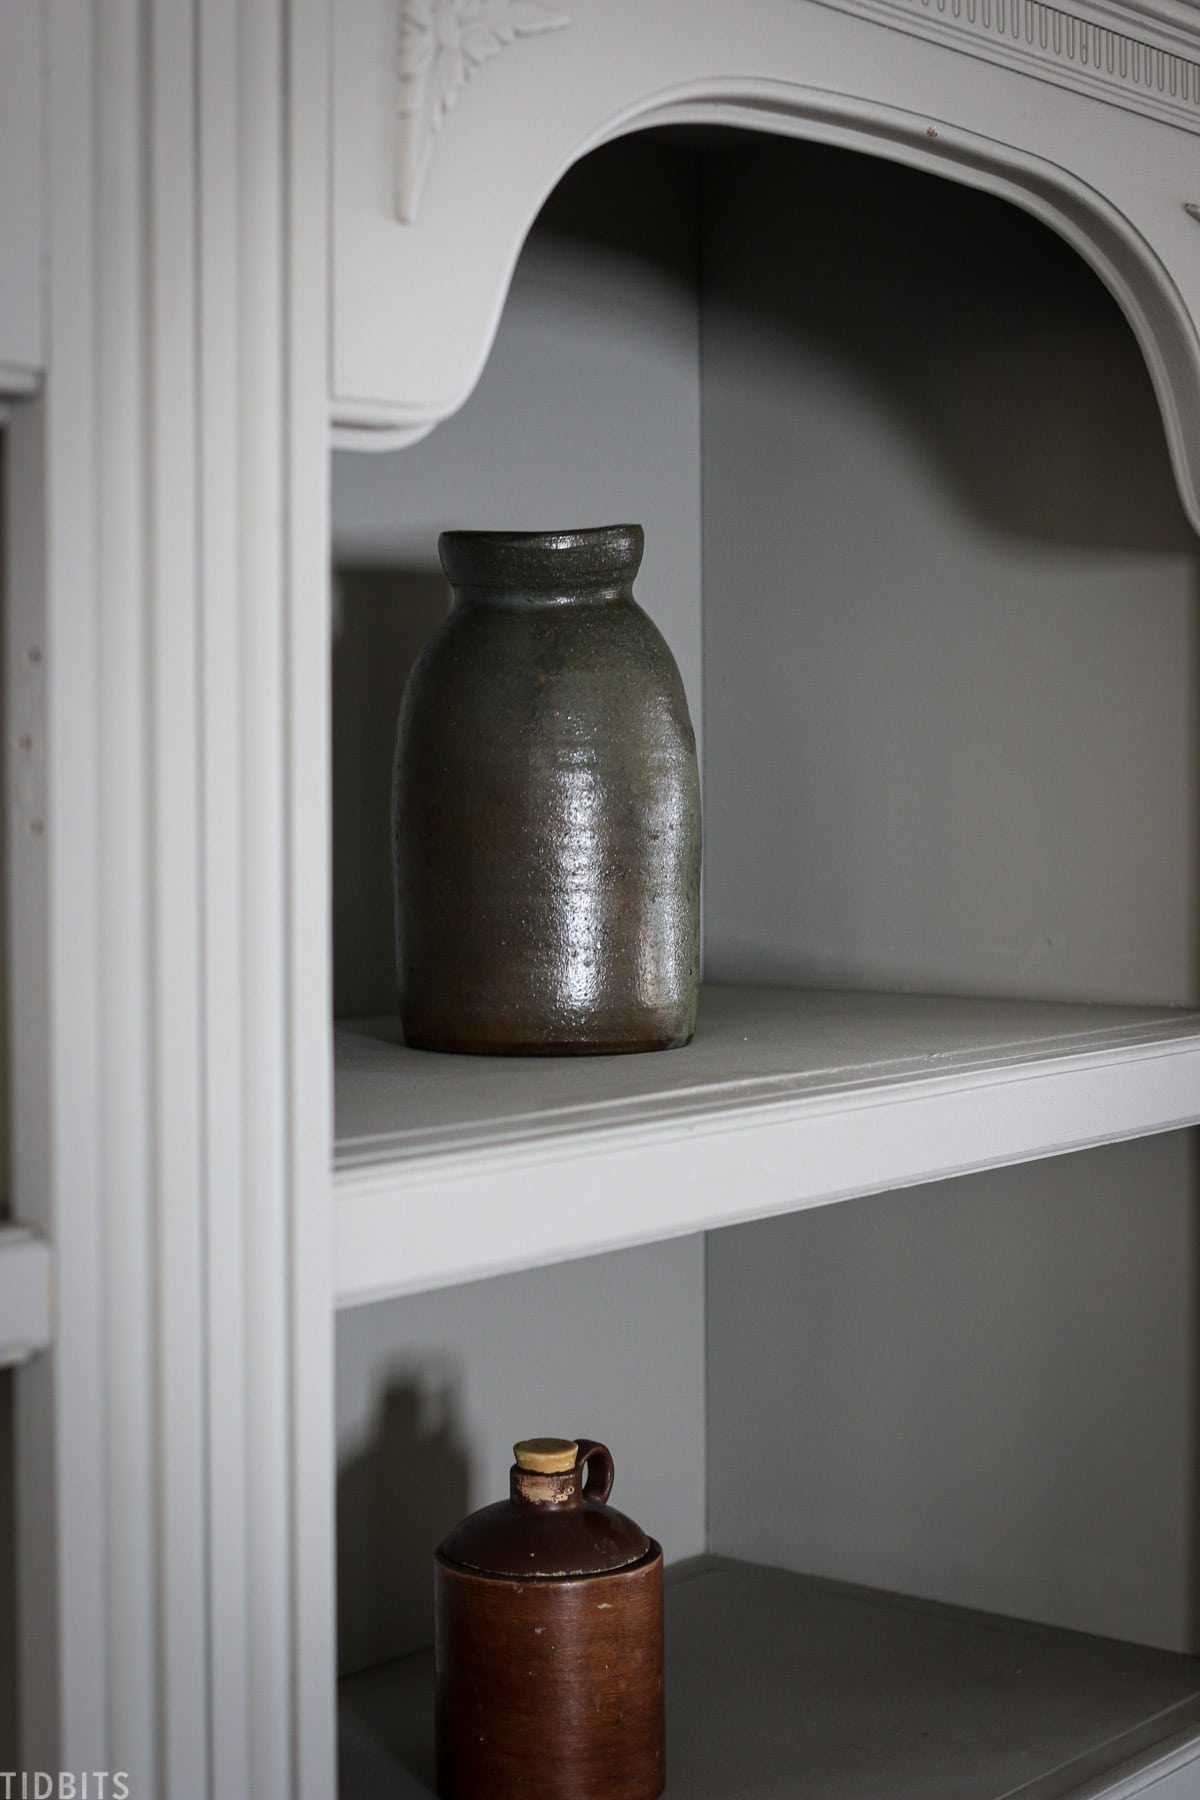
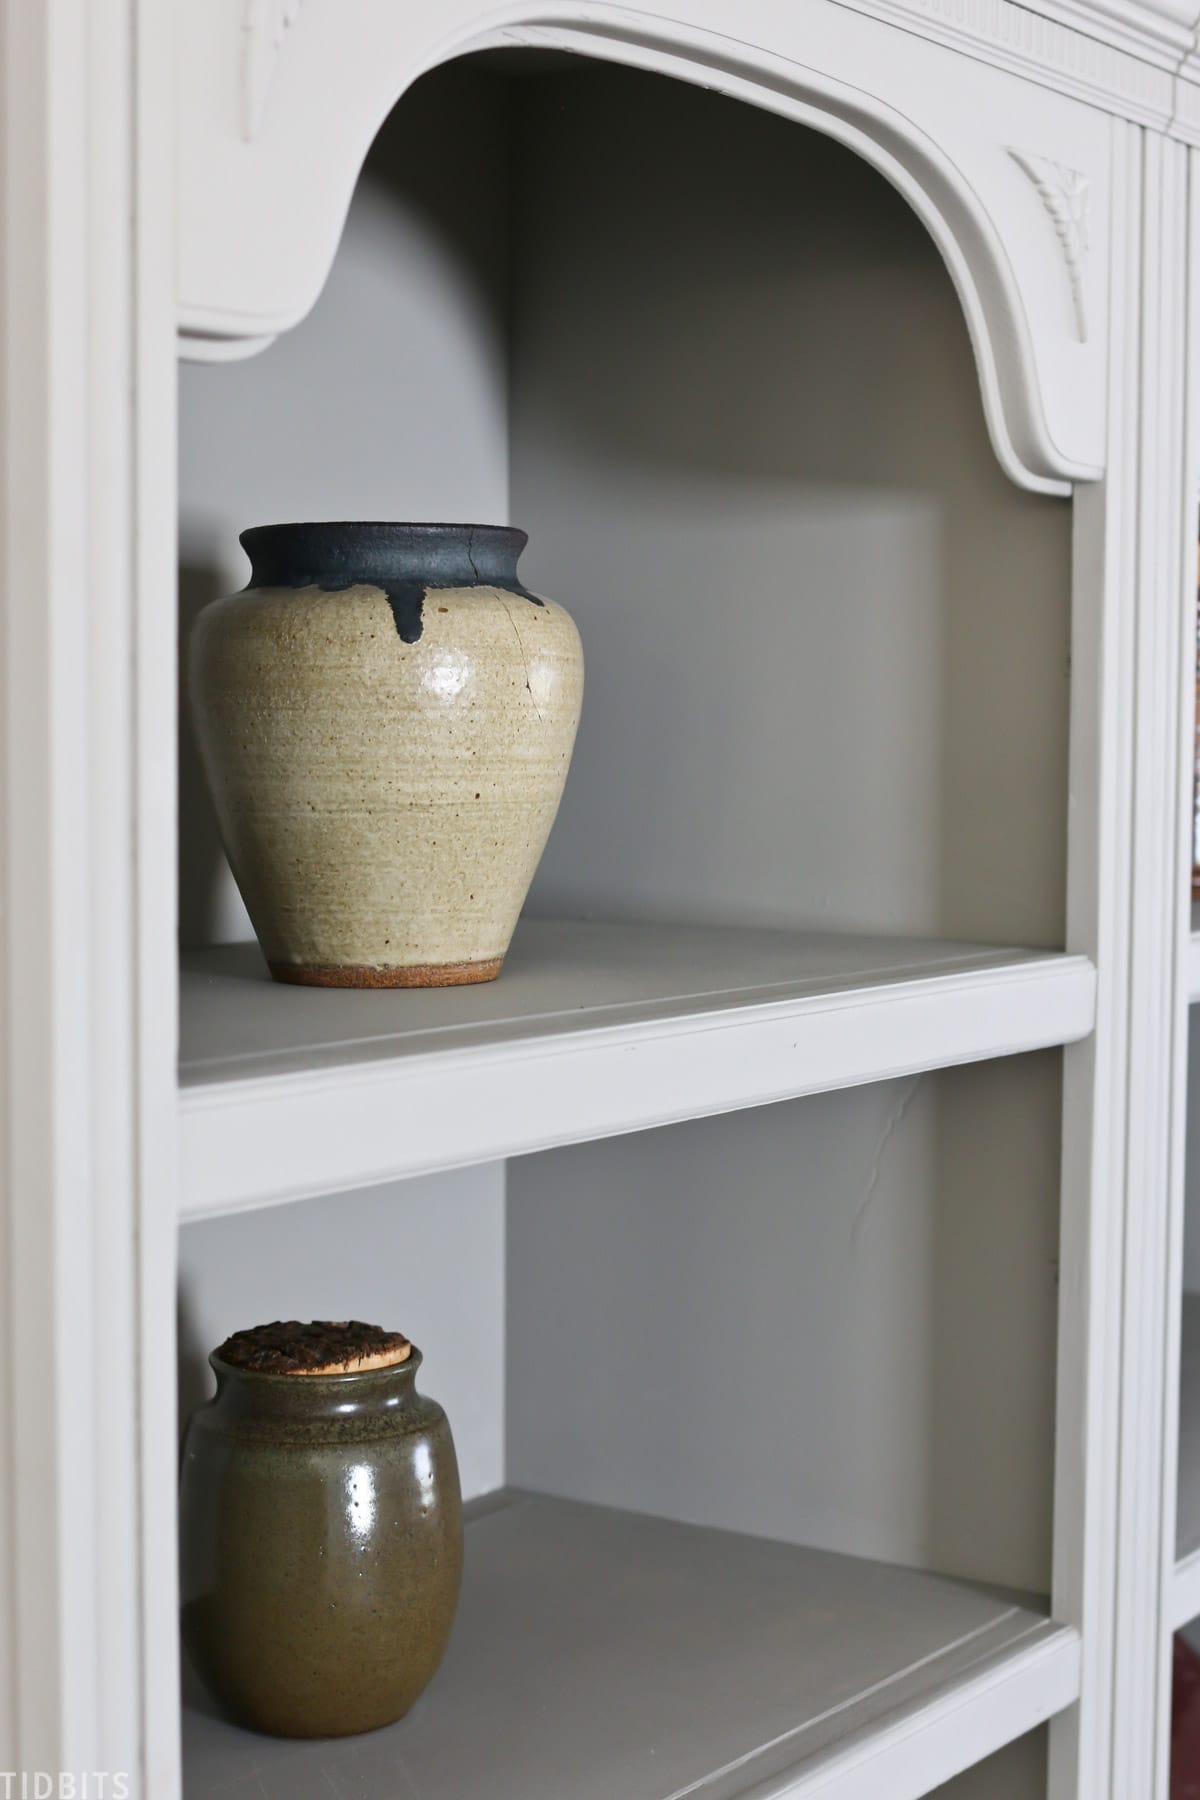
While I love the interest in perfectly styled open shelving with all sorts of goodies, I felt simplicity really calling to me for this piece.
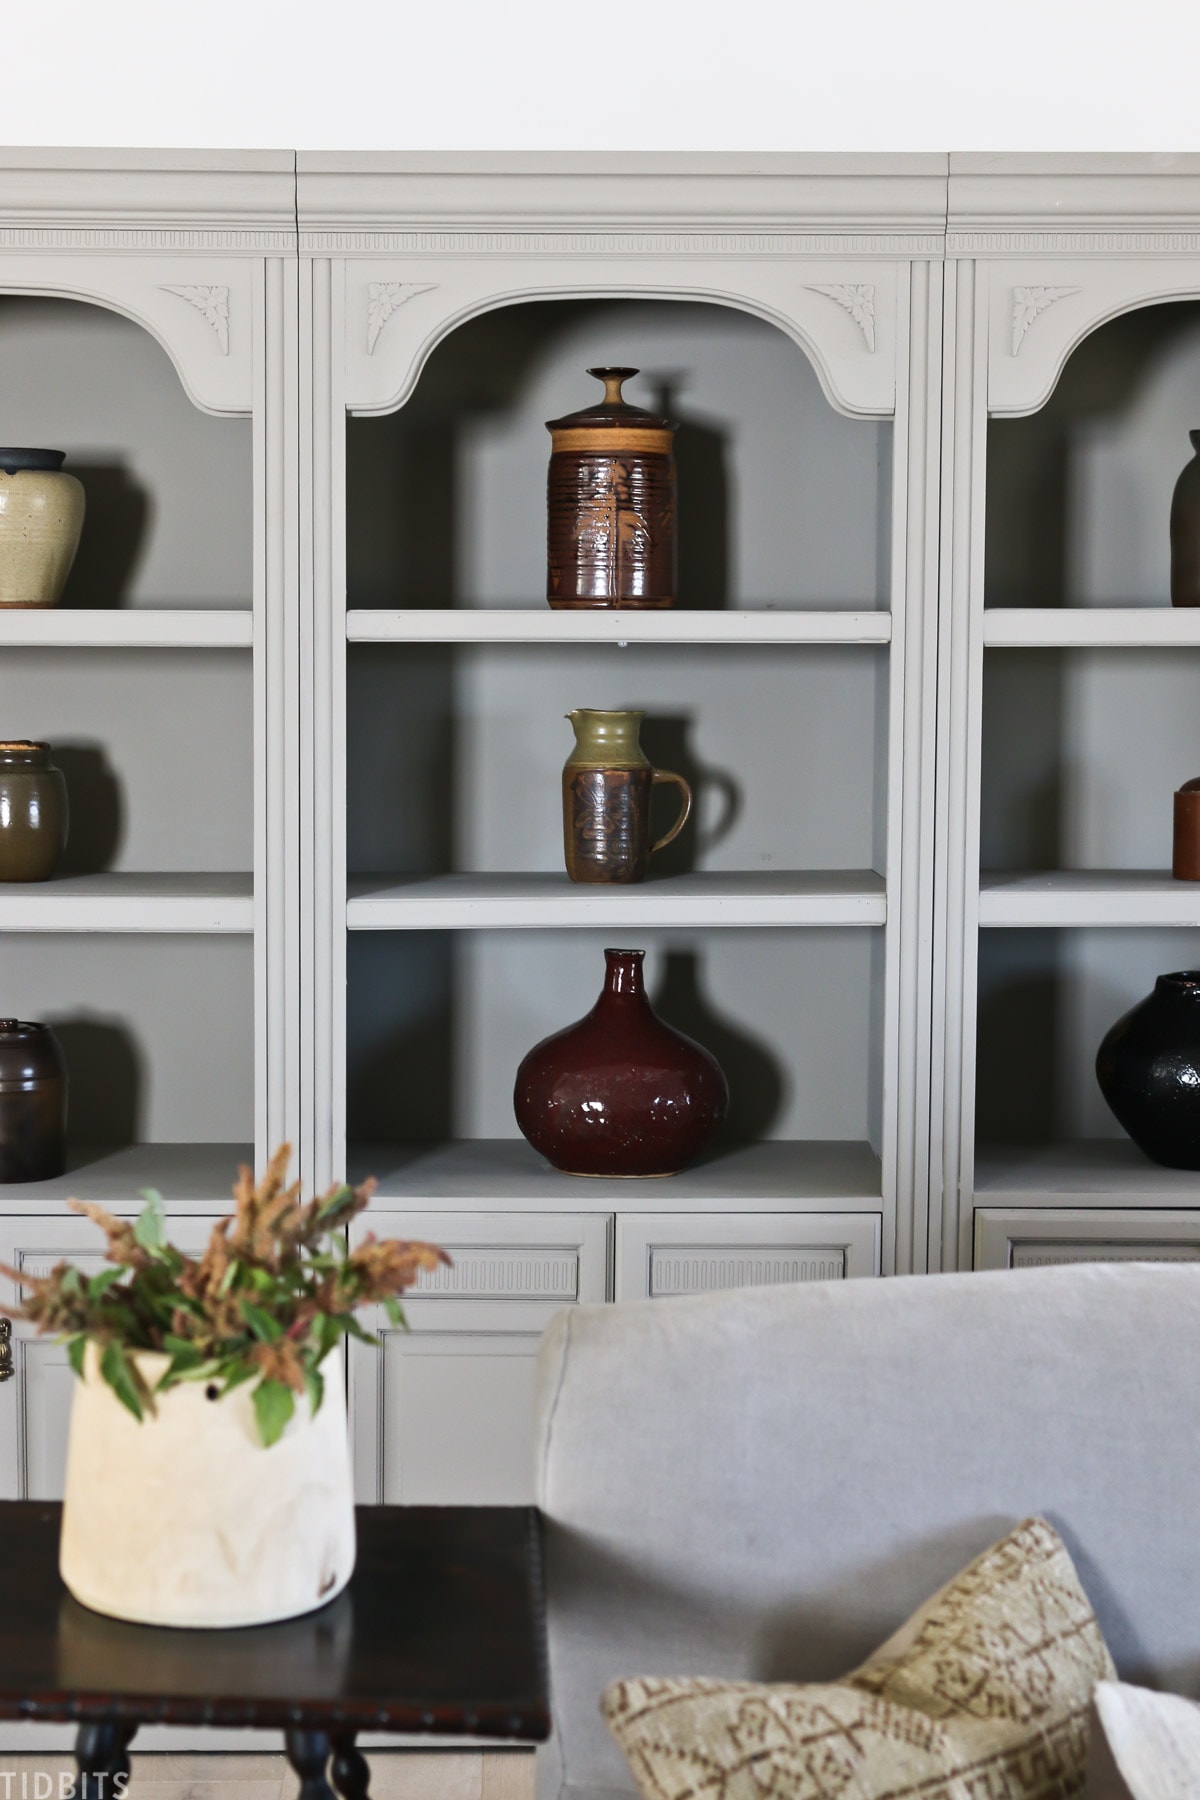
I went to an antique store for a few pieces, and a thrift store for a few more.
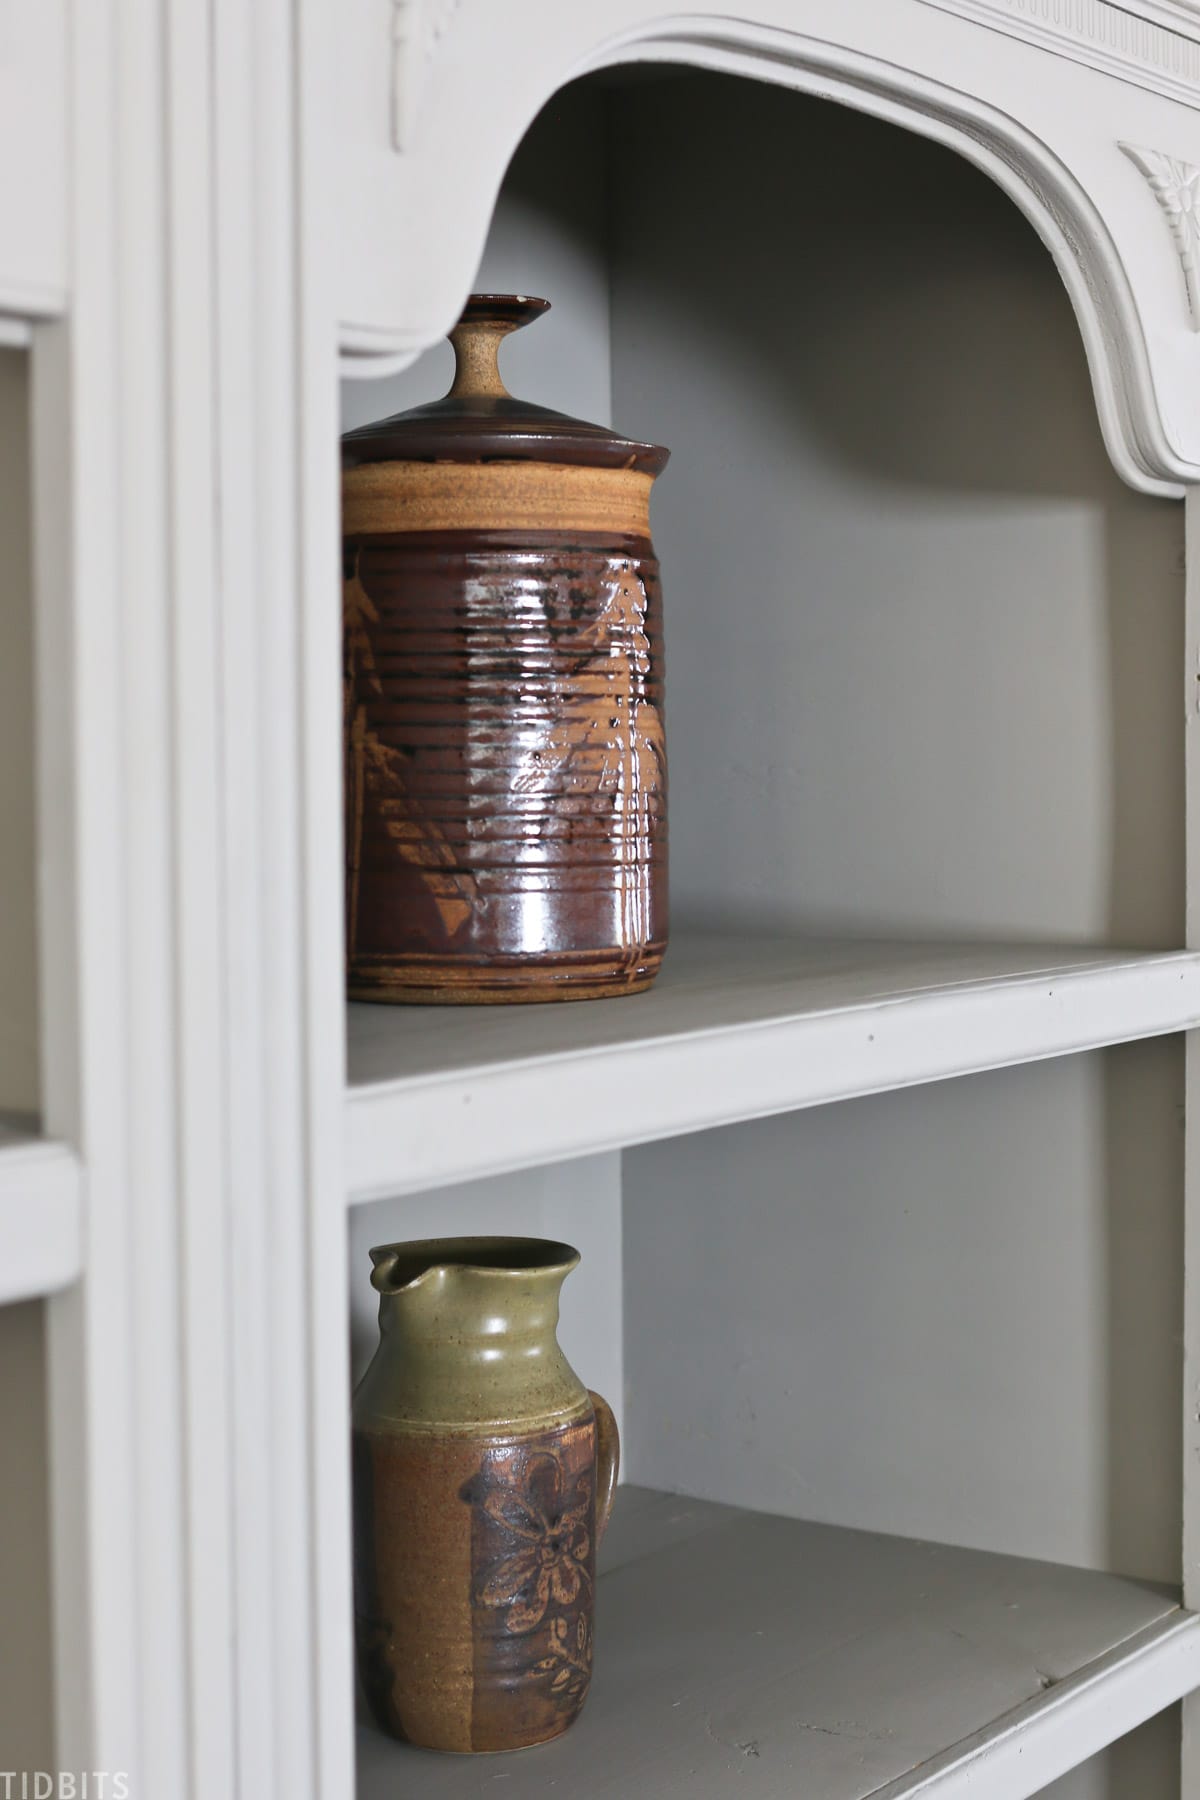
Some of them are not my favorite pottery pieces ever, but together they look pretty neat.
It might be something I also take my time to swap out with vessels that I will treasure for a lifetime and use for many centerpieces and floral arrangements.
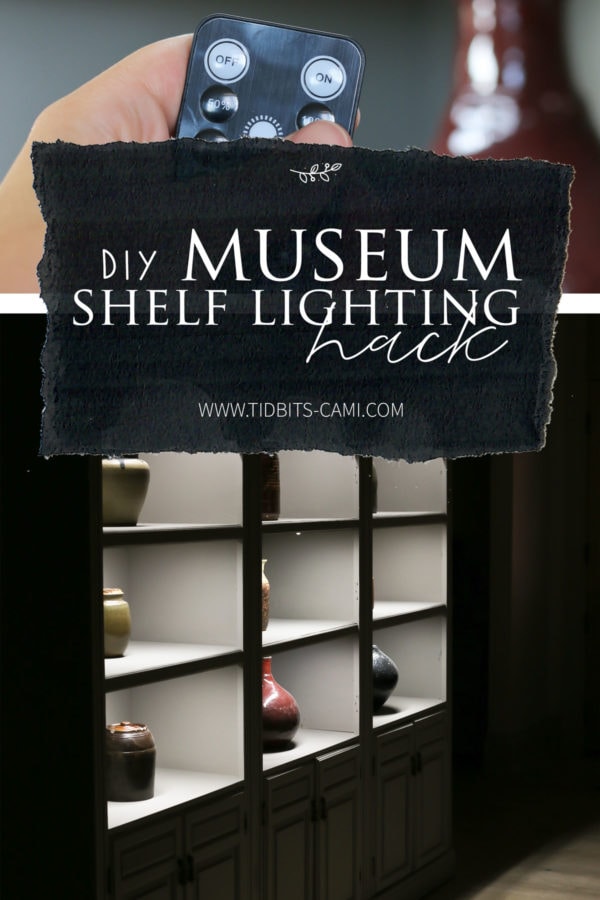
SHELF LIGHTING
Revisiting my museum inspiration, I thought it would be really neat to add some under cabinet mood lighting on each shelf. I discovered these magnetic and rechargeable bar lights that turn on with a remote. They are the coolest things.
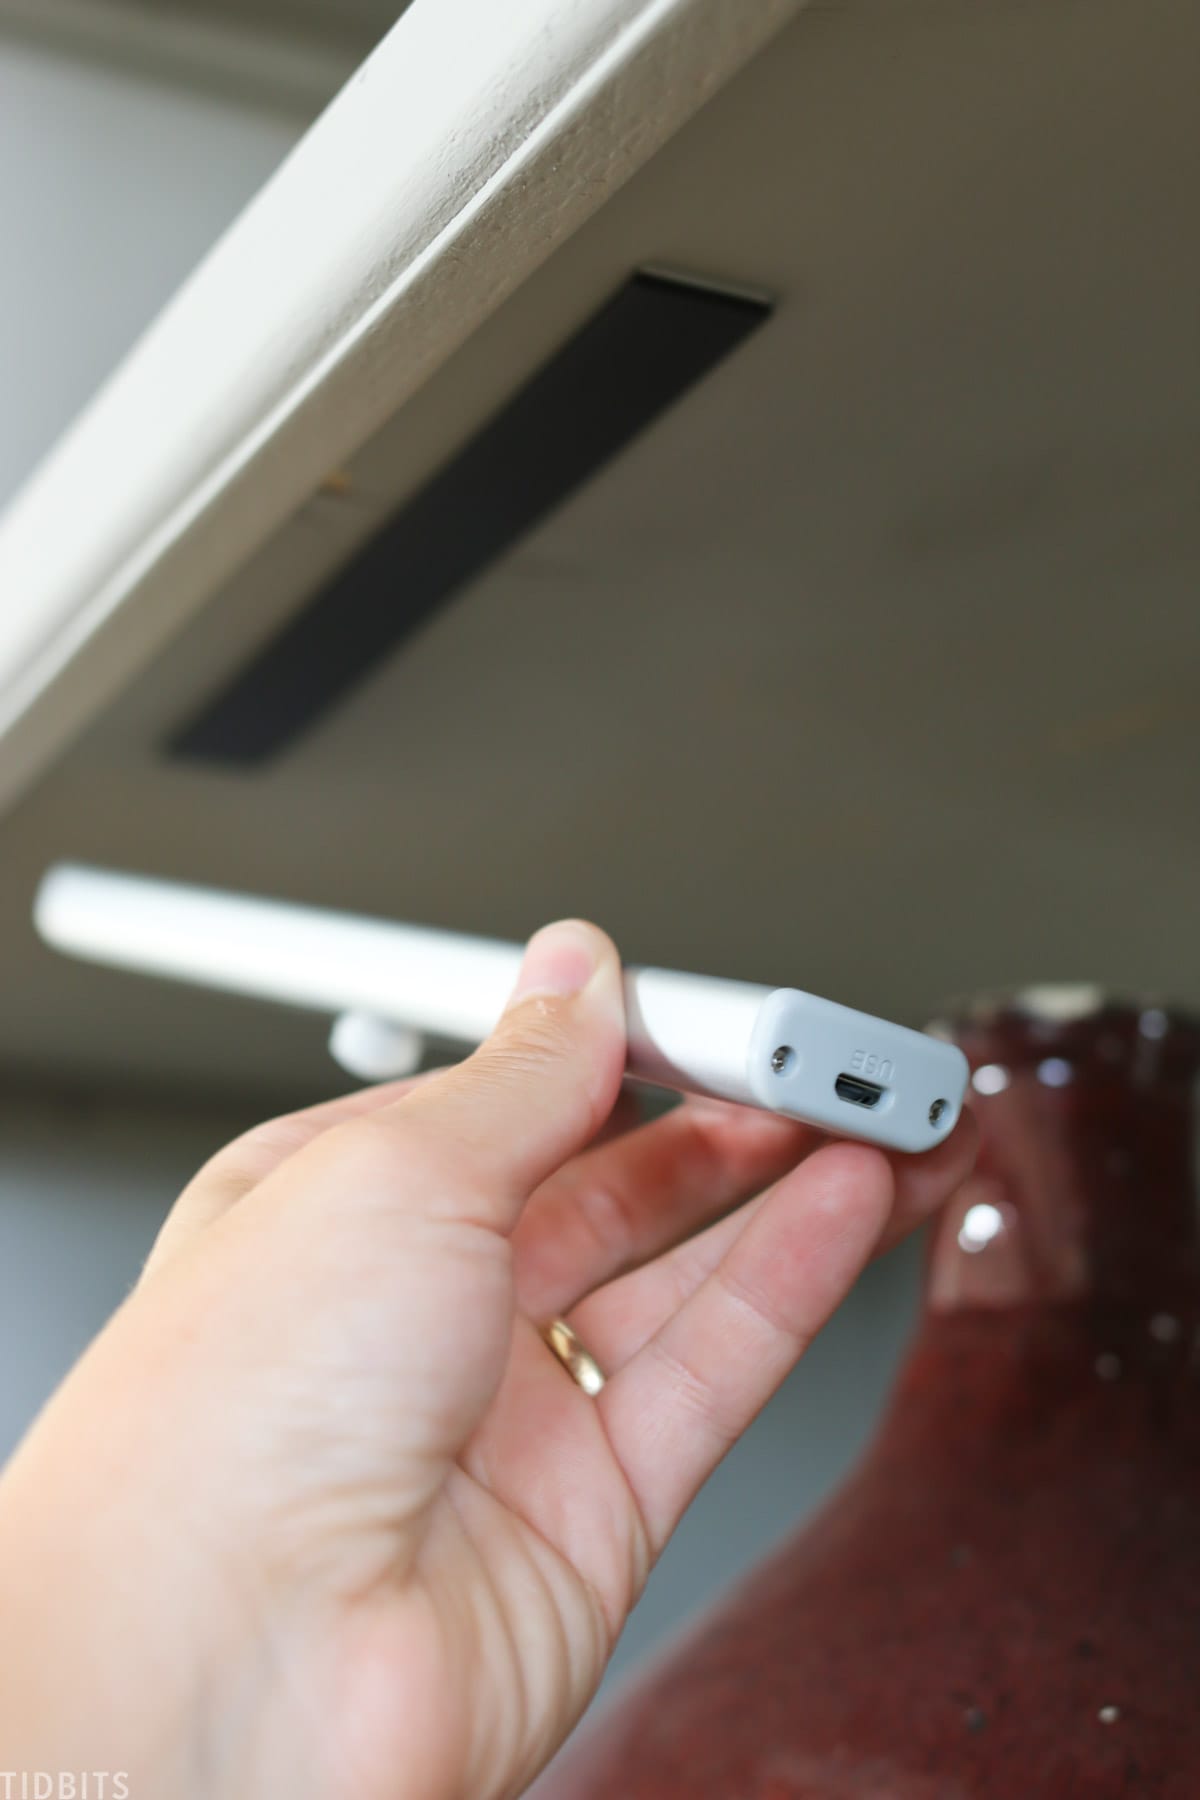

If the light runs dim, I just plug them in like a phone. I turn them on or off with the push of a button and I can also set them on a timer if I want them to turn off or on at certain times. At night, it creates the neatest mood lighting.
I hope you enjoyed seeing the before and after of our recent Facebook marketplace find. I’m looking for one more cool piece for our living room to hide shoes and bags right by our side door, but I am being super picky.
I’d love to hear something you’ve found secondhand lately, and perhaps fixed up.
Looking for more DIY makeover projects? Here are other projects where I’ve breathed new life into old things!
- DIY Painted Antique Cabinet Makeover
- DIY Painted Dish Hutch
- DIY Plaster Vase Makeover
- How to do a Room Makeover | Step by Step Process
Don’t forget to snag my free “complete guide to painting a room”!
Be sure to subscribe to get Hot off the press TIDBITS to your inbox.


I am so impressed with how fantastically this turned out! The color, finish, and styling of the shelves are perfect. The lighting is also brilliant.
You did an excellent job, Cami! I’m now looking for my own masterpiece to re-do after being inspired by you!
This looks good, I don’t have many books that can fit… but yeah having a bookshelf really helps, thanks for sharing..
What a difference paint makes! That is beautiful!!!
WOW ! I cannot believe the difference , will be saving this post as I love the paint. You are so gifted.
Great makeover!
It turned out beautiful!
One of my very favorite things after I’ve finished a house project is to see it in different lighting. And then, styling it to fit the rest of the room! Love!
Great makeover! Love the look, and the lighting is something I’m saving! Your home is coming together beautifully!
Wow! It looks amazing! Just stunning!
Thank you Maria!
Hi Cami , love love ❤️ the way it came out looks like a brand new piece you totally made a master piece your work is so nice and I love looking at your blog ,gives me lots of ideas ,although I am not handy or a DIY cant do that kind of stuff but that’s ok get lots of ideas . Been watching your blog for a bit and enjoy it so . God Bless stay well for you and your family . Thanks. Dina
Hi Dina,
Your comment was so thoughtful and encouraging! I really enjoying sharing ideas to spark inspiration in others. It fuels me to keep going! Thank you so much for watching and visiting my blog. It means the world to me.
Fantastic job! Looks like custom built book cases and the lighting is incredible! I’m hopping over to Amazon via your link to get some for a place that needs light. I really like the rechargeable and remote features. So glad the color turned out perfect for you!
Thank you Cecilia! And thanks for using my links! It really helps fund all the blog work! The lights are so fun I’m starting to wish I could sprinkle them everywhere 😉
LOVE , LOVE, LOVE everything about it! You are so talented????
Oh thank you for saying so Gale!
Love how that piece turned out! And the “mood” lighting is nice!
Thank you! My kids have a lot of fun with the mood lighting too!
Wow, Cami! That turned out great. I always say paint can turn ugly furniture into something just gorgeous. I love it without the doors too. I am looking for storage pieces to put along one wall in our garage conversion so it will be more interesting than plain closets. This really inspires me. Did you have to dilute the paint any for the sprayer? Goodness, I can’t get over the transformation!
Hi sweet Cecilia! I was so glad it had some behind door storage too. It’s like the best of both worlds! Your garage conversion sounds way fun! You should send me pics! Hugs!
Oh – and yes, the chalk paint calls for some dilution. But I just follow what was on the back of the can.
They look fantastic. I love the color and I love the lights they add just the perfect amount of light and love you can recharge them. Everything is coming together so nicely. Thank you for inspiring us
Thank you Casey! I”m so glad you found some inspiration! That’s why I share!
I’m sooo impressed by how fabulously this turned out! Perfect color, perfect finish and your styling of the shelves is spot on. Genius lighting, too.
Well done, Cami! You’ve inspired me and I’m now searching for my own masterpiece to re-do!
Very nice. Your house is really coming together in a beautiful and inviting way.
Thank you Sue! Slowly, but surely!
Yay! I hope you find a fun piece to makeover! I’m so glad you felt inspired! That is why I share!
Love it!! It looks like a very expensive piece. It’s so perfect for that wall.
I agree – it was a major upgrade! Thanks for visiting!
Oh my, how talented are you. Looks so good.
Thank you so much! How kind!
Looks fabulous!! Really like the lights inside the shelves.
Thank you Linda! I appreciate your visit!
That looks GREAT!!
Thank you!