
This post may contain affiliate links, which means I get a small percentage of the sale at no extra cost to you. I only recommend items I love and have had a positive experience with. Thank you!
Taking you through the process of cutting, honing, and installing marble yourself, so you can have marble or stone without the high cost of fabrication.

*Delighted to have this post is sponsored by Verona Appliances.
WATCH THIS POST
*I did a video for this post so you can see it all in action! Enjoy! Greater written details are found throughout this post.
When you love marble as much as I do, you find a way to incorporate it into every room.
But to hire out cutting and honing of marble for projects big and small, makes this endeavor not only costly but a bit of an inconvenience.
Thank heavens Mr. TIDBITS is willing and able to do this the DIY way so I can splash marble wherever my heart desires. It’s messy and heavy, but doable and easier than you might think.
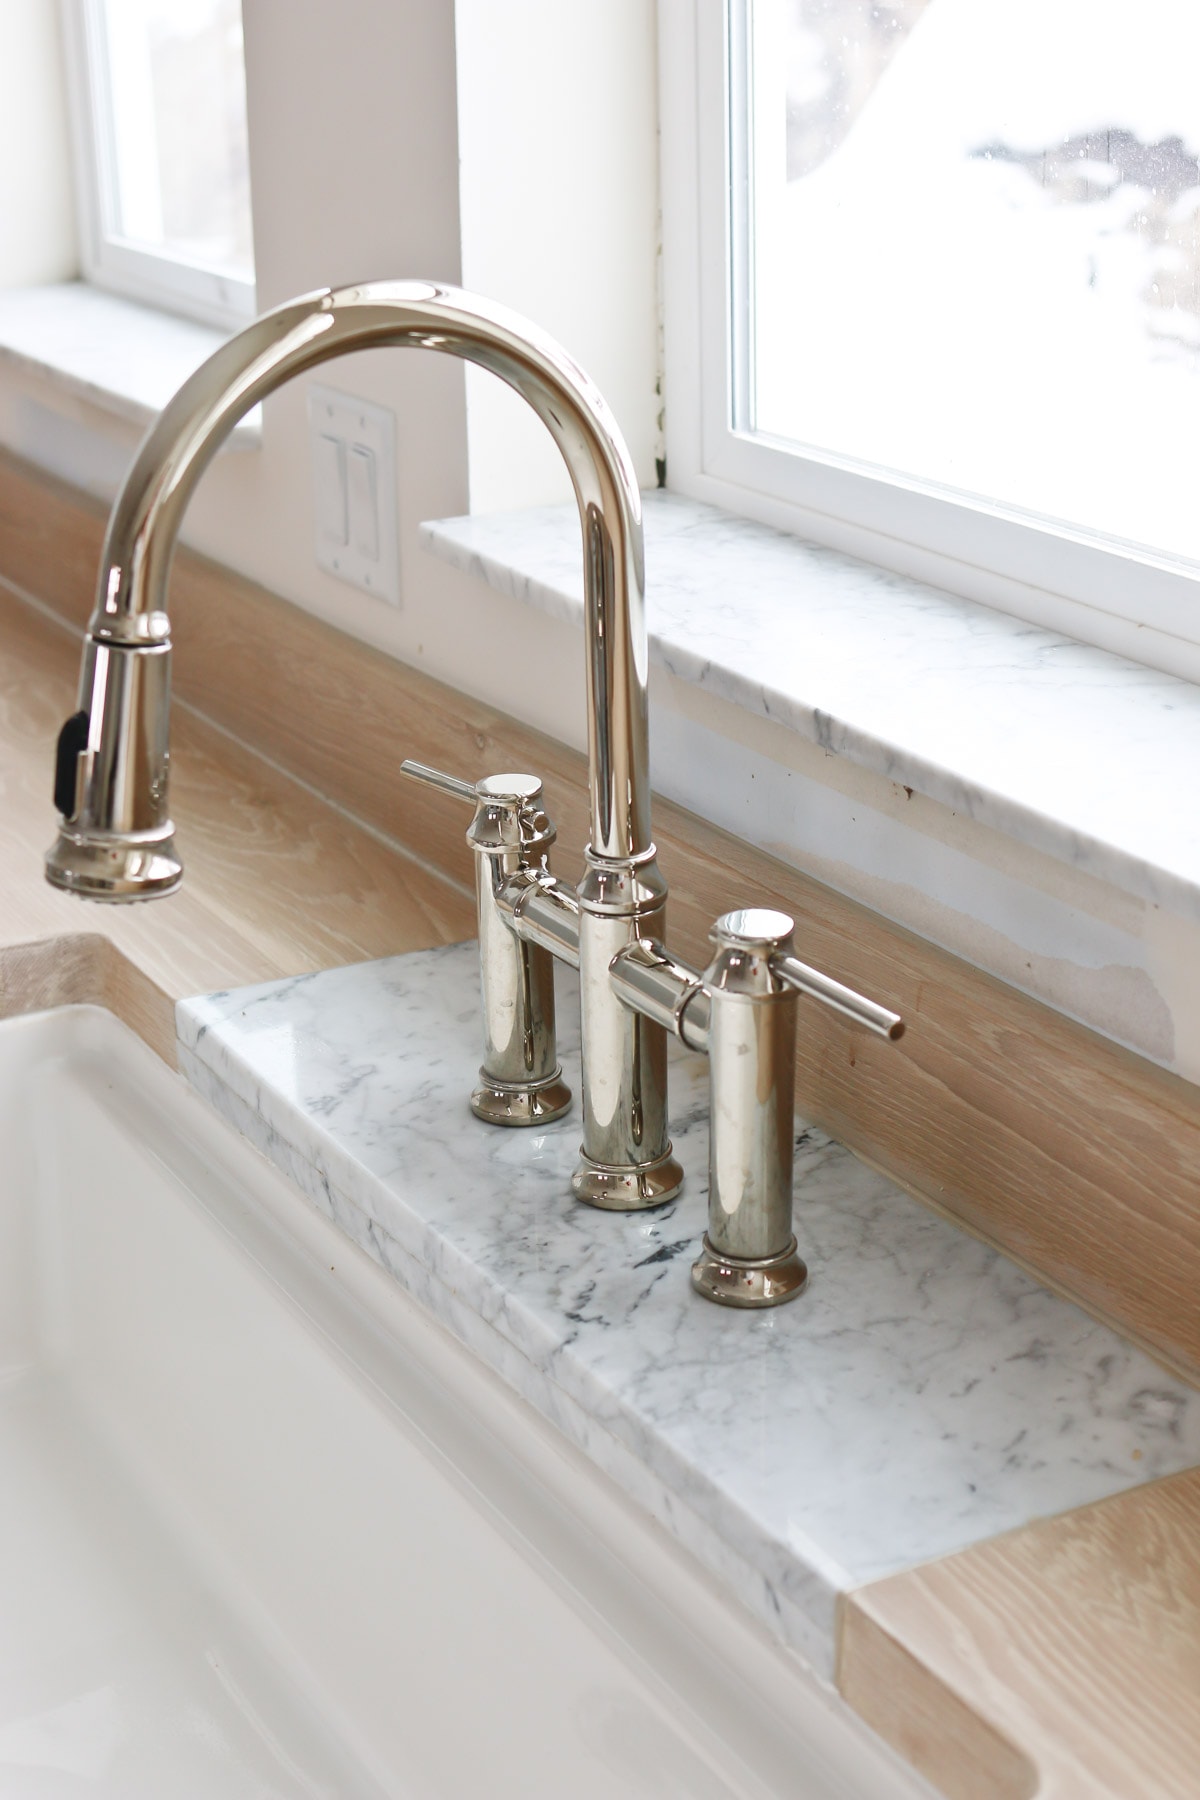
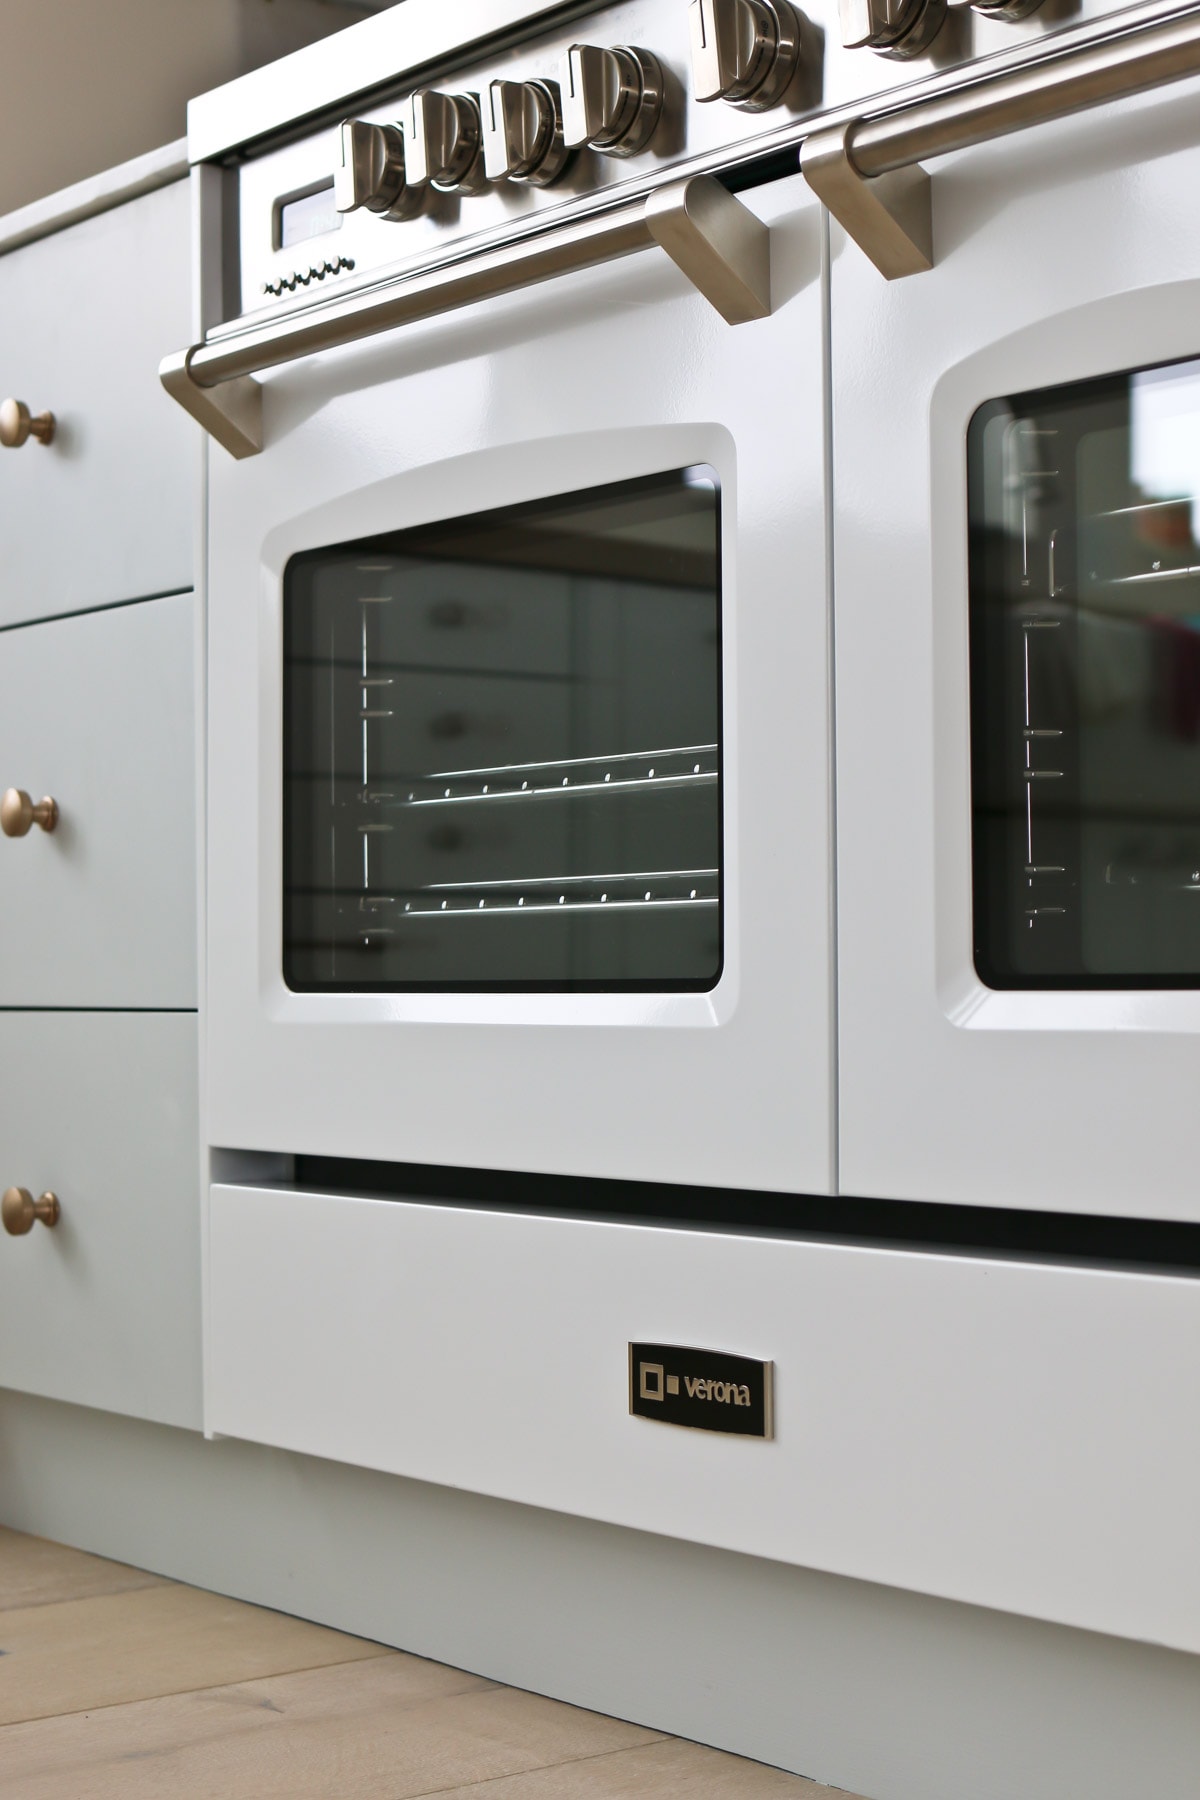
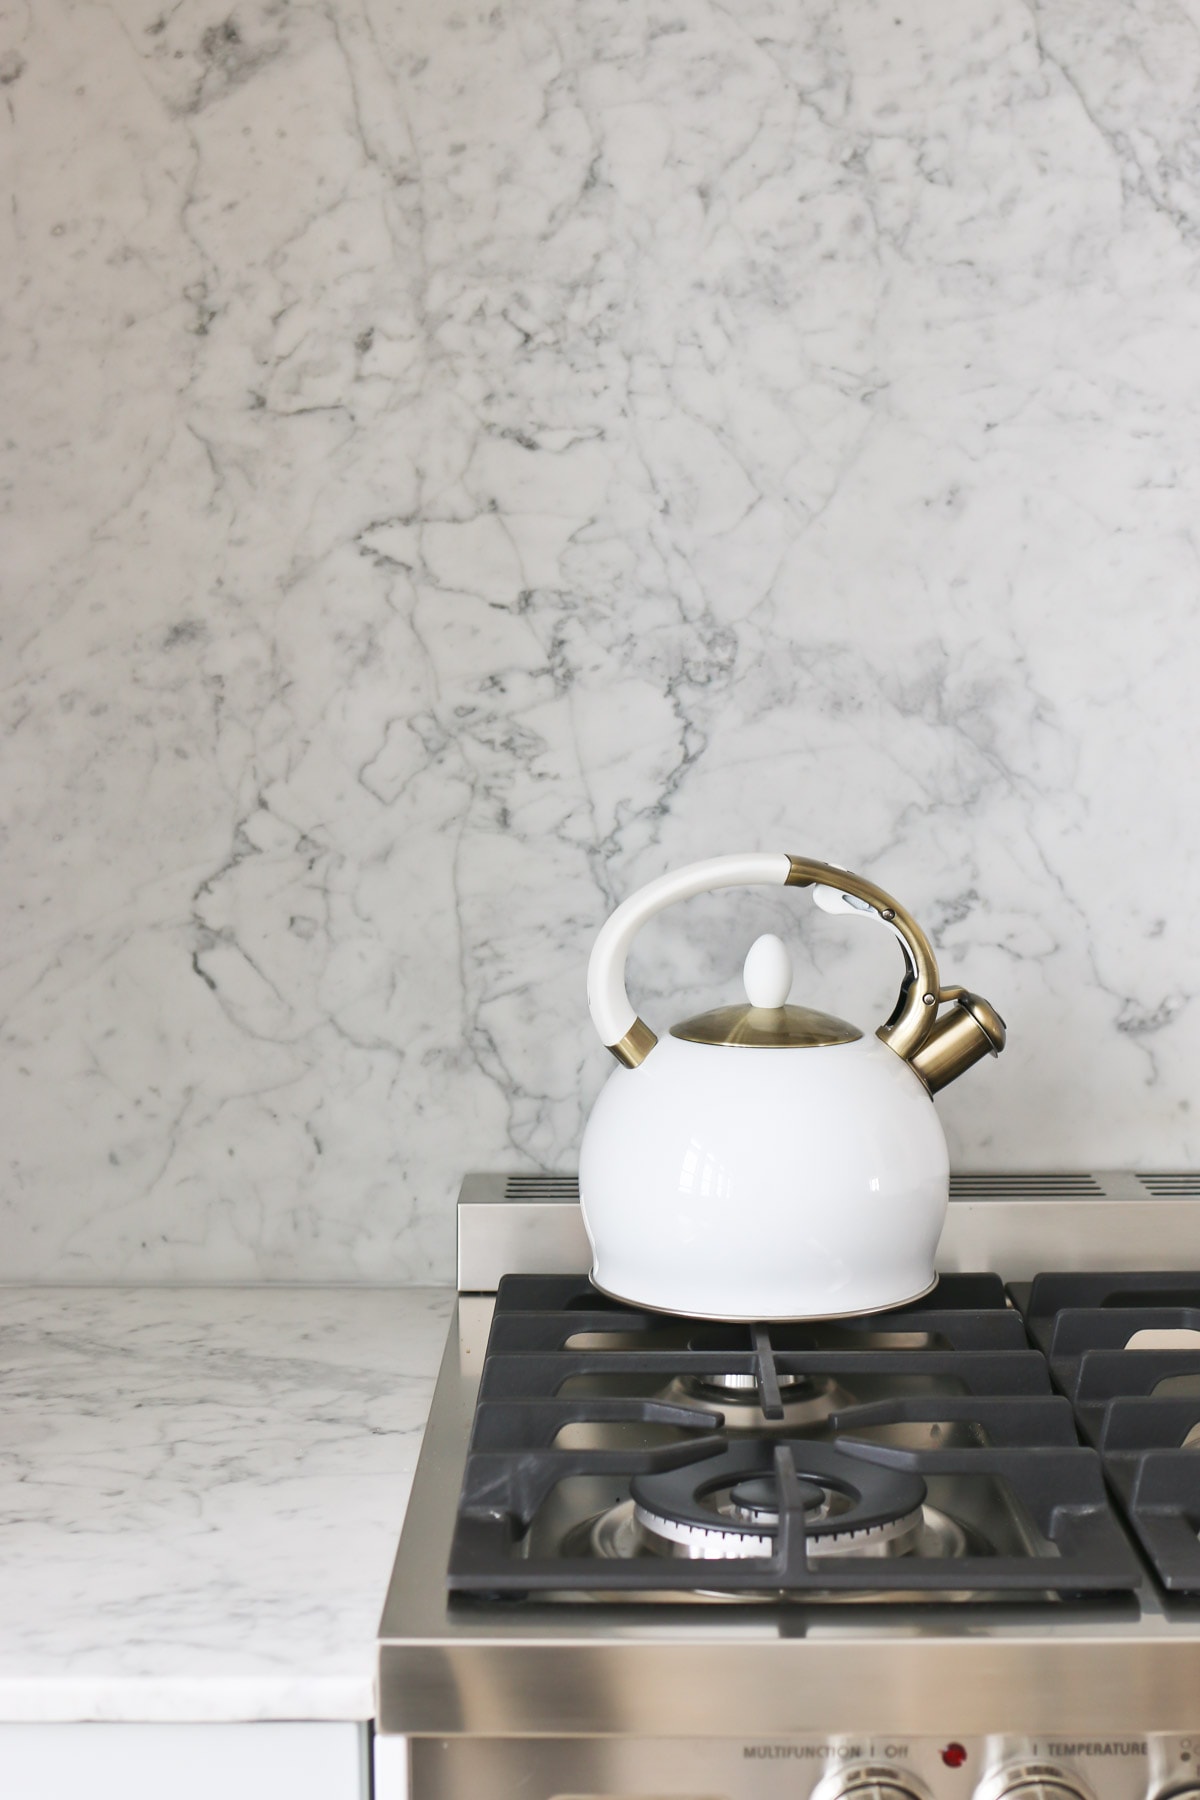
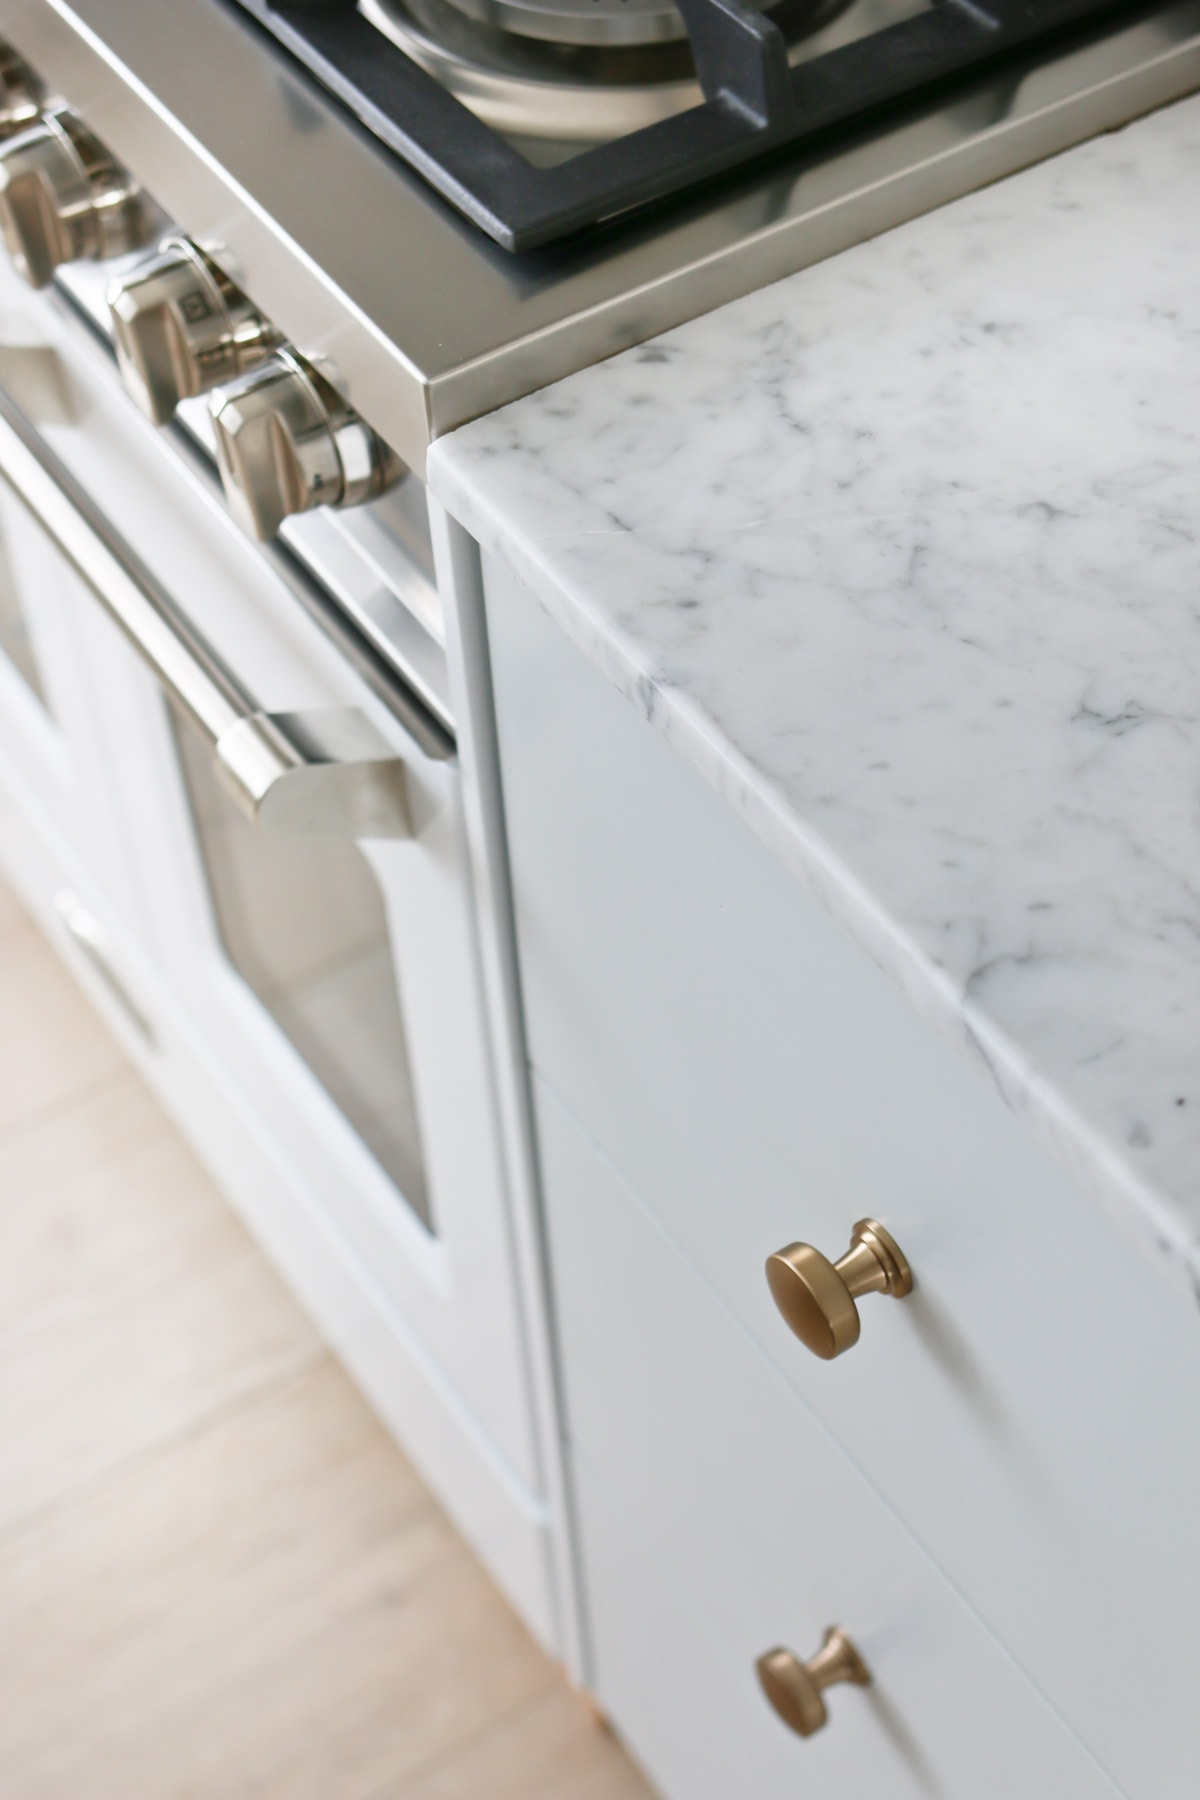
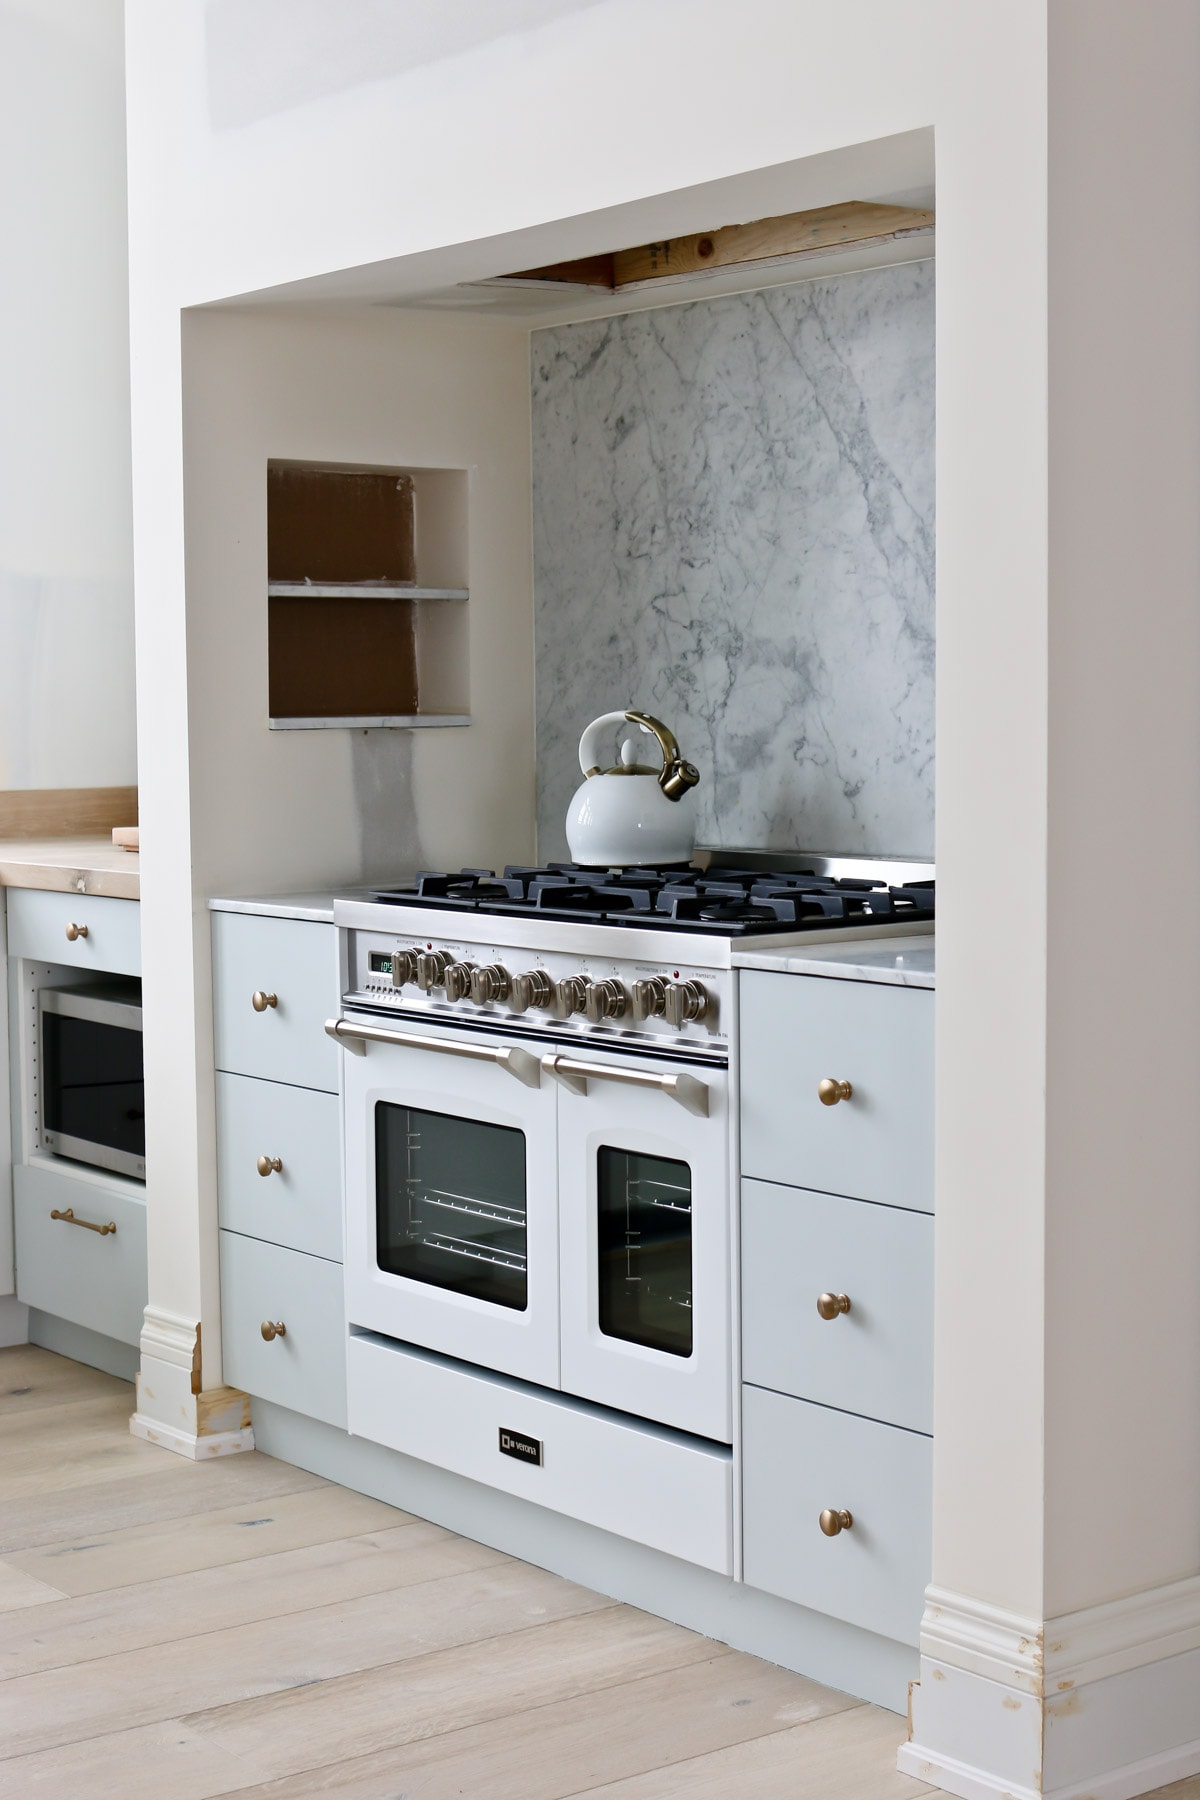
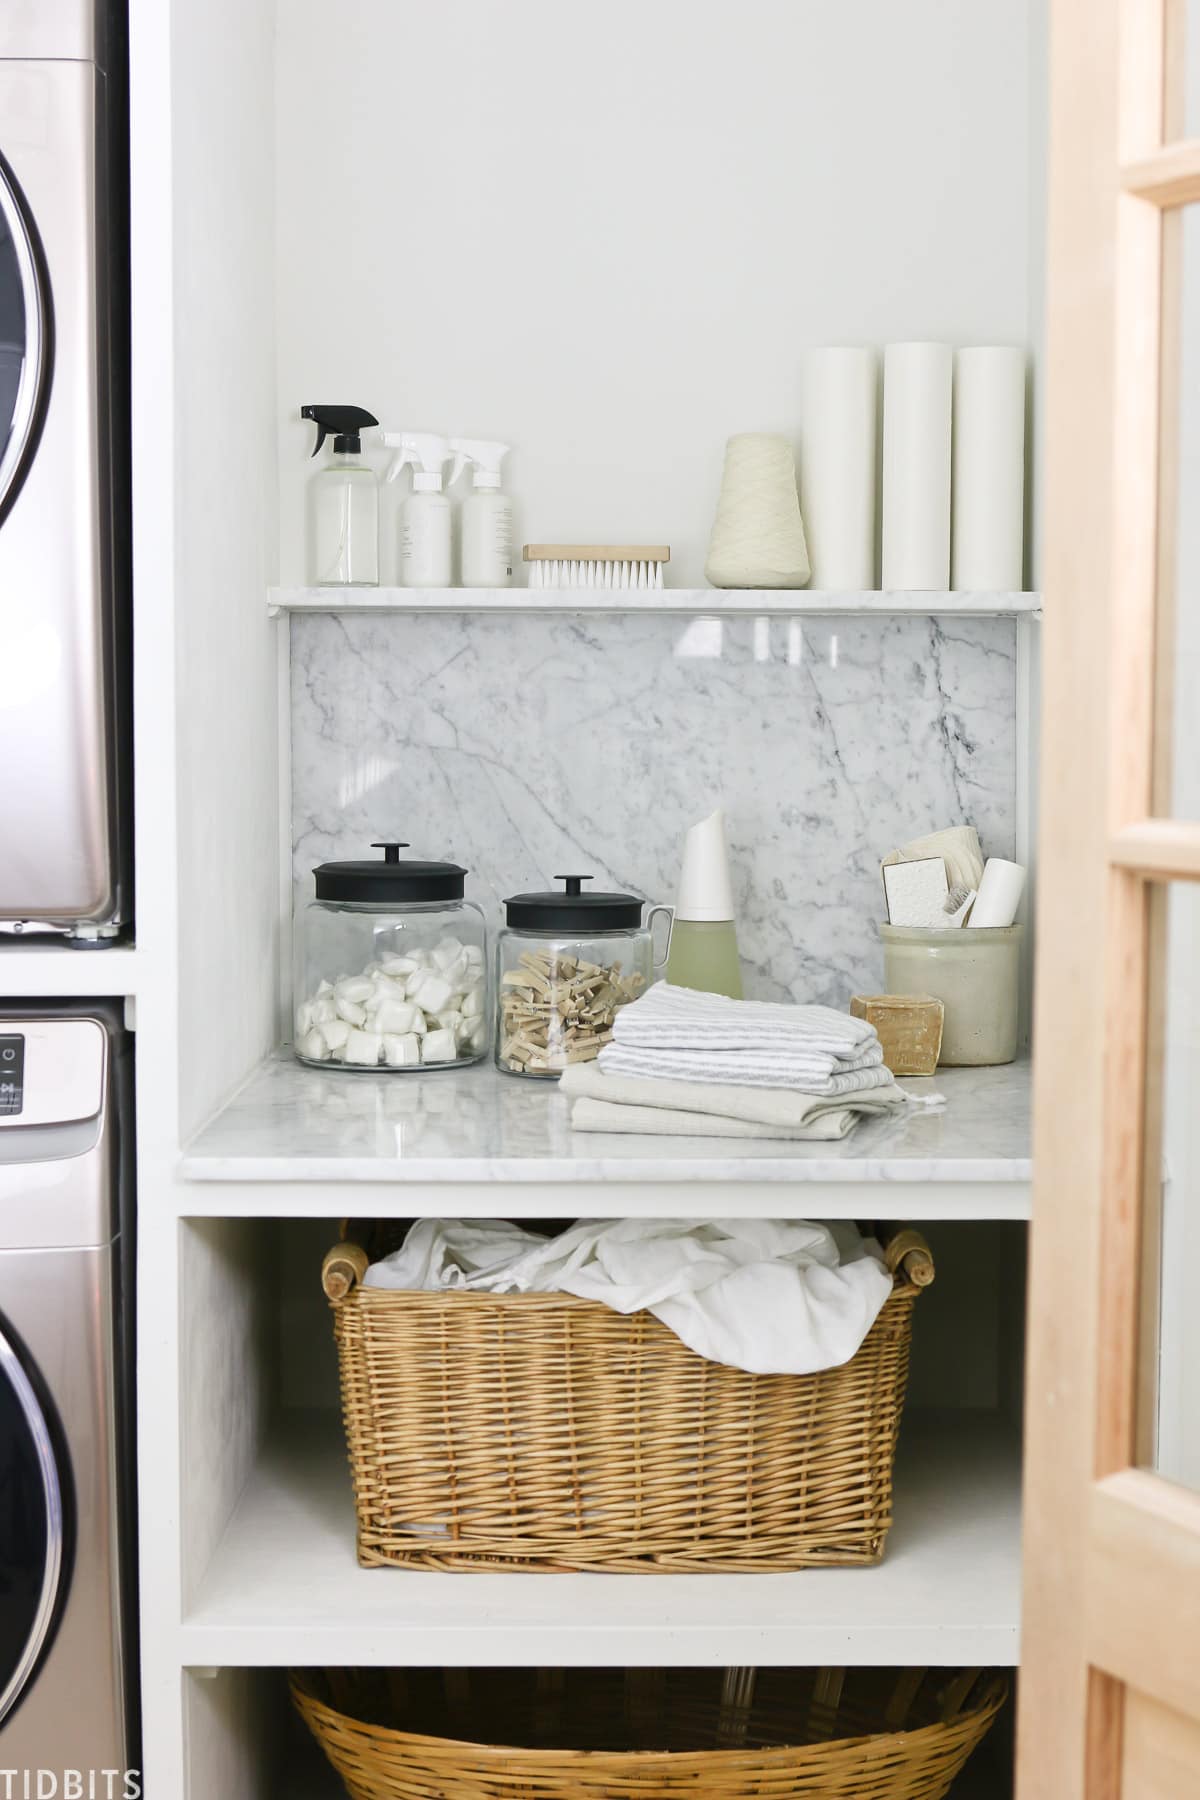
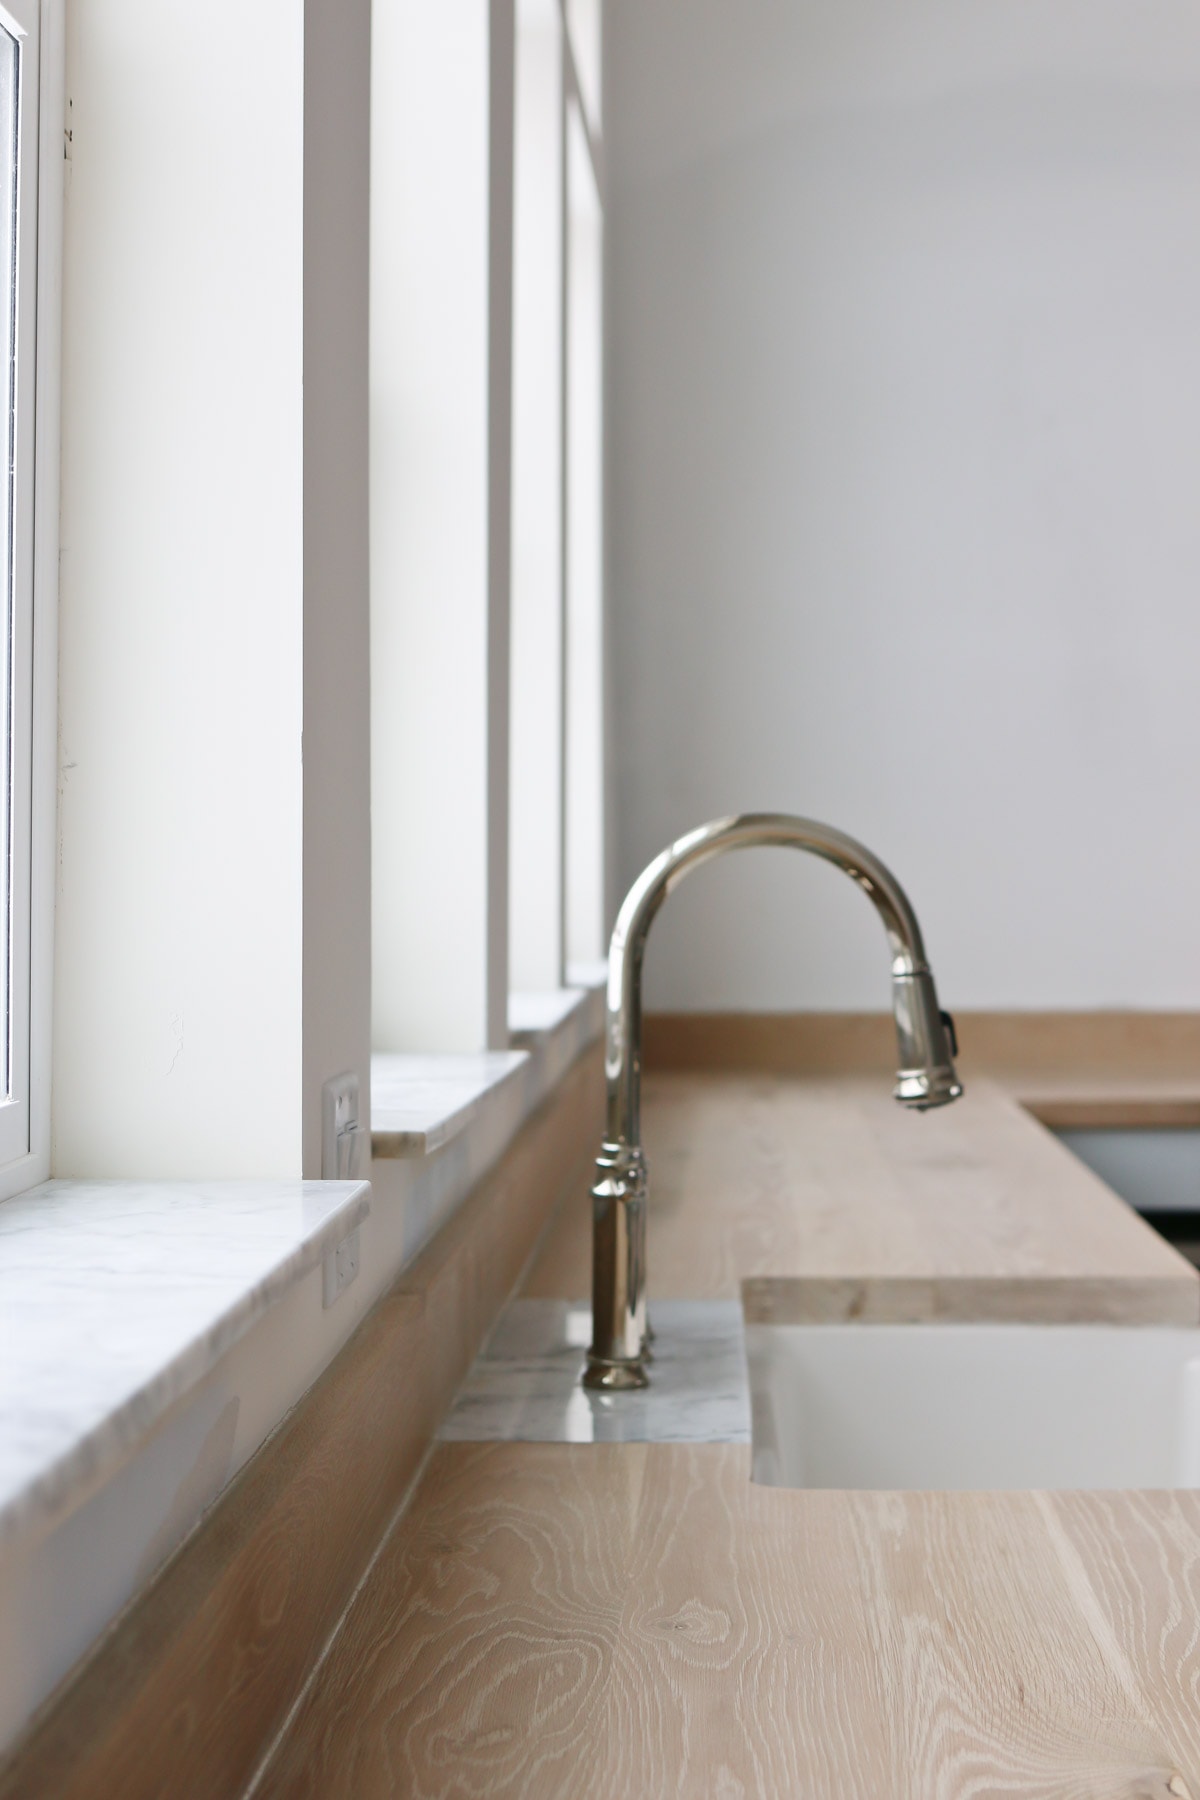
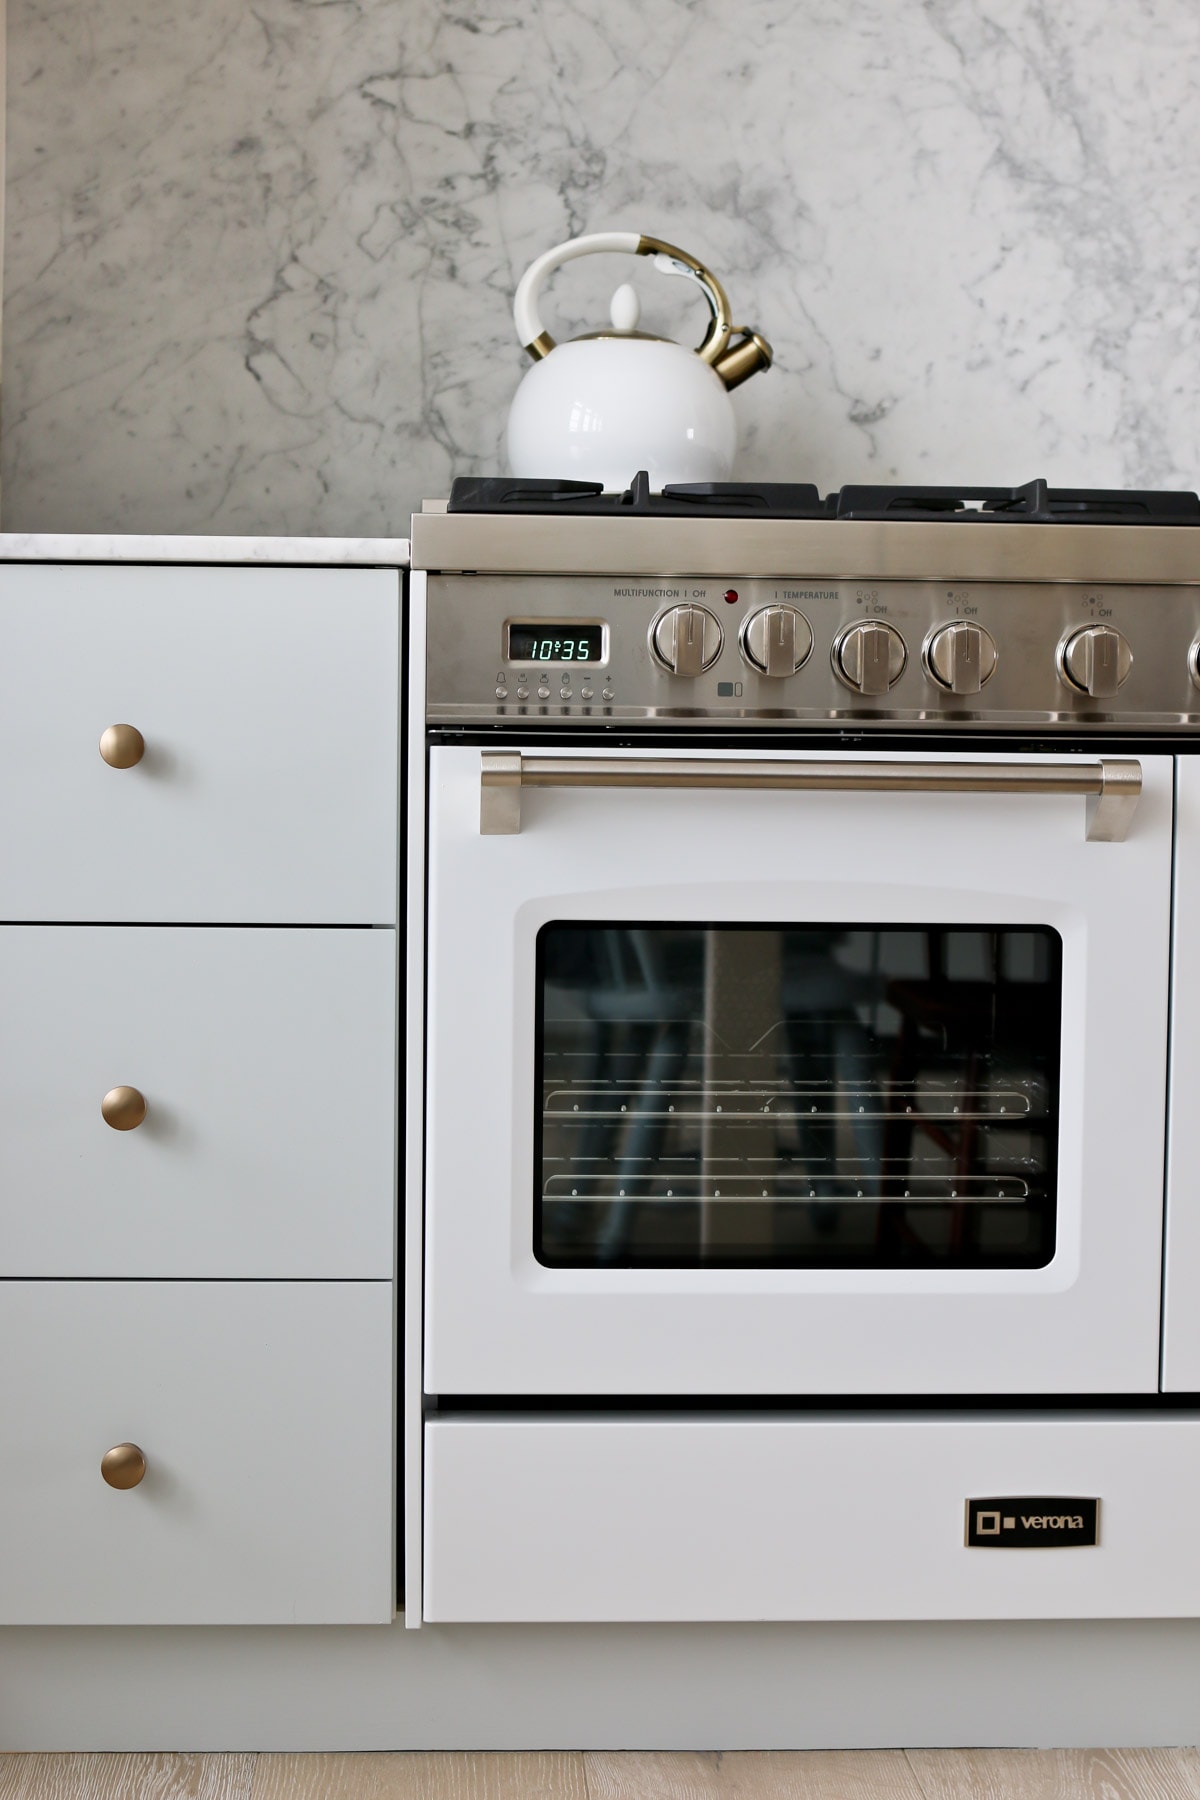
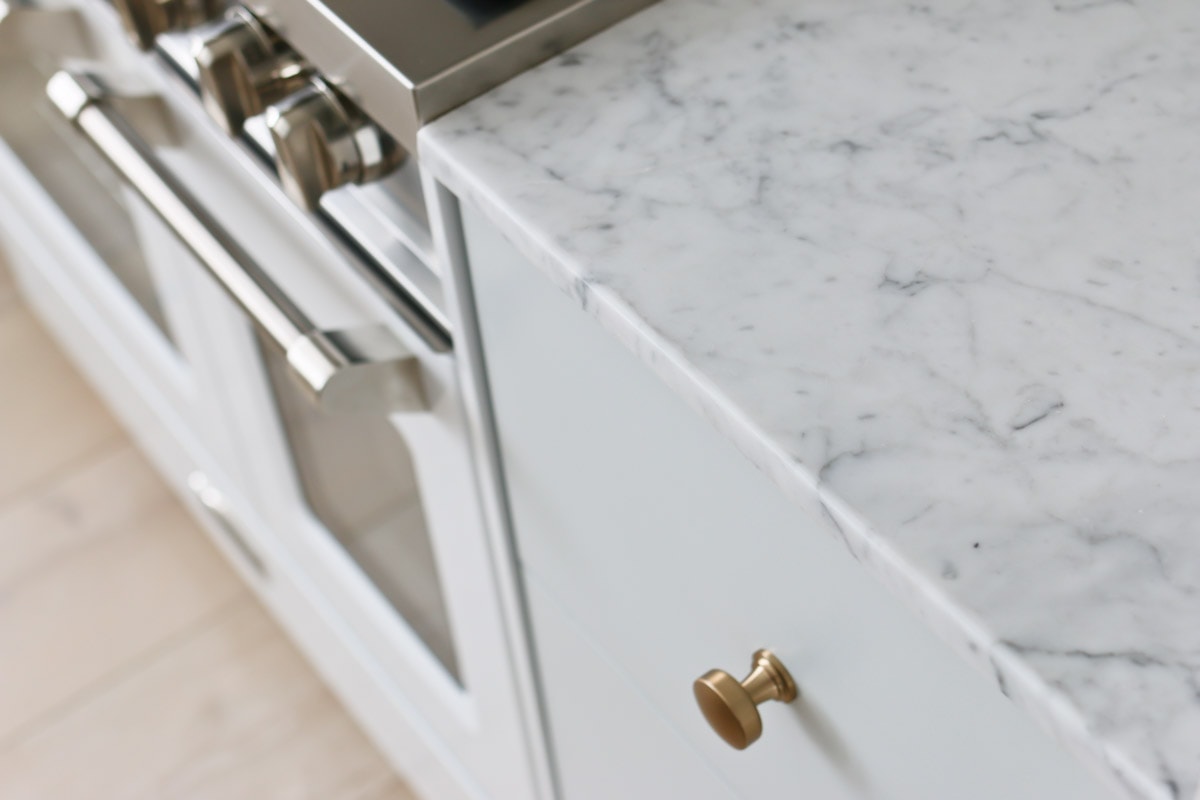
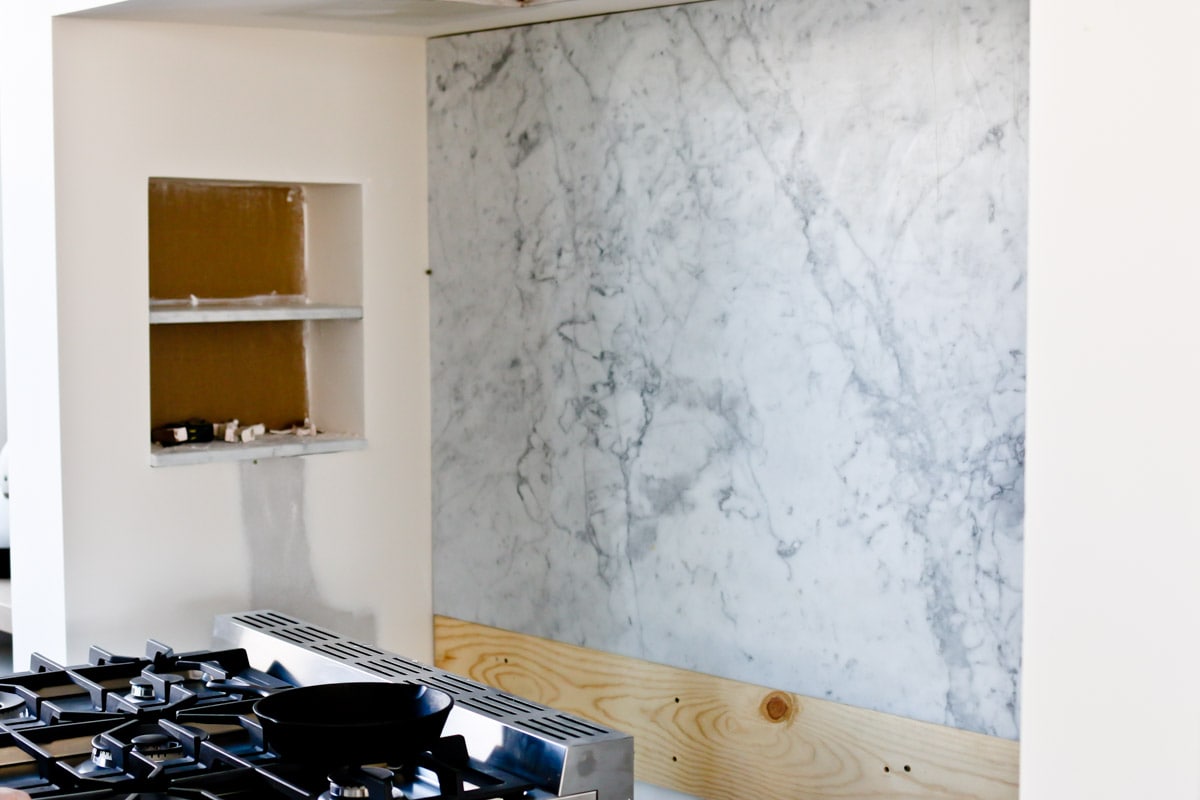
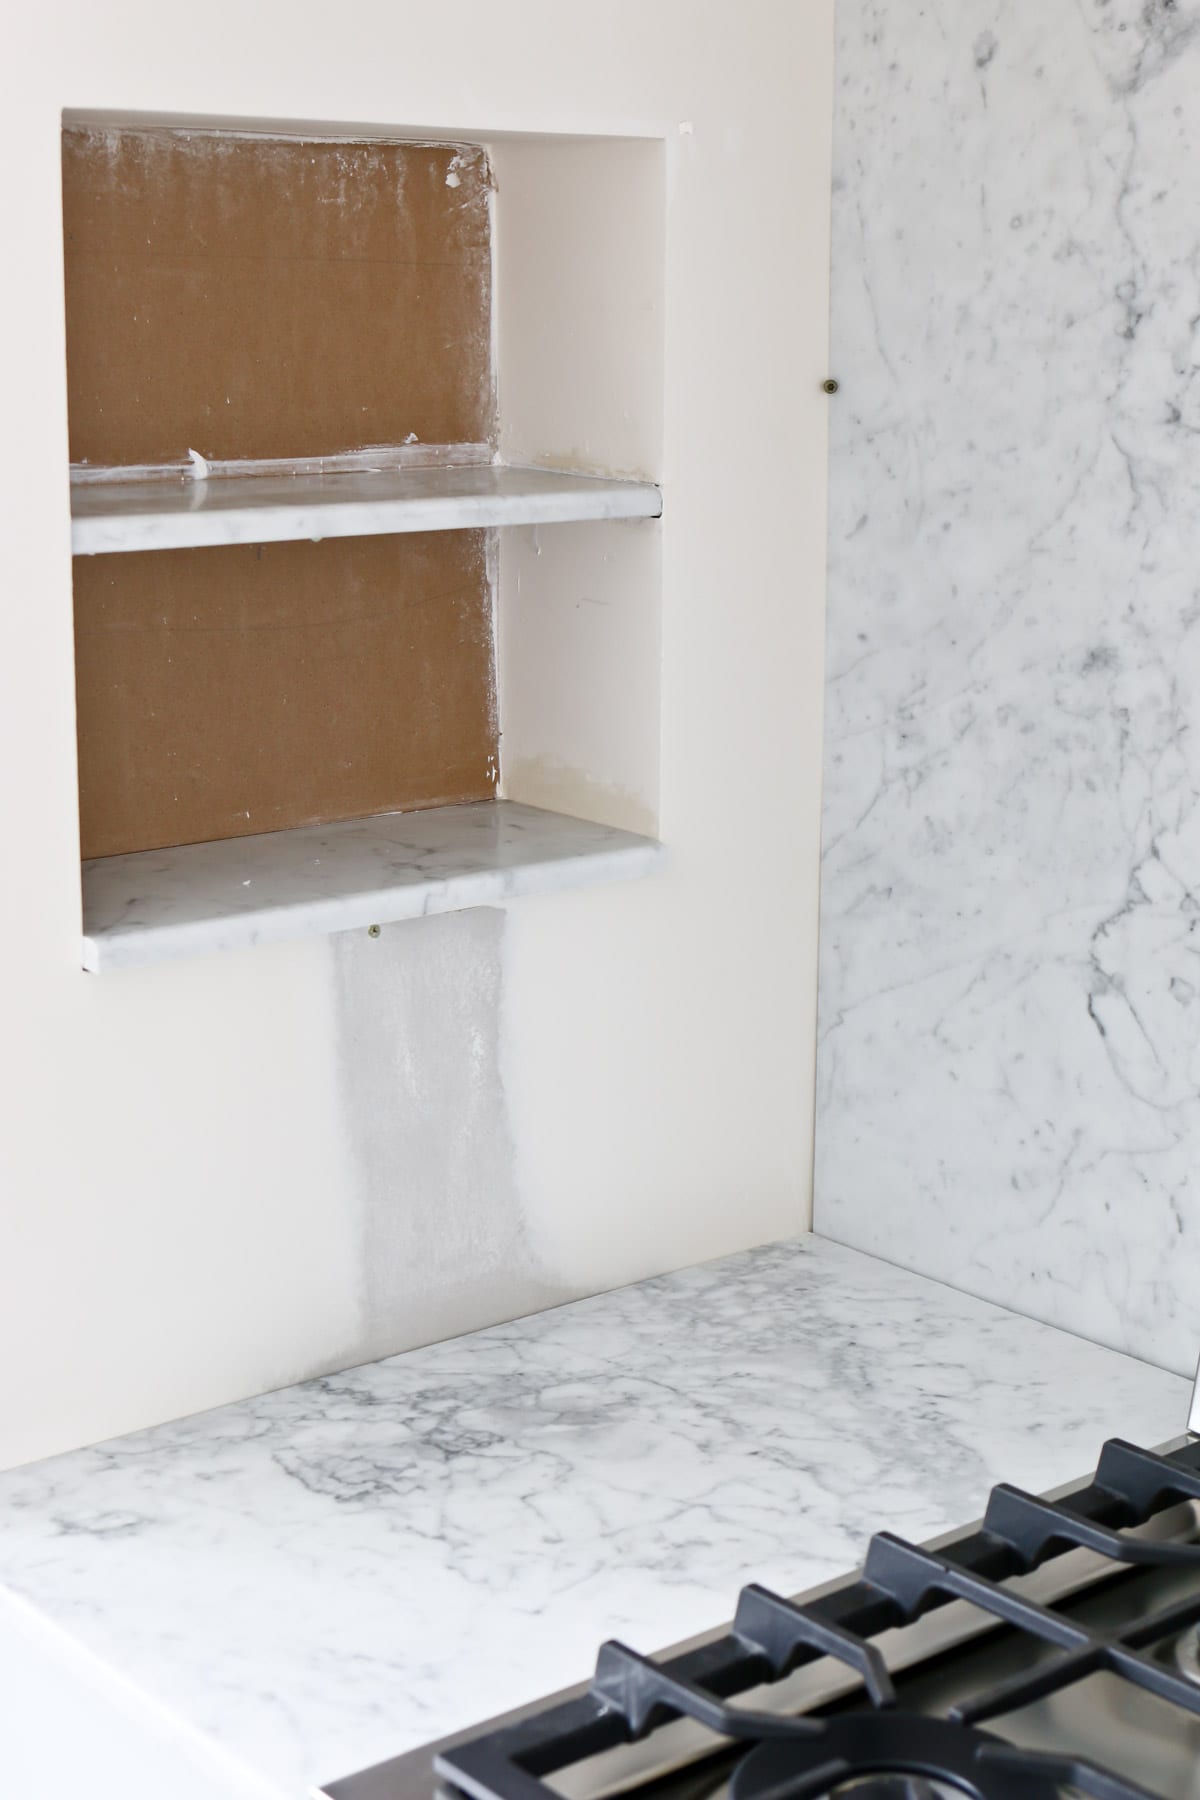
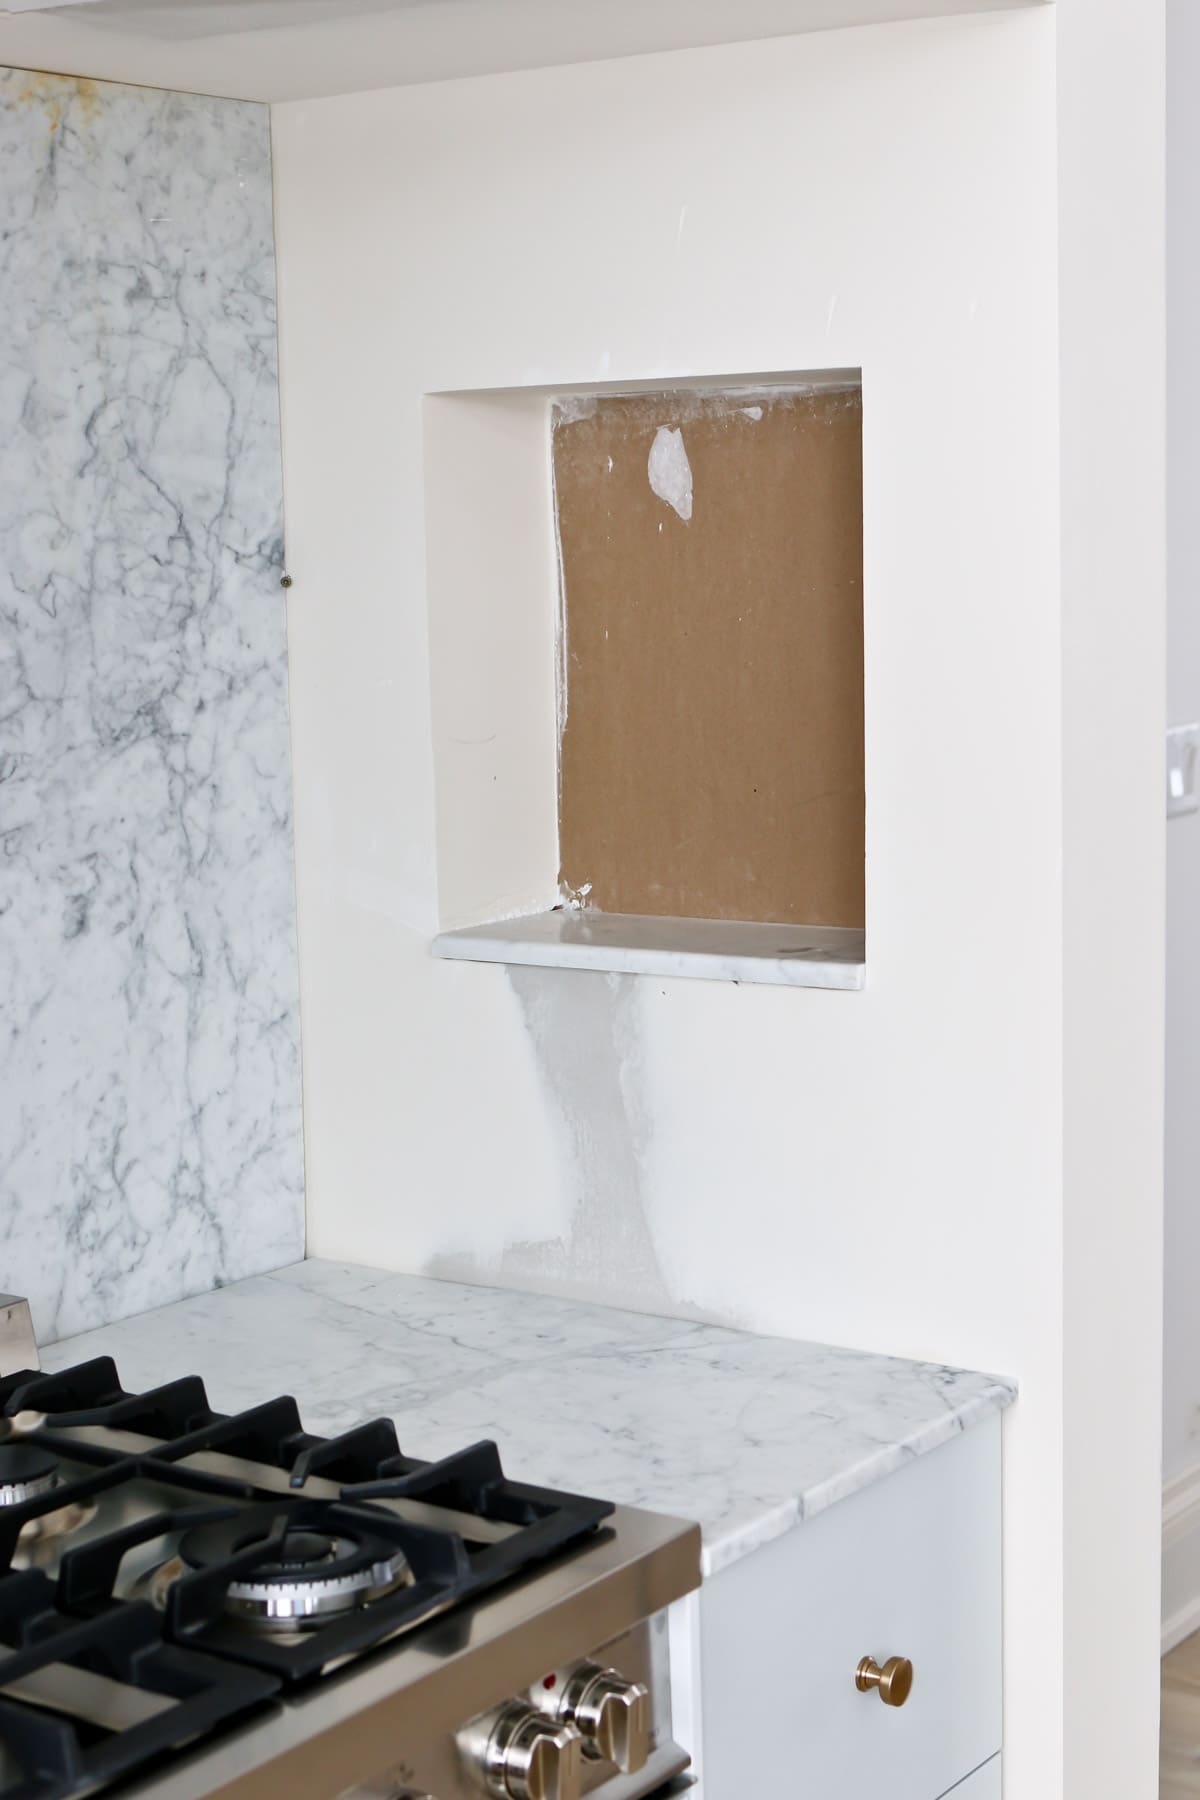
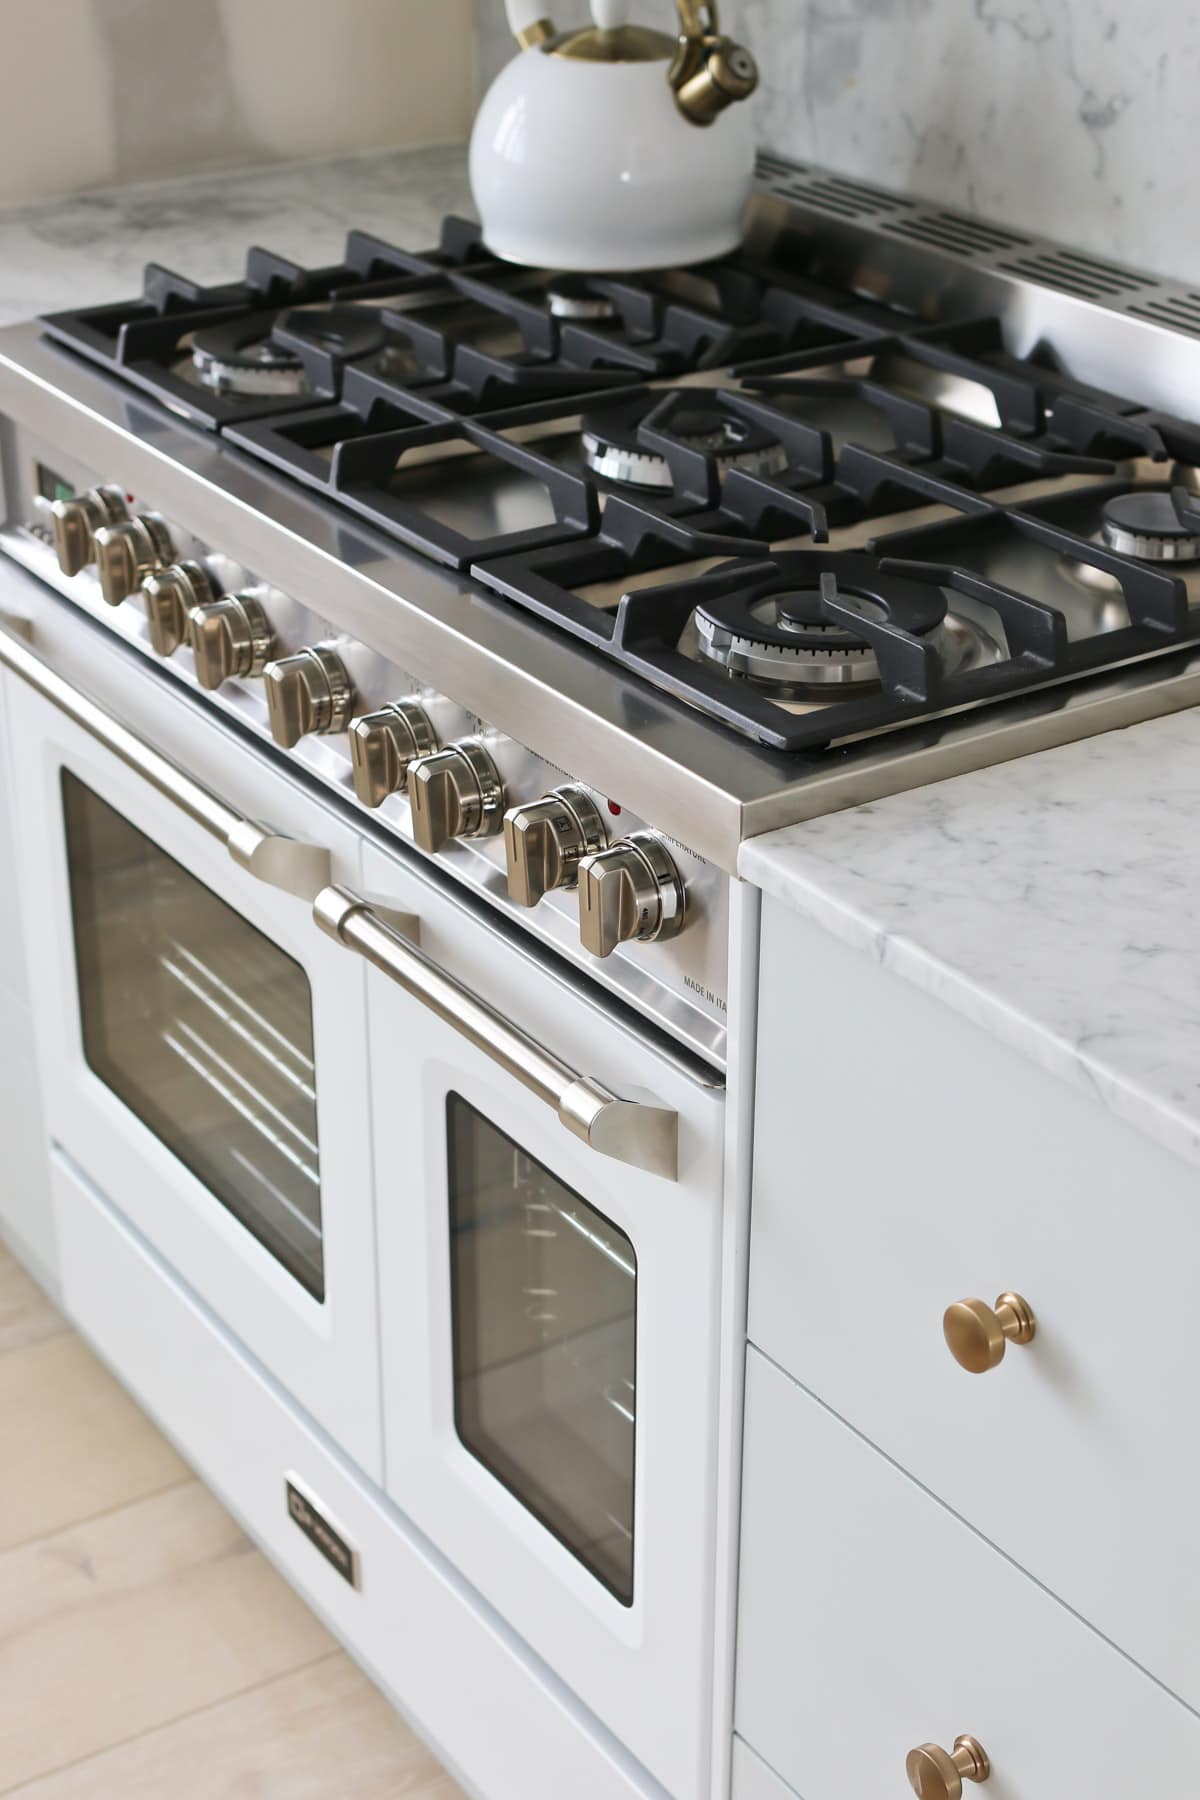
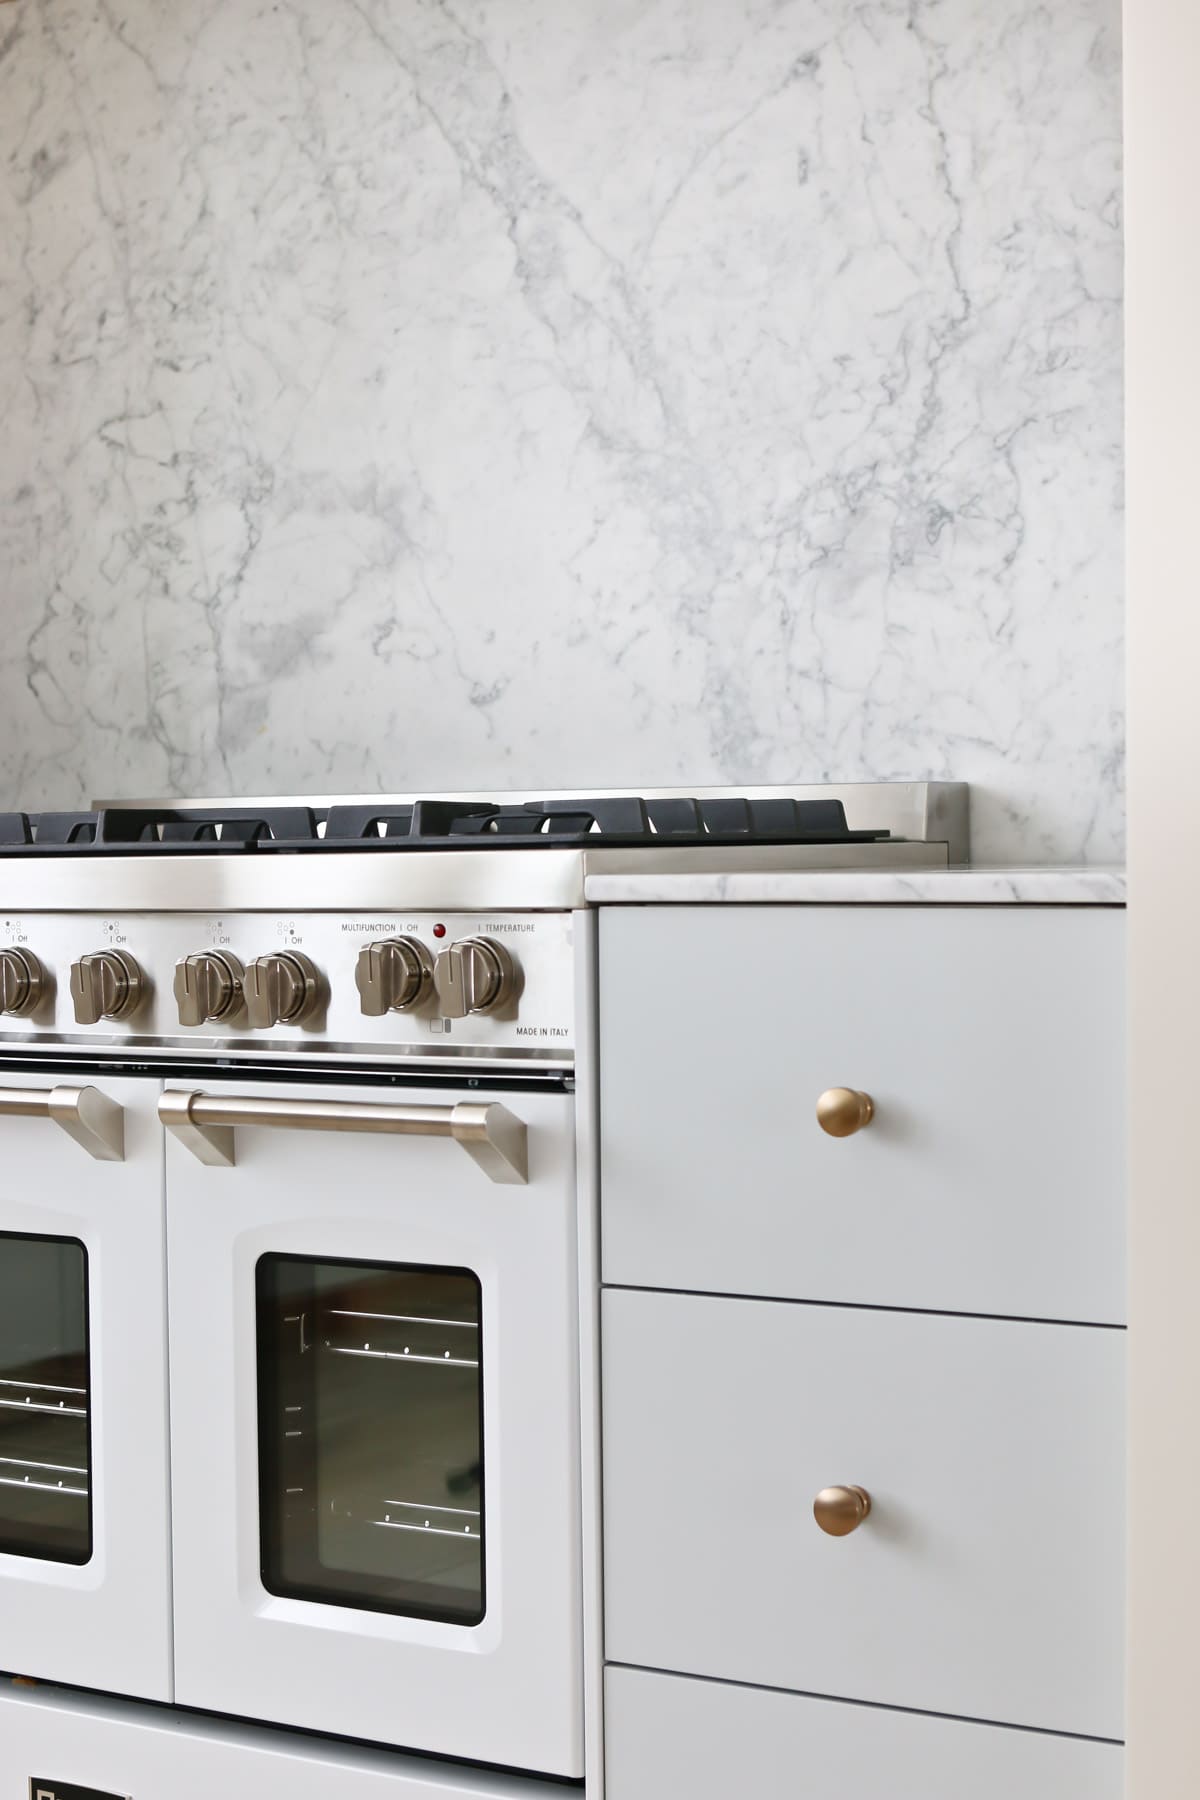
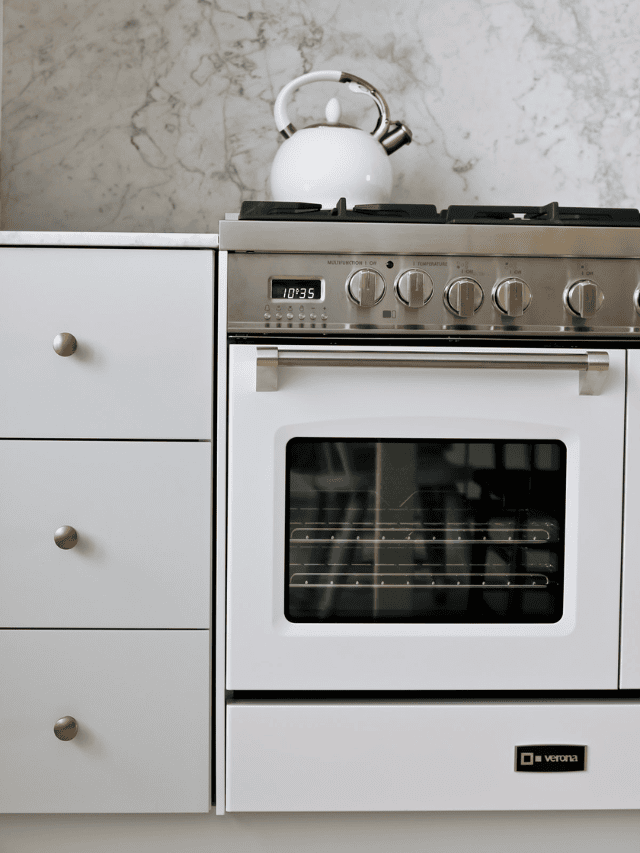
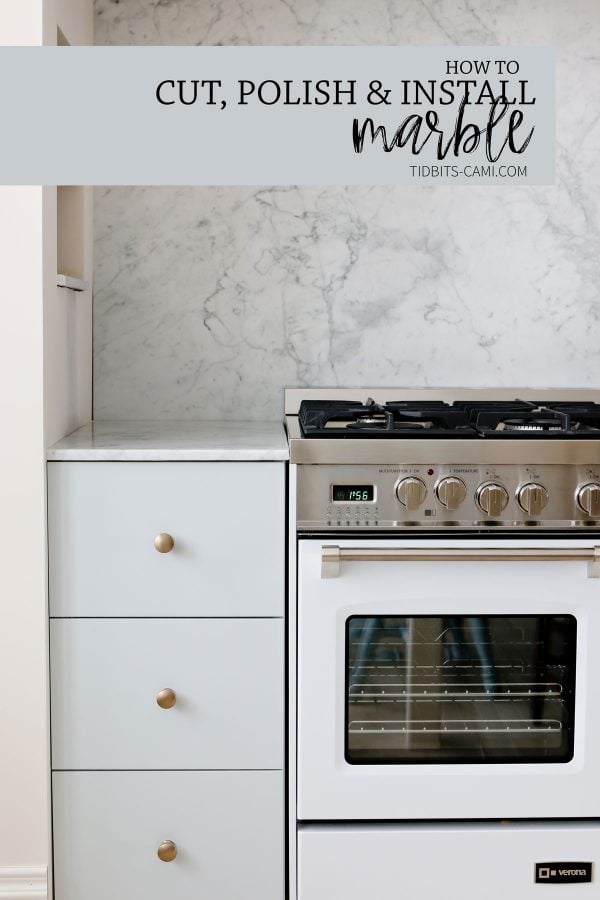
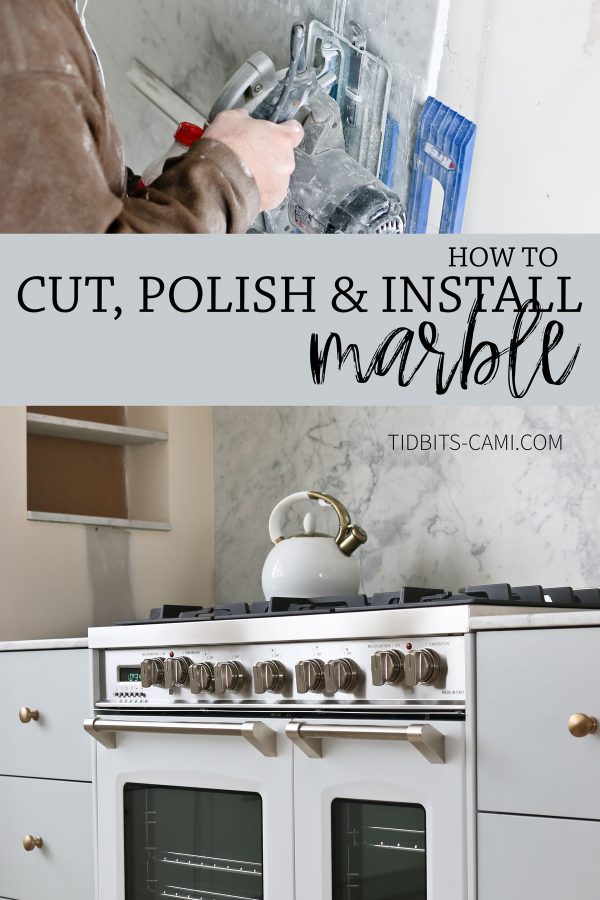
In our new pole barn home, we’ve already begun installing Carrara marble slabs in the laundry room, as a stone tap inset for our butcher block countertops, in window sills, shelves, and now we just added marble as a backsplash and countertop to surround our lovely 36″ Prestige Verona Italian Range in Matte White.
While our kitchen is still a work in progress, I’ve had many readers want to know how we are able to do this at home so I thought it would be a good time to follow Kevin around and capture how he does it.
WHERE TO SOURCE MARBLE
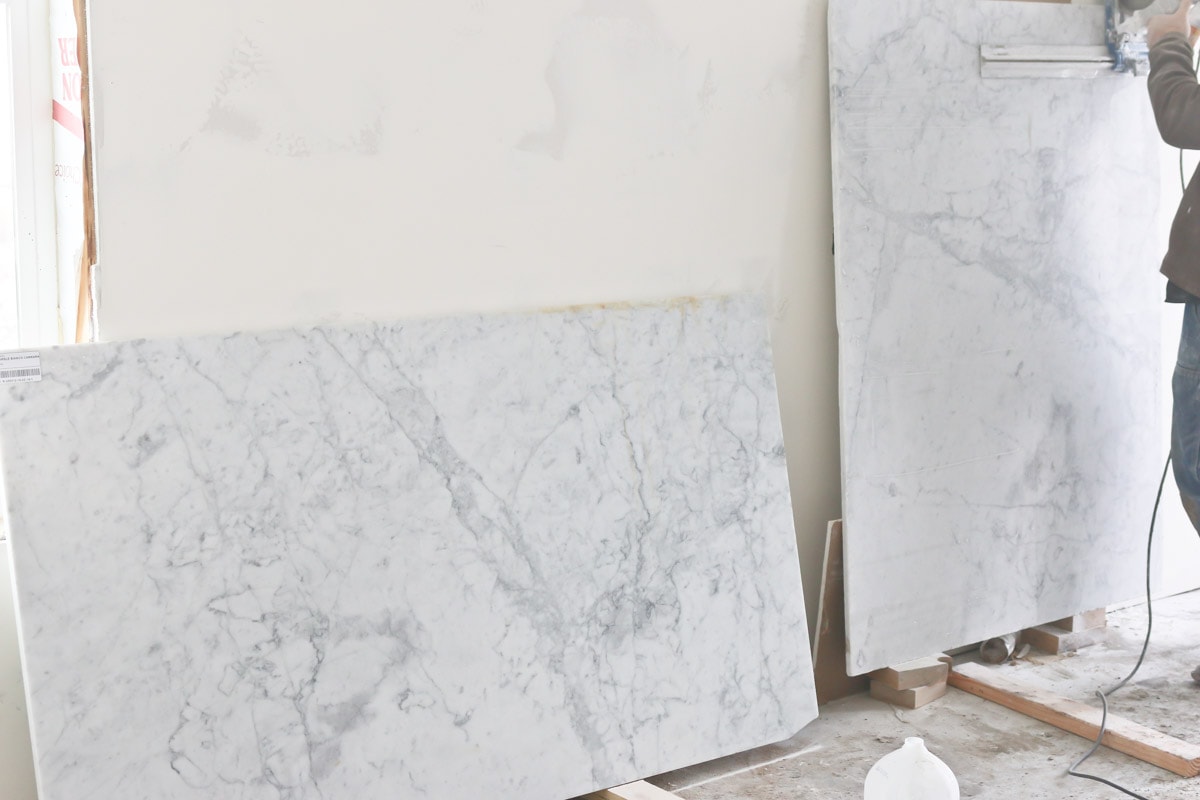
There are a couple of local countertop providers in our area that sell their remnants. This means they have pieces left from other big jobs that you can buy from them at a discounted rate. You can pick them up yourself as is, or they always offer me the options to have them fabricated and installed. To give you an idea – to buy these two slabs as is, with only their help in loading them onto our truck, cost us $400. To have them simply cut all our pieces to size and hone/polish was estimated at $2500. This was for this backsplash piece, 2 small countertop slabs, these small shelves, and for the pieces in our window sills – with a little leftover.
While prices may vary, you can see how being able to do this yourself will save you hundreds.
I will say, without the use of industrial tools, you do need to embrace a bit of imperfection as this soft stone can chip a bit. You can work hard to polish the imperfections out, but it is something you need to be aware of. We have learned to embrace a bit of imperfection when it happens and just do the best we can.
TRANSPORTING YOUR MARBLE SLAB
If you opt to pick up and transport the marble slab, it is highly recommended to build an A-frame. Laying marble flat in transport always runs the risk of cracking the slab. We shopped for and bought the marble remnants and then returned for pickup with the A-frame, which they loaded onto our truck. Some companies may have one you can rent, but my husband just threw one together himself.

From there, it was a 2 man (well, probably should have been a 4 man) job to get the marble off the truck and stored in a vertical position in our garage.
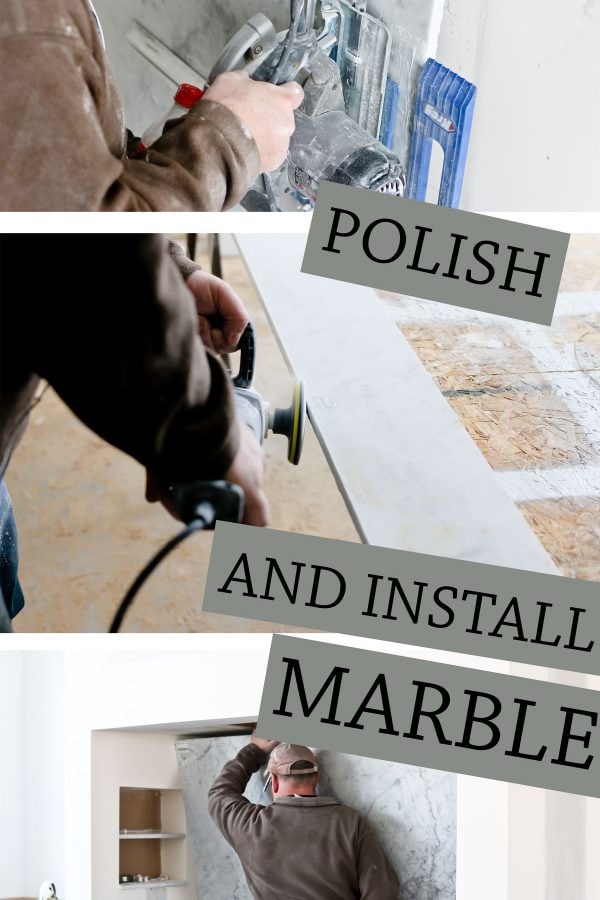
TOOLS AND MATERIAL NEEDED TO CUT AND HOME MARBLE
Skilsaw – used to cut the marble
Diamond blade for cutting tile – specific blade used in cutting rock or tile, needs to fit your Skilsaw
Water bottle or if possible a hose – The diamond blade cuts much faster and better if used with a constant stream of water. Poking a small hole in the cap of a bottle of water is a great option if a hose is not available.
Blade guide or painter’s tape and a pencil – He used a blade guide attached to his Skilsaw to make a straight cut. Remnant pieces often are not square so a blade guide isn’t always the best. In the past, he has used painter’s tape along the line we want to cut and marked a straight line on the tape with a pencil. Marking directly on marble will wash off easily or is very hard to see so the tape makes the cutting along the line much easier.
Hand-held grinder with polishing pads – This is for polishing and shaping the marble edges and sides. He used the following pads – 50, 100, 200, 400, 800, 1500, and 3000 grit.
Buffer – This is for buffing up and polishing the marble. Often times polishing the marble with a grinder can darken or burn the marble leaving a brown color. We use a drill with a 2” buffing pad along with a rubbing compound to clean up the marble and remove any burnt coloring.
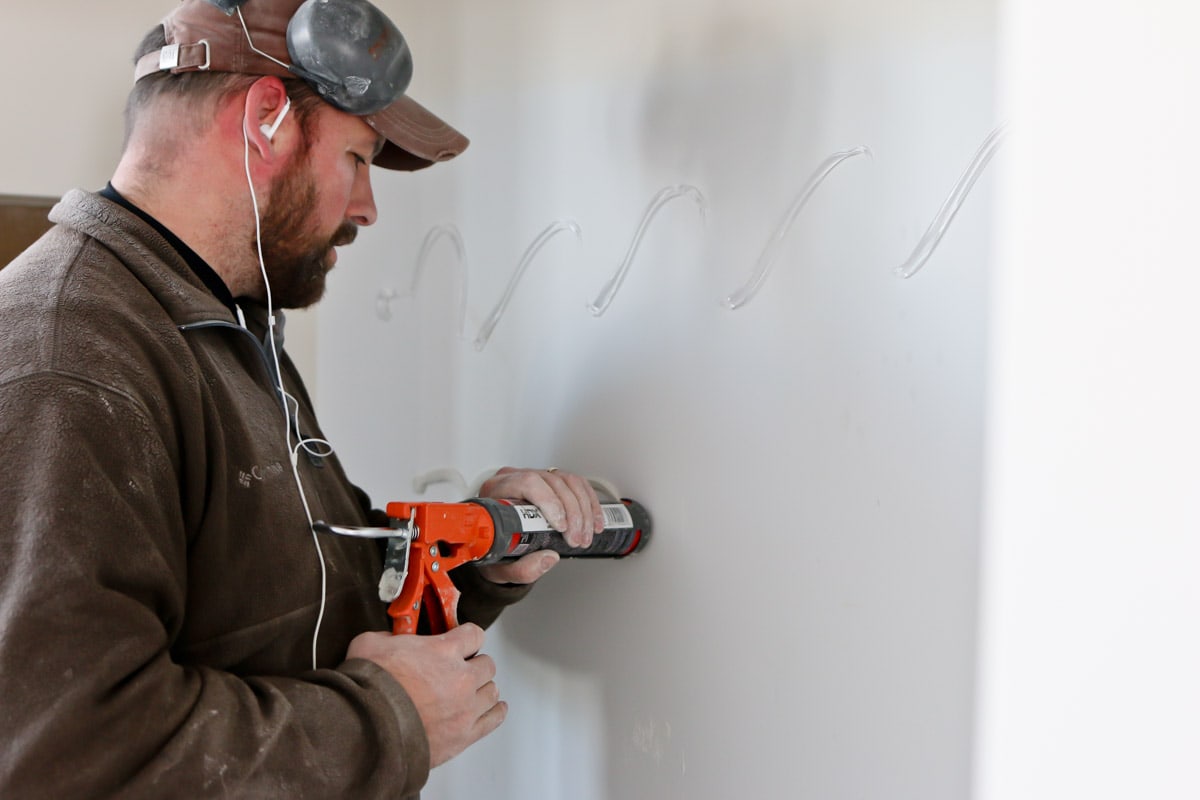
Caulk gun and tile adhesive – We use liquid nails brand adhesive designed for marble and tile. It has strong immediate adhesion and cures quickly.
CUTTING YOUR MARBLE
Marble is relatively fragile and easily breaks along natural cracks already existing in the grains of the rock, thus we always transport and cut the slab in a vertical position. Leaning it against a wall with a piece of wood or sheetrock as a spacer against the wall works best. Always cut top-down and never horizontally as the marble will break and trap the saw blade or fall – which could be very dangerous. We have also seen others cut the marble horizontal, but you need to ensure even support under the entire piece.
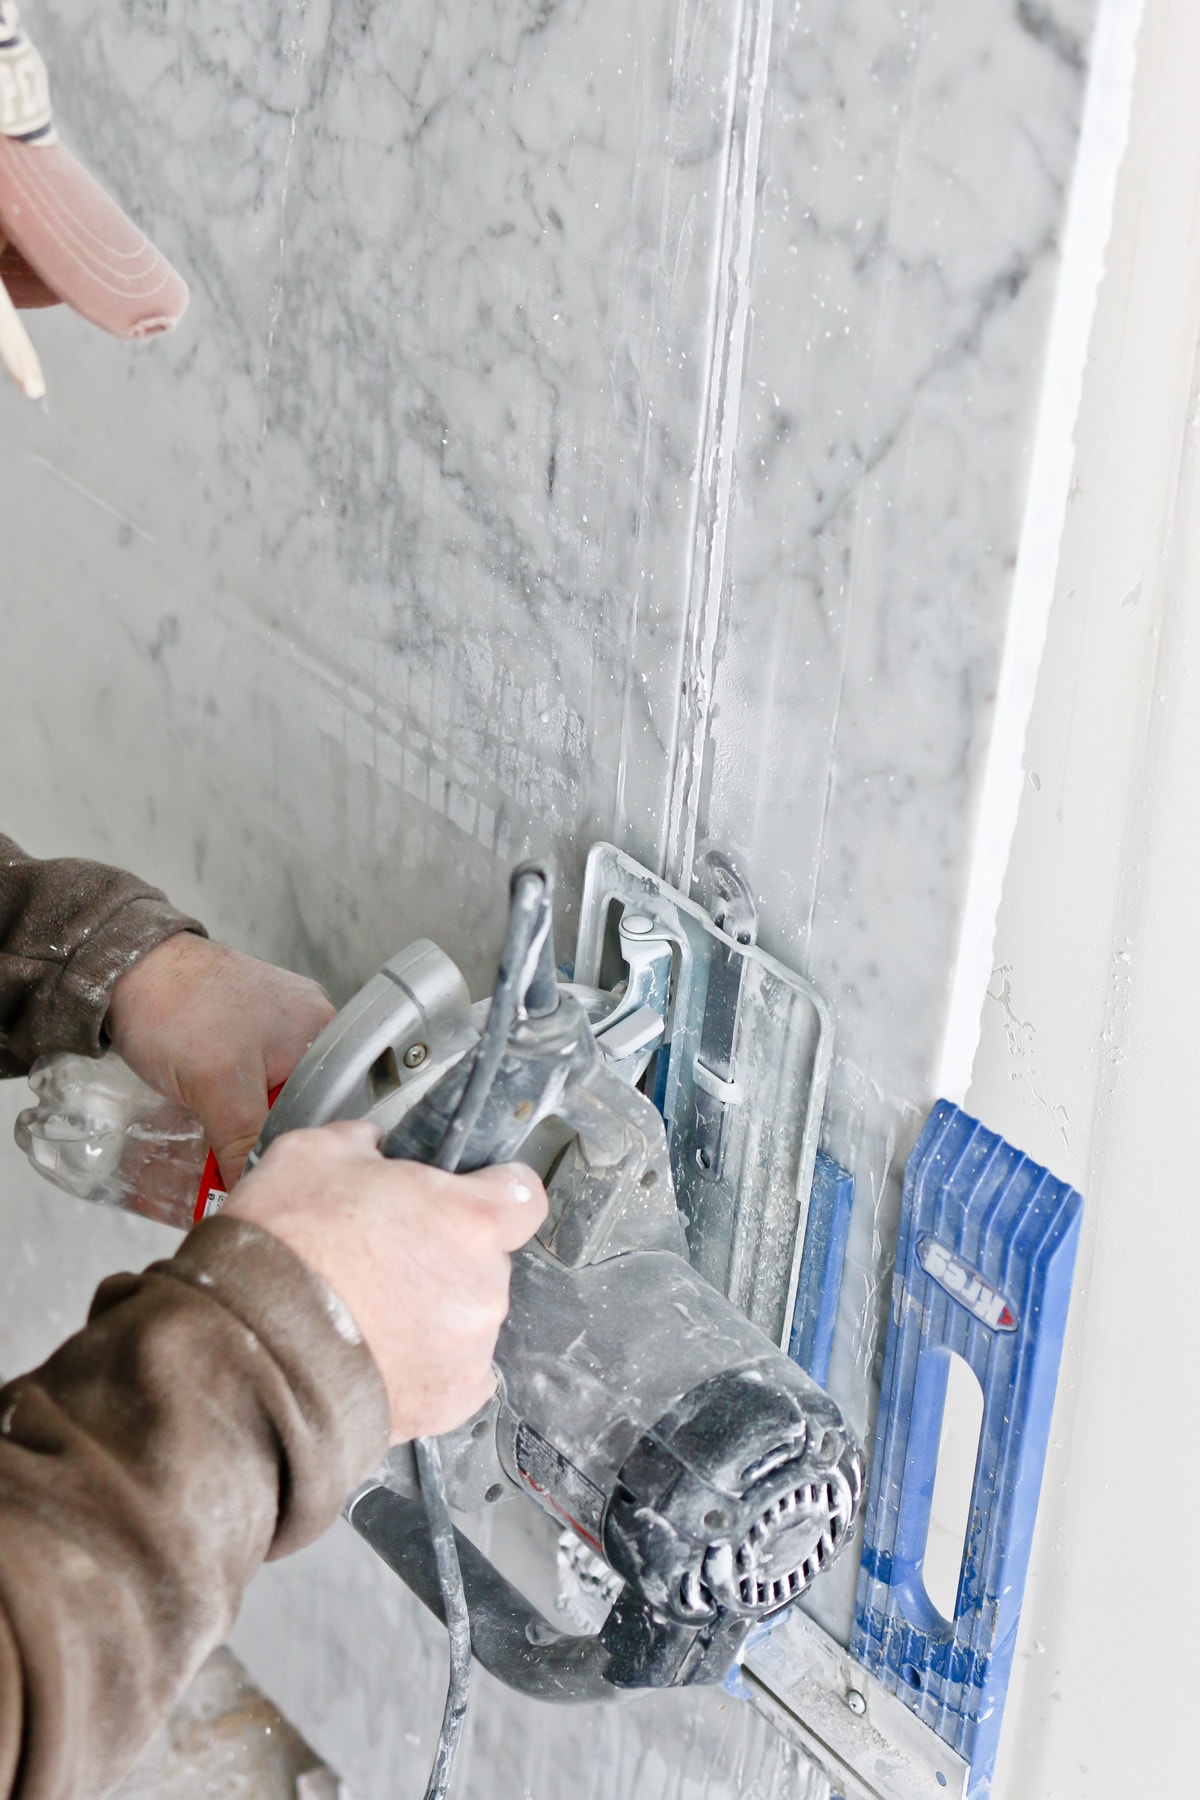
Verify that your remnant is square and layout the cuts you want to make. Use a piece of tape along the line you want to cut and then mark on that tape the line you want to follow.
With the water source and saw ready, start to cut along your lines, keeping a constant spray of water on the cutting edge of the blade. You don’t need to soak it in water, just keep an even steady stream and if you see things drying out where you are cutting, add a little more water – but only enough to keep the blade wet.

The blade will heat up and evaporate the water so you will need to constantly monitor the amount of water during the cut. One water bottle will usually last 2 – 3 full cuts depending on length. Cutting marble can produce a lot of noise and dust especially if it is a thick piece so wearing a dust mask, hearing protection, and safety glasses are always a good idea.
FINISHING YOUR MARBLE
This particular marble slab was sold as a honed piece of marble, versus a polished finish. In a nutshell, you can polish your marble surface which gives it a more glossy surface, or choose a honed finish that is more of a matte finish. I much prefer the look of honed marble so was delighted to find honed slabs. This meant that any finishing we needed to do was mostly just around the cut edges.
Using a grinder, start with the lowest number pad and start to shape and smooth the surface of the marble.
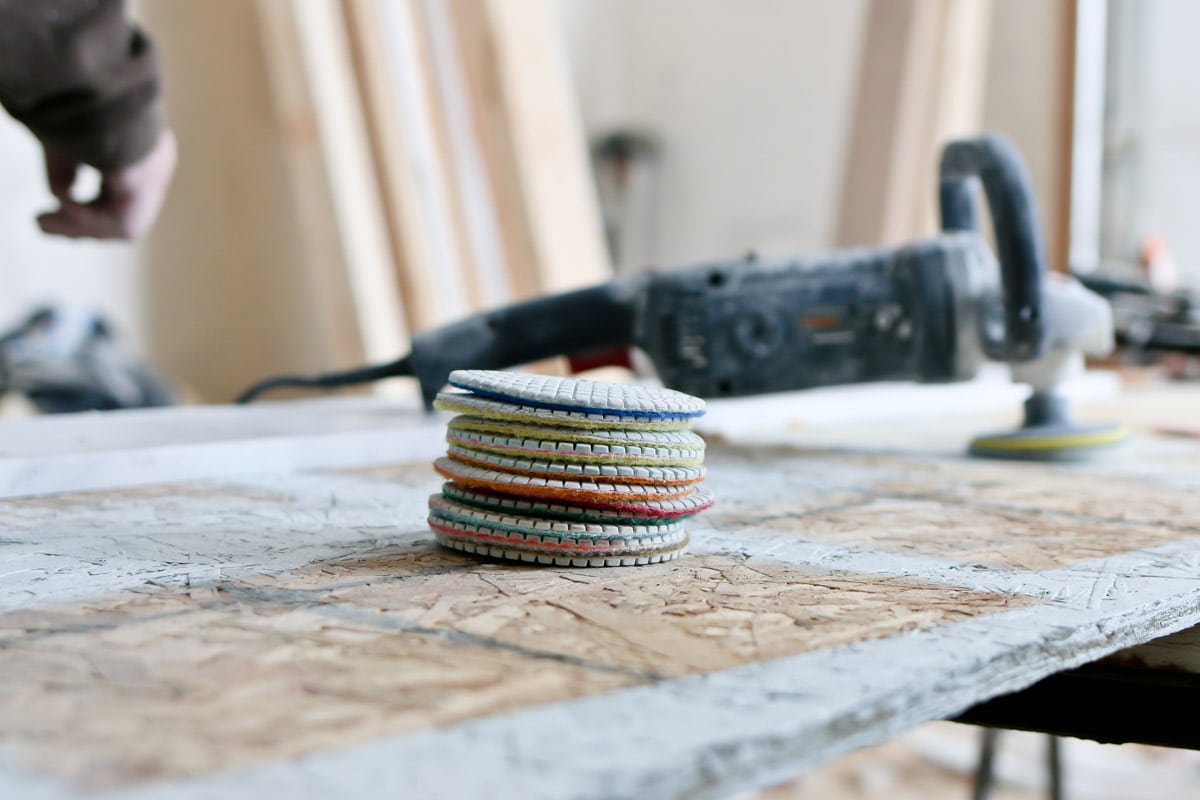
Due to the relative softness of marble, a 50 grit won’t take long to grind down so don’t sit in one spot for very long. Use long even strokes to remove all high spots, sharp corners, and saw marks. Each consecutive pad will remove less and less material until it is only polishing the surface. For a higher gloss finish, you can keep going up in number up to a 6000 or higher grit pad.
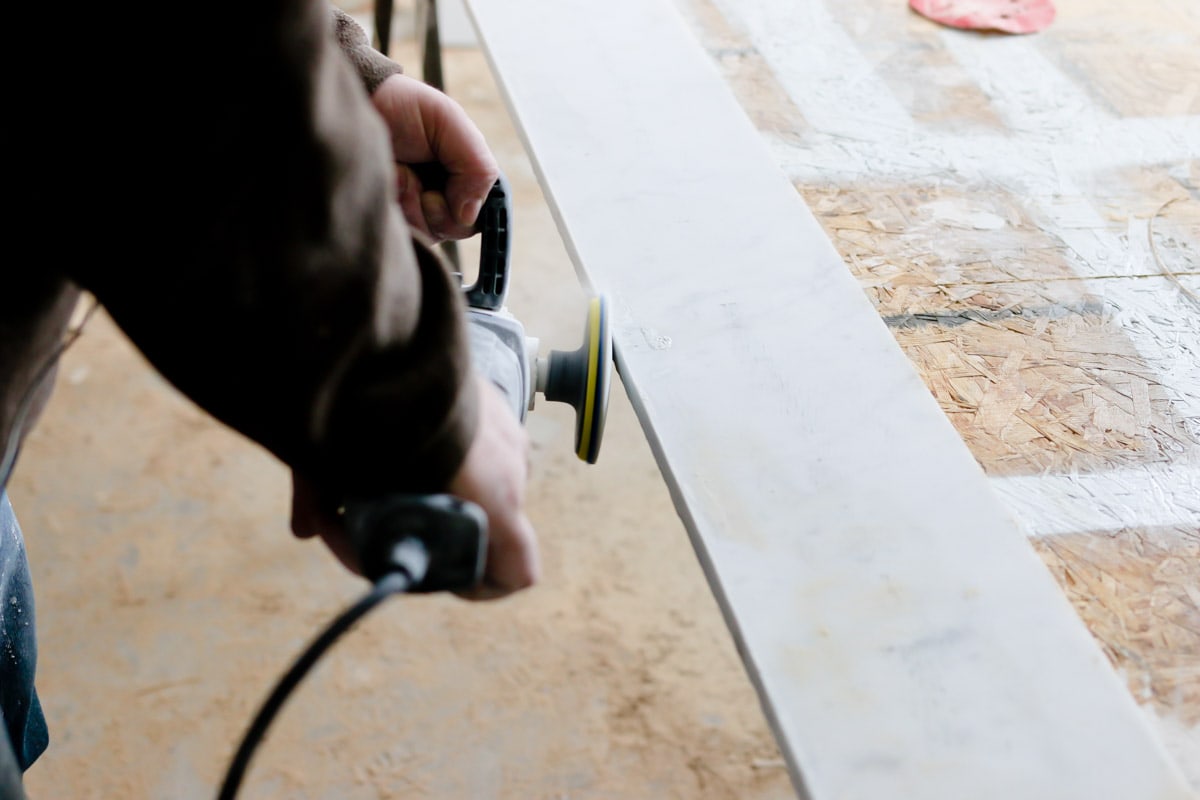
Once you have the finish desired, spread a little buffing compound on the stone and buff it off. This step is not required but definitely makes the final surface look better.
INSTALLING YOUR MARBLE
When it comes to installing your marble, you may need help to transport your slab – depending on the size. I was both extremely frustrated and impressed by Mr. TIDBITS’ gumption to bring this 150-pound beast in himself. And he wonders why his back hurts him.
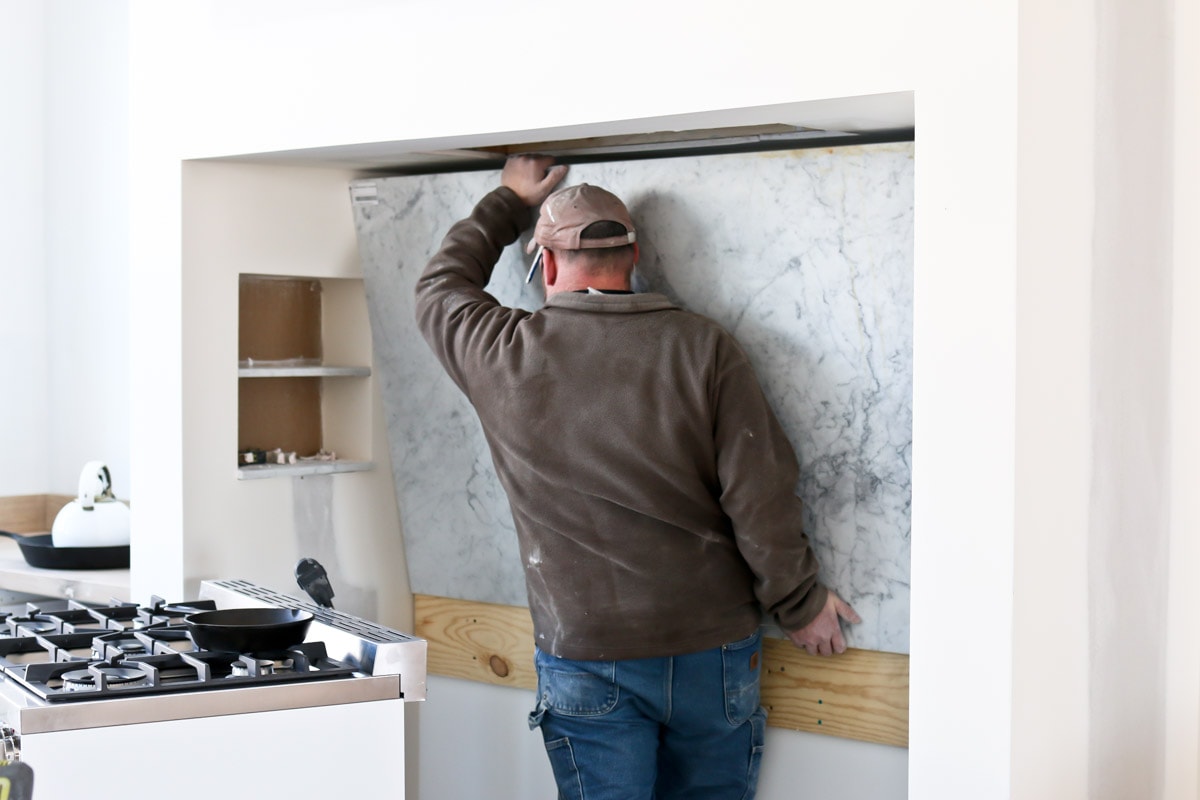
To install the marble on the backsplash, we built wood support and just use a caulk gun and a tube of adhesive designed for tile or marble.
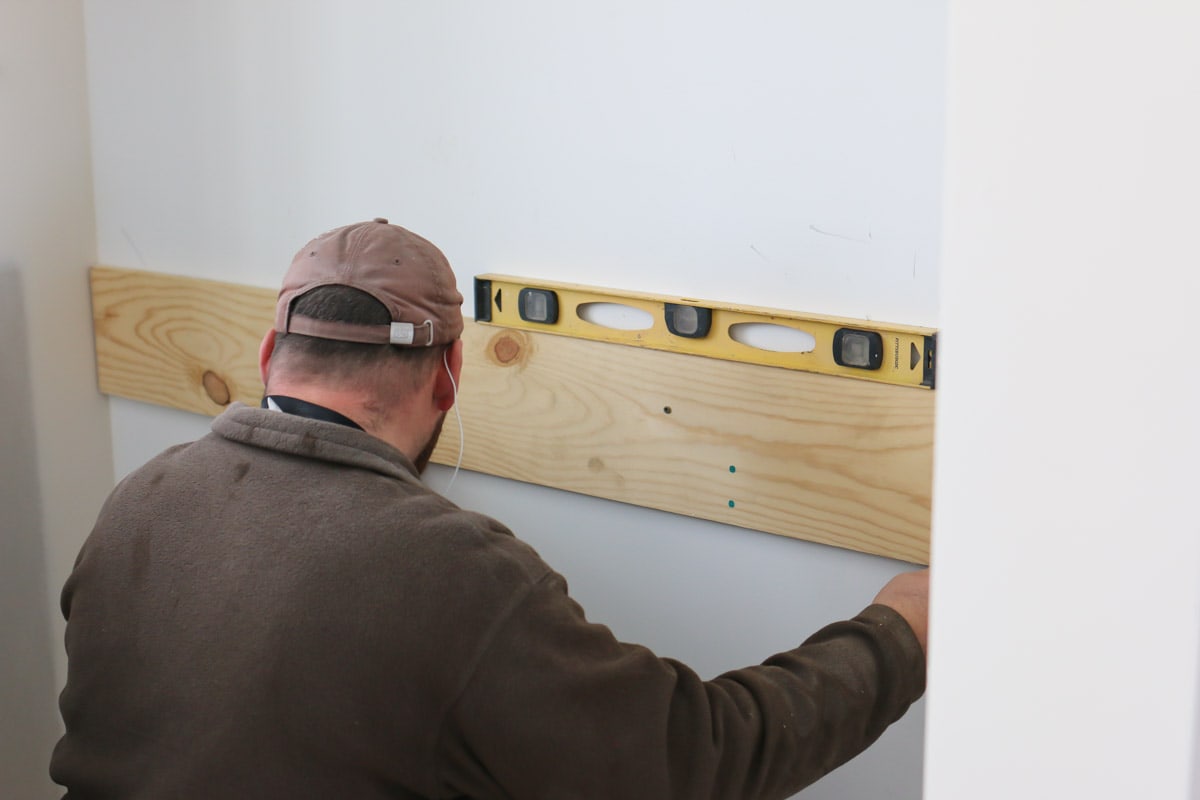
We spread the caulk/adhesive on the surface where the slab will be going and firmly press the marble in place. On our wall, we used screws in the corner to keep the marble in place while the adhesive cured.
For the countertops, we used the adhesive along the top edge of the cabinets and set it in place.
SEALING YOUR MARBLE
Because marble is a very porous stone, you do have to seal it frequently. We actually have not done that yet but plan to run to the home improvement store to pick up some stone sealer. Just wanted to make sure you knew that was going to be a part of your process.
YOU CAN DO IT!
As intimidating as cutting your own marble maybe, once you realize you can do it from home, the possibilities become endless! You can get this high-end look for way less, and work it into your designs in a creative way.
Once we decided to frame in this range area with walls, cabinets, and marble, it made such a huge impact. I felt this matte white Verona Range was so beautiful, I really wanted to make it a focal point of our U-shaped kitchen and all these elements bring it together so well. I simply can’t wait to finish painting and decorating it all! I’ll be back to share more details about how we like this range and what kind of amazing features it has. This is the first gas range we’ve ever had, and we are so hooked!
And now – for all you marble lovers, I hope this post gave you the courage and inspiration you need to incorporate more marble into your home and give cutting this lovely stone a try for yourself.
If you would like to see what the rest of our pole barn home looks like, check out my move-in tour and gear yourself up for all the DIY home projects to come!
Thanks for reading and be sure to subscribe for more inspiration for do-it-yourself living.


Nice work done. It is a beautiful blog with some clear image, which is clear the things. After reading this blog any one can cut marble and done their jobs if he/she try. Thanks for this nice instructive blog.
This was the BEST post! Thanks for inspiring that true DIY attitude–with details, it all seems doable! Congratulations on your vision, your great hubby and making your dreams come true…truly inspiring.
It looks great and I am so impressed at the jobs that you take on! And that Verona stove/double oven is so gorgeous! LUCKY YOU! I am just wondering if grease from the stove will be a problem on the marble? No matter, I love it!
We don’t have the tools or wherewithal to DIY it ourselves. I love how you showed that a touch of marble added can add so much more depth and that feel of high end, luxury look for a fraction of the cost. Marble is so easily etched and stained that I would never do all my countertop. I’d be afraid to cook in there!
I’m going to save this idea for future reference.
I’m glad you still found some design inspiration in my post! Yes, marble is high maintenance, but I really wanted a bit! I’m glad I found a way to incorporate it without worrying about every inch of my kitchen surface. Thank you so much for visiting!
Everything looks so pretty, love your marble.
It’s coming together! Thank you Marlene!
This is an amazing post, though my husband is probably not going to appreciate it the way I do!😉. I am looking around our house seeing all the possibilities for marble! Thank you and Mr. Tidbits for the DIY tutorial!
Haha! I should apologize to husbands everywhere. Mr. TIDBITS maybe should have even hid this skill from me, if he was smart about it.
Wow, love it! It’s beautiful and I love how your stove fits in and the gorgeous paint color! Wow again. I bet your excited to see it coming together.
Thank you Cecilia! It’s so exciting to see it start to come together! I just have to ignore all the other mess left over for us!
Nice work on the marble…its beautiful!
Thank you so much Linda! We are loving it!
Wow… again, you guys are amazing! We DIY everything here too, but I’ve never thought to mess around with marble! You did a fantastic job, Mr T.! 😊
Thank you Becky! You’ll have to try messing around sometime . . . it’s pretty exciting stuff! ha!