
This post may contain affiliate links, which means I get a small percentage of the sale at no extra cost to you. I only recommend items I love and have had a positive experience with. Thank you!
With the year almost coming to a close, I find myself reflecting on 2014.
It’s been a wonderful year.
It has been a year of UPS and DOWNS for my family and I.
The UPS have been soooo up!!
And the DOWNS have been . . . well . . . a bit down.
But there is something about reflecting on it all, that makes you so grateful for all the challenges and the wonderful blessings. When all is said and done, you realize how perfectly all those challenges and blessings worked so closely together to give you a beautiful new perspective on life.
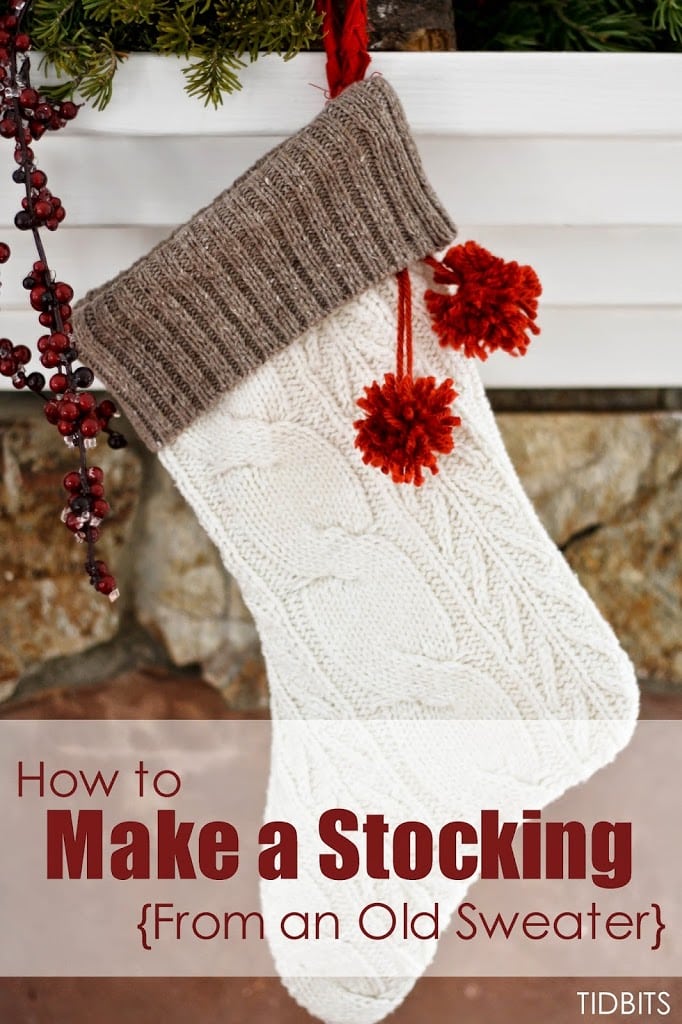
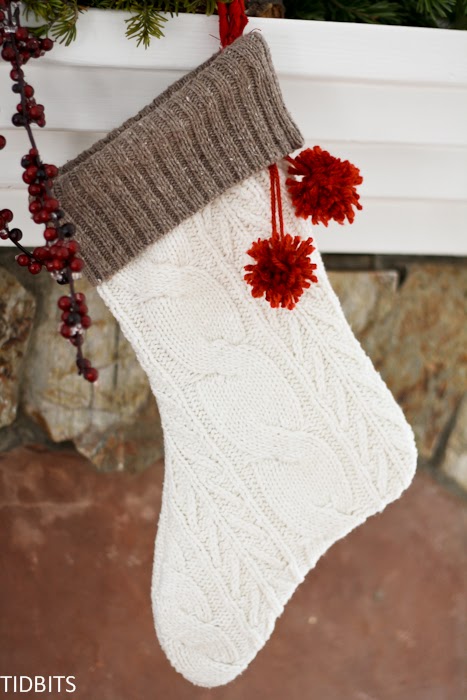
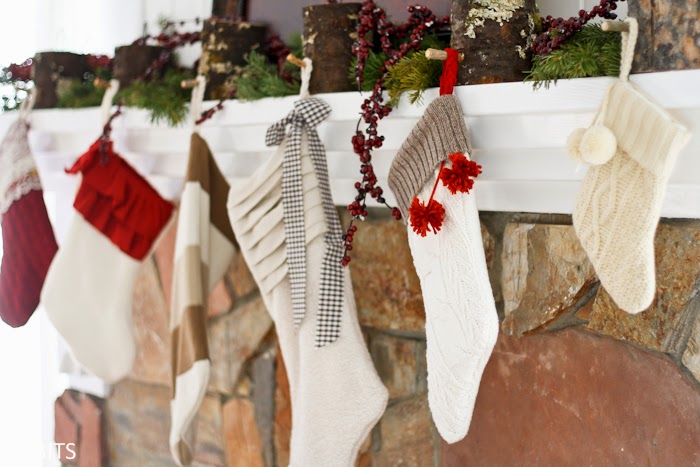
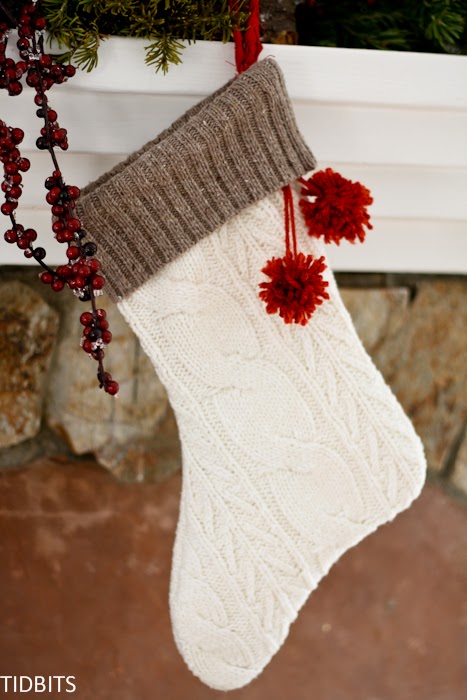
Any way – one of our best UPS was a sweet new addition to our family. A new child means – a new stocking!!
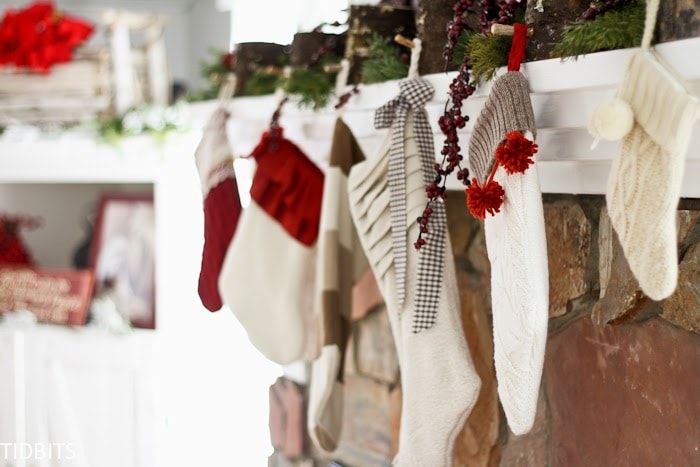
But not just any stocking. This addition had to flow with the rest of the families stockings.
(To see more of our Christmas Decor, go here.)
Which meant a trip to the thrift store to find an unwanted chunky knit sweater. And I found just the one I’ve been hoping to find.

Actually, I found two, because I wanted this stocking to have a bit of a contrasting top.
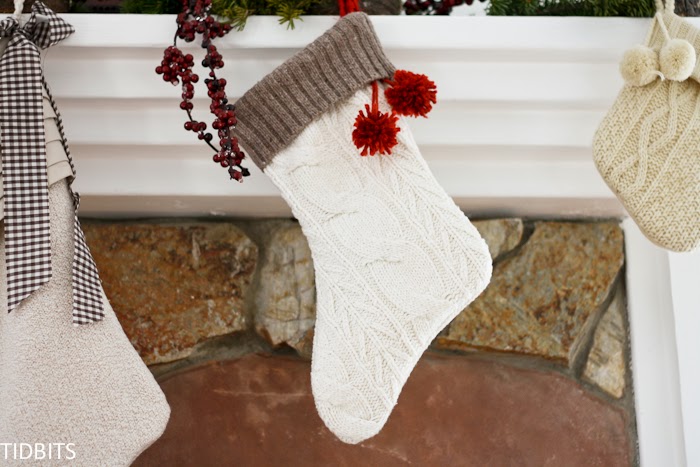
I used the hem of a brown sweater, and the front and back of a white knit sweater to create this up-cycled stocking.
It totally looks like I know how to knit (psst – I totally don’t!).

But this stocking fits in perfectly with the others, which I also made cutting apart thrifted sweaters. (See the original post here).

So head to your local thrift store, or dig through your closet – because I am going to show you how to make this fully lined stocking, with a fold-over cuff out of an old sweater.

You’ll be amazed how easy it is!
(To see details of our DIY flocked tree, go here)
I’ve added a couple of yarn pom pom’s, but you can embellish it any way you would like!
Here is what you will need:
- 1 thrifted or unwanted knit sweater for the main section (or 2 if you want to use a different style for the cuff – but this isn’t necessary).
- Lightweight fusible interfacing (about 3/4th to 1 yard, depending on the size of your stocking)
- Lightweight cotton fabric for the lining (just enough to cut the shape of your stocking twice).
- Any embellishments you would like.
- Ribbon, cording, or any type of string to use to hang the stocking.
Be sure to wash and dry your sweater (if it is thrifted, you just don’t know where it’s been!). This will also shrink the yarn fibers as tight as they will go.
Next, you need to create a stocking pattern. I simply traced an old stocking on paper, added 1/2 inch of seam allowance, and cut it out.
Lay your pattern on your sweater, with the top of the stocking matching up with the hem of the shirt. (if you are using the hem of this sweater as the cuff of your stocking as well, I suggest lining the pattern up in the center of the sweater and cut off the section you want to use for the cuff. Look ahead to the directions for the cuff, before you cut into your sweater, and it should make more sense).
Be sure any pattern on your sweater is where you want it to be for the stocking.

Cut through both front and back layers of the shirt around your stocking pattern.
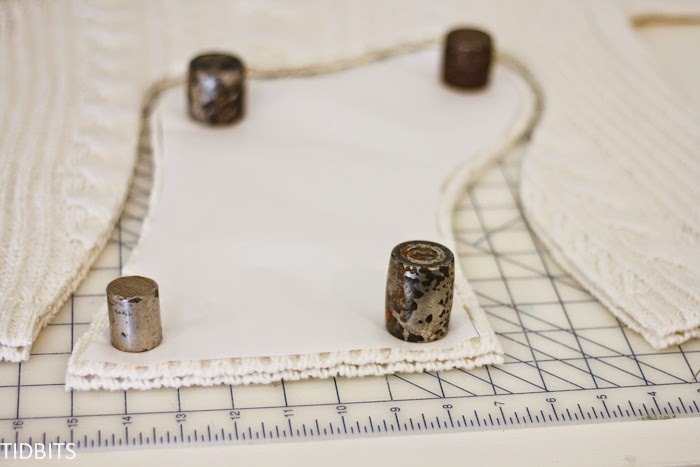
Cut out 2 pieces of fusible interfacing, in the shape of your stocking. Press them onto the wrong sides of the stocking. This is pretty important if you want to hold the shape of your stocking well. Knit sweaters tend to stretch significantly if you try to sew on them without the interfacing to hold it together.

Pin the stocking, right sides together, and sew around leaving the top open.

Press your seams and turn the stocking right sides out.

Make your lining by cutting 2 pieces of the lightweight cotton fabric from the same stocking pattern.
Pin it, right sides together, and sew around just as you did previously with the knit sweater section.
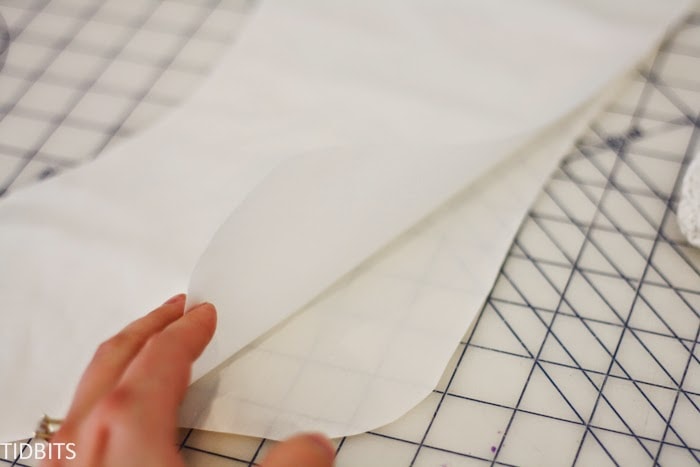
Press the lining seams open, and insert the lining into the stocking, with wrong sides together.

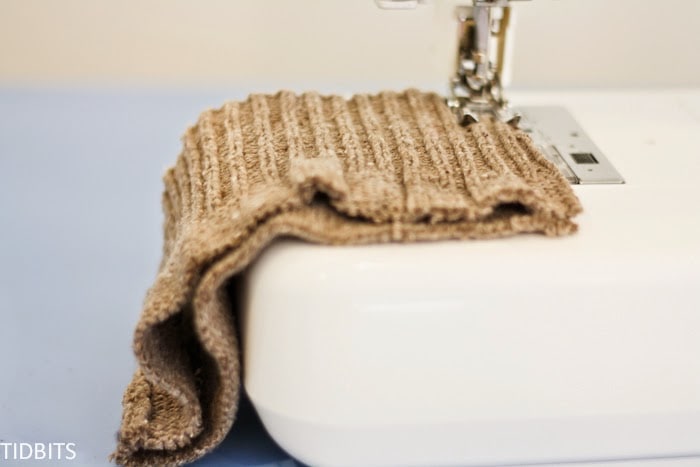
To make the fold-over cuff, you need to cut the hem section off of another sweater (or the same sweater) with about an inch extra from what you want to use.
Cut the cuff to match the length of the top of the stocking.
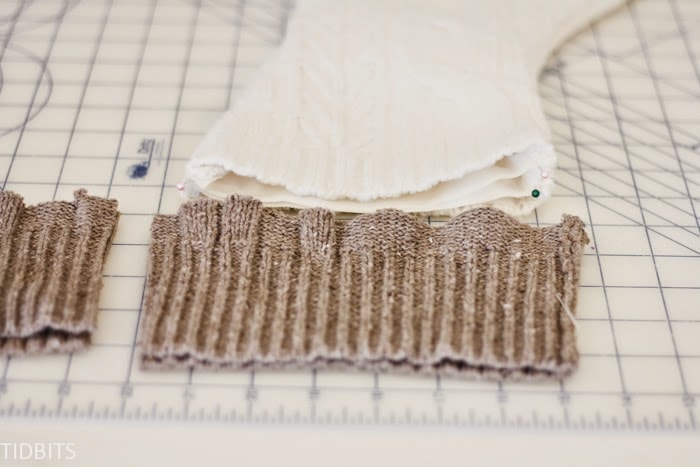
Sew the open end(s) closed, right sides together.
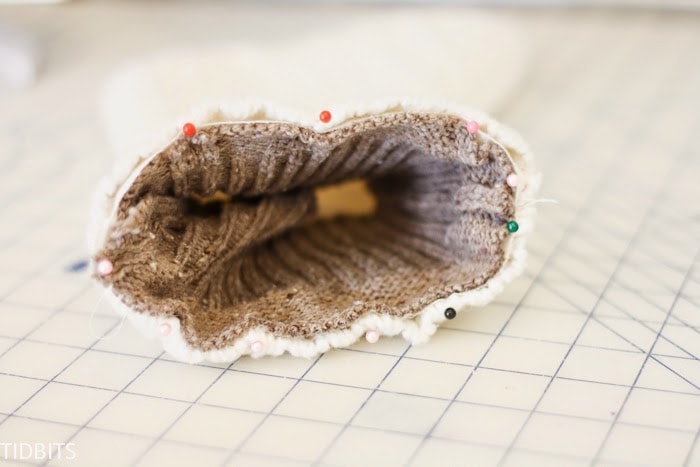
Now you are going to slide the cuff into the stocking, with the hem facing towards the bottom, and the right side of the cuff section facing the right side of the lining.

Line up the top raw ends and pin all 3 layers evenly together.
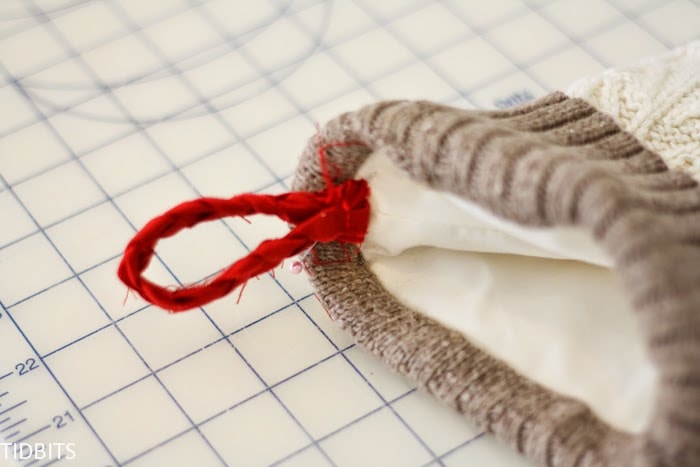
(Also note, It would be best to insert the ribbon, or whatever you have selected to use as the hanging part of the stocking, into these layers and sew it in. I didn’t do that in this step, and had to hand sew it in).
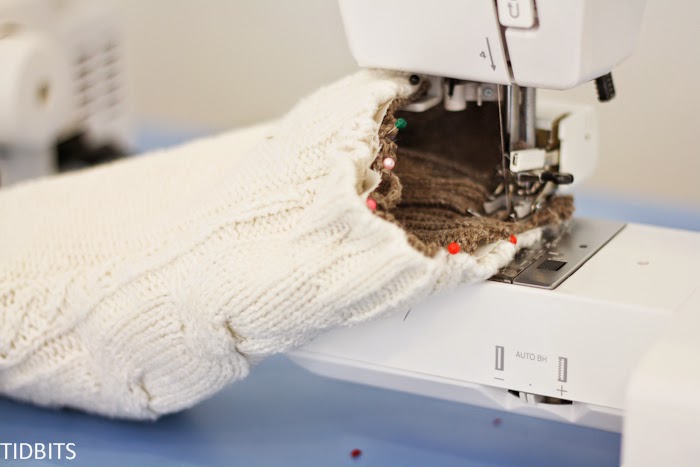
Sew around the top of the stocking, with at least 1/2 inch seam allowance. If desired, serge or finish the raw edges.
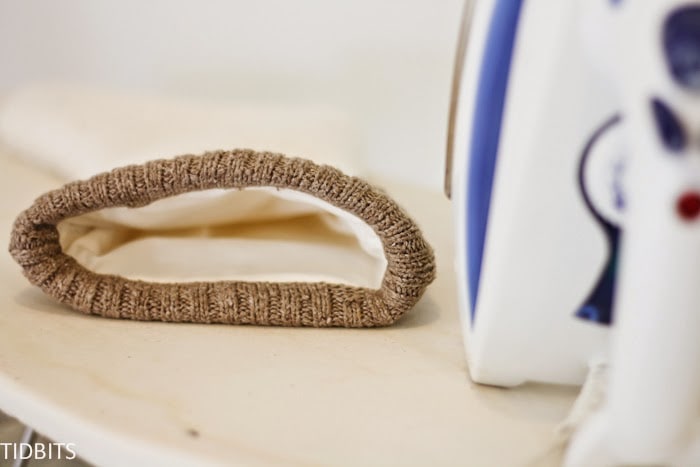
Fold over the cuff to the outside of the stocking, and press the seam.
I used some braided fabric as my hanging section, and hand stitched it in place at this point.
I also made some yarn pom-poms (great tutorial for that here) and tied them together at the top.
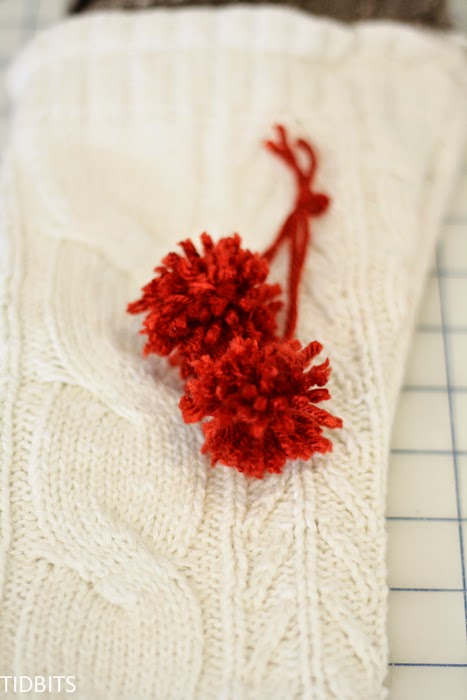
Then I simply hot glued them in place under the cuff.

And that completes your re-purposed sweater stocking!
So many possibilities!

Enjoy!


I made several of these. My father passed away in August and I used his golf sweaters. Then I gave them to his grandchildren and brothers. Was a very special gift!
thank you so much for this beautifully detailed tutorial! I have been wanting to make my own but didn’t know where to start…now I do!