
This post may contain affiliate links, which means I get a small percentage of the sale at no extra cost to you. I only recommend items I love and have had a positive experience with. Thank you!
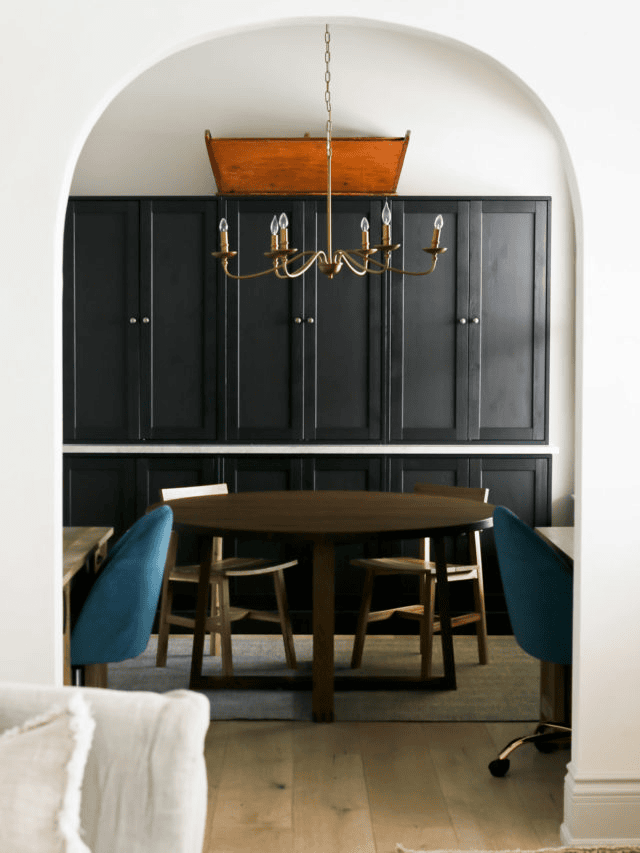
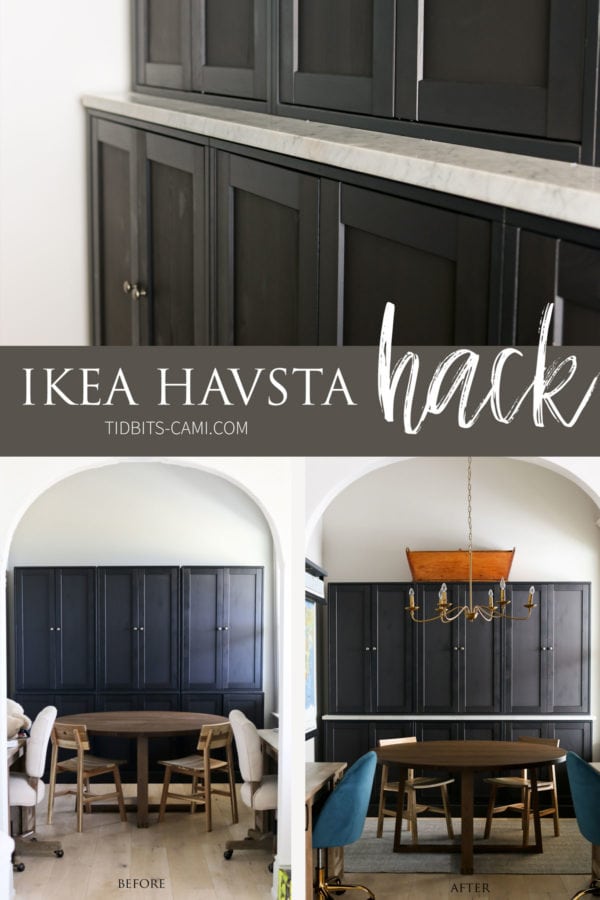
Shopping for Ikea Havsta cabinets? We’re sharing an easy hack to create a major upgrade on the popular step back Ikea Havsta cabinets, and successfully made them look like something you might see in a Downton Abbey kitchen (or so I like to tell myself!).
Watch This Post:
What are Havsta Cabinets?
Havsta cabinets are storage units that are installed into the wall. They first appealed to me because I love any piece of step back furniture or cabinetry.
Step back, meaning the top section is set back from the bottom section. This is a very popular style for antique furniture, hutches, cabinets, and European spaces.

Benefits of Havsta Cabinets
There are a few Havsta storage combinations, and they come with a few fun options to customize your look.
With the Havsta line, you can pick between sliding doors, hinged doors, solid doors, glass front doors, no doors.
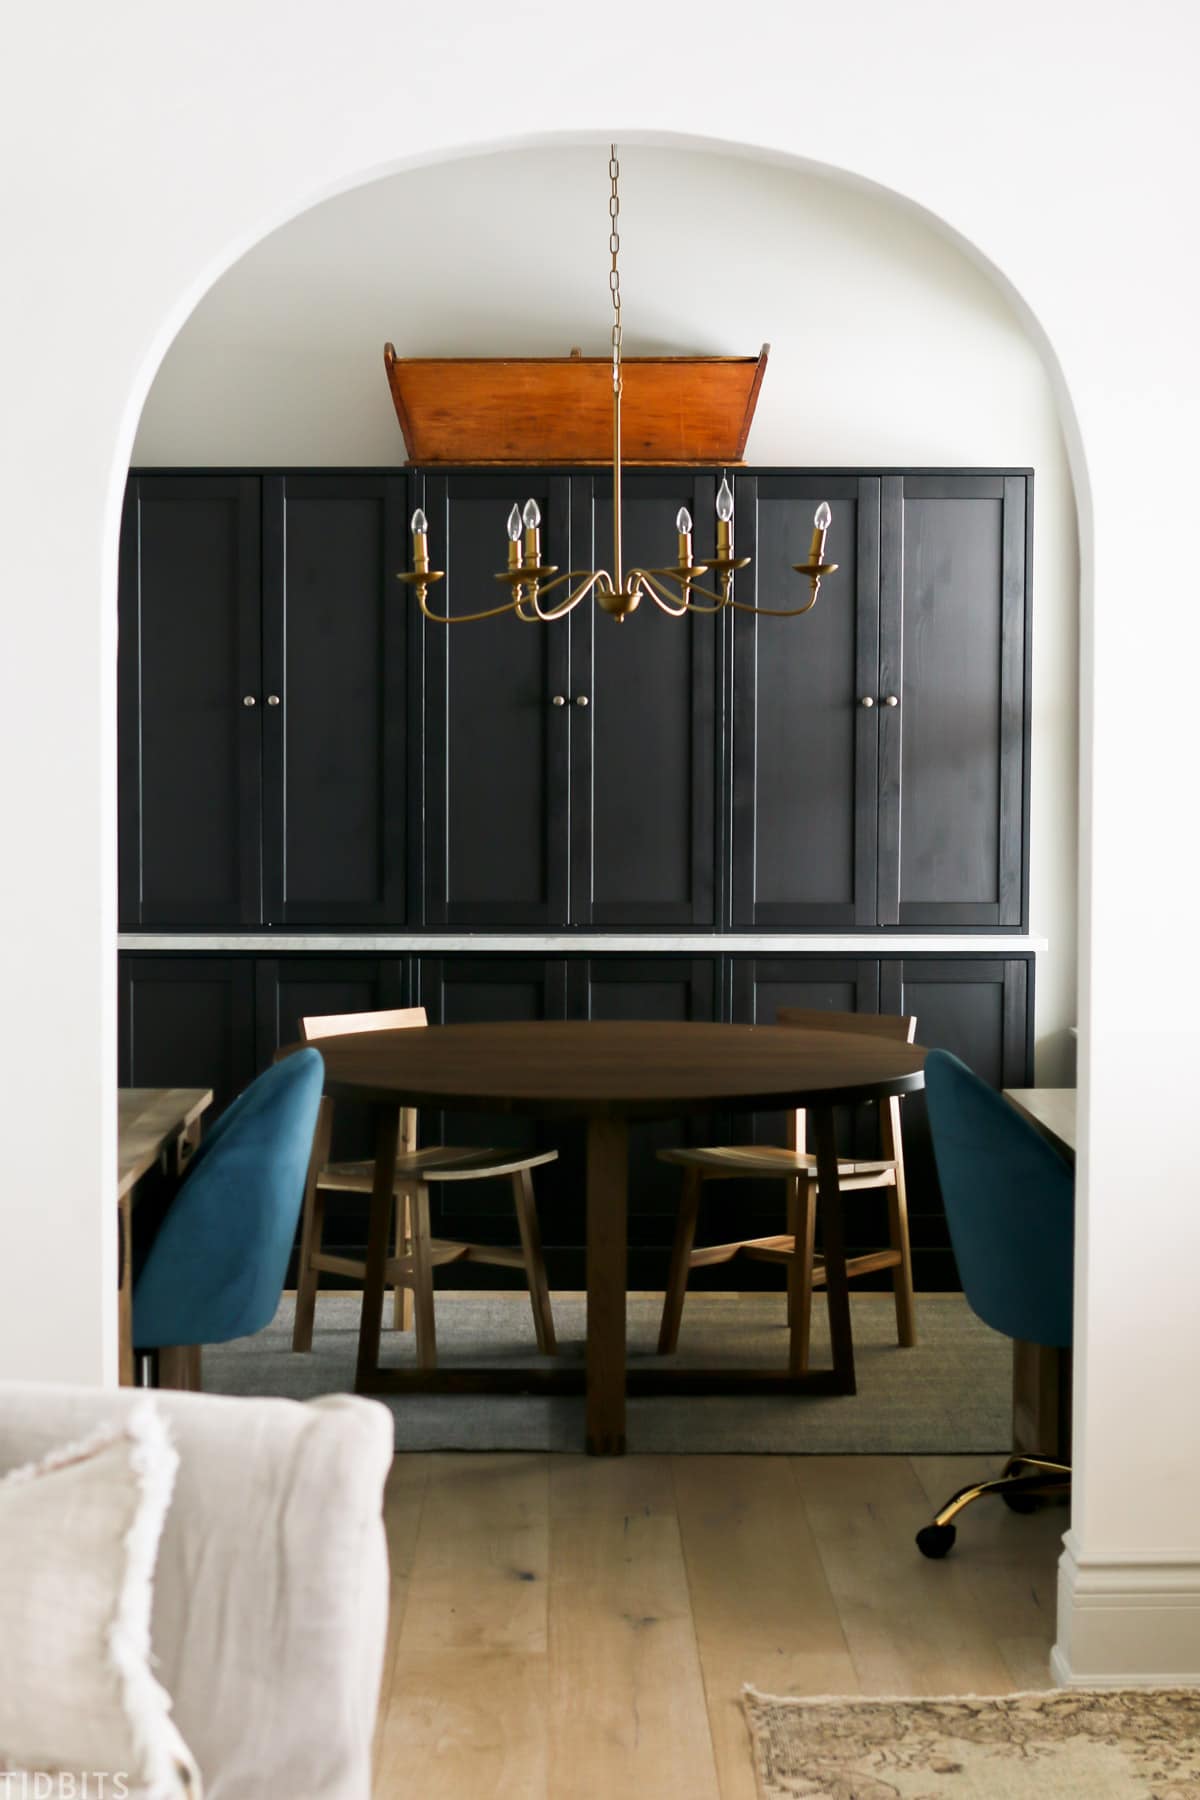
They have a few color options. Right now, there is white, gray, and brown. Well, they call it brown, but I feel it is most definitely more black than brown – which is what we have.
The Havsta is great for display cabinets, bookshelves, and is all around great storage, which we desperately needed in this creative and exploration space.
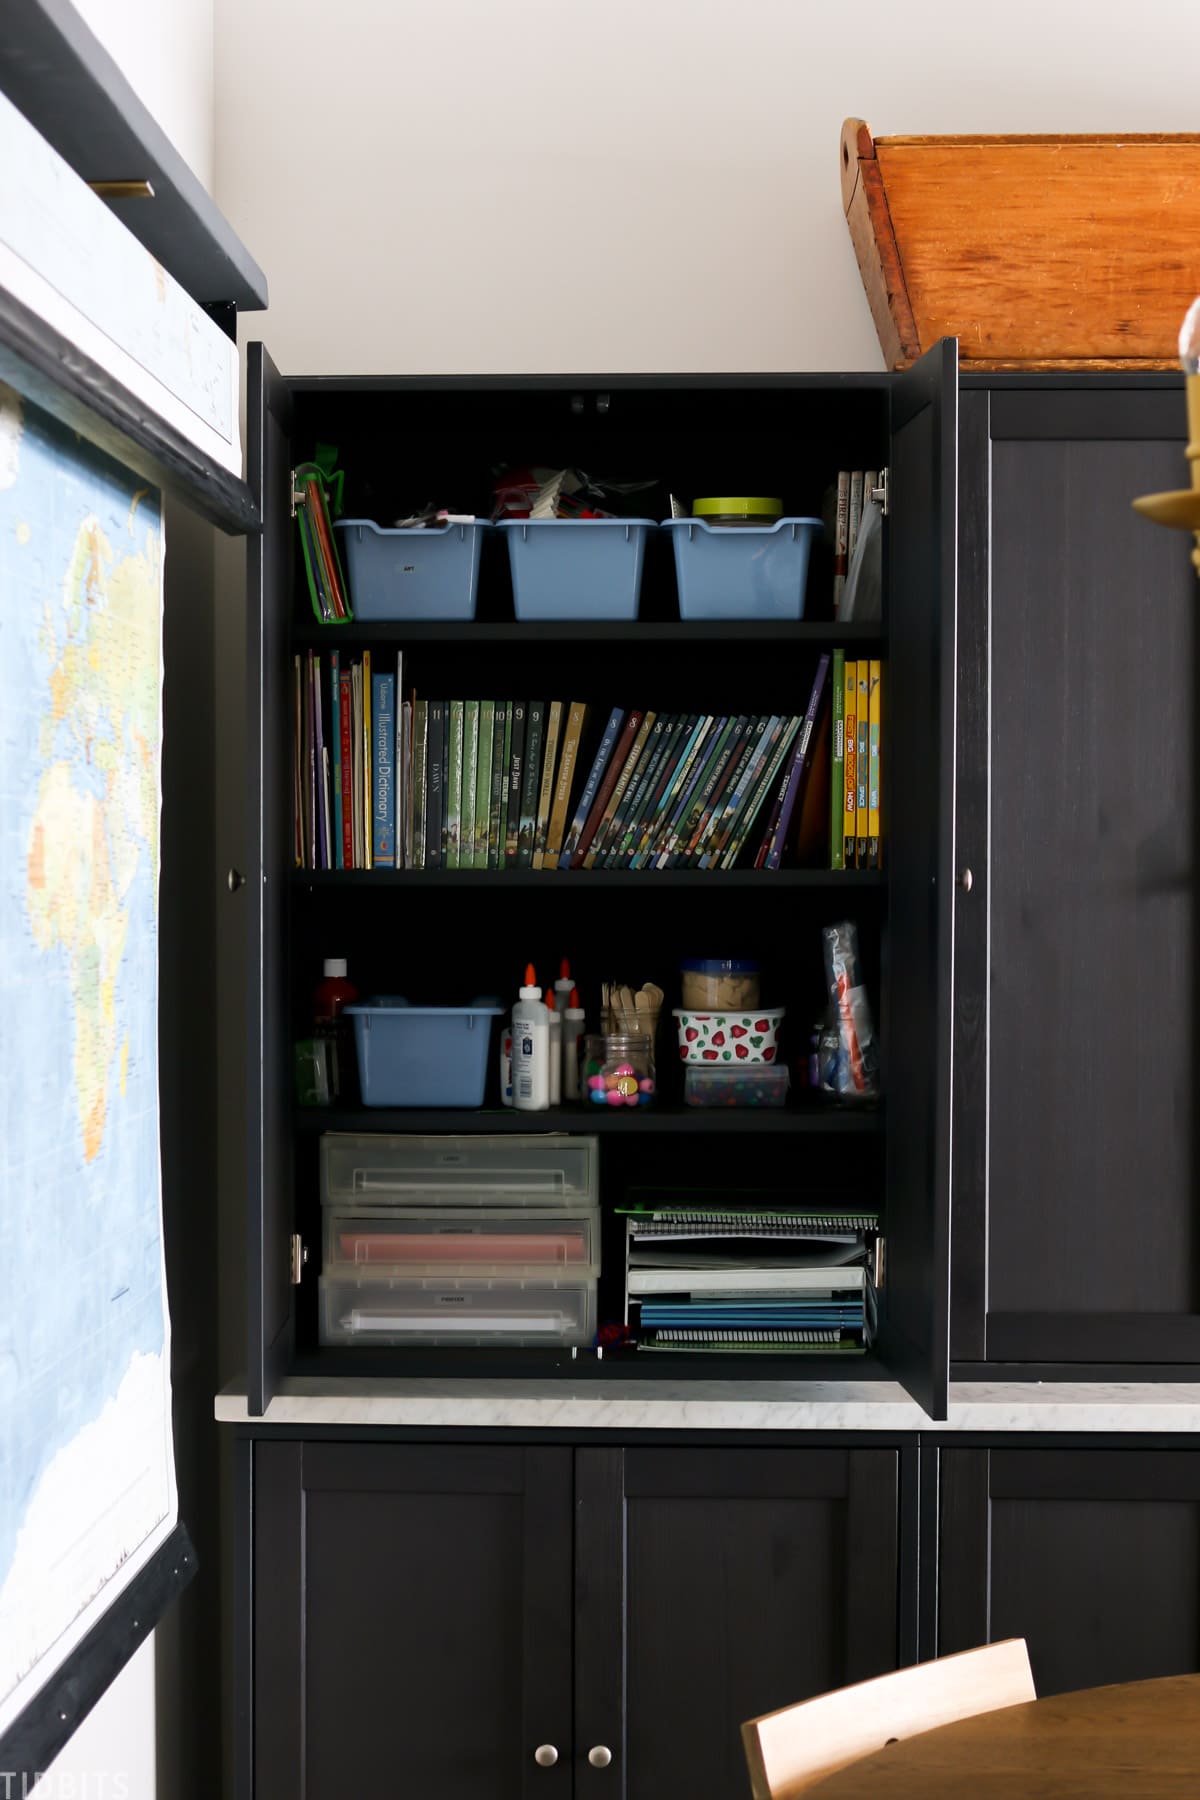
While I love open shelving, I knew the storage we needed in here was not going to be something we could keep pretty. I definitely wanted everything behind closed doors, so I opted for the solid hinged doors on all six pieces.
When we got them and put them in the schoolroom, they honestly just looked a little cheap to me. Something was really missing.
Since this was the first time I had been brave enough to go black and moody, I feared I had gone all wrong and contemplated painting them.
I considered selling them and trying to find some antique cabinets for more character. However, that would have been hard to find and would have likely taken a long time and more money which we didn’t have for this space.
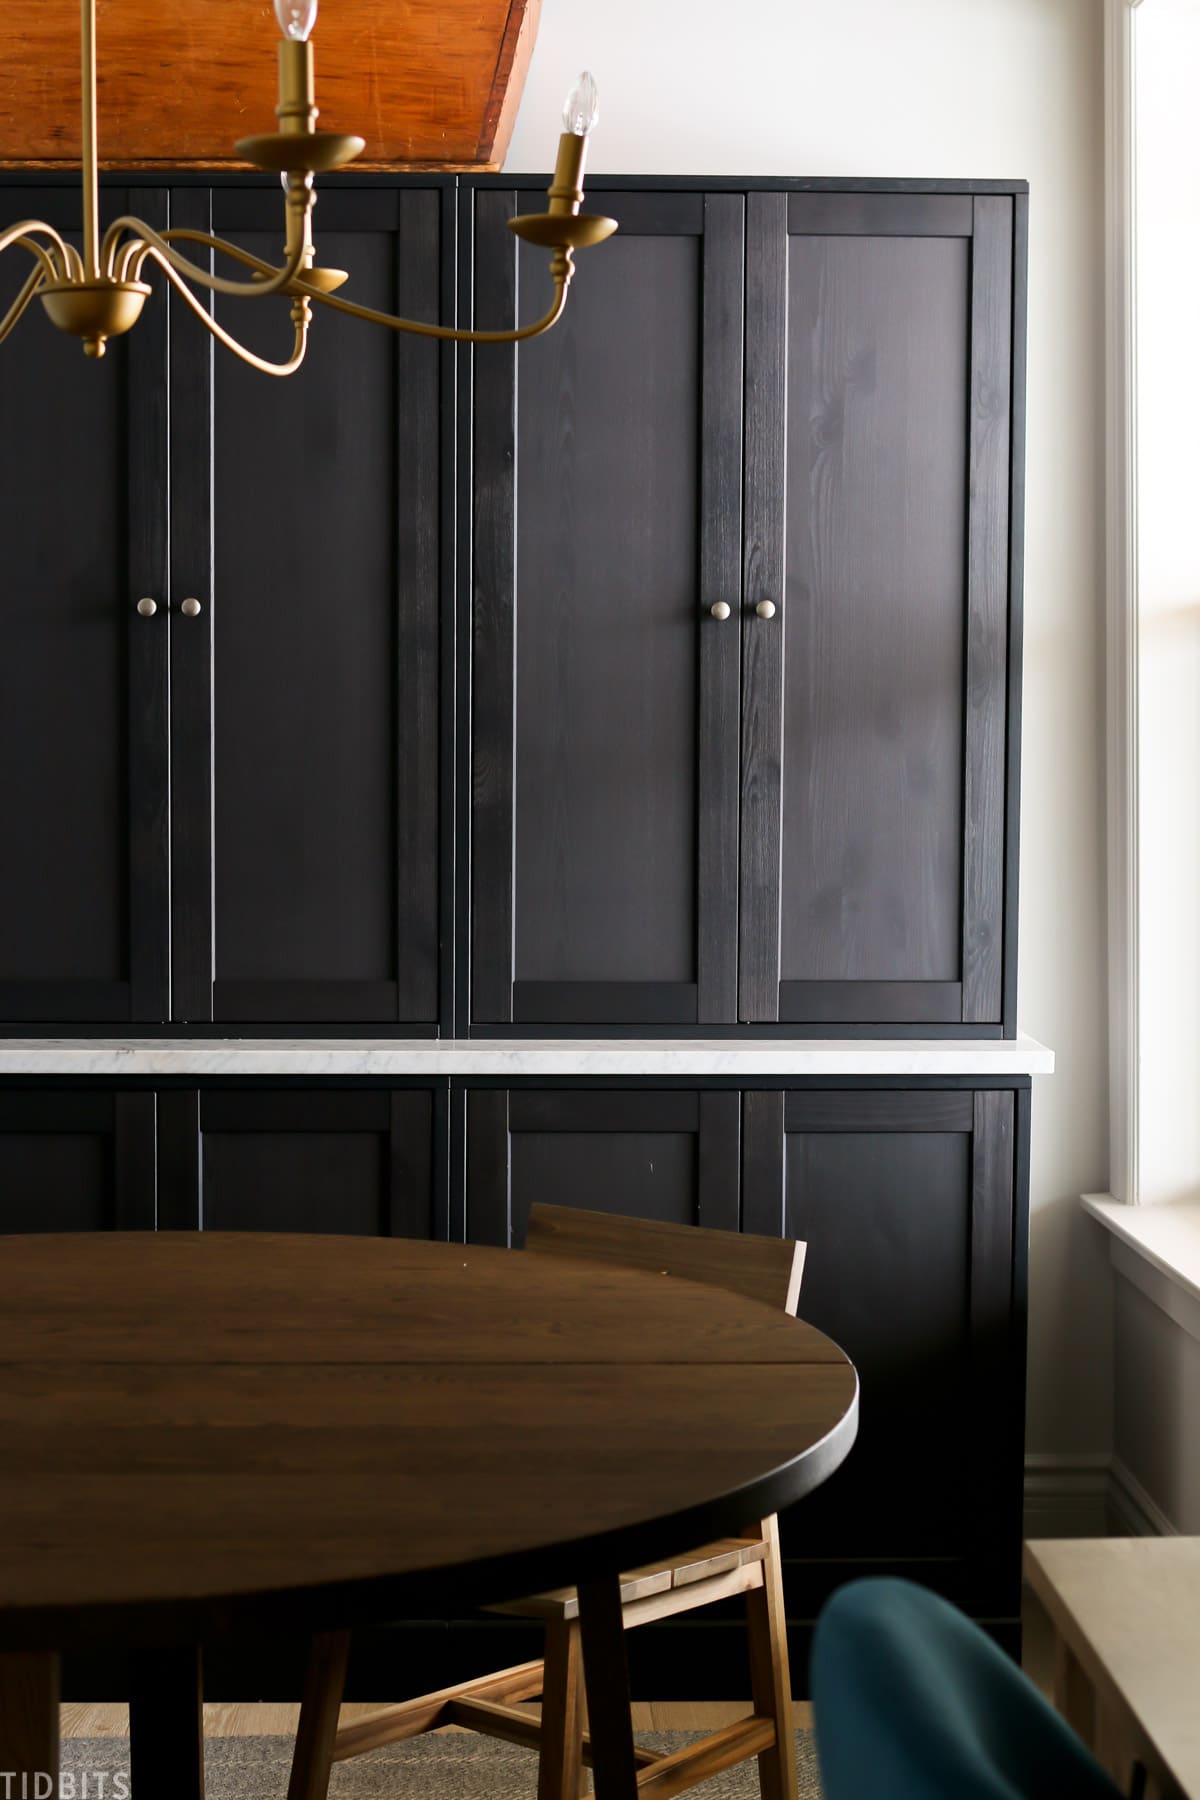
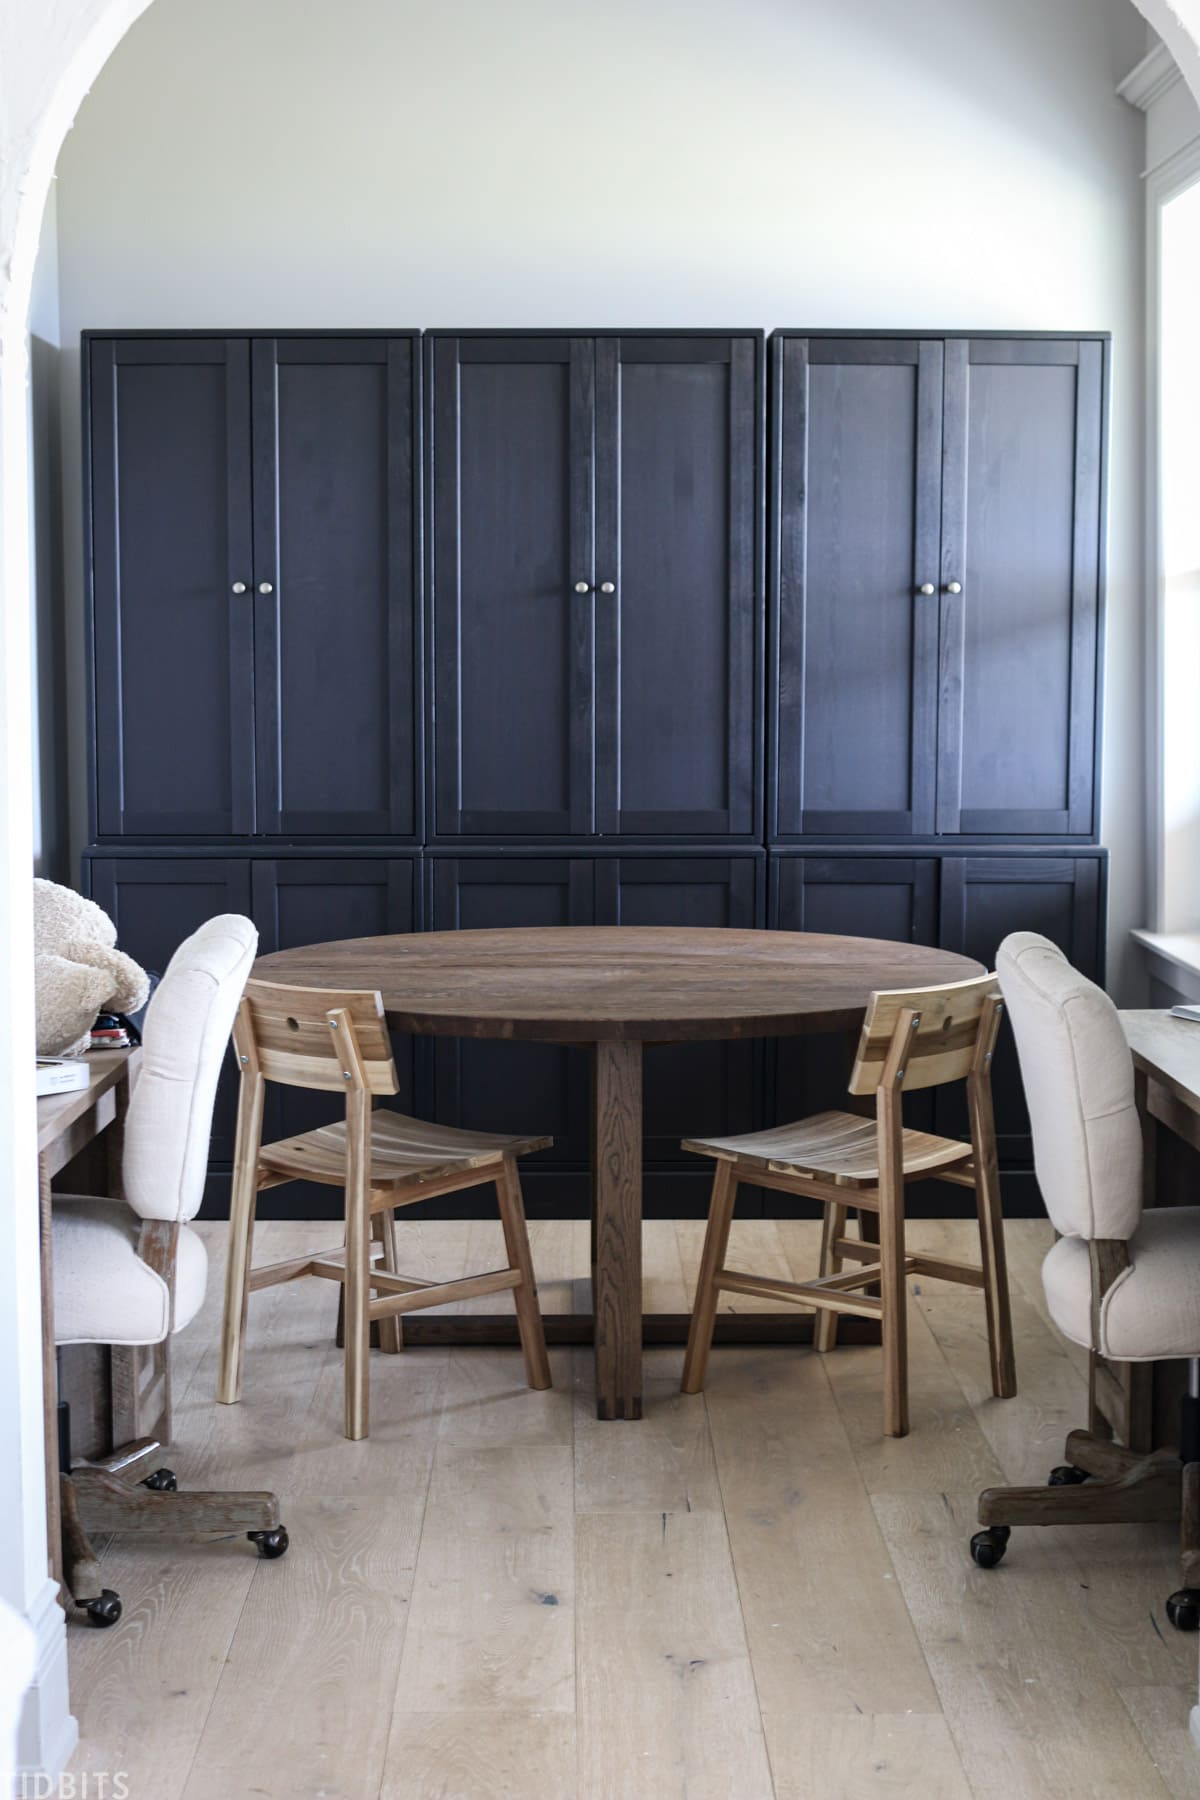
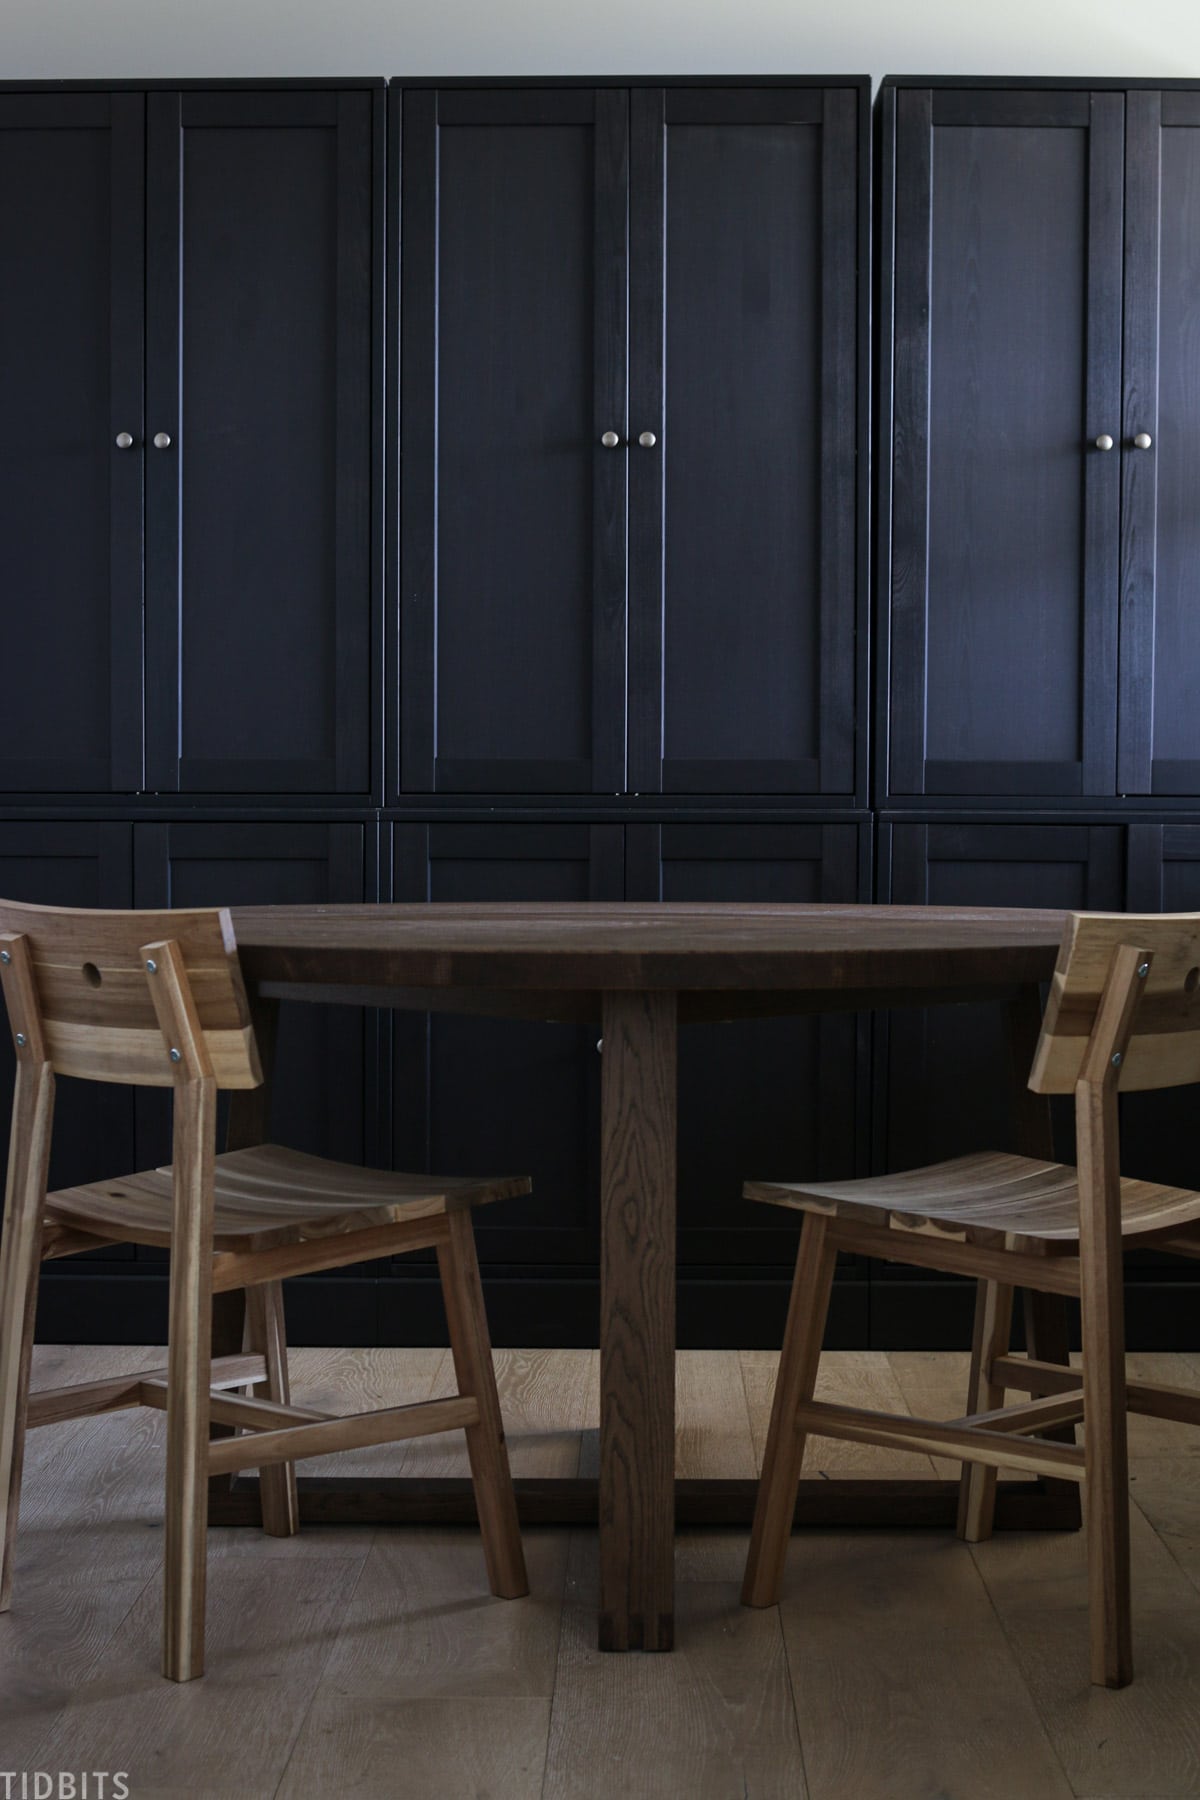
But then, the thought occurred to me to add a countertop to the lower cabinets to break it up visually and add some character that way. Of course, I knew marble would be the bomb diggity.
Ikea Havsta Cabinet Hack: How to Add a Marble Slab
So, we decided to add a marble slab to spruce up the cabinets! We headed to the countertop manufacturer in our area to check out their remnant slabs.
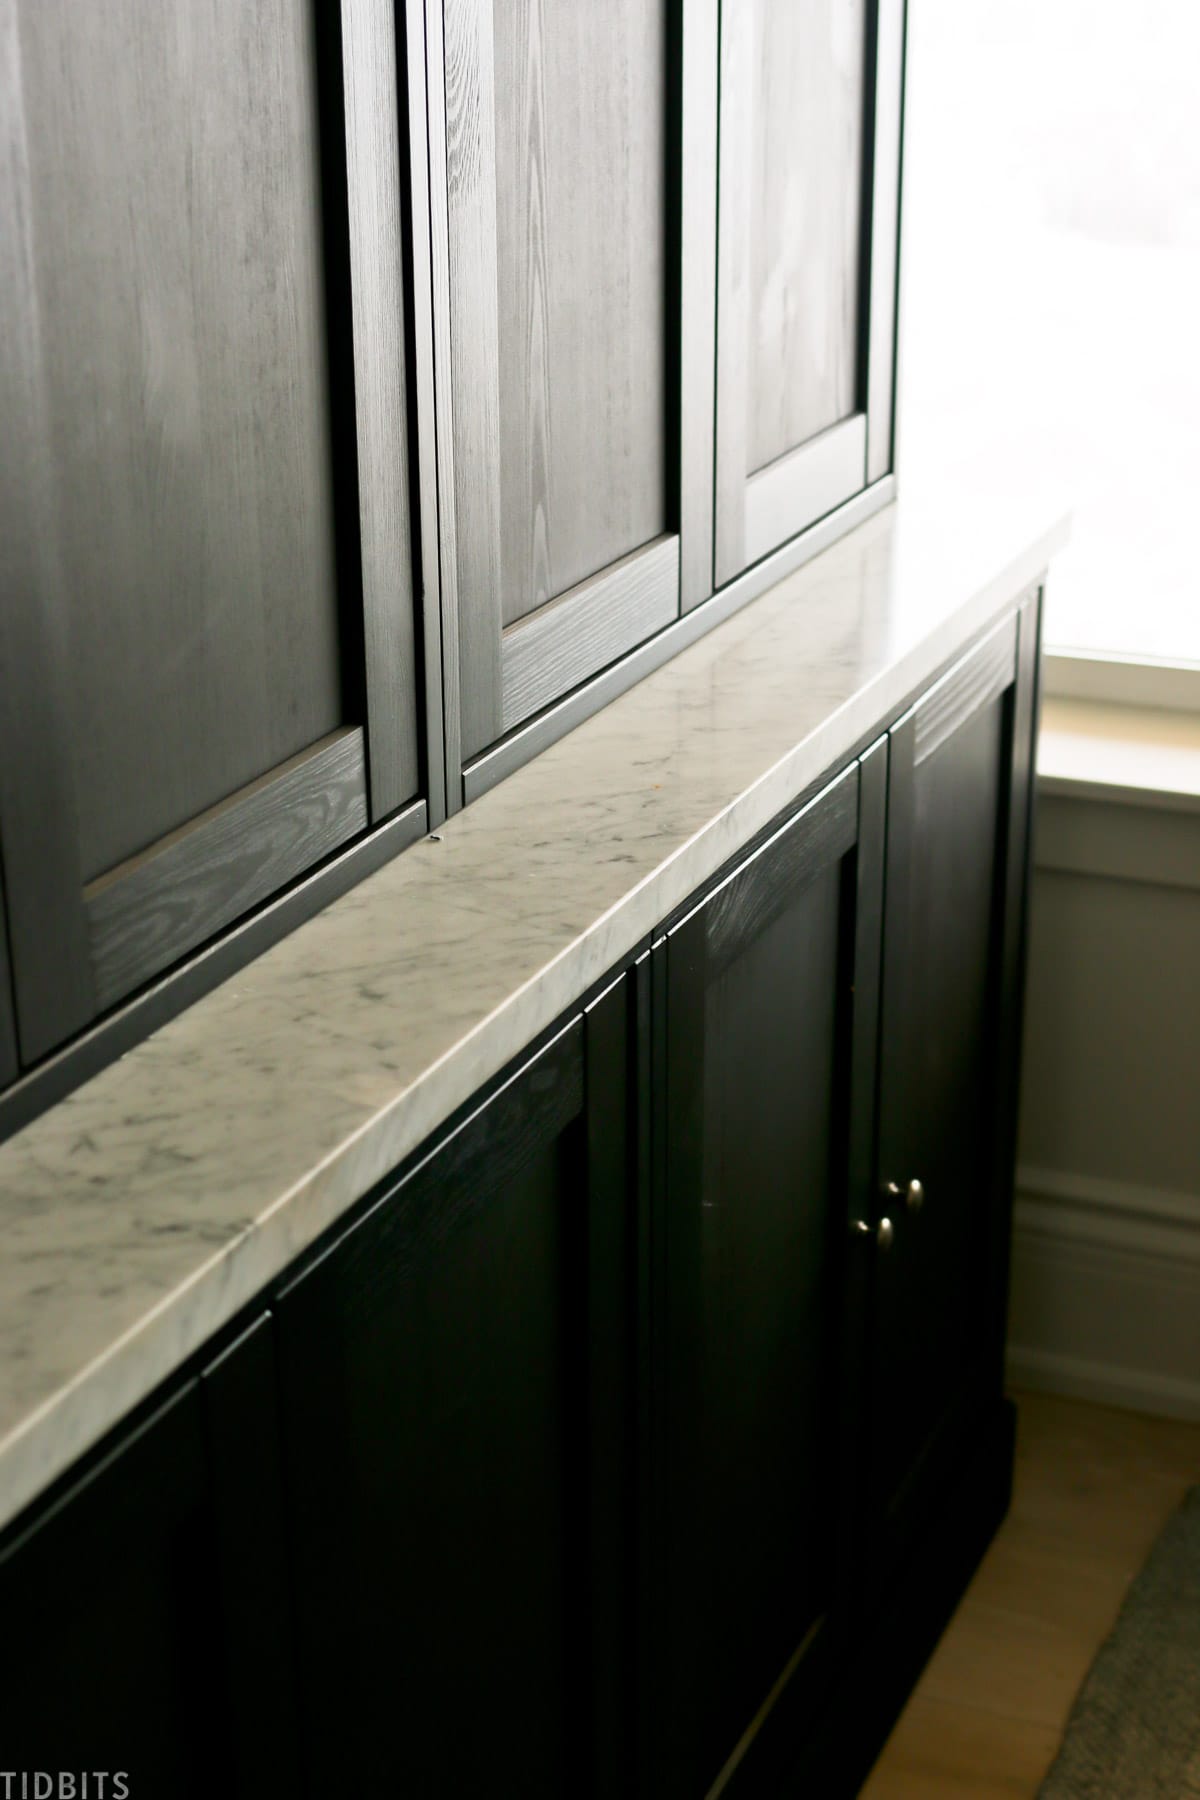
We found a nice thick and huge piece that worked perfectly for the length of these three Havsta cabinets and for our kids’ bathroom vanity.
It was a beast to haul and cut, but my amazing Mr. TIDBITS was up to the task. For both, countertops it only cost us around $350.
If you perhaps think cutting your own marble is impossible, we have a guide on how to cut marble. It is possible, a little difficult, but always worth it!

With the help of my husband’s buddy, they were able to move the cut carrara marble slab in place and put the upper cabinets back on.
Before and After Pictures
It felt so much better immediately, and I absolutely love the contrast and texture between the black cabinetry and white marble countertop. This Havsta storage combination really worked for us!
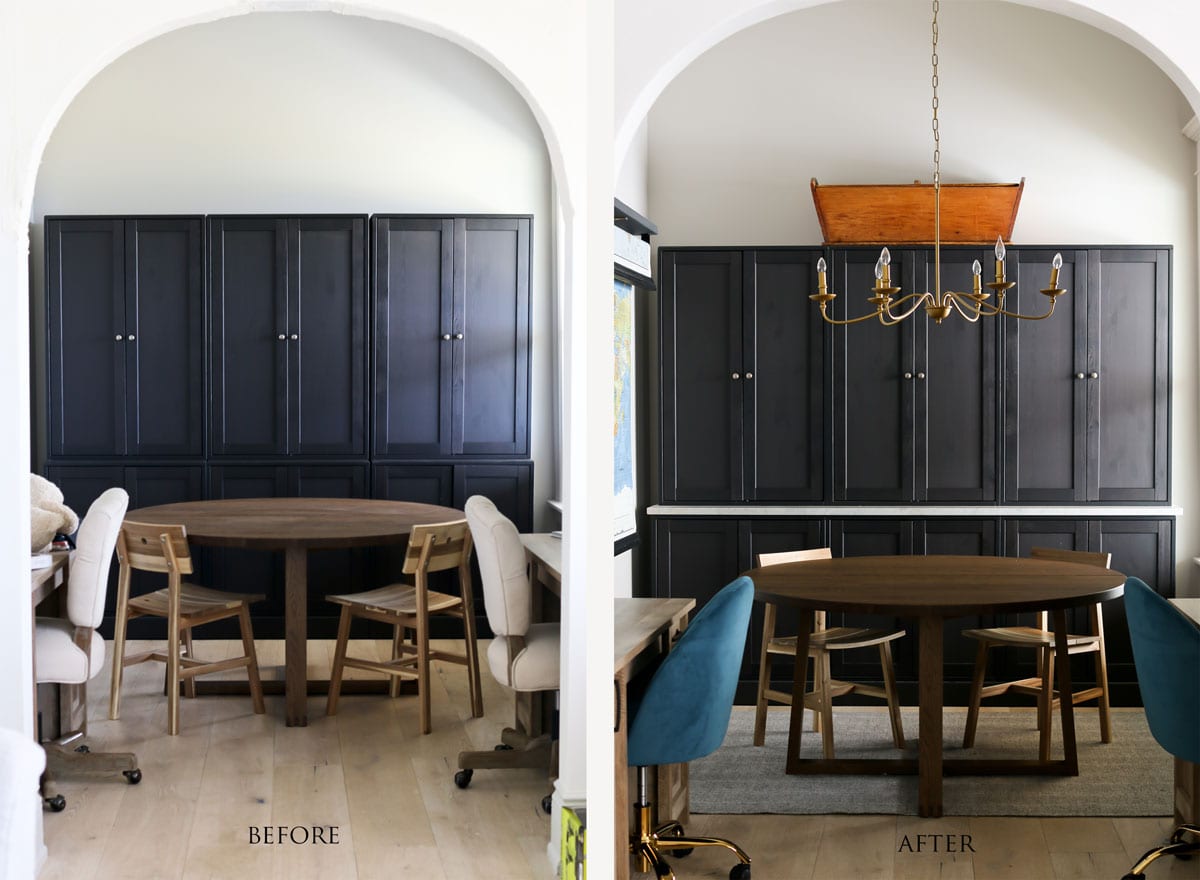
Just by adding that visual horizontal line I feel like the quality of the Havsta went up several notches.
If you are thinking about doing the same and marble is intimidating, I also think a butcher block countertop would look very nice. I also have tips on how to install butcher block countertops as well.
I would love to hear what you think of the upgrade! Do you have any ideas of your own to updgrade the IKEA Havsta cabinets? Let’s chat in the comments below.
You Will Also Love:
- DIY Faux Fireplace Mantel
- How to White Wash Wood
- Easy DIY Cabinet Shelf Risers
- DIY Toy Storage Treasure Chest
- Bookshelf Makeover with Before and After Pictures


I want to do this! I just put together our havsta cabinets and they have instructions on how to attach the base to the top. Seeing as you have a countertop piece in the middle, did you not attach them together? Did you just secure them to the wall without securing them to each other? Please let me know, thank you!
How did you attach the tops to the marble? Are the units attached to the wall, as a built in?
The marble really did make quite a nice difference.
I want to add a wood counter top to 3 white havsta units.
Hi – I’d love to do this also. Can you share how you attached the top to the bottom. It comes with a bracket – but once you add the marble top it no longer fits.
We have this question as well. The bracket that secures the top and bottom units does not adjust, so what bracket did they use?
I absolutely love this! It is exactly what I needed to see done, the same idea has been floating around in my head but I couldn’t quite wrap my mind around the how to and feared a failed attempt. Beautiful. I am so glad I came across you on Pinterest. Out of curiosity, where did you get your map? I am in the market for one and can’t seem to find what I’m looking for. Yours is, again, exactly what I had in mind. Thank you for sharing! -Fran
Love the marble, but it’s a bit over my budget. Do you think a wood slab would work? So, the top and bottom cabinets are not connected correct? Just trying to figure out how you assembled. Great idea! Thanks for sharing!!
Absolutely! I think wood would be stunning. Yes, the top and bottom are not connected.
The havsta cabinets look great. What other floor to ceiling cabinets does Ikea have? Is it self pickup or do they deliver?
What were the measurements you used for the slab? Is I going over the edge on the end? I am going to do a white version. Obsessed with yours!
First off. Love the use of marble slap countertop. I will definitely be using that idea. I was curious how adjustable the shelves are in the havsta cabinets you bought? Do you think you could have separated them into 3 shoving areas each instead of 4? Thanks!
I’m so inspired! Here comes the but, lol…but, I have to clean my garage out to have workspace. I’d love to see a garage transformation! Desperately need one!
I love your floors and am in the market for new flooring. What product are they and did you install them yourself?
Love it! I have the same in white and am planning on doing the butcher block. Did you attach the top to the wall?
Same question! How did you attach the uppers to the slab and did you also attach to wall? (Assume so) I’m making built ins for my office 🙂
Thanks!
Erin
Hi! I am also curious as to how you attached the top? did you change the backing to be able to attach to the wall?
Cami, your cabinets do look like they belong in Downton Abbey’s kitchen…but you had such a great idea with the marble. It completely transforms the look! It sure does love ok like a cozy room.
I am proud of you for going out of comfort area. I love the added slab. Yes the break up is a plus. Heading to IKEA today for the Rast dresser as a nightstand.
Wow! What an amazing difference that made! Looks so good! Love the versatility of ikea products.
Amazing how much that slab of marble transformed these cabinet. They look classy and go perfectly with your European style.
Amazing what such a “little” (big heavy?!😁) thing will do for a piece/room!
Hahaha! Right!
Oh nice! I really like that idea. We are in desperate need of cabinets in our garage conversion. Rather tired of looking at the storage boxes piled along the wall. Hm, I need to go check out IKEAs options. I love seeing hacks to make them look upper end! Thanks for the inspiration. Can’t wait for the complete reveal!
😊 Cecilia
Oh garage spaces are the hardest to keep clean and organized! I think the Havsta would be great in there. But maybe the marble is a bit over the top for a garage (wink). Hope you find something to help!
Looks fabulous! I love a good IKEA hack. You always make your rooms look so inviting. I bet the kids love learning there.
Thank you Lori! It is a very soothing space and we all enjoy creating in there. I appreciate your comment.
It turned out really nice. What a difference. I am surprised IKEA furniture would be strong enough to hold the marble plus the top cabinets. So I will remember this hack for sure. I think spray painting the knobs brass like the chandelier would be a nice touch. But this is beautiful. I would like to know where you got the white desk chairs in the before shot. Thanks Cami. I use your planner everyday. Loving it!
Hi Lisa! Thanks for your comment. I have been wanting to do something about those knobs and brass would tie it in nicely. Thanks for the inspo! I’ll be back to share sources in the reveal.
Oh Cami,
I absolutely looooooove this hack!! I’ve missed you and your creativity. I’m excited to see the room reveal.
Thank you! Life is full right now, but I appreciate being missed. Hopefully this year will provide plenty of creative ideas as we try to finish our home!
What a fun idea to go from ho hum to oh yeah!
Haha! Well said!
Great hack! Looks so amazing! I would love to know where you got the dark brown table in the after pictures. Thank you!
Thank you! That actually came from IKEA too. But I’ll be back to share all the sources soon!