
This post may contain affiliate links, which means I get a small percentage of the sale at no extra cost to you. I only recommend items I love and have had a positive experience with. Thank you!
Why pine is the best choice for a whitewashed wood, and 2 DIY techniques to help you get that beautiful whitewashed wood look for your home and projects.
I LOVE the whitewashed wood look. There is something so beautiful to me about the toned down opaque color that still allows for the cozy wood grain to show through. I’ve used this wood treatment in so many of my projects, and I wanted to finally share the details on how I do it.
Stick with me and we will go over my 2 favorite techniques and products I use to whitewash pine, and in what situations I’ll use them. I’ll also share why pine is the best option if you want the whitewashed wood look.
WATCH THIS POST
For a more personal experience with me, watch this post in video!
WHY CHOOSE PINE FOR A WHITEWASHED WOOD LOOK
Pine takes a whitewash so well. Pine wood has a natural yellow undertone, but a whitewash will even out the warmth with a nice crisp, yet airy white wood look.
The problem with choosing other types of wood – like oak, maple, walnut or mahogany, is their red undertones.
The results of whitewashing those types of wood will yield a whitewashed wood that looks more pink than white.
Trust me, I’ve played with them all and no wood type responds more beautifully than pine.
WHAT YOU SHOULD KNOW ABOUT PINE WOOD
Before you dive into your project and gear yourself up for a whitewashed wood look, make sure pine is a good choice for the project at hand.
What you need to know about pine is that it is a softwood and is more pliable than most woods.
While it is still a nice sturdy wood and great for furniture projects, it will indent, scratch, mark and wear easier than hardwoods. If you are okay with that, proceed.
If you need something more durable, look at other hardwood options and you may need to choose a different stain or wood treatment.
MY 2 FAVORITE TECHNIQUES AND PRODUCTS FOR WHITEWASHING PINE
I feel like I’ve used just about every option for whitewashing. I’ve tried watered down interior white paints, milk paint, oil and water based pickling stains, etc. While they all achieve a whitewash look to some degree, I have found my 2 go-to favorite methods and products based on the woodworking situation I am working on.
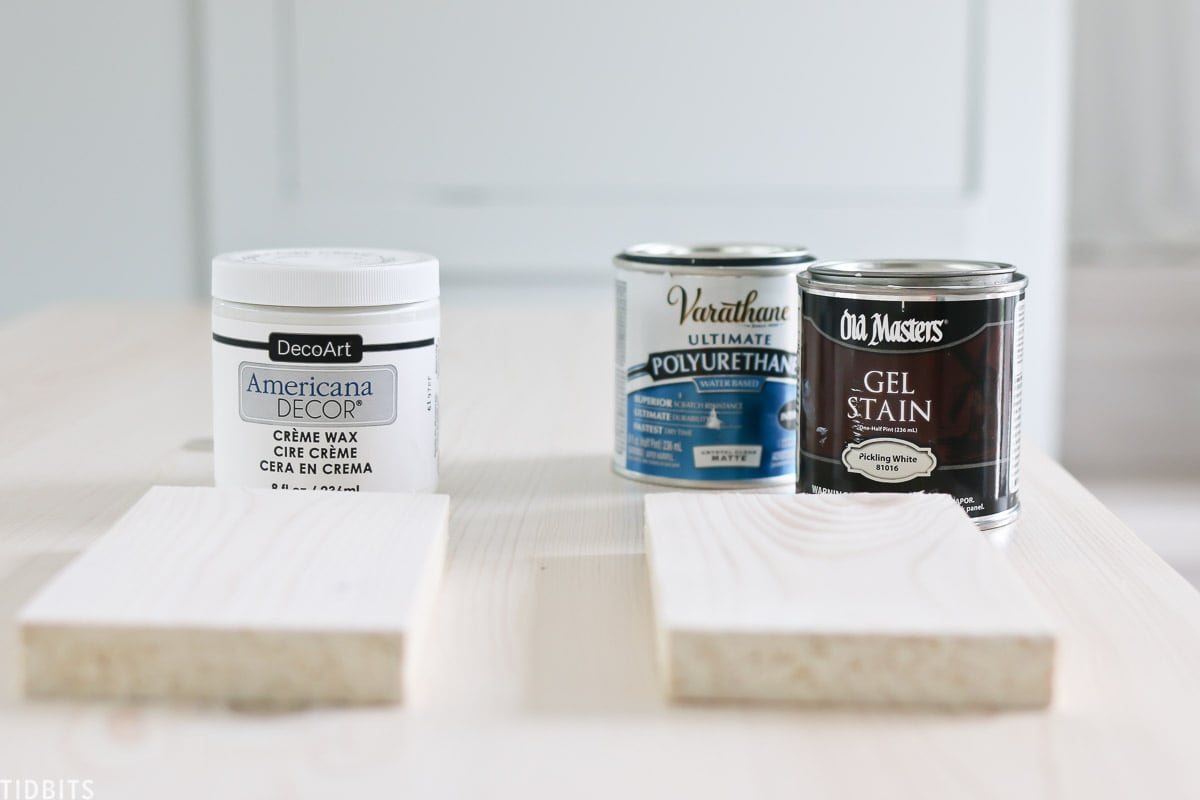
My whitewashing products of choice are:
1 – PICKLING GEL STAIN
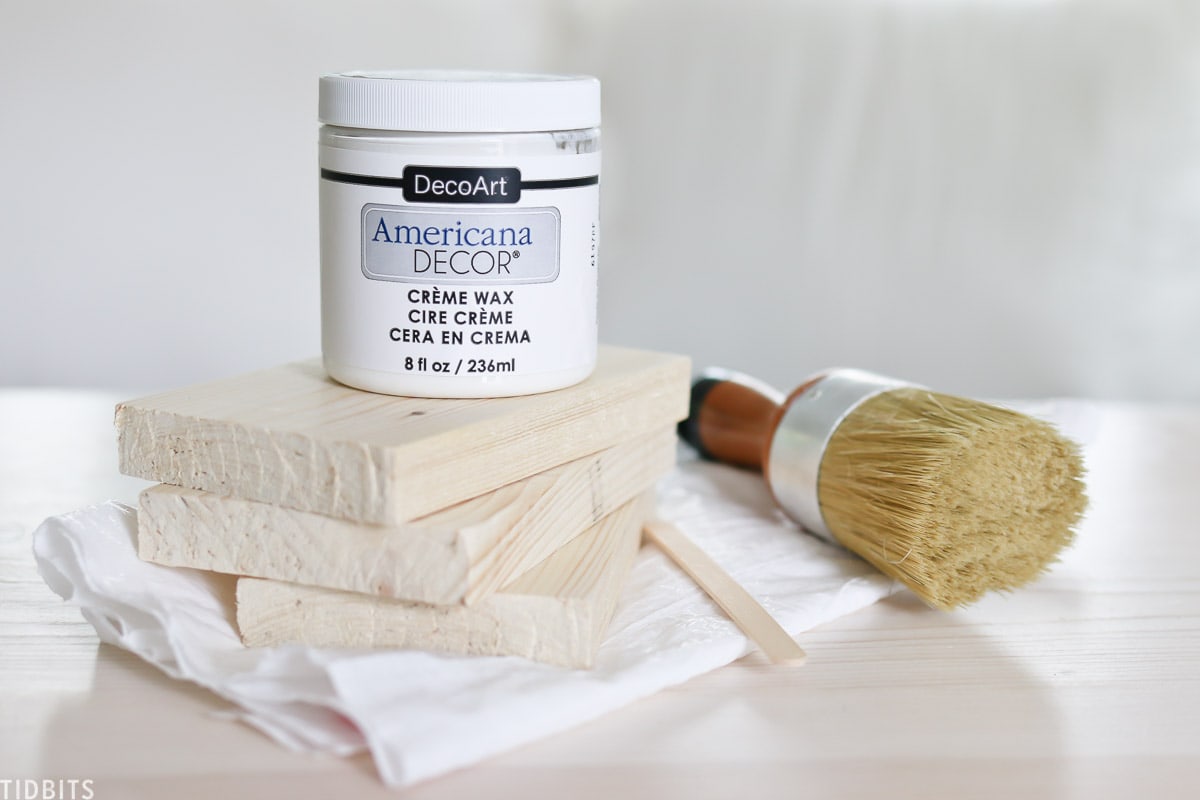
2 – WHITE WAX
White Wax
There are many brands that make a white wax, but I have found DecoArt creme wax or white wax to be easily accessible at hobby stores or online and it works great.
A white wax true purpose is to be applied over a painted surface to seal and give it a milky, vintage look. However, I find it perfect for a whitewashed wood look.
Benefits of white wax:
- Low odor and VOC’s, especially when compared to commercial stain products.
- Thick, easy to apply and doesn’t drip and leave a huge mess. In fact, I rarely cover my surfaces when I use this product, because it is so clean and controlled. But that is the lazy DIY’er in me.
- Best thing – it stains and seals all in one step. Wax is a sealer, so there is no need for an additional step and product to seal the wood. Wax on, wax off.
When is a great time to use a white wax?
Basically, any project that won’t be subject to a lot of harsh elements, such as sun, excess moisture and frequent friction. Things like indoor shelves, beams, side tables, or any other clever woodworking project.
When not to use a white wax?
A white wax is NOT great for a project that will see frequent, daily use and abuse and lots of moisture or sunlight – like say a kitchen table or countertop, outdoor project or chair.
In these instances, I go for my other favorite product, a pickling gel stain.
Benefits of Gel Stains
There are many brands and options here and I’ve tried just about all of them, and they all basically work the same. There are pickling stains that are water or oil based and are more of a liquid, runny consistency. I don’t prefer these because they are super messy!
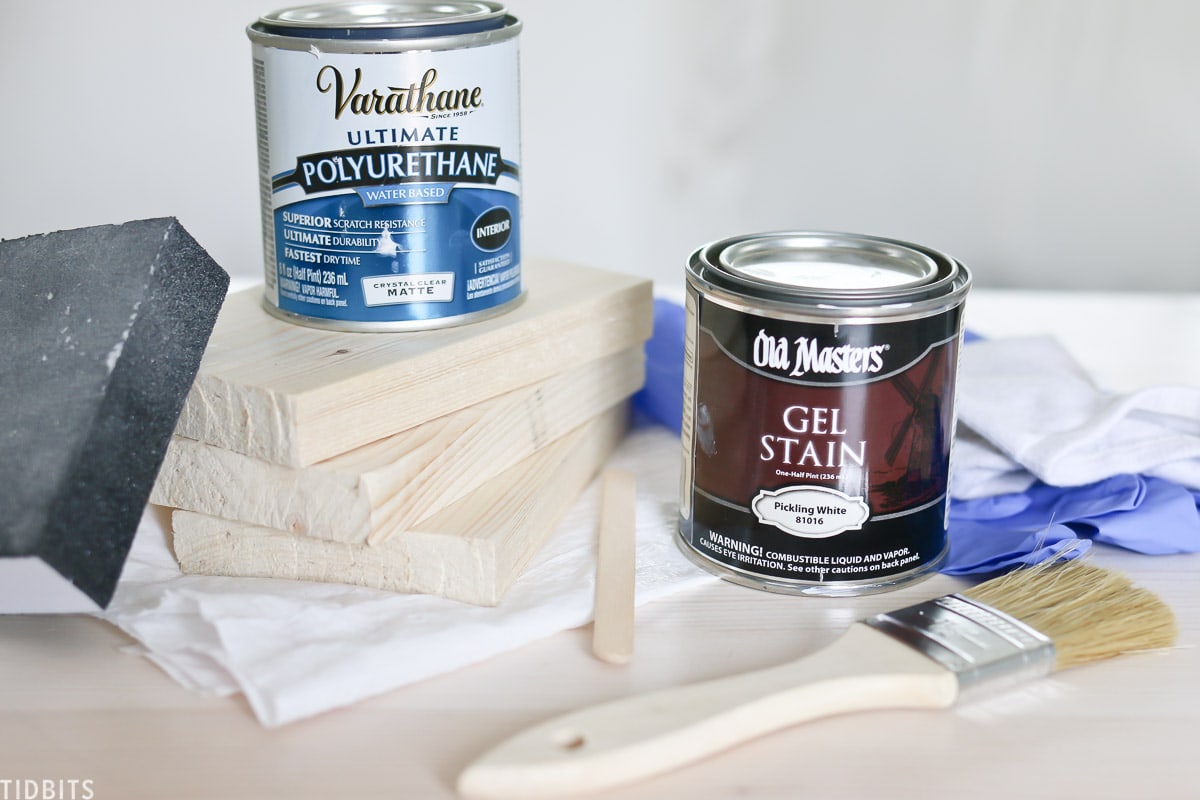
The gel stain, much like the white wax is thick and doesn’t drip all over the place. I can really rub and work it into the wood to get a controlled coverage.
I mostly just grab whatever is available at the store I go to, but this Old Masters Gel Stain works great.
When to use a gel stain
You want to opt for a stain when you need a more durable sealant, one that will hold up to temperature, friction and moisture. We will talk about those sealer options in a minute.
You see, if you whitewash with a white wax, the wax will actually seal the wood and prevent any other sealant to adhere and do its job.
So a gel stain will require an additional product to seal, but one more equipped to handle harsher elements. Also note, stains in nature have a stronger odor and harsher chemicals, which is why I opt for the white wax if at all possible.
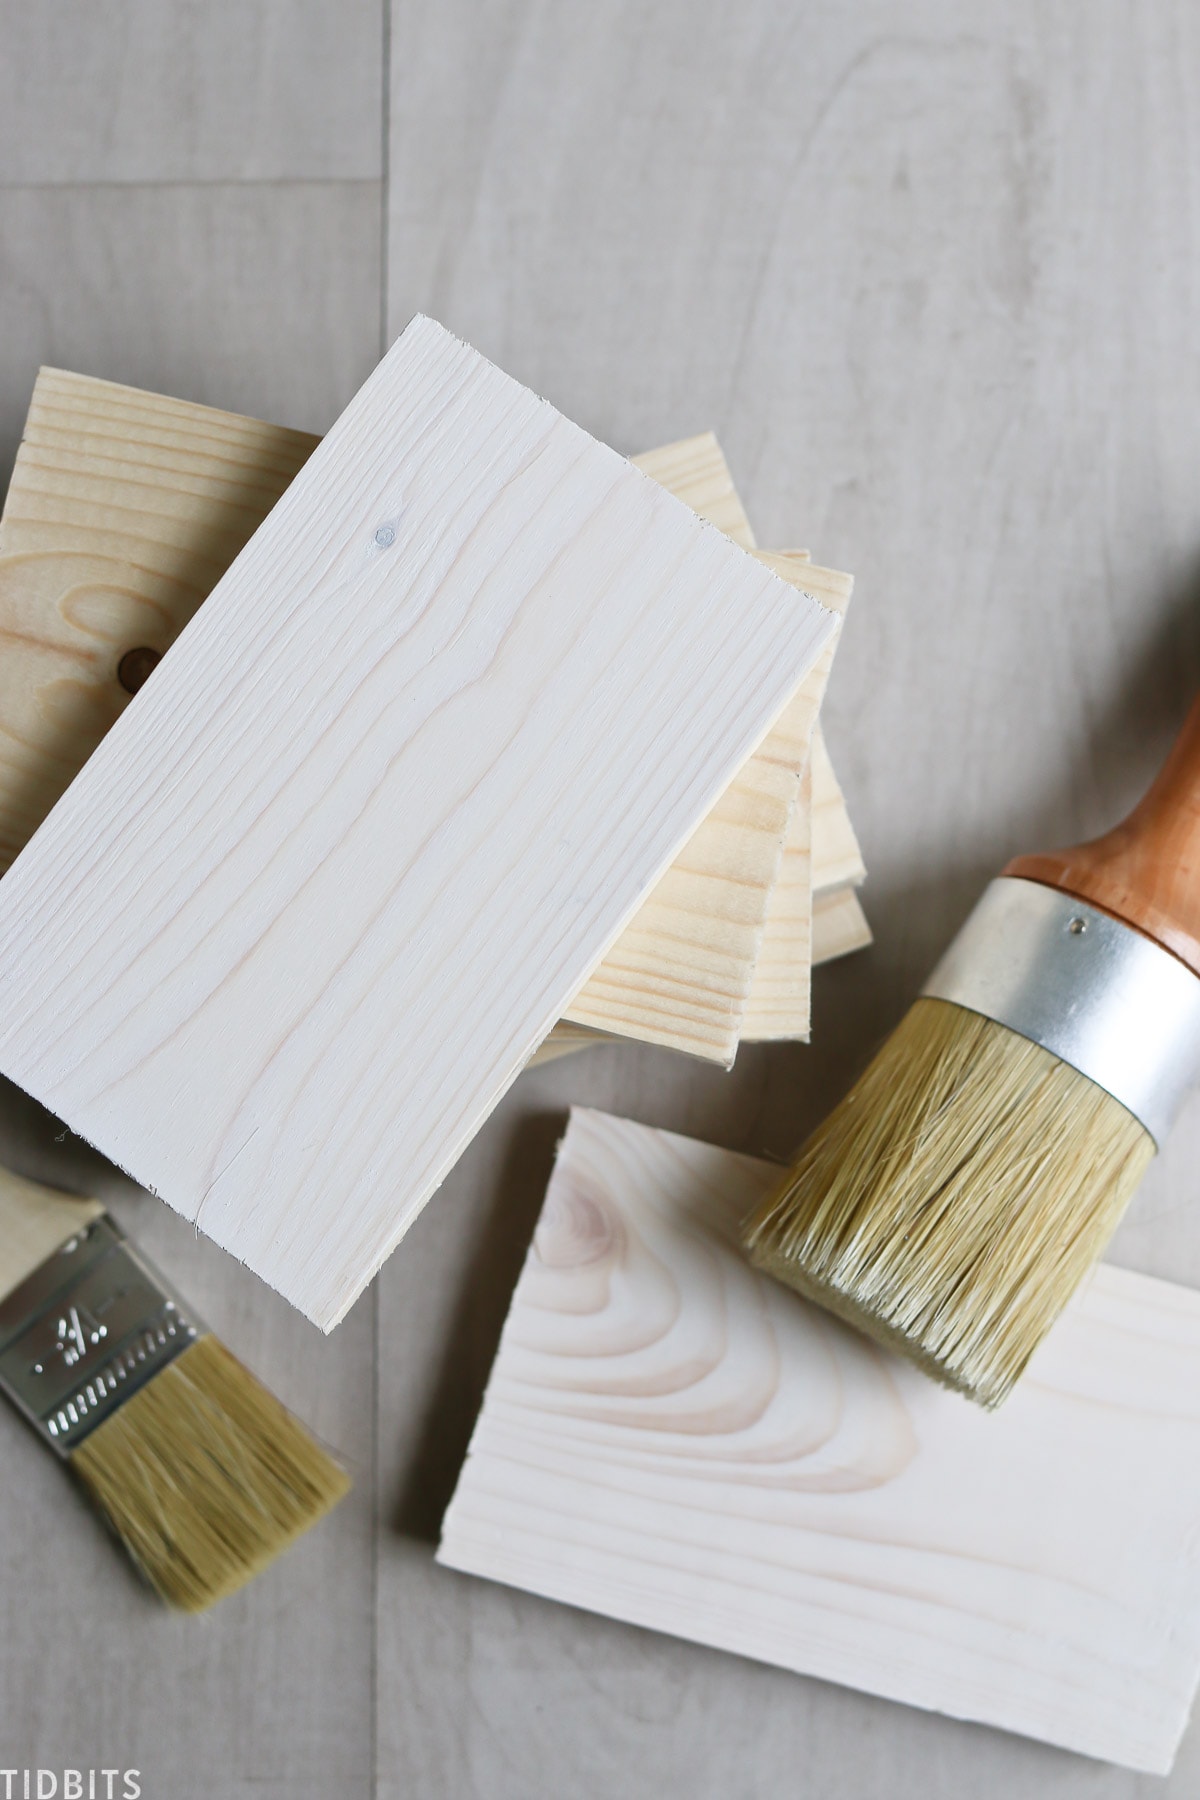
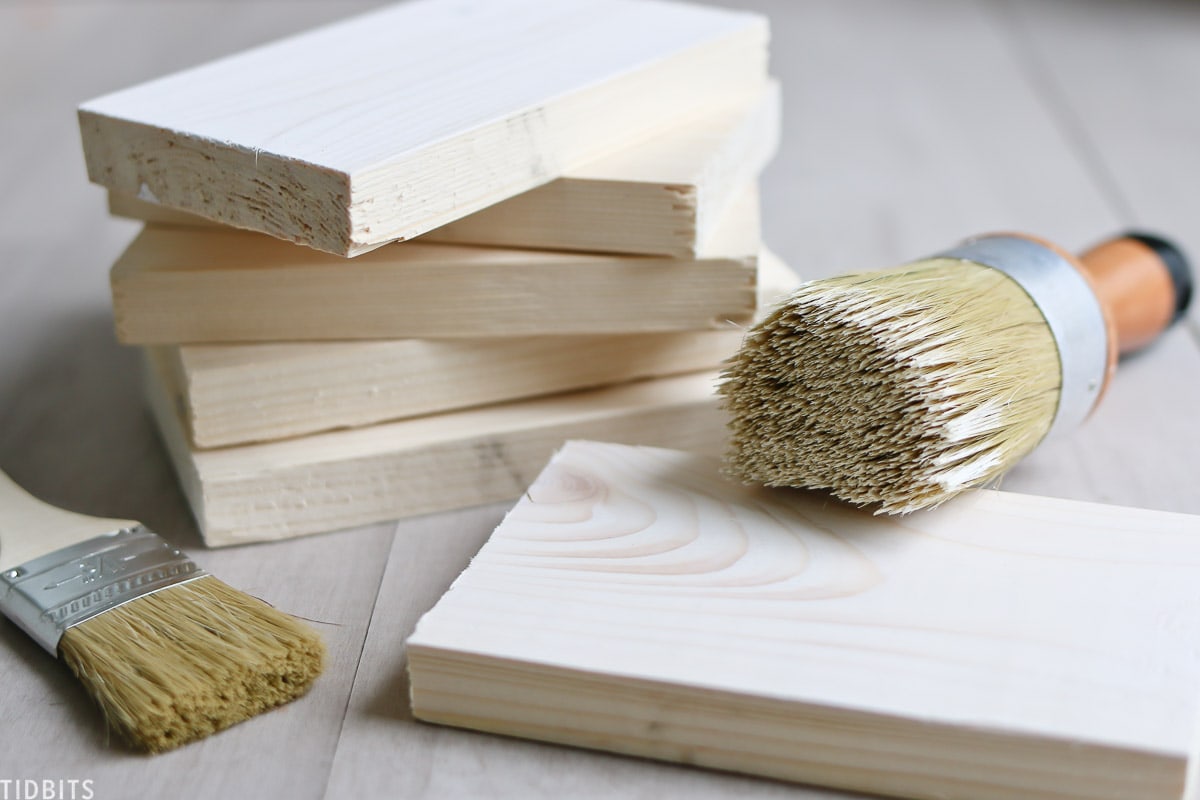
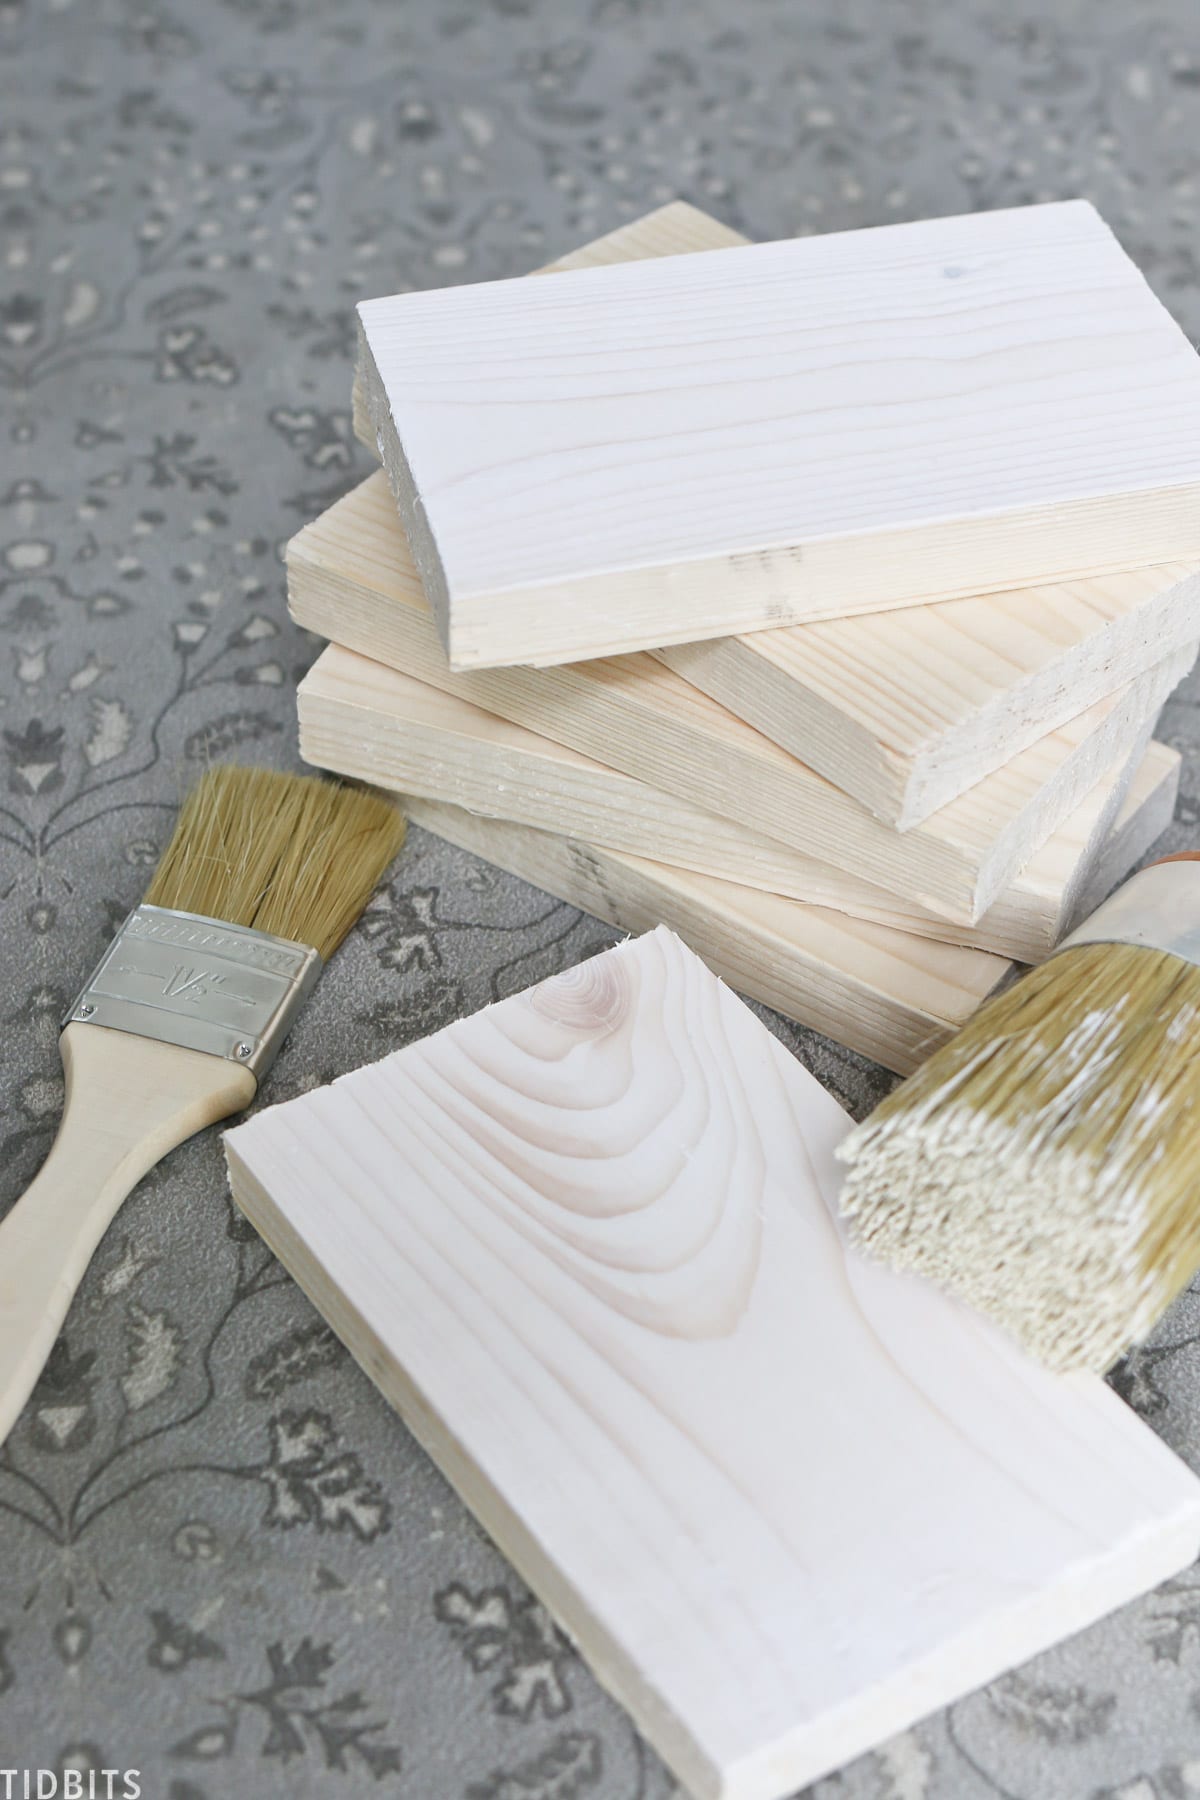
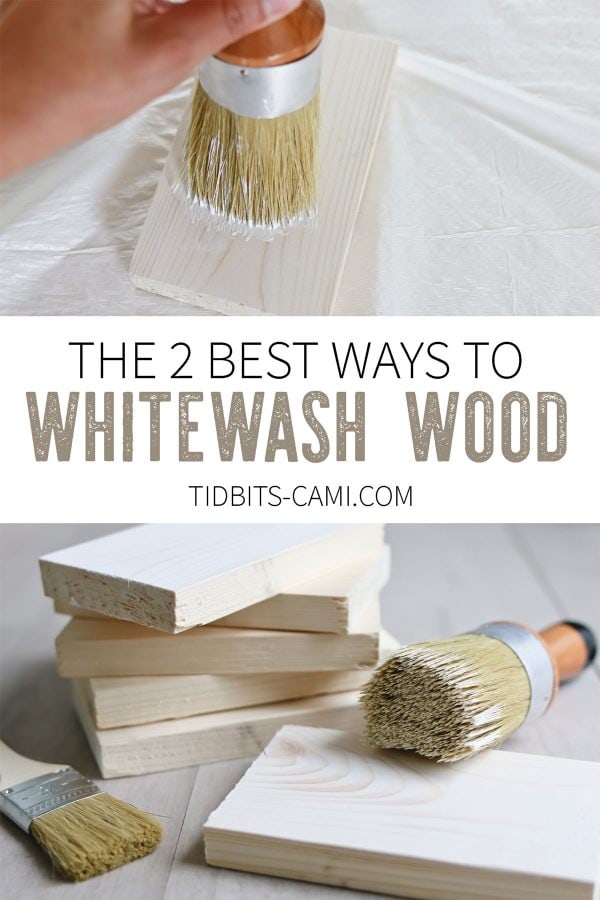
Now let me show you quickly how to apply each whitewash product. I have 3 pieces of pine here. One we will use the white wax, next the gel stain, and then we will leave one untouched to see the difference.
Supplies you will need to apply a gel stain:
- Gloves
- surface protector
- lint free rags (like old cut up t-shirts)
- sandpaper
- stir stick
HOW TO APPLY A PICKLING GEL STAIN
Always work in a well ventilated area for gel stains. And always read and follow the manufacturer’s directions regarding timing and safety.
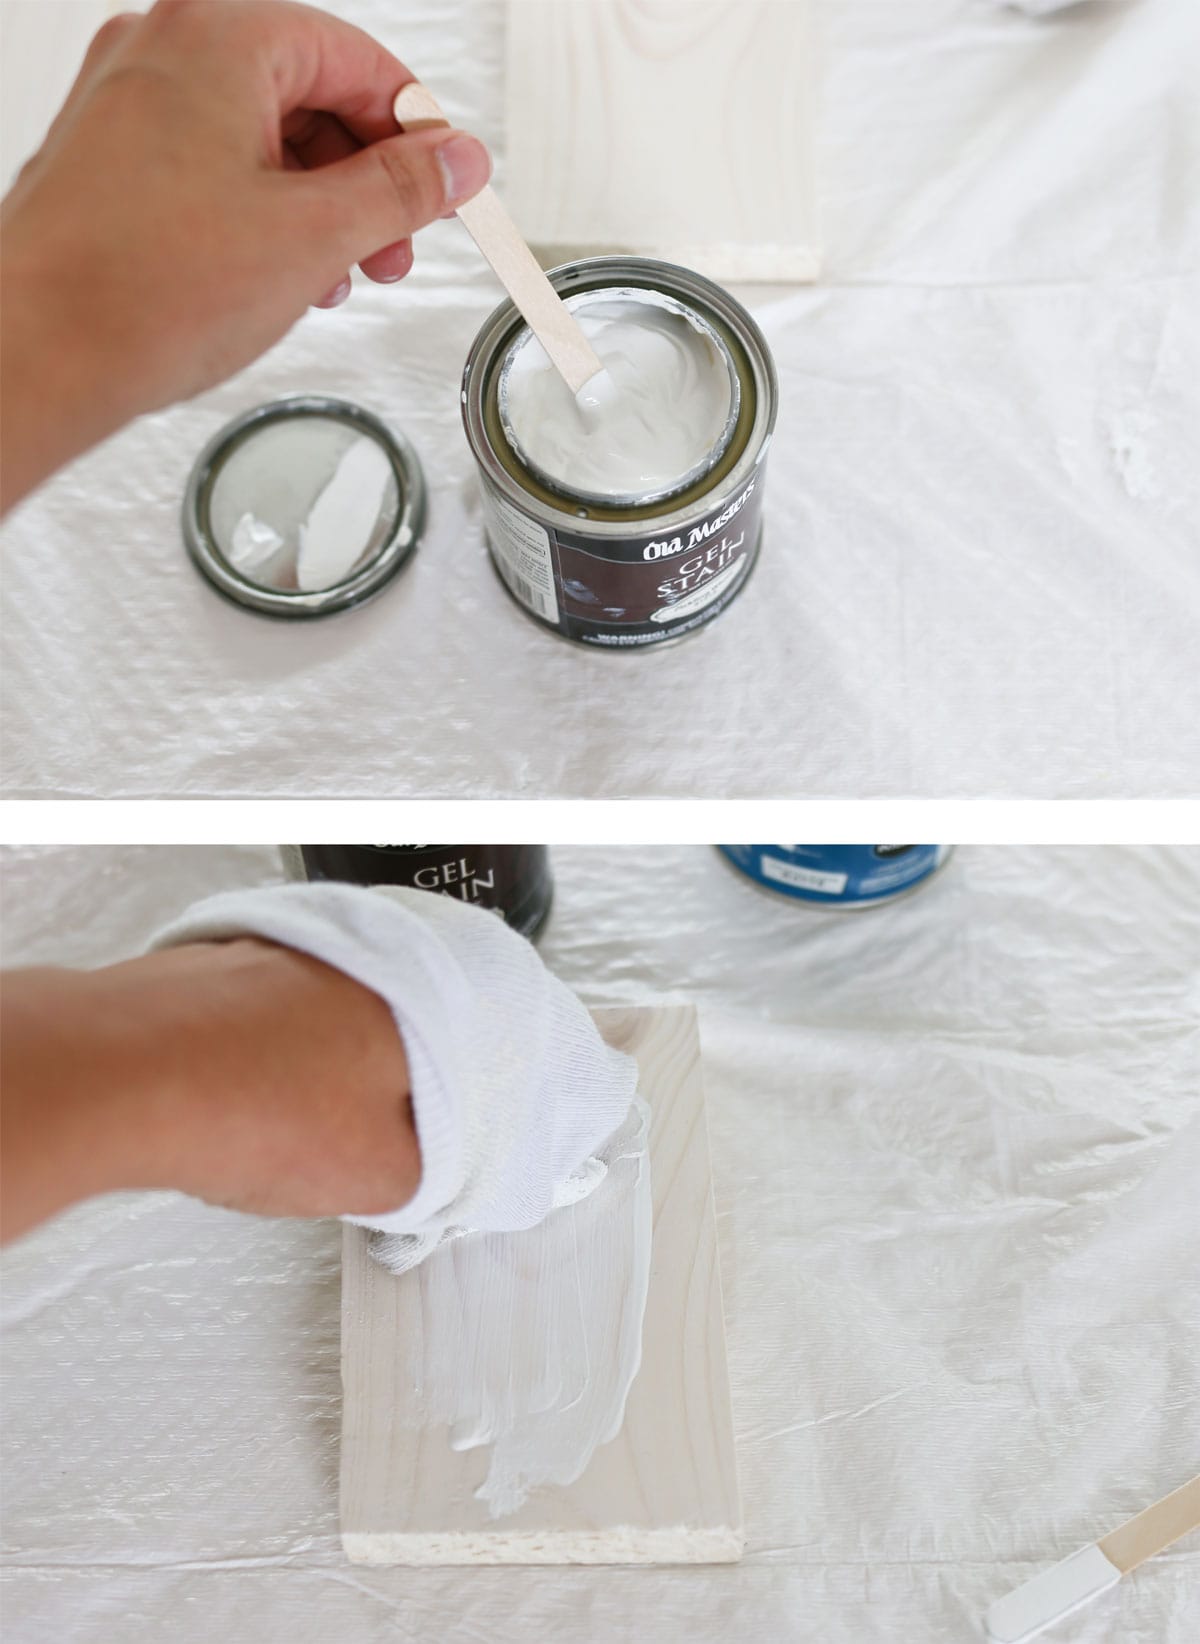
Step 1: Prep your wood by sanding it smooth, and prep your area by covering it. I like to use garbage bags that I can just toss after.
Step 2: Open your stain and stir it gently. Never shake, you don’t want air bubbles.
Step 3: Dip your rag in the stain, and rub into the wood, moving in the same direction as the wood grain.
Step 4: You can go back and wipe off the excess, or rub it in further.
Step 5: When finished and dry, you will give it a light sanding to smooth out the raised grain that happens when wood gets treated or wet, and then either apply the sealant or another layer of stain, depending on how opaque you want it.
Step 6: Once dry according to manufacturer directions, you can seal the wood with your sealant of choice.
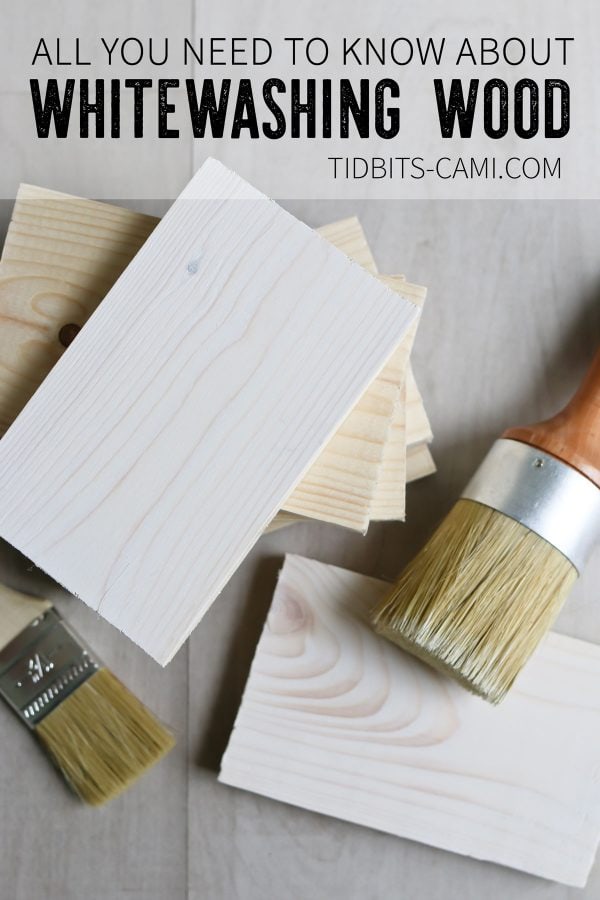
Supplies for applying a white wax:
- gloves
- surface protector
- thick round wax brush
- sandpaper
- stir stick
HOW TO APPLY A WHITE WAX
The white wax is much the same as the gel, but I prefer a different tool for application.
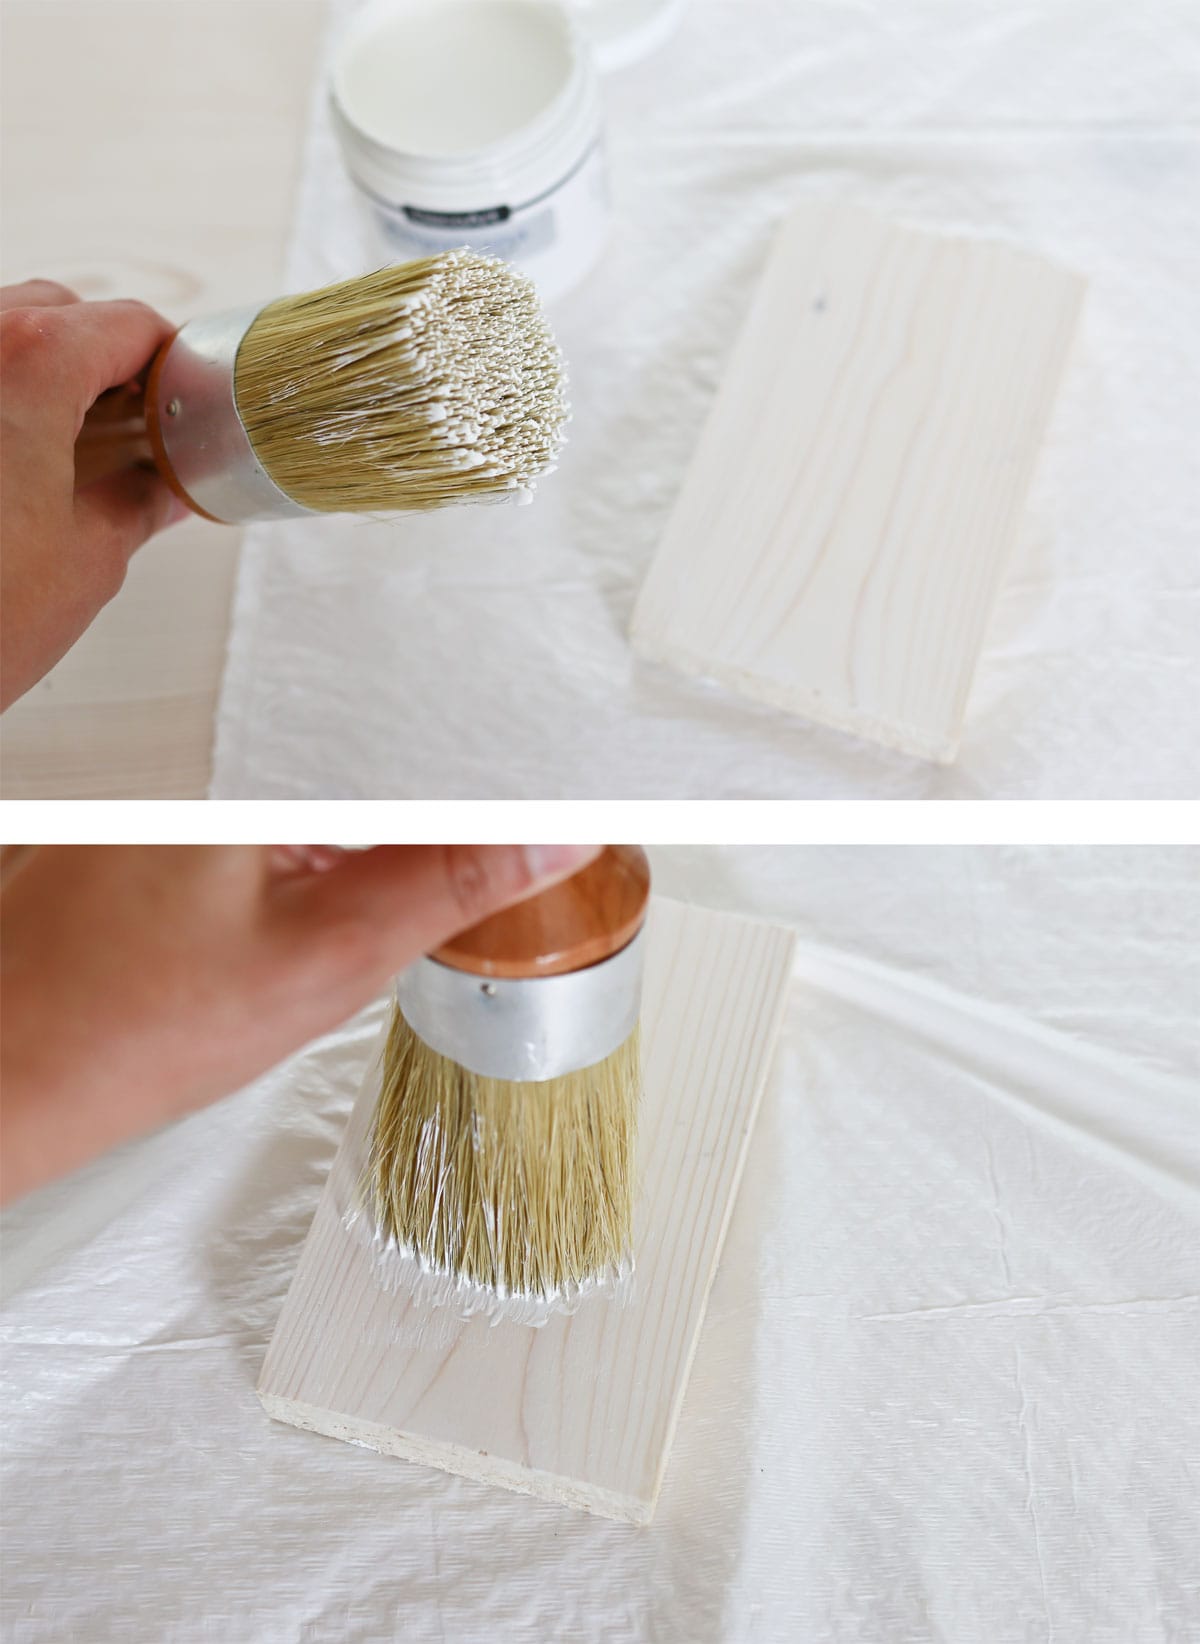
Step 1: Start with a sanded piece of wood, wiped clean, and a prepared surface.
Step 2: Dab your brush lightly into the wax, a little goes a long way, and work the wax in vigorously across the wood surface, moving in the same direction as the wood.
Step 3: You can continue to layer on more white wax according to your desired coverage.
The wax dries quickly, but still needs time to cure.
MY FAVORITE SEALER FOR WHITEWASHED PINE WOOD
So you know if you used the wax, you are done! But if you used the stain, you need to seal it.
I LOVE to use a water based polyurethane, with a matte finish. You’ll want to make sure whatever brand you use, it says “non yellowing”. After all, you just applied a white stain to tone down the yellow.
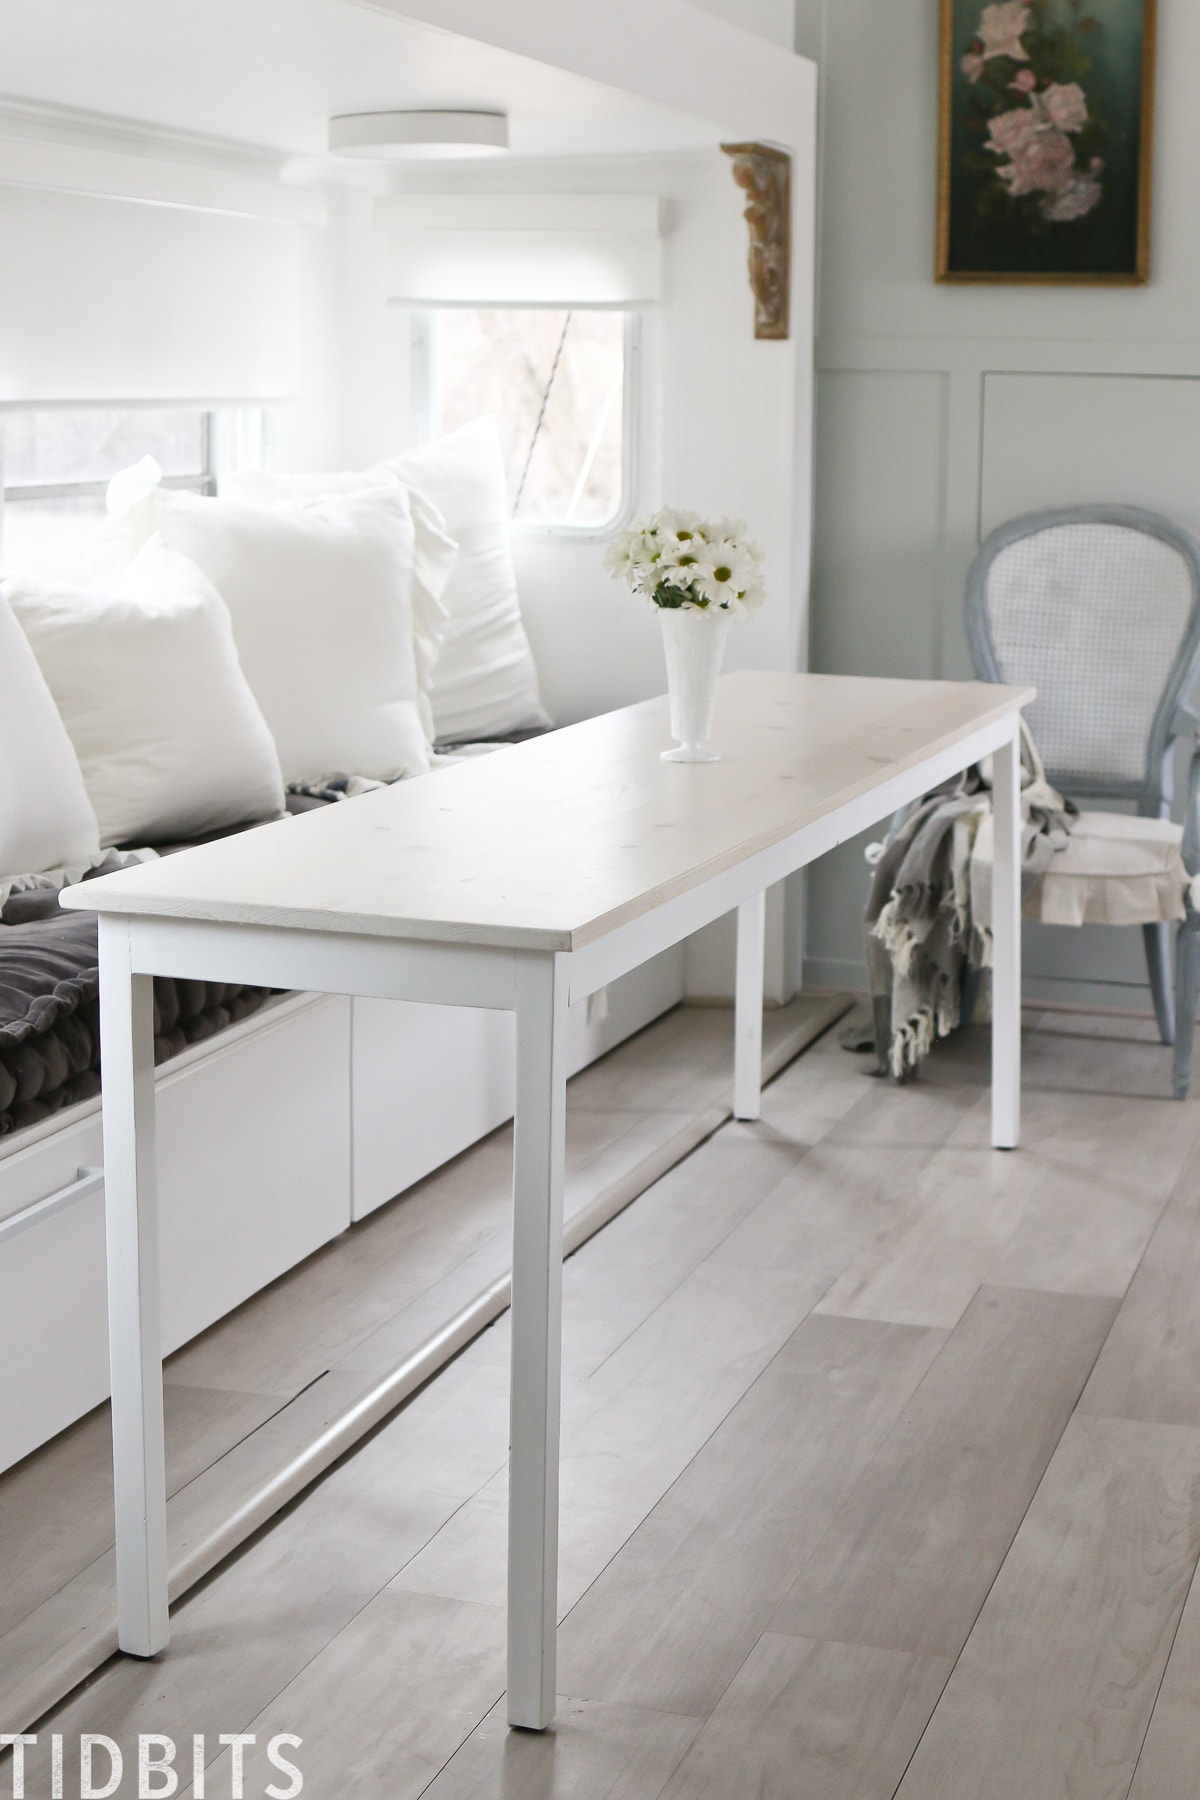
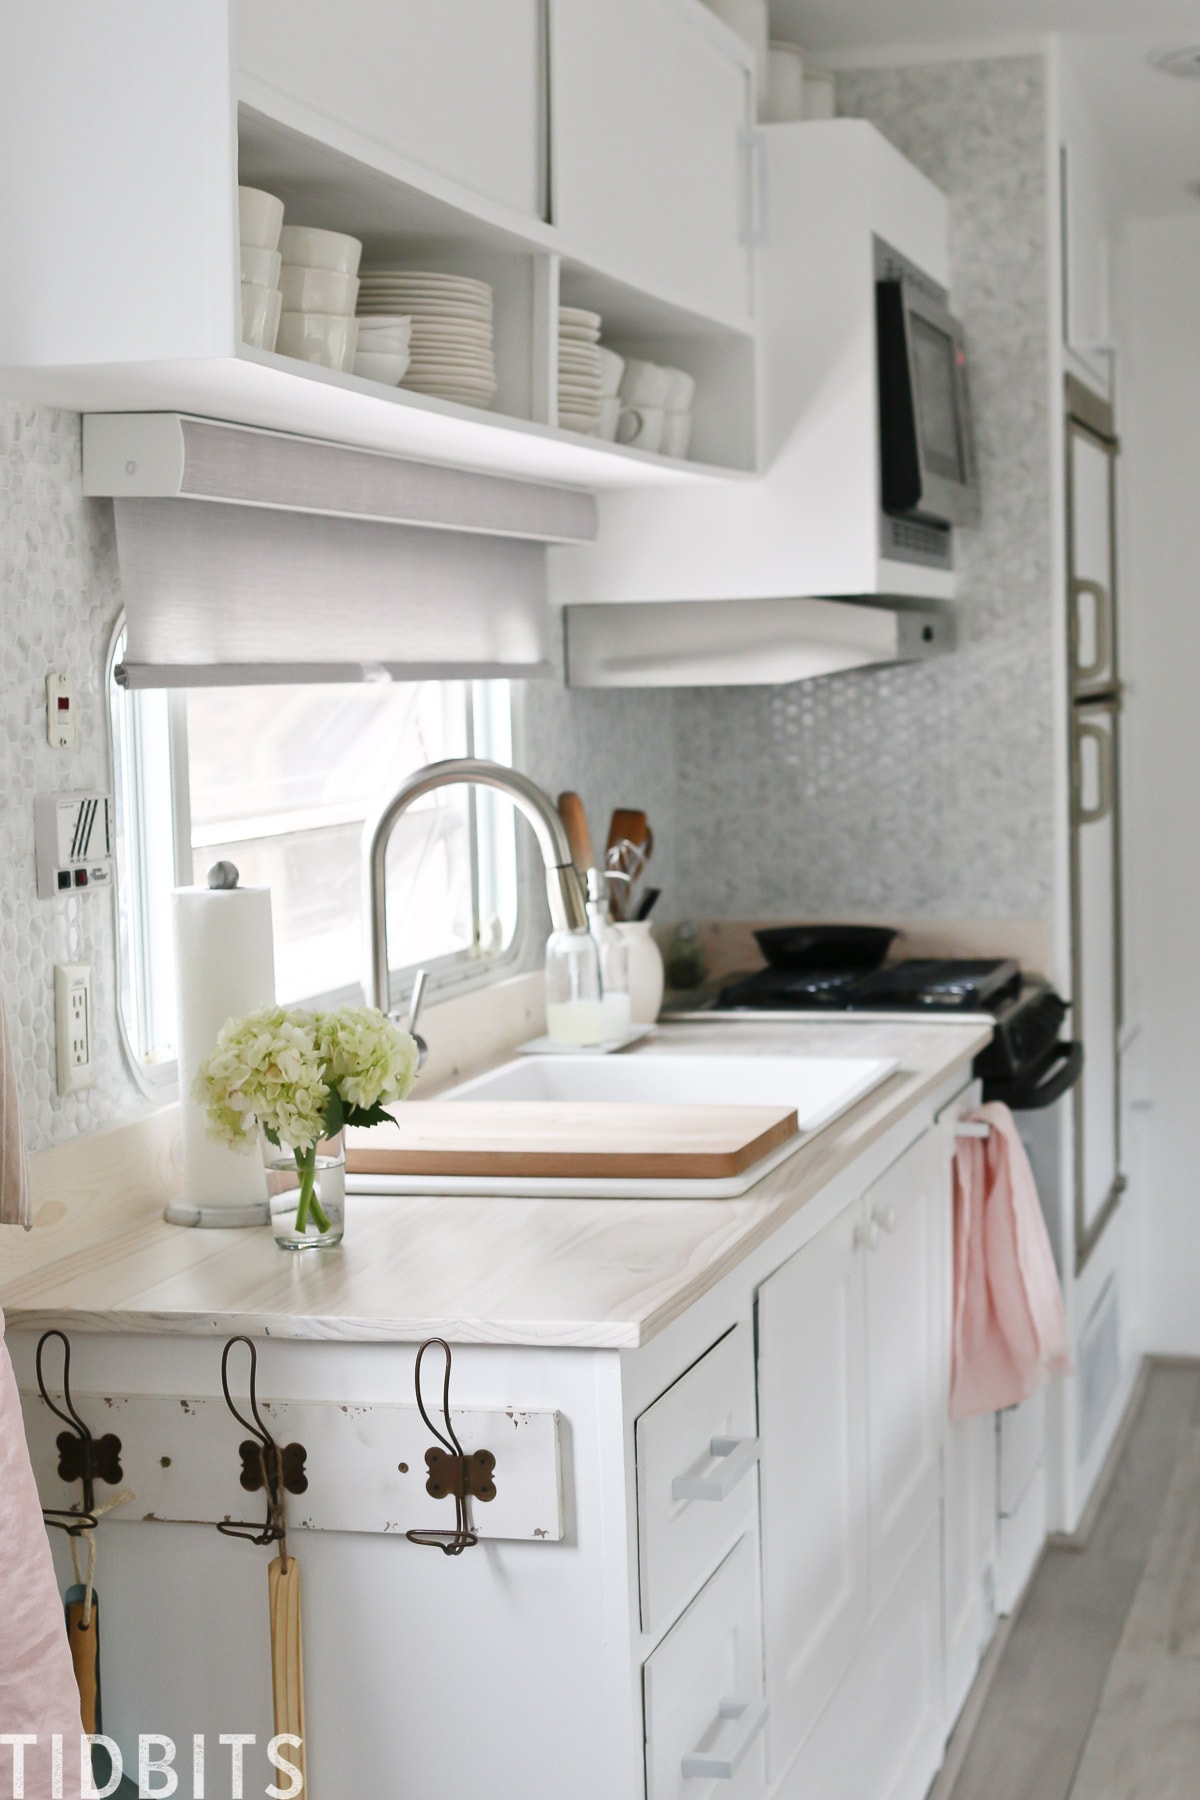
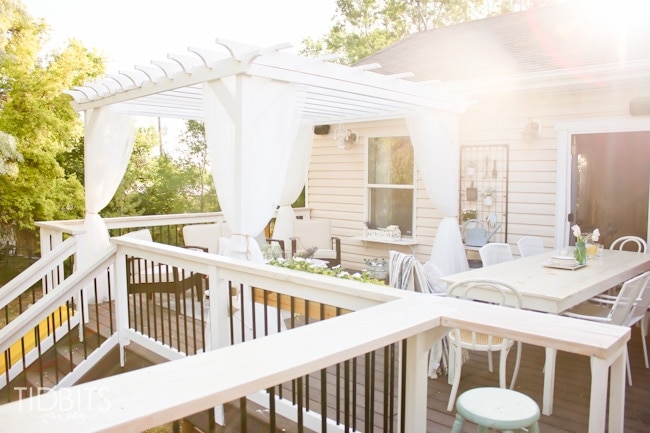
I’ve used this sealer successfully for outdoor tables, decking, our RV kitchen table and countertops and it works great. You can see our many outdoor deck projects below and in this post.

It takes a few layers, and you need to let is dry and sand between each coat, but it comes out to such a buttery smooth surface that I just adore.
I’d like to answer one more quick question –
CAN YOU WHITEWASH OVER PRESTAINED WOOD?
No. I don’t recommend it. Pre-stained and treated wood has been sealed and those wood pours are no longer absorbing. It either won’t adhere or will just look terrible. You will either need to strip the wood first, or just aim for raw wood in the first place.
Thanks you so much for reading this post! I hope it was helpful! If you enjoyed it, I would encourage you to PIN THIS POST, subscribe to my YouTube Channel, and especially sign up for my email newsletter to be the first to know about my new content.
If you are ready to see more of my whitewashed projects in action, visit the posts listed below.
Did I already mention I am obsessed?
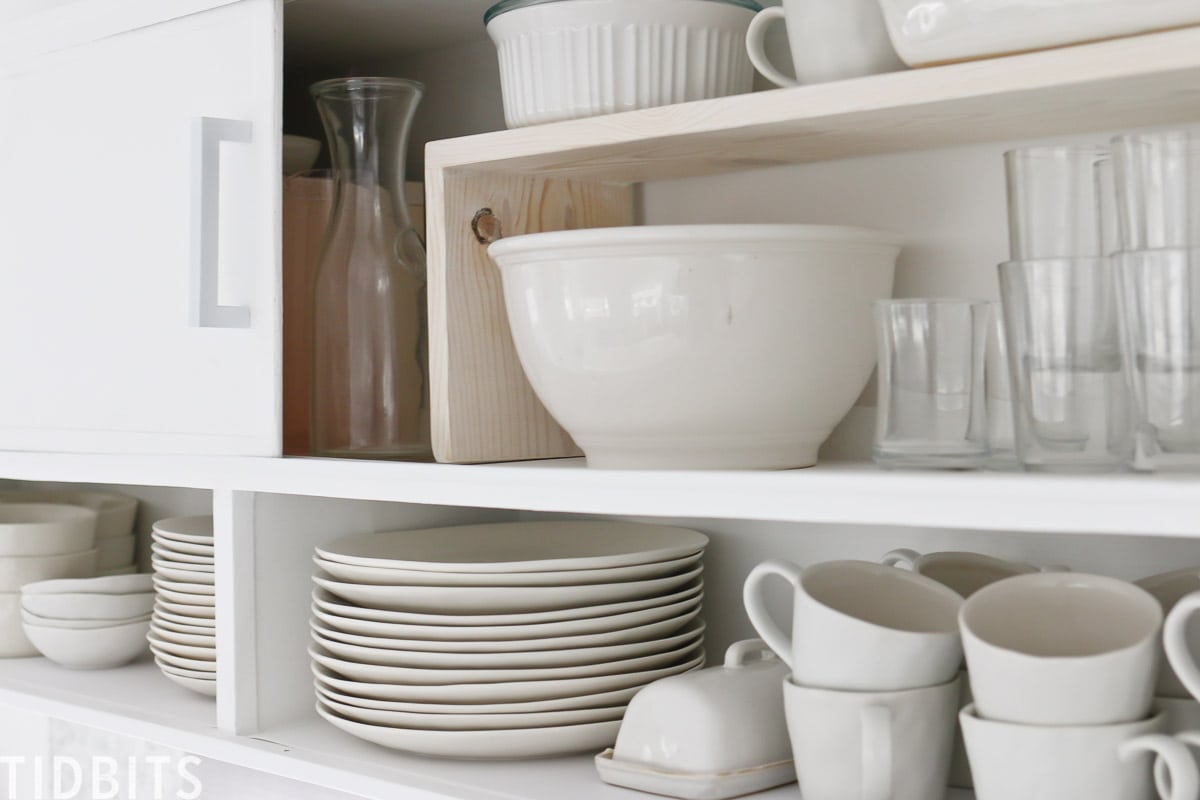
- DIY Shelf Risers
- RV Kitchen Countertops
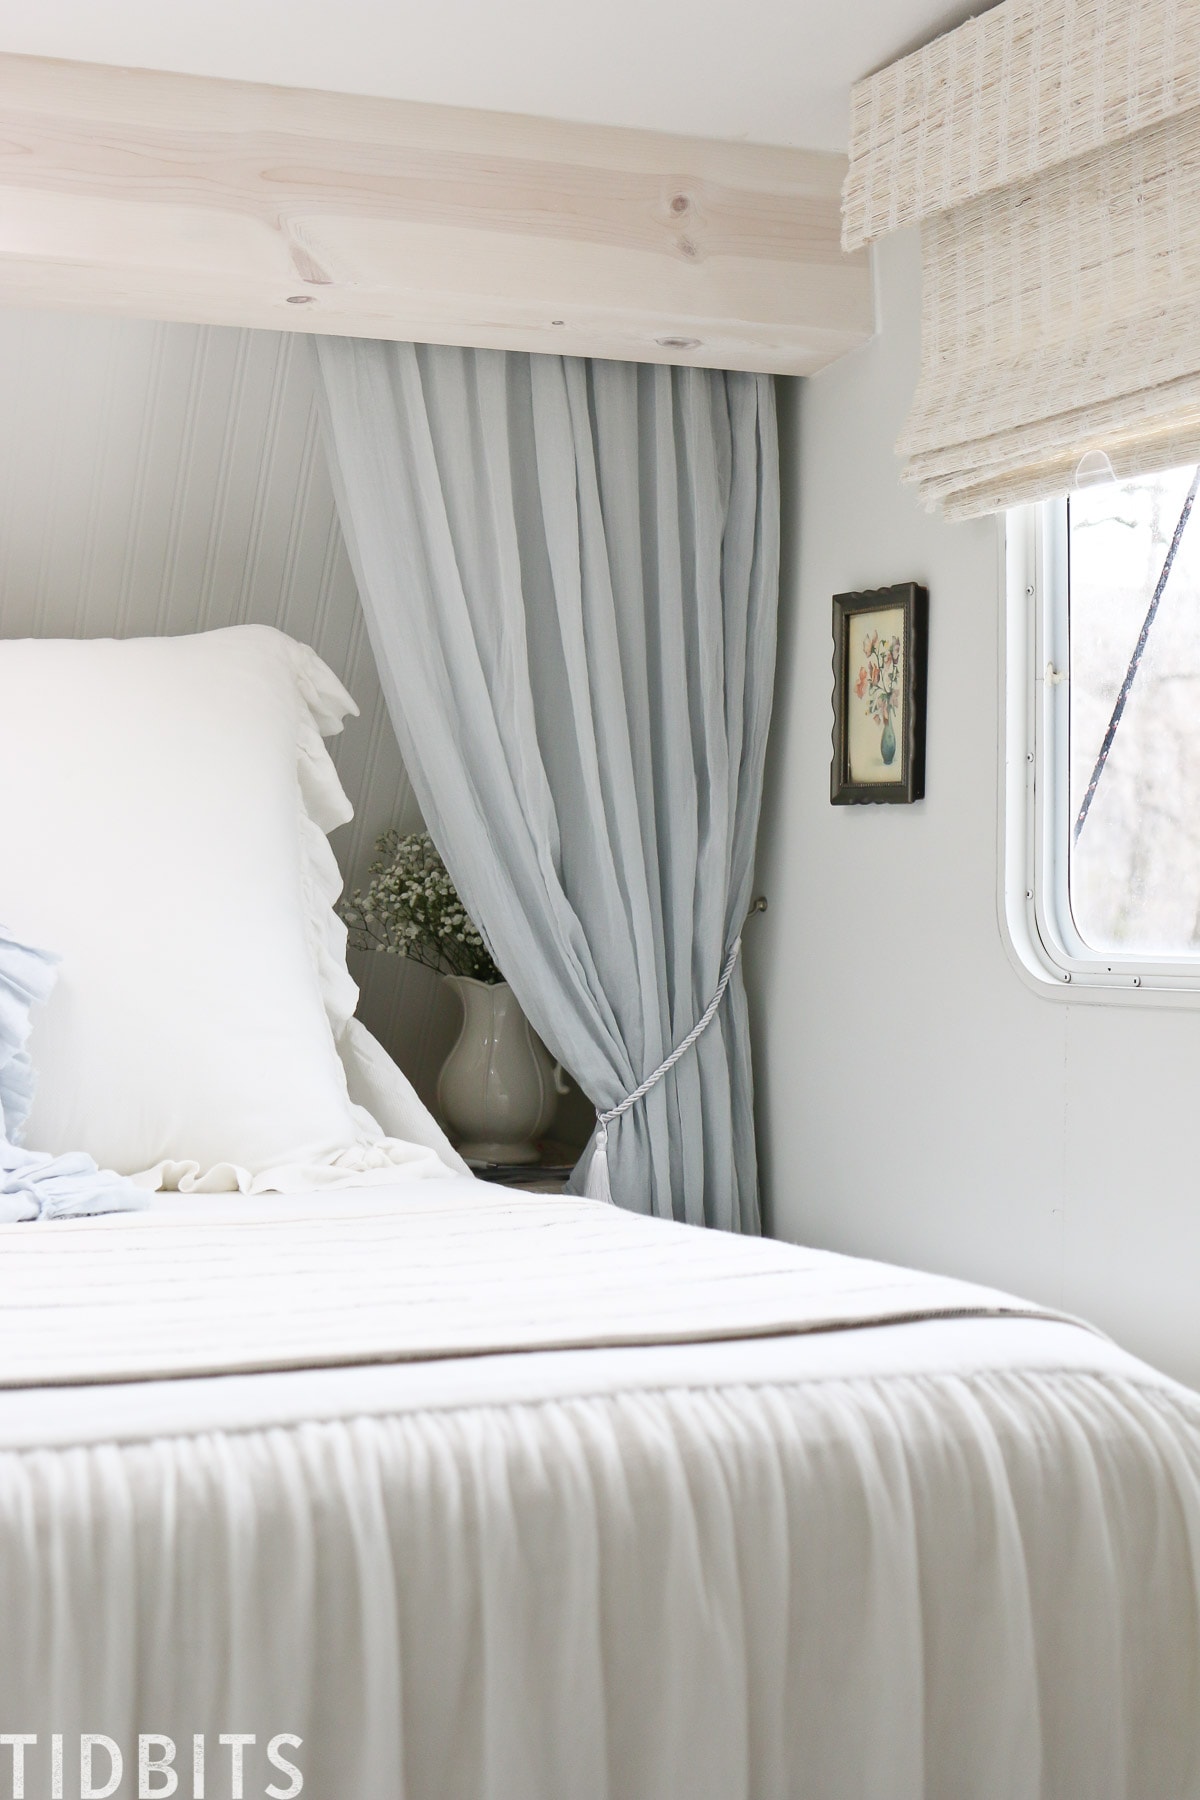
- Faux Wood Beam in RV Master Bedroom
- Outdoor Decking
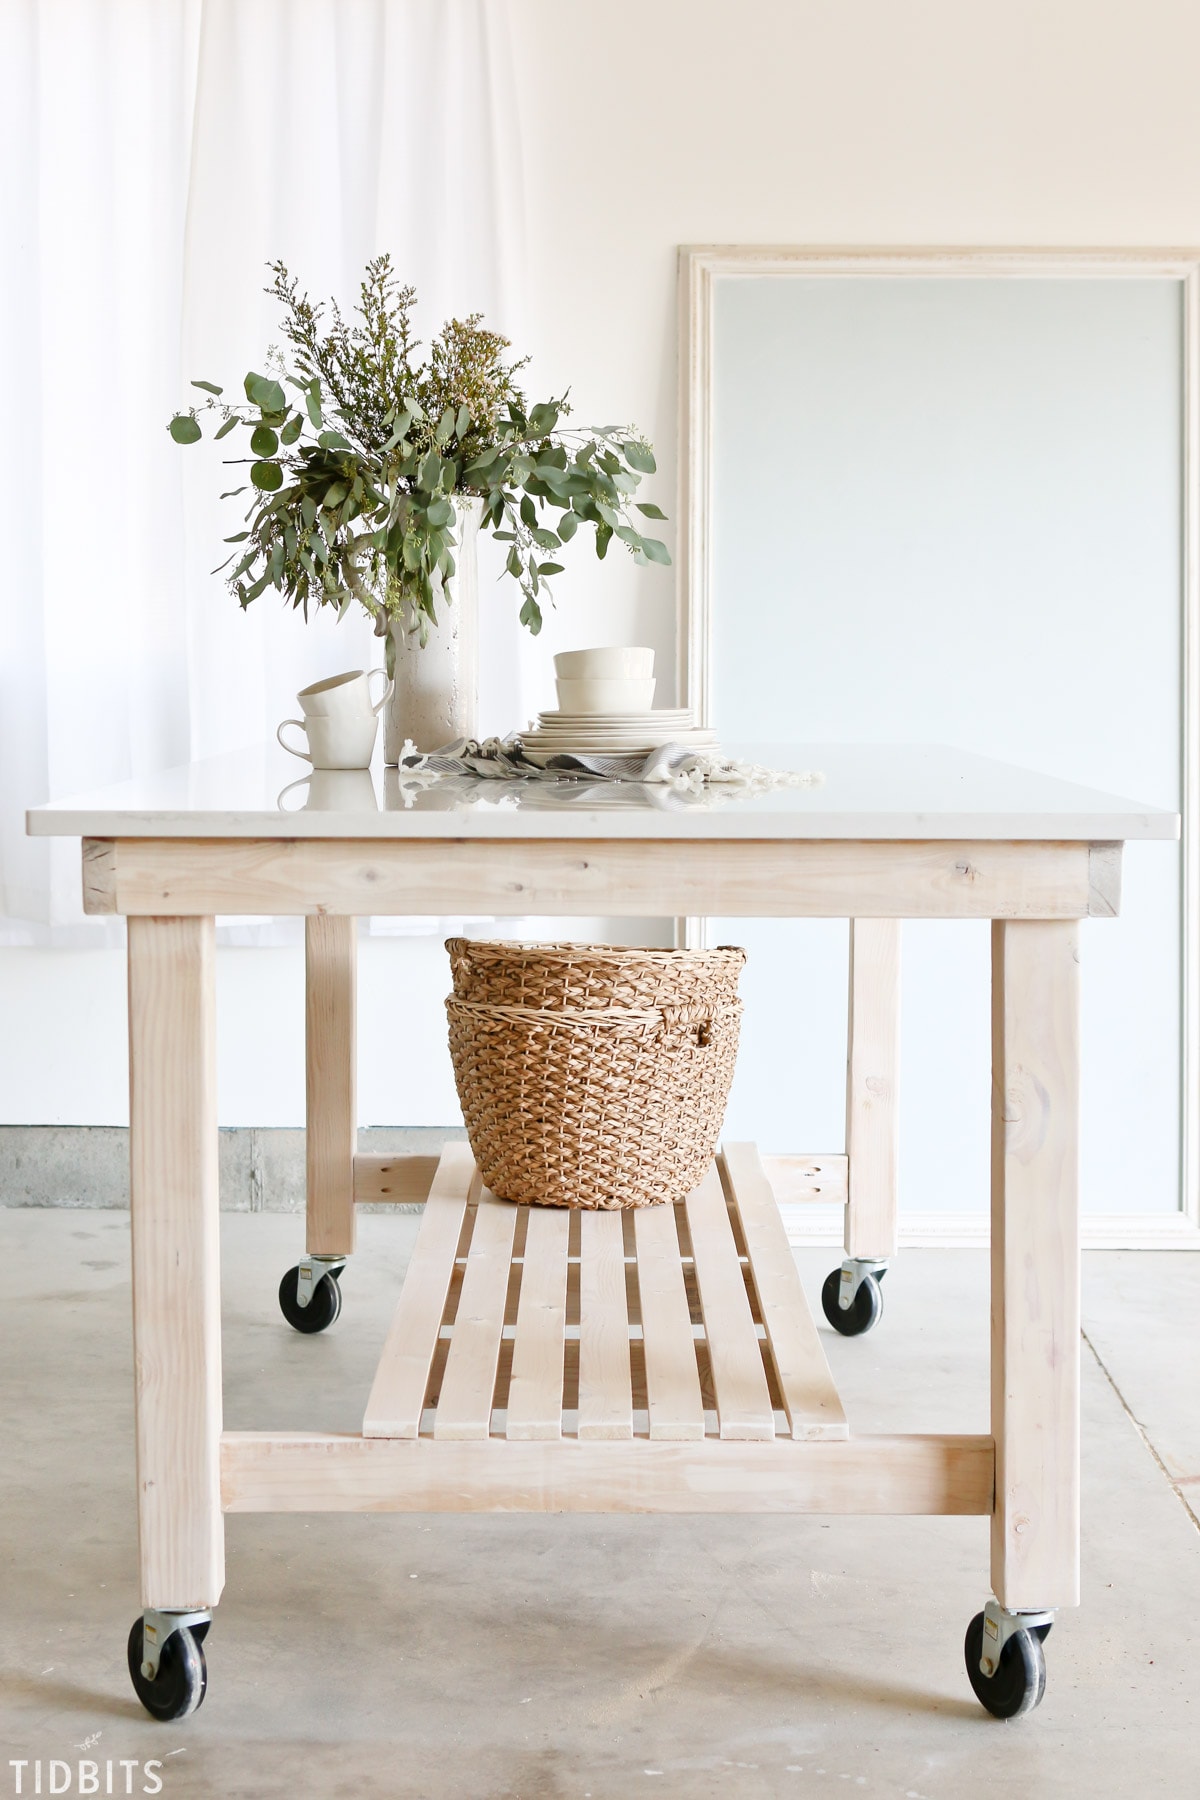
- Rolling Worktable
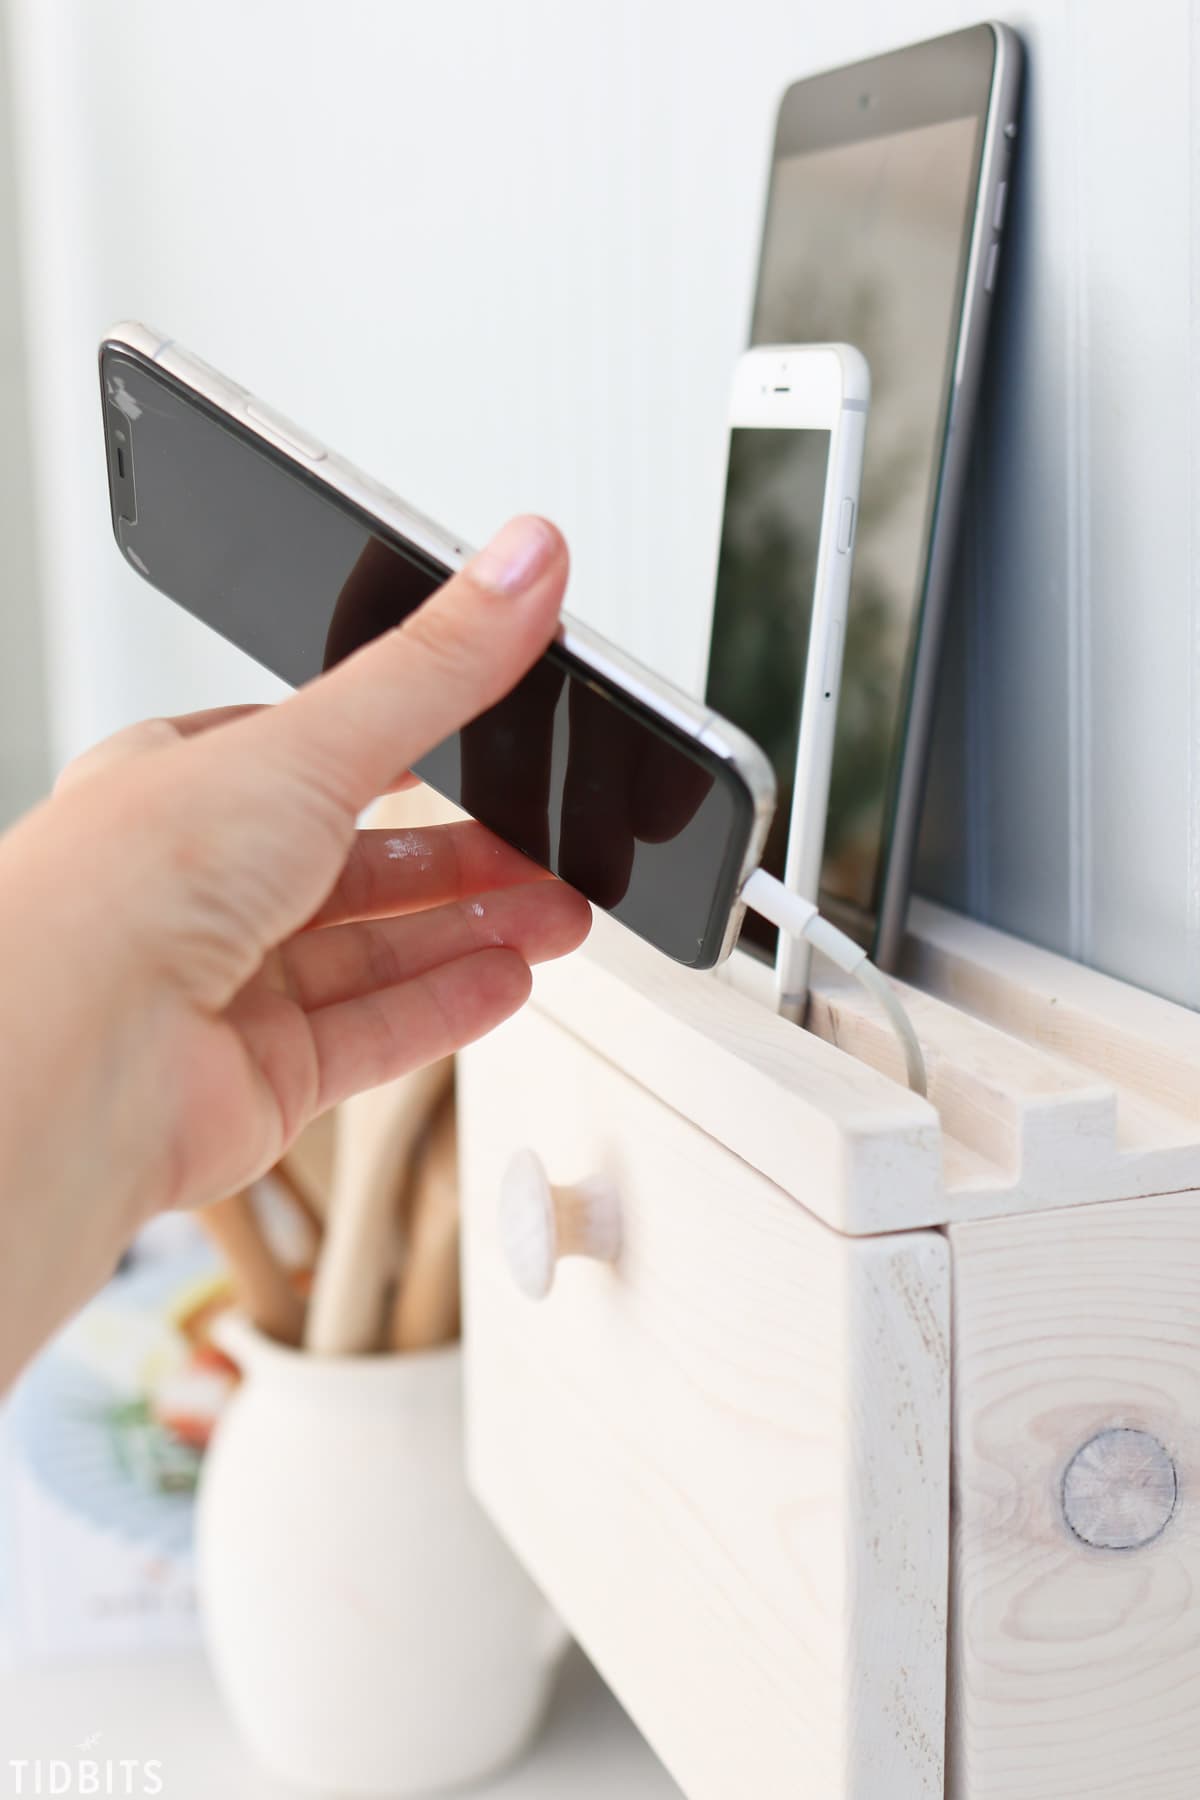
- Device Charging Station
- DIY Shiplap Pine Wood Floors
You might also be interested in seeing how my friends have been whitewashing their projects in their homes. My friend Rachel from Maison De Pax used a watered down white paint on some planked walls in her home. My friend Liz from Love Grows Wild make a darling 2 toned table with a whitewashed wood finish.
Thank you so much for visiting and be sure to follow me along for more inspiration for do-it-yourself living.


White is the color of purity and innocence. I love to see the style you use to turn yellow pine into a white piece and spread it all over your home. You also described the process very nicely. Overall, its a constructive and inspiring post.
Thank you so much for sharing, I found it very useful!
Very thorough and easy-to-understand guide that will definitely help us to freshen up our summer home.
Keep up the good work!
I have dark oak paneling we installed on mid 70’s at chair rail height with chair rail. I saw in your article that white washing would not work well on oak or pre stained wood. Is there a treatment that could get the same effect?
Cami, I am having pine installed over the “cottage cheese acoustic ceiling”. I want the whitewash look but I might need to occasionally wipe it if fireplace smoke discolored it. Your suggestions are appreciated.
Great article. I love having my charging station on the table but that one on the wall looks awesome to declutter. Cheers
Cami! I also LOVE this whitewashed look! I bought the exact Americana Décor Cream Wax you recommended (actually used your link), BUT I’ve applied 3 coats using a wax brush as you suggested already to my sanded pine boards—doing like you did with the surround around our RV slideout., but I’m getting no white effect. It’s still virtually clear. Am I doing something wrong? HELP!
Same here, no white effect at all with the exact same product. I decided to get another white wax brand.
Thanks Cami, i pinned it so i could have it for my next project, i love all the diy you do and can’t wait to see your house. Have a great summer and hope things are going smoothly for you guys.
Thank you so much for pinning it Marlene! It is so helpful and I am so glad you enjoyed this post. Things are frequently bumpy this summer, but I’m learning to enjoy the ride 😉 . Take care! Hope your summer is going good!