
This post may contain affiliate links, which means I get a small percentage of the sale at no extra cost to you. I only recommend items I love and have had a positive experience with. Thank you!
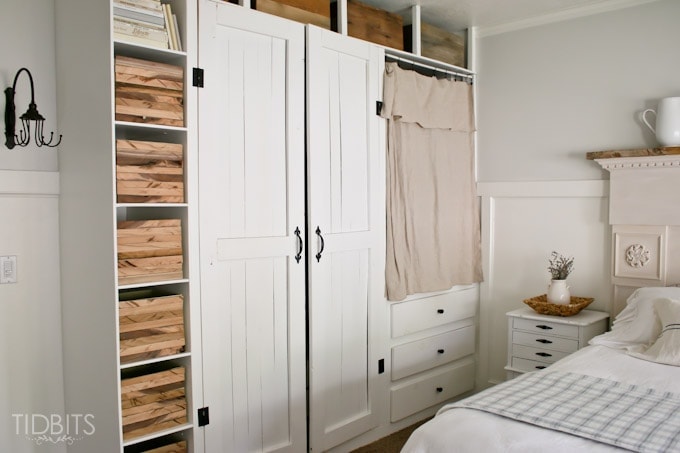
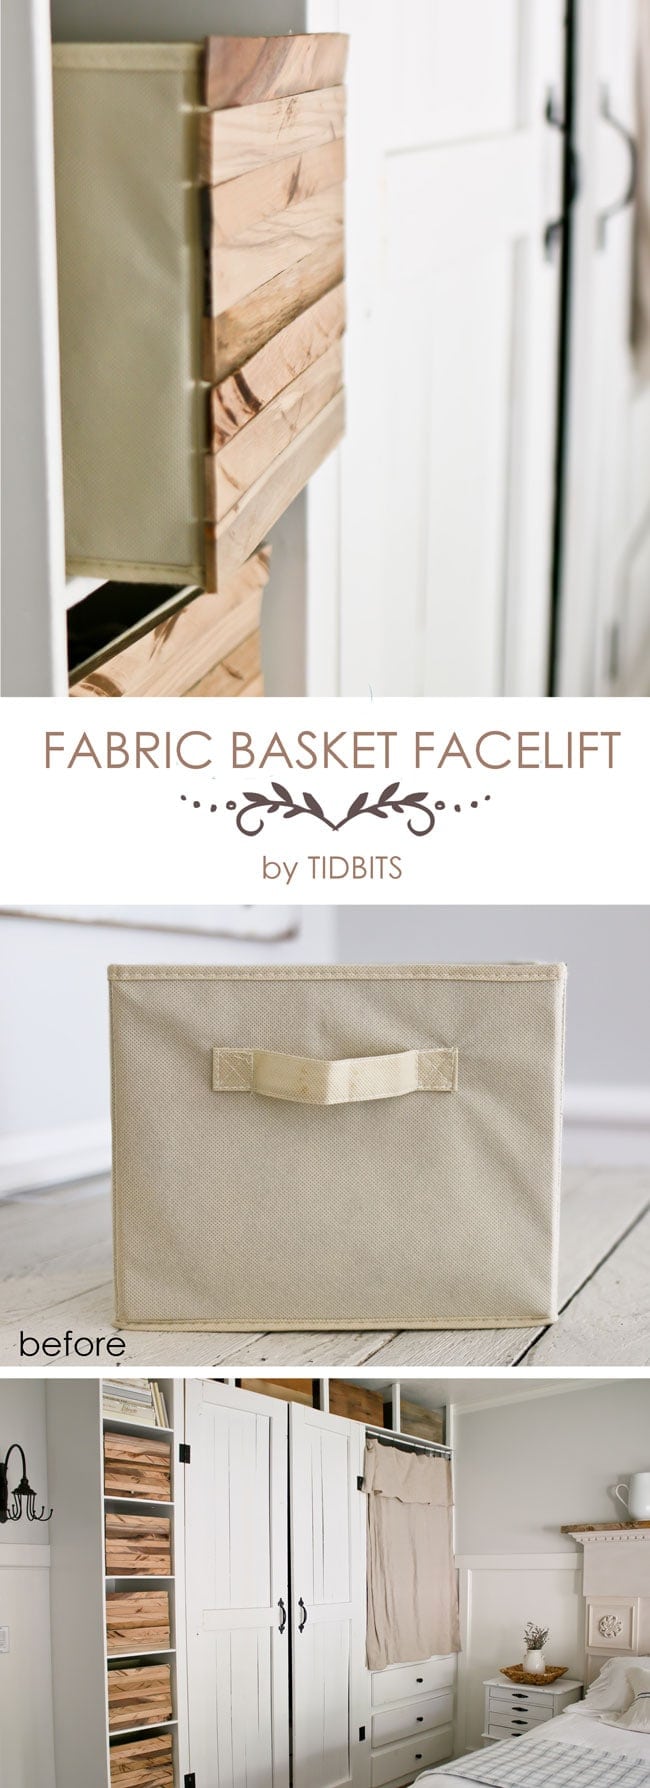
I wanted to be sure I shared the tutorial for our “fabric basket facelift project”, which resulted in some one-of-a-kind storage in our master bedroom makeover.
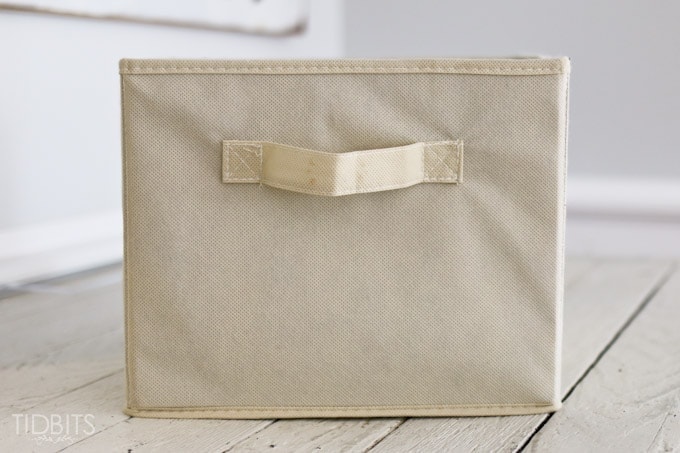
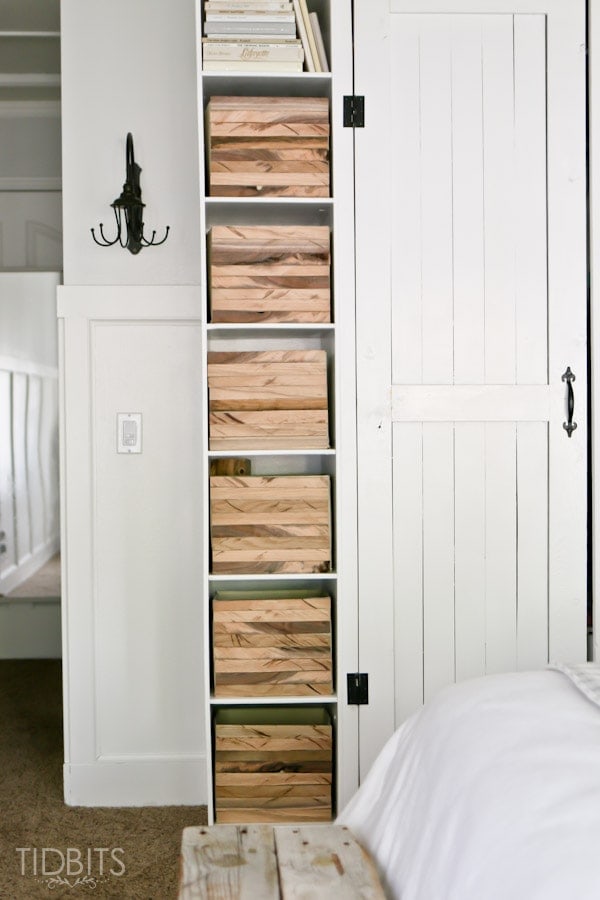
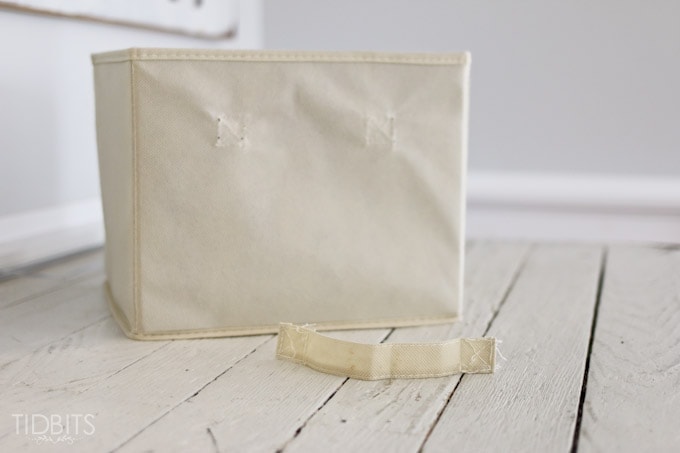
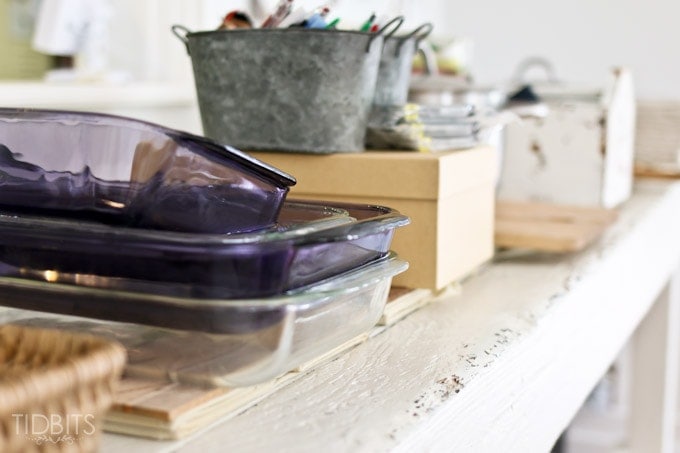
When my husband made our built-in wall closet, he left cubbies for me to insert decorative baskets. However, when it came time to buy some that I liked, buying 6 of them seemed like such a money-sucker and I settled on some inexpensive fabric baskets from Amazon. (Exact ones, HERE.)
I knew I wouldn’t like them, but was hoping genius would strike and I’d find some thrifty way of making them pretty.
It took longer than I care to admit for an idea to finally pop in – but it was well worth the wait.
When I shared my thoughts with the hubs, he came across some beautiful wood in his stash that he could cut up into strips for me. All it took was adhering the wood to the face of the baskets, and our bedroom storage went up all sorts of levels.
Let me show you how we pulled it off – because I’m certain you have some fabric baskets that could use a little facelift. 😉
First, I removed the handle on the basket so I would have a smooth surface to work with.
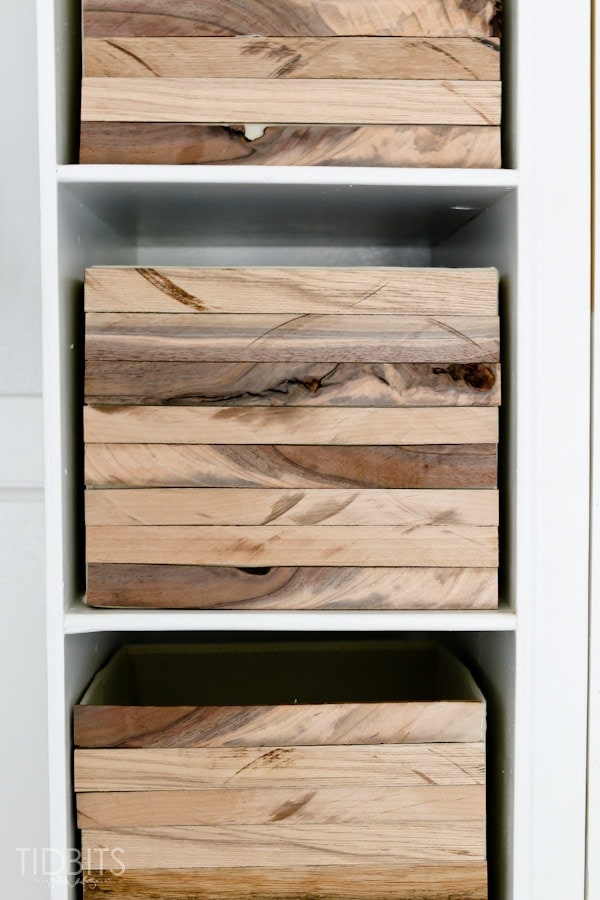
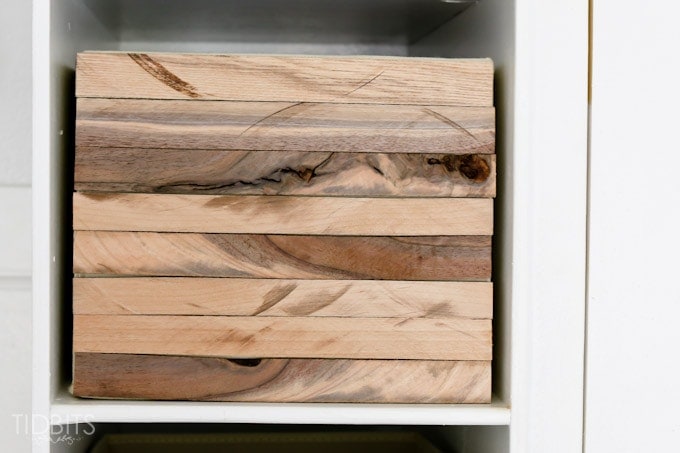
Then I gathered the prettiest pieces of wood I could find in my pile.
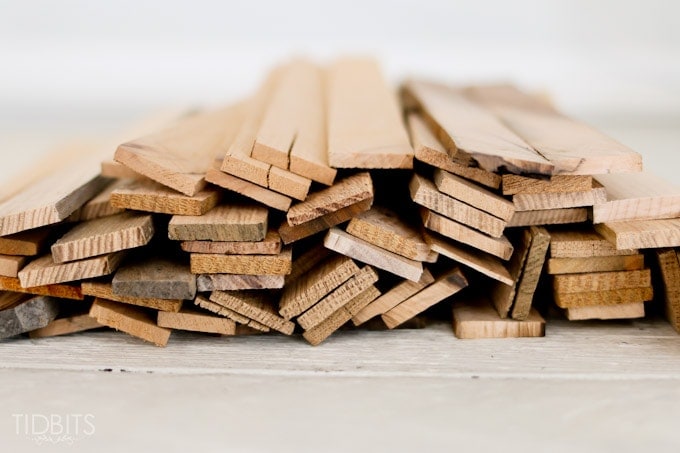
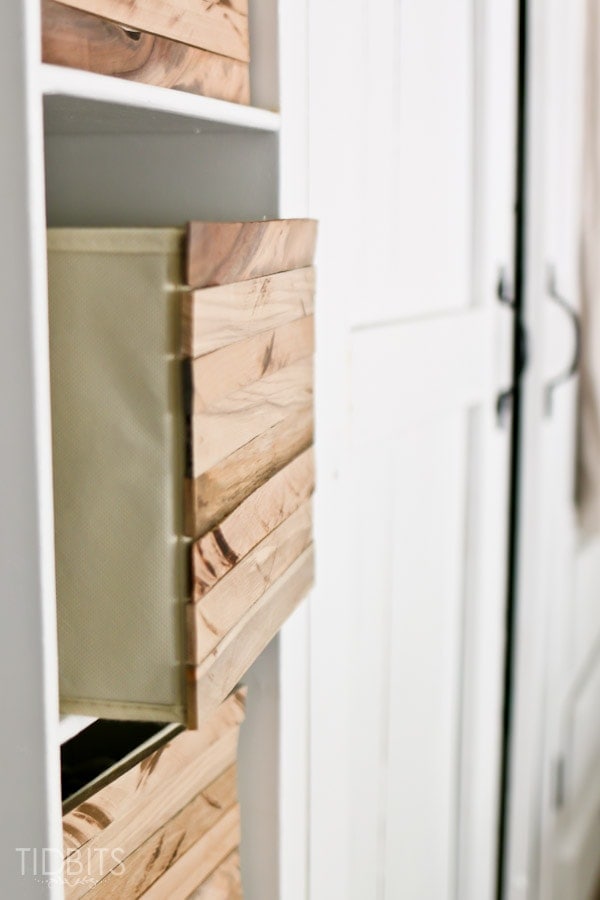
I laid them all down on the collapsed baskets in the arrangement I wanted.

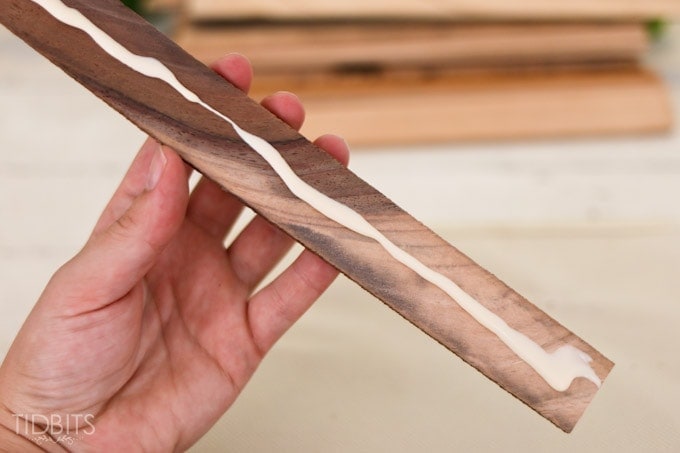
Then, I simply spread wood glue to the back side (not too much, not too little) of each wood piece, and placed it back in its rightful place on the face of the basket.
I needed some weight to press down on the wood and baskets, so my husband and I gathered anything that we could find to place on top while the wood glue dried.
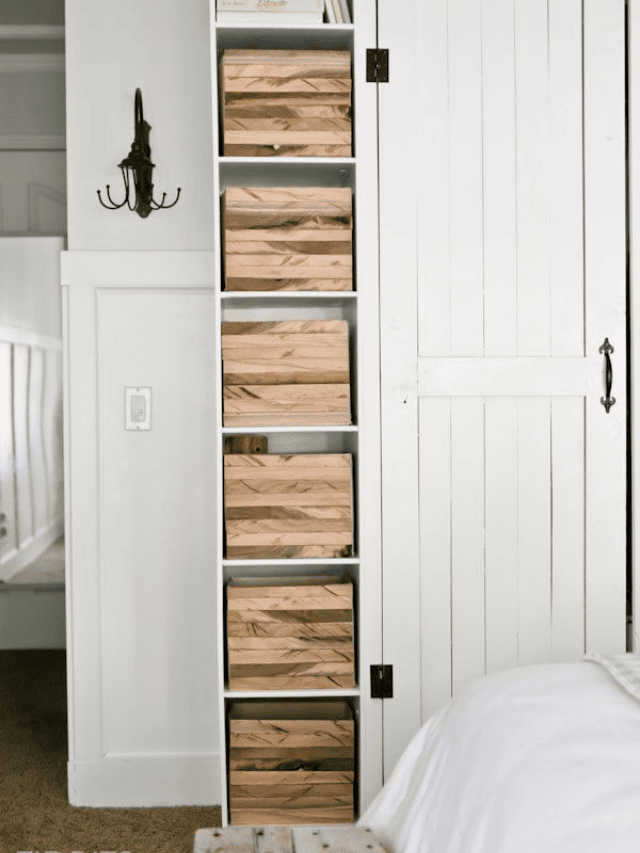
After putting my house back together, the baskets were secure and placed in the cubbies of our closet.
Really such a simple project and can be an inexpensive (or free) way to spruce up your storage. After 1 month later the wood pieces are still secure and none have come loose at all.
If you missed the full bedroom reveal, head over HERE to see it all.
Thanks for reading!

*Linking up to these parties, HERE.
*This post contains affiliate links. Rest assured, I only recommend products I use and love.


Great post! Thank you for the insightful article. I would like to add a little bit more information that the face-lifting method is one of the most simple and quick ways to eliminate facial fat, but be sure to pay attention to the correct posture.
Hi, these are beautiful and i would love to do them in a toyroom but I am wondering how they would hold up to kids, what do you think?
I love this idea! I’ve been looking to replace my my fabric baskets with wooden ones and I keep cringing at the price tag! This might be the perfect option!
Hi Cami,
What an innovative face lift for fabric baskets!
Val
What a huge difference the wood makes! I have some of those basic fabric bins, maybe they need a makeover, but I would need handles since they fit higher in my space. I think I could figure that out 🙂 Pinning for sure!
I debated adding some kind of rope handle or hardware – I am sure that would look good too, and I may in the future. You should go for it and let me know what you figured out 😉 Thanks for stopping by!
They are incredible!!! SUCH a creative idea! LOVE!
Cami, I have these same baskets and they look so puny now! I love yours and how you gave them a gorgeous makeover. I just wanted to let you know these will be one of the features at the Something to Talk About Link Party on Monday. Hope your weekend is awesome, CoCo
Thank you so very much for the feature! Looks like you have some basket facelifts to do yourself 🙂
very good idea!!!!!!
Looks great! This is defiantly something I would love to try! Thanks so much for sharing!
Thanks for your sweet comments! Much appreciated!
OMG this is a brilliant idea!! This will be my weekend project. Thank you for sharing.
Wonderful! I hope you give it a try! Thank you for stopping by.
OMG this is a brilliant idea!! This will be my weekend project. Thank you for sharing.
I still think that’s amazing! Really dressed them up!
Hi, Cami! I love that look! Some pieces of the wood looks like shims I have purchased at my local home store ~ thinner on one end, thicker on the other. Would those work for this? I’m not sure they’re as long as my baskets are wide, however …
I love these! What a genius idea!