
This post may contain affiliate links, which means I get a small percentage of the sale at no extra cost to you. I only recommend items I love and have had a positive experience with. Thank you!
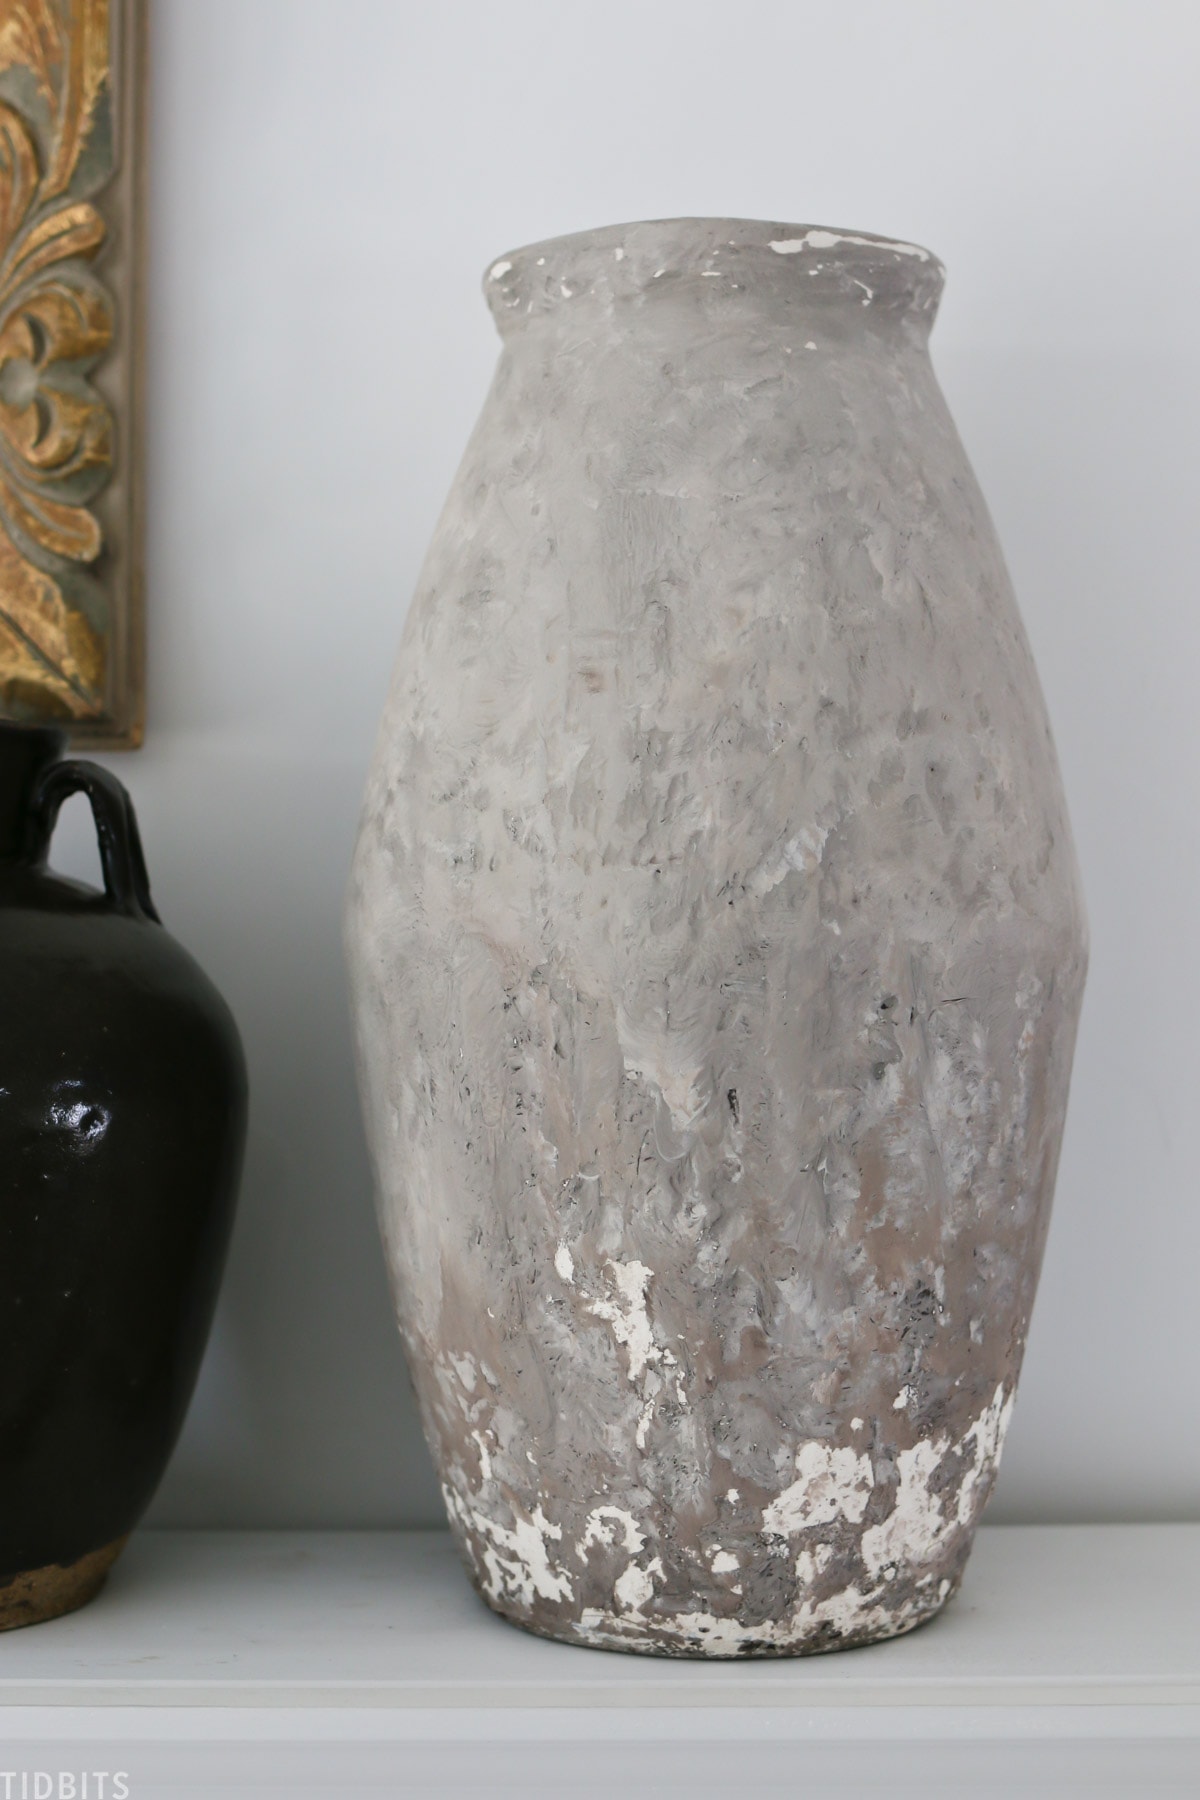
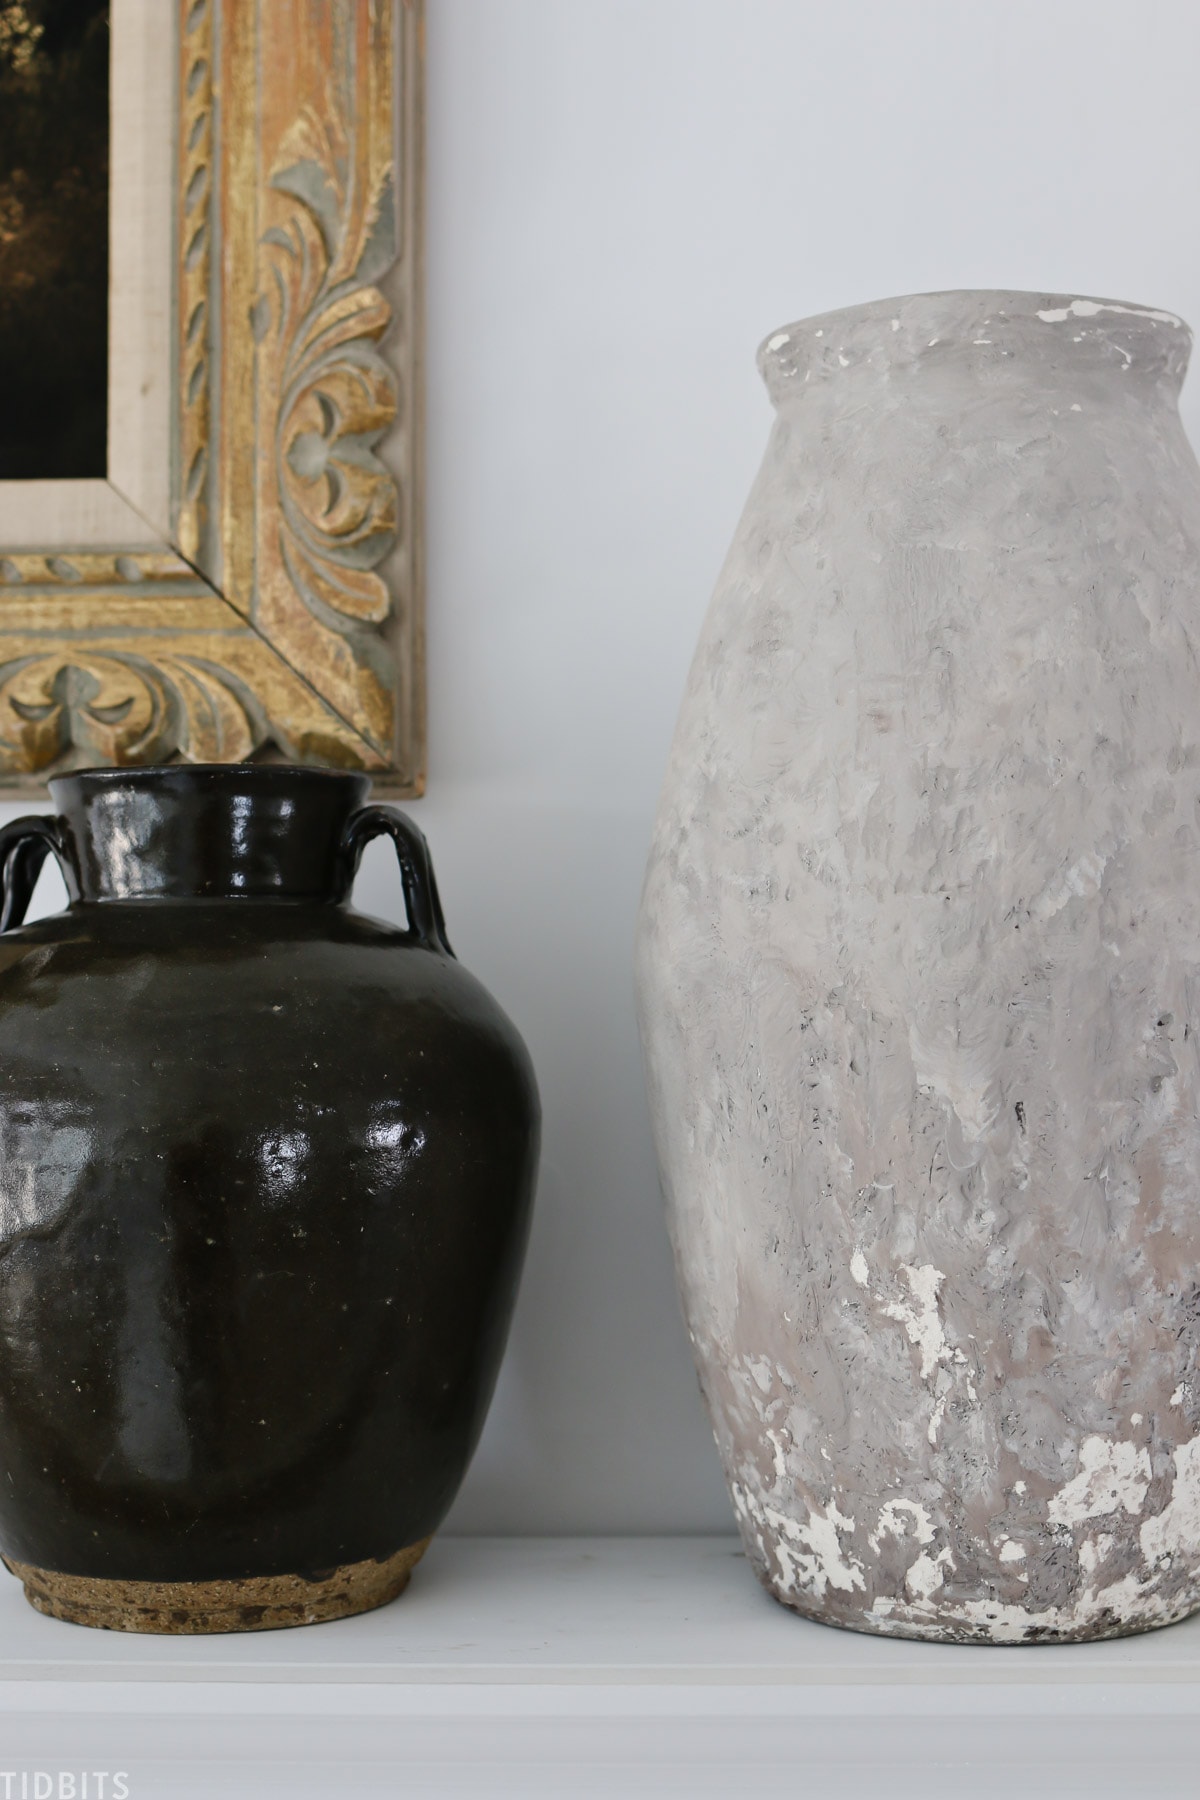
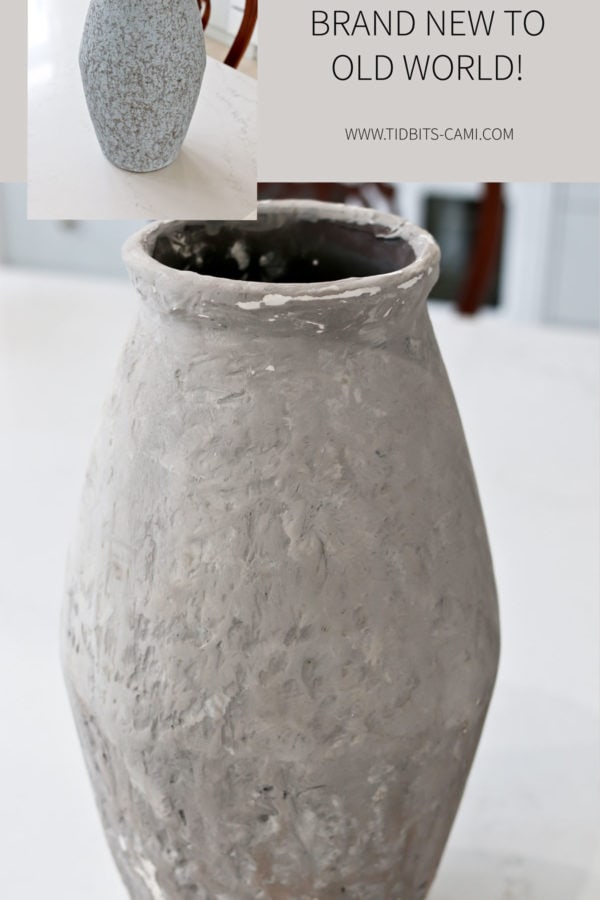
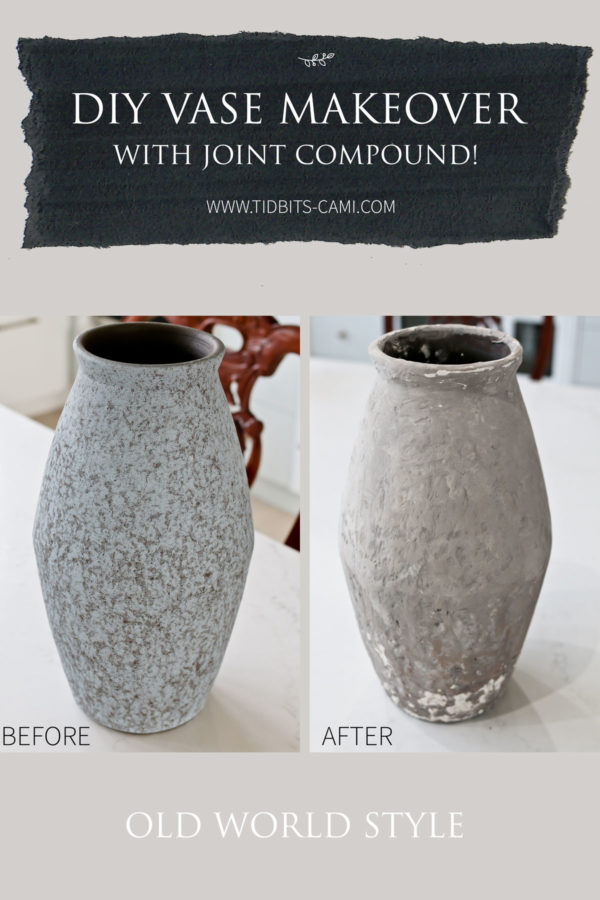
Joint compound takes the center stage to turn this vase from looking brand new to century’s old, with a unique old chippy plaster texture. Let me show you how I did it!
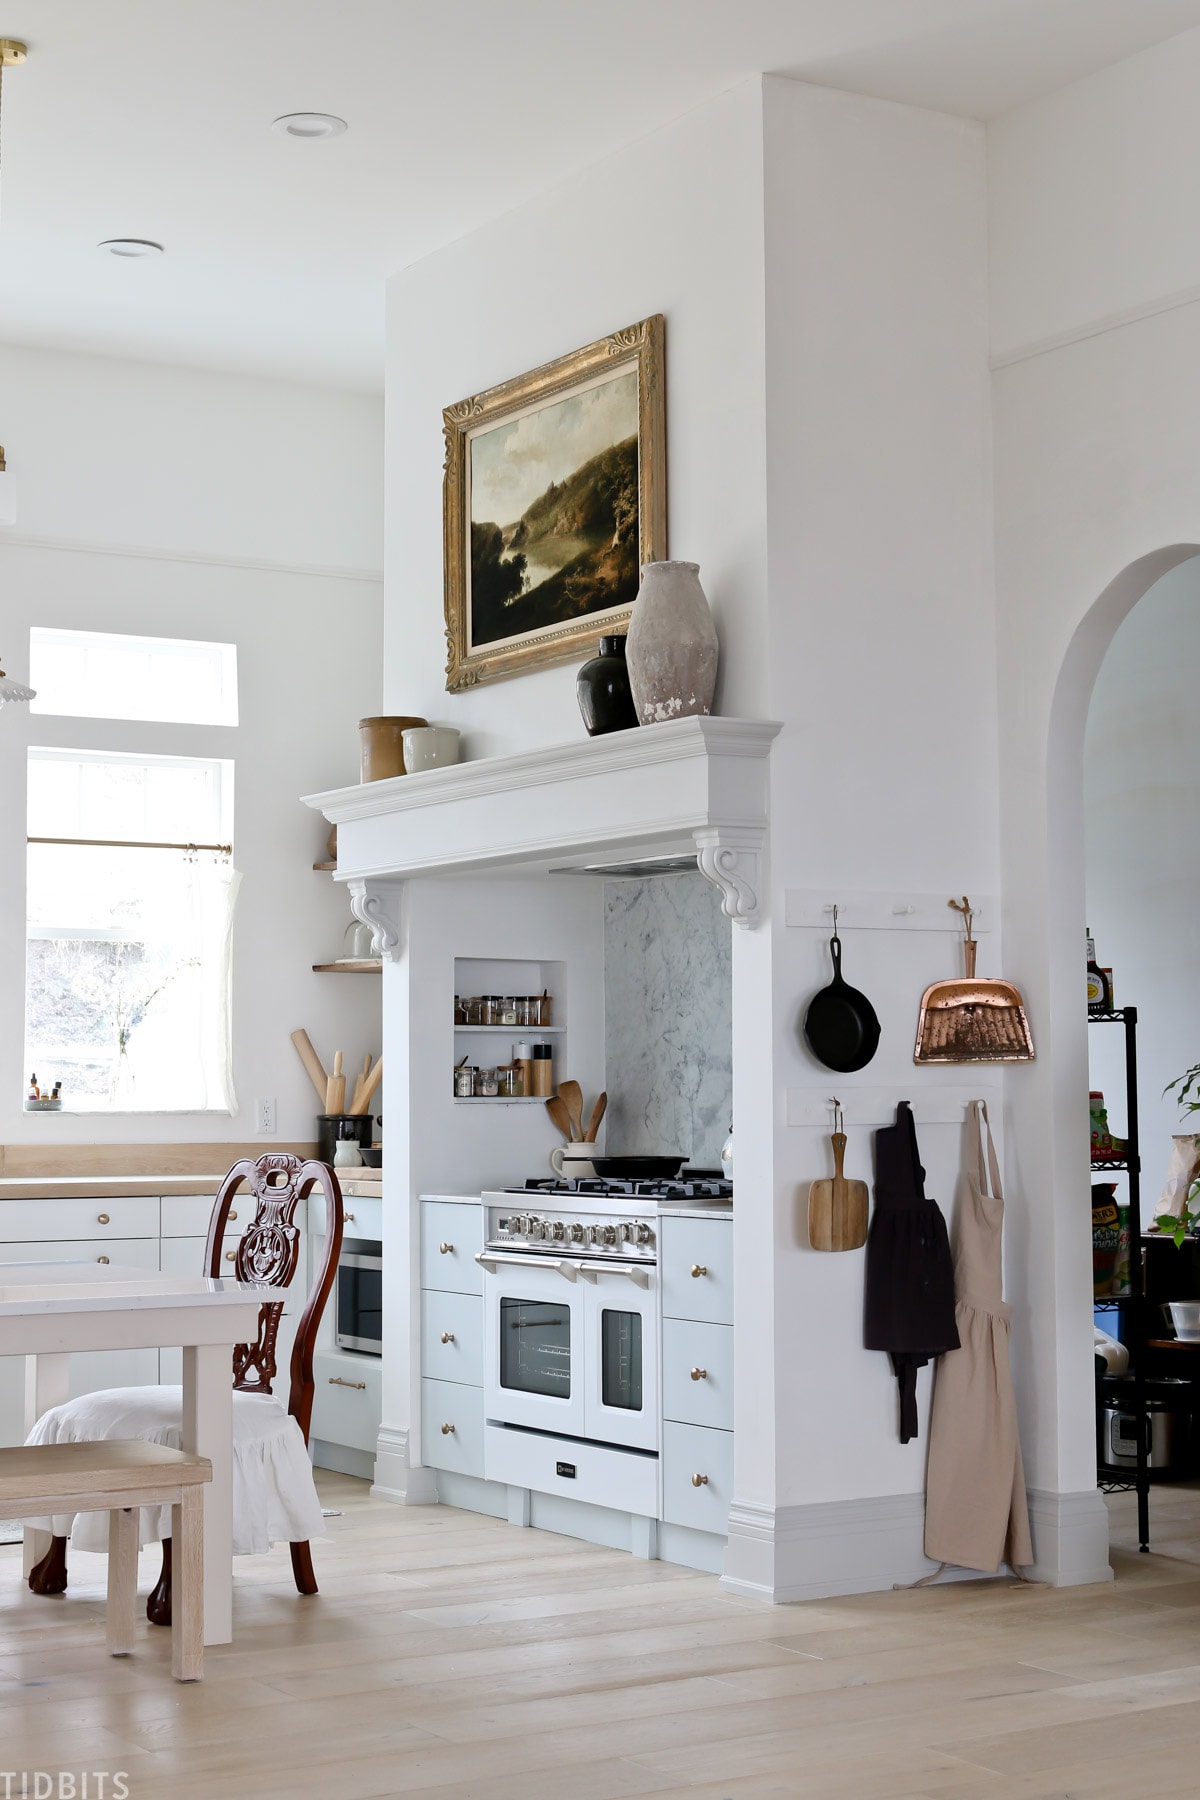
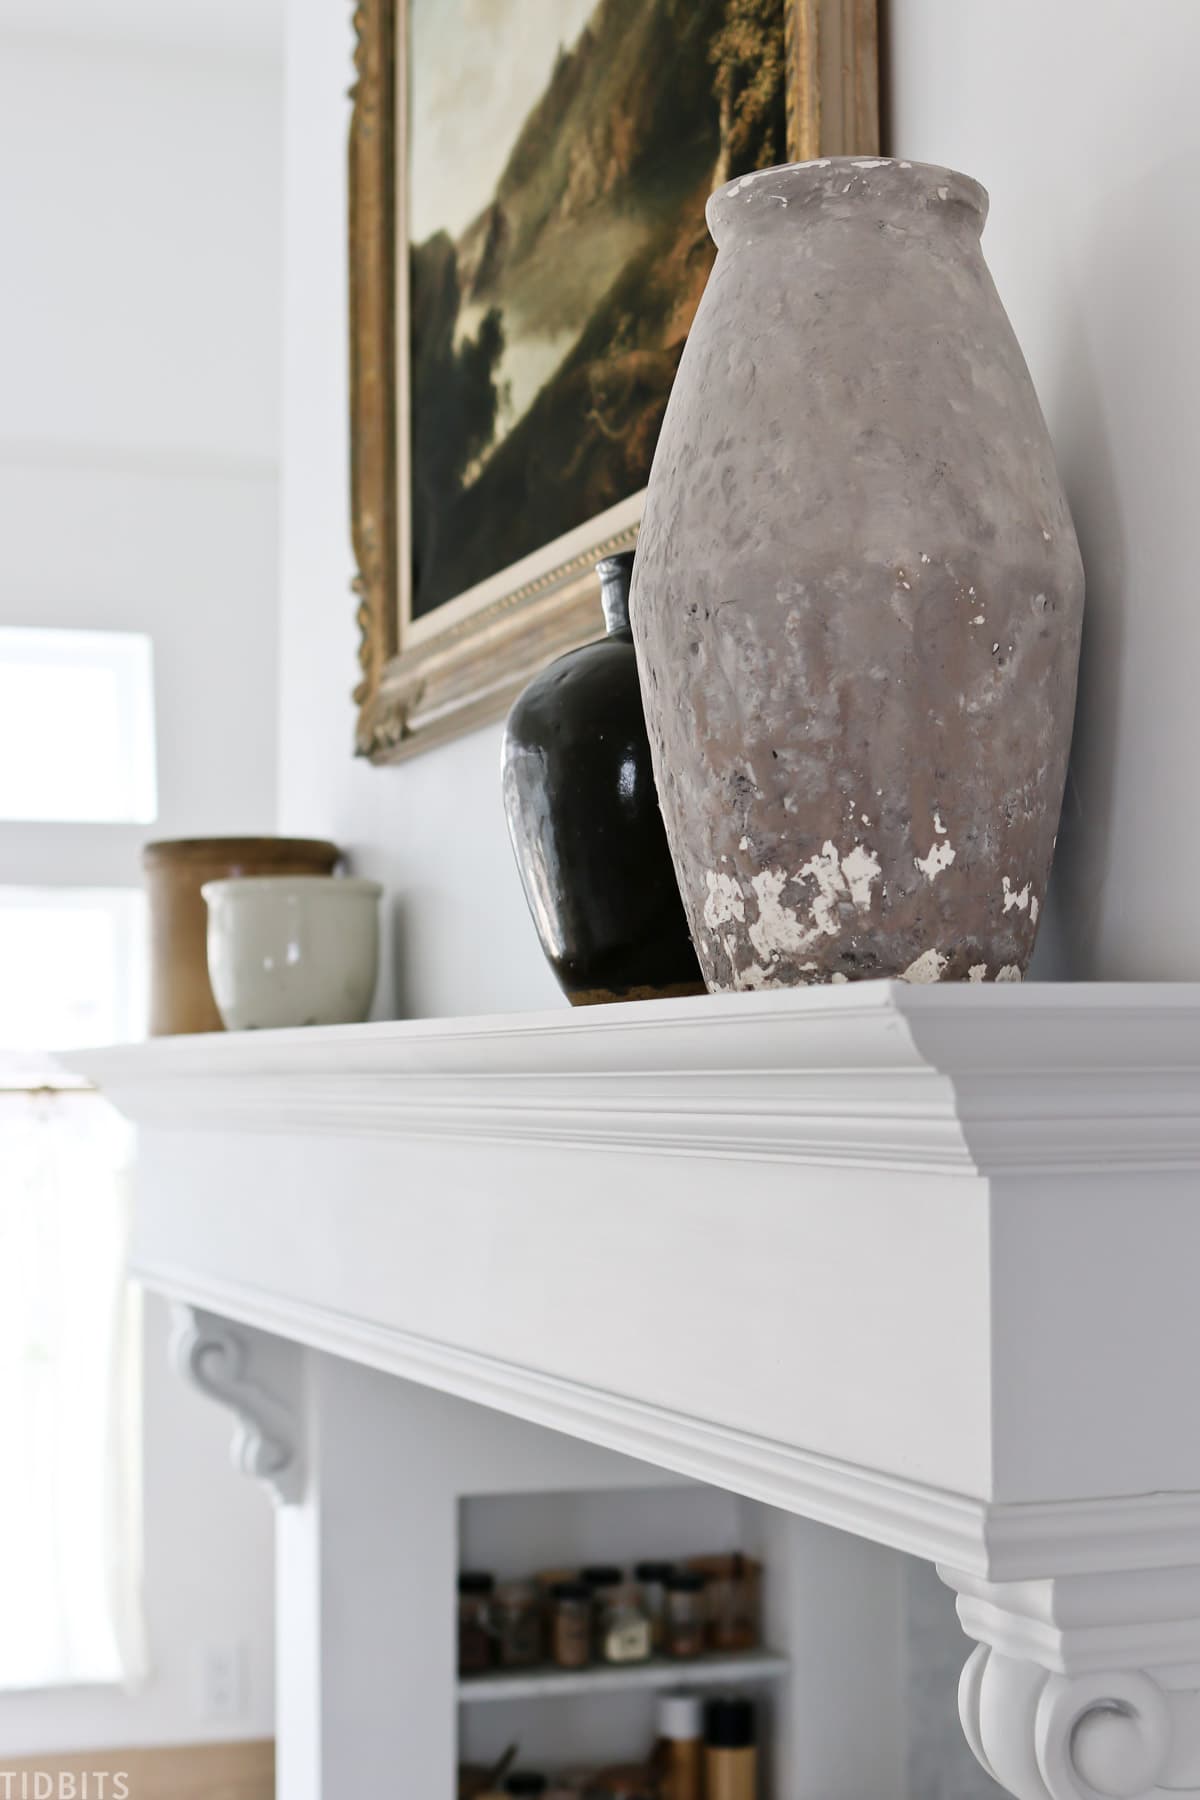
I personally can’t help but feel this vase was the icing on the cake for our kitchen reveal. I struggled for so long to find just the right decor for on top of our range mantel shelf.
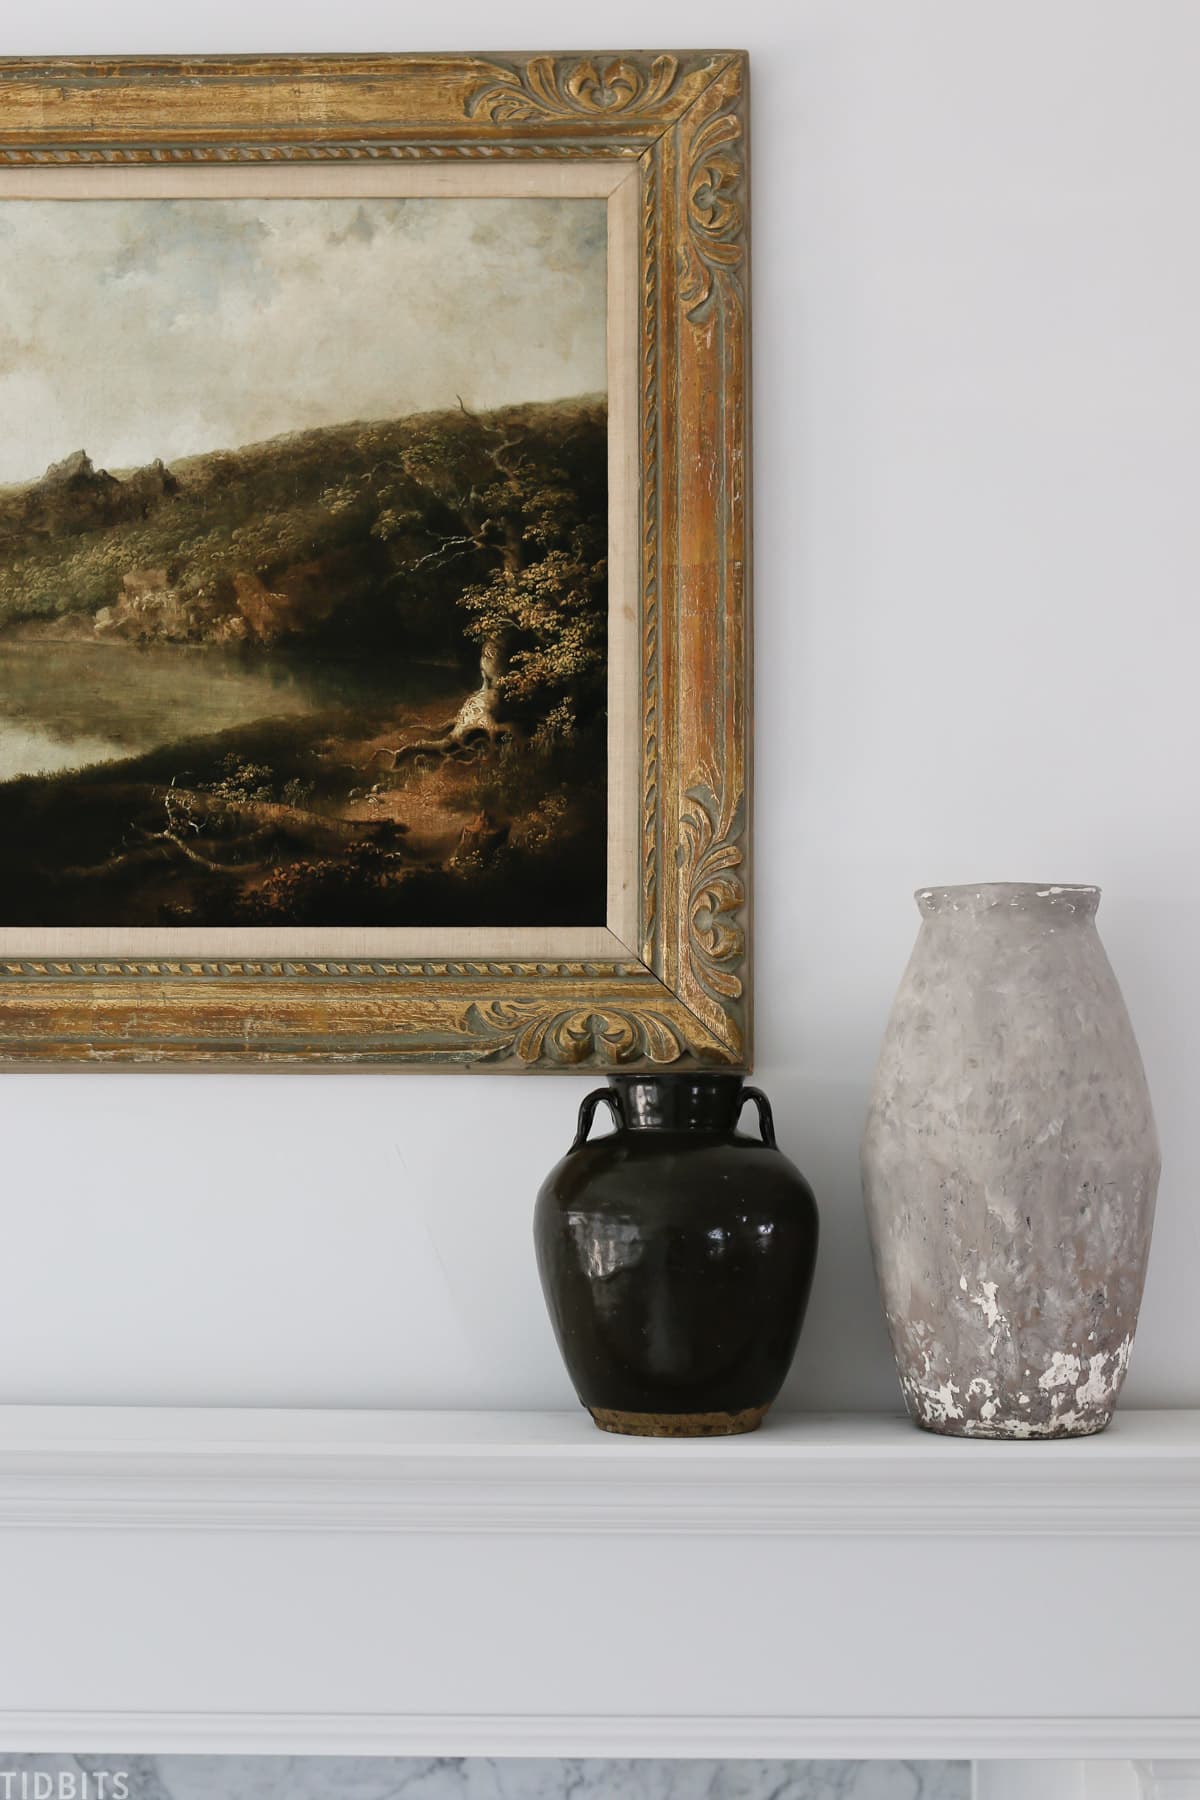
While I was lucky to have found the pretty dark brown one while antiquing, I knew I wanted a taller vessel to sit beside it. It had to be something super cool and old looking – of course.
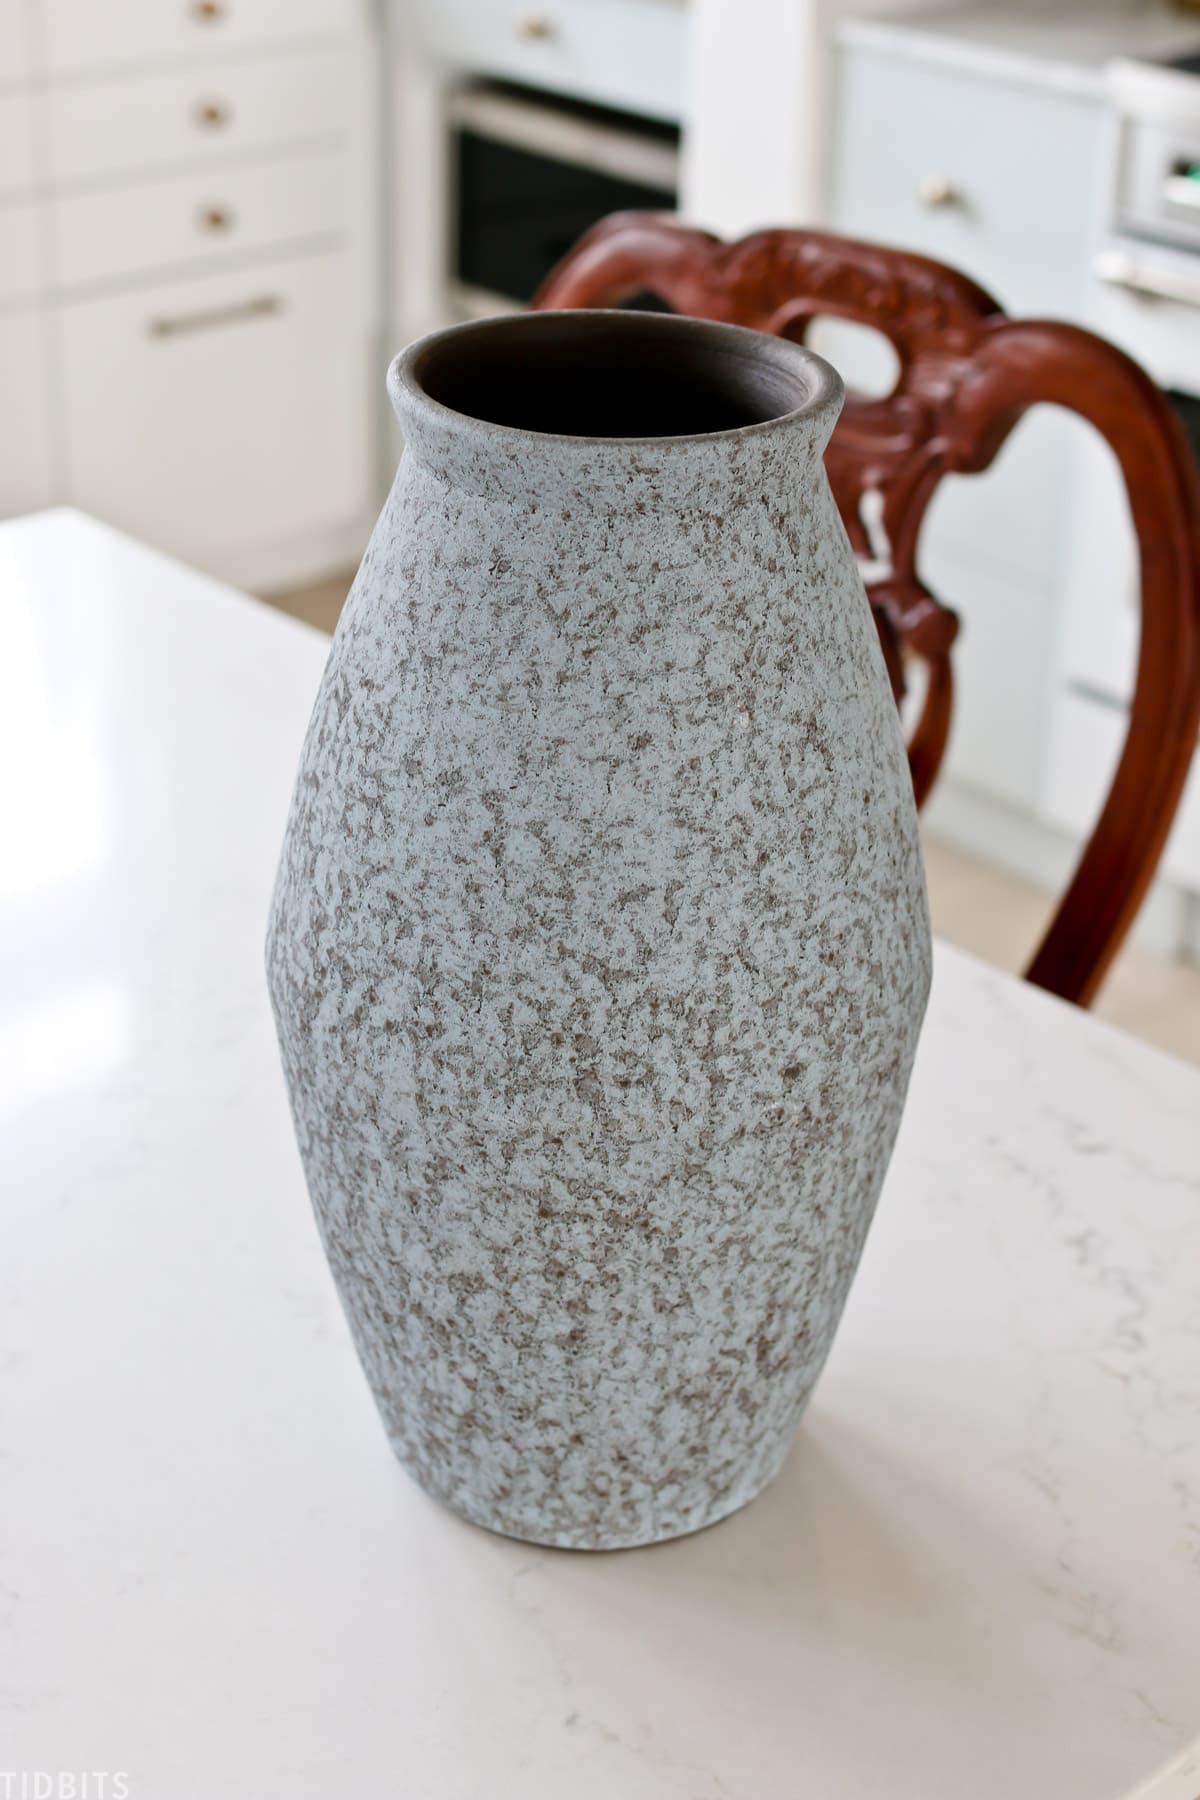
After multiple unsuccessful market and antique shopping trips, I decided to stop into Homegoods. What I found was a piece that was the right shape, just not the right finish.
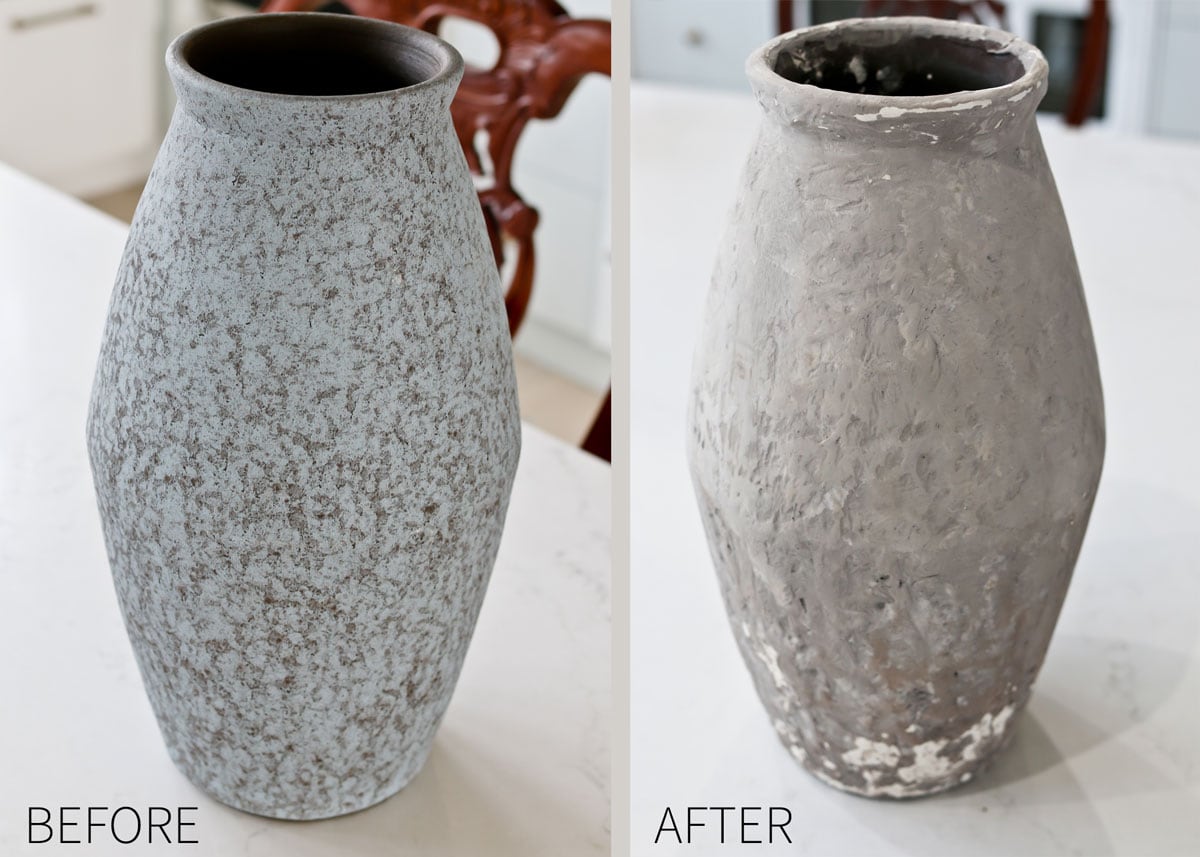
I decided it was worth buying and playing around with! I had seen several DIY’s where folks use Plaster of Paris to add texture to their objects – but I was impatient and wondered if my husbands box of joint compound he used to make our arch would have the effect I was after.
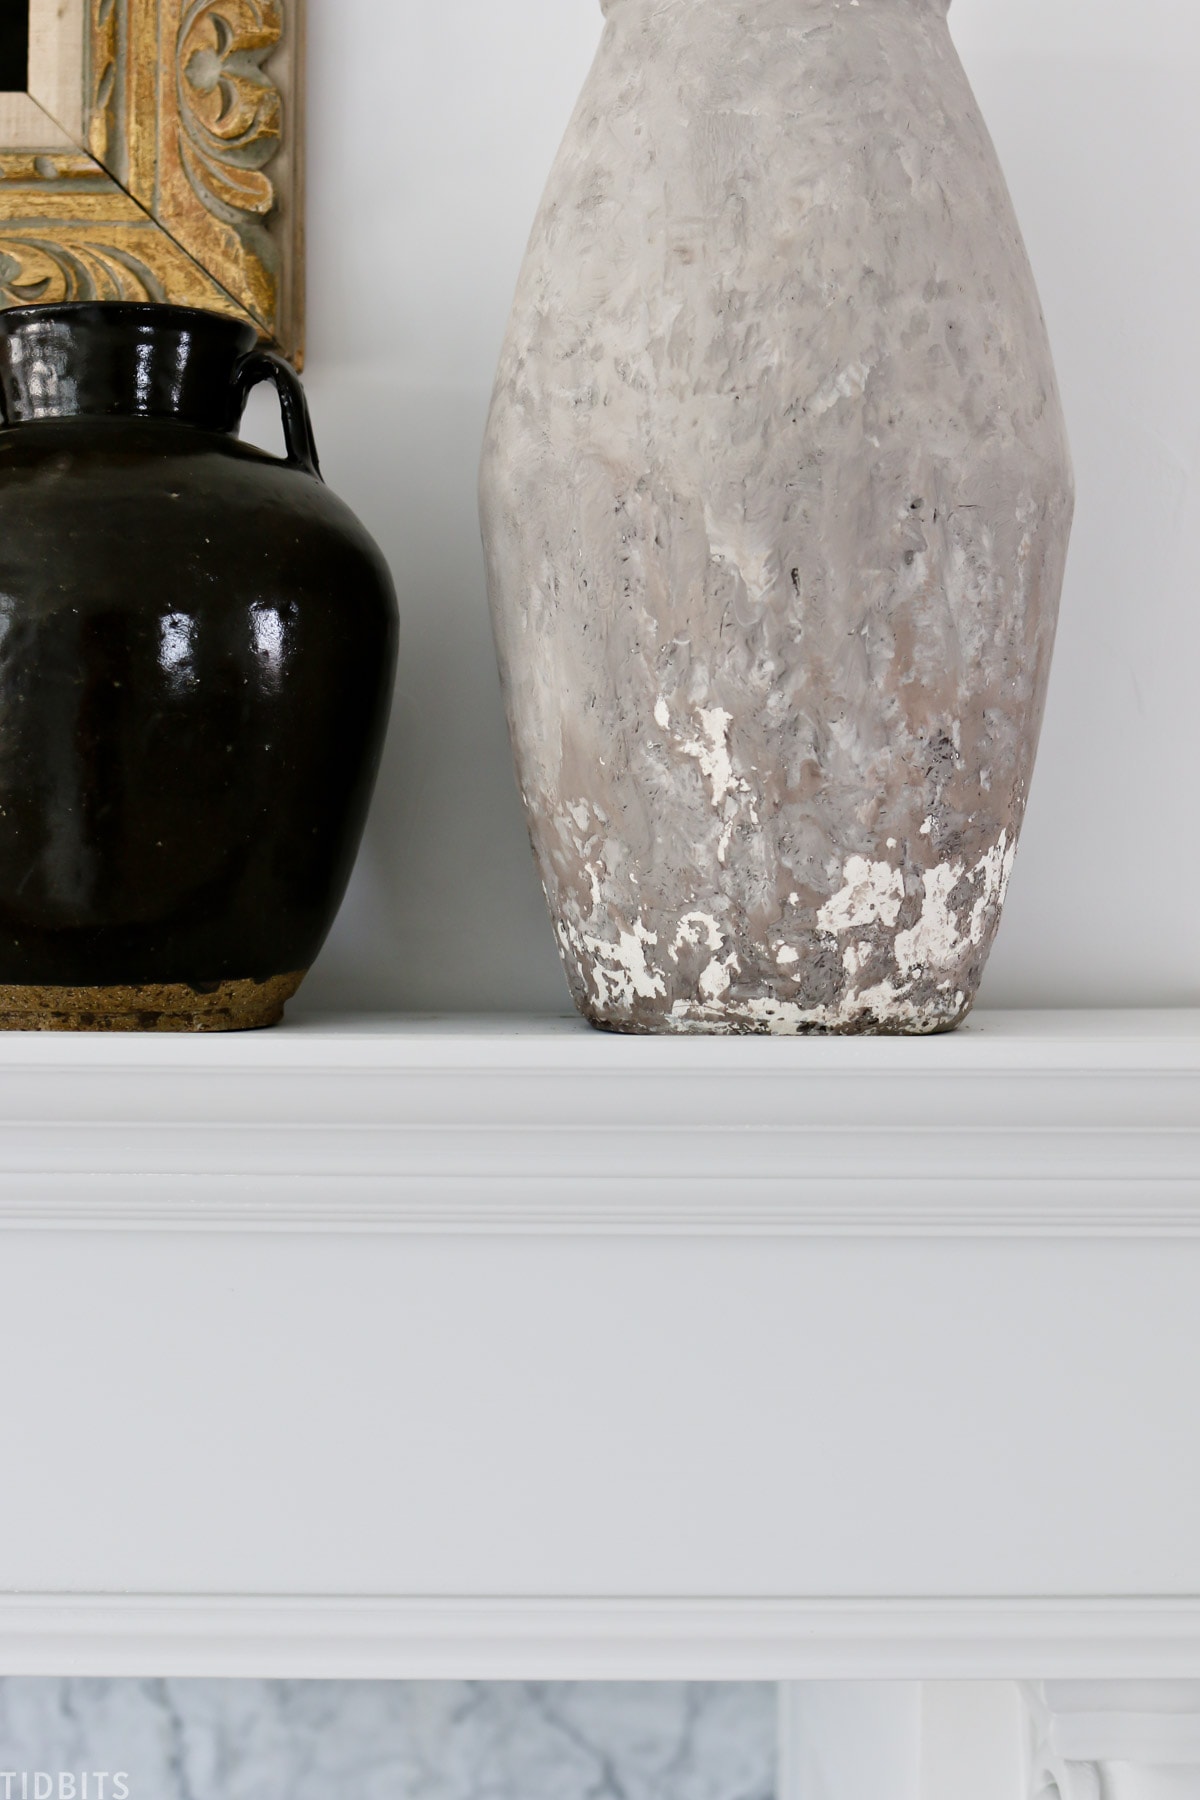
It worked better then I hoped! After I was done with my project, Mr. TIDBITS came in and said, “Wow. It looks like an old pottery vase that has been sitting in water and elements for a long time.”
Yes!!! That’s exactly what I was thinking of when I was layering on the joint compound, paint and chipping away at it. Luckily I grabbed some images of the process so I could share it with you. I wish I would have created a video, but . . . the really anxious part of me just went for it!
I did however capture the process in my Instagram stories. If you like video, check it out under my DIY Highlight reel.
HOW TO CREATE AN OLD WORLD PLASTER LOOK ON A NEW VASE
1 – The Vessel.
Joint Compound sticks pretty well to any surface. I would like to see if it would adhere to a glass vase, but I am not totally sure. But it stuck like glue to this somewhat textured vase. Definitely something worth experimenting on, but just find a vase with the shape you desire.
2 – Joint Compound
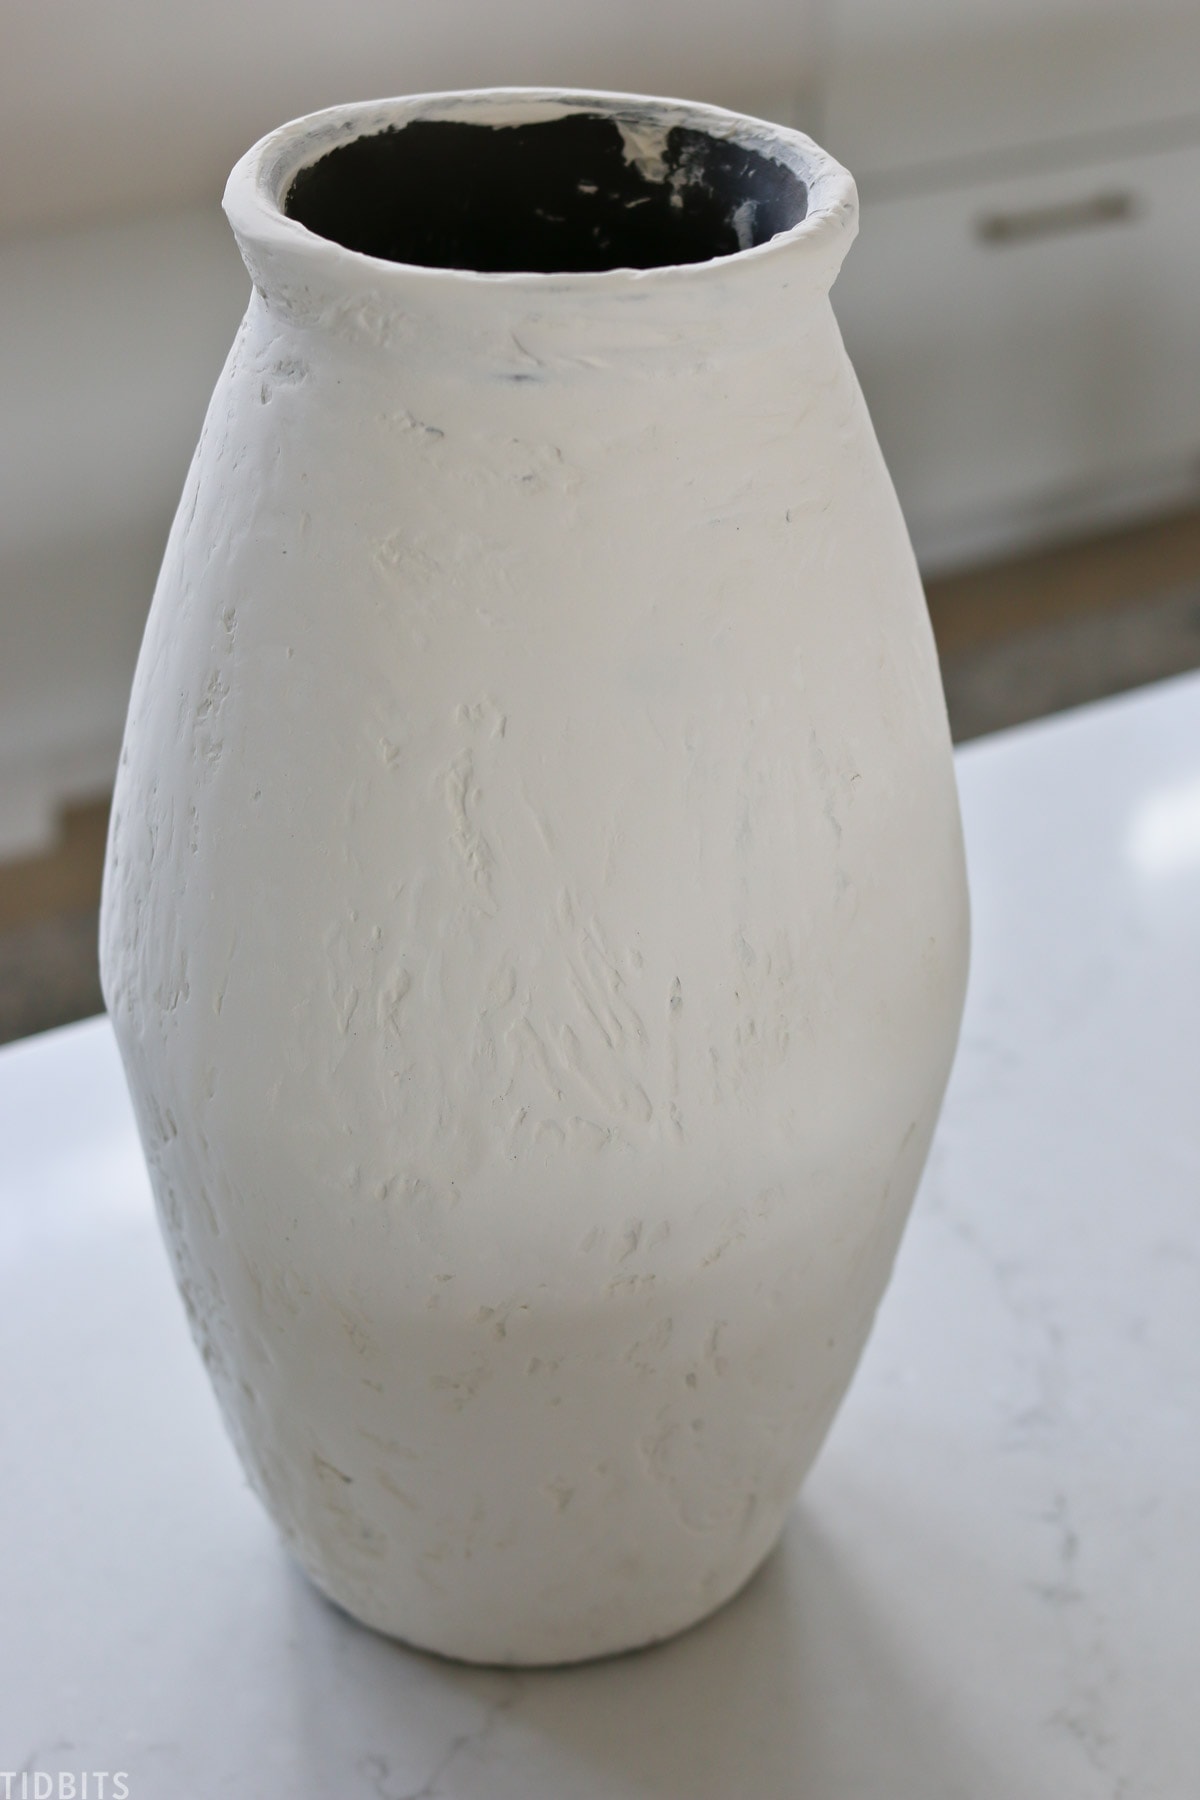
We had some already mixed up, so I just used some latex gloves and my hands to wipe it all over the vase.
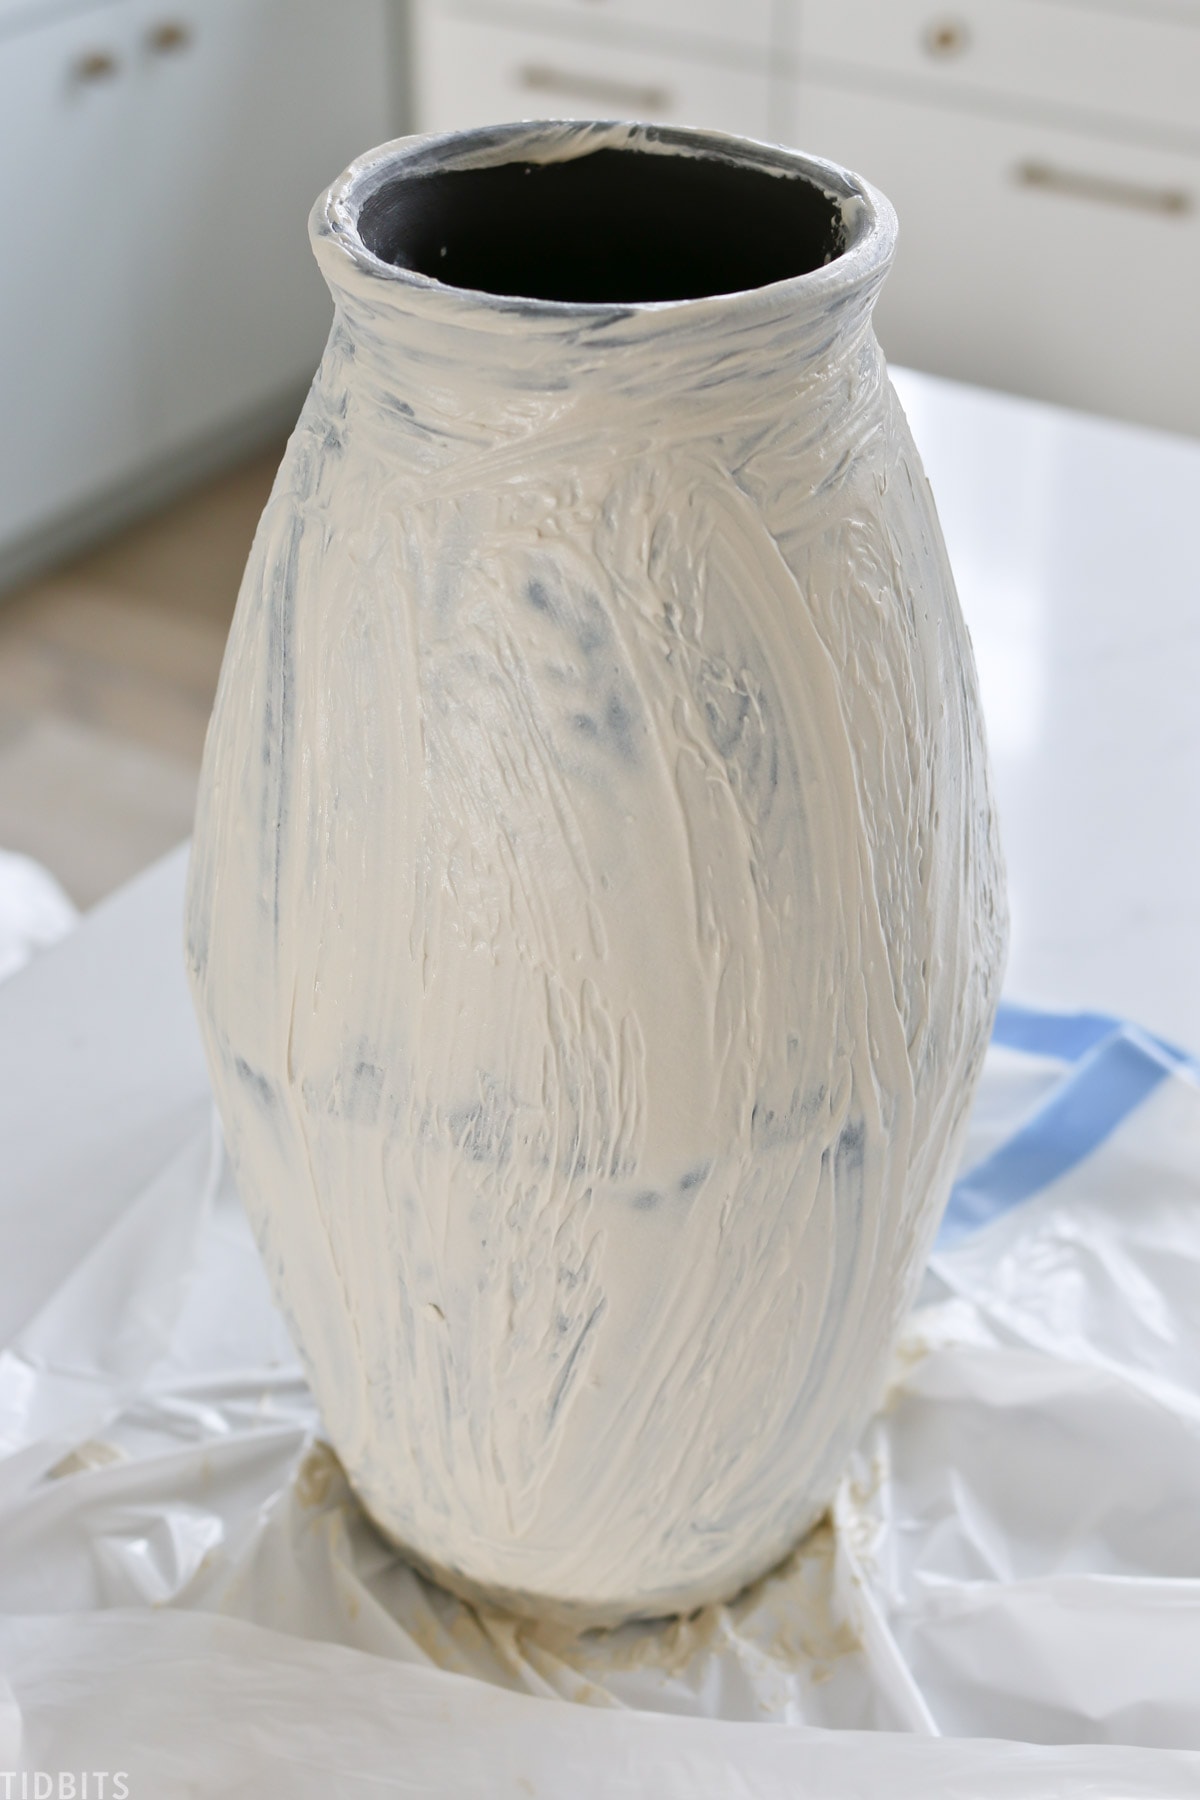
You are seeing my first layer here, but I did end up adding one more heavy layer, in more of a slapped on and glooby texture. I knew I would be sanding it down but wanted a whole lot of texture! (sorry I didn’t get that pic!)
3 – Sanding
Once the joint compound was very dry, I took it outside and sanded it down until it was as smooth as I wanted, and with enough remaining texture that I wanted.
4 – Paint
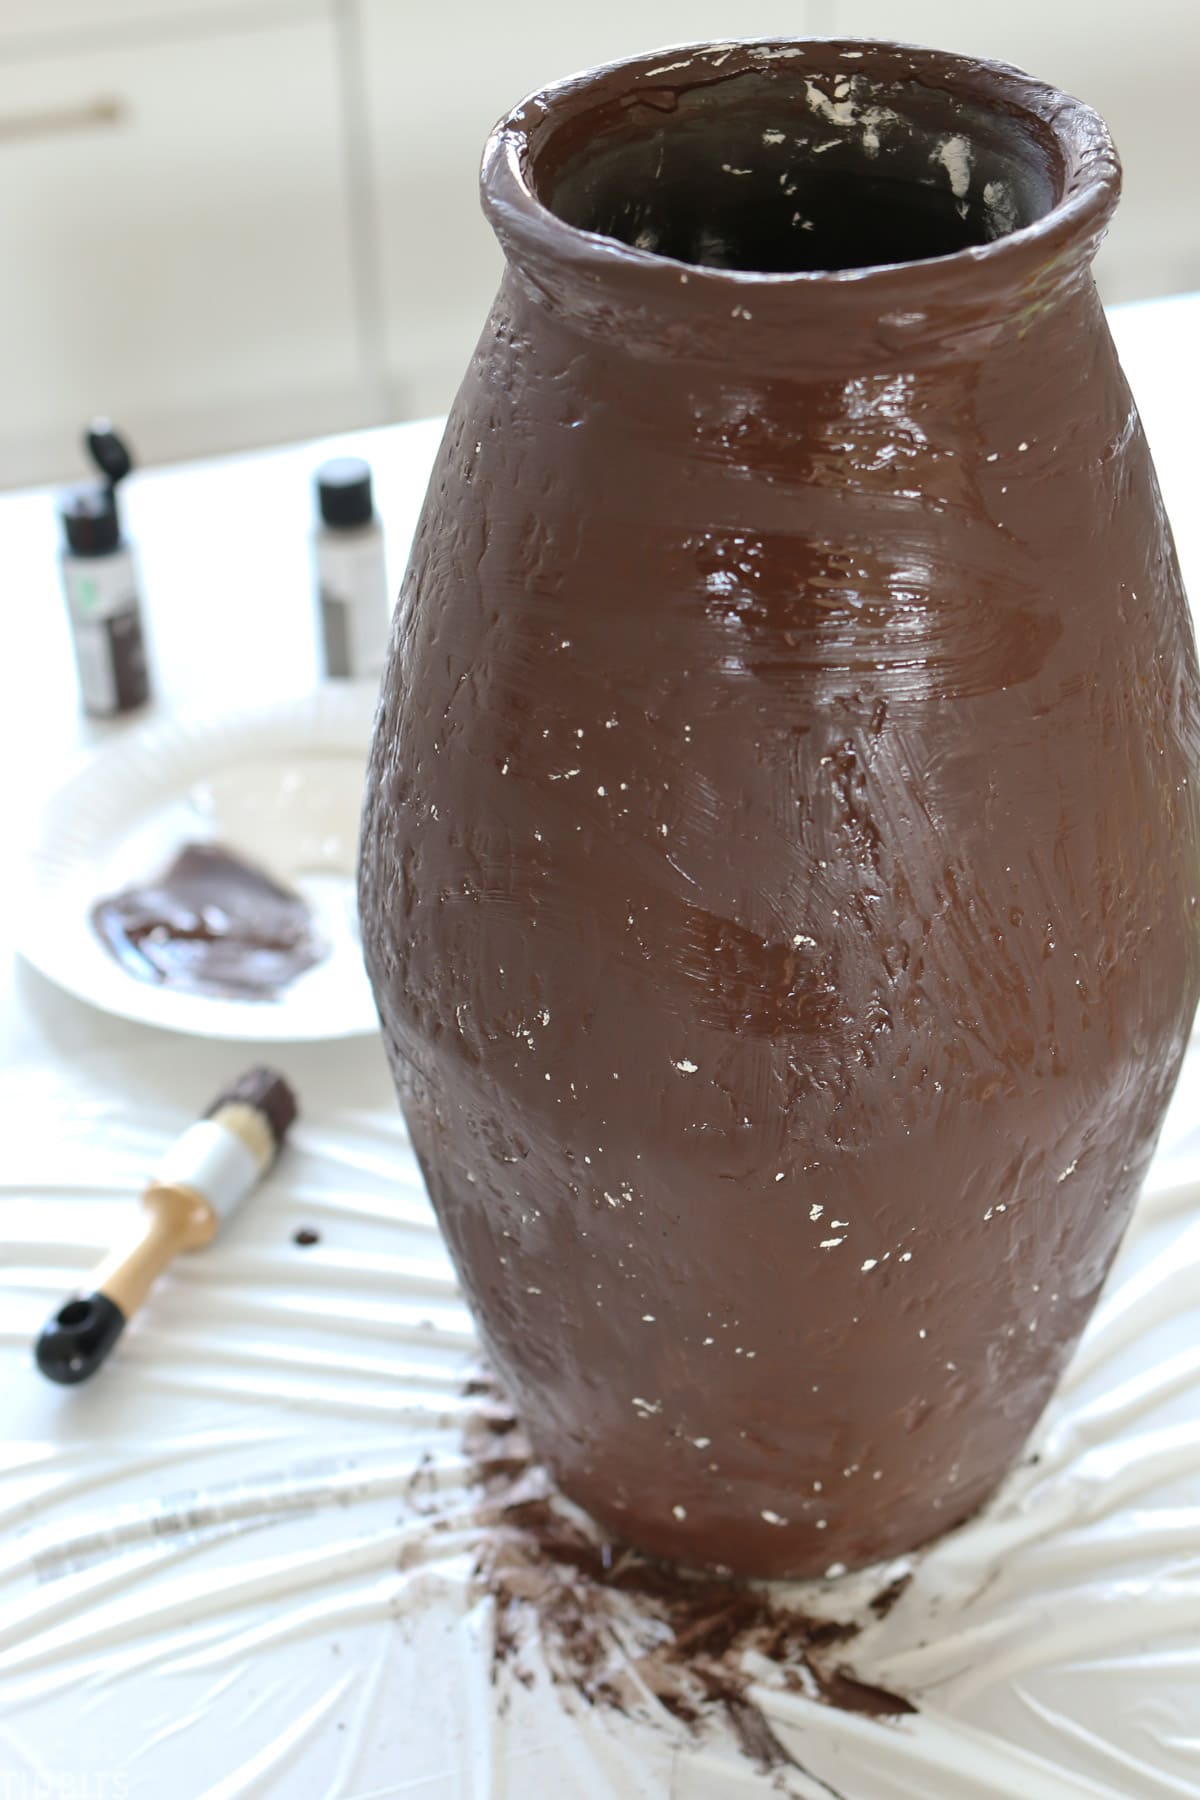
I used a mixture of 3 colors of acrylic craft paint.
I used a dark brown acrylic paint to cover the entire surface. I knew this wasn’t my desired finished color, but I wanted to be able to sand it down and have some dark show through.
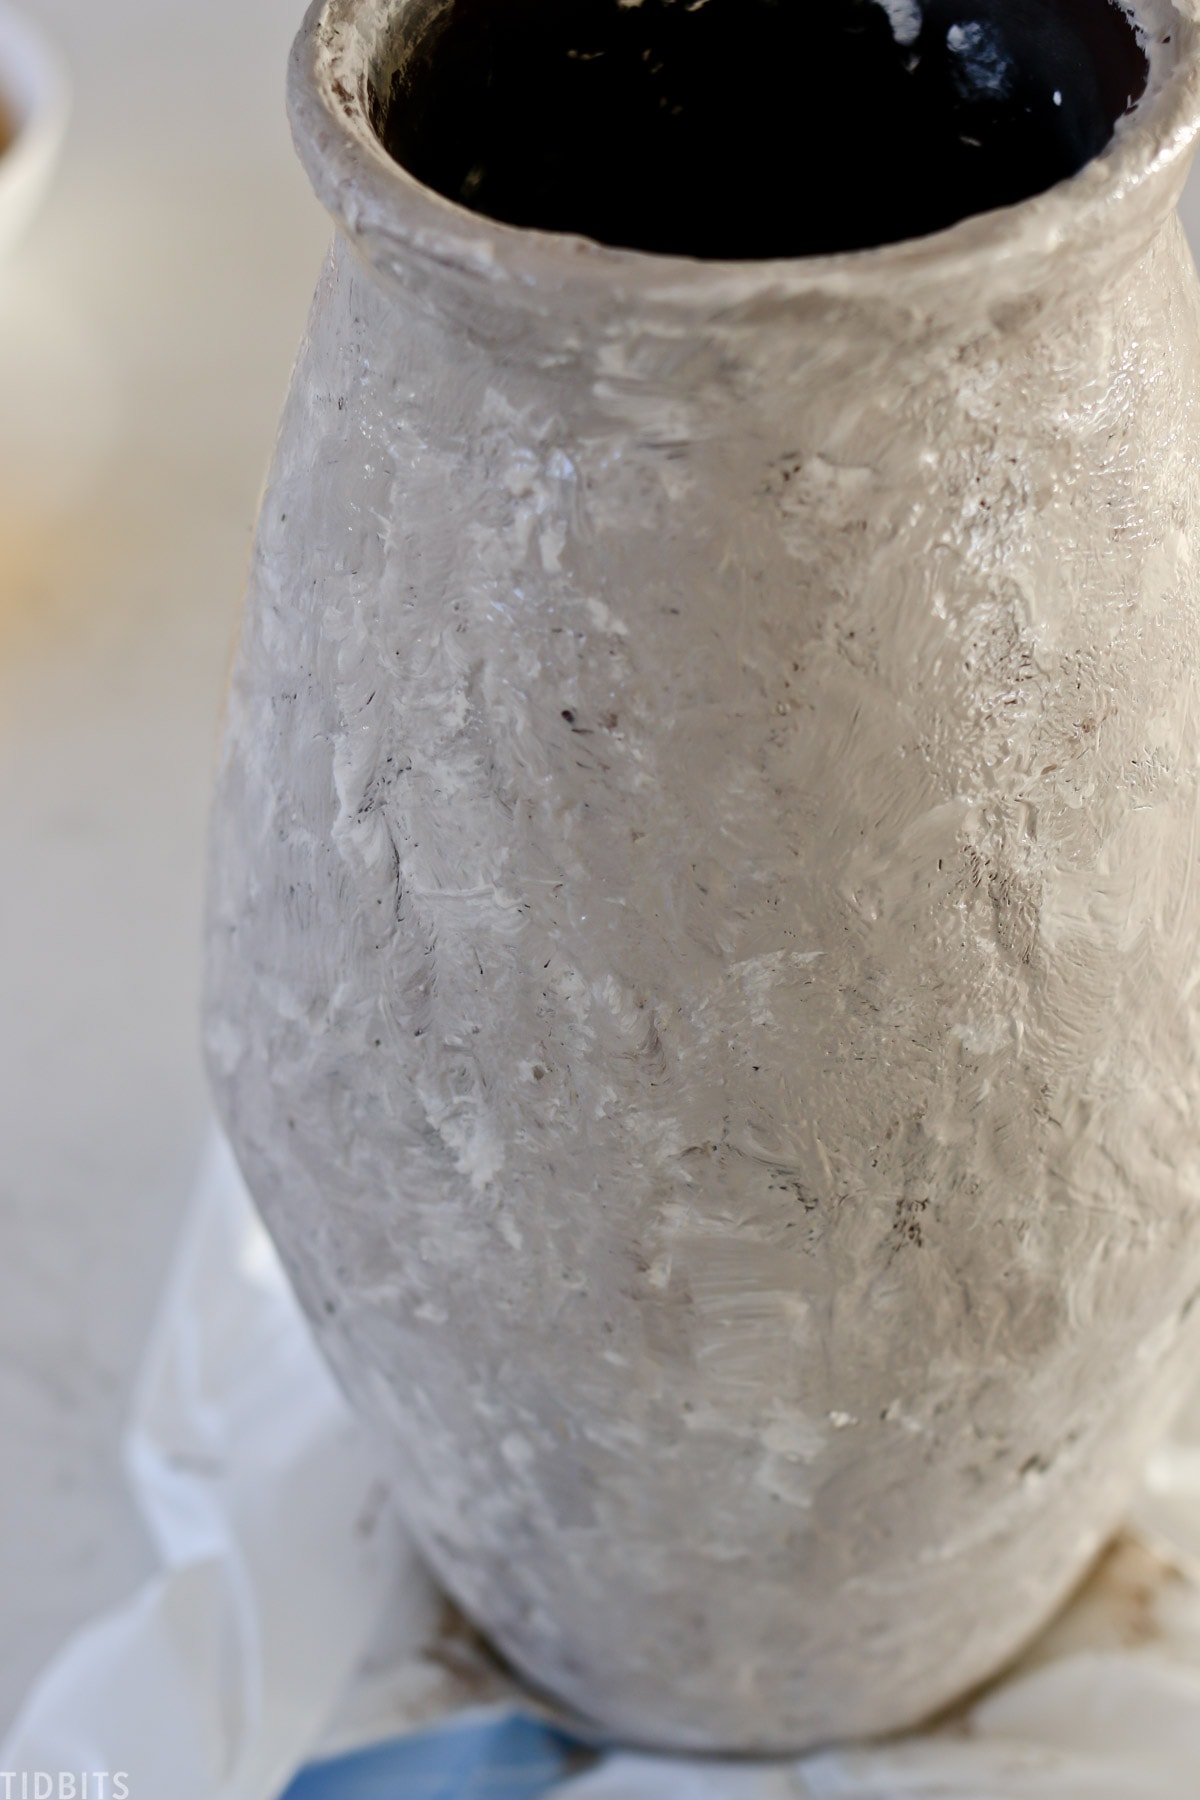
After the brown had dried, I used a some greige and creamy white to dab around the entire vase in a very sloppy fashion. Real art going on here, folks (wink).
5 – Final Sanding
Once that paint was mostly dry, I took more sand paper to it. The bottom was still slightly wet, which caused the paint to chip and move in bigger sections, right down to the joint compound. I was loving the effect so I just went with it.
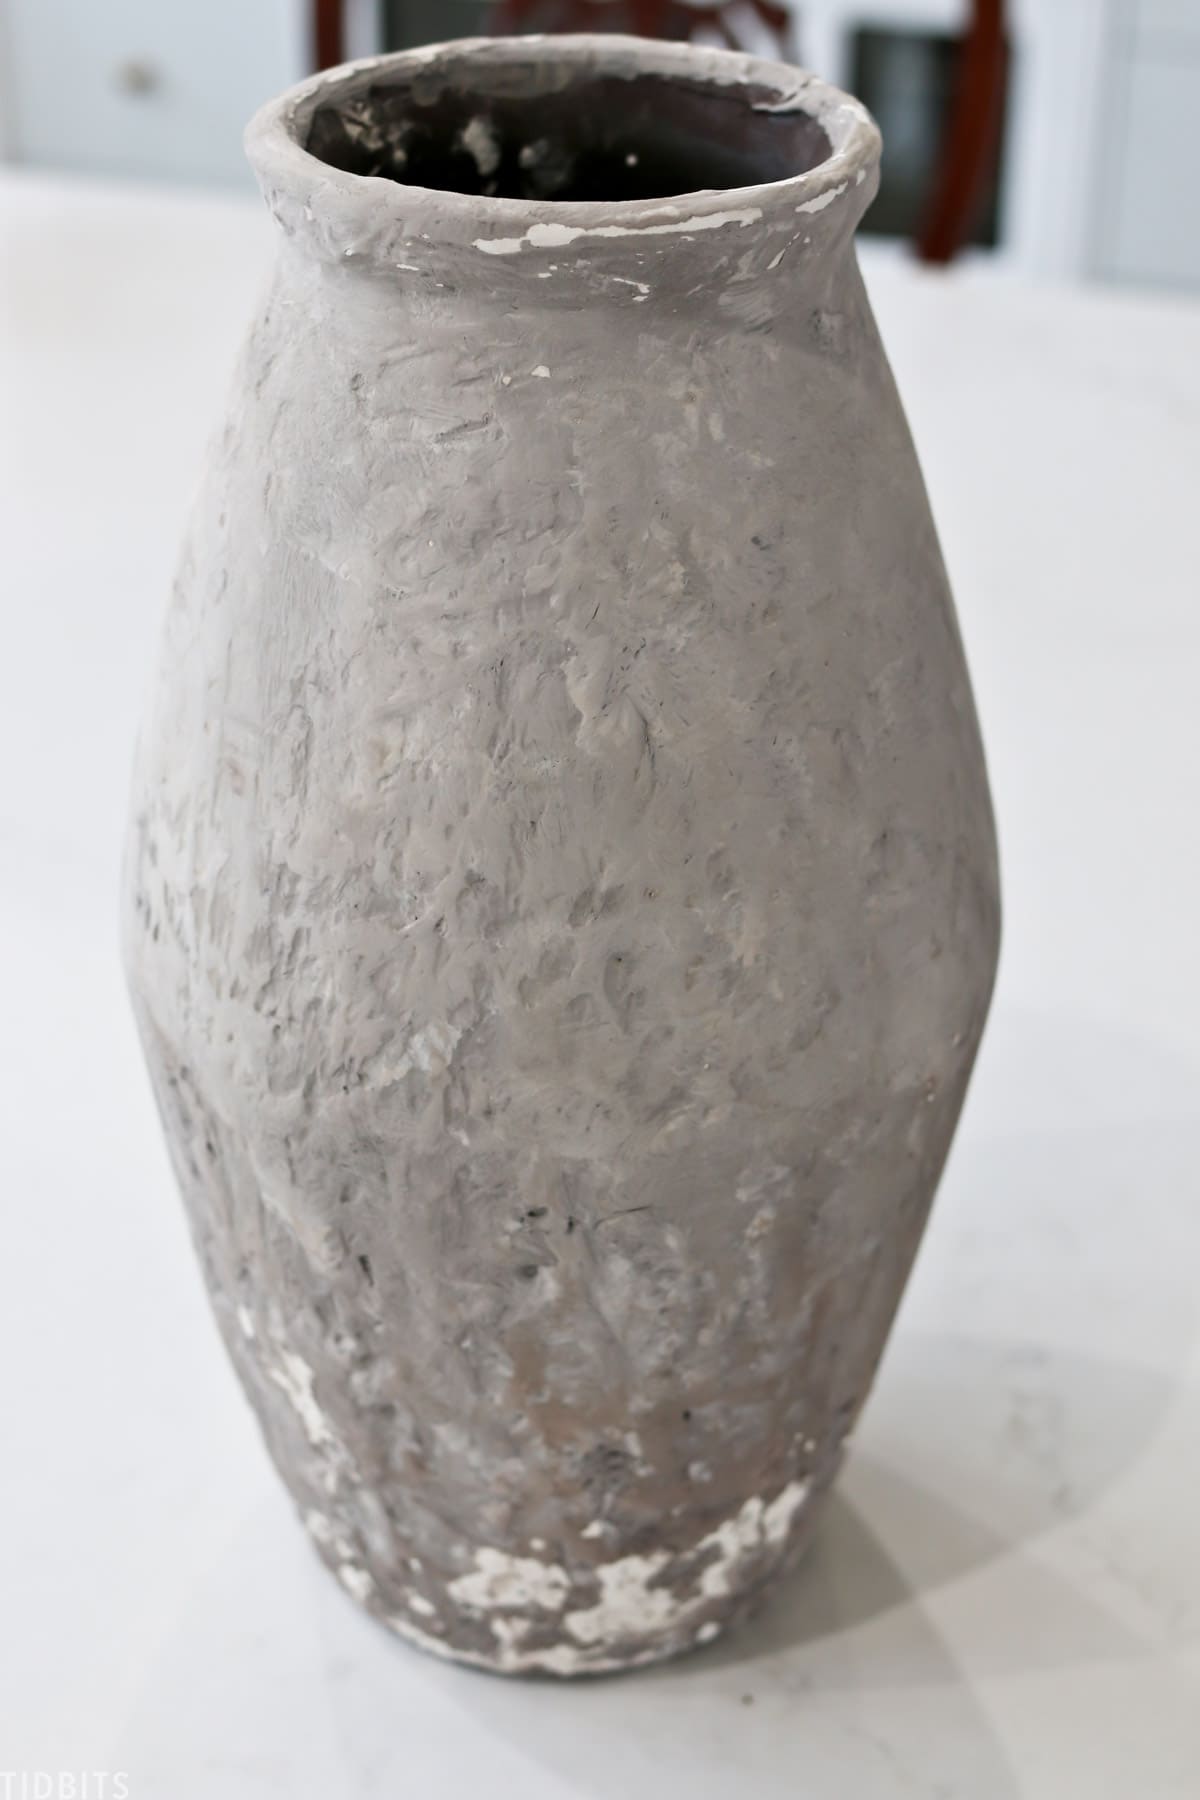
I sanded more heavily around the neck of the vase, where it might be handled more, and at the bottom where it might wear more. I just really went with my gut, and I think it turned out lovely!
I know this old world look might not be everyones cup of tea, but it was such a fun project! I’d love to hear what you think of it, and be sure to tag me on social media if you give it a try yourself!
Now, if you do love Old World style – here are some other DIY posts I think you’ll love!
- How to Age Metal | Vintage Patina on a New Candelabra
- How to Make an “Antique” Cutting Board
- Six Old World Textures I look for when I go Antique Shopping
Thank you so much for reading! I’d love it if you would PIN THIS POST and. help me share it!


Nice work but your “before vase” was beautiful and so much better. Why ruin the beauty? I am just puzzled.
This turned out so gorgeous! I love how you made appear chippy. And that kitchen is seriously stunning. Thanks for sharing your inspo!
I’m working on a project and want to put plaster onto a mirror. How would I get the joint compound to stick without falling off if it’s a bit heavy? I’ve been reading I might need to create a texture but I’m not sure how I’d do that without breaking it. Please help!
I really love these, Thanks for the ideas.
I will love to try these.
Your vase is utterly fantastic, Cami. You indeed have achieved authentic looking ancient wear in both texture and color. I’m gobsmacked. Cheers, Ardith
This is fantastic! Looks authentic and beautiful! P.S. – made your pumpkin banana oatmeal this week and I could hug you! 😆 Thank you! ❤️
I absolutely love this vase! I very much enjoy following your blog! Your buildout around your range is so awesome! What is the name and brand of your floors? Thanks much and keep up the good work!!!
Love this. I, too, love projects and being creative. I will definitely try this. I love your design and blogs and get so excited with each email I see from you. Thank you.