
This post may contain affiliate links, which means I get a small percentage of the sale at no extra cost to you. I only recommend items I love and have had a positive experience with. Thank you!
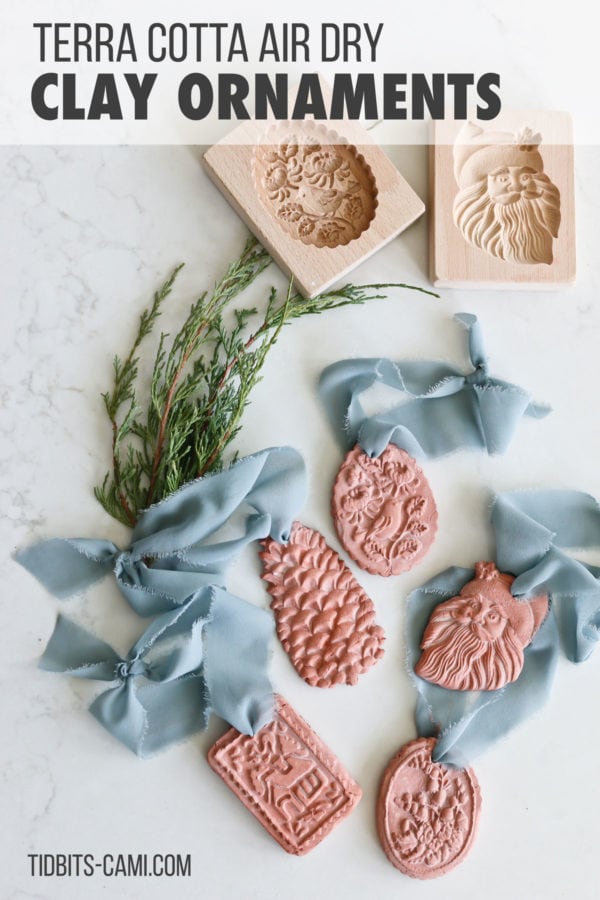
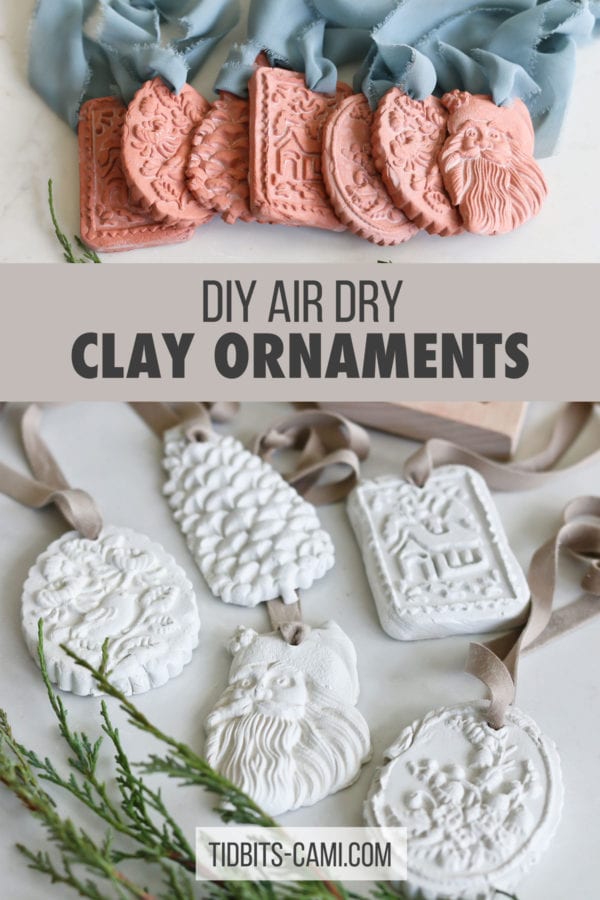
Terracotta is all the rage right now, and I had the idea to make terracotta Christmas ornaments! Let me show you the step by step instructions on how to make air dry clay ornaments with terracotta and white clay. They turn out unbelievably beautiful!
Don’t you love it when a project turns out better than you envisioned!? I really wanted to find a way to make some terracotta Christmas ornaments since I was throwing some terracotta pots into my decor this year. White clay is also very welcome in my abode.
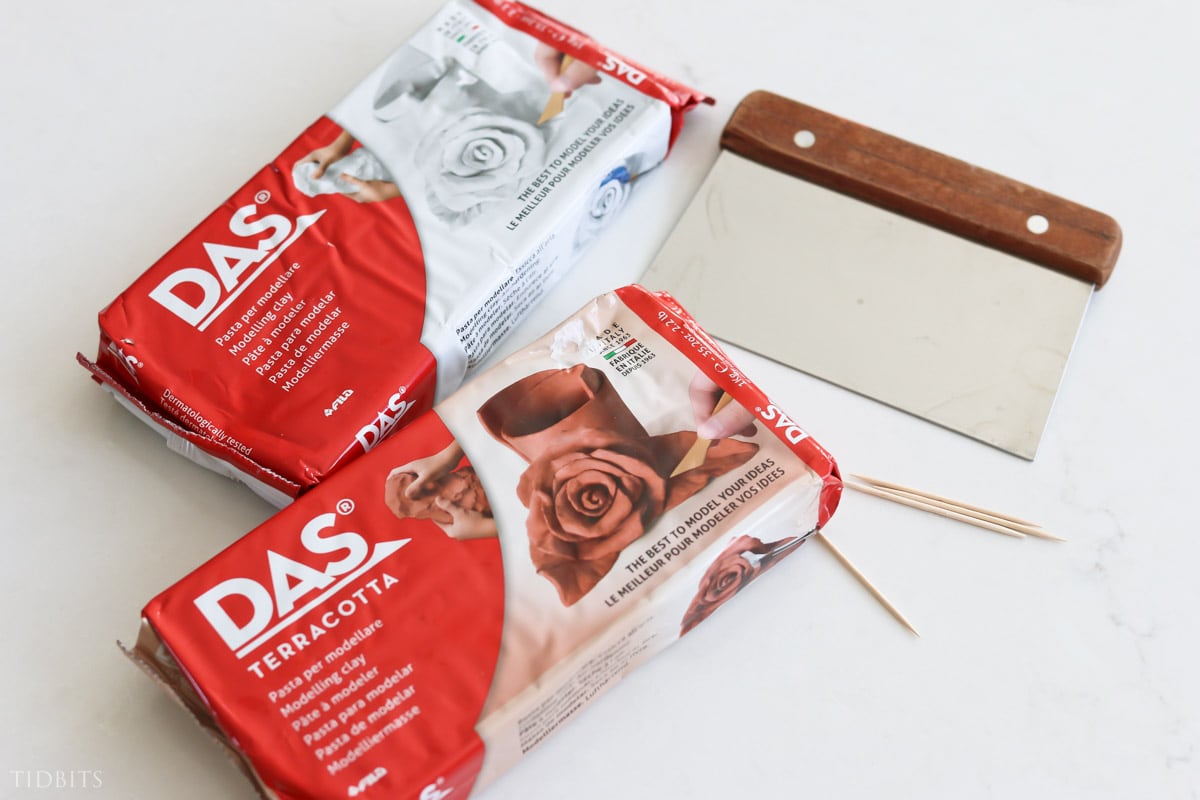
Low and behold – I discovered this amazing air dry clay from DAS in both terracotta color and white! I was delighted and couldn’t wait to get started.
Let me share with you all the supplies I needed to make DIY air dry clay ornaments, and walk you through my entire process.
These are similar to the results from making salt dough ornaments, but will likely last a longer time and have a slightly different texture. Here is some great inspiration if you want to try a salt dough recipe.
SUPPLIES FOR MAKING AIR DRY CLAY CHRISTMAS ORNAMENTS
- AIR DRY CLAY
- Any air dry clay will work. If you want a light weight type of clay (great for kids) I recommend the Crayola brand. However, I used the DAS air dry clay since it is more like the type of clay used for pottery and ceramics. It is heavier and more substantial – and lots of fun to work with!
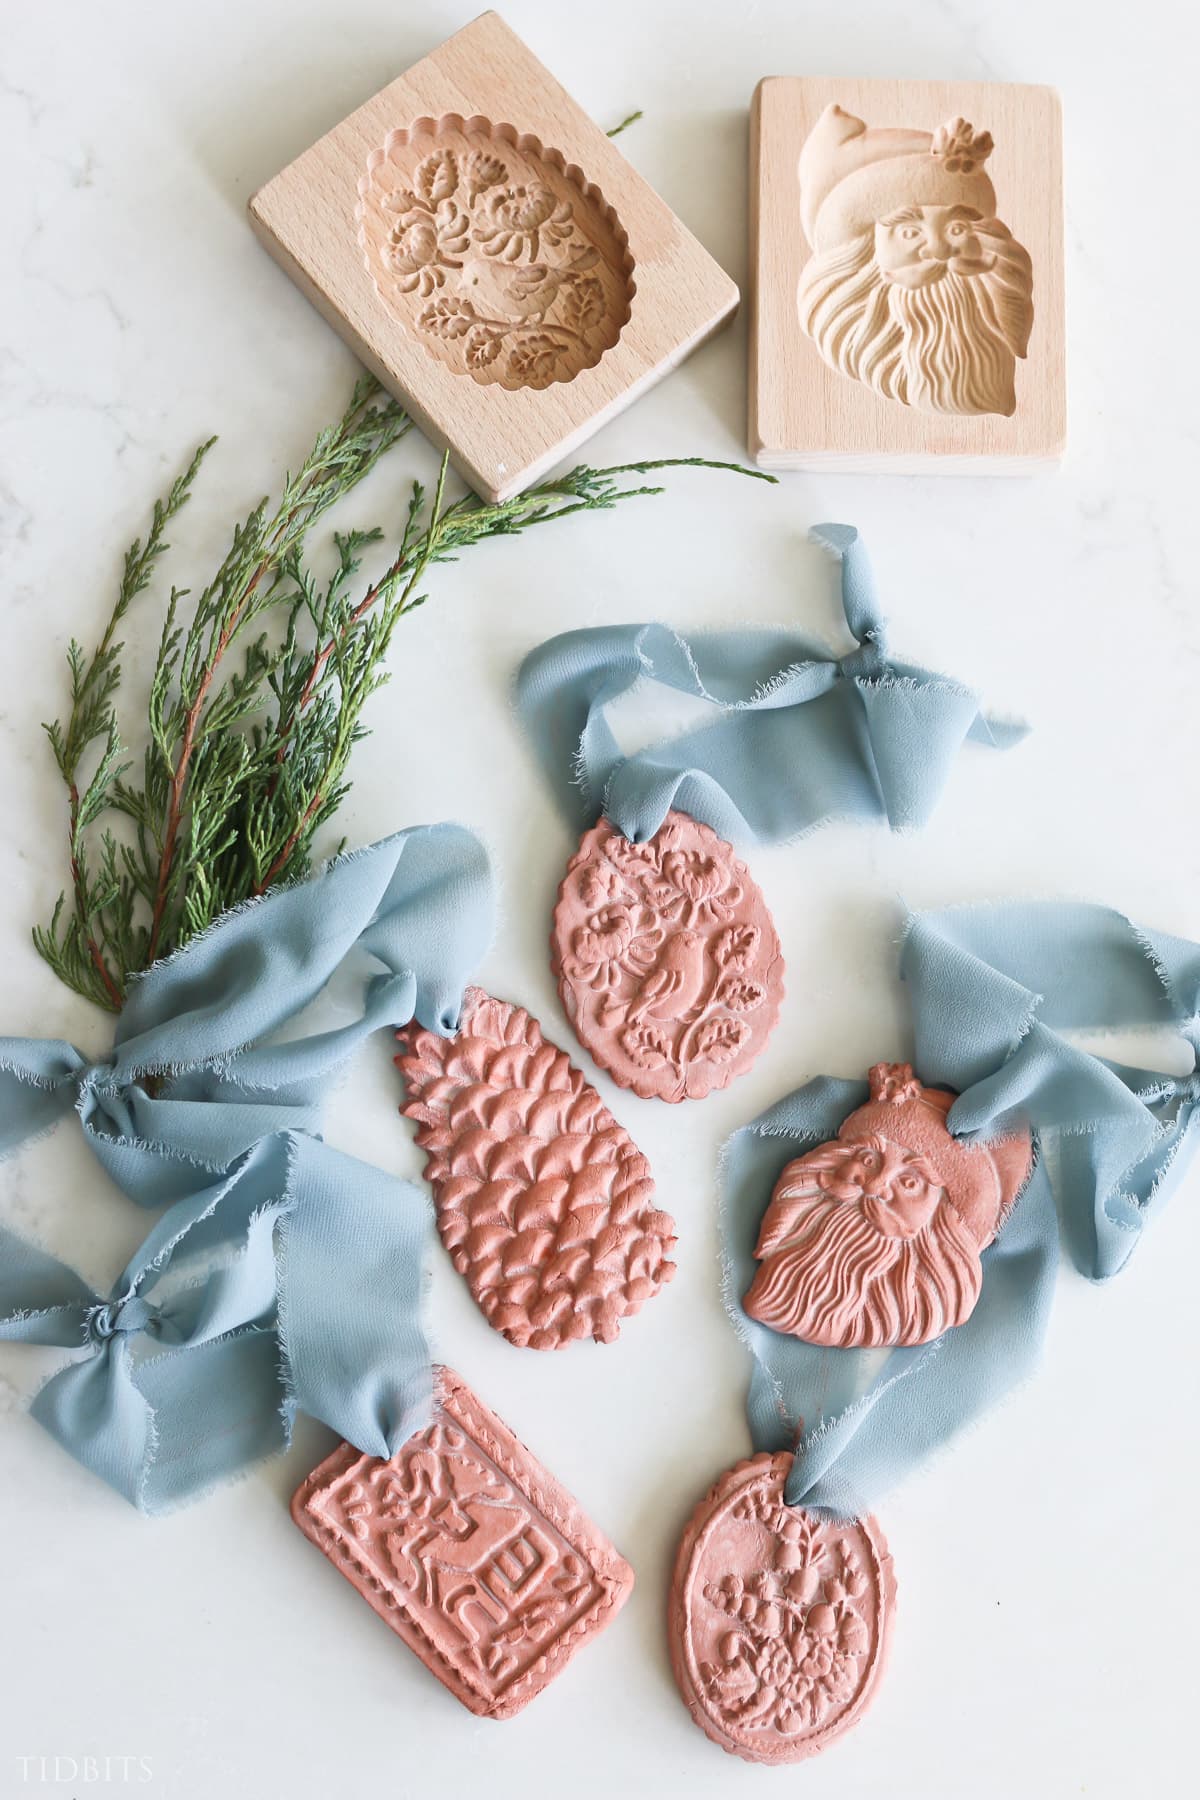
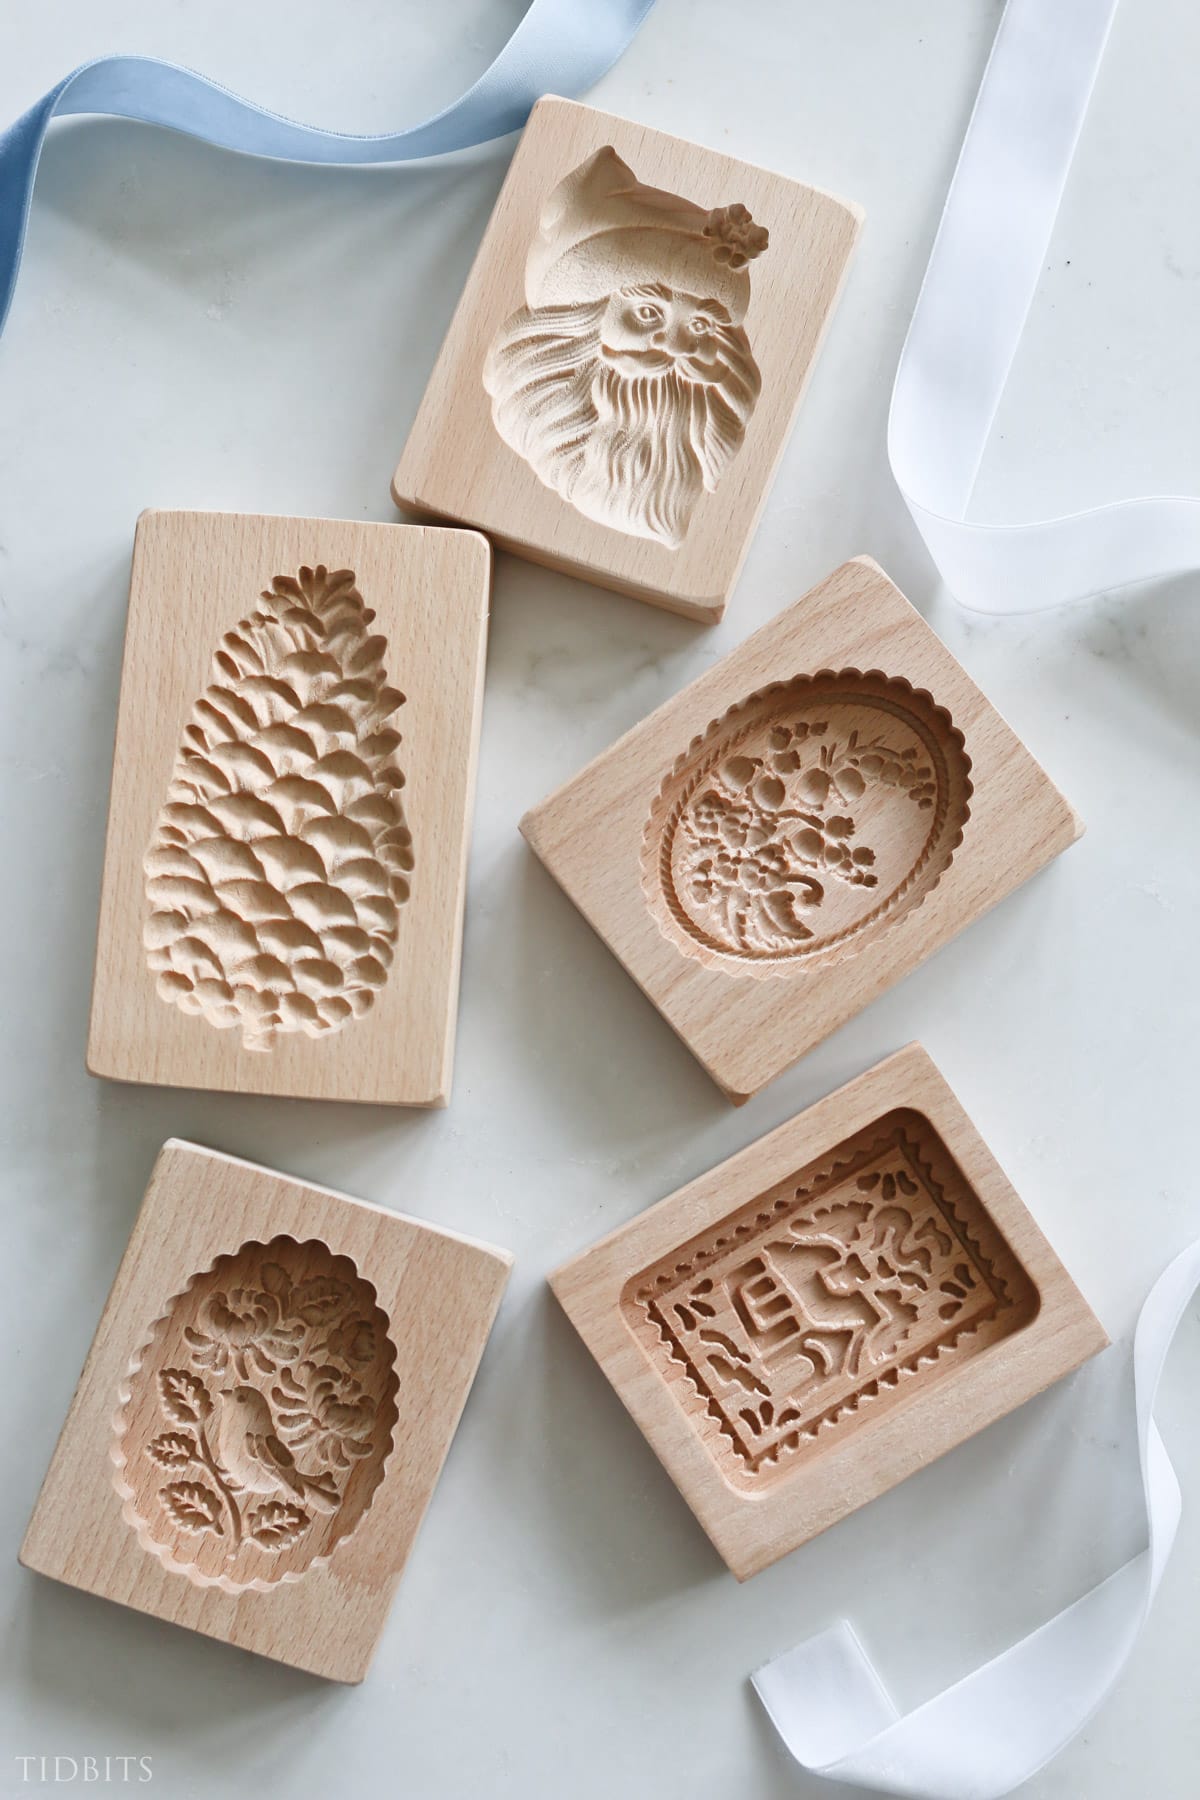
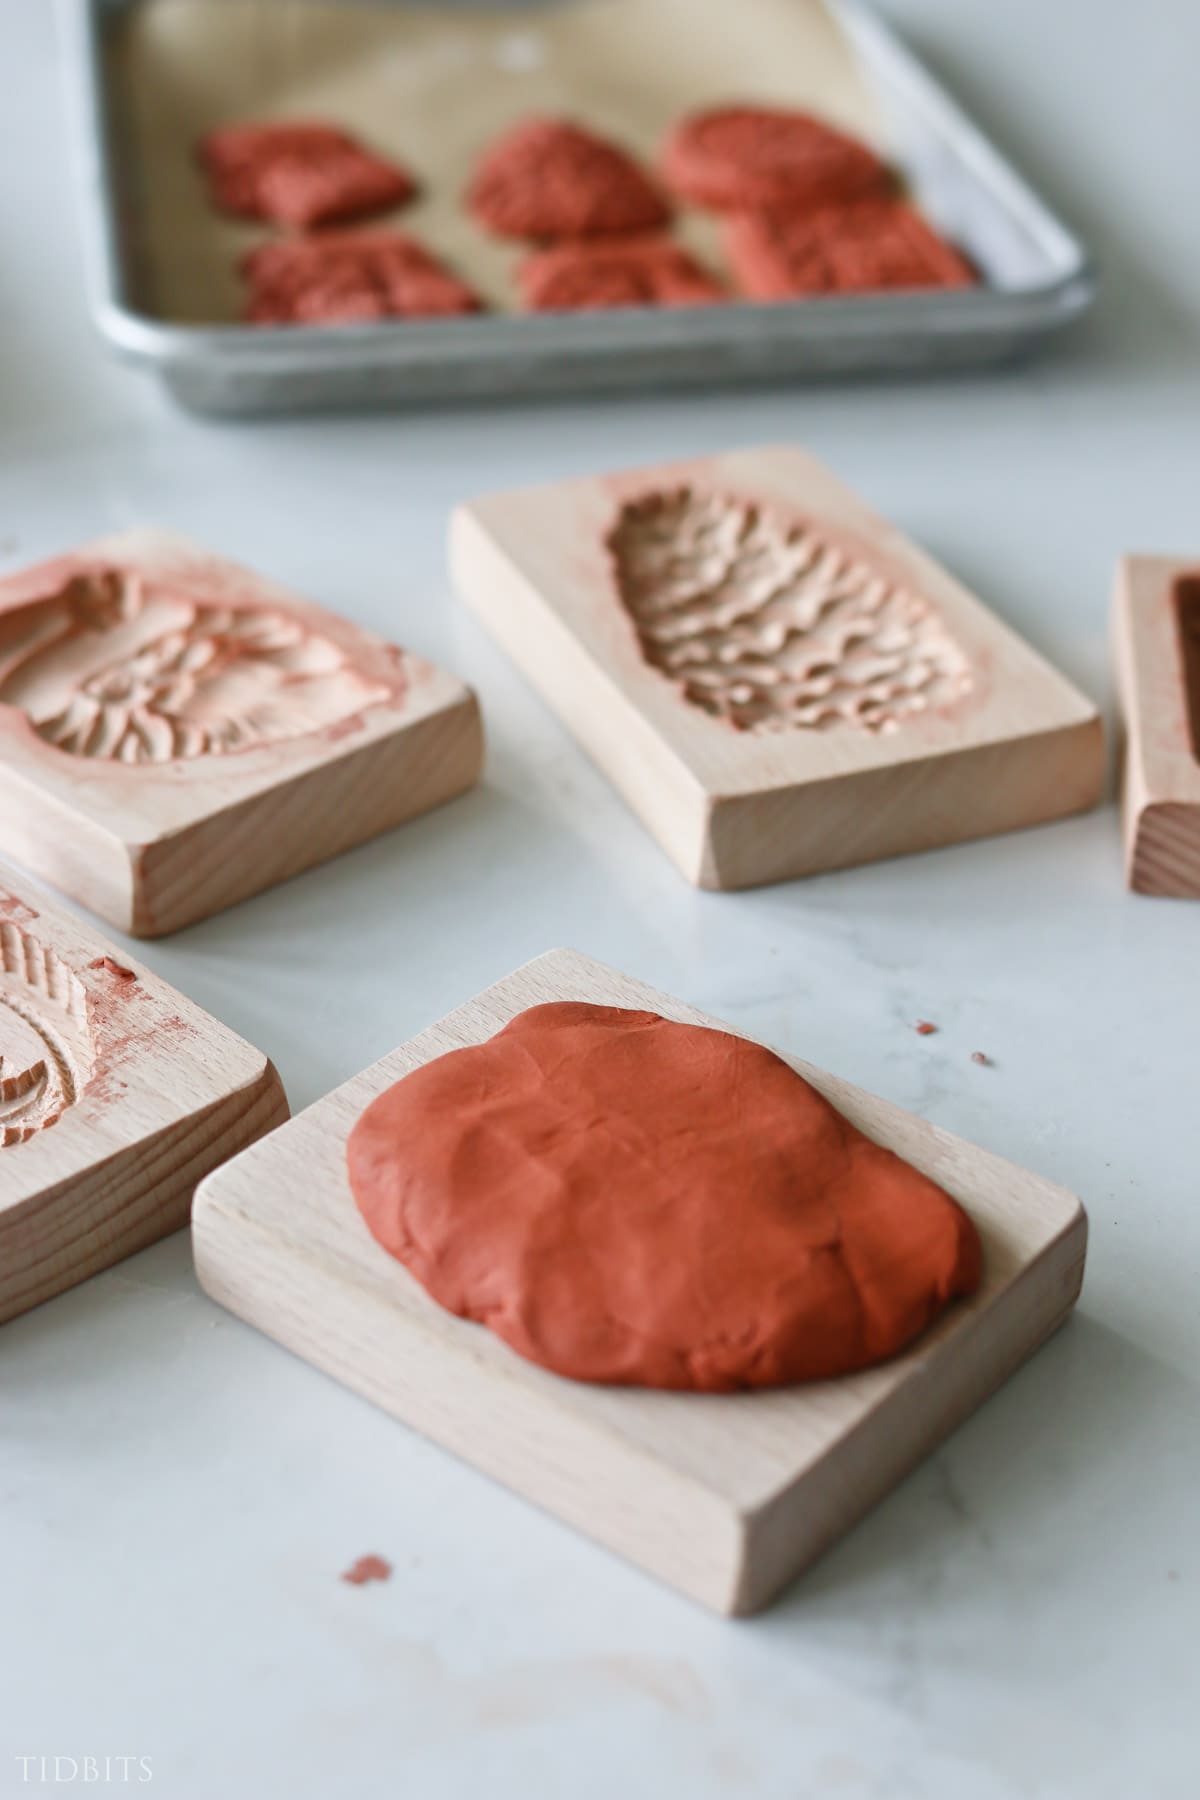
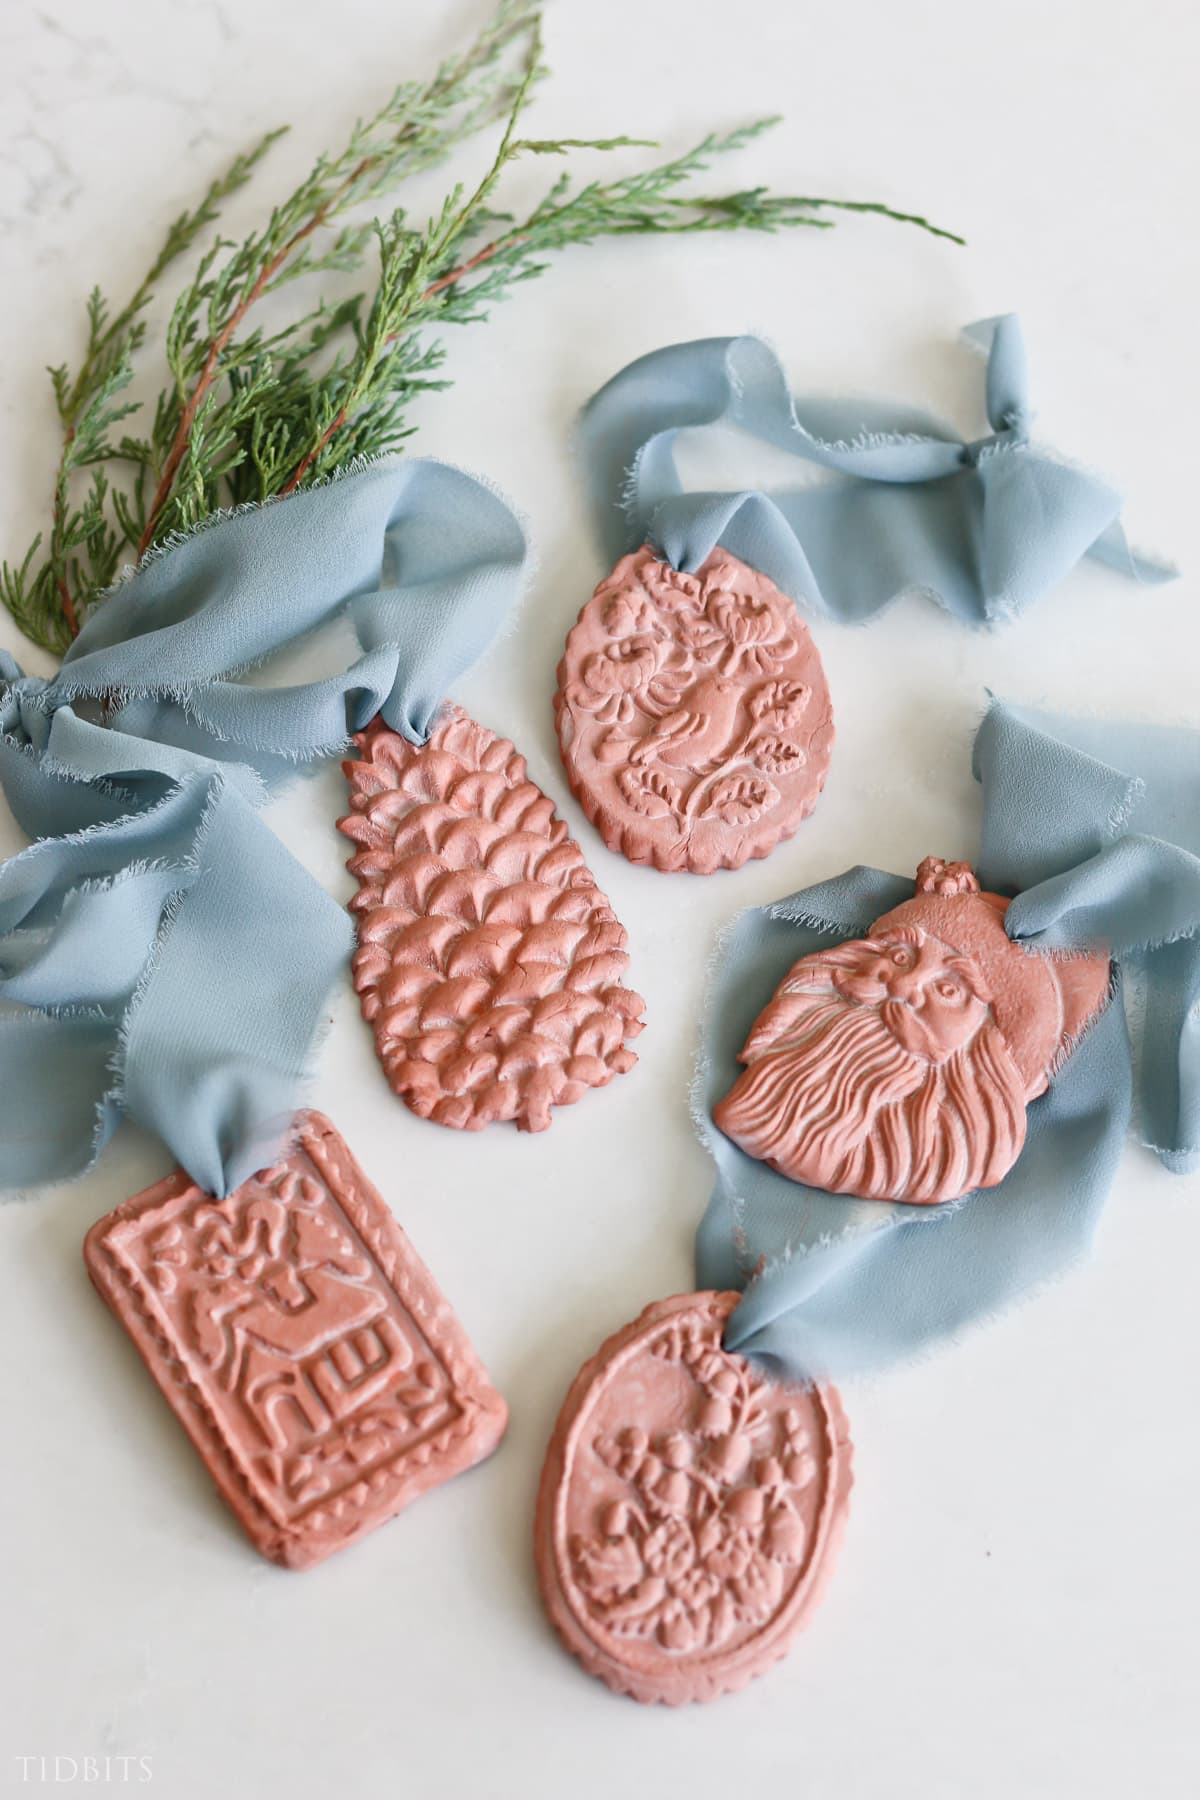
- WOODEN COOKIE MOLDS
- You could also get away with using cookie cutters or other types of molds.
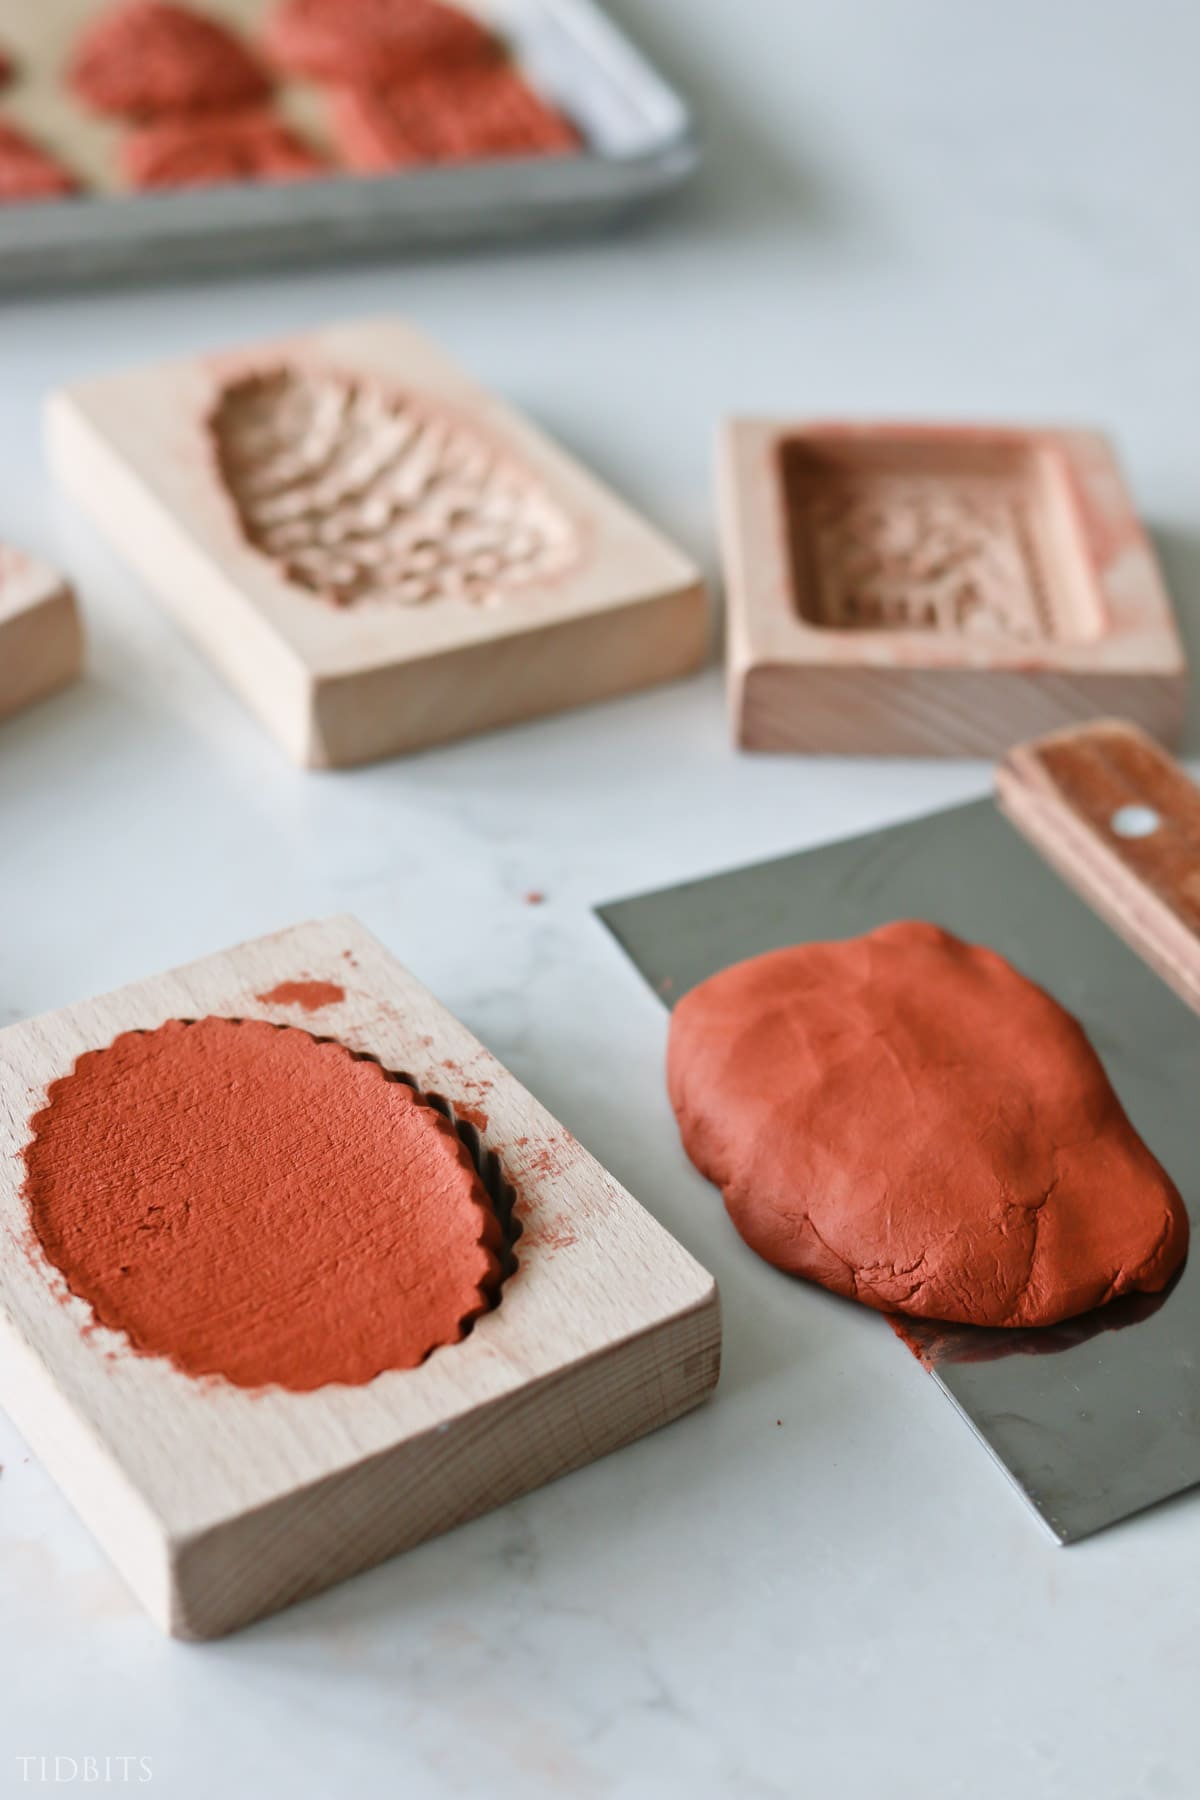
- SOMETHING TO SCRAPE THE EXCESS CLAY OFF THE MOLD
- I used a pastry scraper tool, but anything creative would work!
- Parchment paper, wax paper or other mat
- Tray or baking sheet for drying them on
- Straw or toothpicks for making hole
- Rolling pin if you want to use that to work the clay
- Ribbon for hanging
WHERE DID I PURCHASE MY WOODEN COOKIE MOLDS
I found a collection of these molds on amazon and there are many more to choose from. I think the molds are so very beautiful and have a vintage appeal. If you are lucky enough to find these while antique or thrift shopping – grab them up! I know I will be. You can also use them for cookies later!
HOW TO MAKE AIR DRY CLAY ORNAMENTS: PICTURE TUTORIAL STEPS
This is super easy and fun! Perhaps a bit messy too, but it washes off easily so just enjoy this fun Christmas craft!
STEP 1: SOFTEN THE CLAY
Just grab a handful of the air dry clay and start molding it into a ball with a smooth surface. This will make it easier to work with.
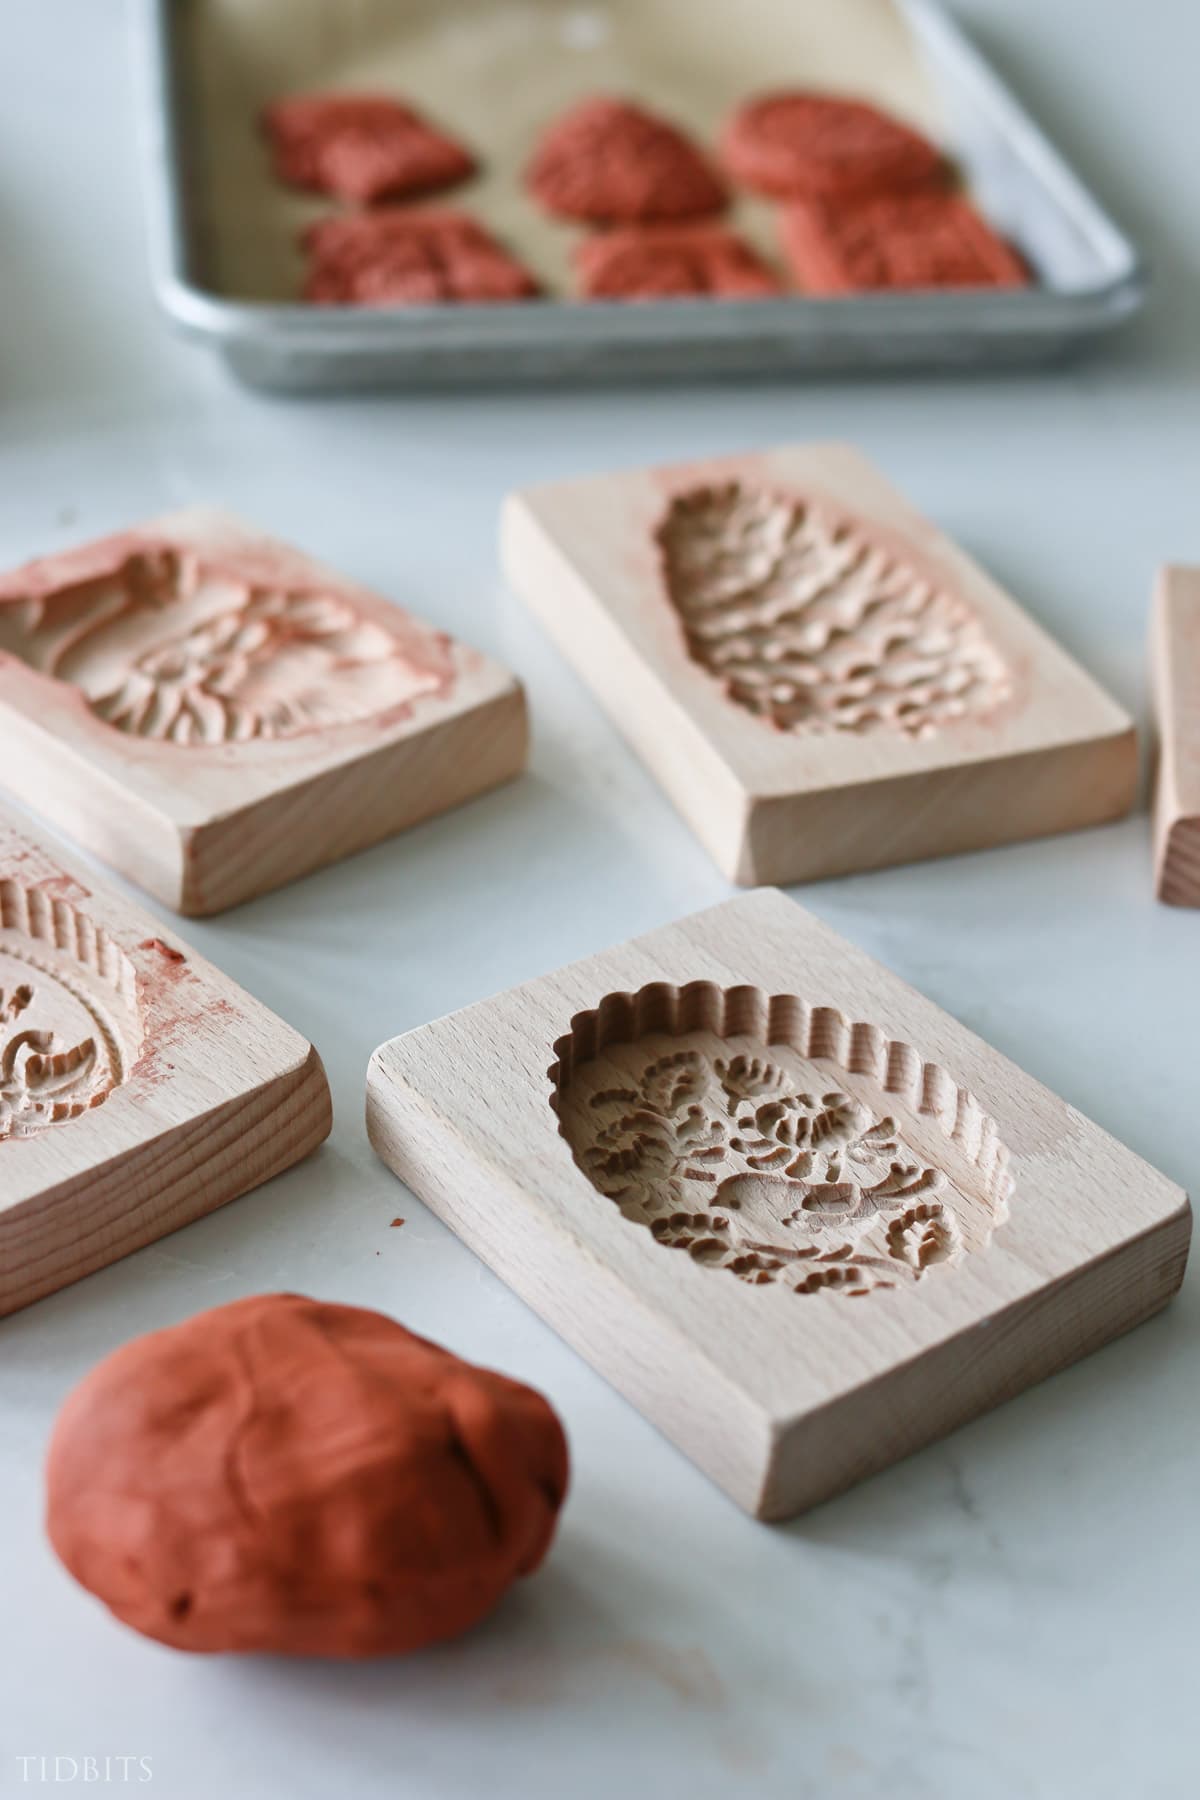
STEP 2: PRESS INTO MOLD
Use your fingertips to press all the clay into the mold, covering the entire cut out design.
STEP 3: SCRAPE OFF EXCESS CLAY
With your scraper tool of choice, quickly and swiftly scrape off the top layer. If it doesn’t release cleanly or easily, you may need to start over and work your clay a little more. It should actually cause the molded shape to lift slightly where you began your scraping motion. This is excellent and will help you release the clay much easier.
STEP 4: LIFT OUT YOUR SHAPE
Carefully lift out the ornament shape and gently press any parts that may need some reshaping. If it doesn’t lift out easily, use a knife, spoon, toothpick or anything else you can think of to help you release it.
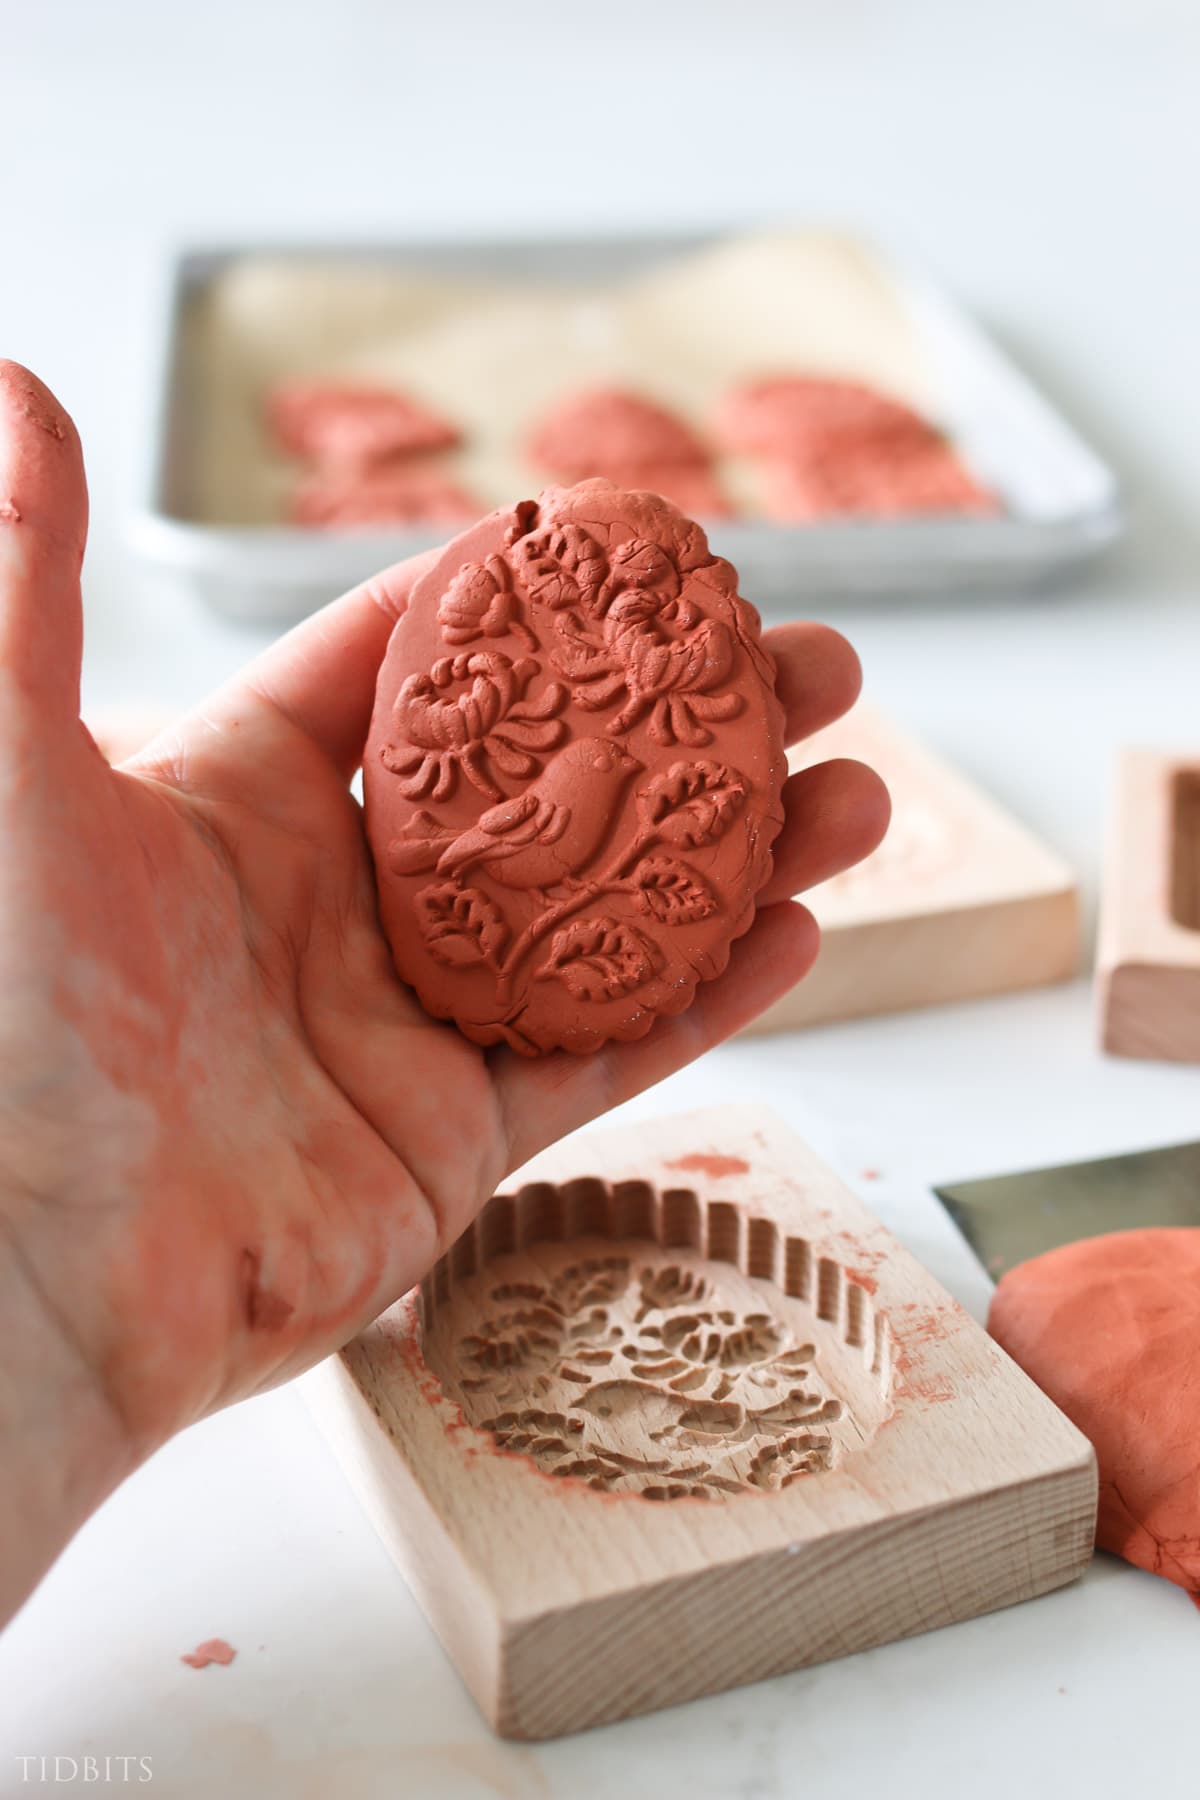
You’ll also want to use a straw or toothpick to poke a hole near the top that will fit your ribbon or string. If you don’t want to poke a hole, you could likely glue a string to the back when finished.
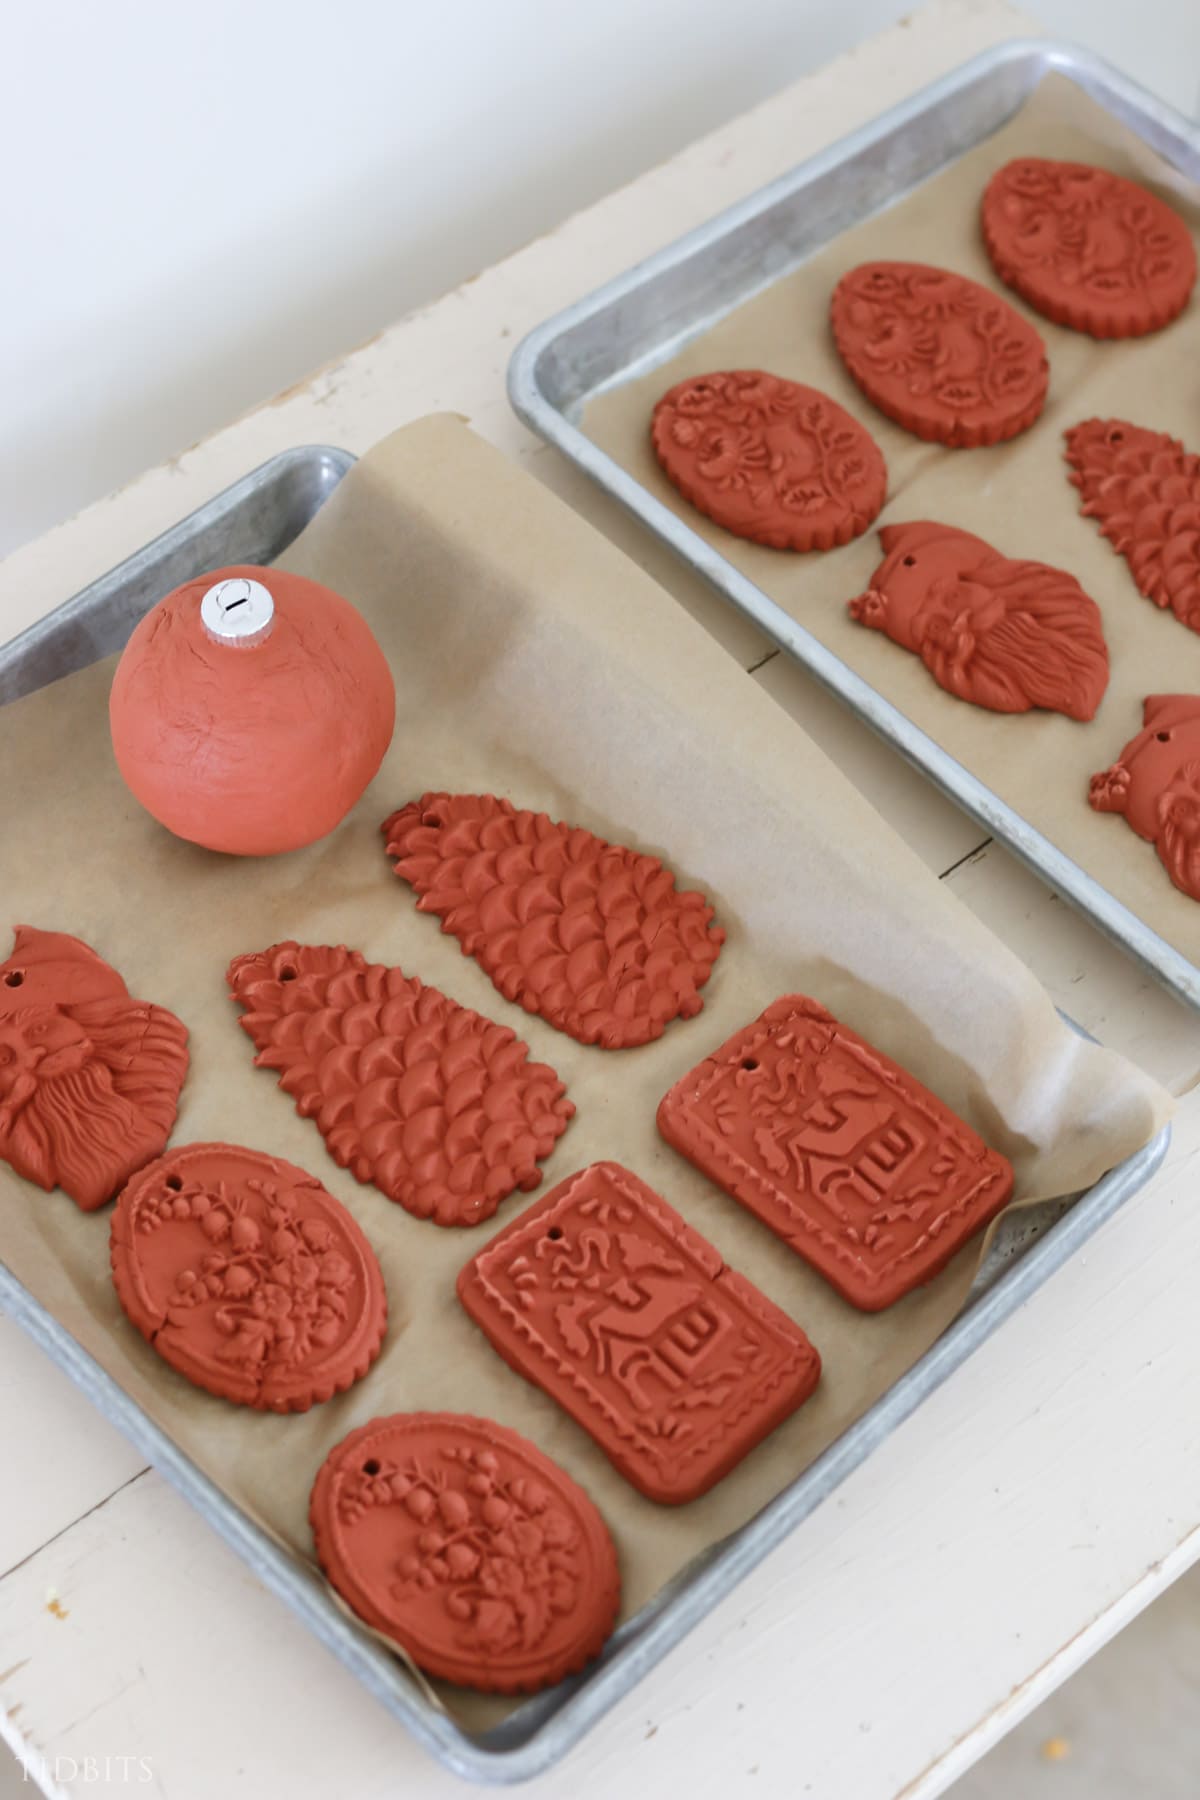
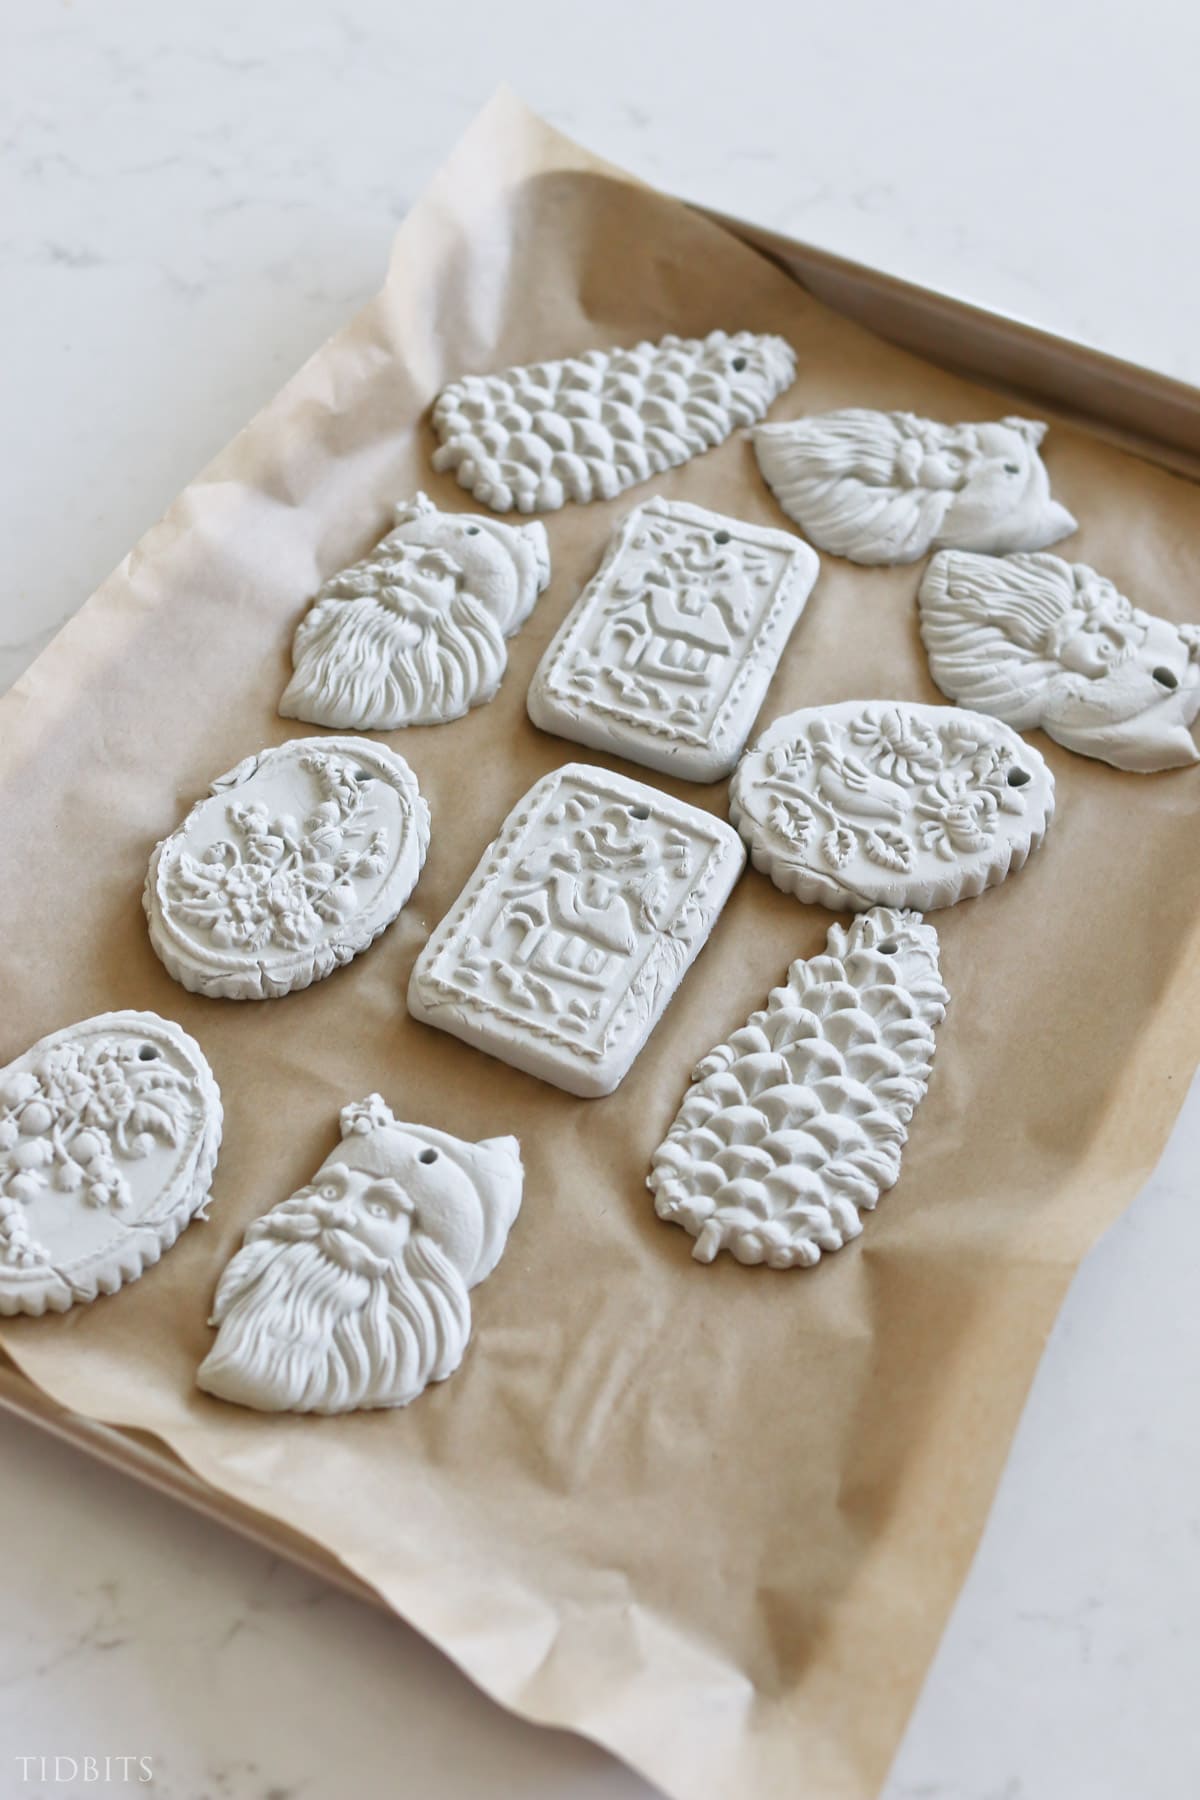
STEP 5: LEAVE OUT TO AIR DRY
Just set your wet clay ornament out on your pan covered with parchment paper. First dry them with the back side of the ornament down. It should take a full 24 hours to dry, but I recommend flipping them around half way through to let the back side air dry. You’ll know they are dry when you can’t feel any moisture on the front or back.
VIDEO TUTORIAL ON MAKING AIR DRY CLAY ORNAMENTS
To watch me make these in video, click on my YouTube video!

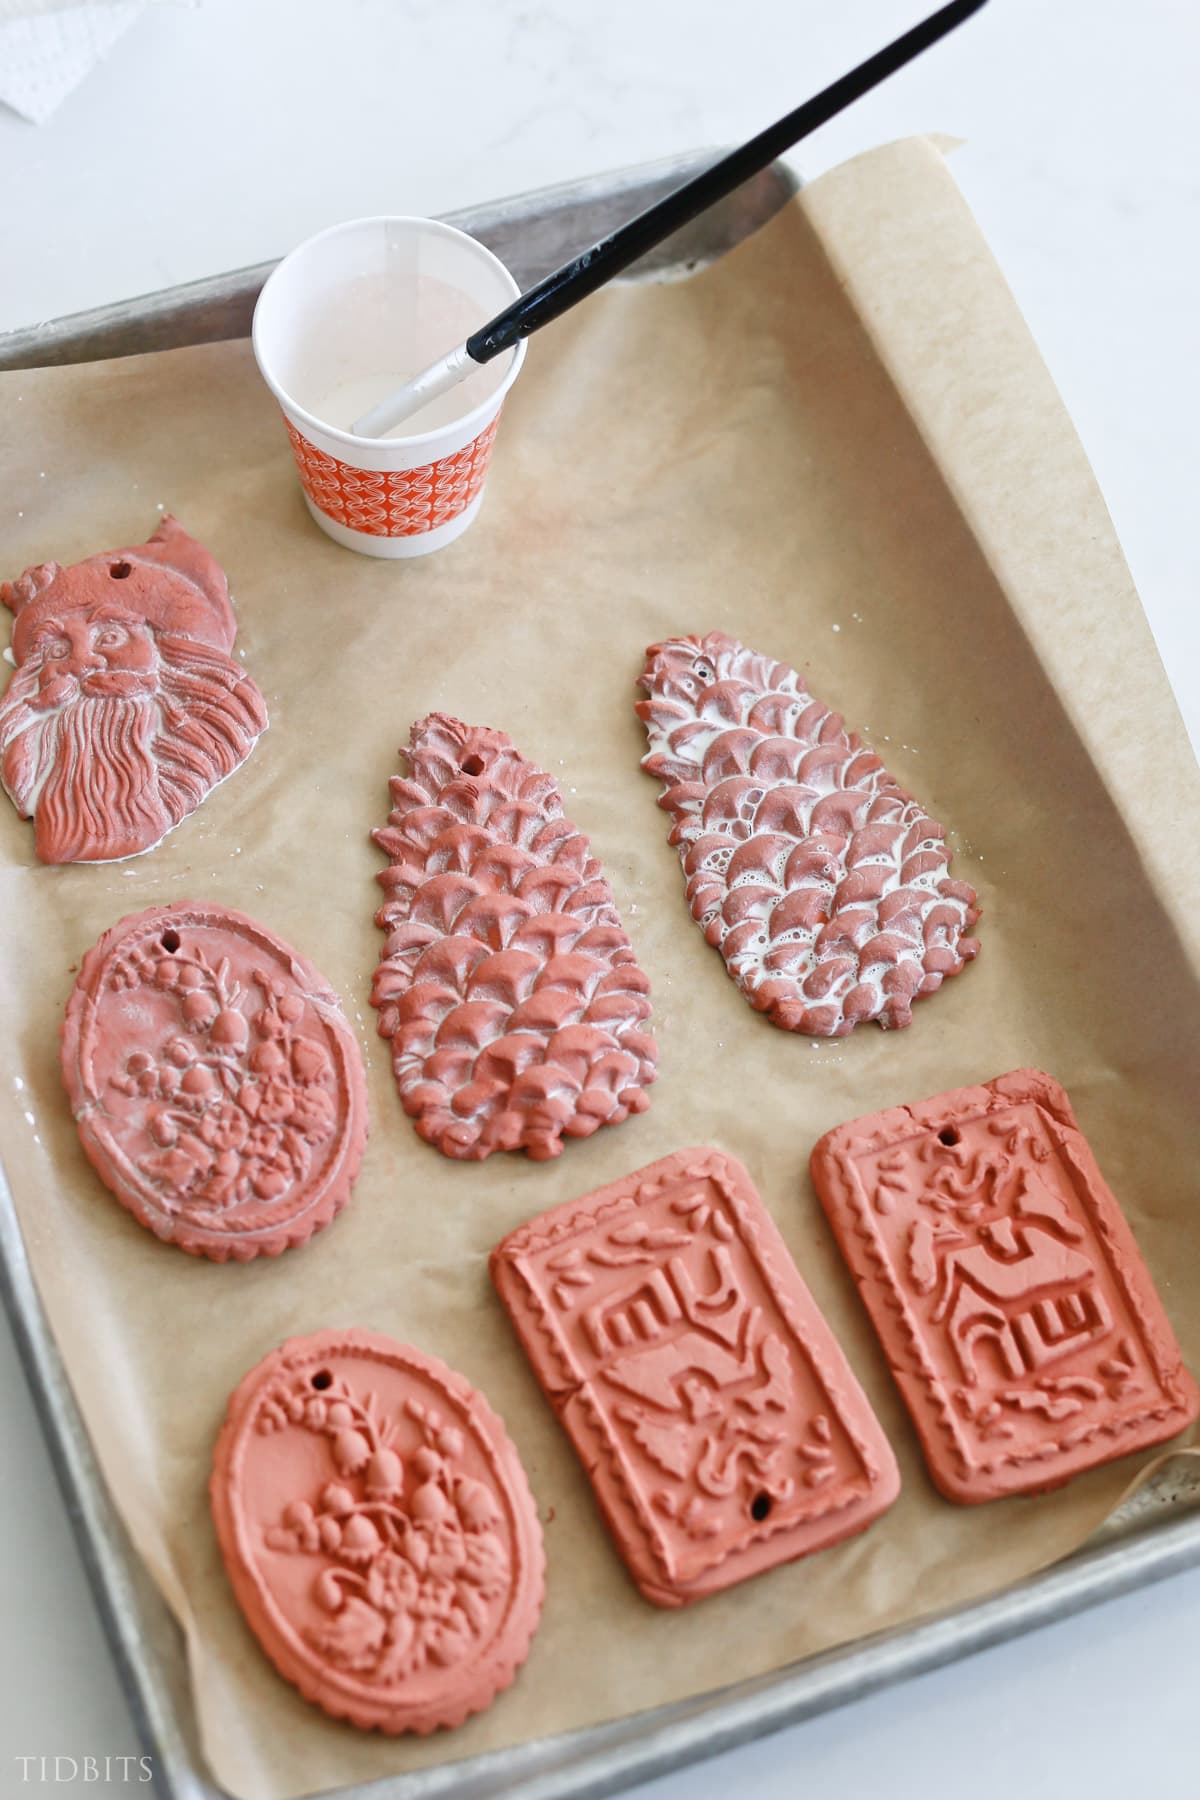
CAN I PAINT MY AIR DRY CLAY ORNAMENTS?
YES! Absolutely!
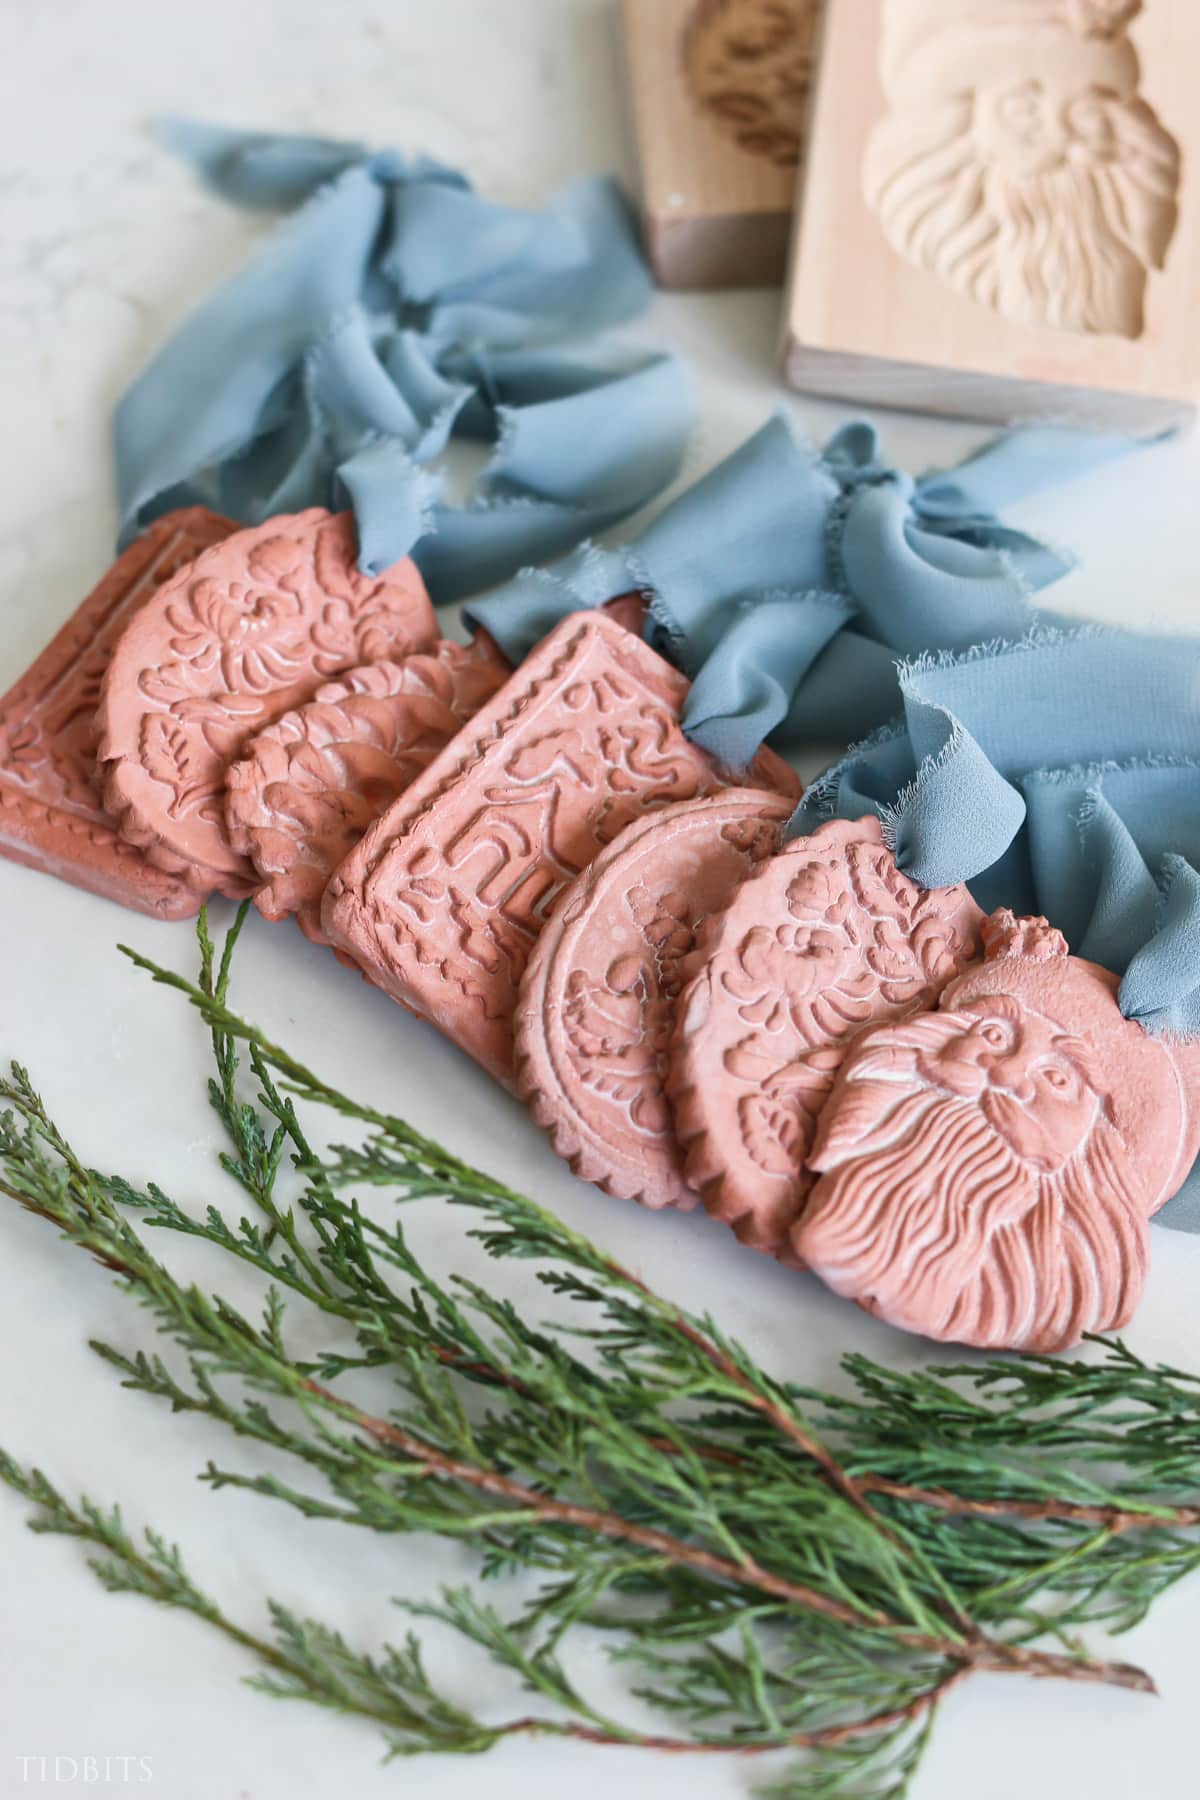
On my terracotta ornaments, I wanted them to look a little aged – like a beautiful old terracotta pot. So I watered down some white acrylic paint a lot, and dabbed it on with a brush. I carefully dabbed off any paint excess and let them dry with the white paint into the crevasses.
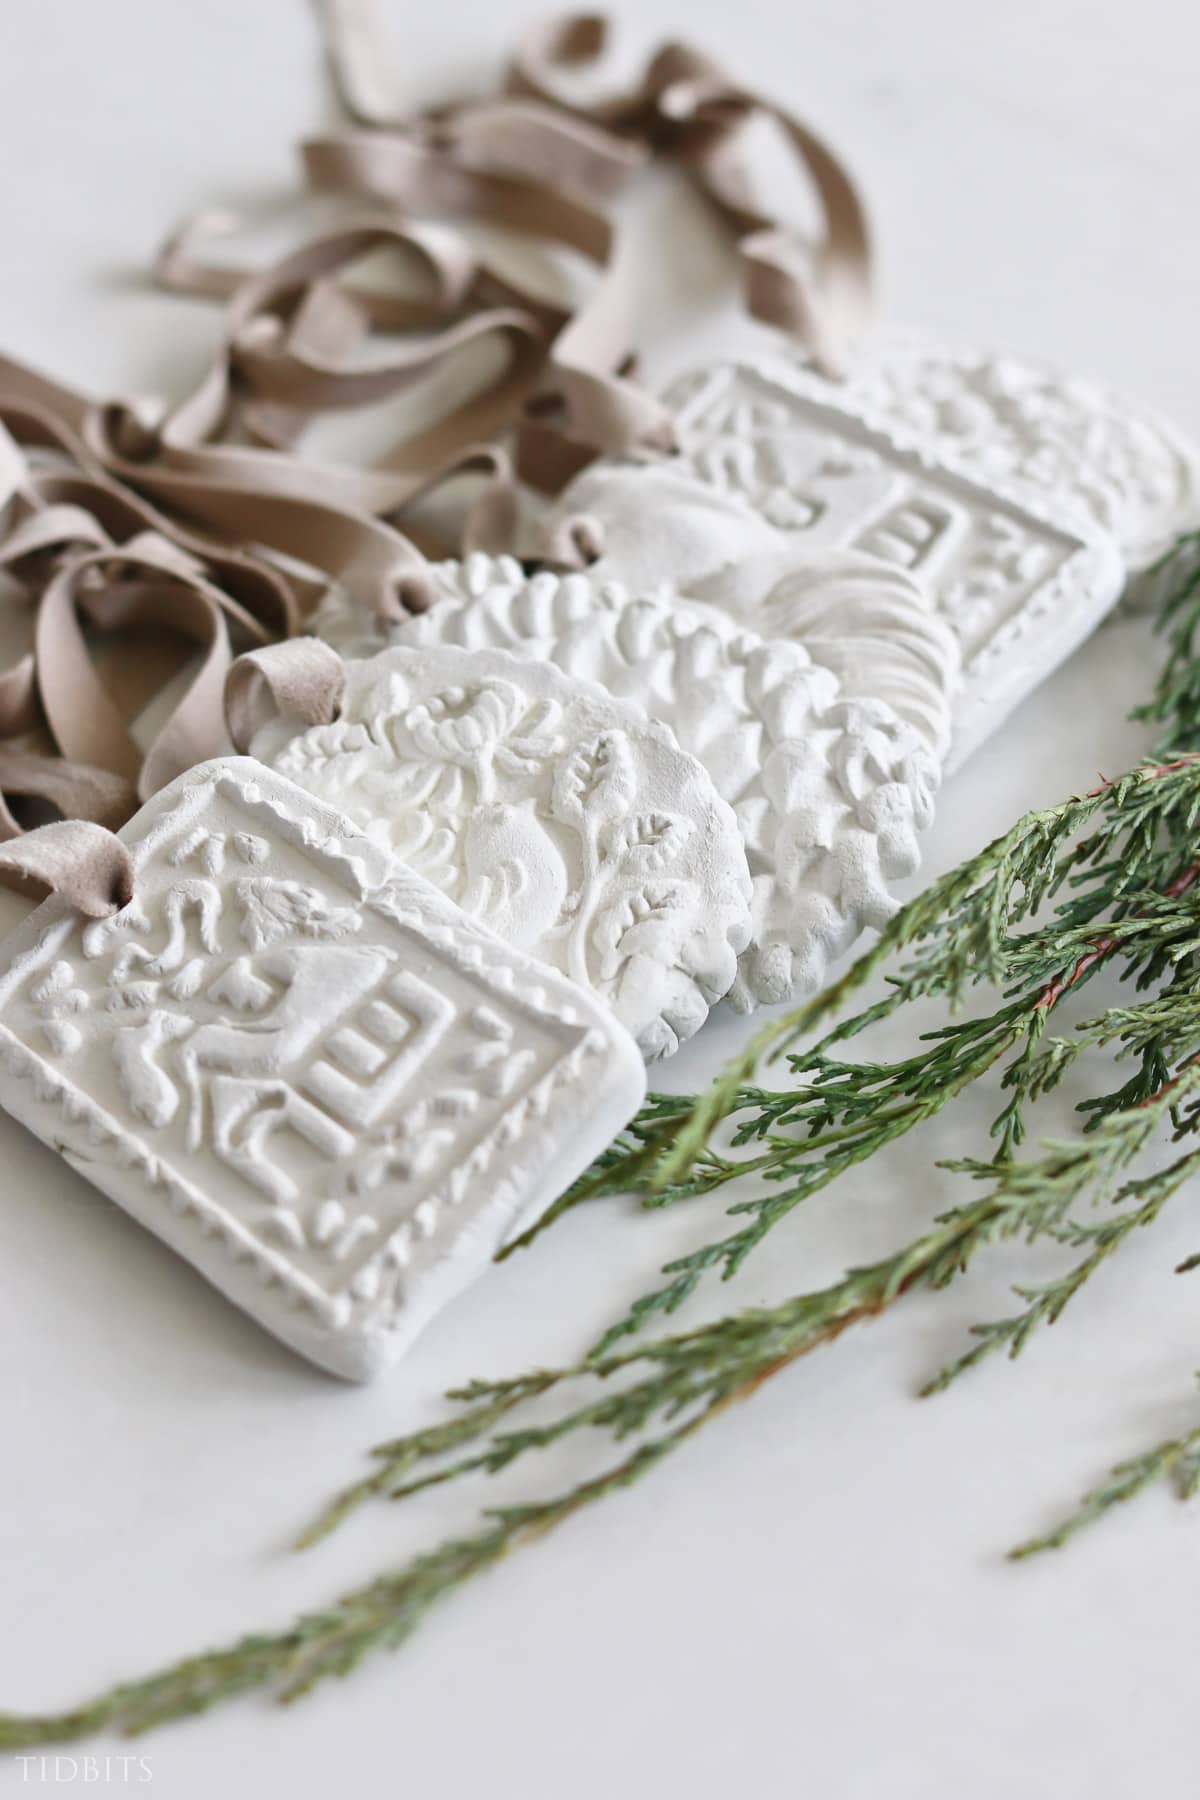
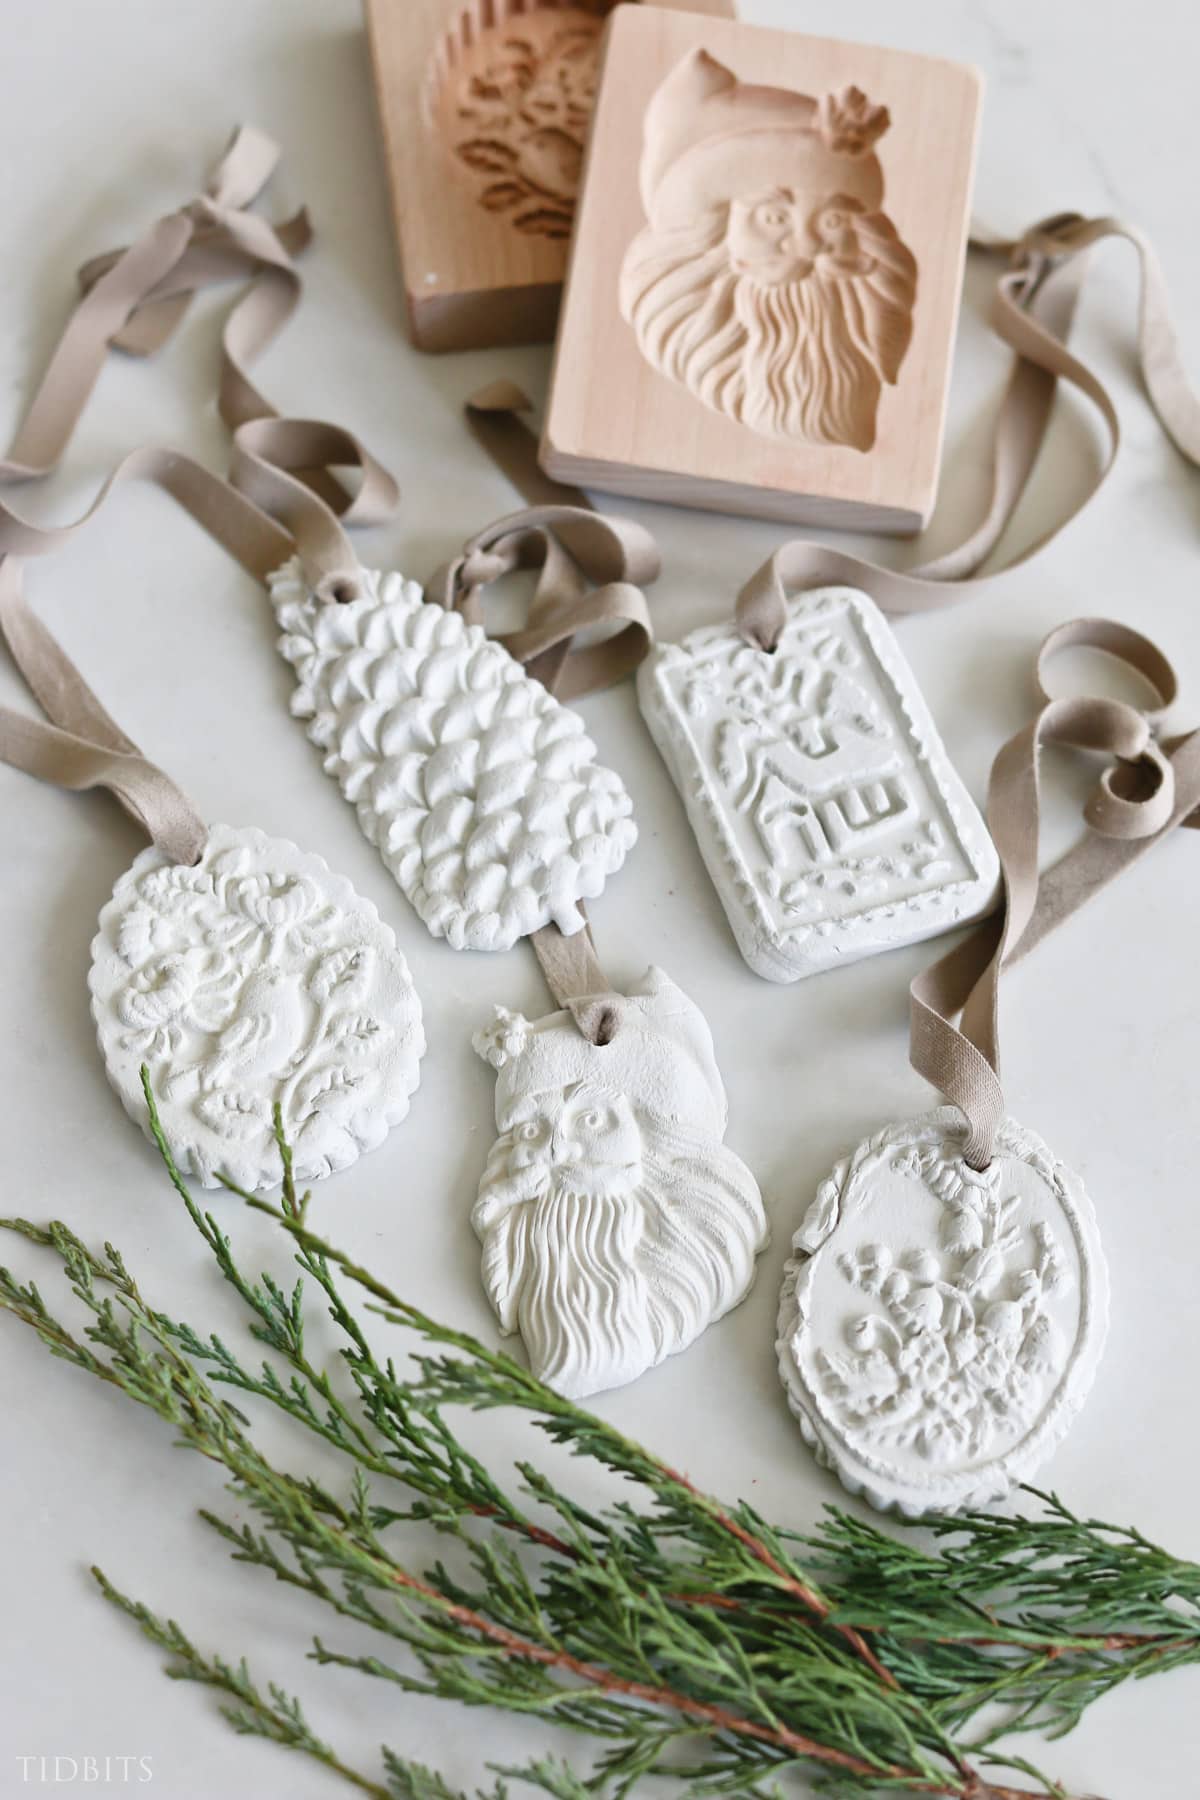
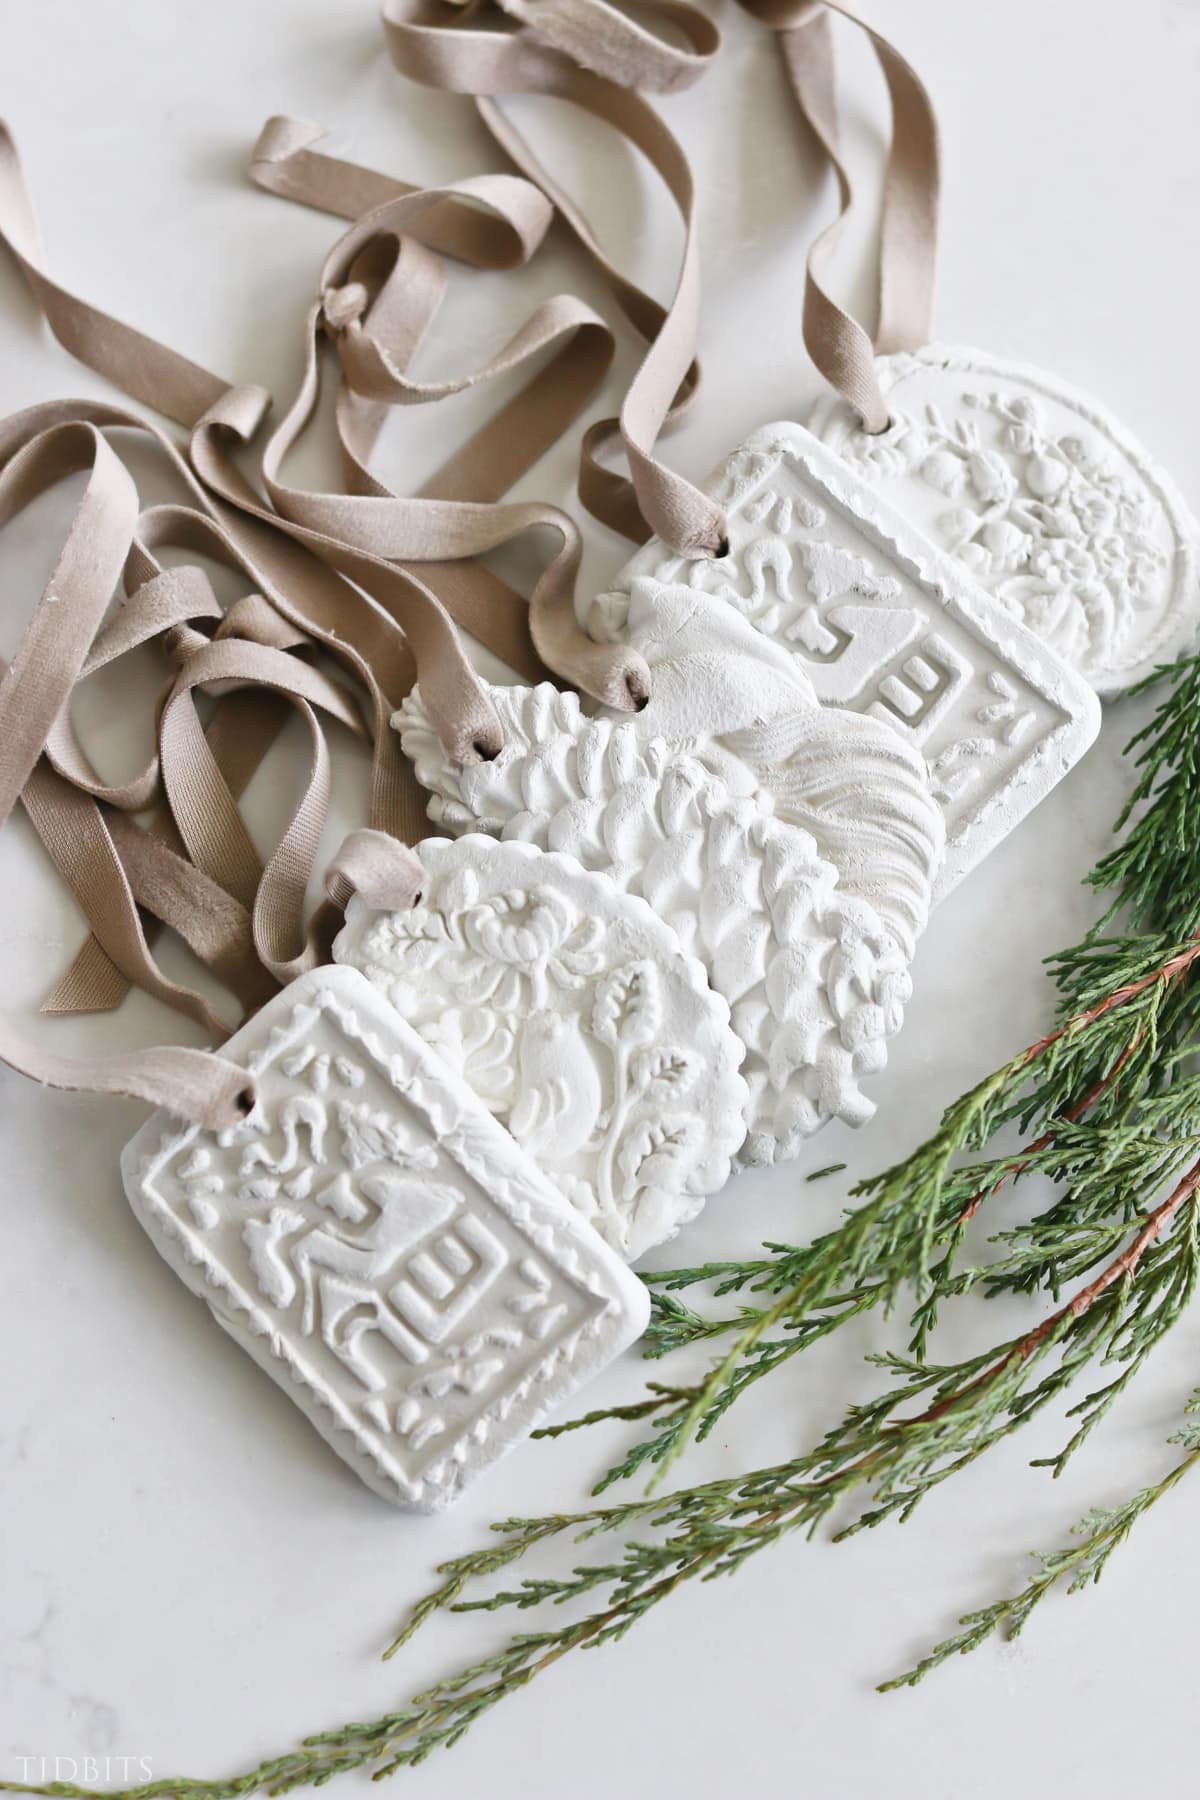
I left my white ornaments unpainted for the more natural clay look, but you could paint them any way you want. I imagine any type of paint will suit the job.
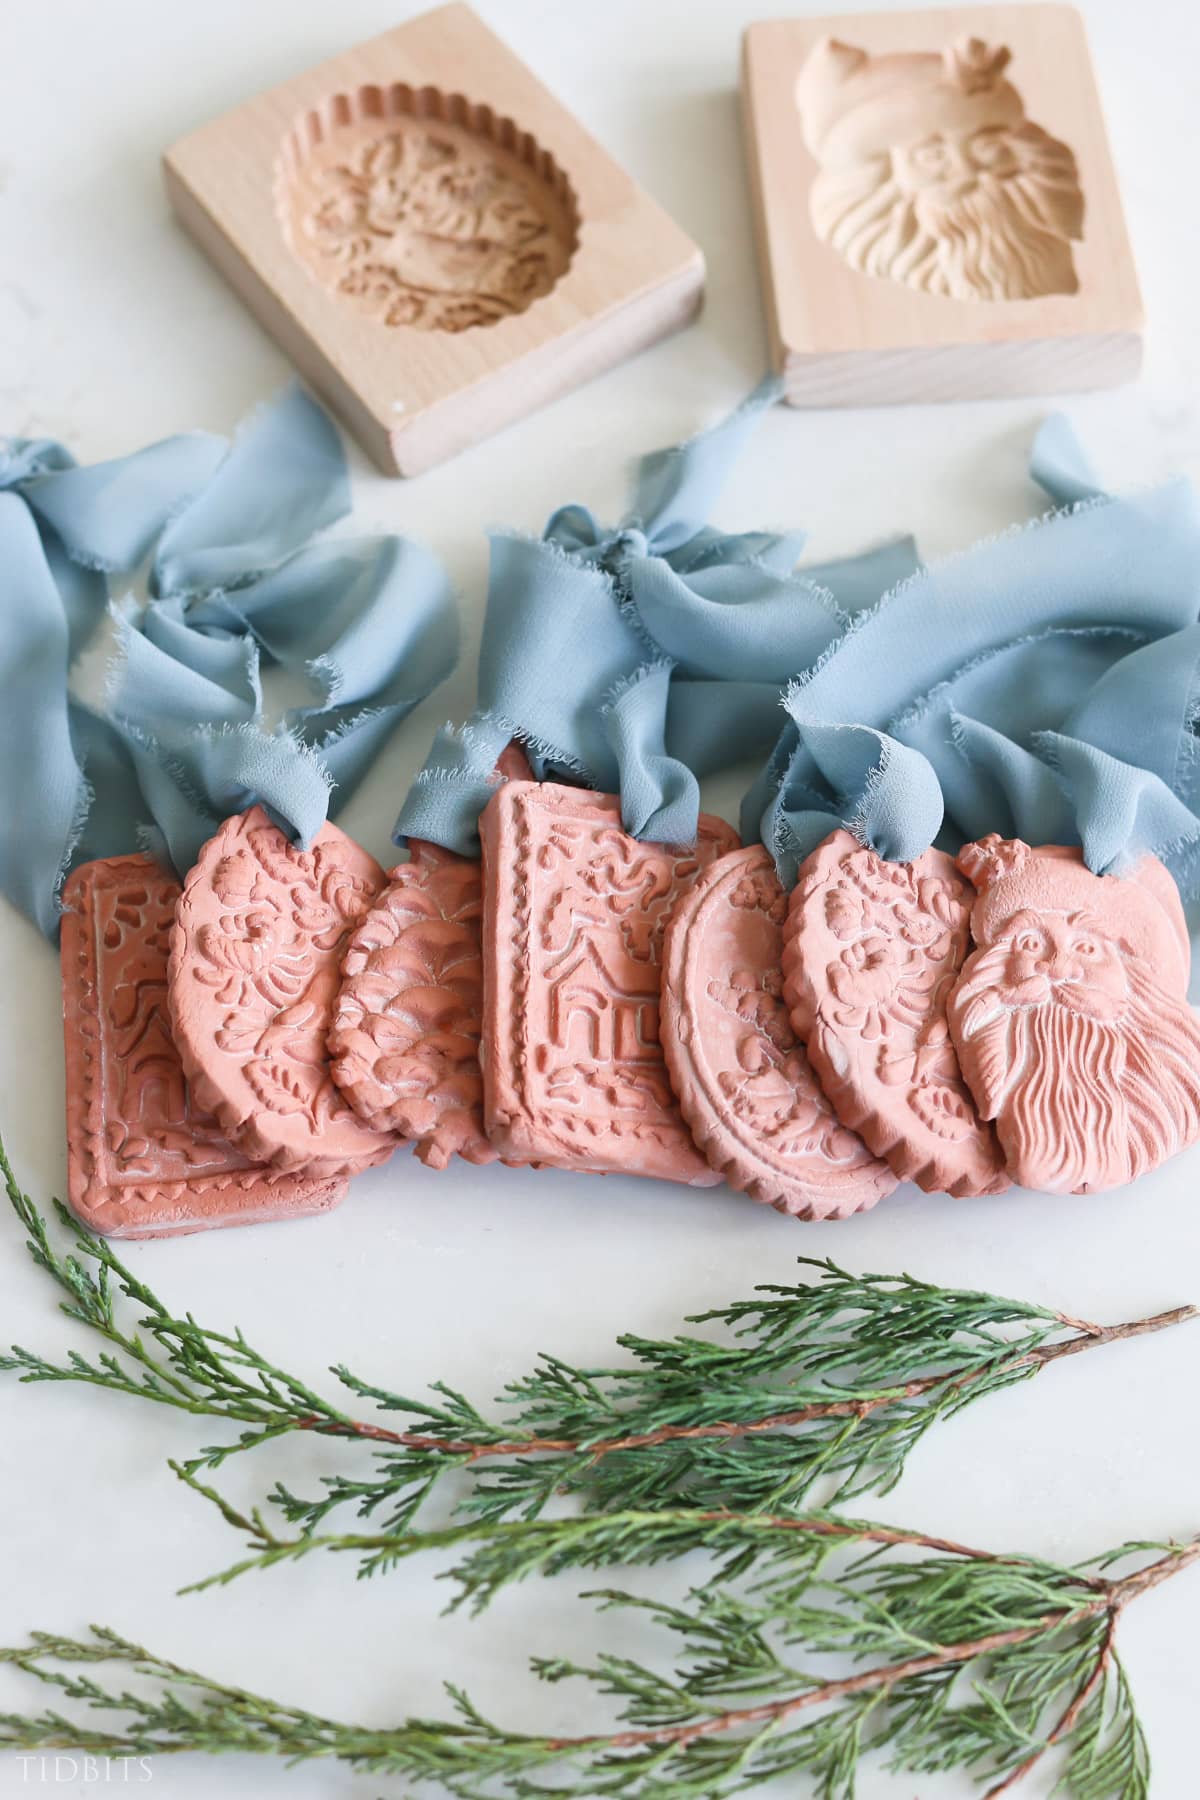
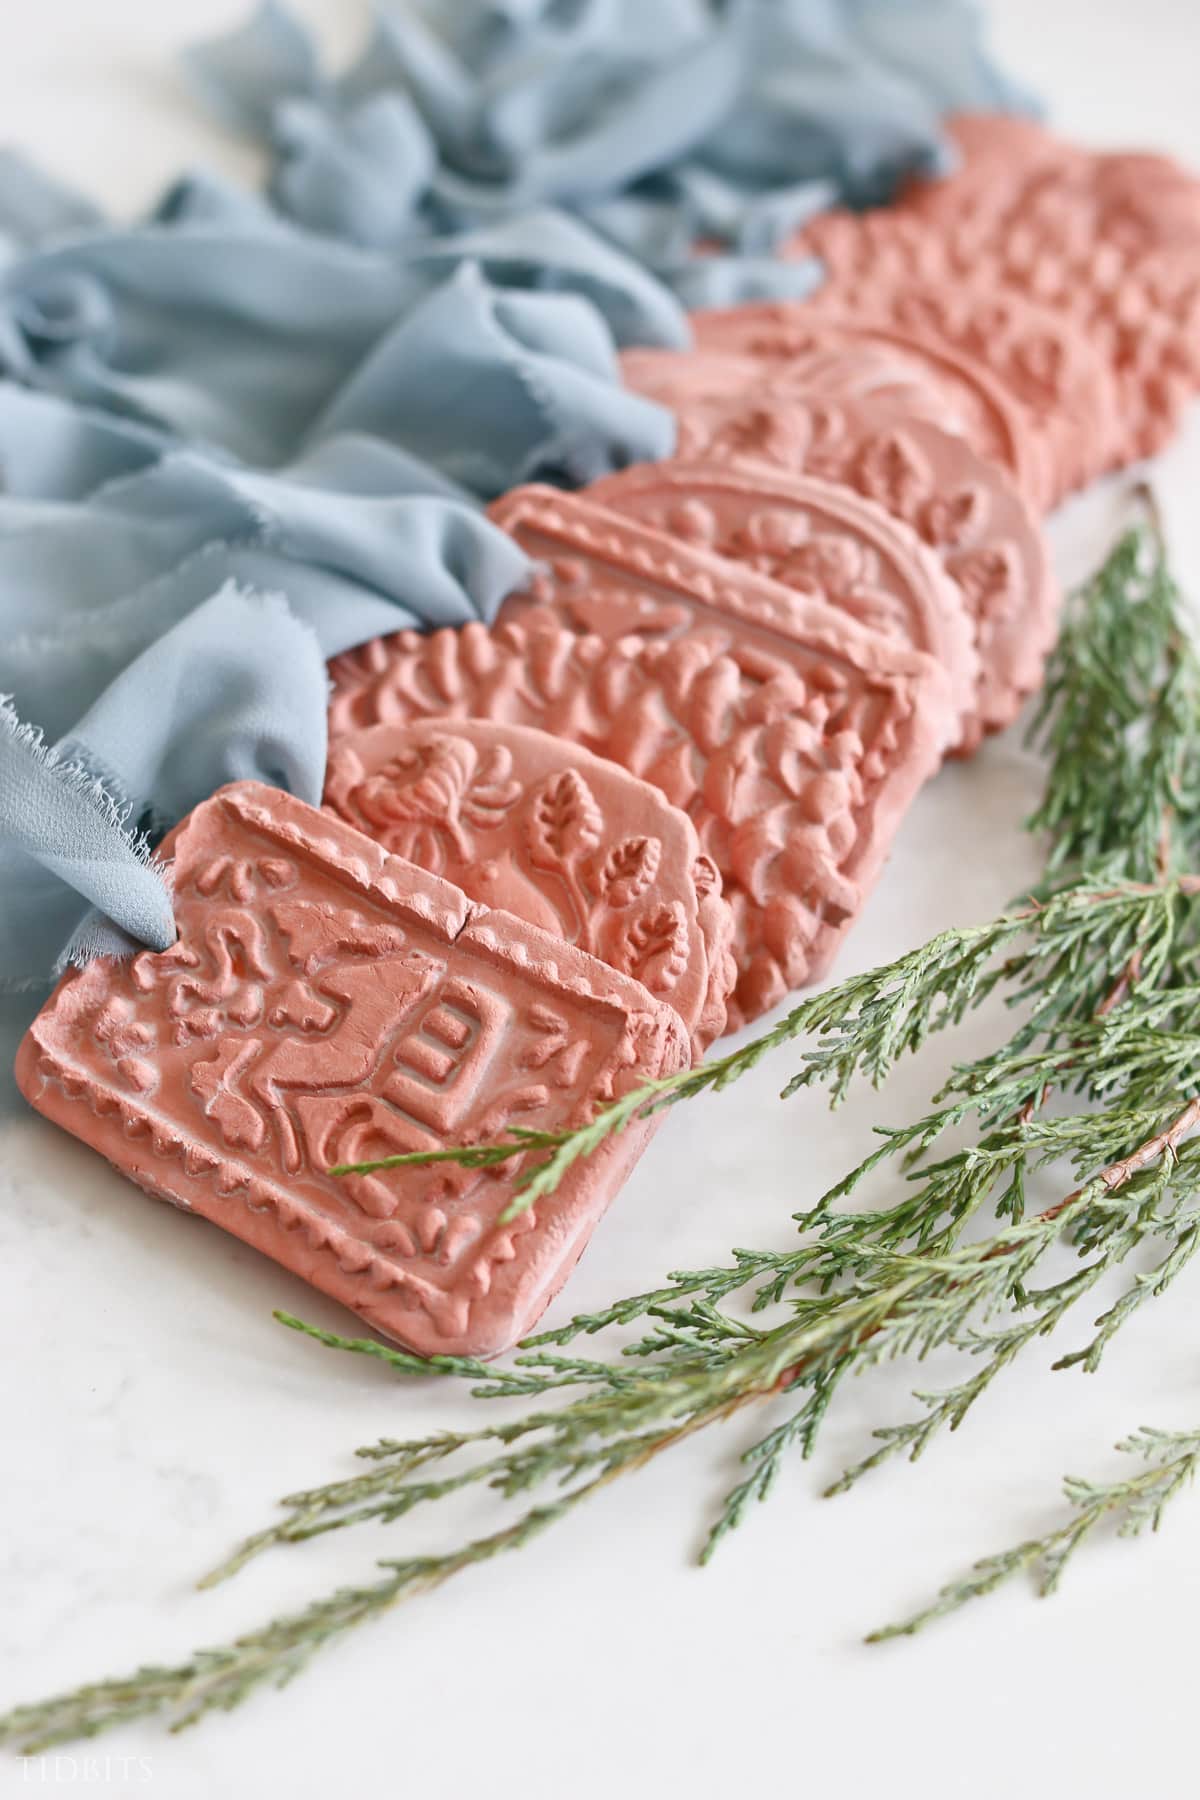
To top it all off, I used some beautiful French blue chiffon ribbon for my terracotta clay ornaments, and some sweet taupe velvet ribbon for my white ornaments.
I think they turned out lovely and was such a fun craft for the Holiday season. I also tried molding the terracotta air dry clay over a clear plastic ball ornament, and here is the result:
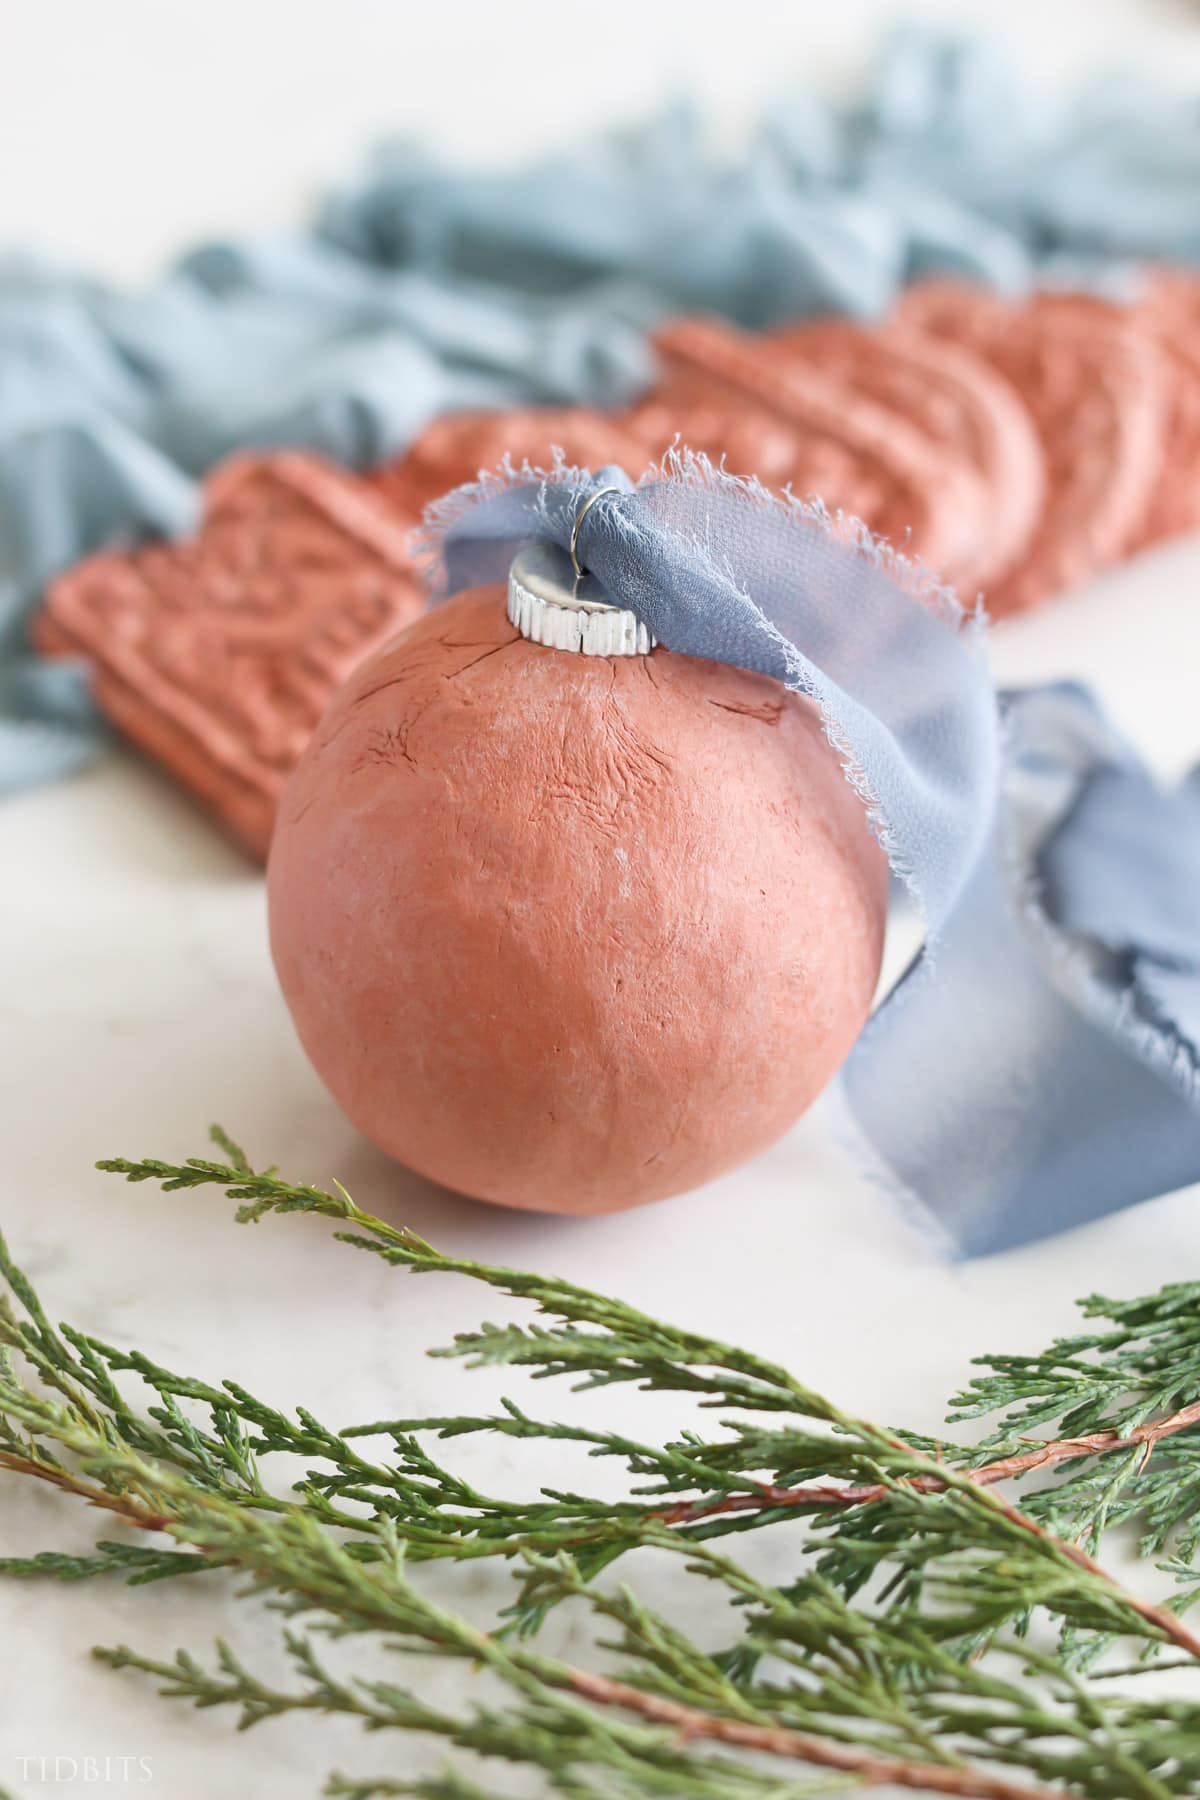
Not sure I love how this turned out, but it might be something you like to do with the air dry clay. I suggest rolling it out with a rolling pin to create a smoother surface before you put it on the ball.
HOW TO USE MY AIR DRY CLAY ORNAMENTS
Besides using them as the obvious (as ornaments on hanging on your Christmas tree), here are some other ideas for how to use the finished products.
- Gift tags (write their name on the back)
- Christmas decorations hanging all around the house
- As a craft project for a Christmas party (kids and adults will love them!)
These can likely be an heirloom type project, since air dry clay will last indefinitely if stored properly.
You don’t have to seal air dry clay, but it will help it last longer and keep it protected. Moisture is what will ruin your creation, so if there is any risk of moisture in the air or surface, sealing them will be best.
I recommend keeping any air dry clay creations stored inside a ziplock back, and then inside a waterproof tote or container.
You can choose a glossy or matte sealer. Any type of acrylic sealer, varnish, white craft glue or even epoxy will work. Just depends on the look you want.
I hope you enjoyed this post! Please help me out by saving it to your Pinterest boards or sharing on Instagram! Thank you!


I bought the crayola brand and can’t get the white clay out of the wood mold. Any ideas?
These are so lovely! How many ornaments were you able to make from one block of the clay?
Cami,
I just purchased the Santa mold and waiting for delivery. I have a question…did you put cornstarch in the mold prior to the clay to help with the release? Do you know if that would help?
Thank you.
I didn’t put anything. I found the scraping off quickly helps release an end nicely and I can gently pull it up from there.
I have learned from Krafty Kathy on YouTube, that if you put the mold in the refrigerator for about 10 to 15 minutes the clay will release so easy. Love these
These are lovely Cami, heirlooms in the making! My favourites are definitely the white ones.
So glad to hear you like them!
What a neat idea. I love this idea. Thank you
So glad you like them!