This post may contain affiliate links, which means I get a small percentage of the sale at no extra cost to you. I only recommend items I love and have had a positive experience with. Thank you!
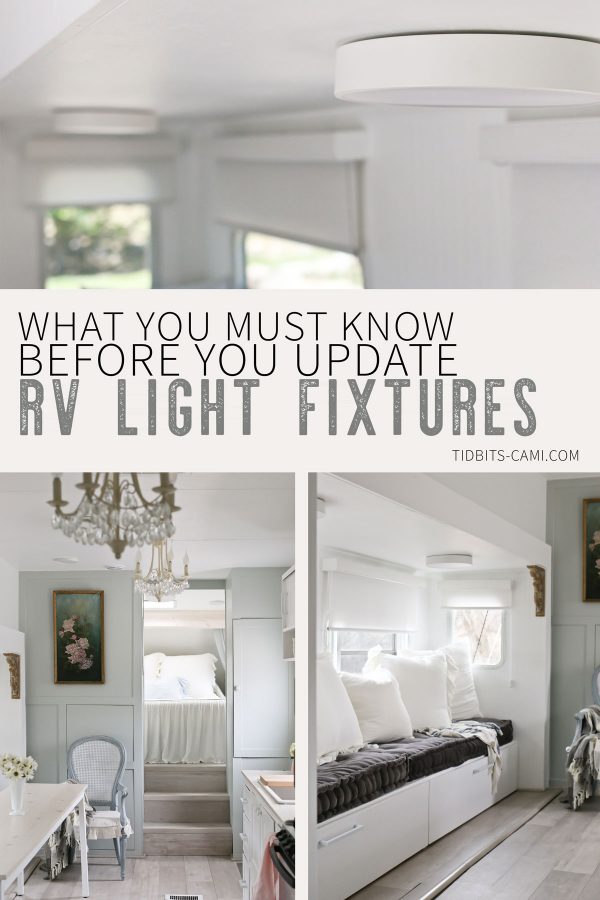
5 RV interior lighting tips you may want to know before you upgrade those RV light fixtures that might be driving you nuts – plus a fun lighting hack that will rock your tiny world!
Are you looking to update the lighting in your RV? Have you found yourself frustrated or confused at your options? Worry not, there are more options and solutions for RV lighting than you might think.
*This post contains affiliate links to products I use and love.
I want to share what we did in our RV renovation to upgrade our interior lighting and cover the following 5 tips:
1 – Challenges for RV Lighting
2 – Your options for updating RV interior light fixtures
3 – What you need to know about RV light bulbs
4 – What and where to buy RV light fixtures and light bulbs
5 – A fun creative lighting hack for RV’s when you don’t want to or can’t hardwire to get some lighting right where you want it.
This is going to be good!
WATCH THIS POST ON VIDEO
For those who prefer a more personal, video experience, feel free to watch my video covering everything in this post.
Disclosure:
First, I need to add a very important disclosure. My husband and I are in no way certified electricians. We are giving you information based on our experiences and the research we’ve done online and while talking to an electrician ourselves. You should continue to do your own research before messing with the electrical in your RV, to ensure your own safety.

Challenges for RV Lighting
RV Lighting comes with challenges different than residential lighting. I want to address a few of these I think you should consider and be aware of when you begin to think about updating the lighting in your RV . This is all based on the challenges that we faced in our own RV renovation.
Challenge 1: Not all your light fixtures in the RV are going to be hardwired – which means the electrical lines are connected to a power source or light switch. Depending on your make and model, some of them might simply be battery operated fixtures attached to the wall, or not hardwired to a light switch, common in bunk areas and slide outs.
You might also find you want a fixture in a spot that isn’t hardwired for one, like at the side of your bed or under cabinets. But don’t get discouraged if you find this problem, because I have an awesome lighting hack for you in this video, that you may find you prefer even more than a hardwired light fixture.
Challenge 2: The amount of vertical and horizontal space you have around your fixtures may be limited. Living tiny certainly has its limitations, and you need to make sure your light fixtures are not in the way of swinging doors or heads for that matter, if at all possible. That means take a measuring tape around with you before you purchase a fixture.
Challenge 3 – You may be discouraged by the limited amount of options you get when you search for RV light fixtures to buy. Because yes, truth be told, the RV manufacturers and suppliers still haven’t quite caught on to the beauty of diversifying our options. But worry not, I’ve got some good news about your options.
Your Options for Updating RV Interior Light Fixtures
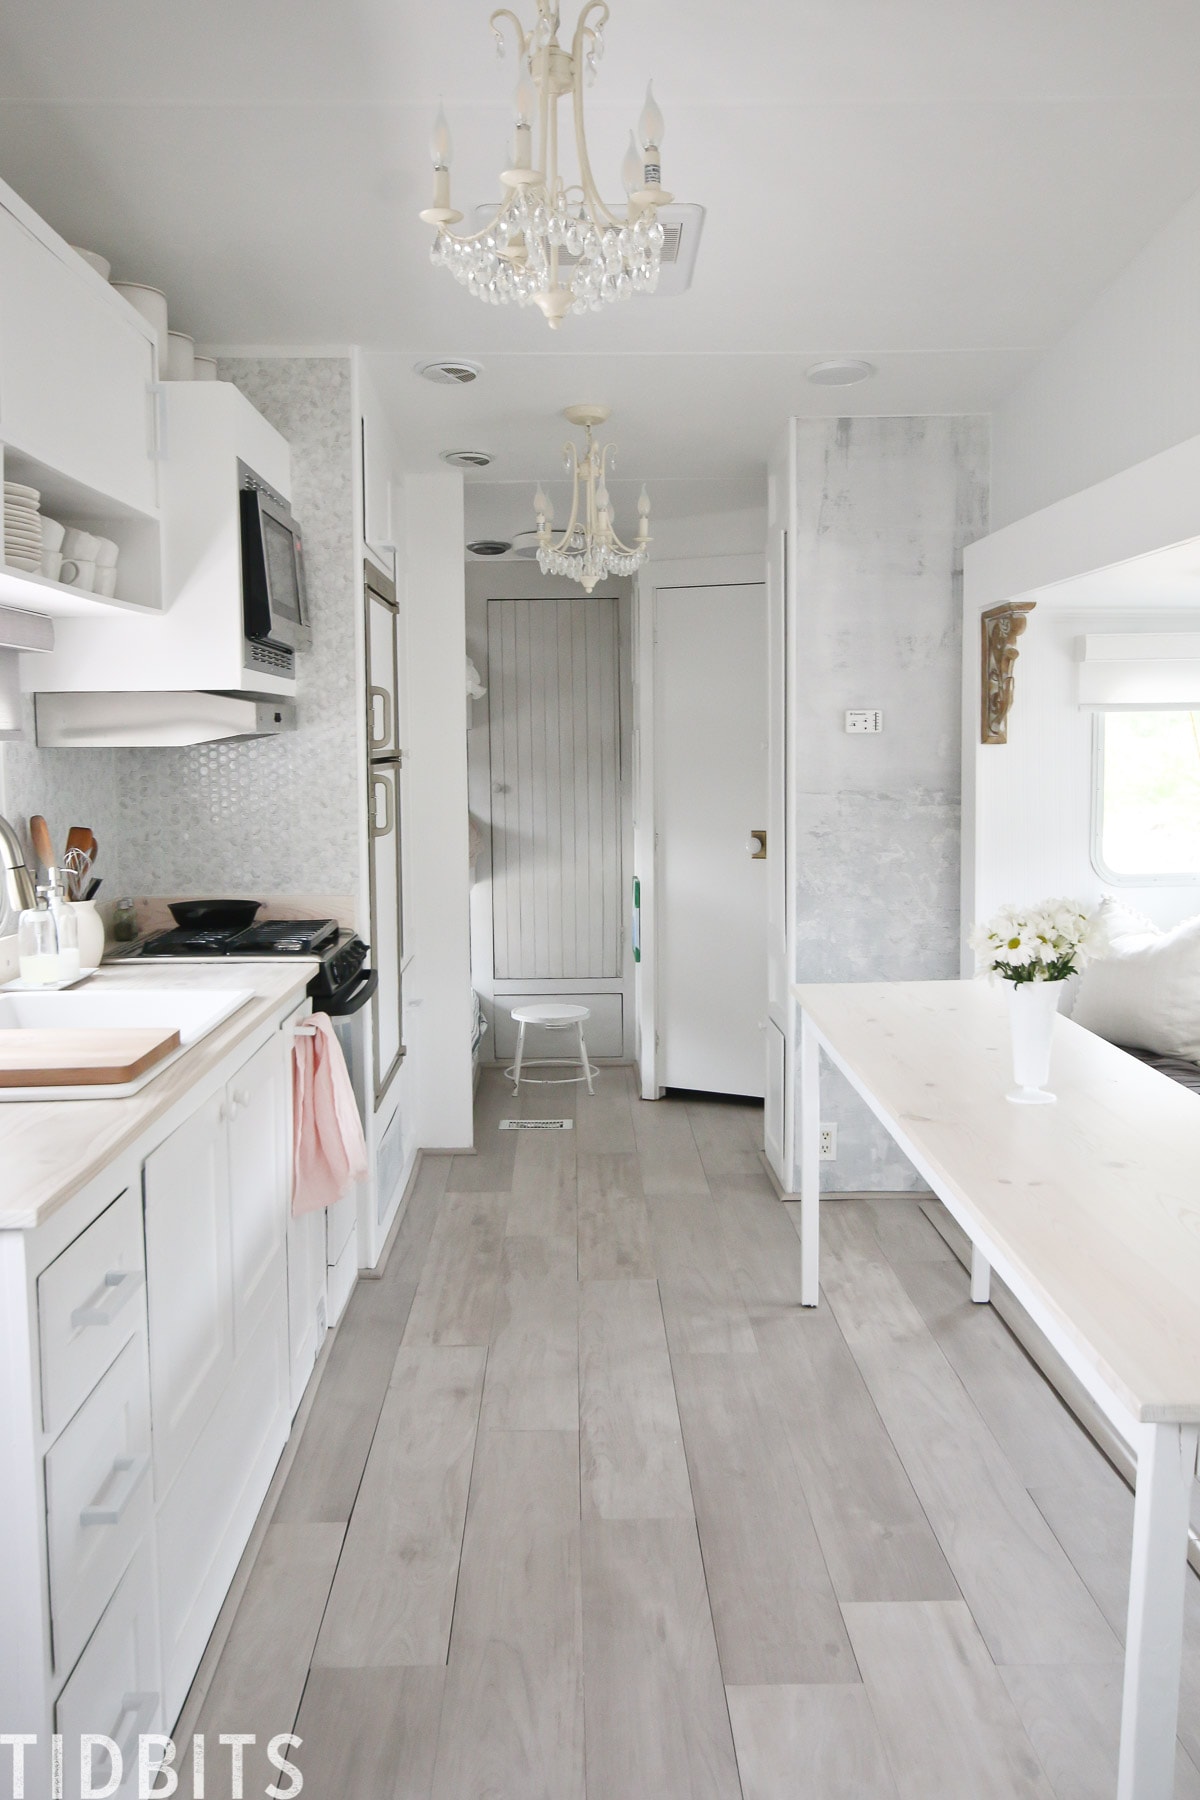
Prior to our renovation we noticed 3 types of lighting in our RV. We had battery operated lights, where you actually had to switch it on and off at the fixture. We had some hardwired overhead light fixtures that were operated at the switch plate on the wall. Then we had your standard RV dome lights that were wired into the RV power system, but still had to be switched on and off at the fixture itself – meaning there was no light switch on the wall. Perhaps you can imagine the challenges. So first, and most important, determine what each lighting source is in your RV, and then you can play around with options better.
Before considering your options, you need to first throw out the notion that you “HAVE TO” buy fixtures made specifically for RV’s. Yep. Throw it out! You can actually buy any fixture that is fitted for residential homes, and fitted for your space. We just opened up a whole new world of options!
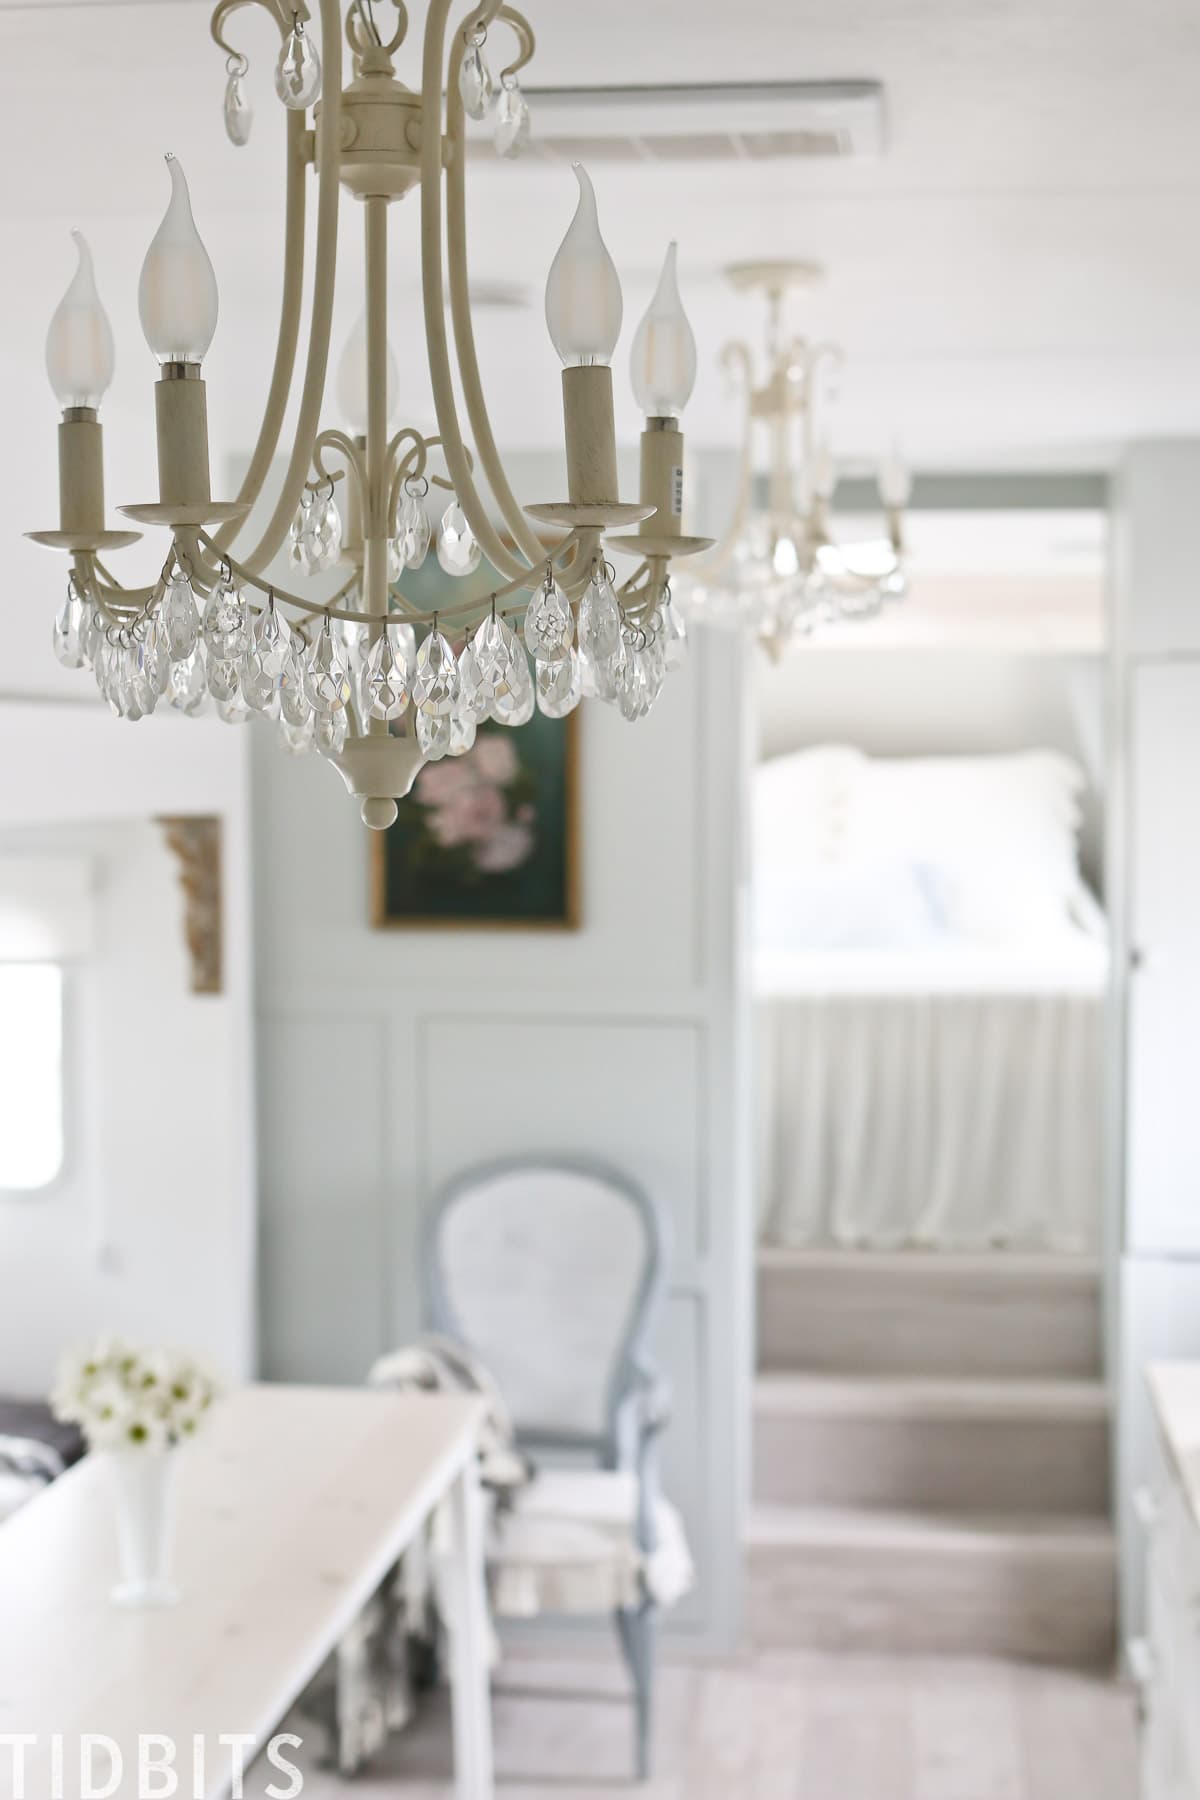
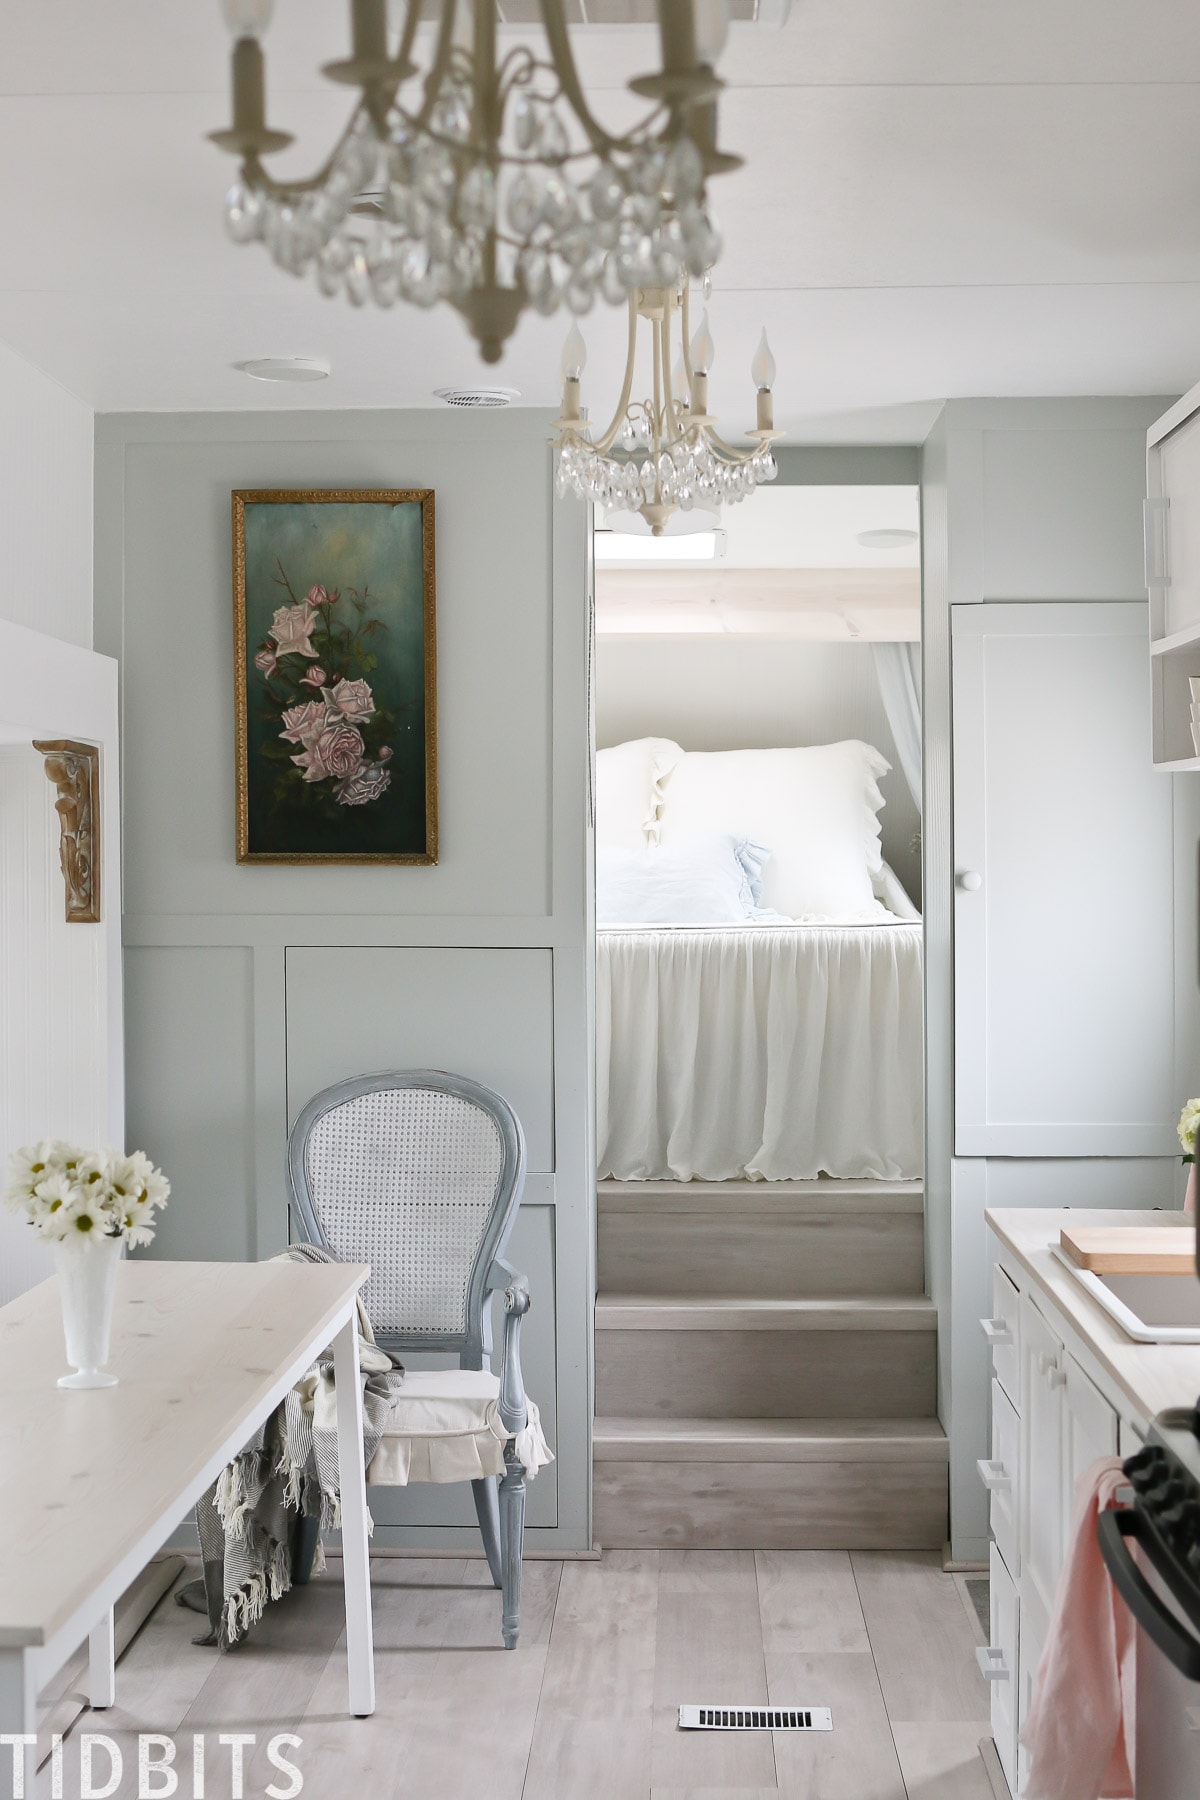
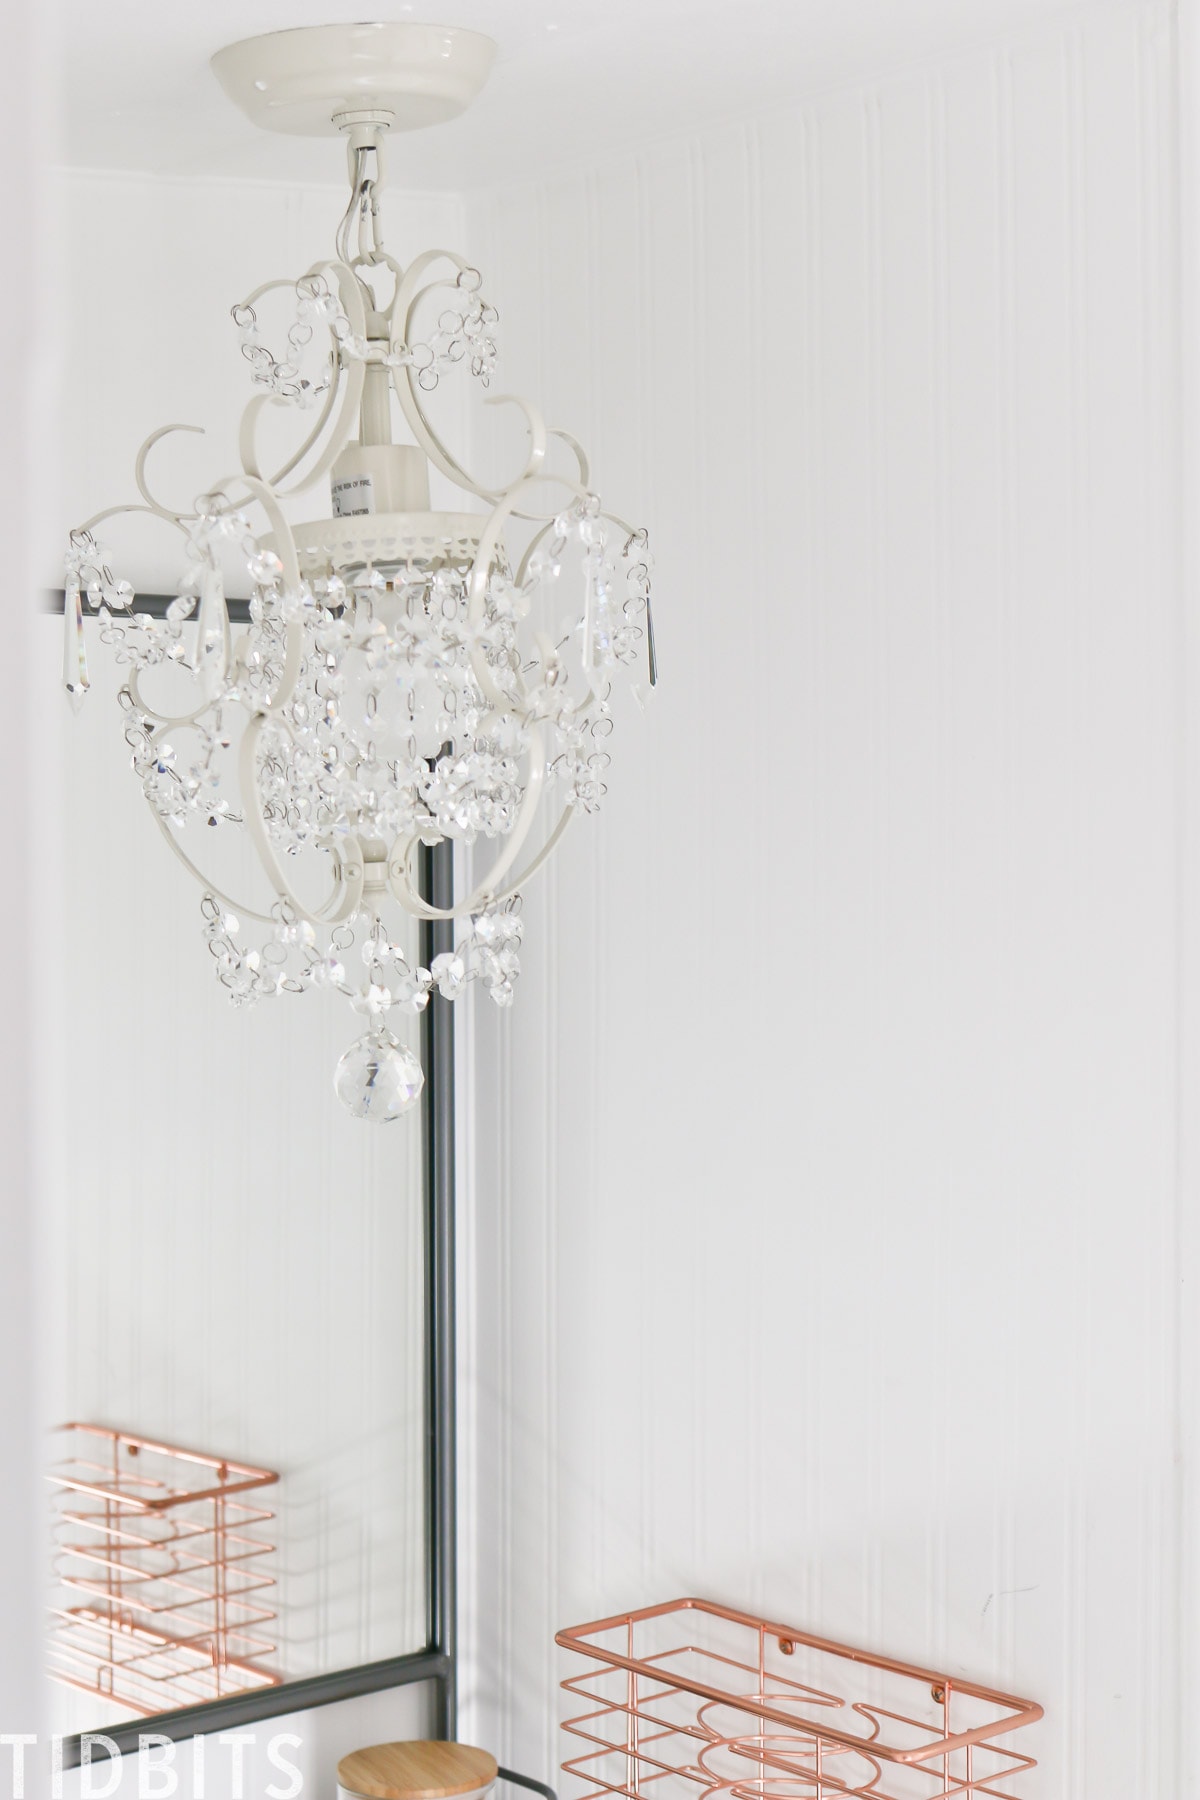
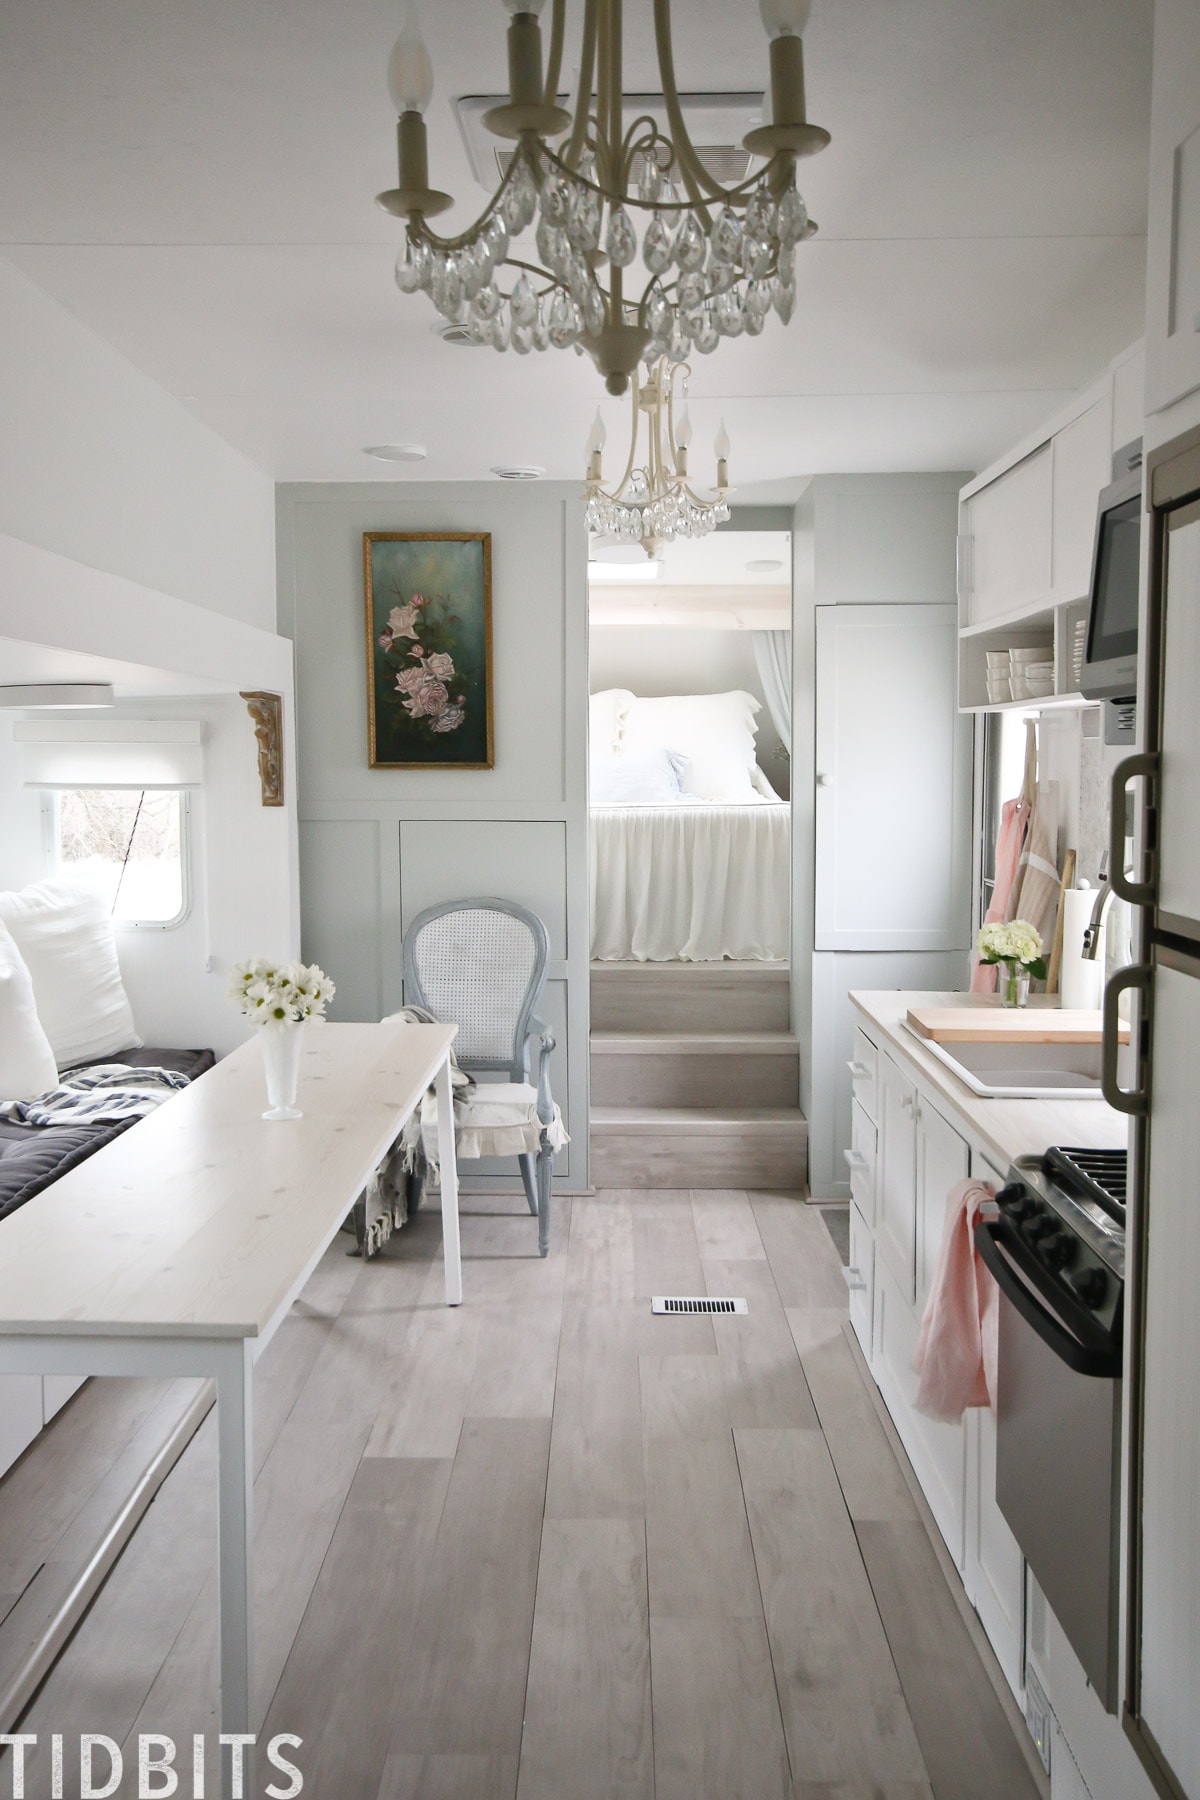
That’s right, you can consider flush mounts, pendants, sconces, and even chandeliers! Oh the possibilities!
Sure, you can buy the fixtures that say “made for RV’s” – and if you like the style, that’s great! But I warn you, you may be able to find better pricing and waaaay more options if you look outside of RV specific light fixtures.
Now that you are celebrating the fact that you can buy any fixture, just hold up one second before you click “buy”. There is something you MUST consider – and that is your light bulb.
Important things to know when updating RV light bulbs
While you have the freedom to choose your fixture, you have limitations for the light source or light bulb. Let’s cover the 4 things you need to check out before you are good to go: The volts, watts, base size, and color.
1 – Volts
The voltage you choose is the absolute most important thing to check. Remember that the lightbulb needs to be the same as the power source, and that will depend on your RV. Our power source works off of a 12 volt DC system, which will be the case for most (if not all) RV’s. This means we have to buy light bulbs labelled 12 volt.
2 – Watts
I’m no engineer, but I do understand Wattage to be how much power is released each second. A light bulb won’t need to be super high in Watts to run in an RV, like a fridge would, and the lower the number you can get here, the less amount of power you will be using. Something to consider especially if you are running your RV off of a generator.
I was able to find light bulbs for our chandelier that are 2 Watts and of course 12 volt.
3 – Base size
Before you buy your fixture or your light bulbs, you should make sure you can find the right size of light bulb base that coincides with the base size in the fixture. Then make sure you can find the 12 volt and wattage you want. If all those things measure up, you are good to go!
From what I’ve seen, there are 2 main standard sizes of bases, an E12 and E26, though I am sure there are more. These chandelier bulbs are the smaller bases at E12, and your more standard size bulb is probably going to be an E26.
4 – Color
I didn’t think considering warm or cool color light in an RV would matter that much – until we tried it out. My hubs was the one who brought home some daylight 12 volt bulbs at first for our chandeliers – which is the main overhead light source for our RV. I didn’t like the shape of the bulbs he picked for this French style fixture, but we put them in anyway. The daylight bulbs were extremely bright in this small space. Almost way too much so. At night, it would light up the world.
I decided to switch them out for these candelabra type bulbs, which not only look so much better but they are a warm light. Since these lights only go on in the evenings, it omits a nice warm cozy light which I much prefer for this small space. In a home, I actually prefer daylight, so this was a learning experience for me. A daylight bulb may not be so bad if it is in a fixture that is encased in a cover, so feel free to try them out and see if you prefer the warm or cool light.
Where to buy RV light fixtures and light bulbs
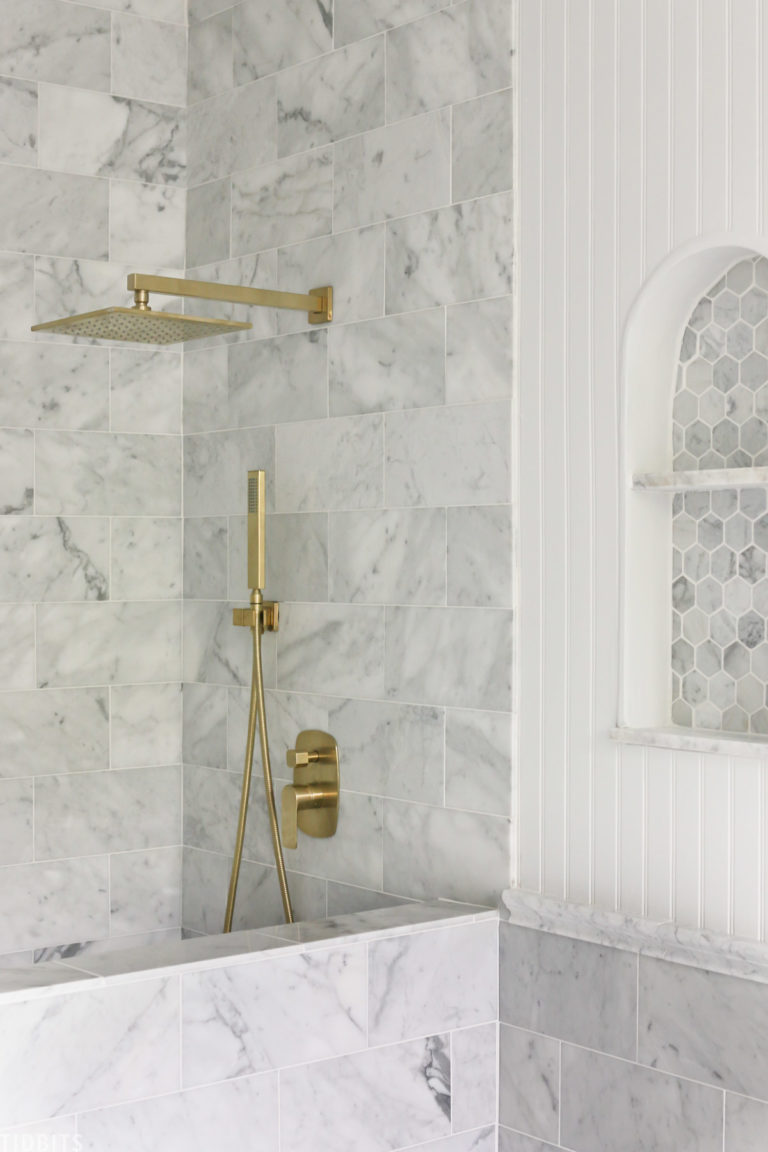
Skies the limit my friends, especially when you consider residential light fixtures. Shop wherever you find a fixture you like, but searching on Amazon is a great place to get an idea of what you like. Little trick for ya, I actually found these chandeliers on Amazon, fell in love but didn’t love the price. So I searched the name of the fixture on google, and it led me to Wayfair where they were a bit cheaper, at the time. So feel free to try something like that, or you can walk into a home improvement store and pick what you like – which is what we did for the bathroom light fixture when we needed it in a pinch.
As for the bulbs, I had better success buying on Amazon. The home improvement stores had one tiny row and one option I didn’t love for RV or 12 volt light bulbs. I was delighted I found the candelabra bulbs on Amazon that matched the volt, watt, base and color I was hoping for.
Click this link to lead you to my RV shop page where I have sourced all the products we’ve used in our RV. You’ll find the exact bulbs and fixtures we bought. I hope that is helpful!
You could also look to an RV supplier and they may have what you need.
Creative Solutions and Hacks for Updating RV Lighting
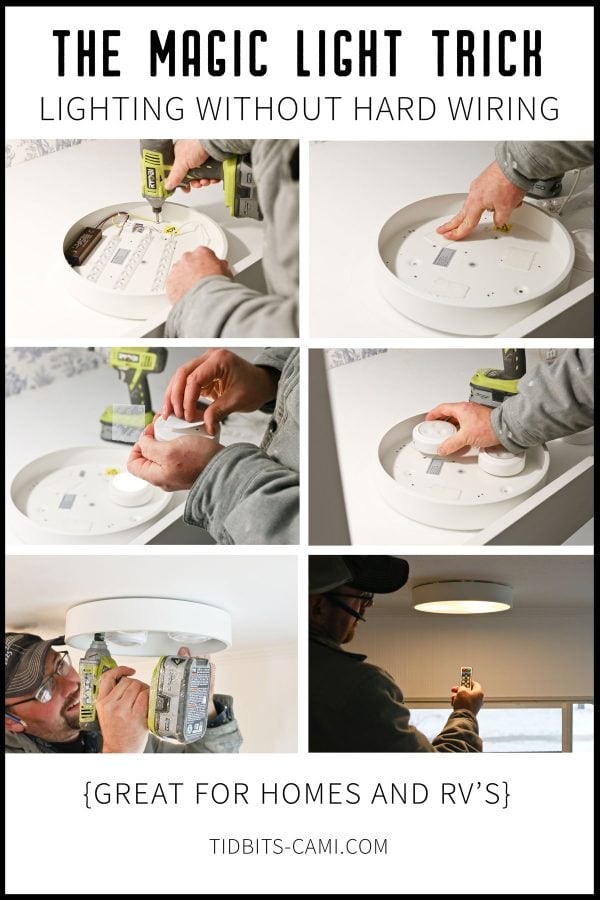
Ok. The part I’ve been dying to share!
What should you do if you want a light source or fixture in a spot that isn’t hardwired for an electrical source or if your source is not wired to a light switch on the wall?
I’ve got the funnest lighting hack to share, and I owe it all to my brilliant friend Brooke from Nesting with Grace. She calls it “The Magic Light Trick”.
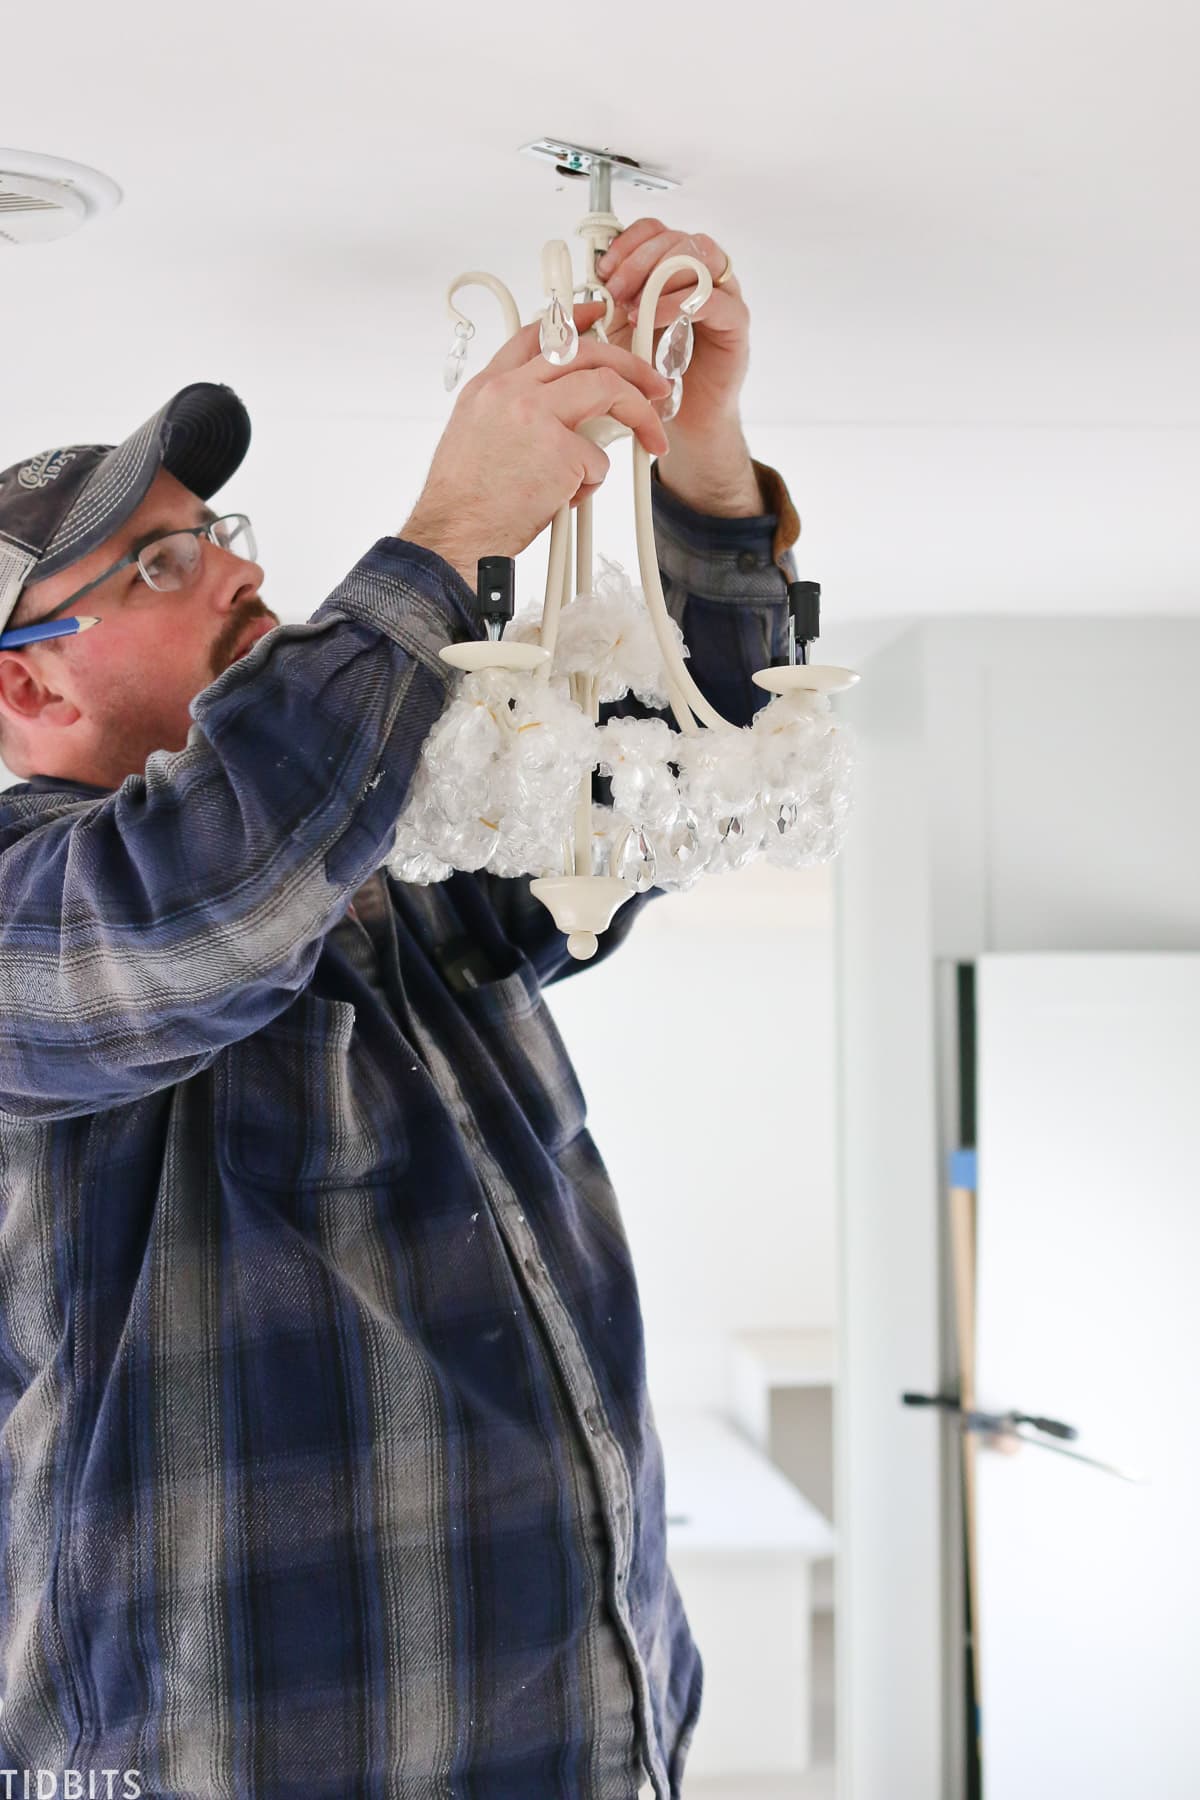
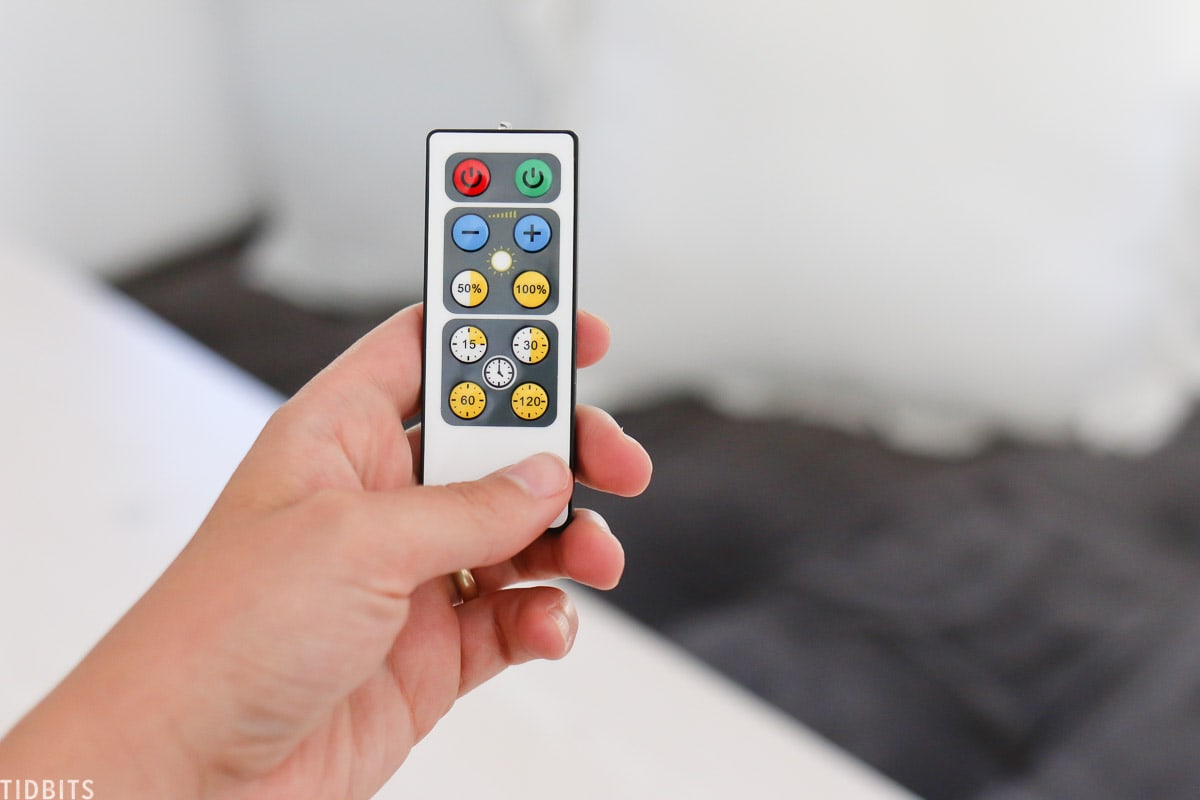
In a nutshell, you are basically adhering a long lasting, battery operated LED puck light inside the fixture, and it will operate either by pushing the light, or by remote, which can also be timed.
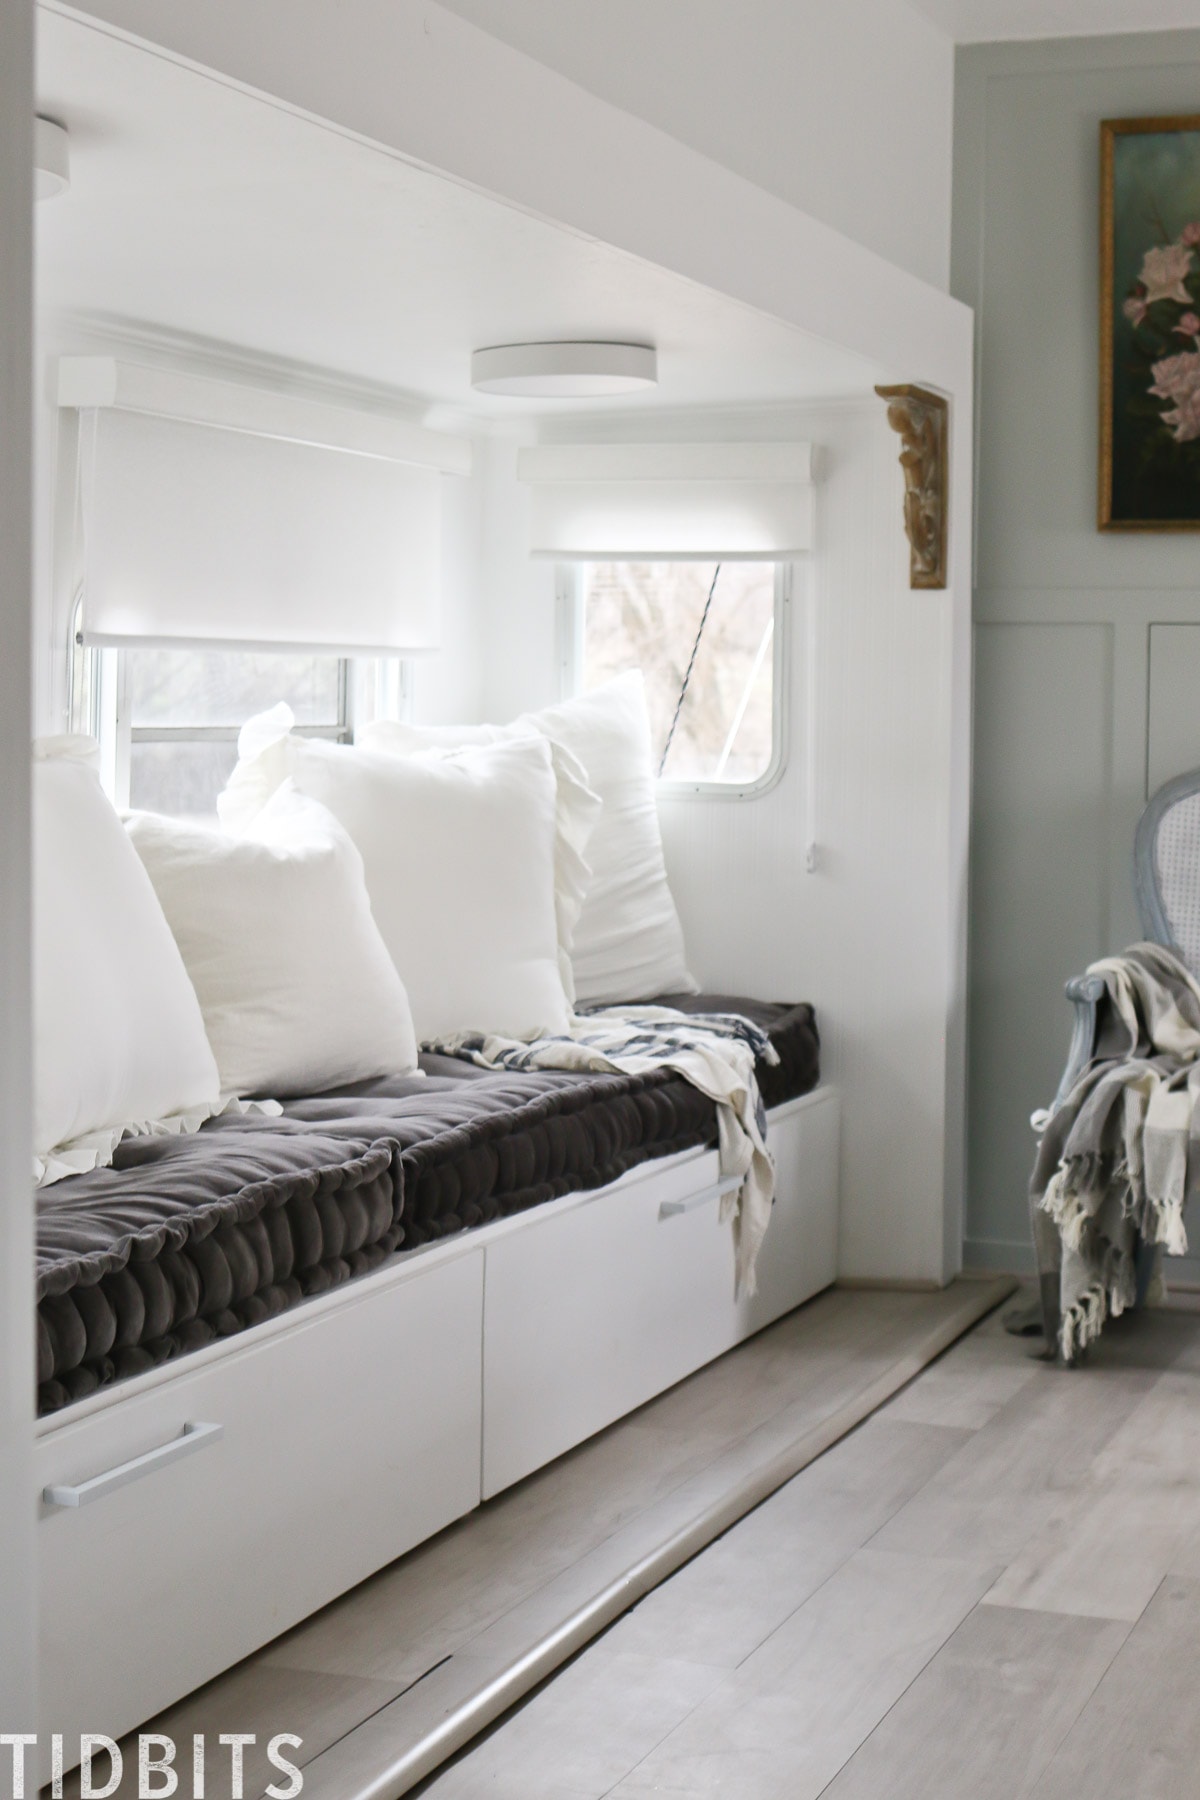
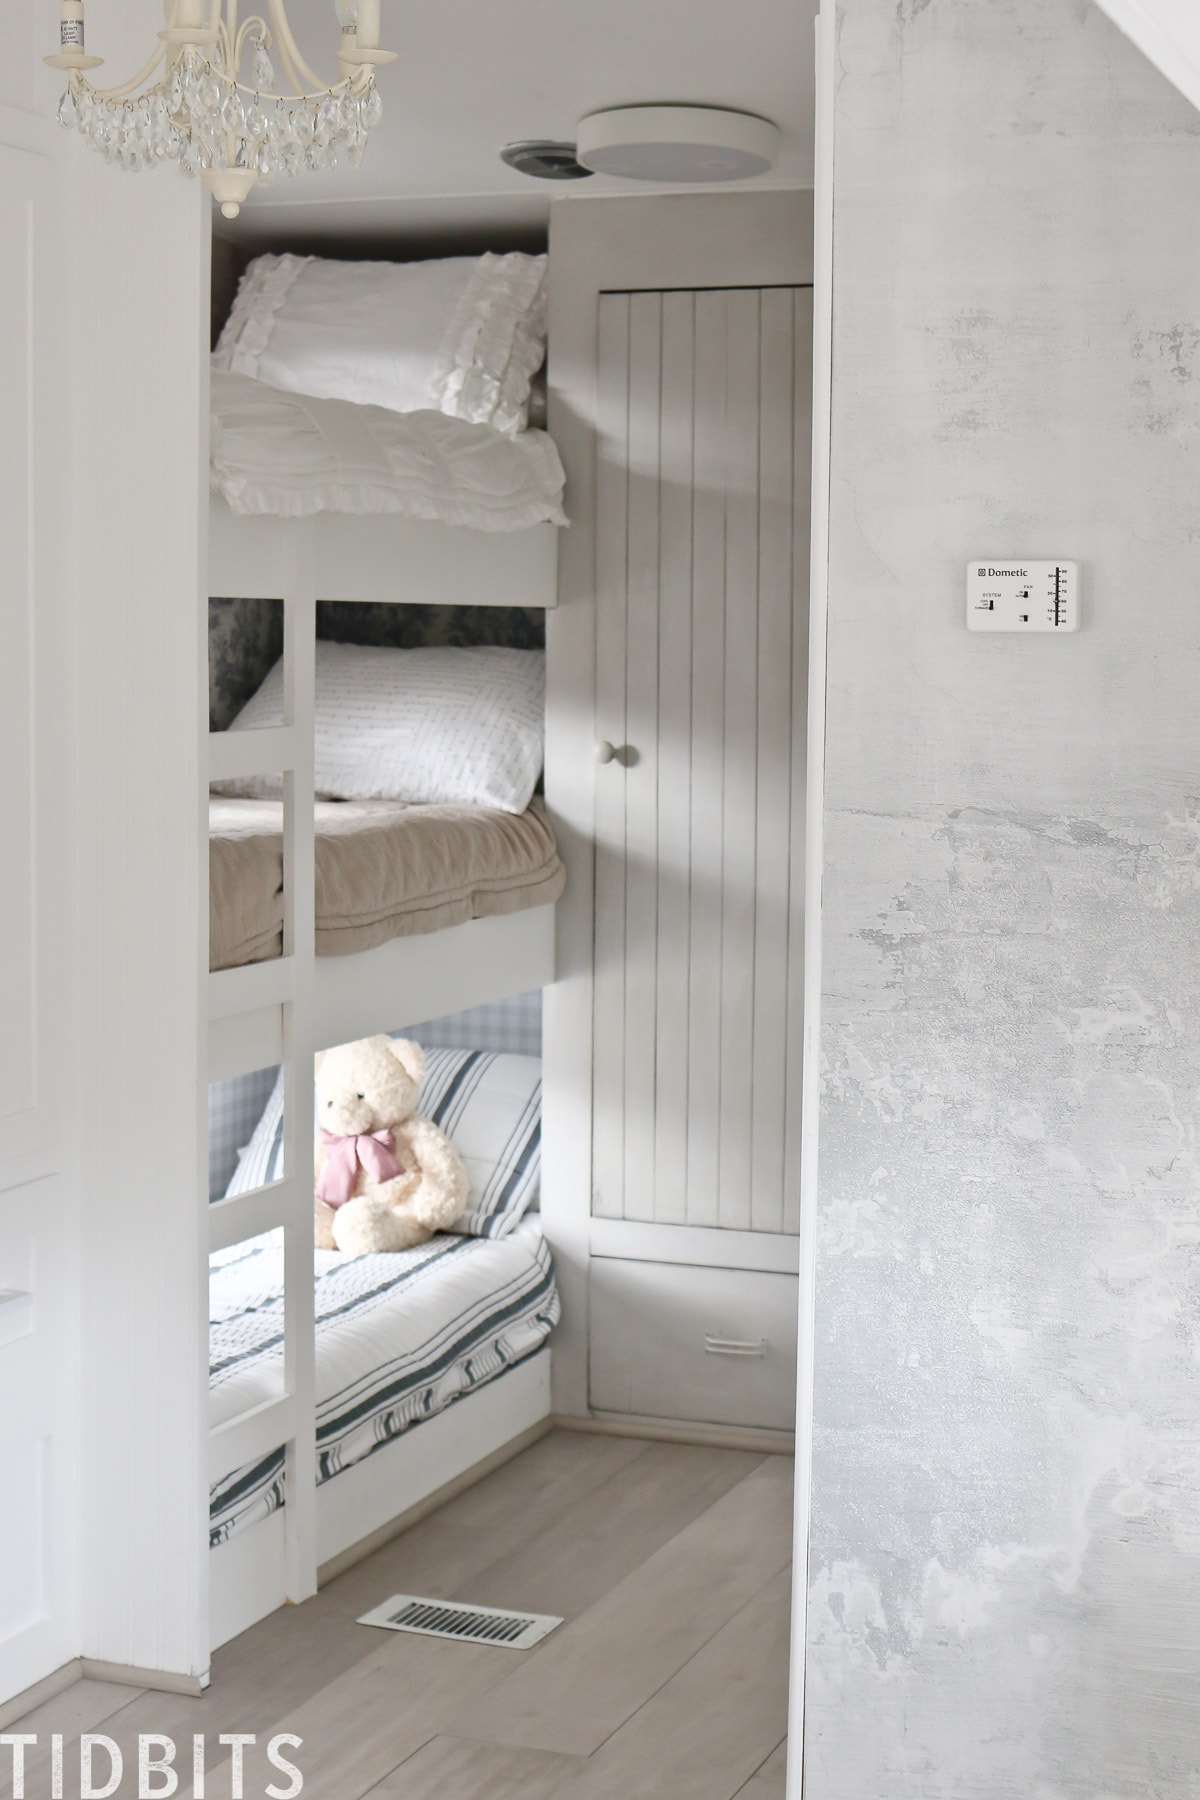
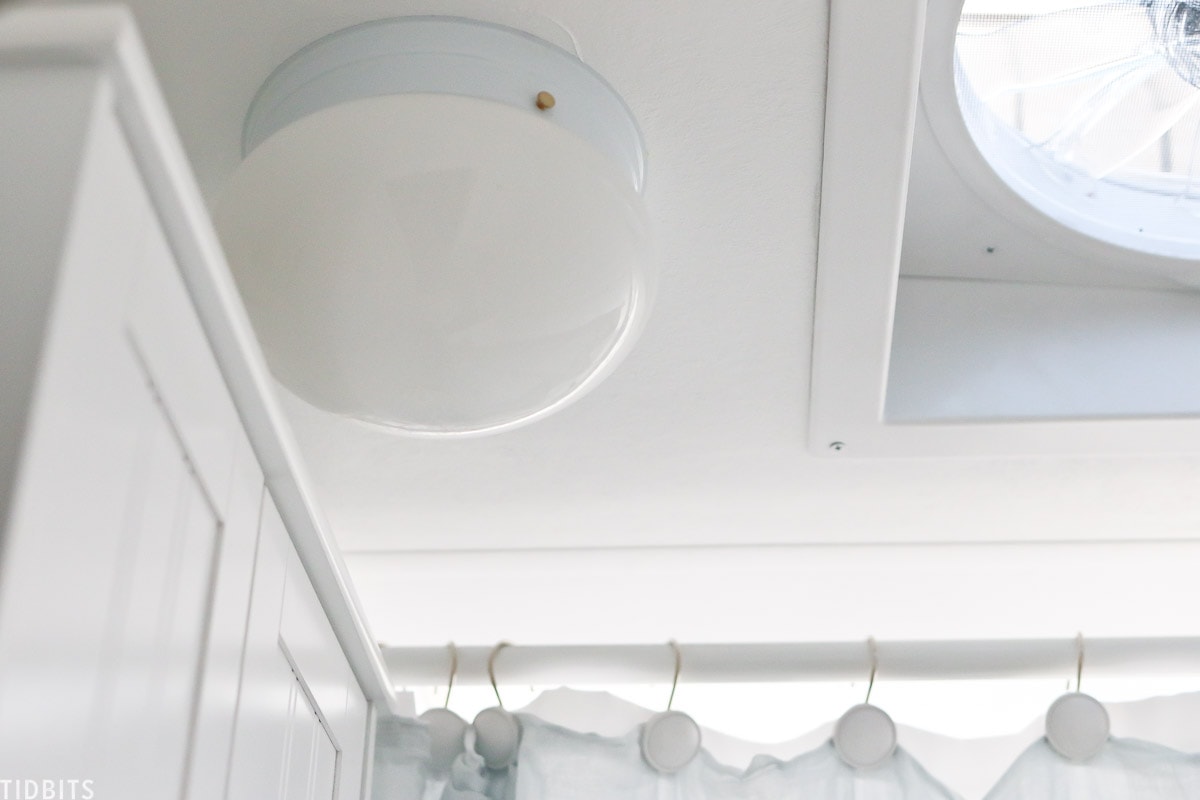
This magic light trick was a life savor for us! I wanted these very minimalistic and affordable flush mount light fixtures for this slide out area and by the bunks and bedroom.
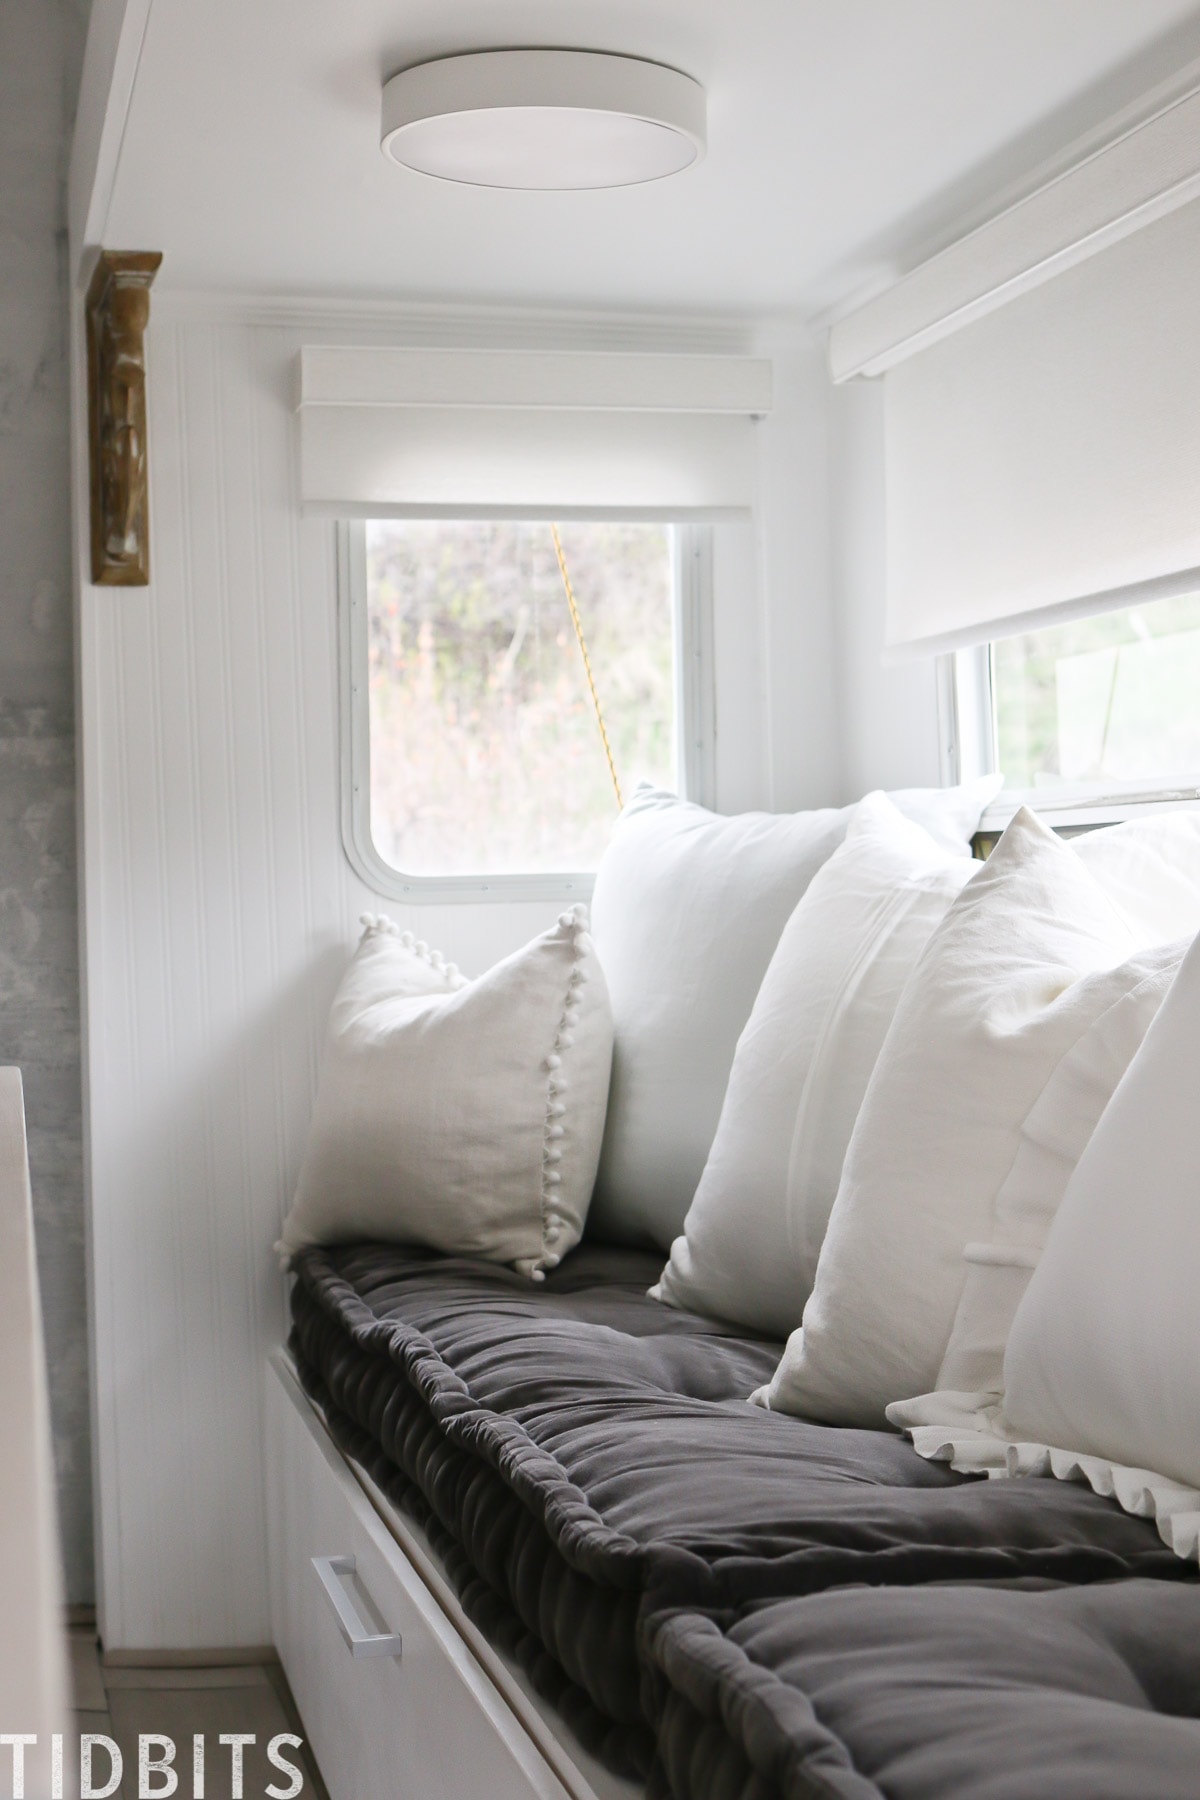
I didn’t want a fixture that was going to hit our heads or feel intrusive to the space. Our problem was that these were pre wired to RV dome lights that only turned on by the switch on the dome. This meant I had to either buy another ugly dome light, or it was the perfect time for the magic light trick.
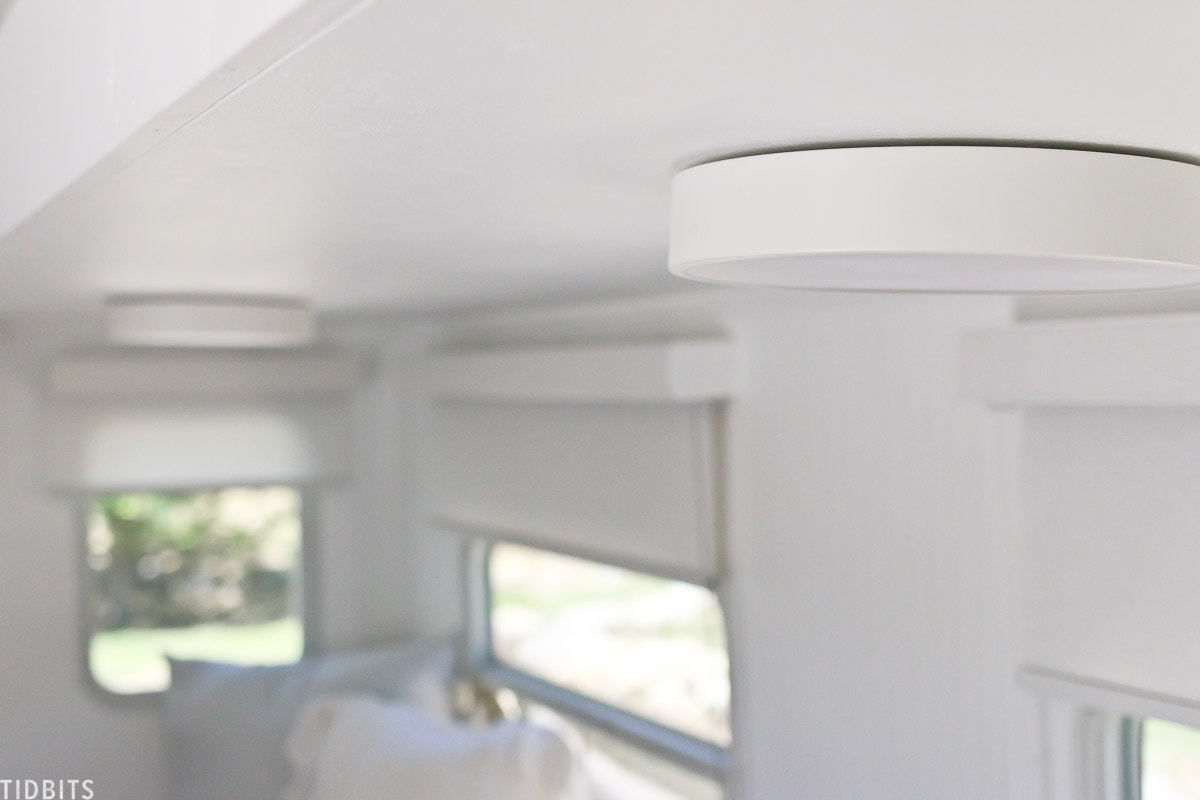
We simply removed the electrical guts inside the fixture itself, then adhered the puck lights to the inside of the light fixture. The beauty with this fixture is that it has a plastic cover, so no one would know there were puck lights in there.
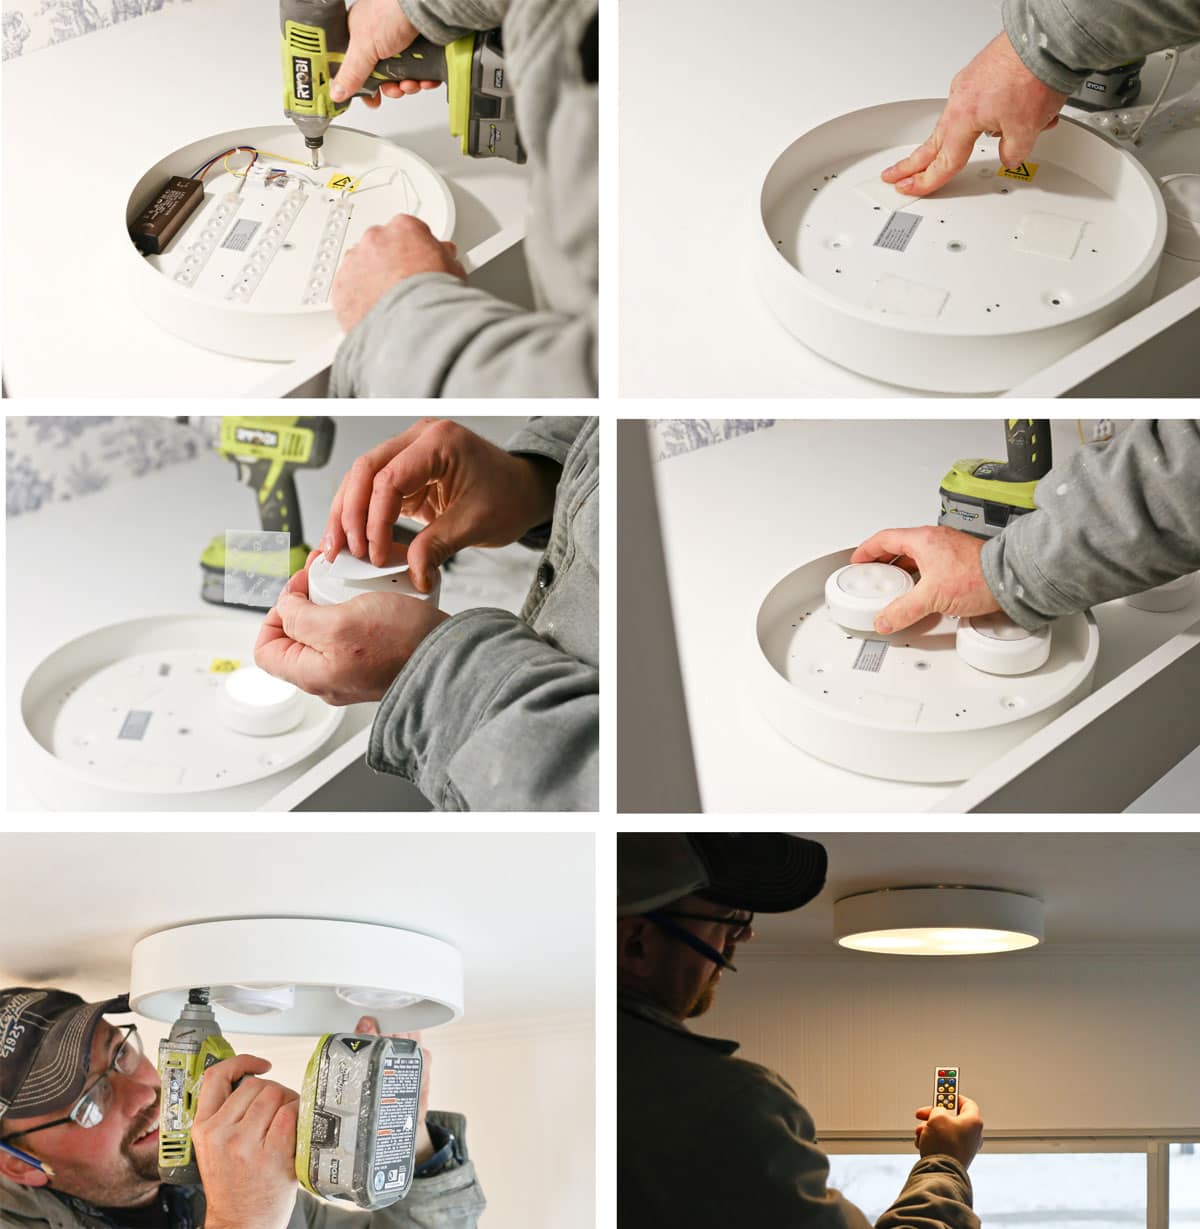
Then we proceeded to screw the fixture into the ceiling, replace the plastic cover, and now we can enjoy the soft glow of these lights in the evening, by either turning them on with the remote or setting them up on a timer to turn on and off at certain times. It works so perfectly!
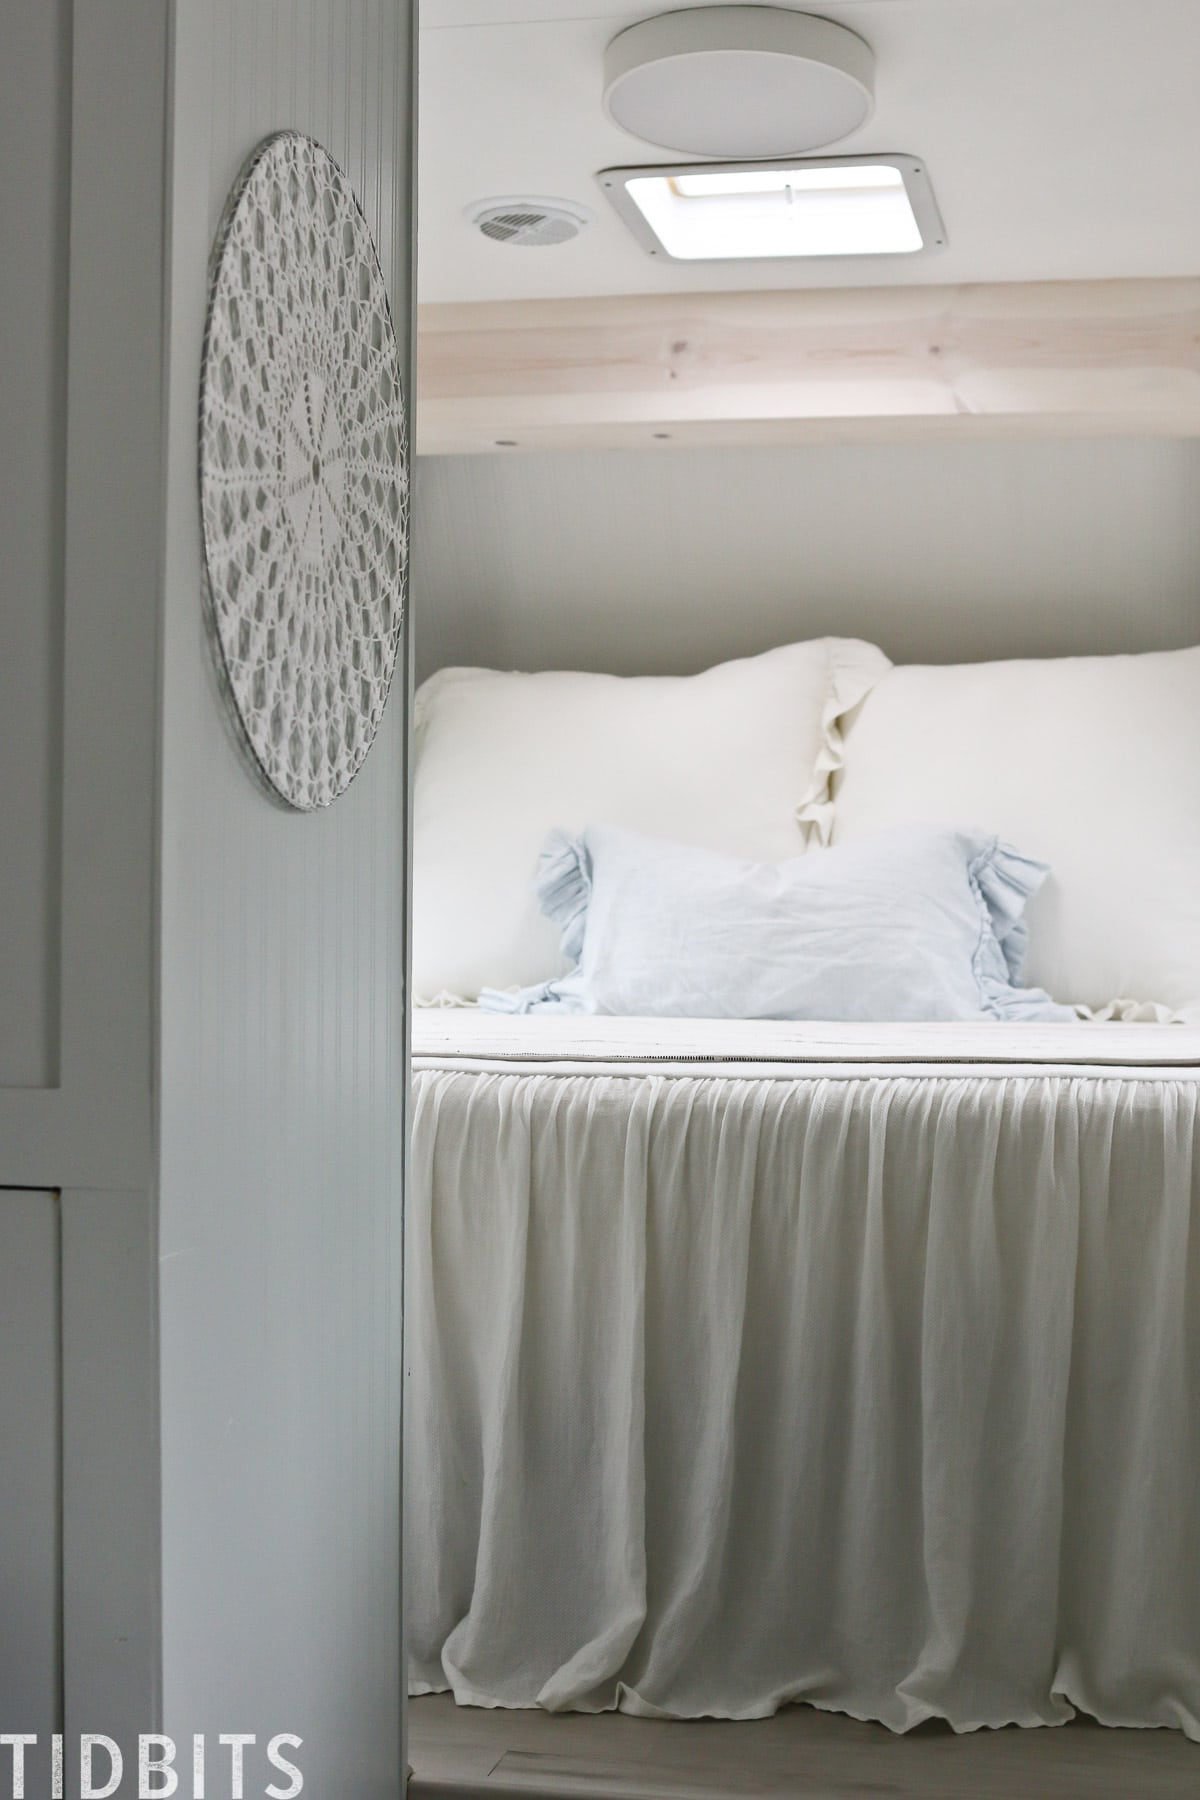
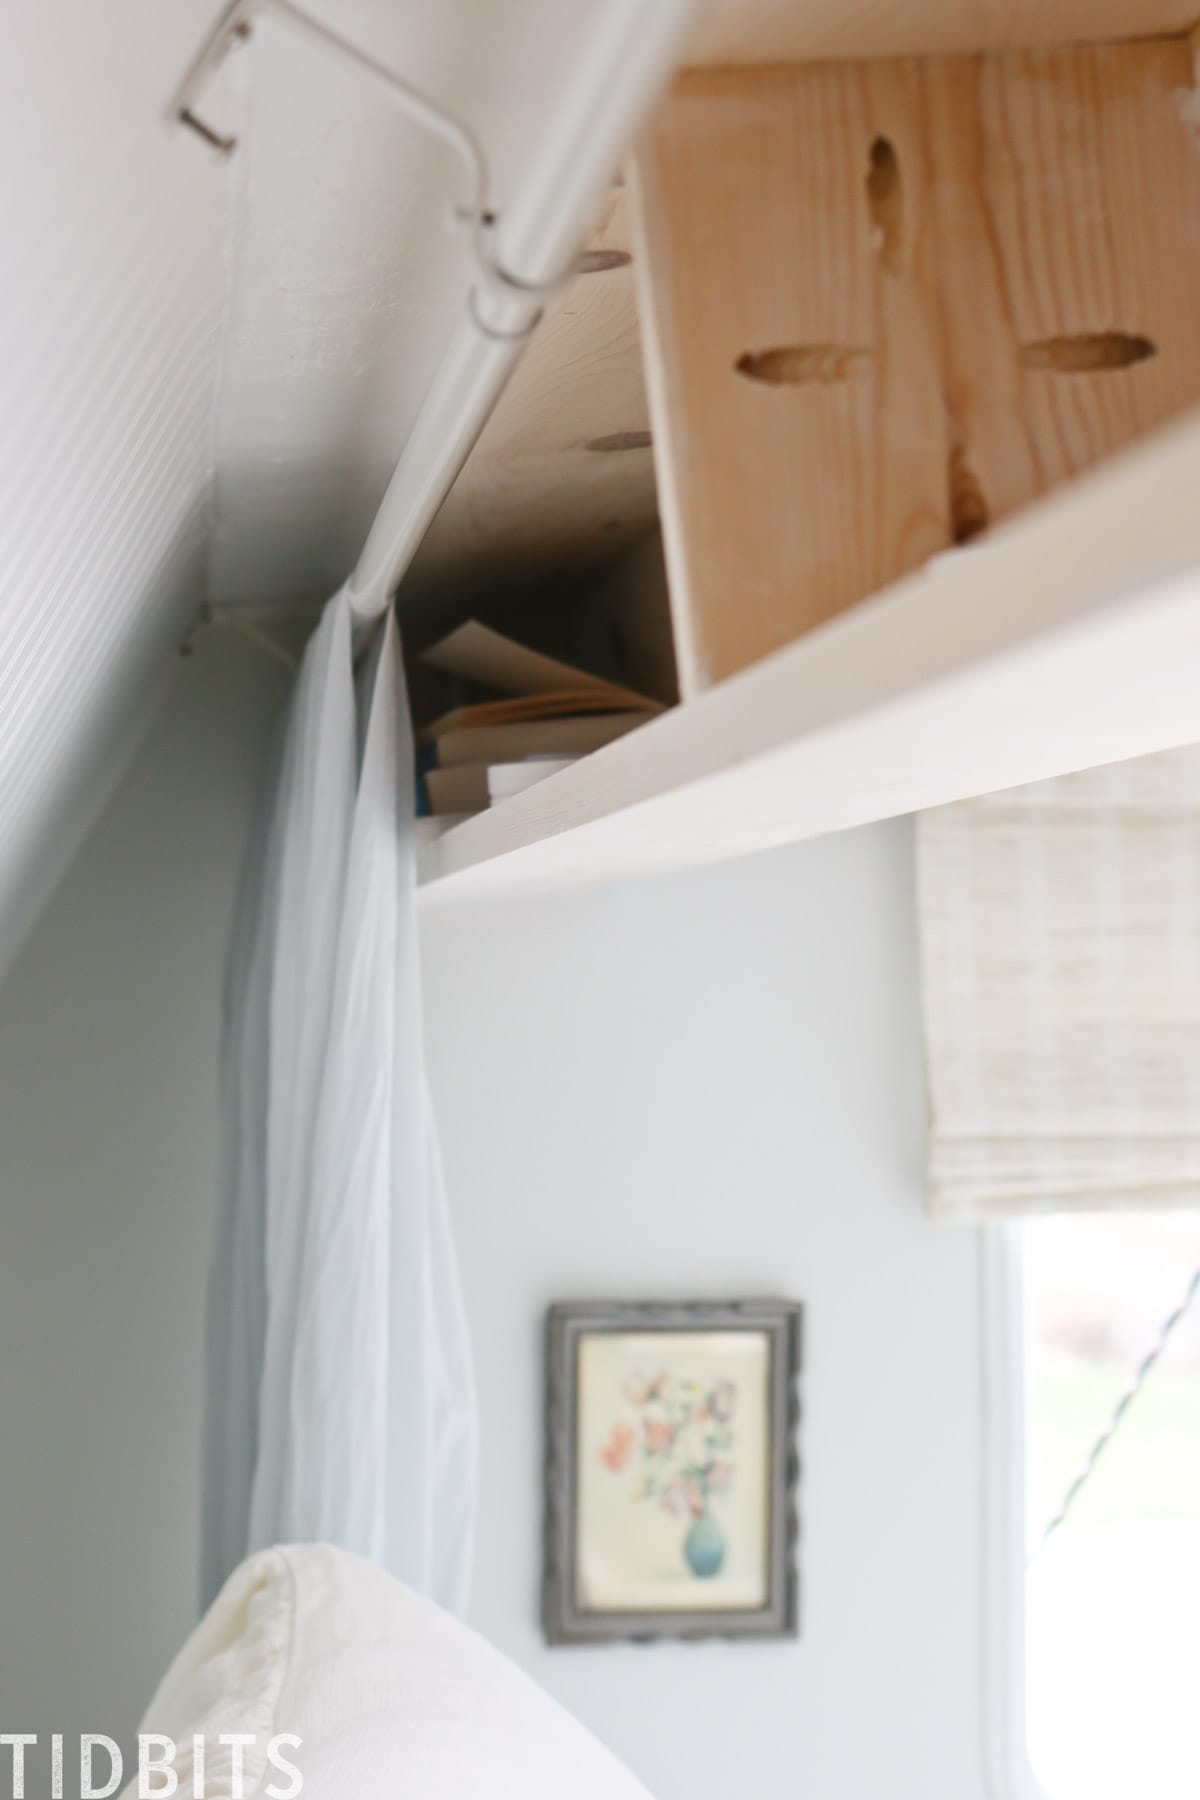
We also added some puck lights to the inside of the beam in the master bedroom. At night when it lights up, it is the most cozy, charming glow and perfect for flipping through my favorite magazines at night.
You could also put these pucks into sconces that you could hang anywhere on the wall, place them inside cupboards, or mounted under kitchen cabinets for that cozy under cabinet lighting. I believe they even have rope lighting that operates the same. You can get so creative with lighting knowing that you have this option. They do run out of battery, but they have a very long life because they are LED.
Finally, I want to address the question I often get:
How do you move your mobile home with chandeliers or hanging pendants?
Well, truth be told, if we were going to travel in our RV versus parking it while we build our home, I would have chosen a more practical lighting option than chandeliers. As you may have guessed, we do have to tie them down when we move the RV. In fact, on moving day, there was so much chaos going on, I had relocated with my kids and we forgot to tie down the first bathroom pendant light we had installed. It was our first casualty and had serious damage in the move and I had to buy another fixture. Luckily, the tie down worked great for these main chandeliers. So if your goal is to go serious glamping (or live in your tiny home) – chandeliers or pendants may be worth it. If you want to pick up and move with ease, find a flush mount you really like instead.
That was a lot of information on RV lighting! I hope it helped! Did I miss anything? Do you have anywhere in your home or tiny home that could benefit from the magic light trick?
Thank you so very much for taking the time to watch and learn with me. I’d be very grateful if you could PIN THIS POST and/or subscribe to my YouTube channel and visit often for more inspiration for do-it-yourself living.
Thanks for reading!
Discover more about our RV adventures in the following posts:
- TIDBITS ON WHEELS big reveal
- RV Renovation Pre Decor Tour
- RV Art | Home is where you park it FREE printable
- RV Renovation Process | Walls
- Our Next Crazy DIY Adventure
- 20 Inspiring RV Makeovers
- RV Renovation | Kitchen Details
- Easy DIY Cabinet Shelf Risers
- The Best RV Bunk Bedding
- RV Master Bedroom Essentials
- Tiny Home and RV Bathroom Organization
- RV Window Treatments
- Our 9 Super Practical, Healthy and Easy Camping Breakfast Ideas
- My 10 Best Tips for Small Pantry Organization


Thank you for all the great information and congratulations on such a beautiful job.! I tried to install a lightweight chandelier ( I thought ) in my RV bathroom which I had redone, and the electrition told my that there was not enough support in the ceiling for it. How did you compensate for the thin ceilings in your RV? Thanks so much for your help!
Hi- love your space. 🙂 I’ve been using your blog as a guide and bought some great lights. I had a professional electrician come and say- absolutely not on all of them and said they had to be “RV” lights. I am so frustrated, as I know you are not the only one they says you can use any light, just mind the bulb is correct. Do you know what the difference is in the wiring that is making them say this? Or any info I could tell them? Thanks, michelle
When replacing a wall sconce that has that light shade so the light is toward the “ceiling” do you need to do the same or can you use one that shines toward the “floor”? Thank you and enjoyed your question and answer forum!
Linda, it really depends on the situation, but be sure to keep in mind the surrounding area. You do not want to put a hot bulb directly below any material that could deform or worse catch fire from the heat. Sorry I could not be more specific, but more often than not you should not have a problem with reversing the direction of the globe. At least with ceiling lights the material used in the ceiling is already rated to withstand the heat of the ceiling fixture regardless of which way the bulb points since the amount of heat is more dependant on distance than direction.
I think your information is very useful but I want to know how to replace RV light bulbs because my light has broken. Look forward the answering from you. Thanks so much
we have purchased 3 new chandeliers for our rv but we are now getting scared they could be too heavy. I found your page here while researching if we can still install them due to their weight. We bought the exact same chandelier you had in a picture for our bathroom but ours is bronze color. Which makes me feel good about the weight. Is there any hints or knowledge we need to know about the weight of the chandelier and installing them. Thank you so much…..
Thanks for sharing this information related to bulbs.
I’ve slowly been transitioning my home over to LED but I had no idea there were recommendations on colour temp and brightness for various rooms. After work tonight, I’ll have to run around my house to see what I have in place vs these suggestions. Good food for thought.
Glad you have some take aways!
Looks great!
Oh Great, This post is very informative and helpful for the general people. I read the post very carefully. I am getting some new ideas about the RV Lights. I have a another solutions. I know the UV HVAC lights for the saving your electricity and the Eye protection.
Which LED light is best for eyes?
I agree with your opinion .Hope you share many things.
Hi Cami…
I went back and looked at your RV renovation and wow, you did an amazing job and it’s gorgeous! I would not have chosen chandeliers for lighting. I think flush mounts are just easier all the way around but hey, the chandeliers look amazing.
Thank you,
Bob
Hi Cami.
I have really been enjoying the videos on your RV remodel. You’ve done an amazing job!
Can you please explain how you go about tying down your chandeliers?
Thanks, Ginger
This remote puck light setup sounds like a great solution for non-wired applications, but I do have a concern: Looking over the comments on Amazon there are negatives about the short battery life these units are causing. It would be helpful to receive an update from you after you’ve been using them for a inh, or even just a week.
Thanks,
John
We’ve used them for months! However, we only turn them on for a couple hours at night when needed. I did have some sweet child mess with one puck light in my faux beam, and I didn’t notice it was on all day long until evening, and it died shortly after. This is not a good solution if lights need to be on all day. But I think for the couple hours the are needed at night, it is a great solution. I think they said they have about 100 hour life expectancy, or something like that. Hope that helped! Thanks for stopping by!
Wow! Y’all have learned so much and thank you so much for sharing! Invaluable lessons!